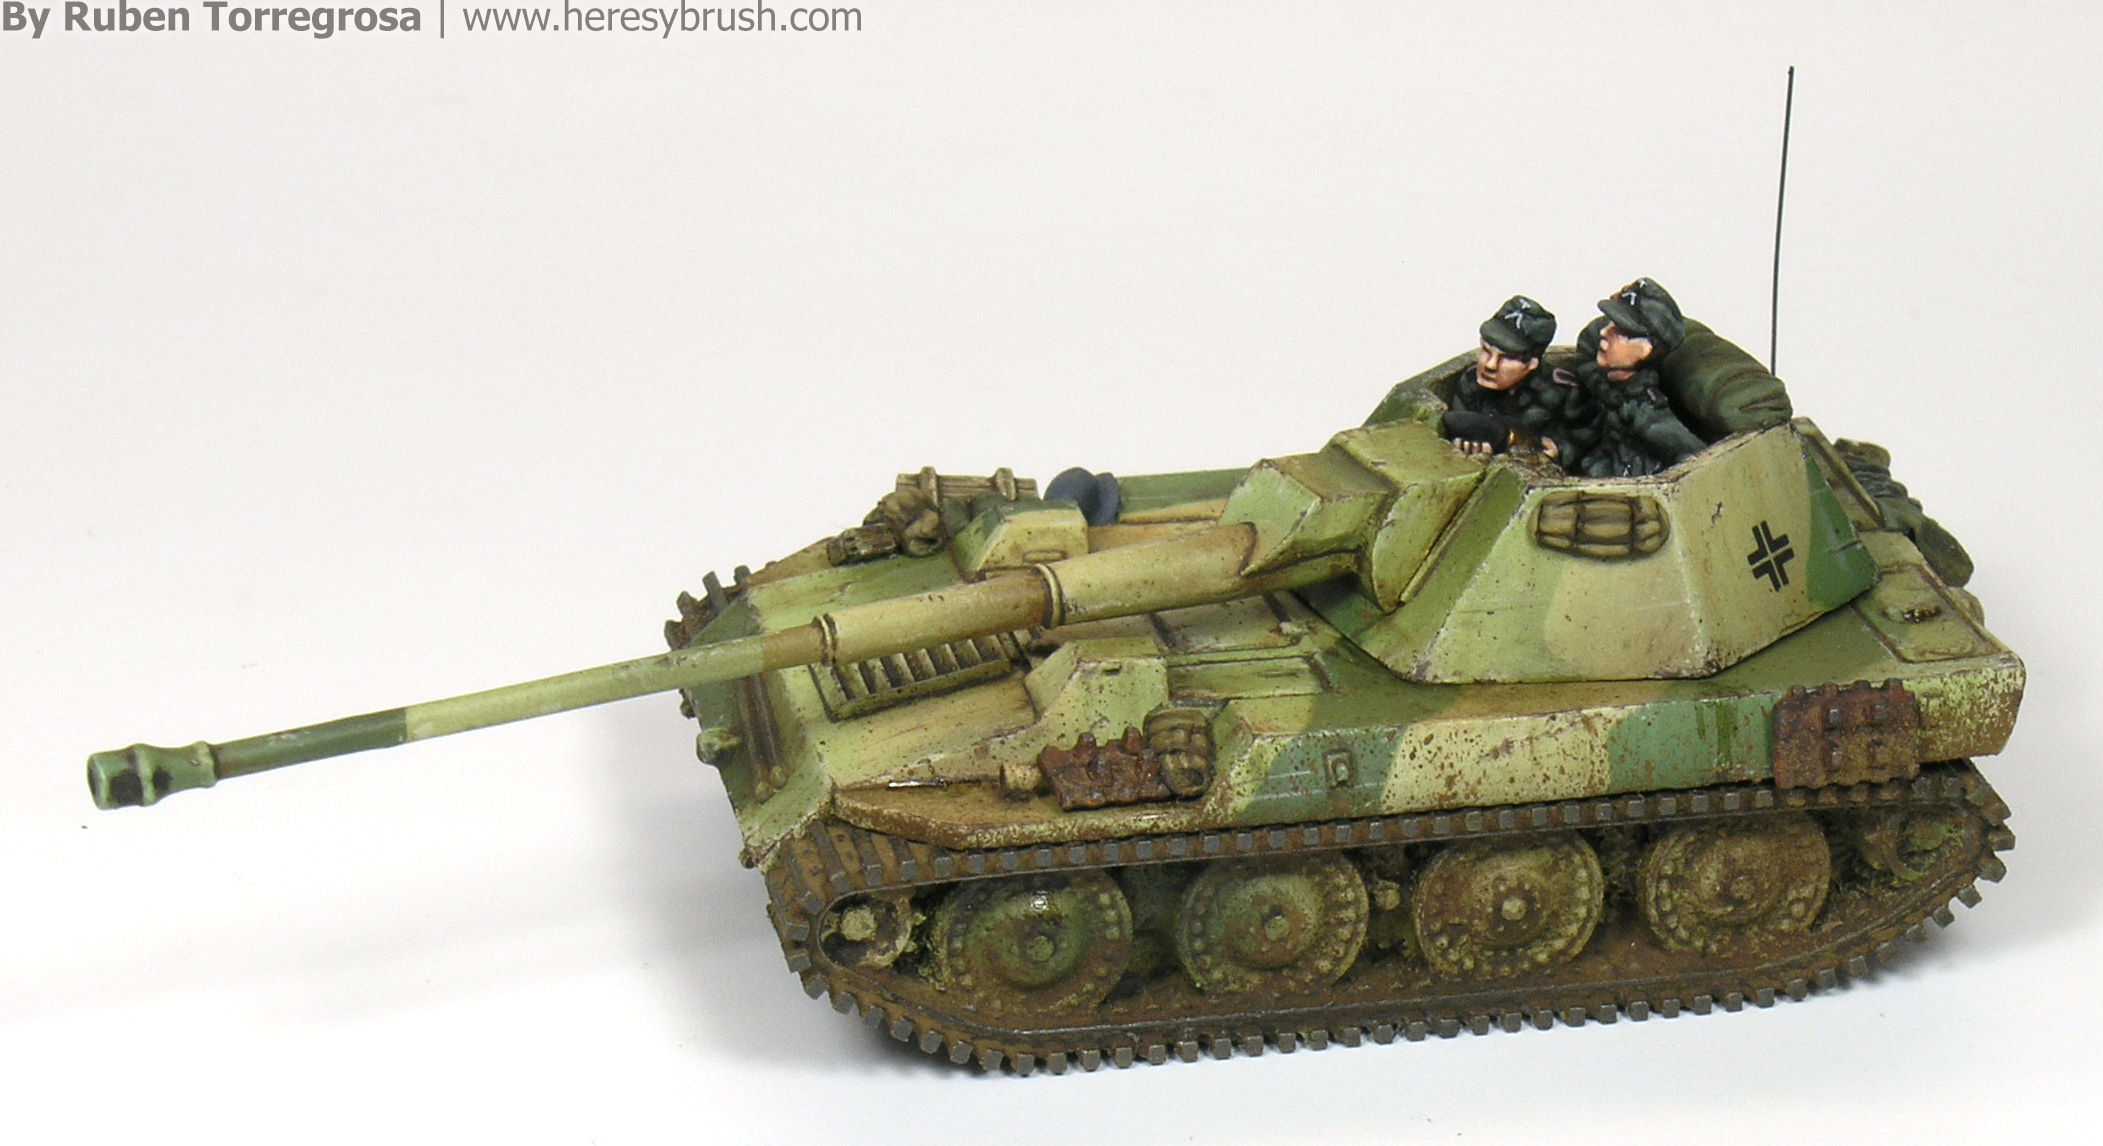
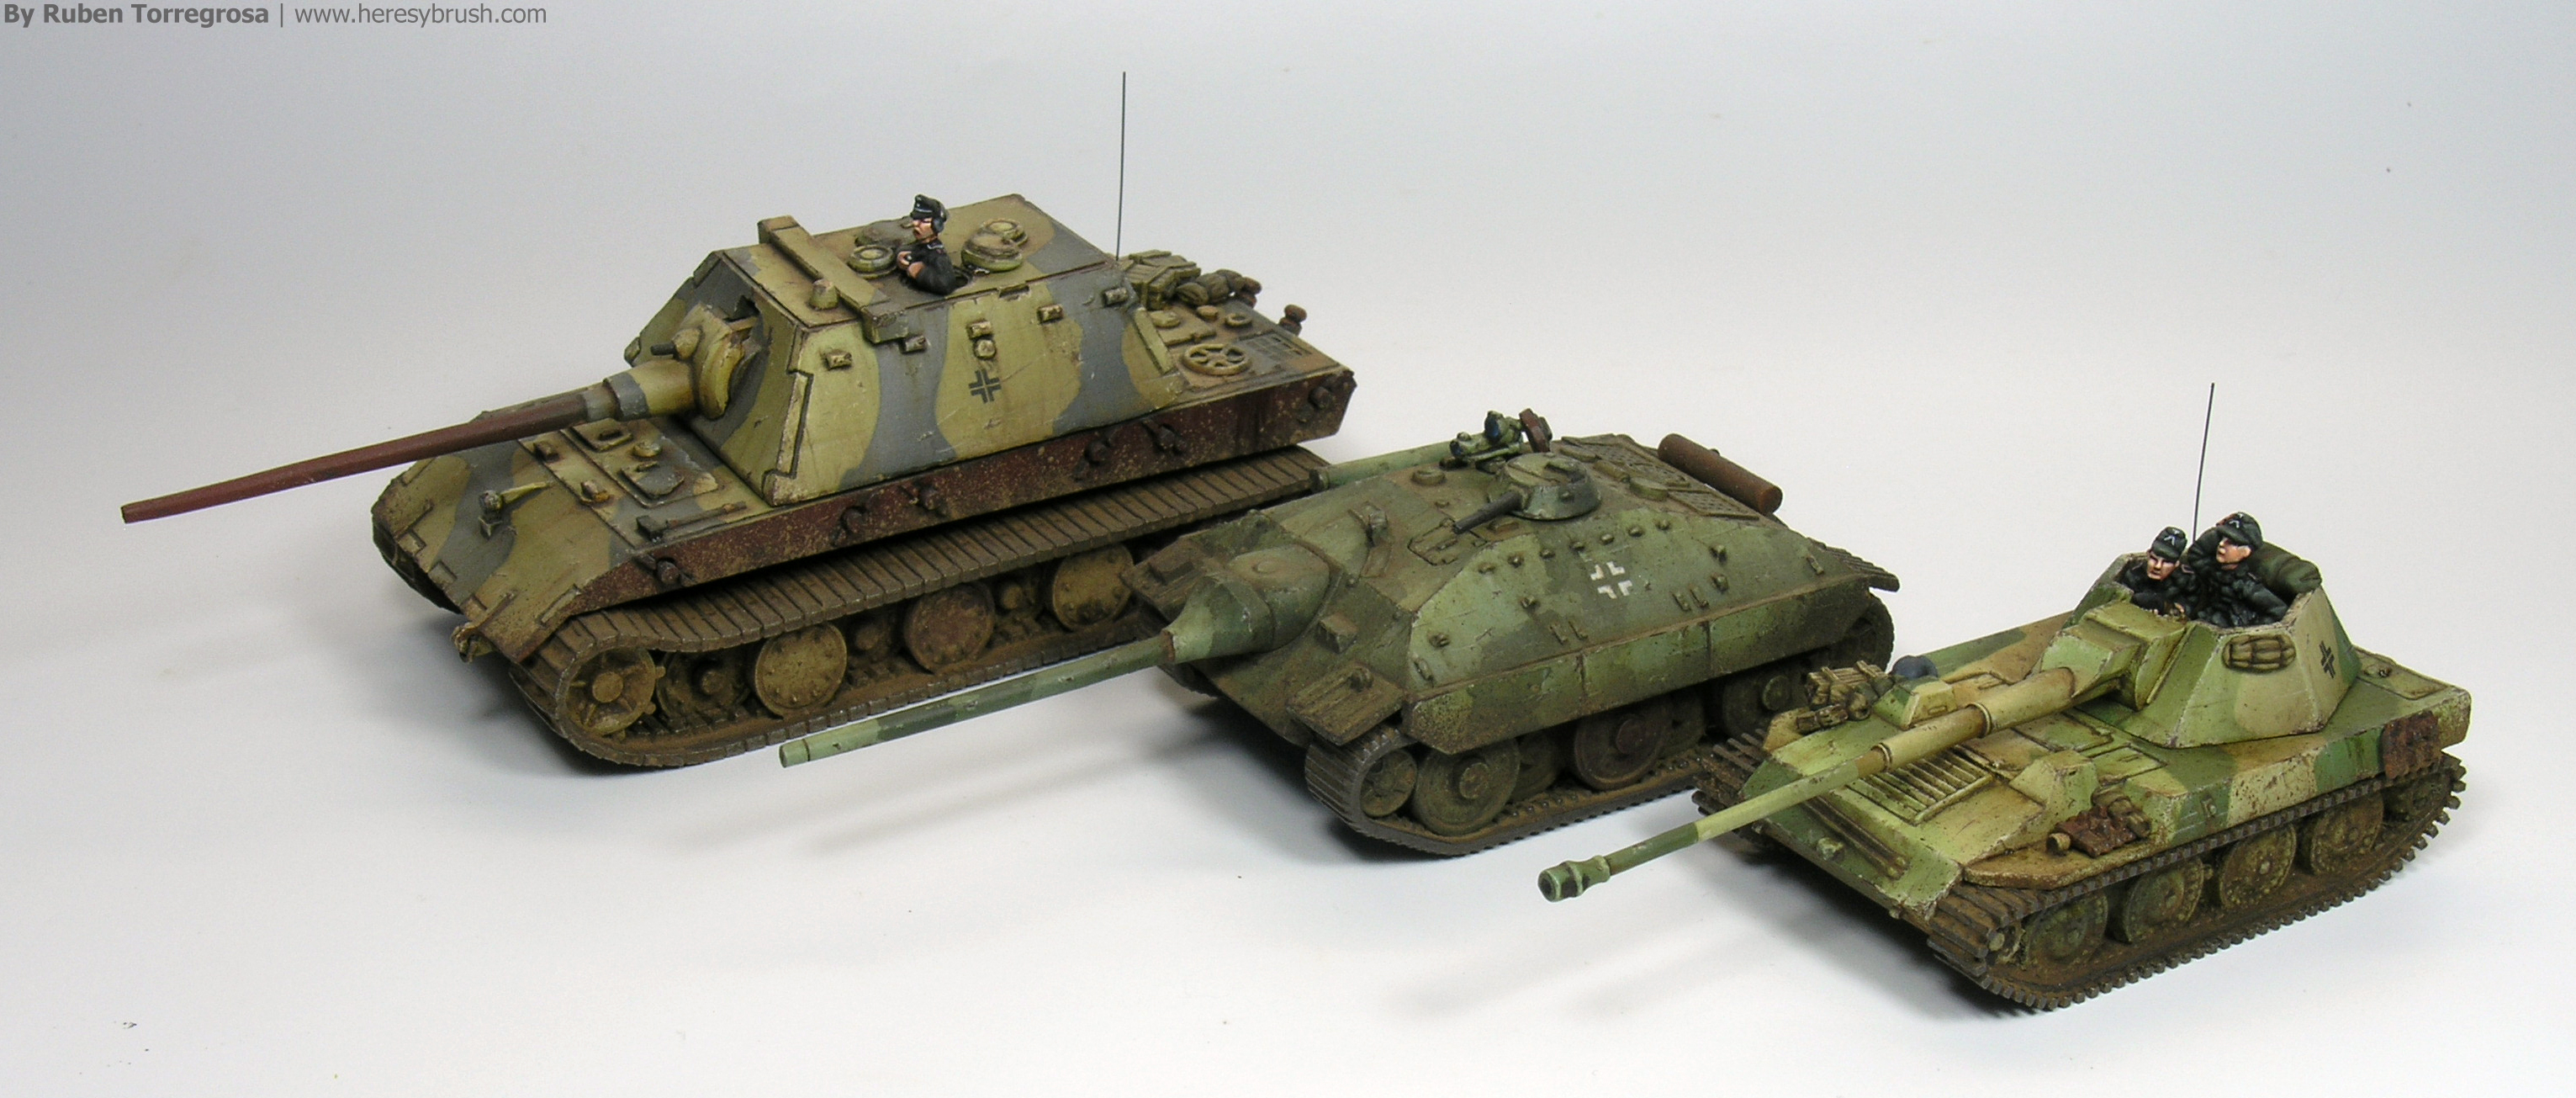
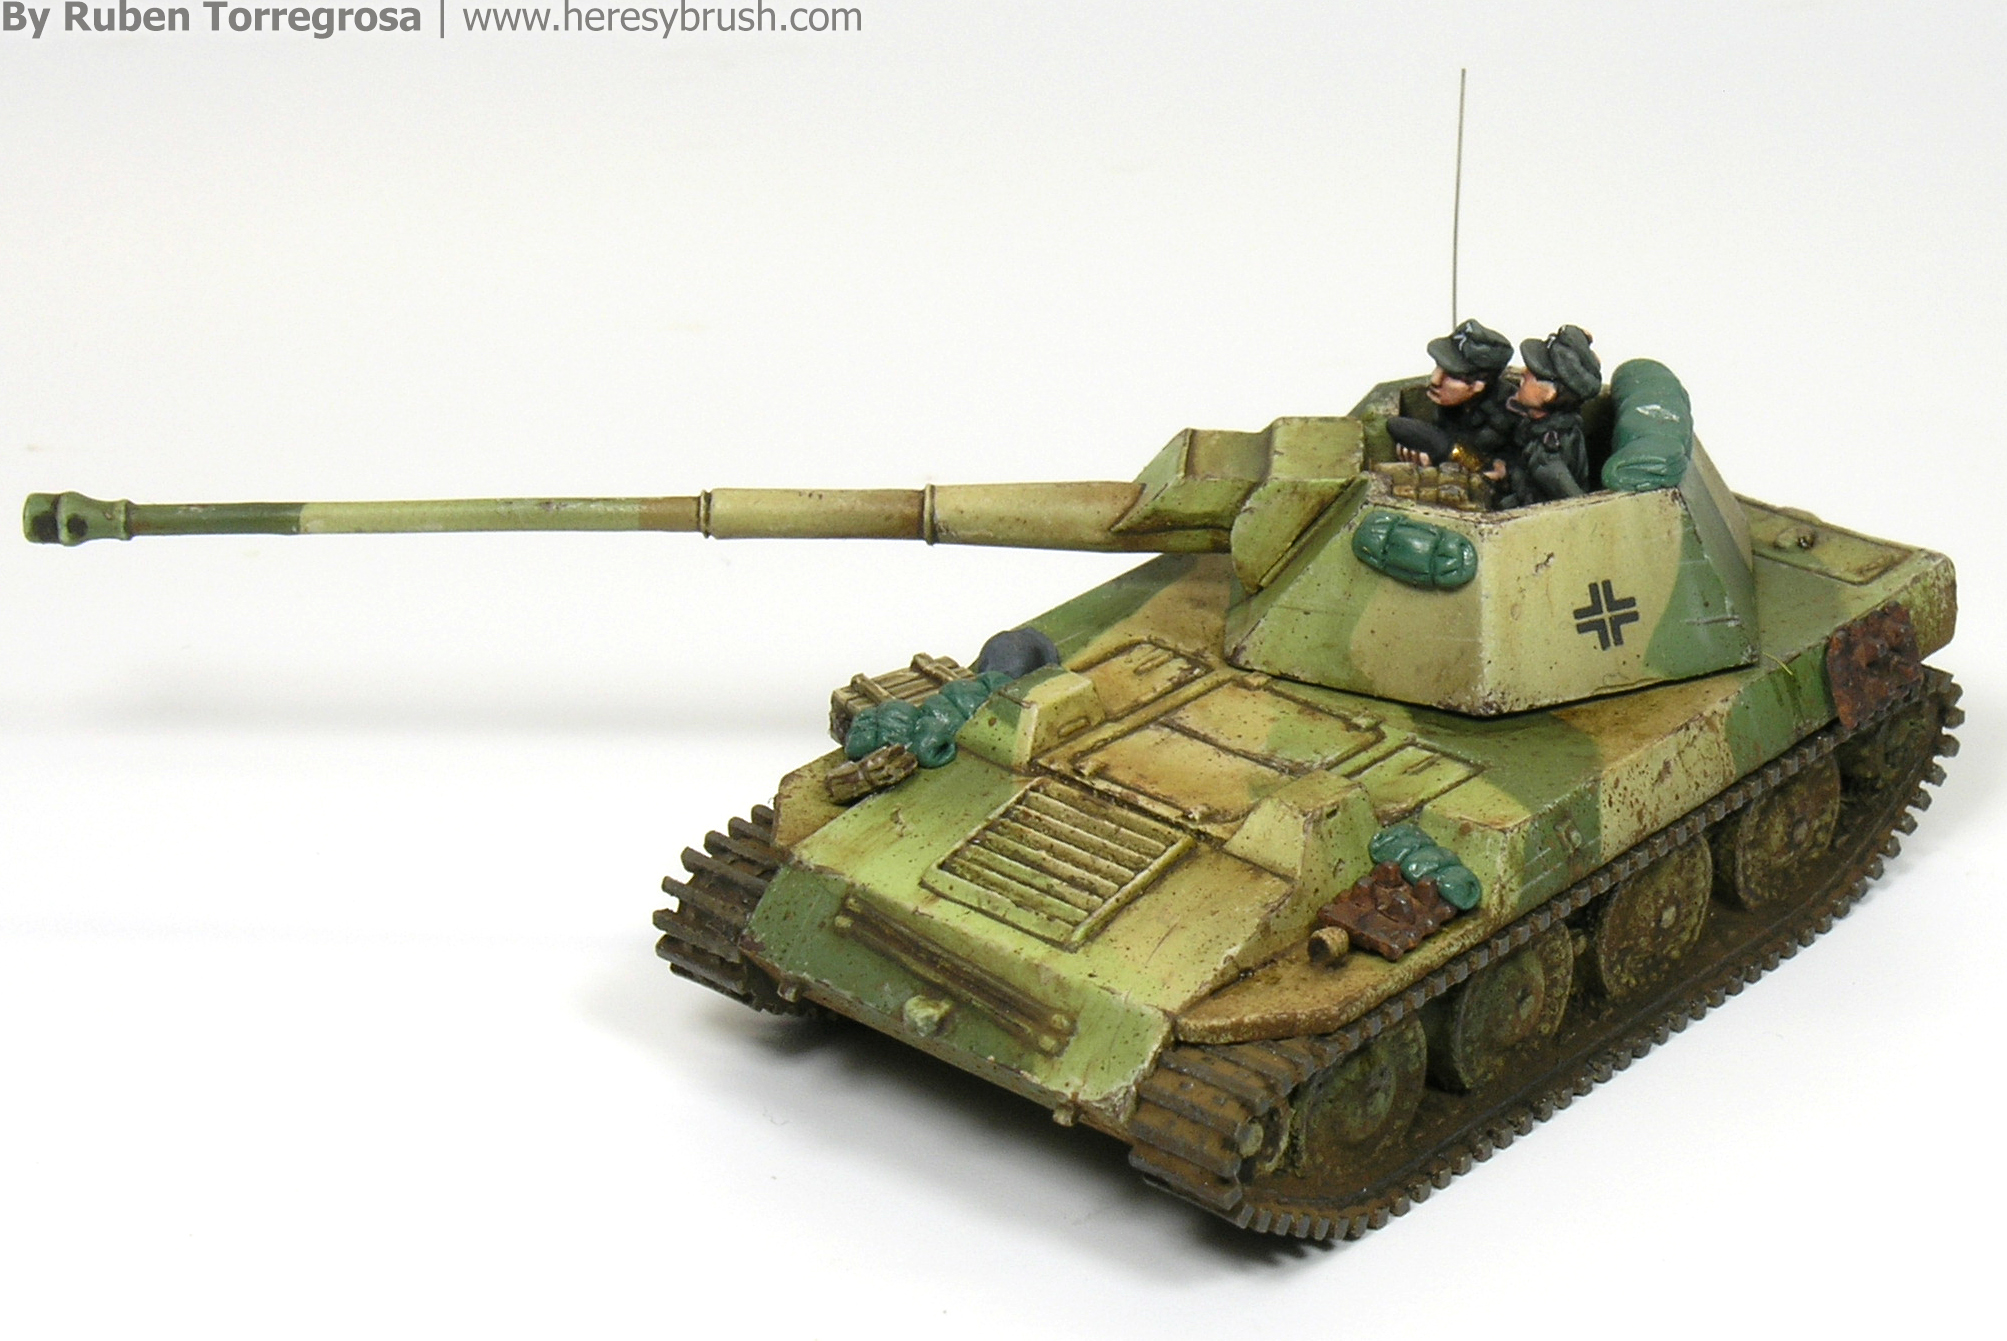
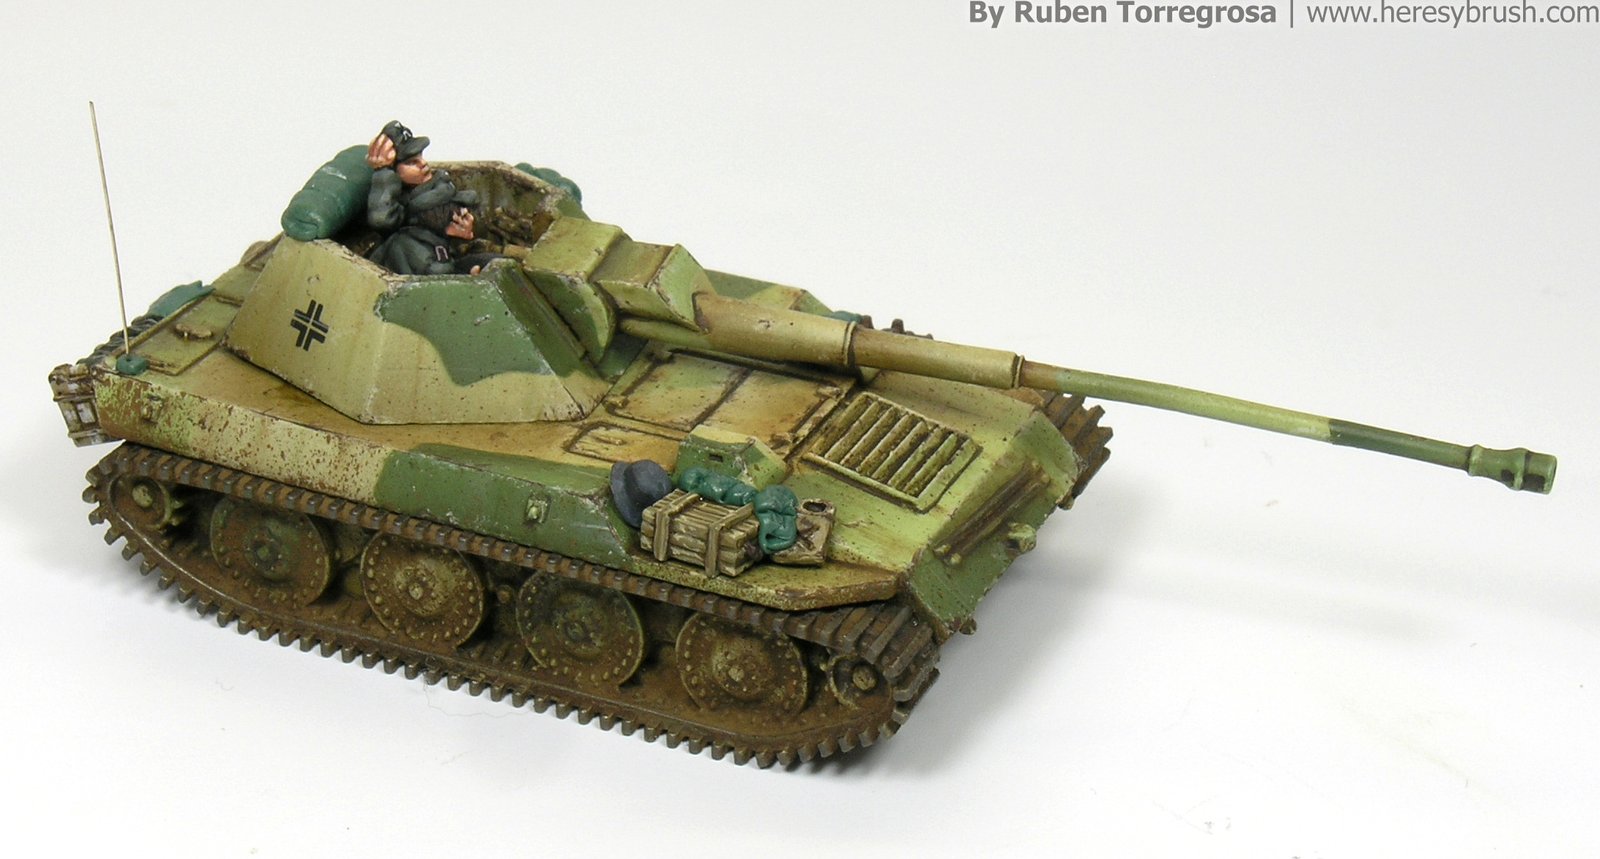
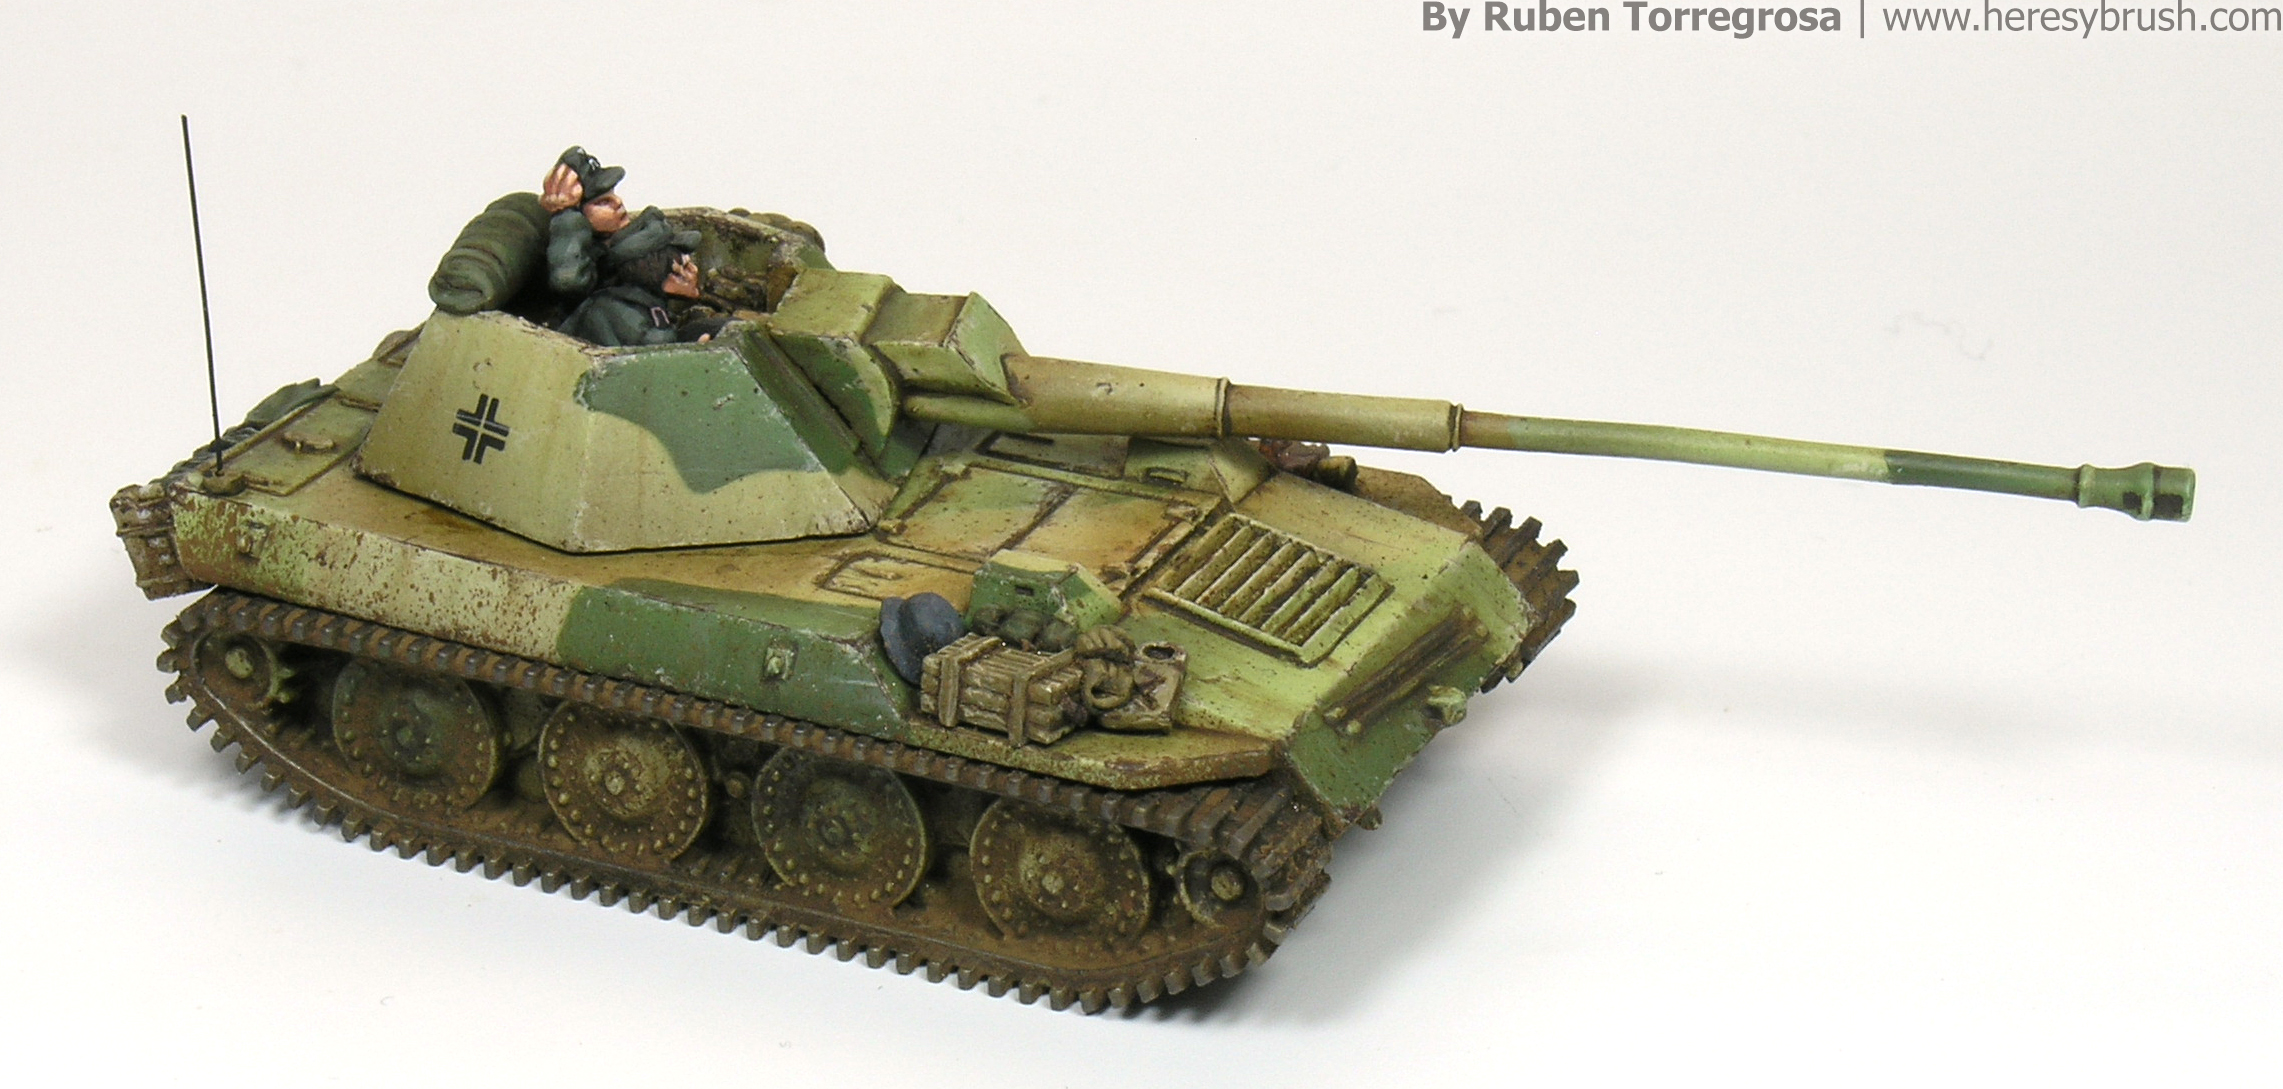
 Once again, it has been a while since I posted last time something here. Since I moved to Helsinki, my painting time has been dramatically reduced to a few hours per week. And some weeks, zero. In spite of this setback, I continue working slowly on several projects such as a new Age of Sigmar army, which I am painting as part of a panting league in Modelbrush.com (a blog I run with my brother and couple of very good friends), or the new 15mm range from Forged in Battle featuring the Dark Age. In fact, I have been more active lately posting in Modelbrush than here; and therefore, if you want to have an eye on my latest works, I recommend you to check this other blog every now and then. In any case, I found among my files a painting guide I never published. And I wanted to bring it here for you. For this guide I will use another paper-panzer, the Krupp Steyr Waffenträger, a full-track artillery tractor Raupenschlpepper Ost refurnished into a tank hunter tank with an 88mm PAK 43 gun. This is a 15mm model (scale 1:100) from Heer46. In this painting guide we will see how to paint a 15mm tank and then how to apply different weathering effects. We will go hand-by-hand from how to paint the camouflage to the final dust and oil effects. If you like this kind of painting guide, do not miss these other ones featuring 15mm vehicles: E25 German tank, British Sherman tank, British Mark IV tank and German mech. Or this one for Warhammer40k-like vehicles: Genestealer Cult Leman Russ.
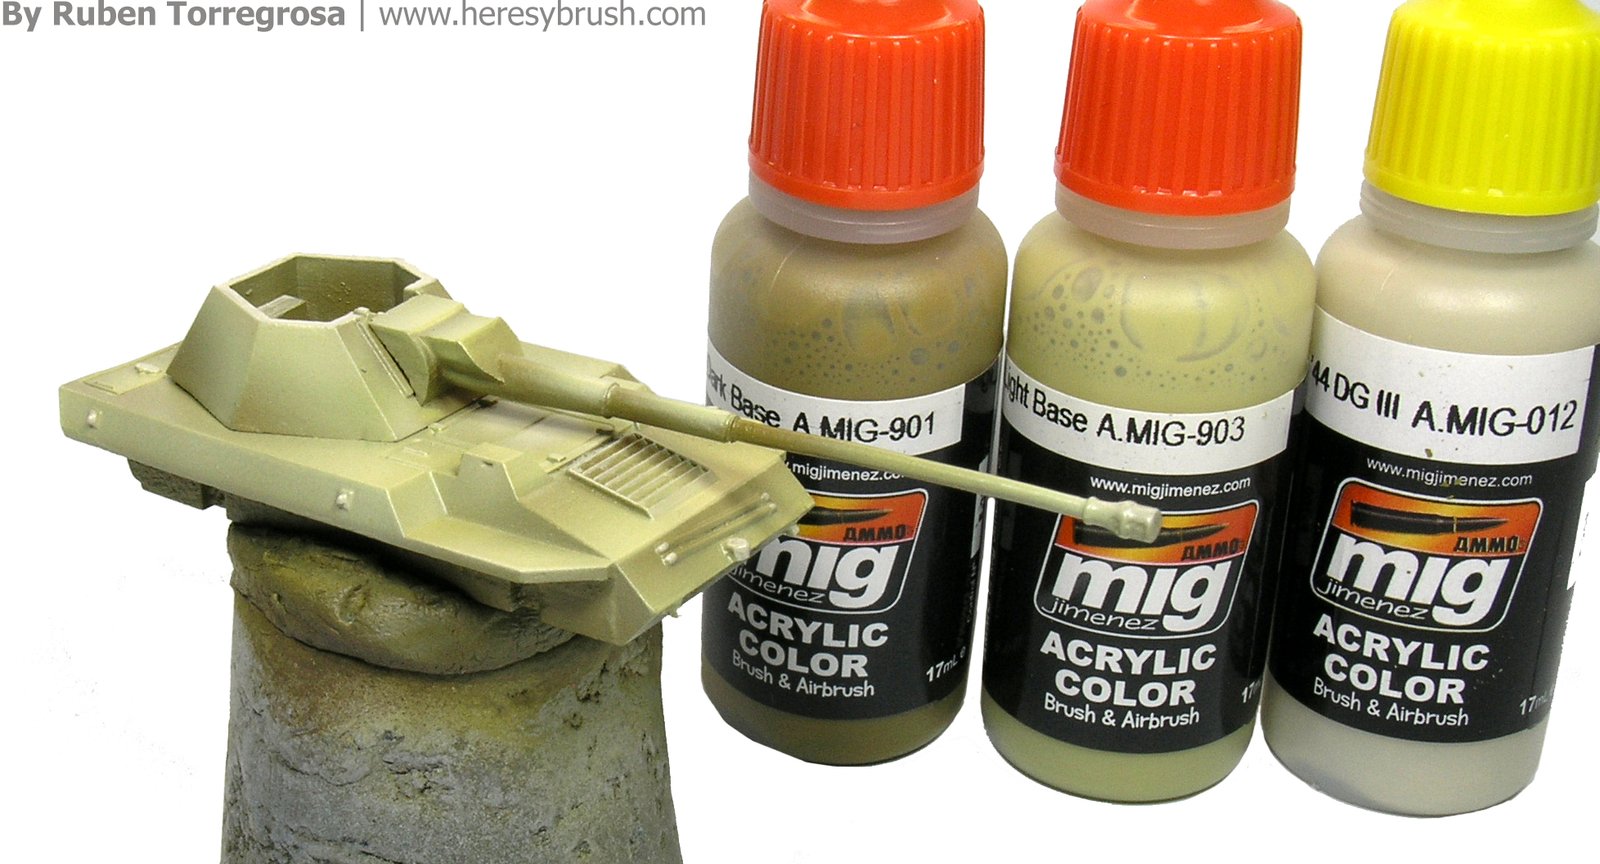
First of all, what do you need? In the image below you can see the minimum paints needed for this painting guide. Note that we are going to use three different types of paints/products: acrylics, enamels and dry pigments. Acrylics are the most common paints for wargames, they dry in a few seconds and are thinned with water. On the other hand, enamels (or oils) are oil-like paints and they dry only after several hours (or days), and need a special thinner such as White Spirit or turpentine. Finally, pigments are a like a colored dust. There are different options to apply pigments, as you will see later. We also need several brushes. For enamels you can use old –but still in good condition– brushes, since the hair will suffer because of the thinner. I usually reserve for enamels those brushes I do not want to use anymore with acrylic paints. For acrylics, we need very thin brushes. I usually use a number 0 and 1 from Winsor&Newton Series 7. They are expensive, but are the best. Another regular brush n.2 or 3 will be also needed. Finally, we need an airbrush. Personally, I am in love with the Renegade Krome from Badger with the 0,21 mm set.
Tank
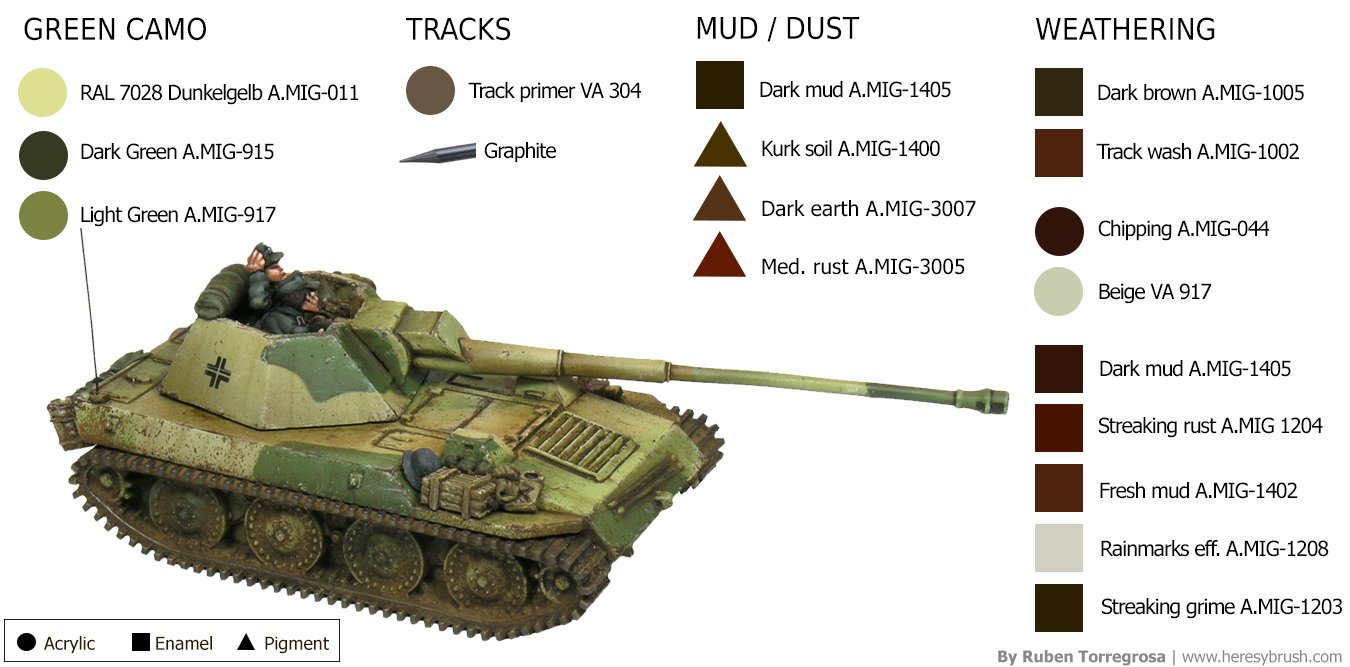
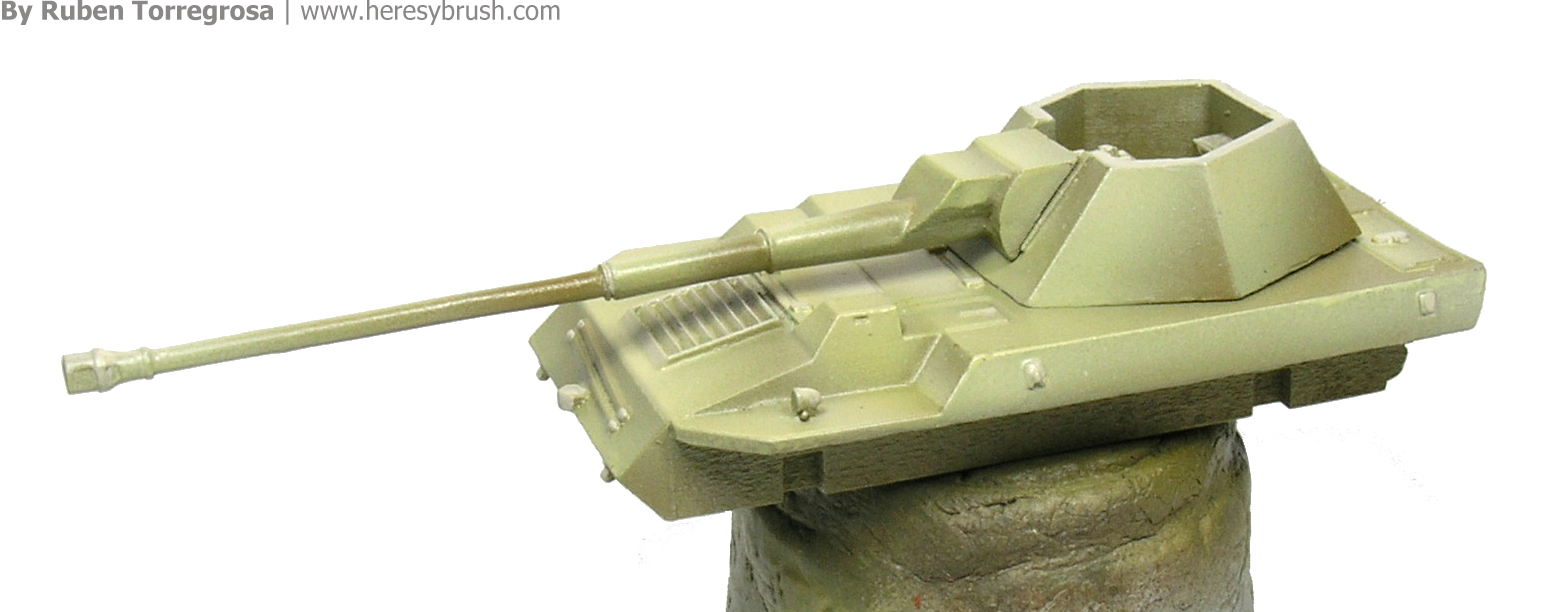
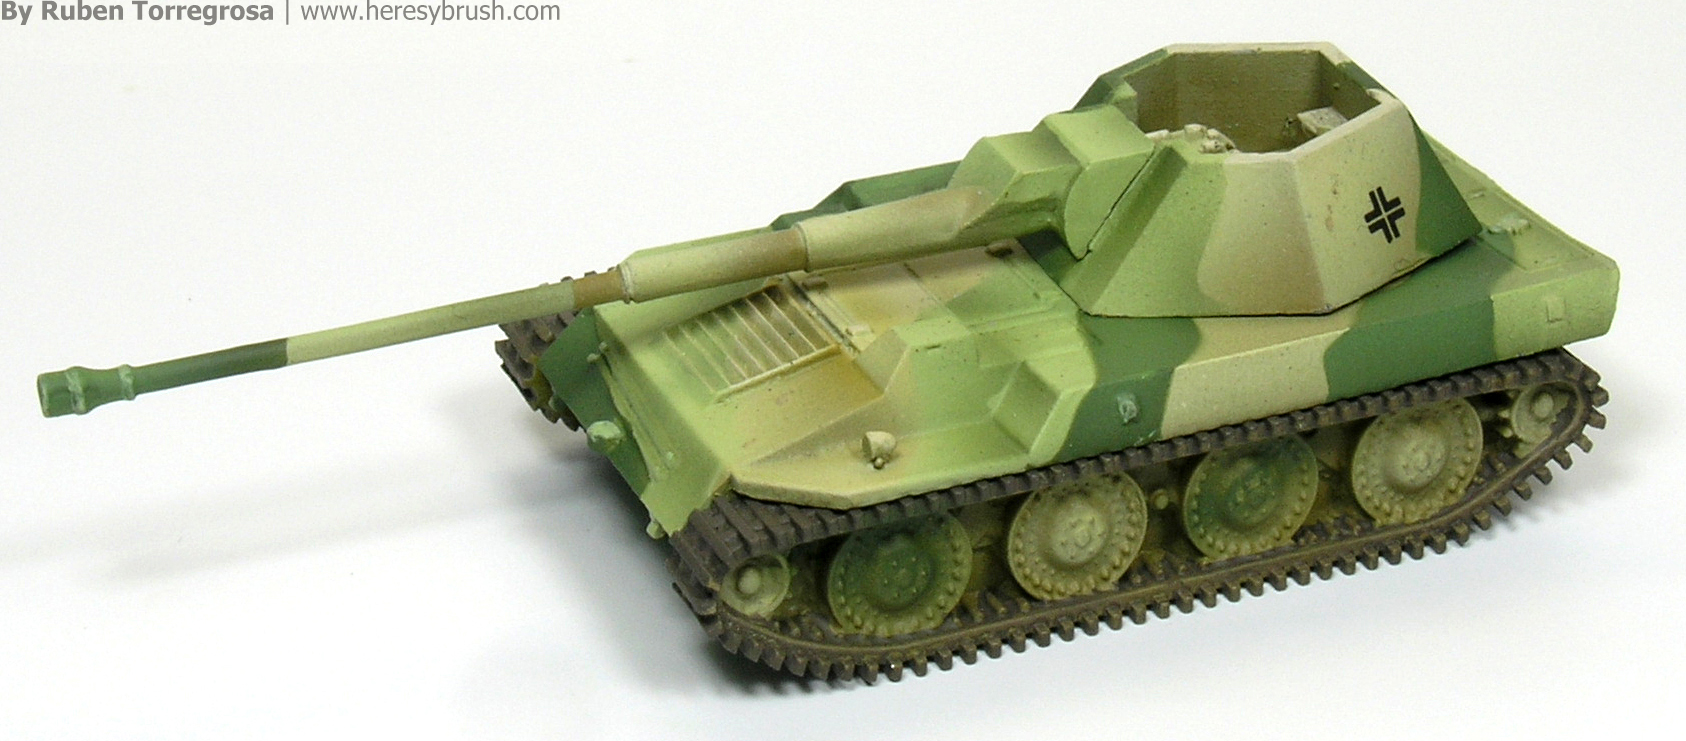
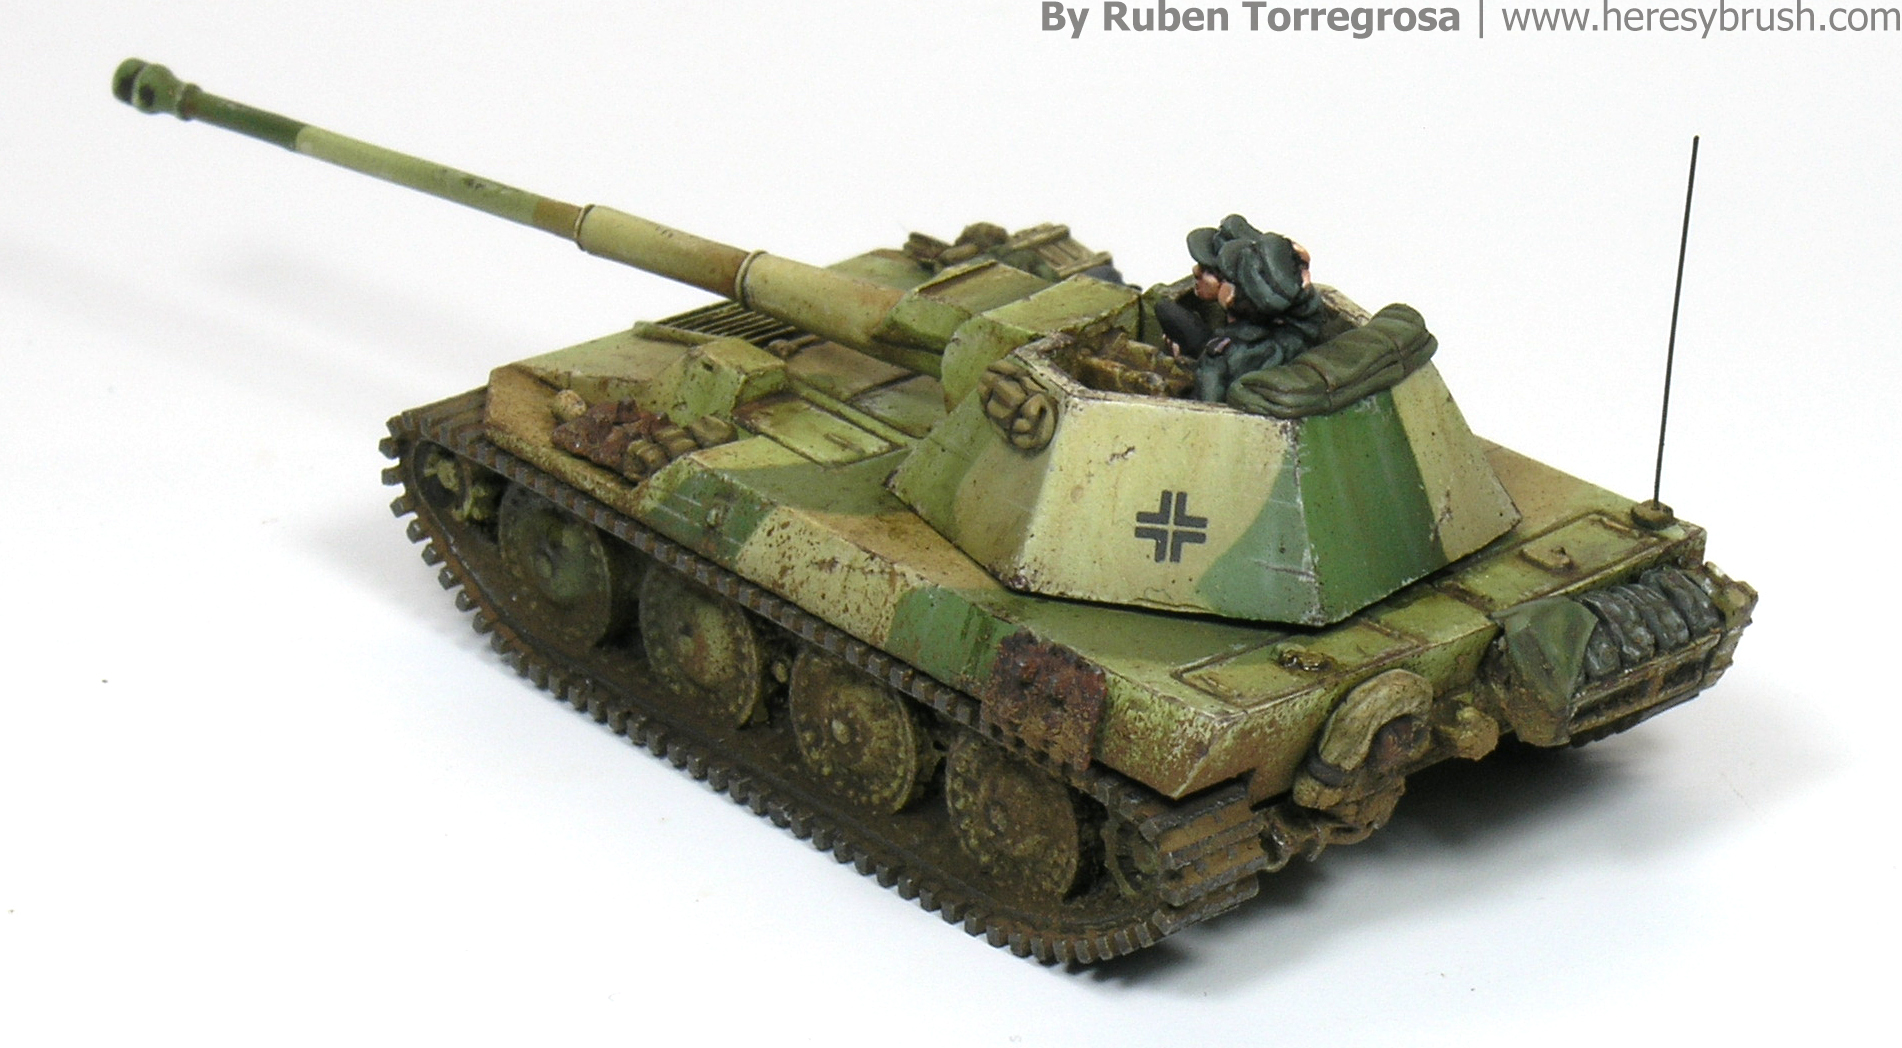
I decided to paint a three color camouflage totally anachronistic (remember, this tank was just a prototype). On top of the classical dunkelgelb or dark yellow, the camouflage will consist in big spots of light and dark green. Each color will occupy around 1/3 of the surface. We start painting the vehicle with the dominant color; or if there is not any, with the color we are more comfortable with. In my case, I first paint the dark yellow. We can apply a classical zenithal light or something more elaborated (but not real) such as color modulation. In my case, I applied a sort of modulation with the airbrush and using directly three paints (I did not mix anything): dunkelgelb dark base A.MIG-901 (shade), dunkelgelb light base 903 (base) and RAL 7028 A.MIG-012 (highlights). Note that if you do not want to spend much time in this part, you can directly use the lightest color A.MIG-012.
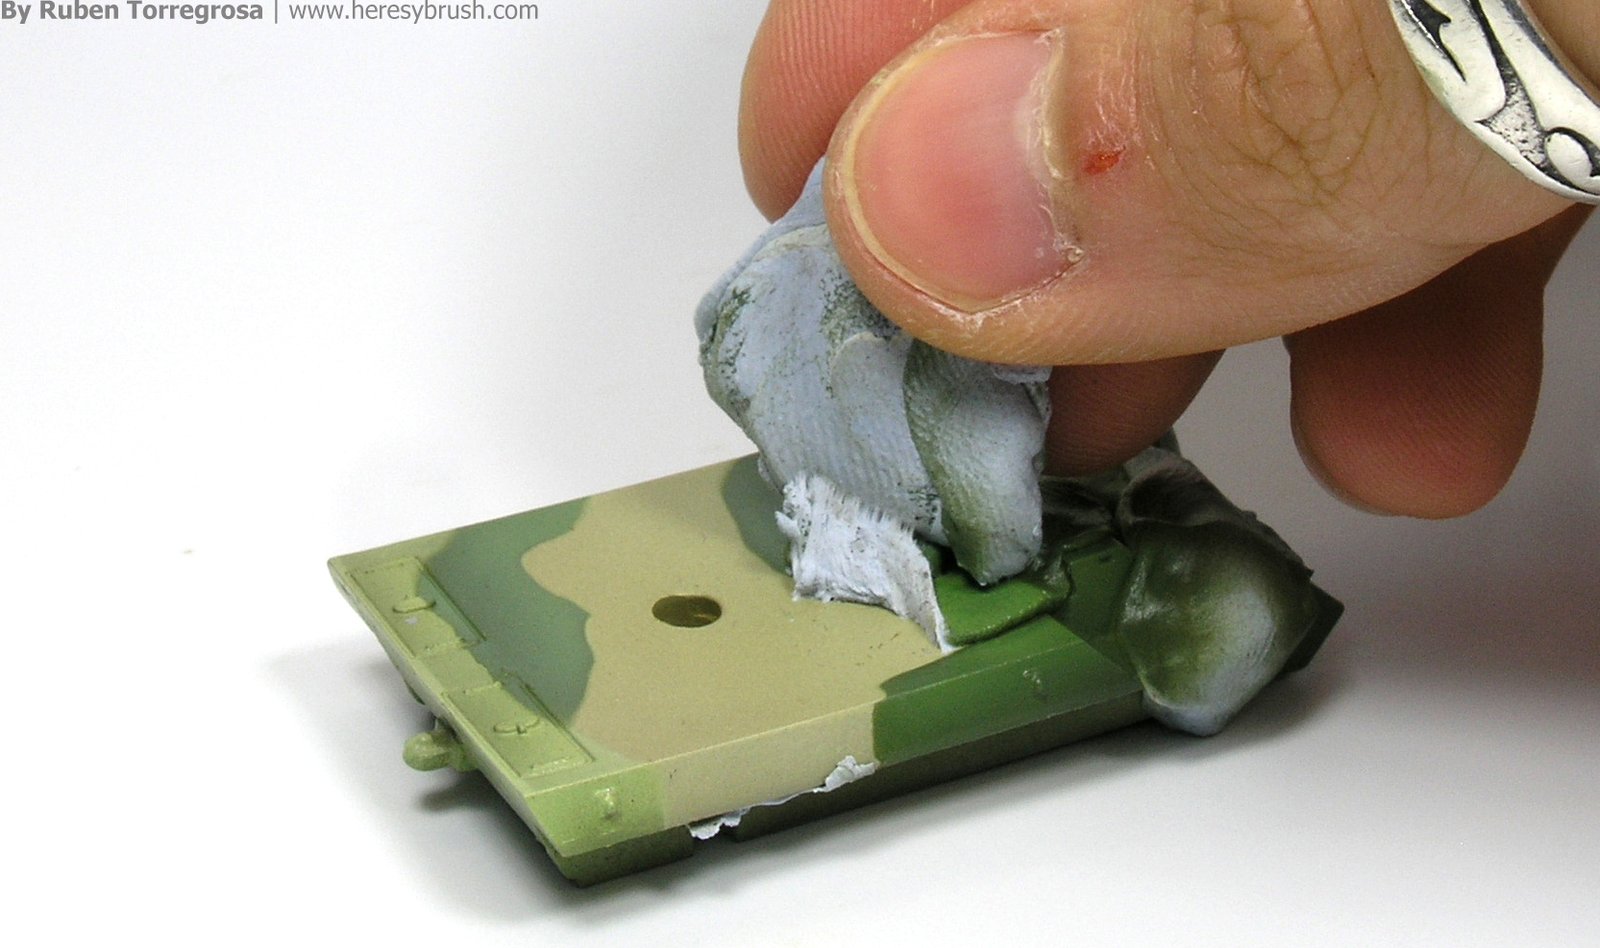
To simulate a hard edge camouflage (in comparison to the soft edge camouflage, where the edges are nicely blended), we can use Blu-tack as I described here. In short, protect the parts of the vehicle you do not want to paint with the auto-adeshive putty Blu-tack. You can use the brush handle to extend the putty. Any other similar putty, such as Silly Puty or Masking putty from AMMO are similarly effective. Since I still need to paint two camouflage colors, I cover one third of the tank.

ow, we paint the exposed areas with the first green color. For the light green, first paint the whole exposed area with Light green A.MIG-917, and then mark the shades with Dark green A.MIG-915. Try to follow the same illumination pattern you used to paint the previews color.
We repeat the same process, covering another 1/3 of the surface with Blu-Tack. Remember, what you cover now, will not be paint. And now we paint the dark green color. Similarly, first I painted the whole area with Dark green A.MIG-915, and then I mixed this color with black in the same proportion (i.e. one drop of each) to apply the shades. You could also start from the shades and then apply the highlights. This is up to you.
We carefully remove the Blu-Tack. If this is difficult in some parts, you can use a little bit more of Blu-tack to remove it.
After painting the camouflage and before starting the weathering effects, we airbrush a layer of satin varnish to protect everything. Before this step we can add decals or apply stencils. If you want to know more about decals, transfers and stencils, check this and this.
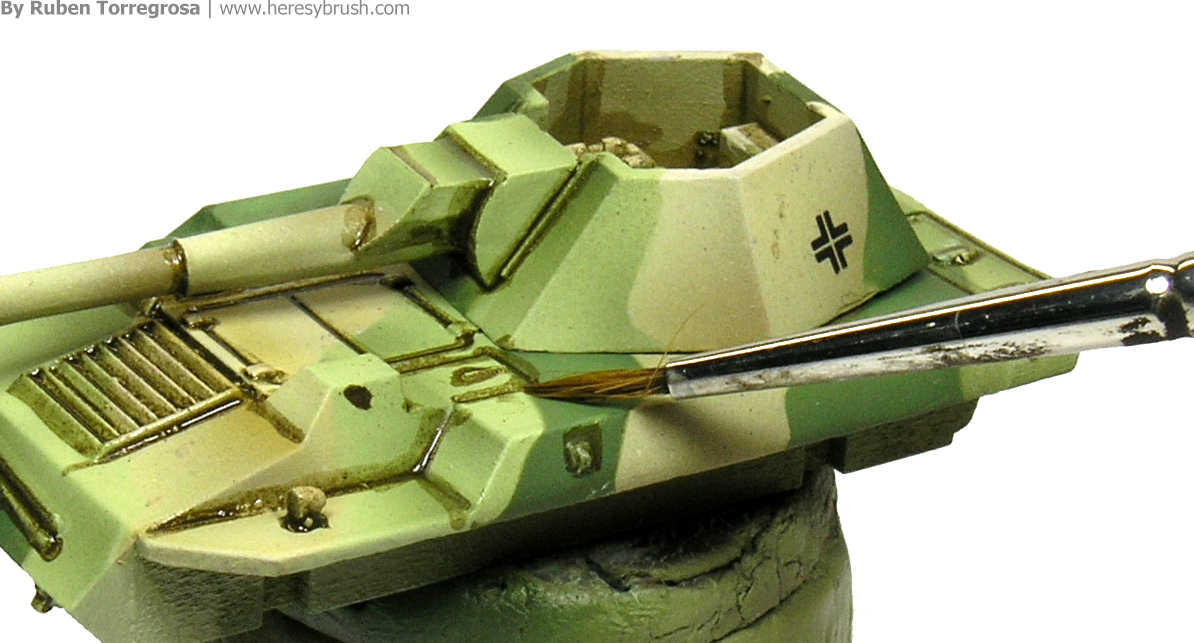
Now we will use an enamel paint. To bring to life all the small details and recesses, we apply a pin-wash. That is, we apply a little bit of an enamel wash only –and ONLY– in the recesses. You will need a thin brush for this. For this tritonal camo, I chose the Dark brown wash A-MIG-1005. Depending on the colors of the vehicle, we should use one wash or another. For example, if our tank is painted only in dark yellow we could use a lighter wash such as Brown A.MIG-1000. If you are not sure, choose a dark wash.
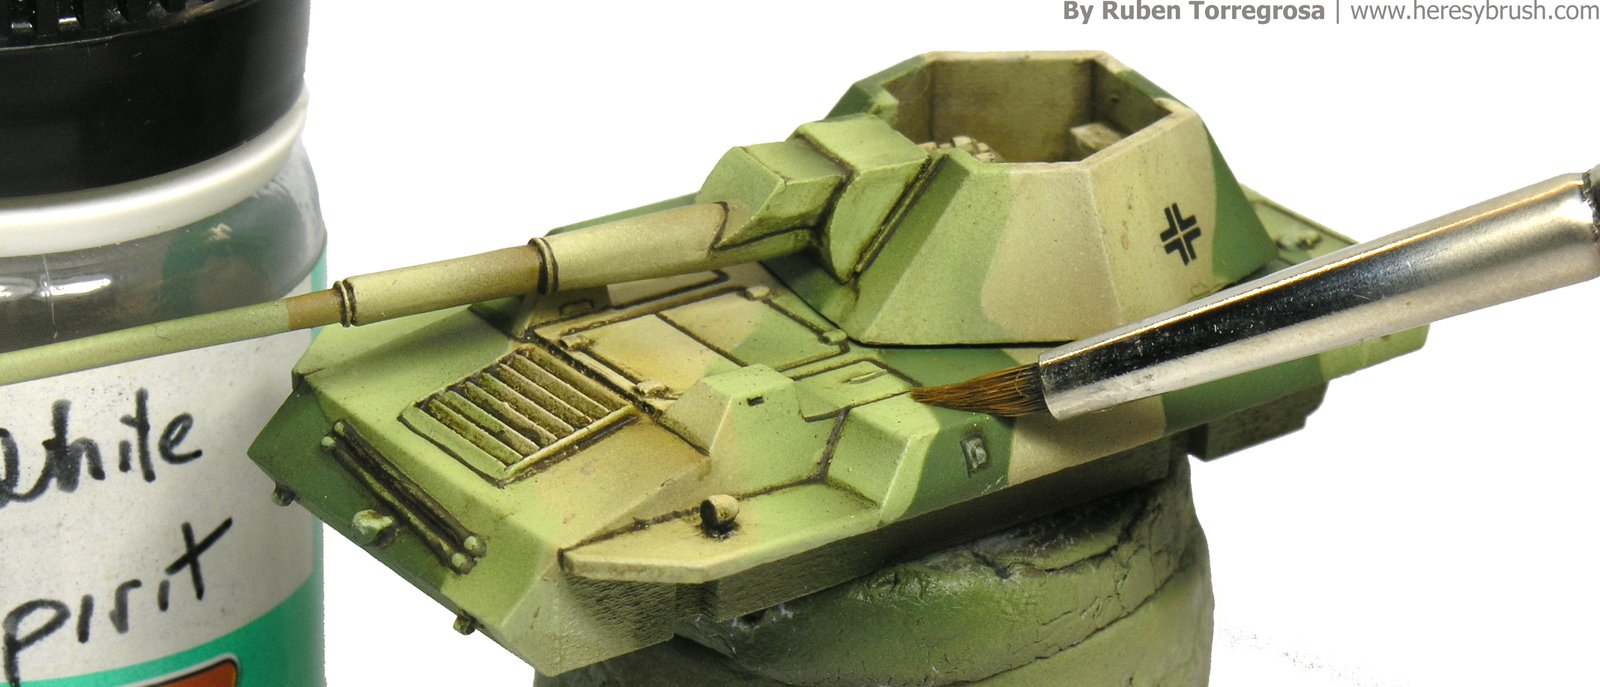
After one hour we can remove the excess of the wash with a brush moistened with thinner (white spirit or turpentine). A cotton-swab can be used instead. Do not press too much to avoid removing the wash from the recesses; although you can always repeat the wash step.
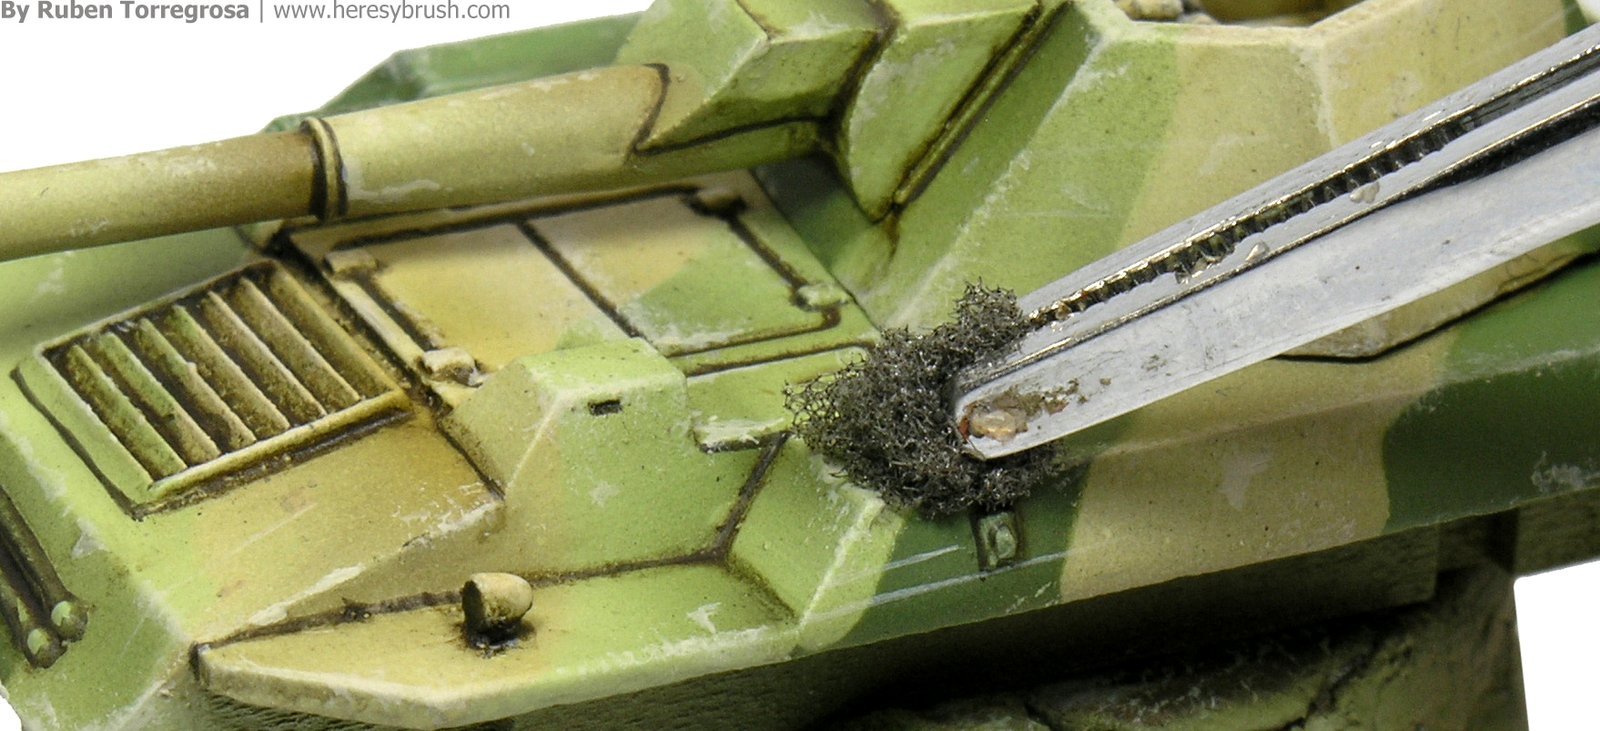
The chipping effects are done in two phases: first we paint superficial or light chipping effects. And then we paint deep or heavy chipping effects. For the superficial impacts we use a light color. Since the base color of this tank is dark yellow, my chipping effects will be done in light yellow. I mix RAL 7028 A.MIG-012 with white in the same proportion. If you are not sure which color you should use, a beige color (such as 917 Vallejo) is always a good option. To apply the chipping effects we can use the brush to paint scratches or tiny dots and/or a piece of sponge to create a more severe effect.
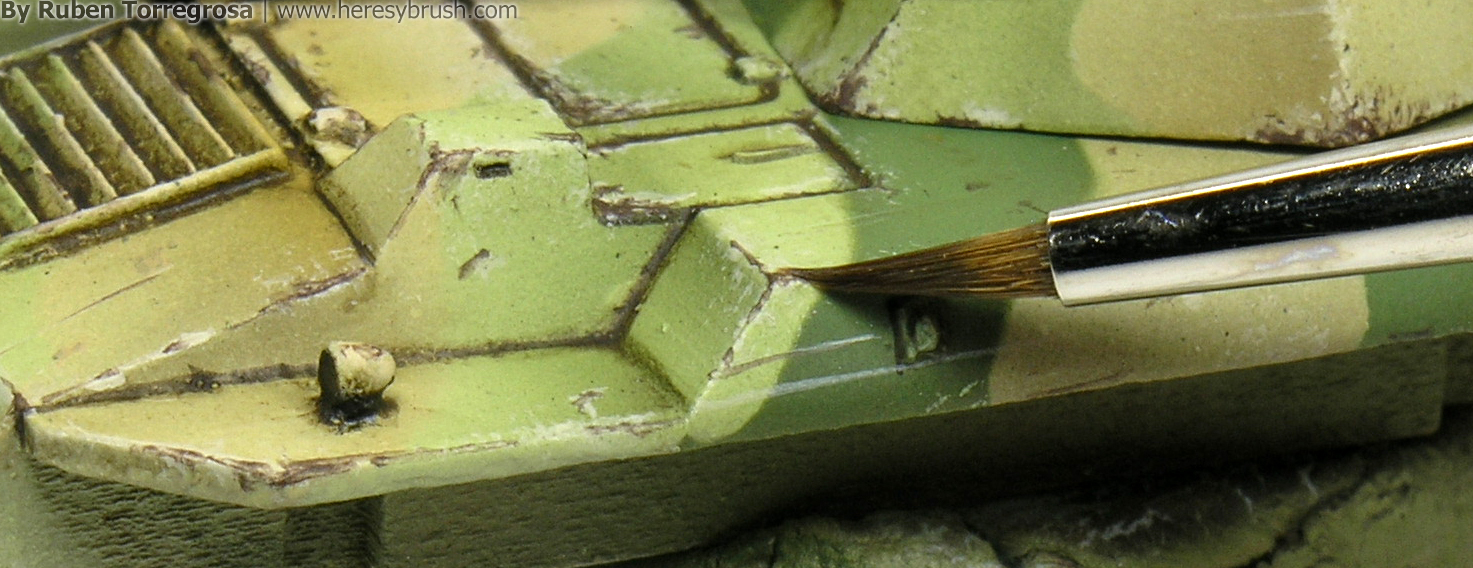
For the second phase, we repeat the same process but this time using a dark brown color such as Chipping A.MIG-044, regardless of the color of the tank. This color resembles the exposed steel. When applying this color, try not to cover the light color we previously painted. This will add some volume to the scratches and chipping.
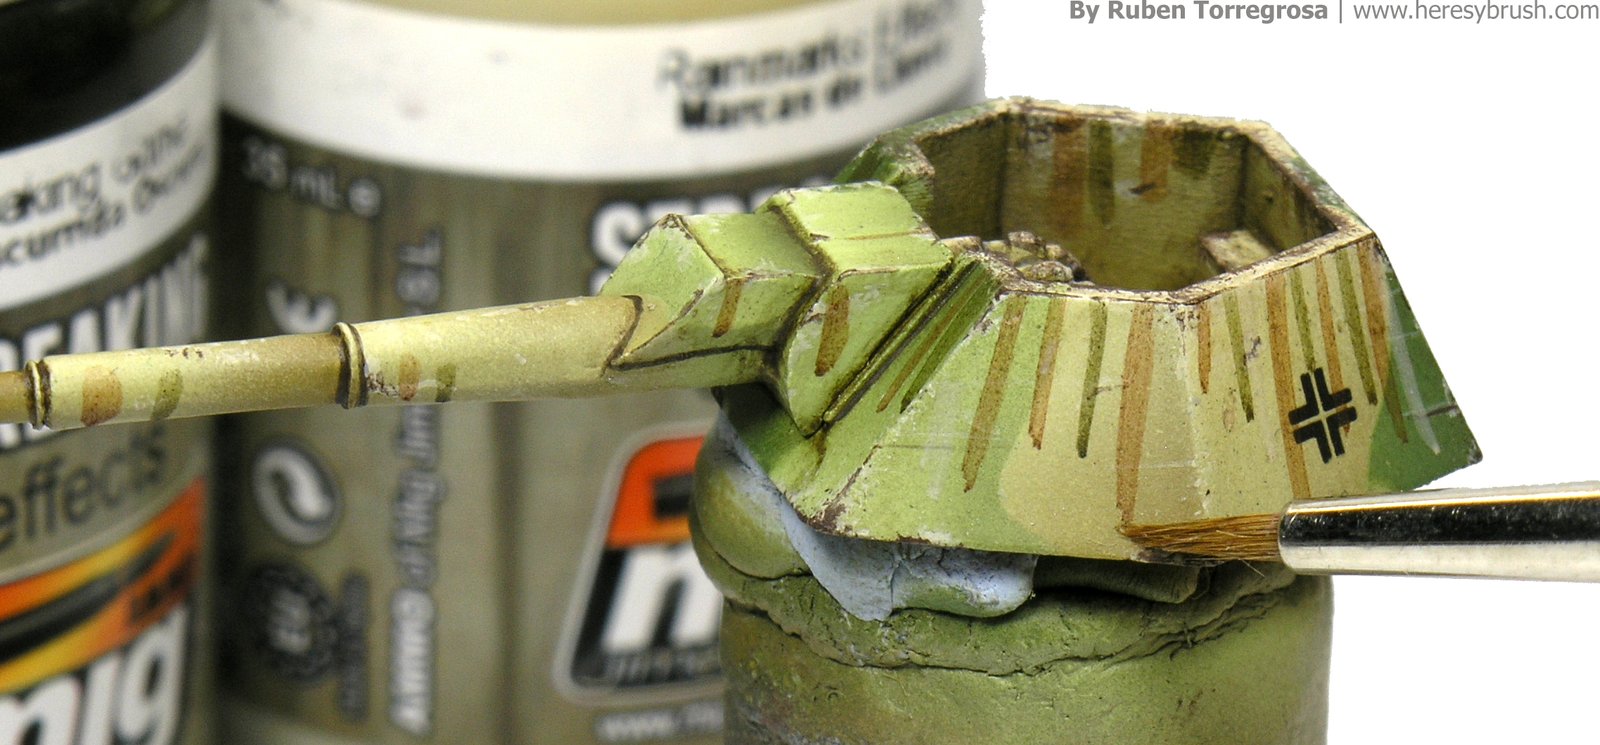
To simulate some streaking effects we will use several enamel paints again. Pick several colors depending on what you want to simulate. If you are not sure, you can check my general palette for this effect: dark mud A.MIG-1405, streaking rust A.MIG-1204, Fresh mud A.MIG-1402, Rainmarks effect A.MIG-1208 and/or streaking grime A.MIG-1203. Some of them are reddish, others are greenish and the rainmark is whitish. For example, if you want to simulate dust you can use more the whitish streaking effect, while if you prefer to simulate dirty and rust you can use red and greenish colors. Combine these tones to add a little bit of chromatic variation on the tank: for example, the red tone gives a lot of contrast on the light yellow parts, while the white has a similar effect on the dark green parts. Brownish colors are useful to generate a general dirty looking. When choosing the streaking effect colors, you also need to consider which color you have below. The same streaking color will produce totally different effects on a green Sherman or a yellow Panzer. Play around to get familiarized with the different possibilities. To apply the streaking effects, use a thin brush to paint thin lines on the vertical planes.
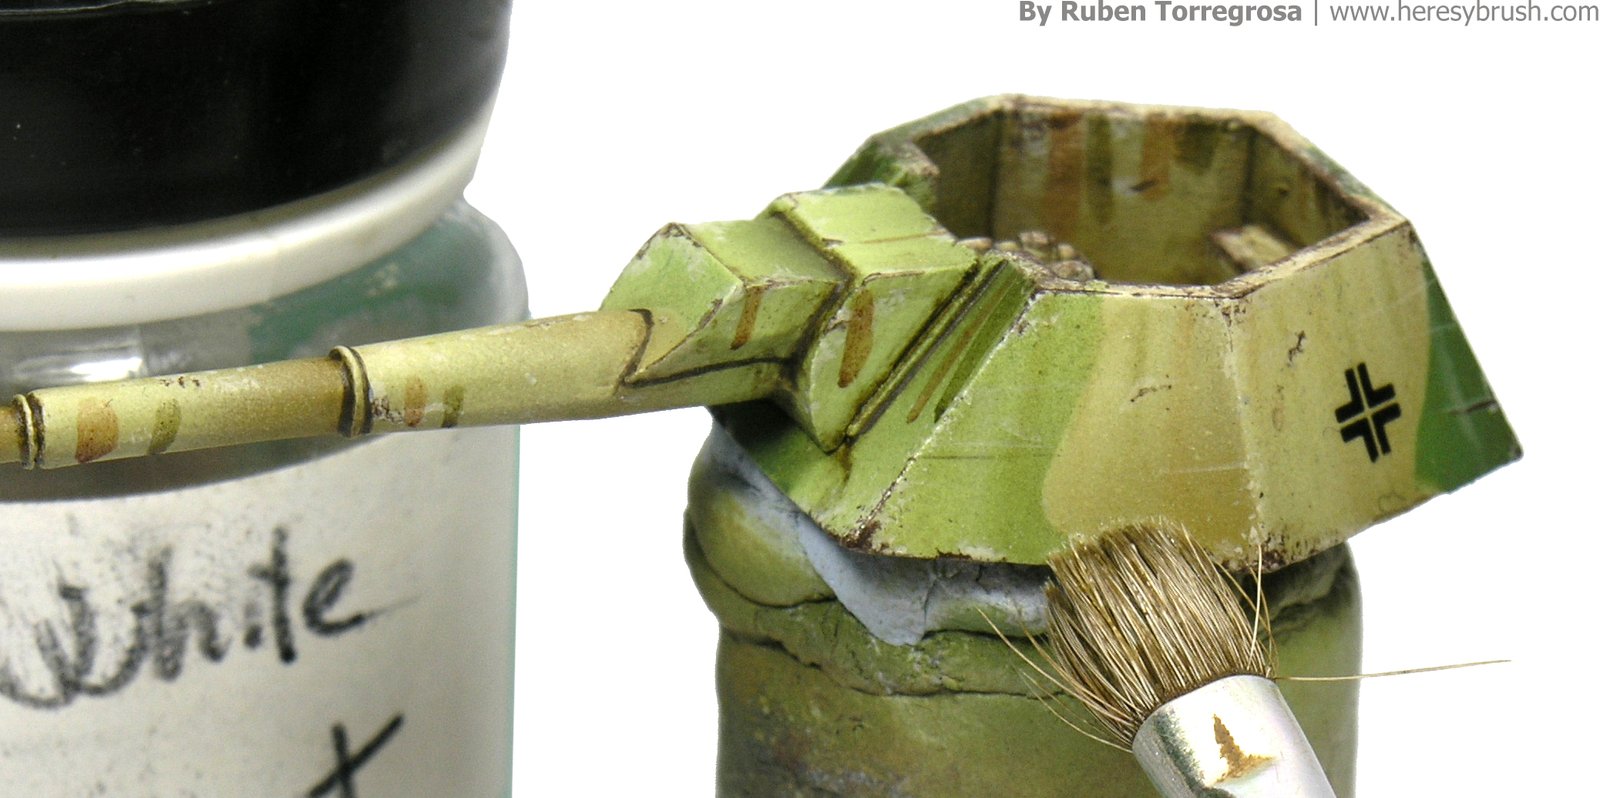
With a flat brush moistened with thinner (turpentine or white spirit) we blend the streaking effects by applying vertical strokes, from the top to the bottom. Do not worry if you remove most of the paint. This effect can be as subtle or striking as you want. If you want a more striking effect, you can repeat the same process several times and/or try not to eliminate too much paint. But remember, sometimes “less is more”. Do not abuse of this effect.
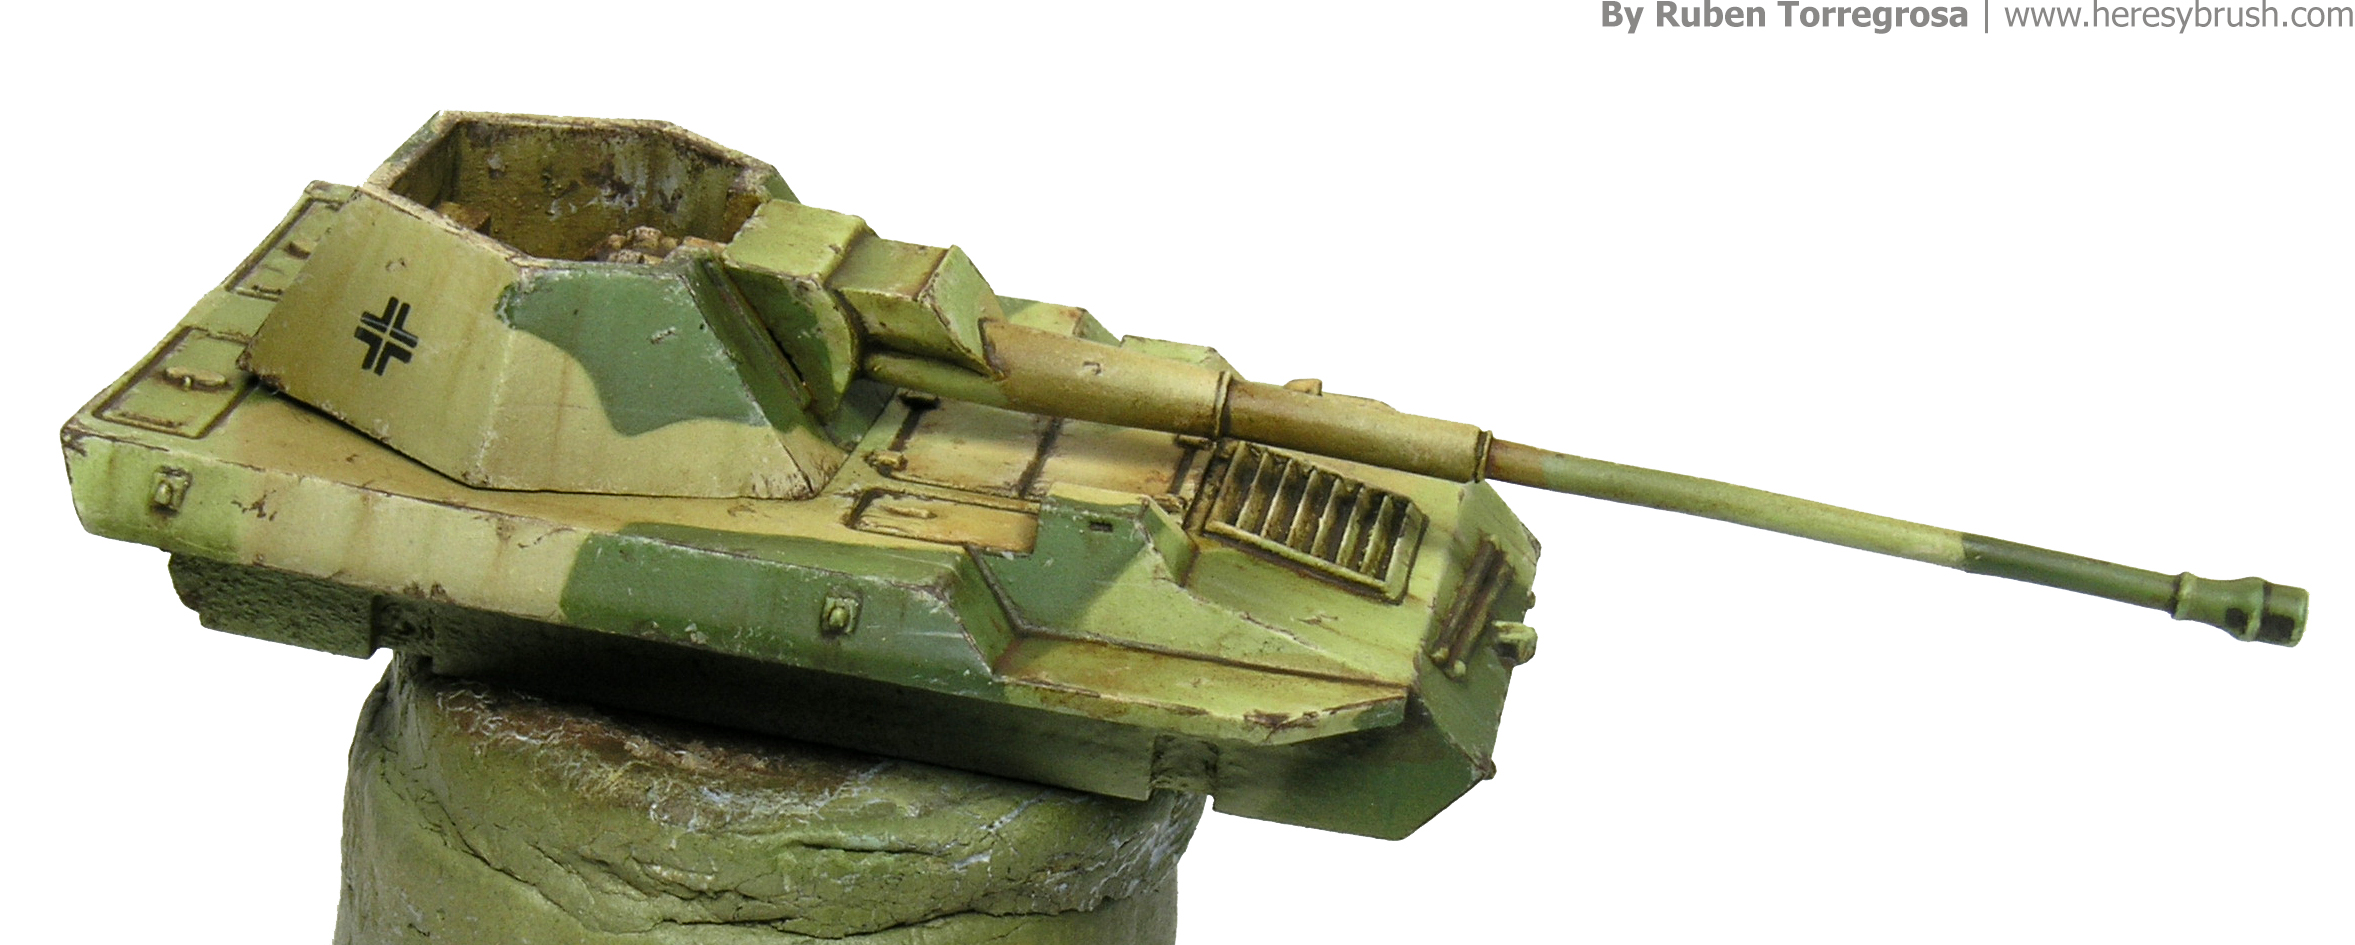
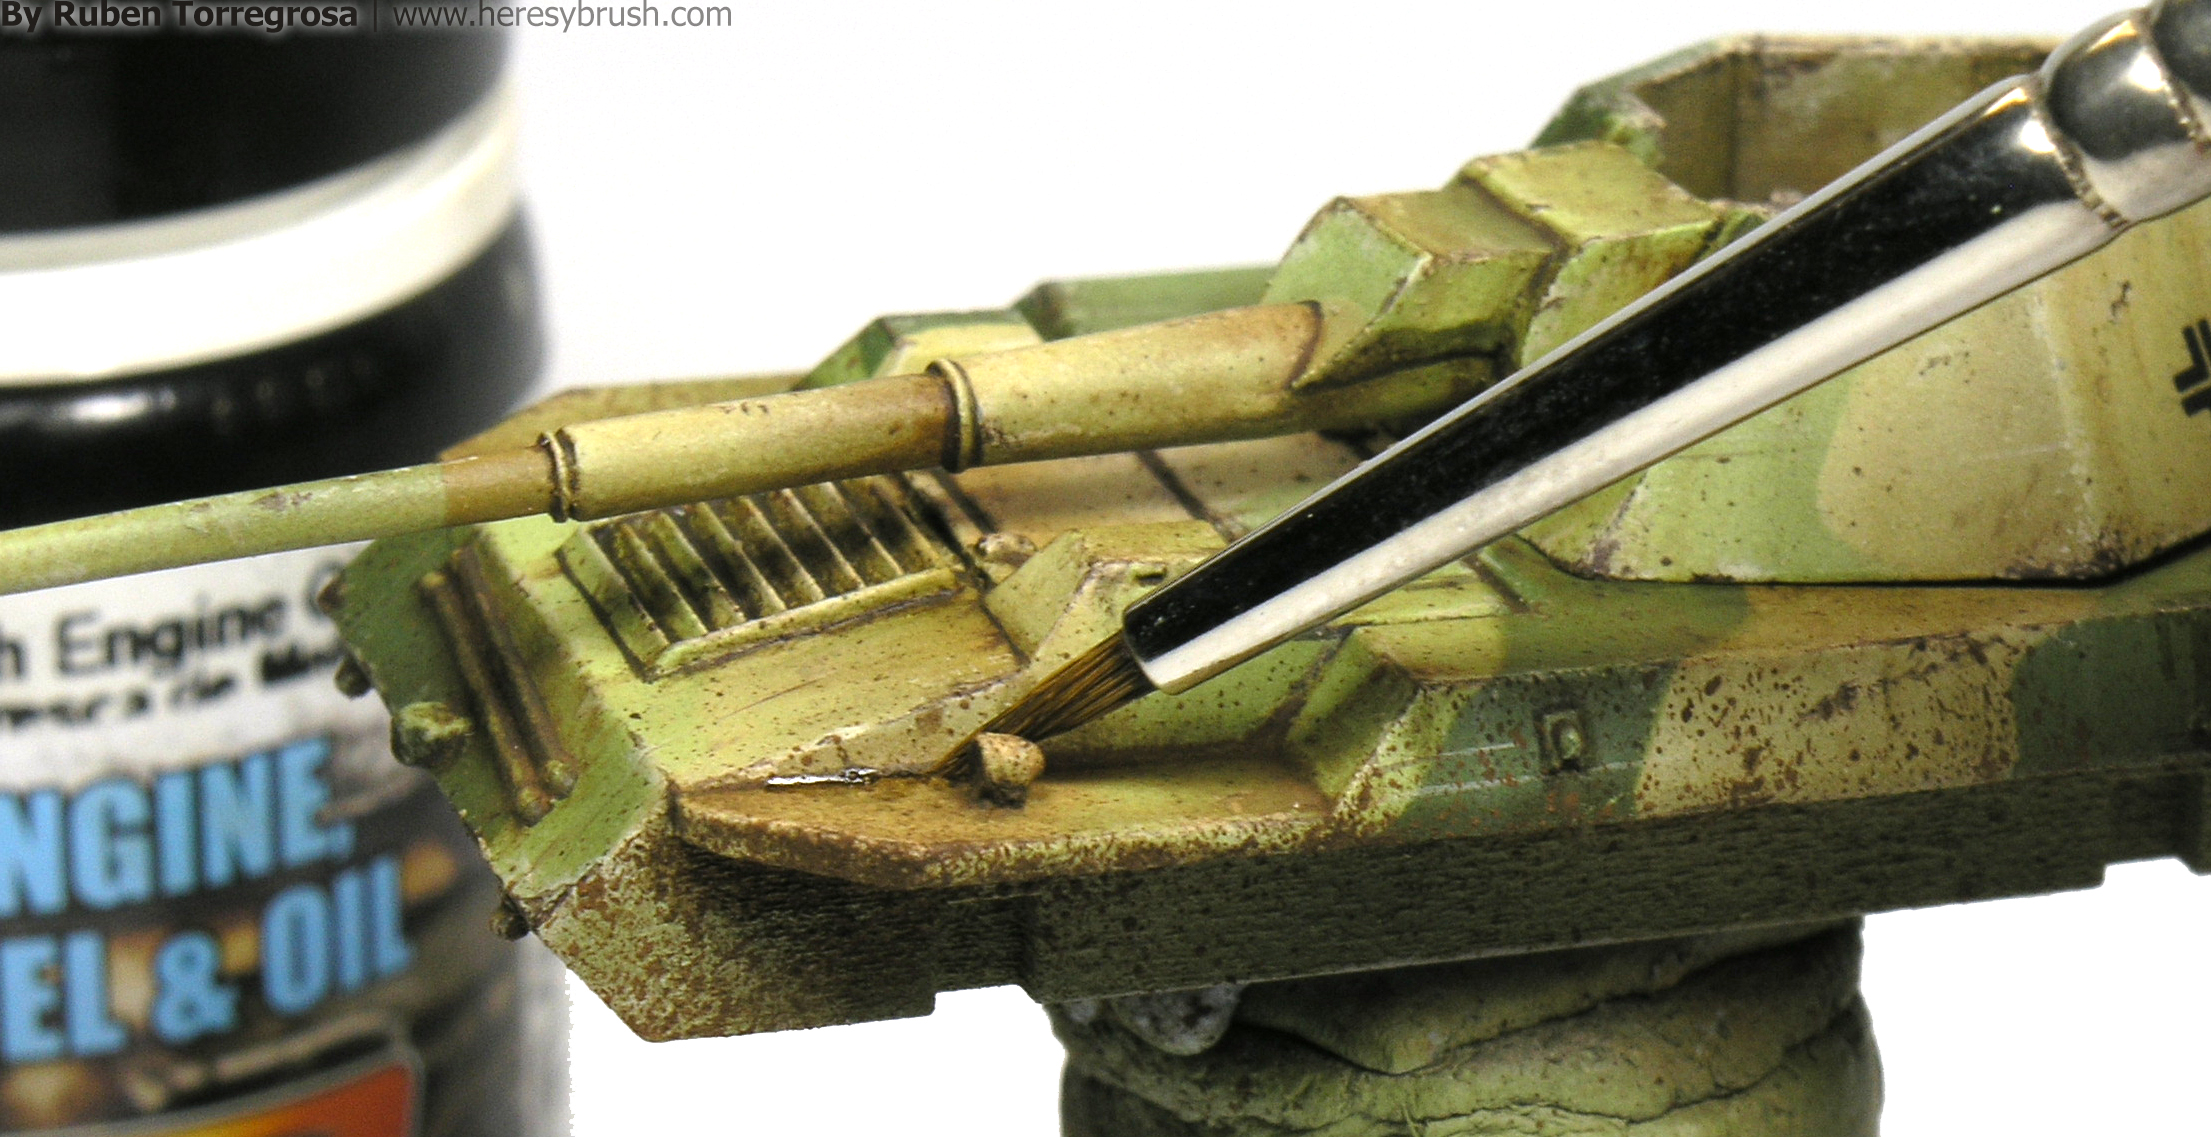
Most of my striking effects are very subtle, as you can see in the photo below. But you can also see some of them standing out. I particularly worked these with a thin brush moistened with white spirit, removing carefully only a little bit of paint.
We can slightly change the color of some panels or elements with oils thinned with white spirit. This will add even more chromatic variation to the vehicle. Apply a little bit of oil in the area you want to change (for example, the corner of one hatch) and blend the edges with white spirit. You can use any color, depending on the effect you can to simulate and the base color you want to change. For example, here I use a red brown color to simulate a dirty area on a corner of a dark yellow panel.

We can simulate mud splatter effects with a stippling brush, a toothpick and several enamels. You can read a full tutorial here.
Oil stains can be easily done with the enamel Fresh engine oil A.MIG 1408. I usually thin it with a little bit of white spirit before applying it. You can play with the dilution to simulate more or less intense stains. Use the logic when painting these stains: accumulated on recesses, streaking effect on vertical panels, etc.
If possible, we can paint the tank crews with acrylic paints. Since these are 15mm miniatures, try to force the shades and highlights. I also painted some stowage, such as fuel cans, tools and a box; and then carefully glued them on the vehicle with cyanoacrylate glue. To be coherent, we should apply on top of these new elements similar weathering effects as those applied on the vehicle. However, we can play with this around so that some elements might be newer than others.
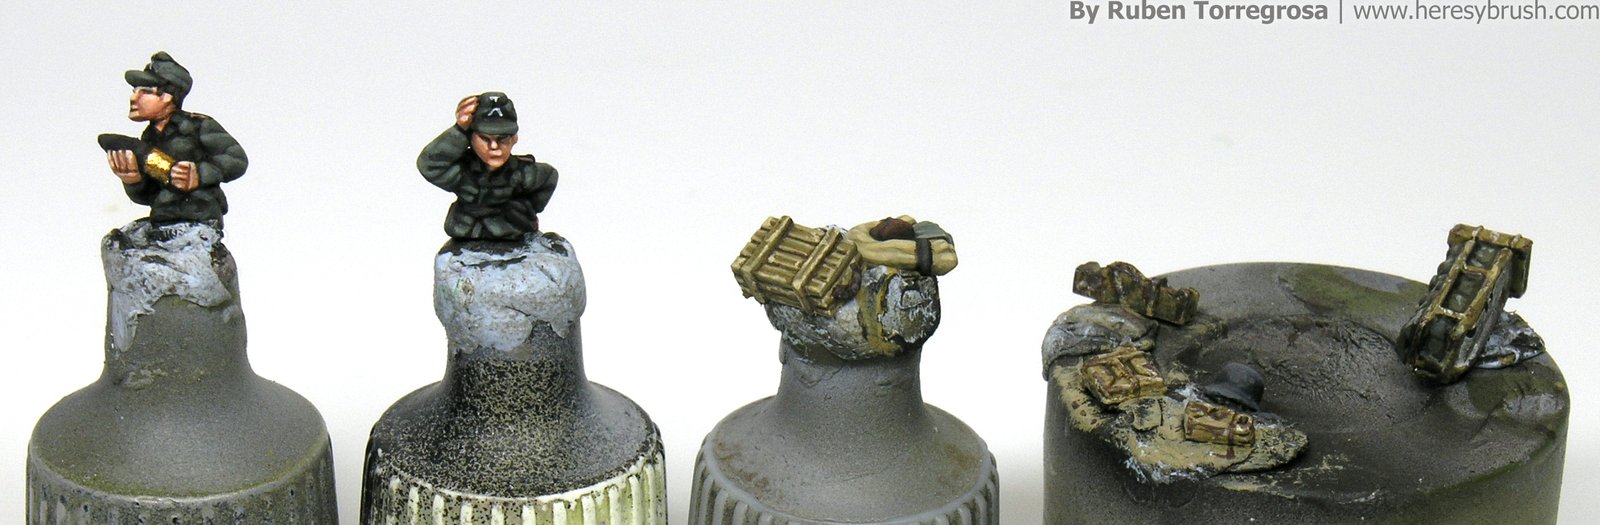
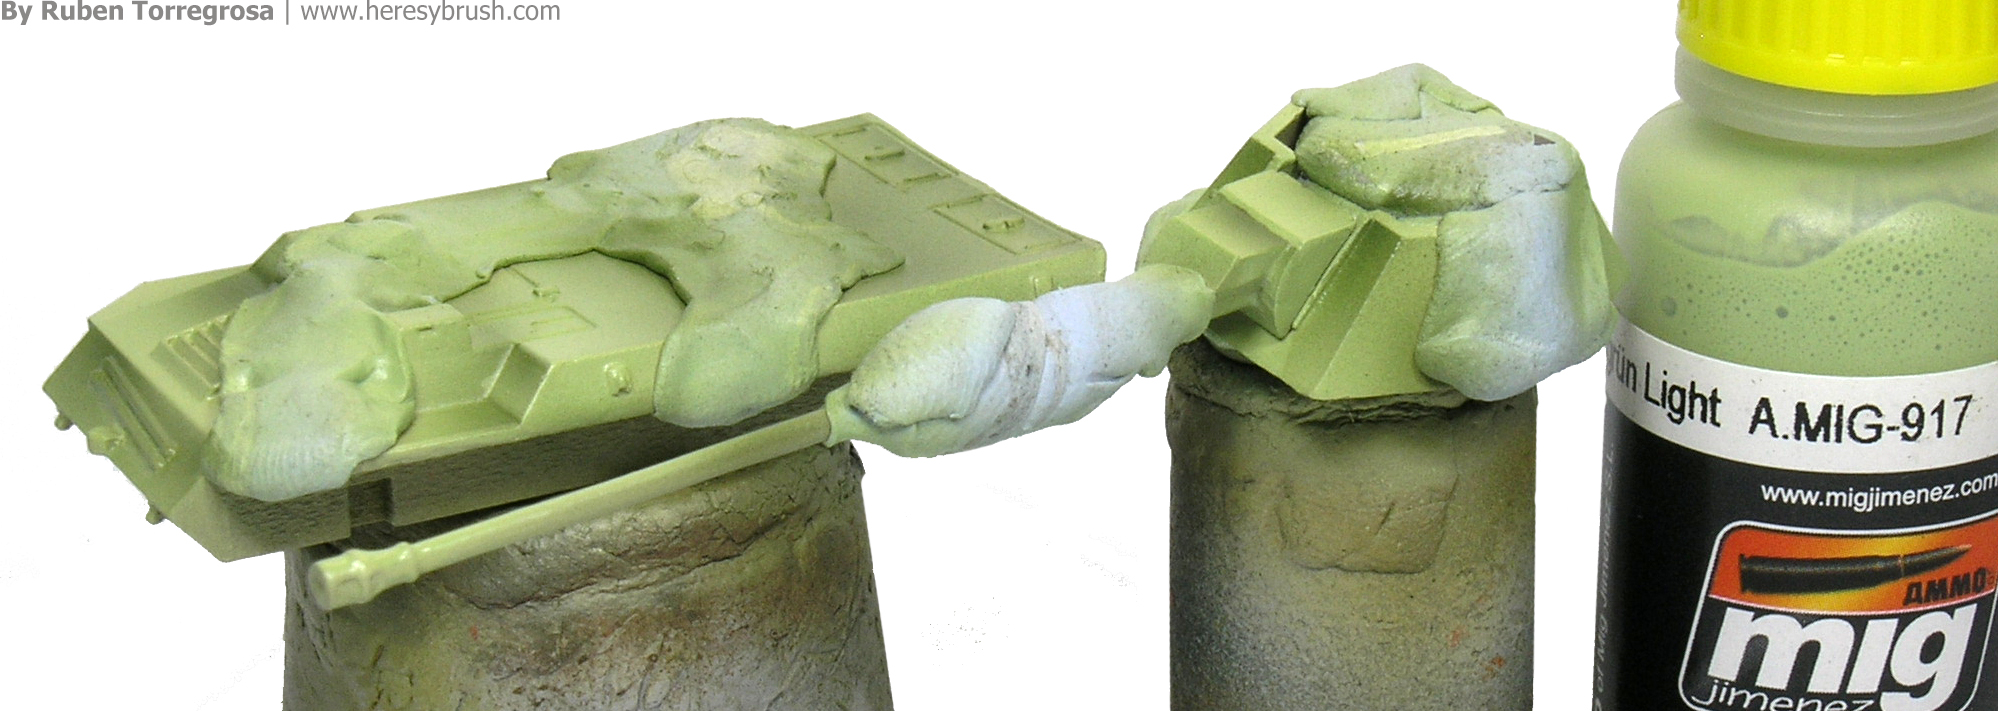
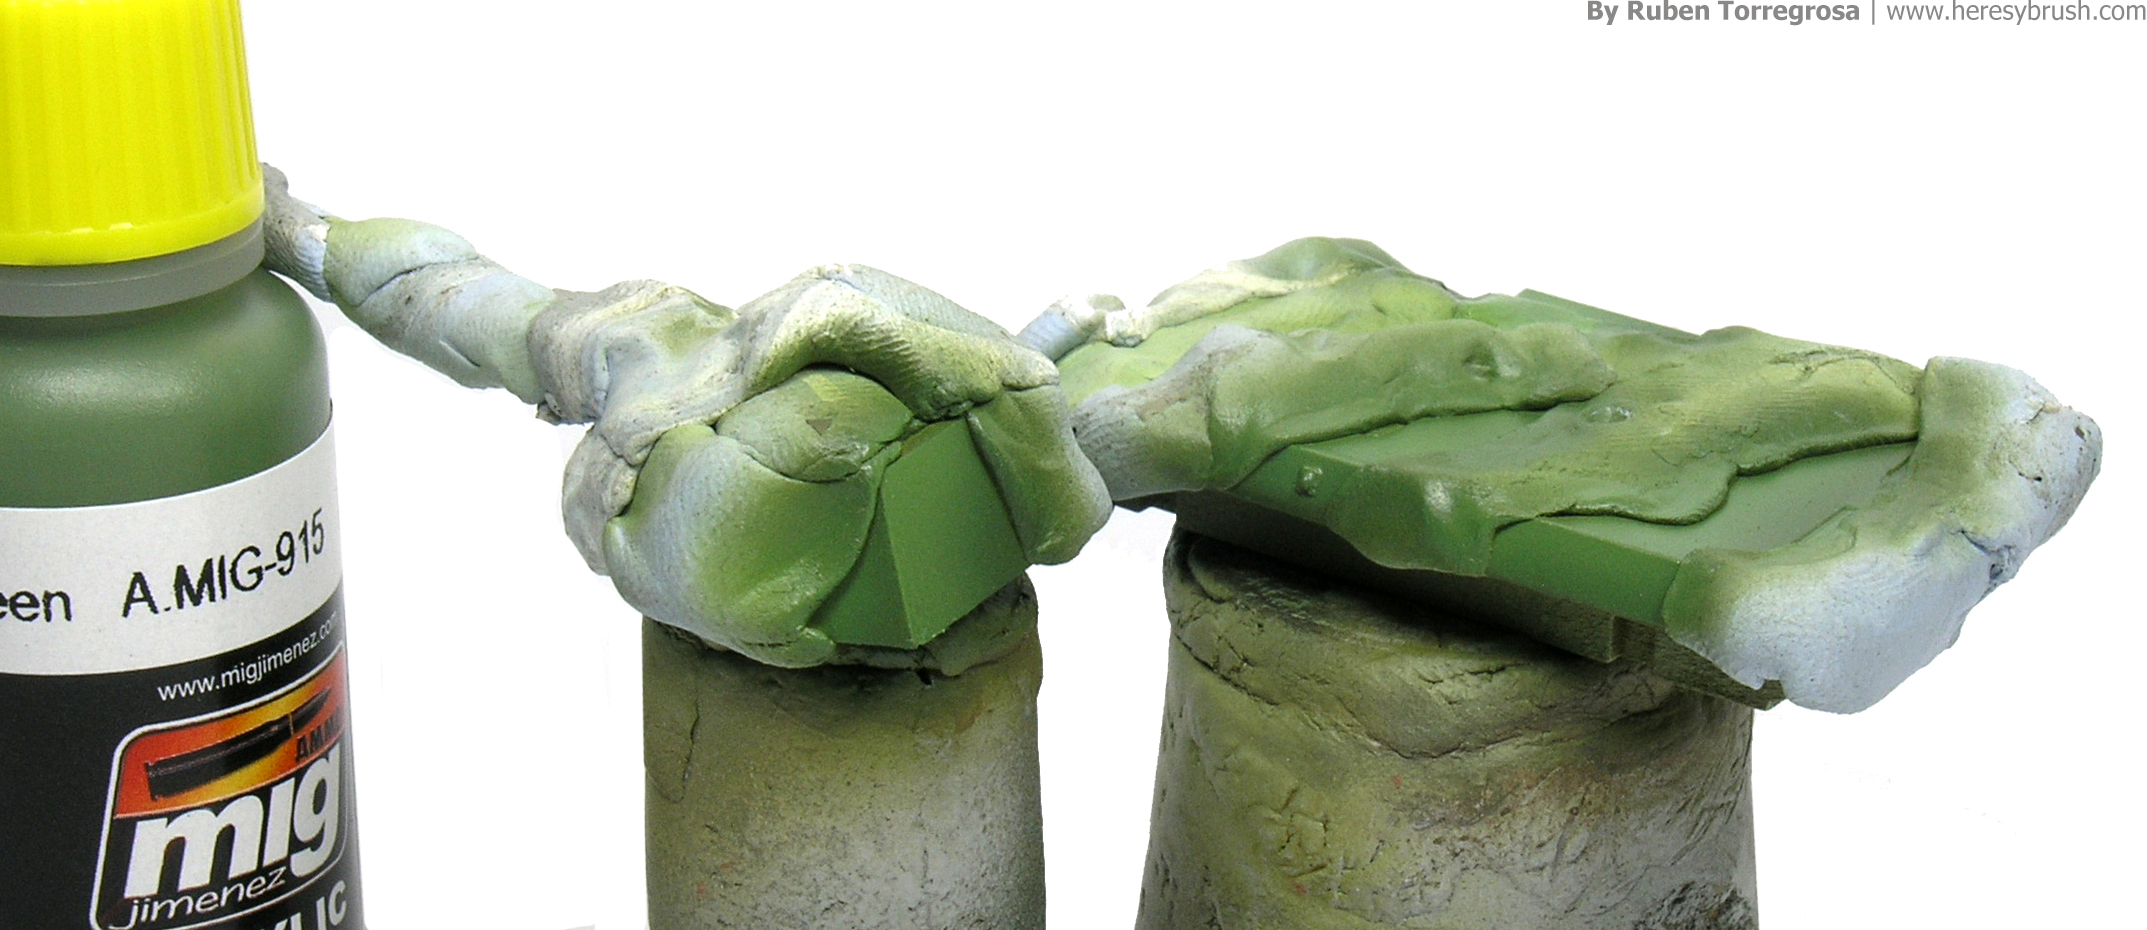
In addition, we can sculpt some stowage including blankets and bags. I used green stuff for this. Note that you can always sculpt and add the stowage before painting the tank. That is what most people would do. However, I personally prefer to do it now because then all these add-ons do not disturb me when painting the camouflage and weathering effects on the vehicle.
Once again, we should apply a similar layer of weathering effects on top of these new elements after painting them.
Tracks
We start painting the tracks with a brown or beige acrylic color, such as Track primer (Vallejo, 304). Do not worry if you accidentally paint the wheels. This can be covered during the weathering phase.

To highlight the recesses and details of the tracks we apply a dark enamel wash, such as Track wash A.MIG-1002. You can also cover the whole wheels with this (instead of the Brown wash we used before), since we can use it to simulate dust or dirty effects. Once it is dry, you can or cannot remove the excess of the wash as we did before. Personally, I only remove it from the wheels; but sometimes I do not, since the low part of the vehicle is expected to be quite dirty. Obviously, if you have in mind to paint a tank leaving the factory, then you should carefully wash the excess. Keep in mind the story you want to tell.
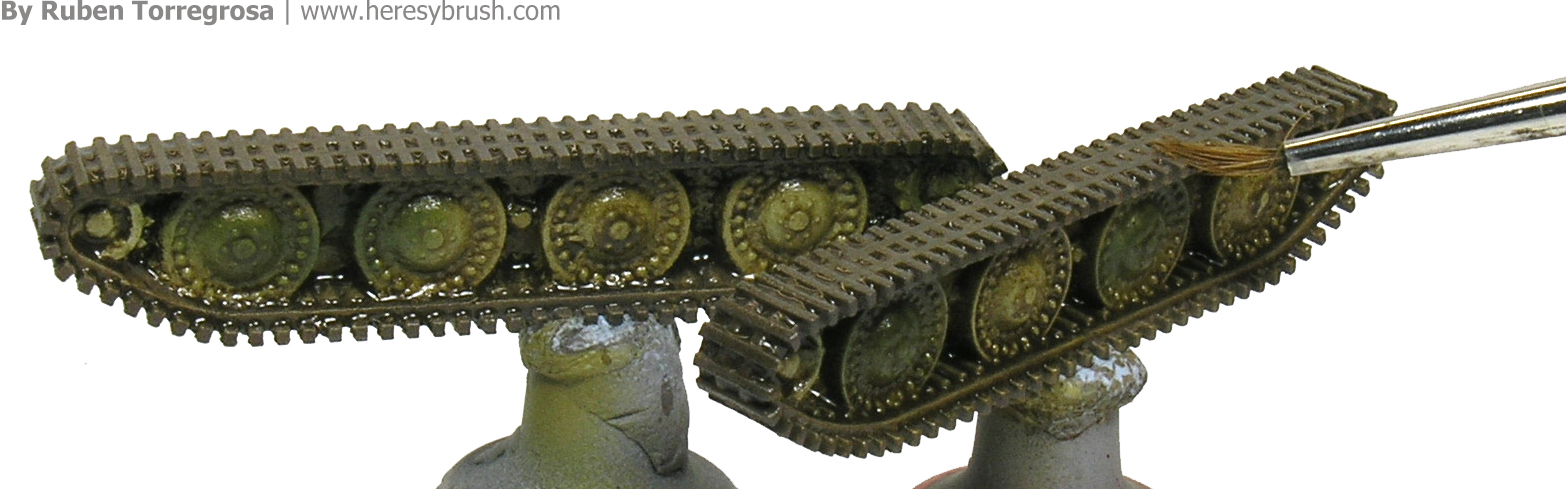
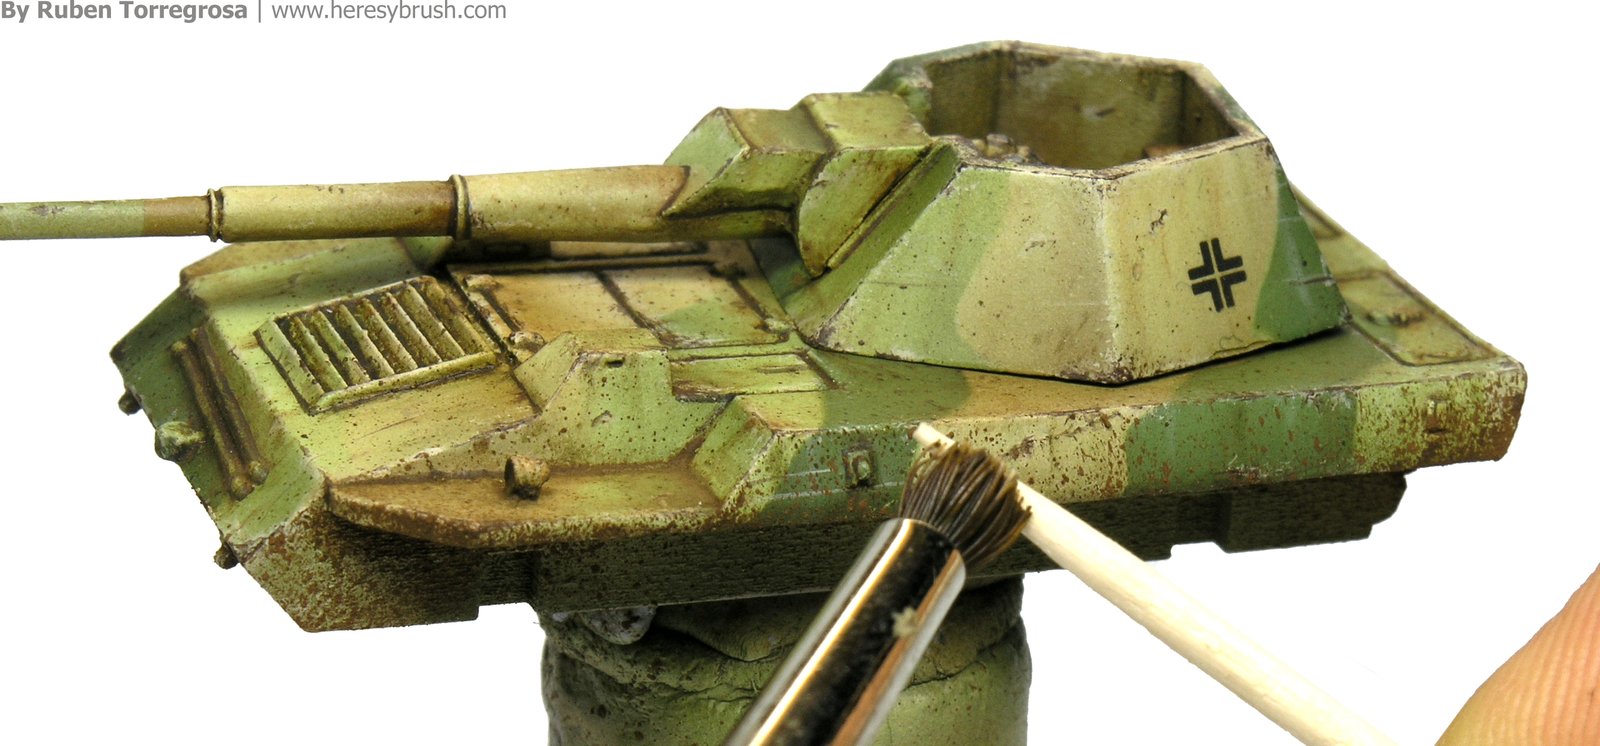
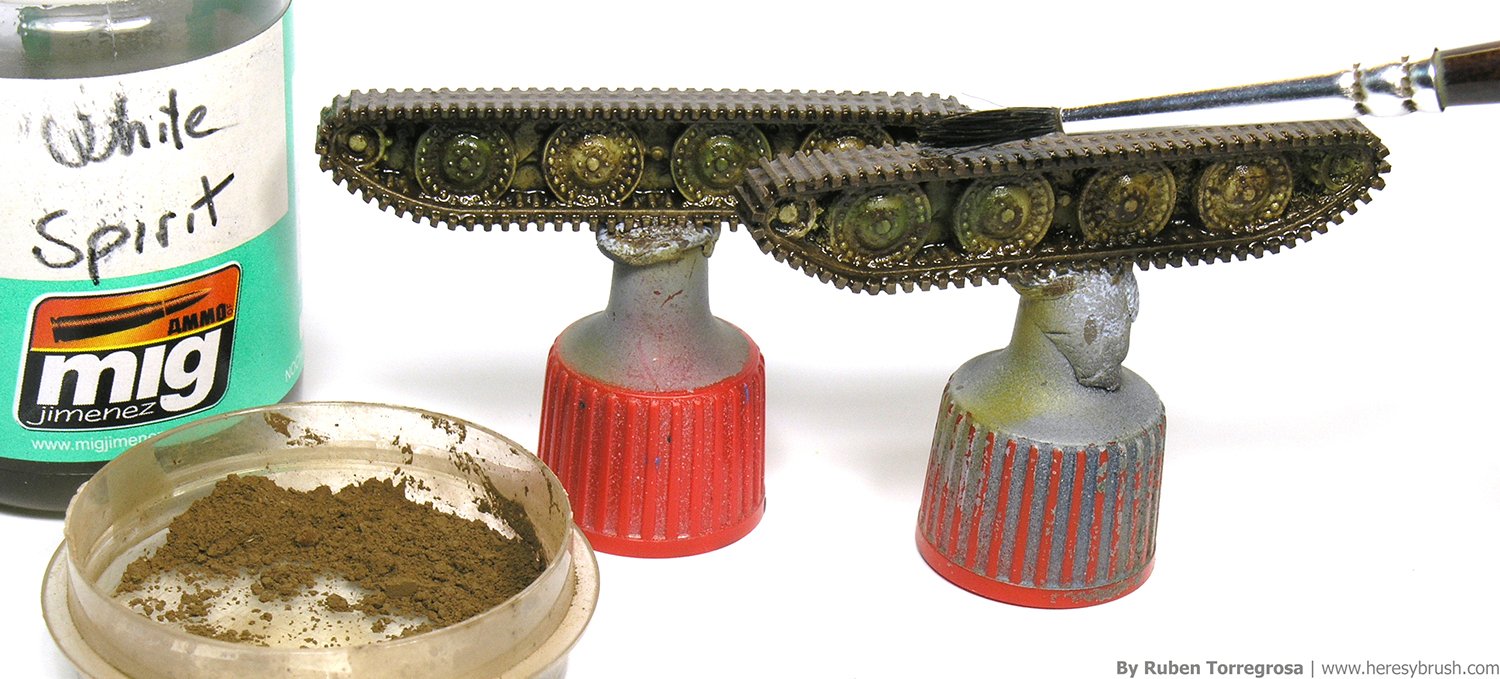
Once the wash is totally dry, we prepare a mix of several dry pigments. Try to choose different colors to enhance the chromatic richness of this effect. For example, I took these three pigments: dark brown (Kursk soil, A.MIG-1400), red brown (Medium rust, A.MIG-3005) and yellow brown (Dark earth, A.MIG-3007). The choice depends on what you want to simulate. The sand in North Africa differs from the sand in Karelia. Once you have your mixture ready, dissolve it with white spirit or turpentine to create kind of a wash with a texture similar to fat-free milk. Then, apply it on the tracks and wheels with a brush. Alternatively, here you have some guides about how to do other effects: dust and mud.
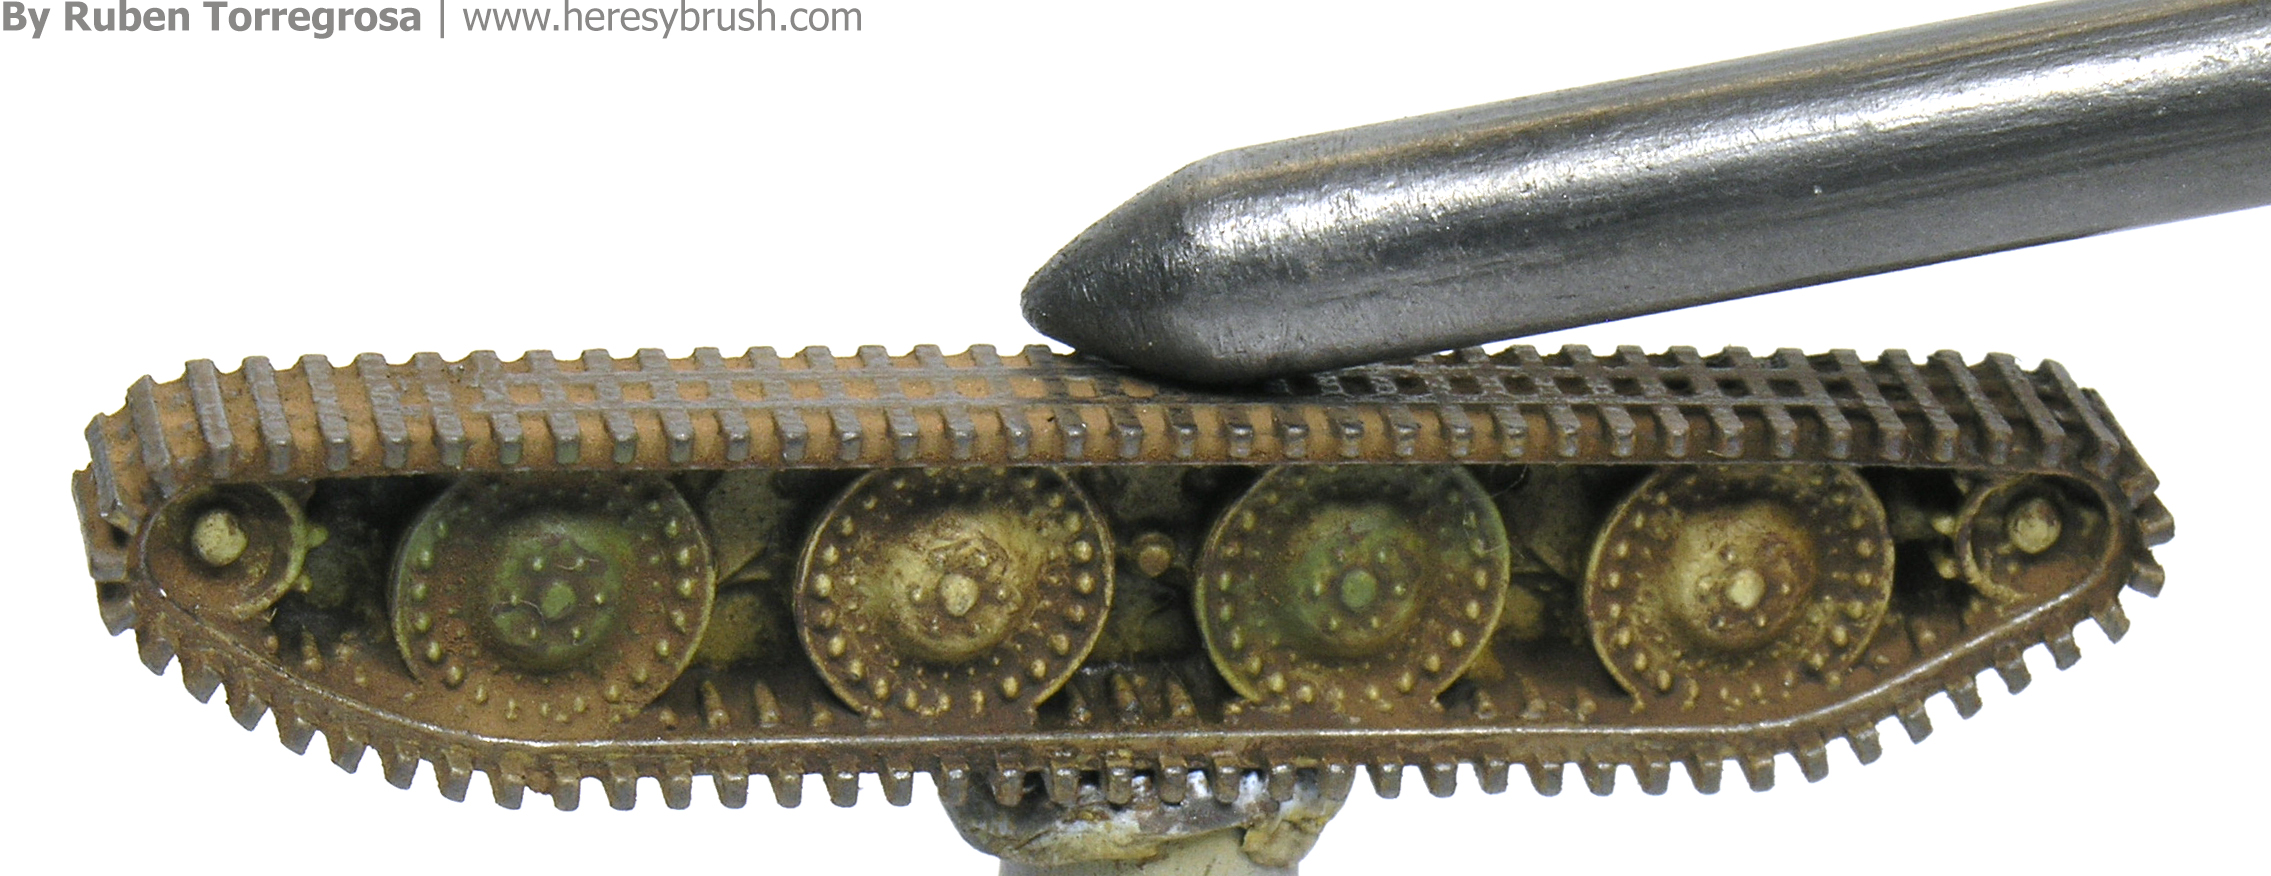
Una vez tenemos el pigmento completamOnce the pigments are totally dry -which can take several hours- use a graphite pen to mark the edges of the tracks.