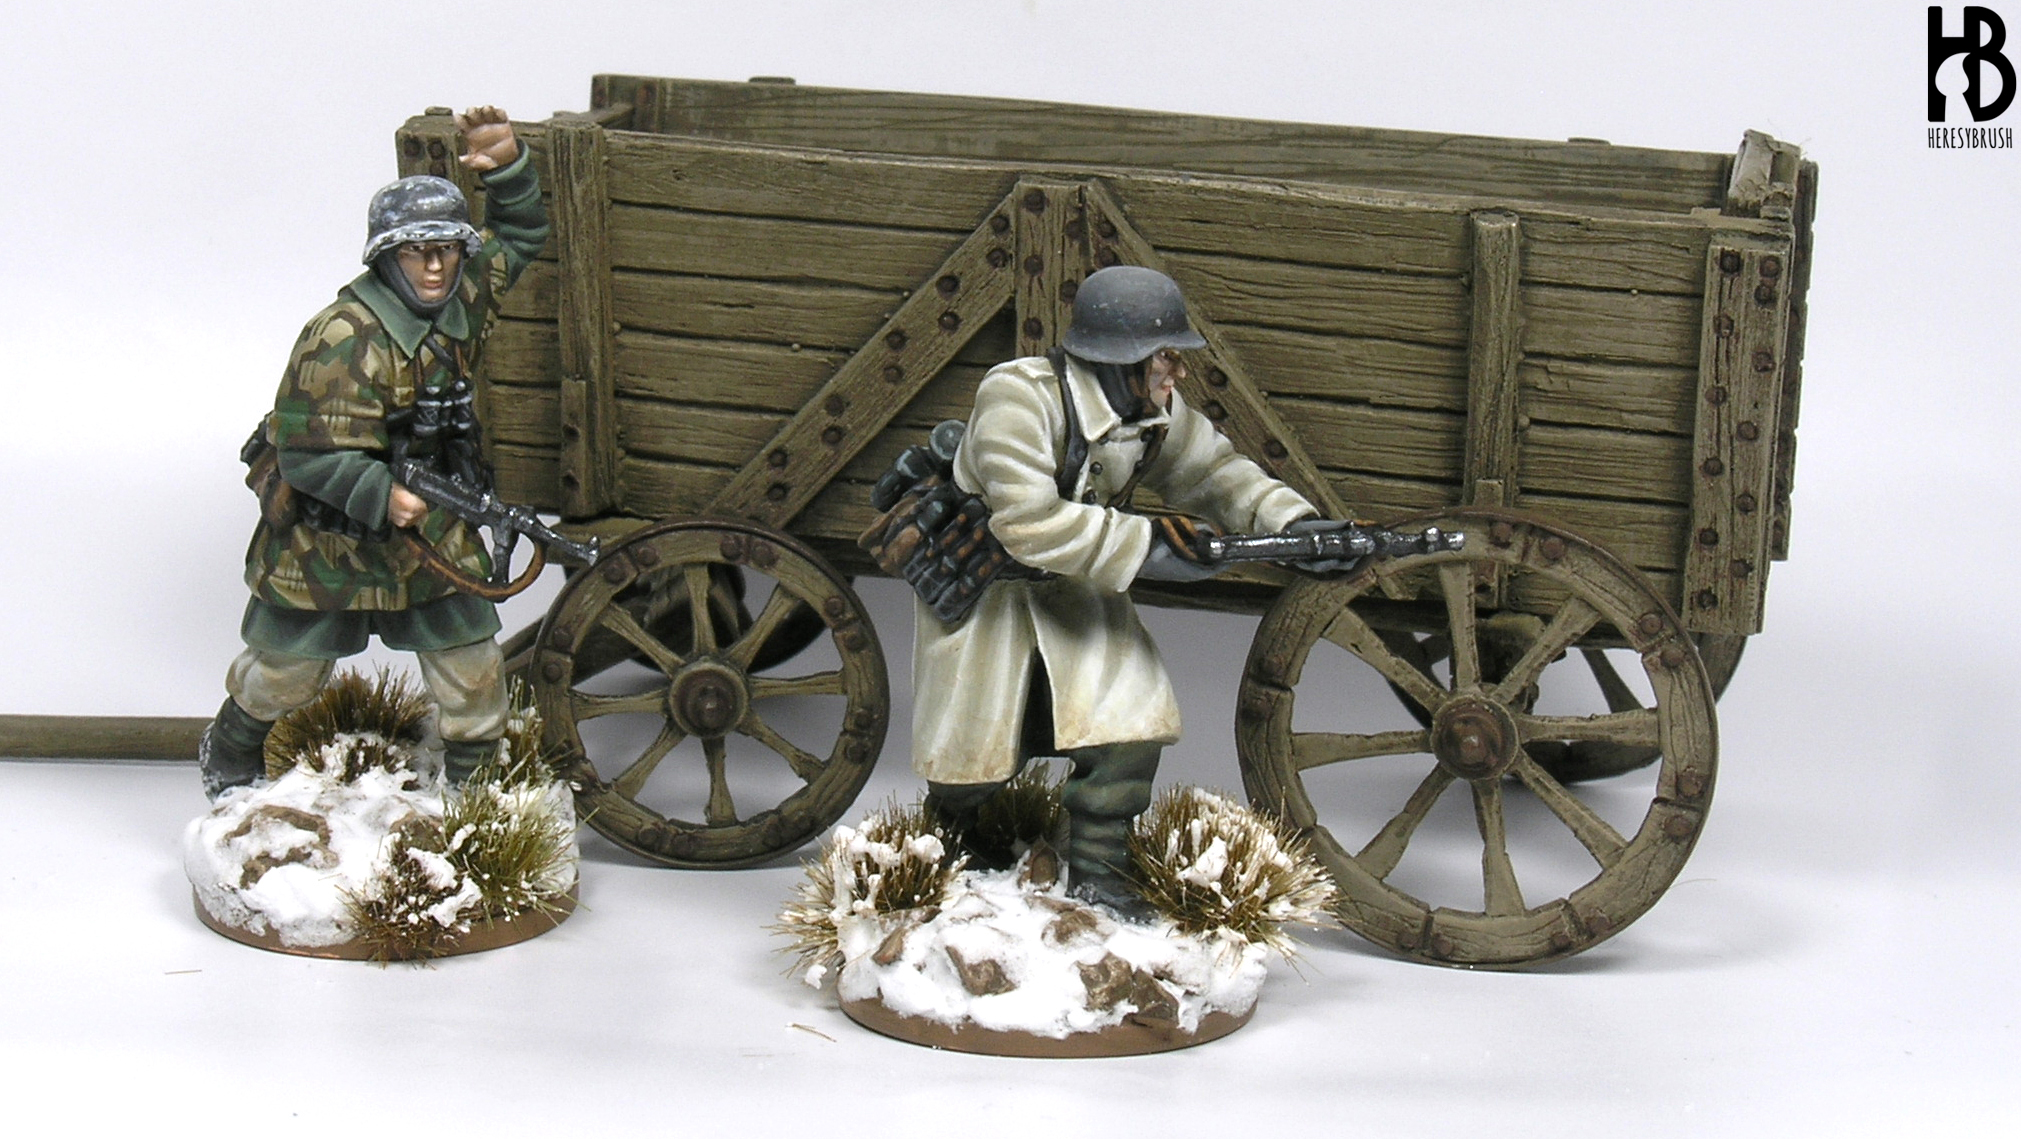
 I have recently prepared a painting guide featuring couple of WWII German soldiers in winter attire from 1-48 TACTIC (Baueda Miniatures). This is a WWII skirmish game using 1:48 miniatures (36 mm), which are nicely 3D-modeled. If you do not know it, I recommend you to have a look at its webpage (note that the rules are free!). With the support of Baueda miniatures, now you can also download for free this painting guide; where I explained how to paint step-by-step a German soldier. From the priming to the basing. Furthermore, I explain in detail how to paint the famous splinter camouflage, as well as a worn helmet simulating a white wash effect. I hope it is useful for some of you!
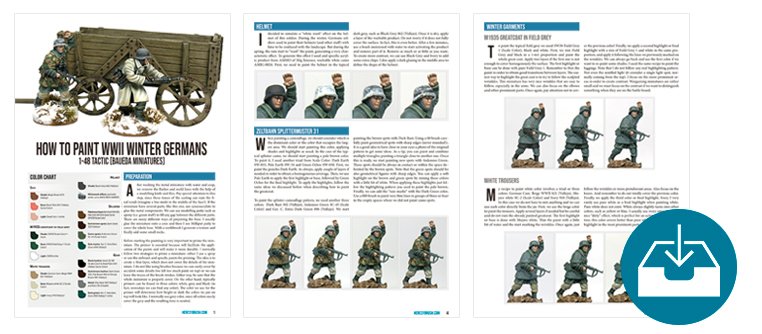
Download the painting guide here:
Since this guide only covers one miniature, the soldier with the zeltbahn, here you can find additional information about painting white clothes and German helmets using the second model.
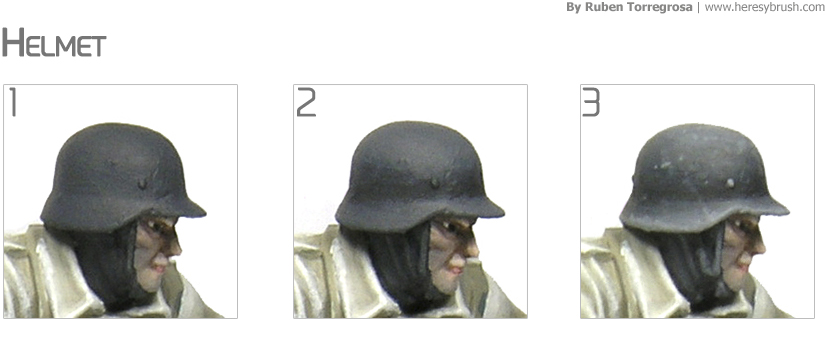 To paint the regular German steel helmet, we only need two colors, 862 Black grey and ivory (or white). (1) First we paint the whole helmet with Black grey. Apply two layers if needed to cover the whole surface properly, and remember to always thin the paint with water. (2) Next, we start working on the highlights by mixing Black grey with ivory in a 2-to-1 proportion (two parts of grey and one of white). We apply this initial highlight on the upper part of the helmet and sides. Basically, the shade (Black grey) is only preserved in a middle line between these two parts. (3) We continue adding white or ivory to the previous mix to apply several subsequent highlights. As many as you wish. The more layers, the more smooth are contrasts (although using thinned paints also helps). The last one was done using twice the amount of white (1-to-2 proportion). Each new highlight is added either on the upper part or the sides of the helmet, but always covering a smaller area progressively. The idea is to create a transition. The final highlight is only added on the edges of the sides of the helmet, and it is also used to add some chipping effects and scratches here and there. For this effect, use a thin brush and dilute the paint a little bit more. Do not abuse of these effects. Remember, sometimes “less is more”.
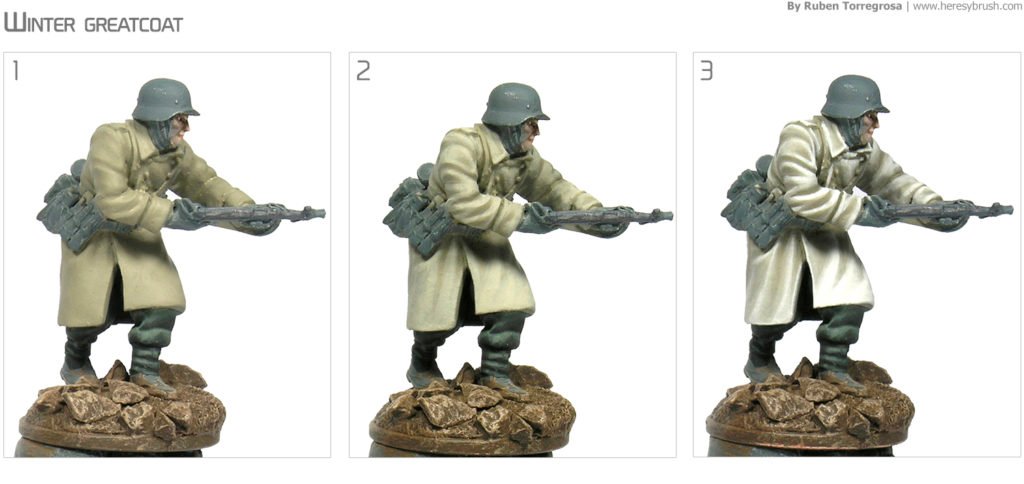 White is for many people one of the most difficult colors to paint. In fact, I also belong to this group of people. However, I think that a good “recipe” helps considerably to overcome this problem. After trying several things, such as this one, a few years ago I came up with this other recipe: German camo beige WWII 821 (Vallejo) as a shade and Ivory 9128 (Vallejo) for the highlights. This beige color offers a perfect base to work light colours such as ivory (or even white!), and ivory is much easier to use than pure white as its coverage is better.
In the painting guide I already described how to use these two colours when painting white gear. Thus, I will just highlight a few things here. First, remember to always thin the paints with water. This is essential and I will never stop repeating it. Note that even do our beige colour here is not specially dark, a transition towards the ivory is needed. By using thinned paints this transition will be smoother. And of course, the paint is easier to apply. Second, I applied around four or five highlights. The last one with pure ivory. Remember that the idea is that we reduce the area that each layer covers progressively, always preserving part of the previous layer. Do not totally cover the previous highlight! This will help to create the transition. The final highlight should be a fine dot or line marking the most exposed area. And note that we can always go back an use any of previous color to fix and area, or even enhance some shades with the beige color. Third, when painting miniatures for wargames, I do not usually follow any logical light pattern (e.g. zenithal light). Instead, I normally focus on the more exposed areas such as the wrinkles. At least, I find this much easier than any other method, since I just follow the wrinkles sculpted in the miniature. And if there is not any or not enough, I follow my instinct (and logic after all) to create some new ones. This is what I did in the lower part of the greatcoat, for example.
If you found useful this painting guide, I cannot help suggesting you to have a look at the PaintingWar book series, where you could find two issues featuring my painting style and techniques. The first one is devoted to the WWII German army, which would be a nice extension of this post; and another one focuses on the Spanish Civil war.
Добрый день, сделайте пожалуйста урок по рисованию лошадей, разных мастей, поэтапный. Спасибо.