
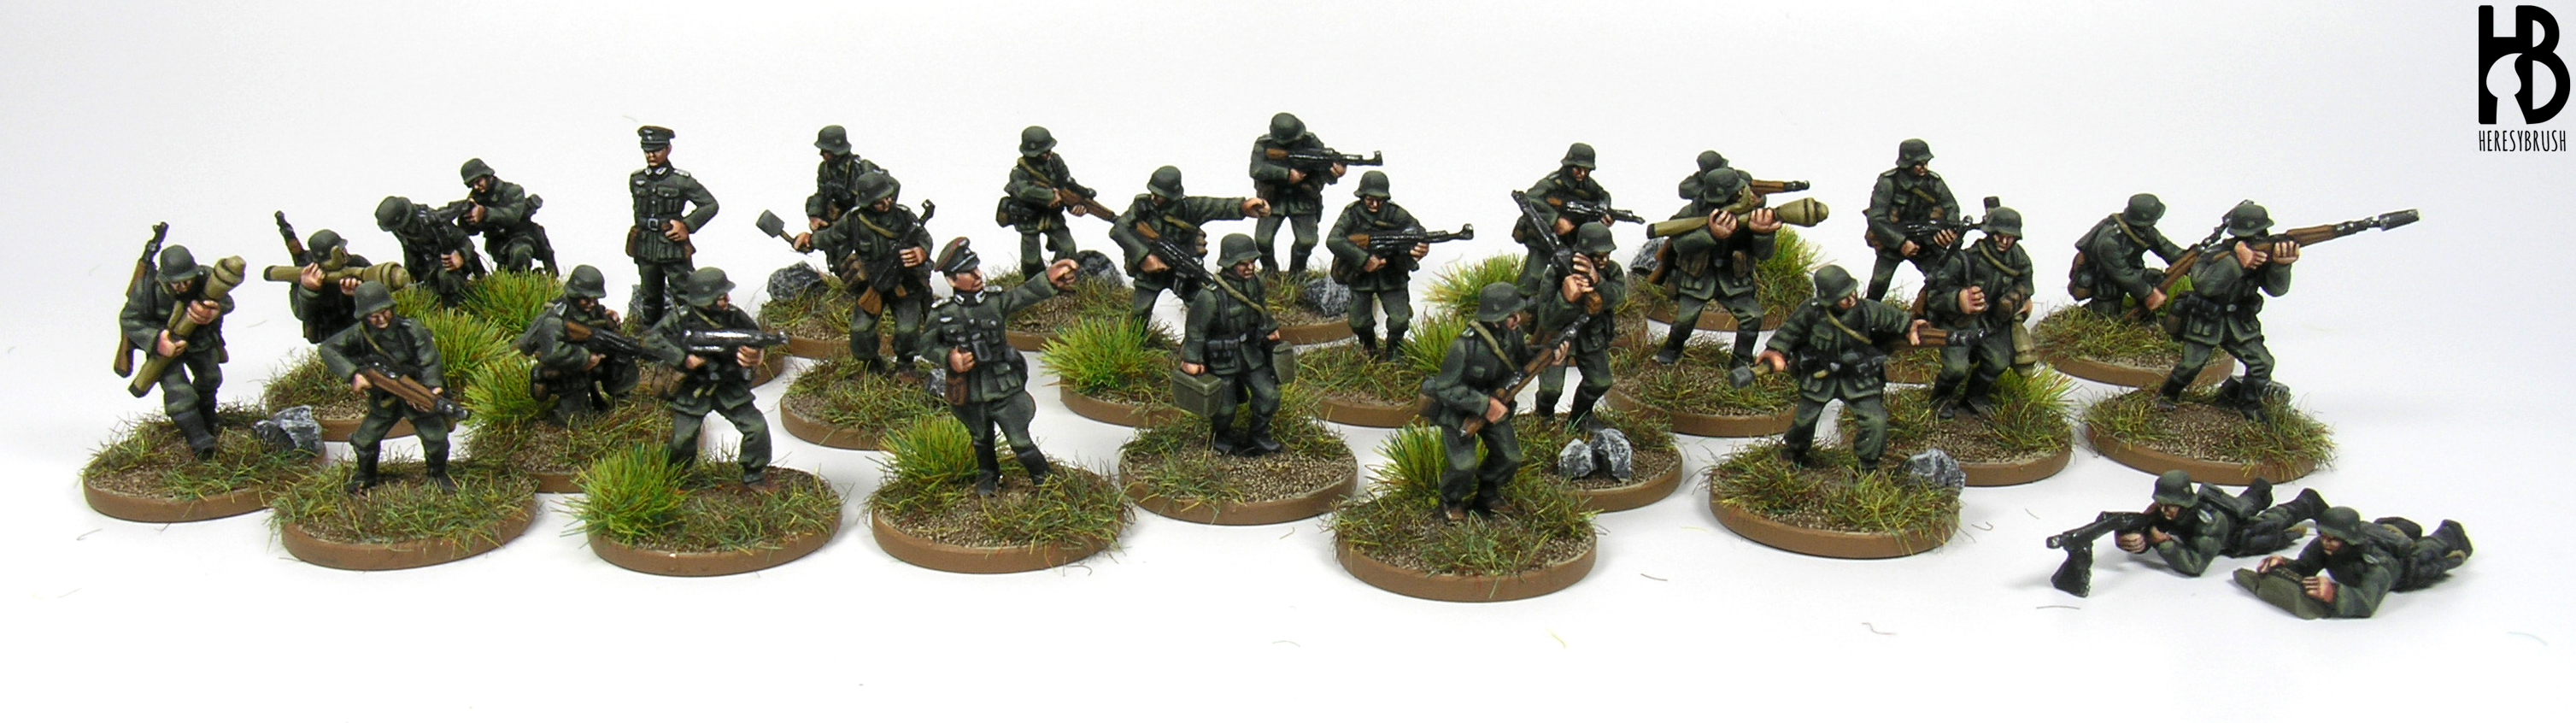
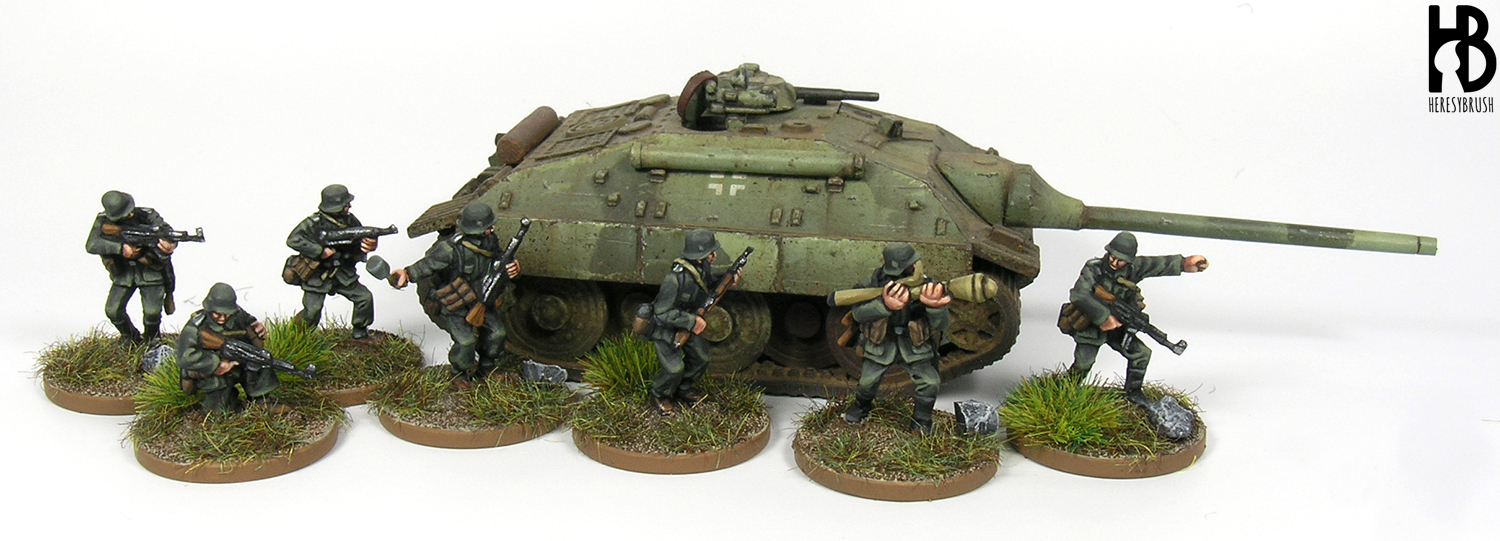
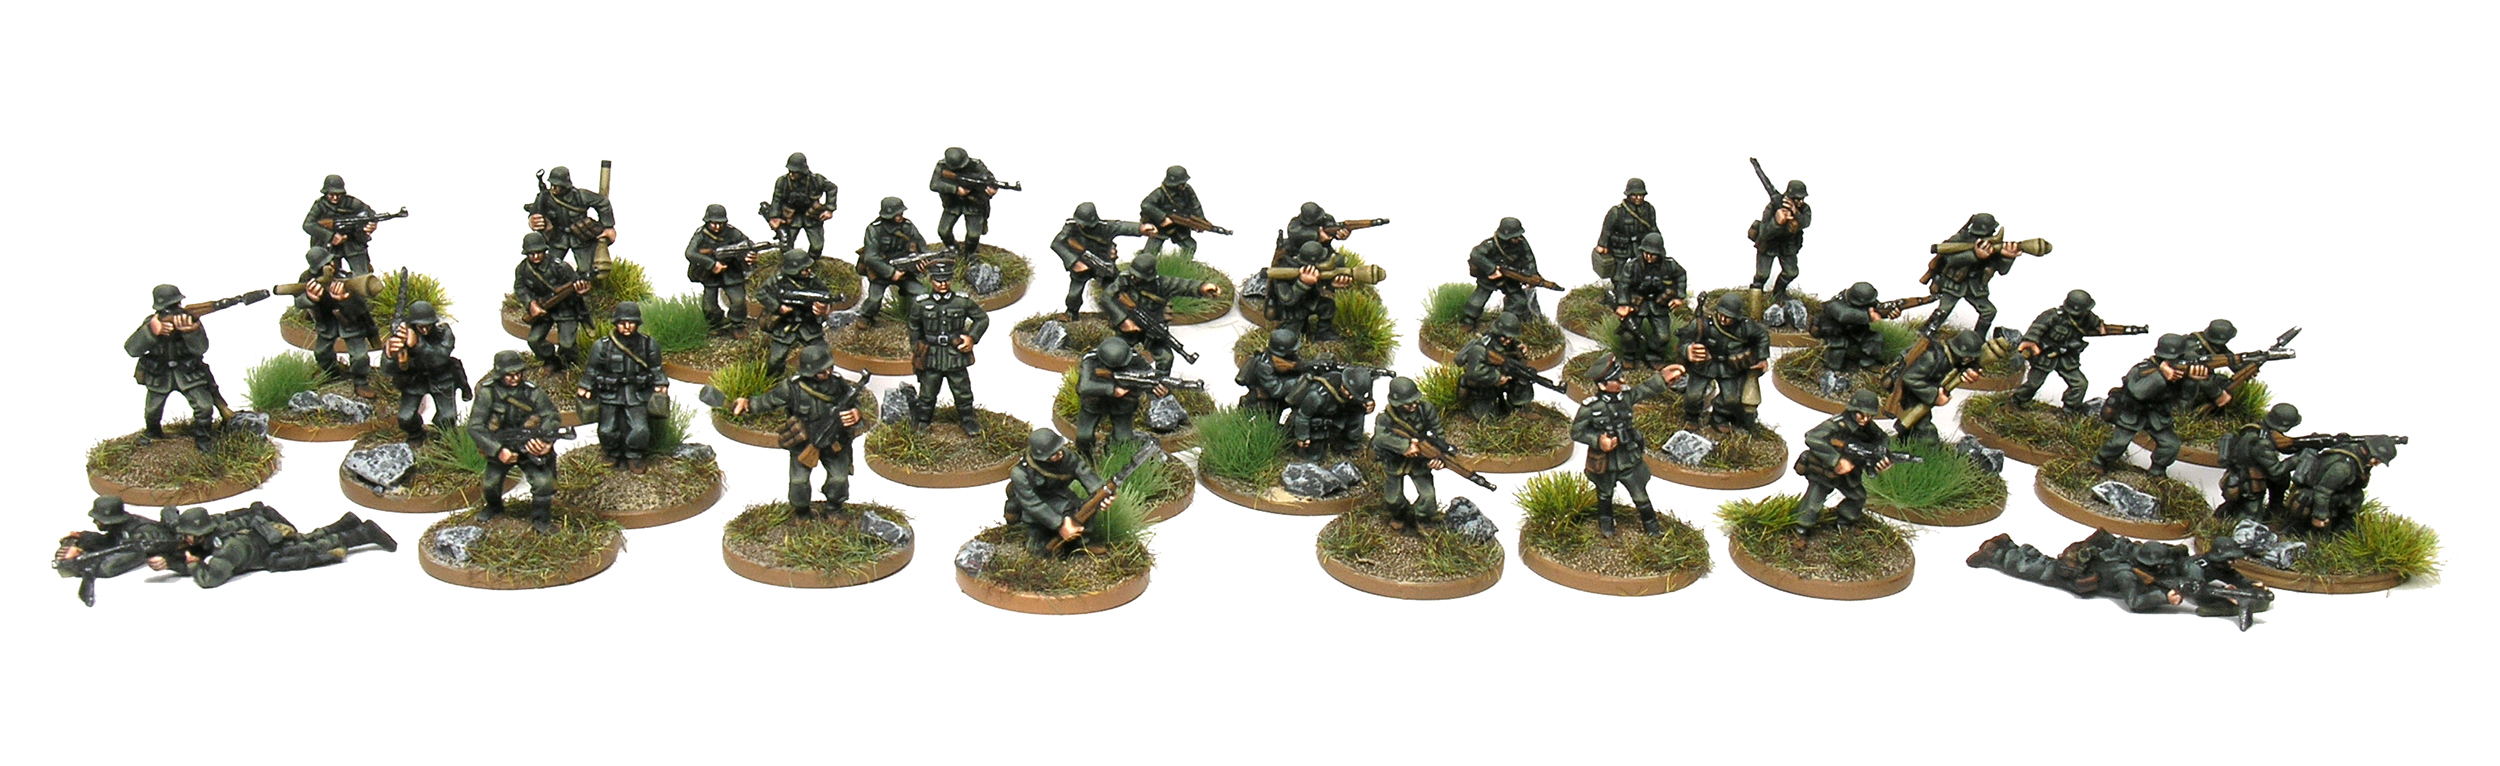
Since I have been lately busy painting some WWII german miniatures from Khurasan Miniatures, I wanted to share with you this short painting guide where I show how to paint 15mm miniatures, and more specifically, the M43 German uniform (mid-late war). However, if you are looking for a painting guide featuring the early war uniform, you might be interested in this another painting guide I published in Modelbrush a few years ago. Or, if on the other hand you want to know how to paint camouflages in 15mm miniatures, then this another guide is what you are looking for.
If you liked these guides and you are interested in my painting style, I would like to recommend you the book series PaintingWar, where you can find two issues where I explain how to paint WWII german uniforms and another one focused on the Spanish Civil War. On the other hand, I cannot help recommending Michael Farnworth’s WWII German modelling and painting book.
Color chart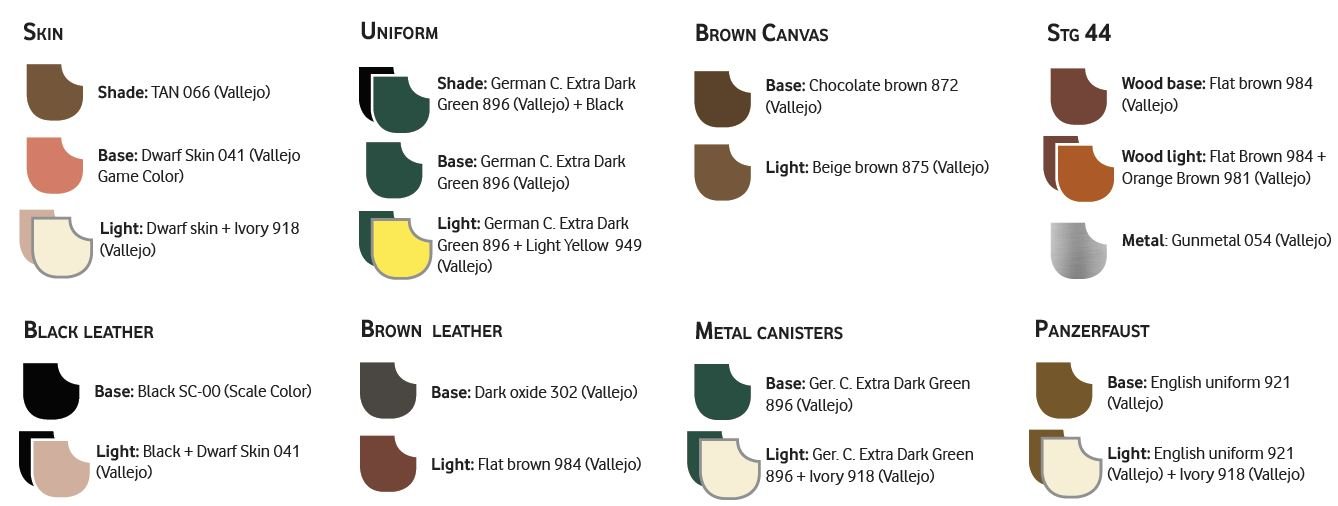
Step 1 – Preparation
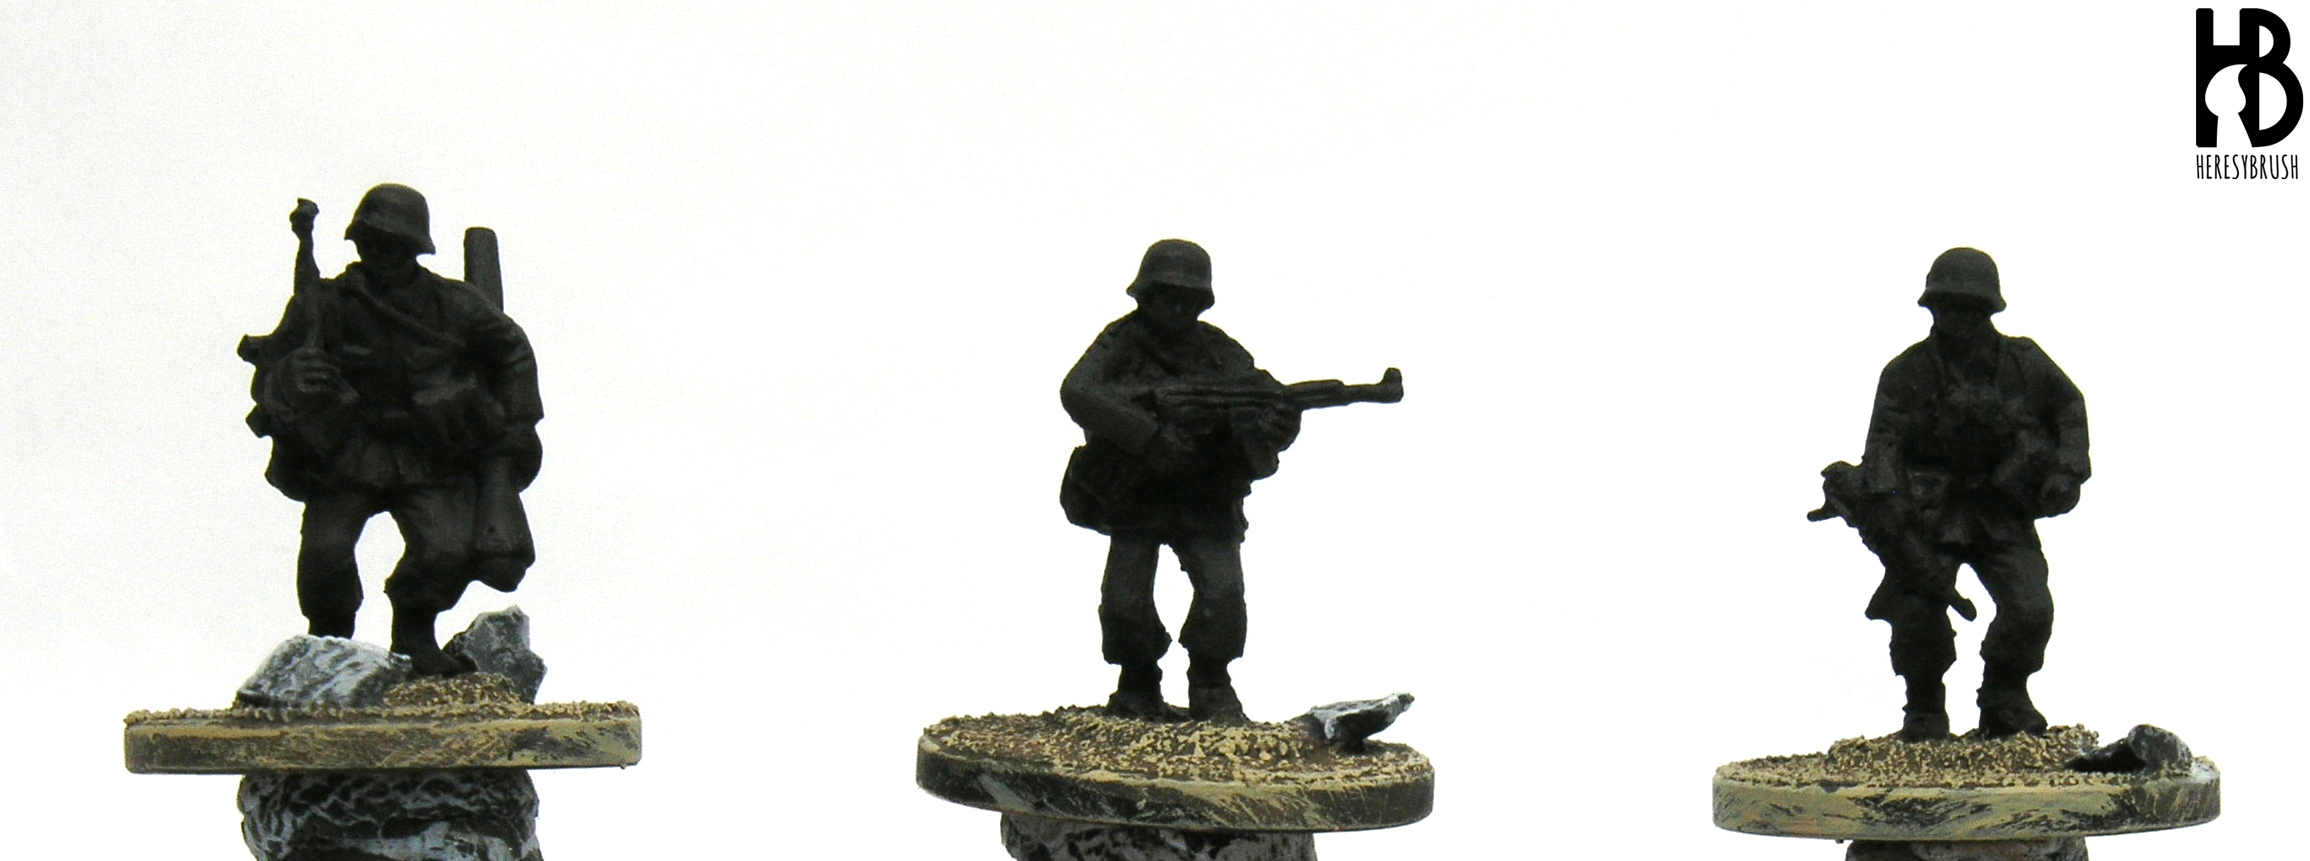
We remove the mould lines and flashes with the help of a modelling knife and metal files. Be especially careful when processing small parts such as the tip of the rifles to avoid accidentally damaging them. Next, we fix the miniature on a base with cyanoacrylate glue. I use one eurocent coins for the 15mm miniature individual bases. To decorate the base, we can fix beach sand and small rocks with white glue. Once it is dry, we can apply the primer coat. This is essential as it will facilitate the application of the paint and will increase its durability. I always use black primer when painting 15mm, as I can use it later on as a “black profiling” (see below). I prefer to prepare the base at this moment rather than at the end, when you can accidentally ruin the painting job. First, I paint the whole base with Chocolate brown 872 (Vallejo) and then I used the Citadel Shade Agrax Earthshade to create some shades. Finally, I apply a dry brush with Iraqui sand 819 (Vallejo). Similarly, we can use the dry brush technique to paint the rocks using grey colors.
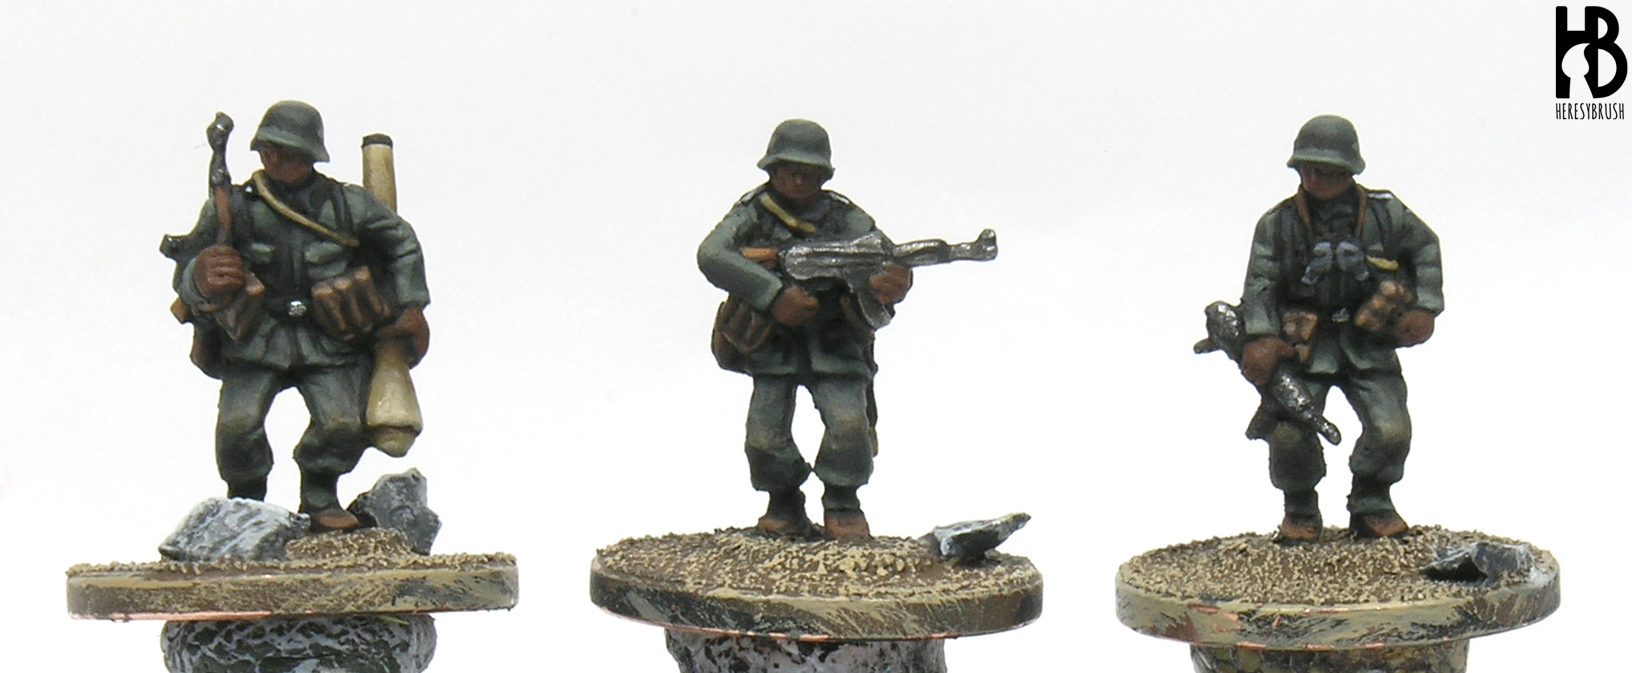
Step 32 – M43 wool uniform and M42 helmet
The M43 tunic had a characteristic grey green or field grey color, including the collar, and it was the result of simplifying the original design M35 (and M40) in order to save resources and time during its production. For example, the pockets have no longer pleats and the fabric quality was poorer. It was largely used until the end of the war. The M43 trousers were issued in the same color and quality. On the other hand, the M42 stahlhelm did not change much compared with the previous M40 model and it could be painted in different shades of medium to dark field green (feldgrau) or slate grey. Or any other paint used to paint vehicles.
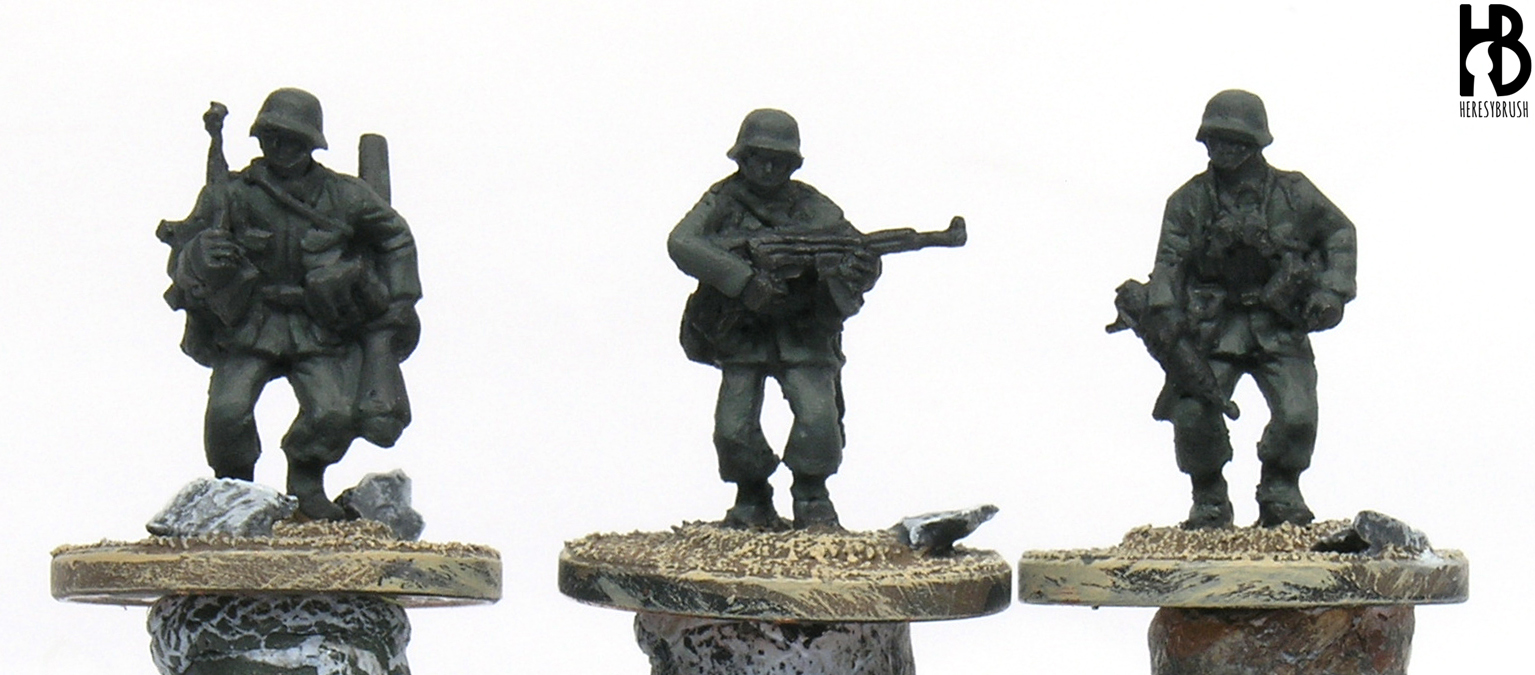
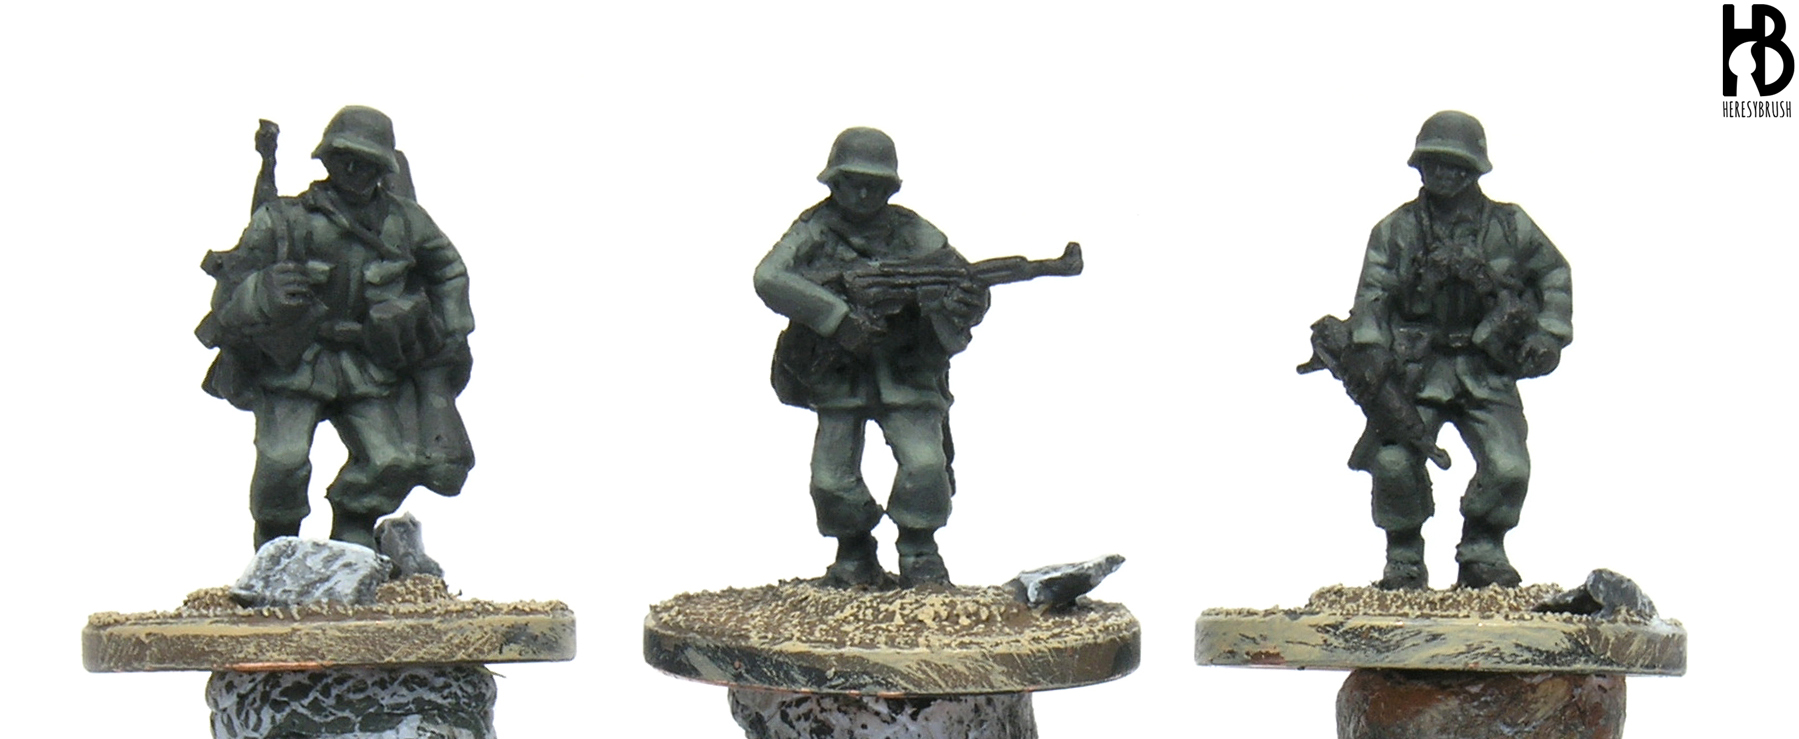
To paint the field grey color we start mixing German C. extra dark green 896 (Vallejo) and black in the same proportion (1:1). This is the darkest color or shade, but it is not the “real color” or base for our field grey color. The base color will be German C. extra dark green 896 (Vallejo). Finally, we apply the lights by mixing German C. extra green with white or Light yellow 949 (Vallejo). As you have noticed, this painting style involves three layers: shade > base > light. This is known as the triad system, which was developed by Kevin Dallimore for Foundry Miniatures. In fact, Foundry (and other brands) sell sets of three colors or triads, ready to be used as such. However, sometimes the contrasts between these three layers is too striking. This is totally fine, but I personally dislike it. I prefer another method: the layering technique. It is basically the same, but you increase the number of layers. For example, when painting 28mm I normally apply 5 layers: shade > intermediate 1 > base > intermediate 2 > light; where the “intermediate” layers are the result of mixing the two side colors (i.e. intermediate 1 = shade + base). Furthermore, it is very important to thin the paint with water. Always. Never use a regular acrylic paint straight from the bottle. When thinning the paints, it will be easier to apply them; and more importantly, we will generate semi-transparent layers that will help us to avoid marked contrasts between layers. If you want a more intense or opaque color, you only need to apply more semi-transparent layers. Note that it is very important not to cover completely the previous layer when applying the highlights. Always keep part of the previous layers to create a gradient effect. Said this, when painting 15mm we have a much smaller surface to paint, and therefore, applying five layers might be tricky. Thus, what you can do is to follow the triad system. That is, three colors (shade > base > light). But remember to use the paints very thinned water (at least 1:1) so that you are able to obtain smooth transitions between layers. If you think that the miniature is still pretty dark, you can apply an additional highlight (lighter) only on the most prominent areas, such as elbows or knees, to remark these areas.
Thus, first we paint the uniform, leggings and helmet with German C. extra dark green 896 (Vallejo) mixed with black in the same proportion. Once it is dry, we apply the base directly with German C. extra dark thinned with water. Use this color to cover the prominent areas. Or in other words, paint again the whole uniform except the recesses such as wrinkles, which will remain painted in the shade or darkes color. Next, we mix German C. extra dark green with white or Light yellow 949 (Vallejo) in the same proportion (1:1). If you use white, you will obtain greyish and cold highlights, while the light yellow will generate greenish and warm highlights. Either option is fine, and in fact you could even mix both in your unit or miniature (for example, the trousers highlighted with white and the tunic with yellow). The color of each piece of the uniform might vary considerably, because of different batches or just different handling. This variation will give a lot of personality to your unit. In this tutorial, I used light yellow. When applying the lights, we should focus on the most prominent areas such as wrinkles, edges of pockets and tunic, elbows and knees. The easiest way to apply the highlights is to focus on the lines sculpted on the miniature. The final highlight –or more intense layer- should be applied only in the most prominent areas and it should be a simple dot or line. Remember that it is very important to maintain visible the previous layers. Do not totally cover them with the new layer! And also remember to thin the paints in order to apply semi-transparent layers that will help to generate smooth transitions. Finally, you can use again the darkest color or shade to re-defined some shades. On the other hand, if you finally decided to follow the layering technique rather than the triad system, the idea is exactly the same but obviously we just increase the number of layers.
To paint the helmet, we can use exactly the same recipe we already described so that we can paint it at the same time when painting the uniform. The only thing that is different is how we apply the lights. We can separate the helmet in two parts, the upper part and the visor or lower part. In the former, we can paint concentric circles whose area is reduced with each new layer. In the latter, we lead the lights toward the edge. The final highlight is a profiling around the edge. You can use the brush horizontally rather than the tip to do this.
Step 3 – Gear and weapons
Before starting to paint the weapons and accessories we can apply a “black profiling”: we paint a thin black line between each element of the miniature in order to separate them. In my opinion, this is very important when painting 15mm miniatures, since we clearly defined each element of the miniature so that the miniature will be more striking on the table. I also apply it when painting 28mm miniatures. Due to the reduced size of 15mm miniatures, rather than painting a thin line we can directly paint the whole accessory with black. This will be especially helpful for those accessories that are actually black, such as pouches and webbings. We can also paint a thin line between the jacket and trousers. In fact, since we used a black primer this step should be quite easy and fast to do.
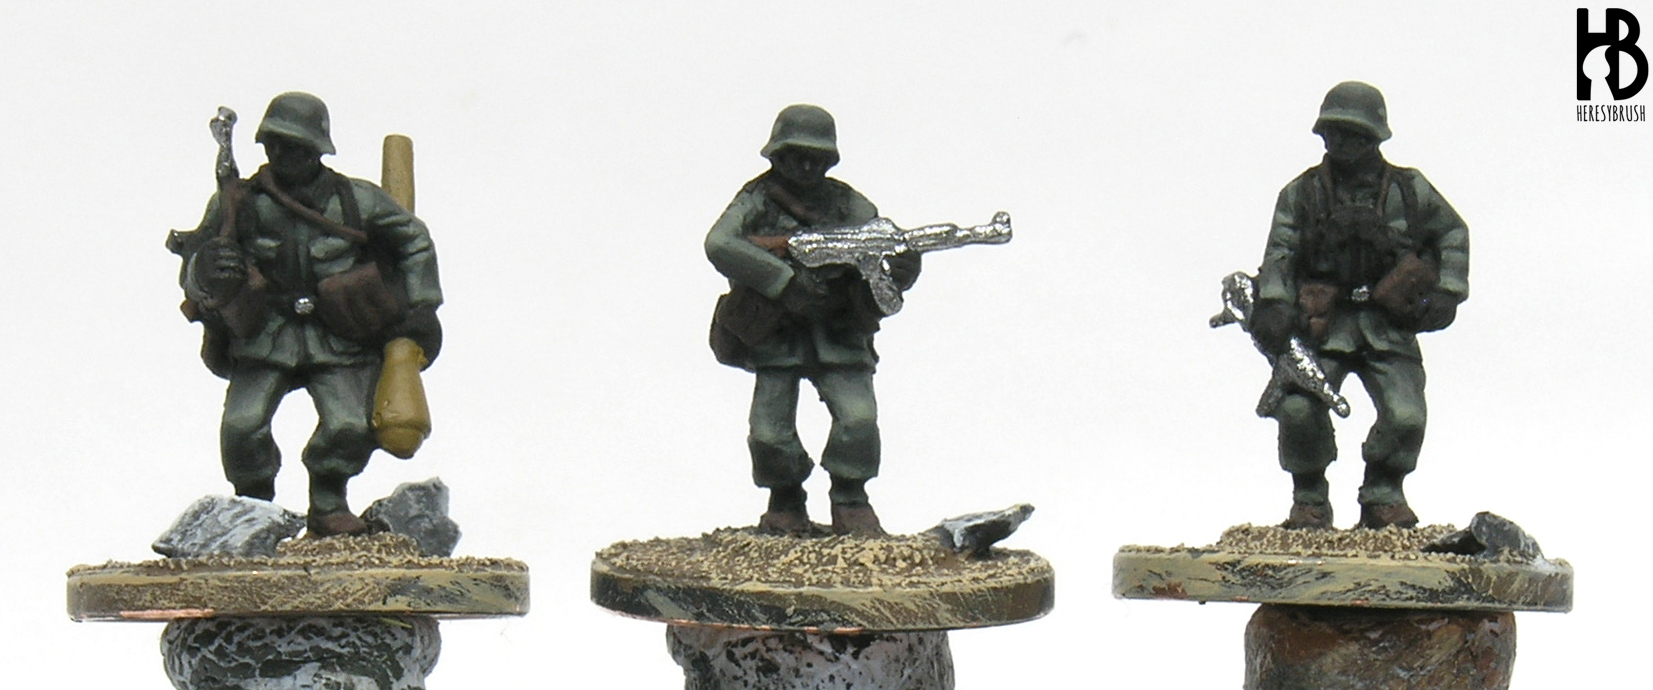
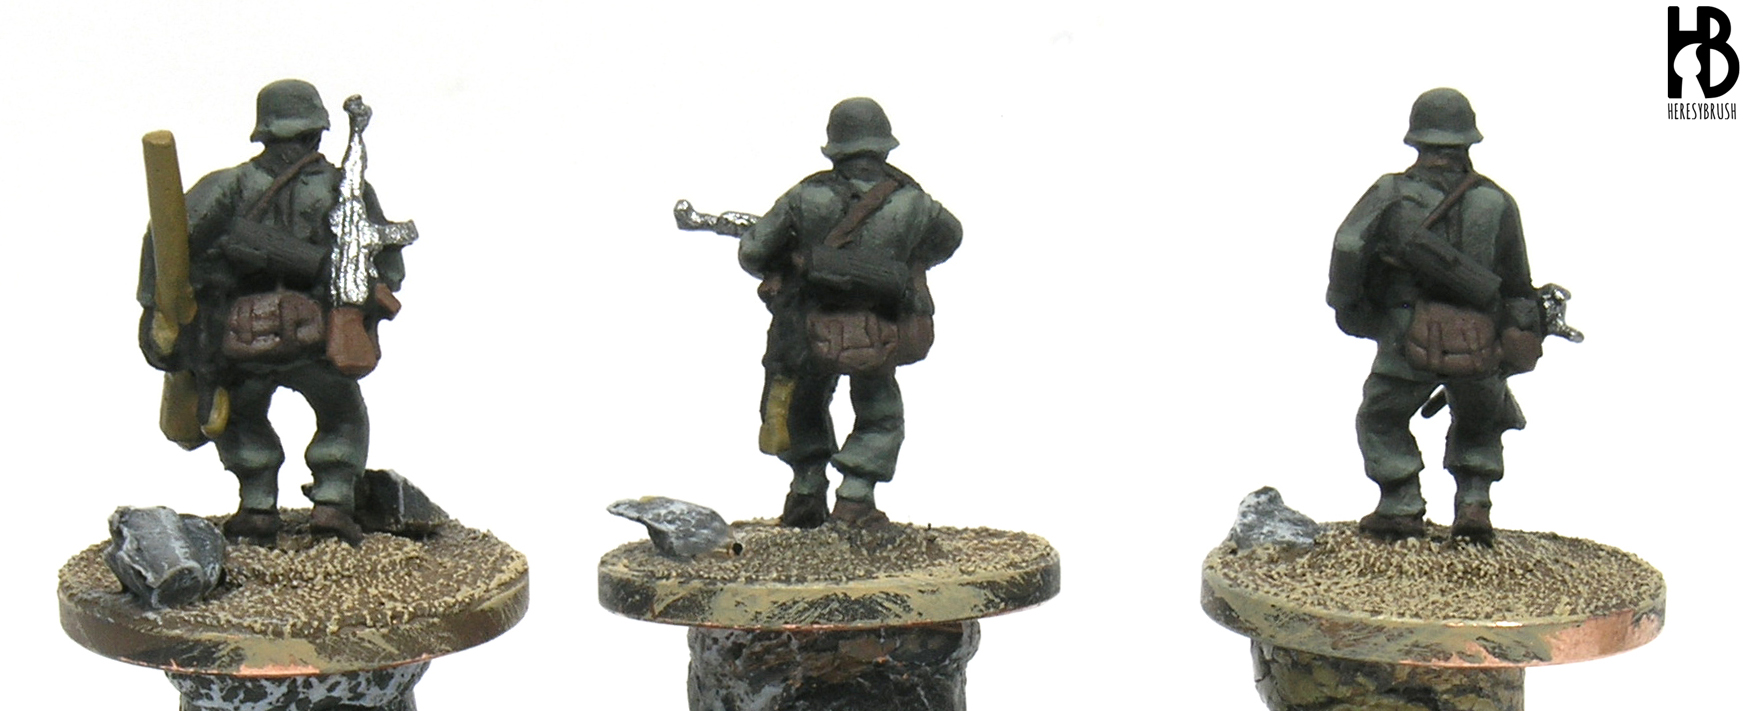
To paint black leather first be sure that the surface of the accessory is completely black. If not, apply another layer. To highlight the black parts, I do not use white or grey, but I use rose or pink. The idea is that pink or rose contain red; and therefore, the resulting lights will be warmer and in harmony with the highlights on the uniform (remember, I used light yellow, another warm color). You can mix black and pink or rose in a 1:1 proportion and paint a thin line across the webbings and pouches. To paint brown leather, such as the boots, we start painting the accessory with Dark oxide 302 (Vallejo), and then apply a light with Flat brown 984 (Vallejo) on the edges. If this is still too dark to your eyes, you can always apply another highlight by mixing Flat brown with Orange brown 982 (Vallejo) in the same proportion. To paint brown canvas, such as the bread bag or Stg44 pouches, we first paint these elements with Chocolate brown 872 (Vallejo). Then, we mix this color with Beige brown 875 (Vallejo) in a 1-to-1 proportion and apply the first lights towards the edges and wrinkles. Finally, we use pure Beige brown to apply the final light just on the edges.
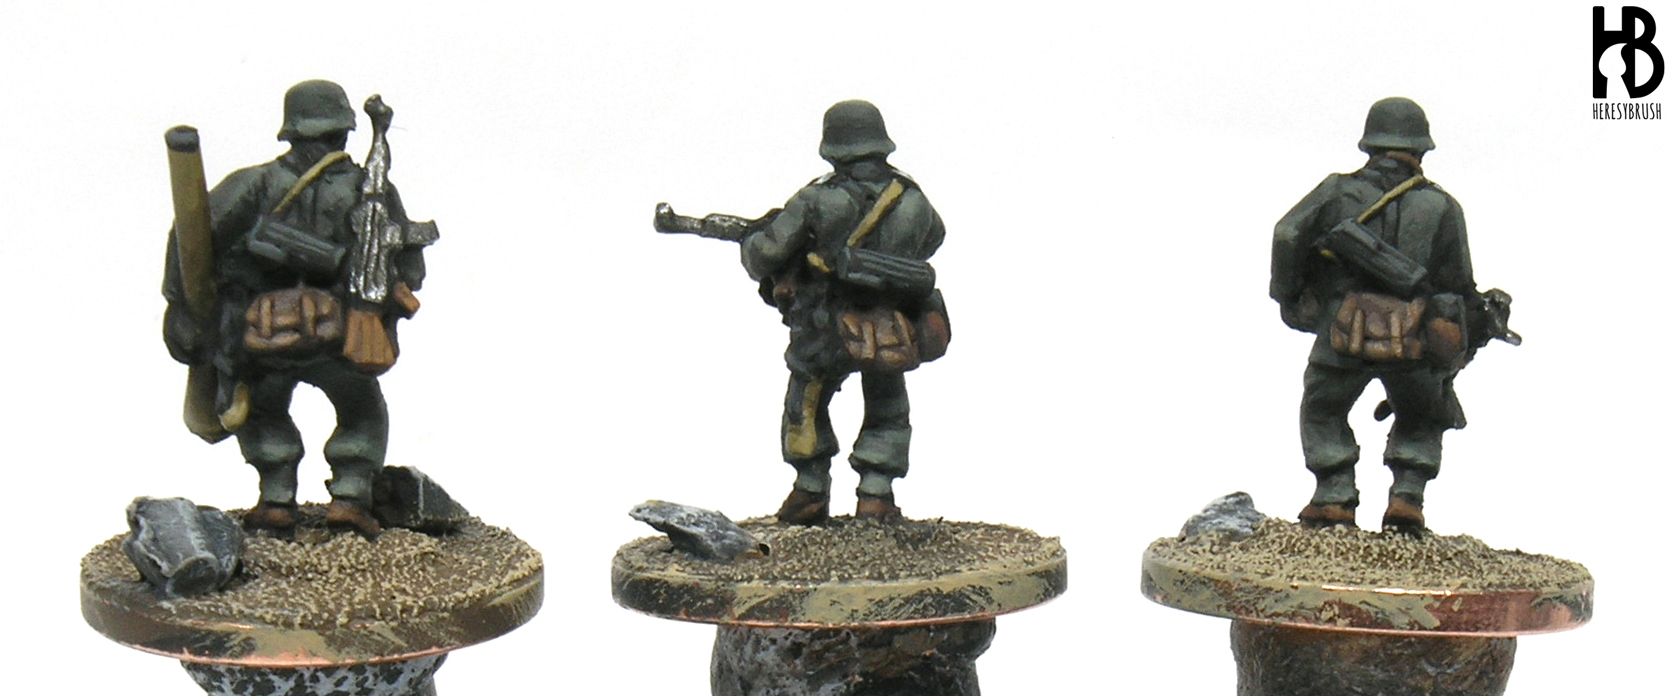
To paint the gas mask canister and metal cup we use German C. extra dark green 896 (Vallejo) mixed with white in the same proportion. For the gas mask canister, you can paint horizontal lines along it (these are normally sculpted in the miniature). And then apply the light color also on the side edges. Regarding the metal cup, you can apply the highlights in the upper part.
To paint the panzerfaust, we first paint the whole weapon with English uniform 921 (Vallejo), and then we apply a wash from Citadel, Agrax Earthshade, to remark the recesses. Once it is dry, we apply the highlights by mixing this color with white. Lead the lights toward the edges of the cylinder (the back and the head). We can paint with black the back part. I used the same recipe to paint the wooden part of the shovel and some straps, but I skipped the wash step. To paint the Stg44, we paint the metal part with Gunmetal 054 (Vallejo) and then apply a wash from Citadel, Nuln oil. We can leave it as such, or paint a “light” applying again Gunmetal on the edges of the gun. To paint the wooden parts, we first use Flat brown 984 (Vallejo) to paint the whole area and then paint horizontal lines with Orange brown 982 (Vallejo) simulating the wood veins.
Step 4 – Face and hands
We first need to paint a transition color, since the black color is too dark for the skin areas. I normally use Flat brown 984 (Vallejo). We use this color to completely paint the face and hands. We will use it as a “black profiling” or “dark profiling” to remark the different parts of hands and face (for example, the line between fingers), but using Flat brown rather than black.

To paint the skin, we start using Tan 066 (Vallejo). Remember to thin your acrylic paints with water. Using thinned Tan, we paint the face details: forefront, nose, cheeks and lower and upper lips. Take advantage of the Flat brown color we applied before and leave a dark line between these elements. But do not worry if you accidentally paint over it, you can always paint it again using a thin brush. Similarly, we paint the hand and fingers, leaving dark lines between fingers. Next, we use Dwarf skin 041 (Vallejo) to apply the first light. Lead the lights to the most prominent parts, such as finger tips and knuckles in the hands; and tip of the nose, upper part of the cheeks, lips and forefront in the face. Finally, we mix Dwarf skin and white in the same proportion and apply a final highlight following the previous ideas, but covering a smaller area. Remember that you can always go back and use Flat brown to paint again the “dark profiling” if you accidentally painted over it.
You can find additional insights about painting hands and faces in this another post.
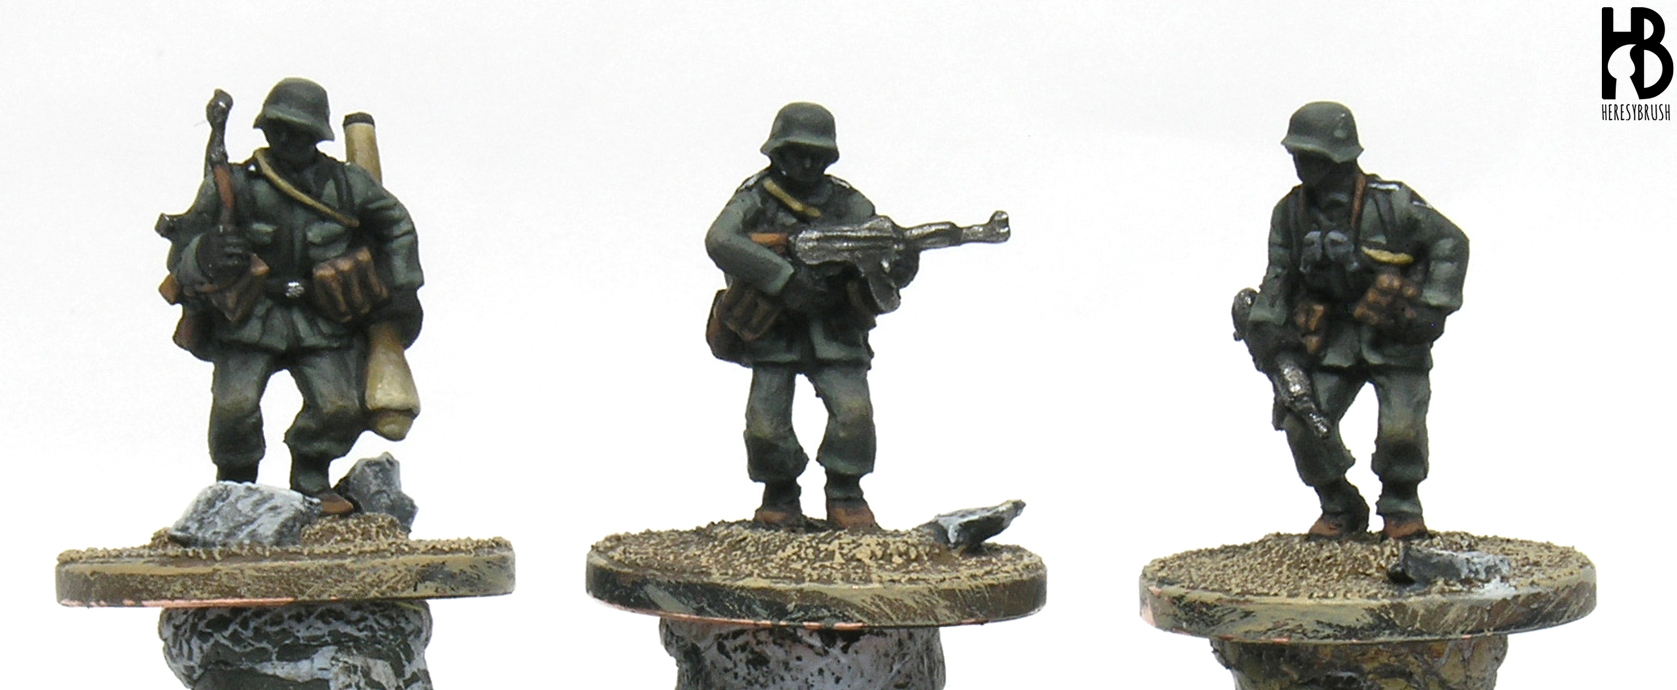
Step 5 – Final details and bases
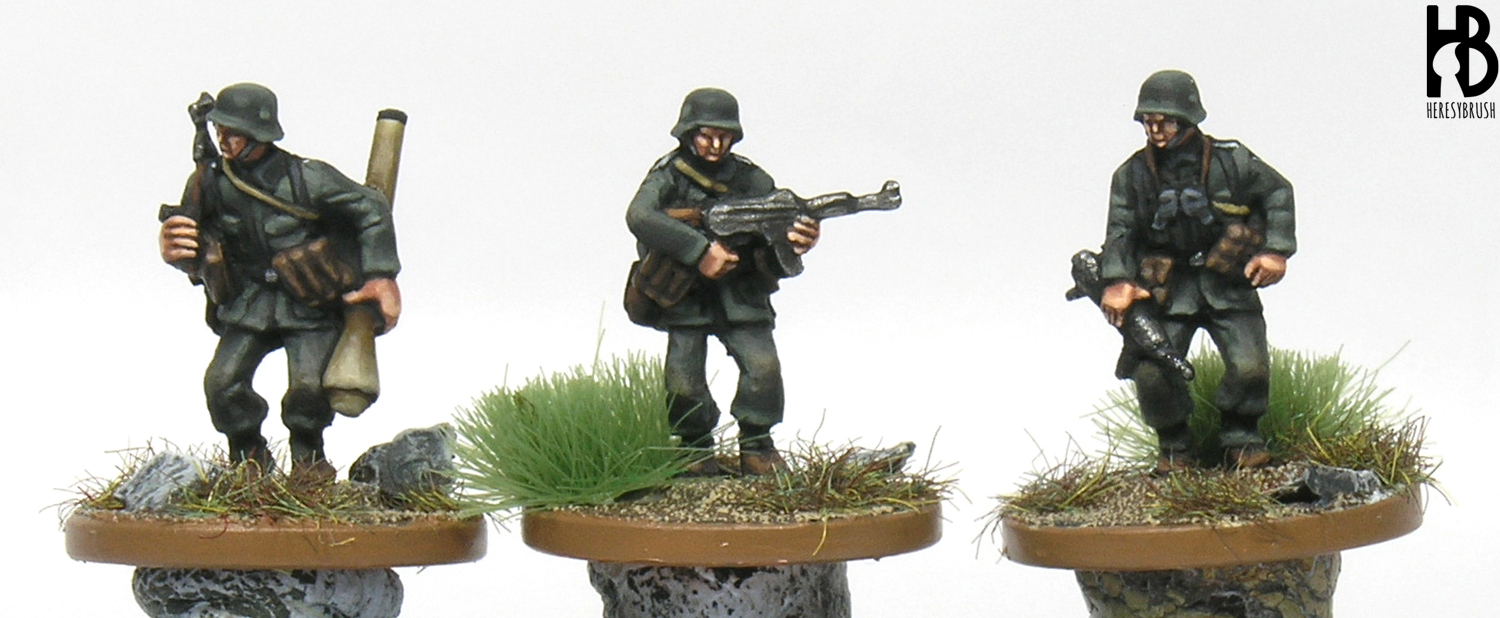

Finally, we can paint some details to bring even more our miniatures to life. To paint the epaulettes, we first paint them with black, and then paint two thin white lines on the edges. We can also paint the officer grade on the left sleeve by painting an inverted triangle with black and then the rank with white. On the other hand, we can also add some weathering effects to our miniatures, such as dust or mud effects on elbows and knees. To do it, you can thin couple of acrylic brown colors, such as English uniform 921 and Chocolate brown 872, with five parts of water. That is, one drop of paint and five drops of water. We apply this “filter” or thinned paint irregularly on the knees and elbows. It should not cover much the surface, just slightly change the color.
Regarding the base, we can add some vegetation. First, consider where you want to place your miniature. A forest in North Europe might be different compared with the Omaha beach. You can work on the vegetation by levels. First, you can add some electrostatic grass or saw dust. Then, add some grass tufts of different shapes and colors. And finally, you can add other elements, such as small branches (seamoss) with some train modelling leaves glued with white glue. The possibilities are almost infinite. You can check this, this and this post to find some ideas.
Great to have you back painting & posting Ruben! We’ve missed you!
Thanks a lot! I will try my best to continue posting! 🙂