
This post was originally published on 12th of February of 2011. And it was updated on 30th of January of 2022 (after reading this I feel very old…).
In this article we are going to see how to create a hard edge camouflage (a camo with solid edges rather than blurred) using a very simple tool for masking: removable adhesive putty. The masking will cover part of the tank, so that we can paint the remaining uncovered areas with another color in a very defined way. For example, the camo spots. We can use any mounting putties sold everywhere such as Blu-Tack or Silly Putty; or we can use something specifically designed for scale modeling such as the Camouflage Masking Putty from AMMO. Compared with the former two, the latter is less adhesive -it prevents accidentally dragging part of the paint when removing the putty, which can happen sometimes-, and more importantly, it is self-adaptive -meaning that it will get adapted to the surface by itself in matter of minutes. This is very important to avoid the paint going beneath the mask, which can occur when the mask is not properly adapted to the surface-.
Never use for this purpose children plasticine. We can barely remove it once it is applied on the tank, and what is even worst, it can leave behind oily traces that can ruin our painting job.

But, wait a moment. Which camo should we apply on our tiny tanks? a soft- or hard-edge camo? In fact, both options are correct from the historical point of view. Some camos were painted with a brush while others with an airbrush. Therefore, the choice depends on historical data in case we are representing a historical unit, or on our own preference. In my opinion, I find the hard-edge camouflage more rewarding when painting small scales such as 12 and 15mm, since it facilitates the application of lights and shades that will create contrast and enhance the definition of the model. A soft-edge camo cannot be highlighted or darkened. Conversely, it is important to keep in mind that soft-edge camos are somehow more realistic (the scale model looks blurry, which is the main purpose of a camo) and are easily applied: we do not need masking and a single pass with the airbrush is enough. If you are interested, we discussed other aspects about this topic at the end of this post. In the previous image you can see two tanks in 12mm (1:144 scale) painted with exactly the same colors but one with a soft-edge camo and the other with a hard-edge camo. Which one do you like the most?
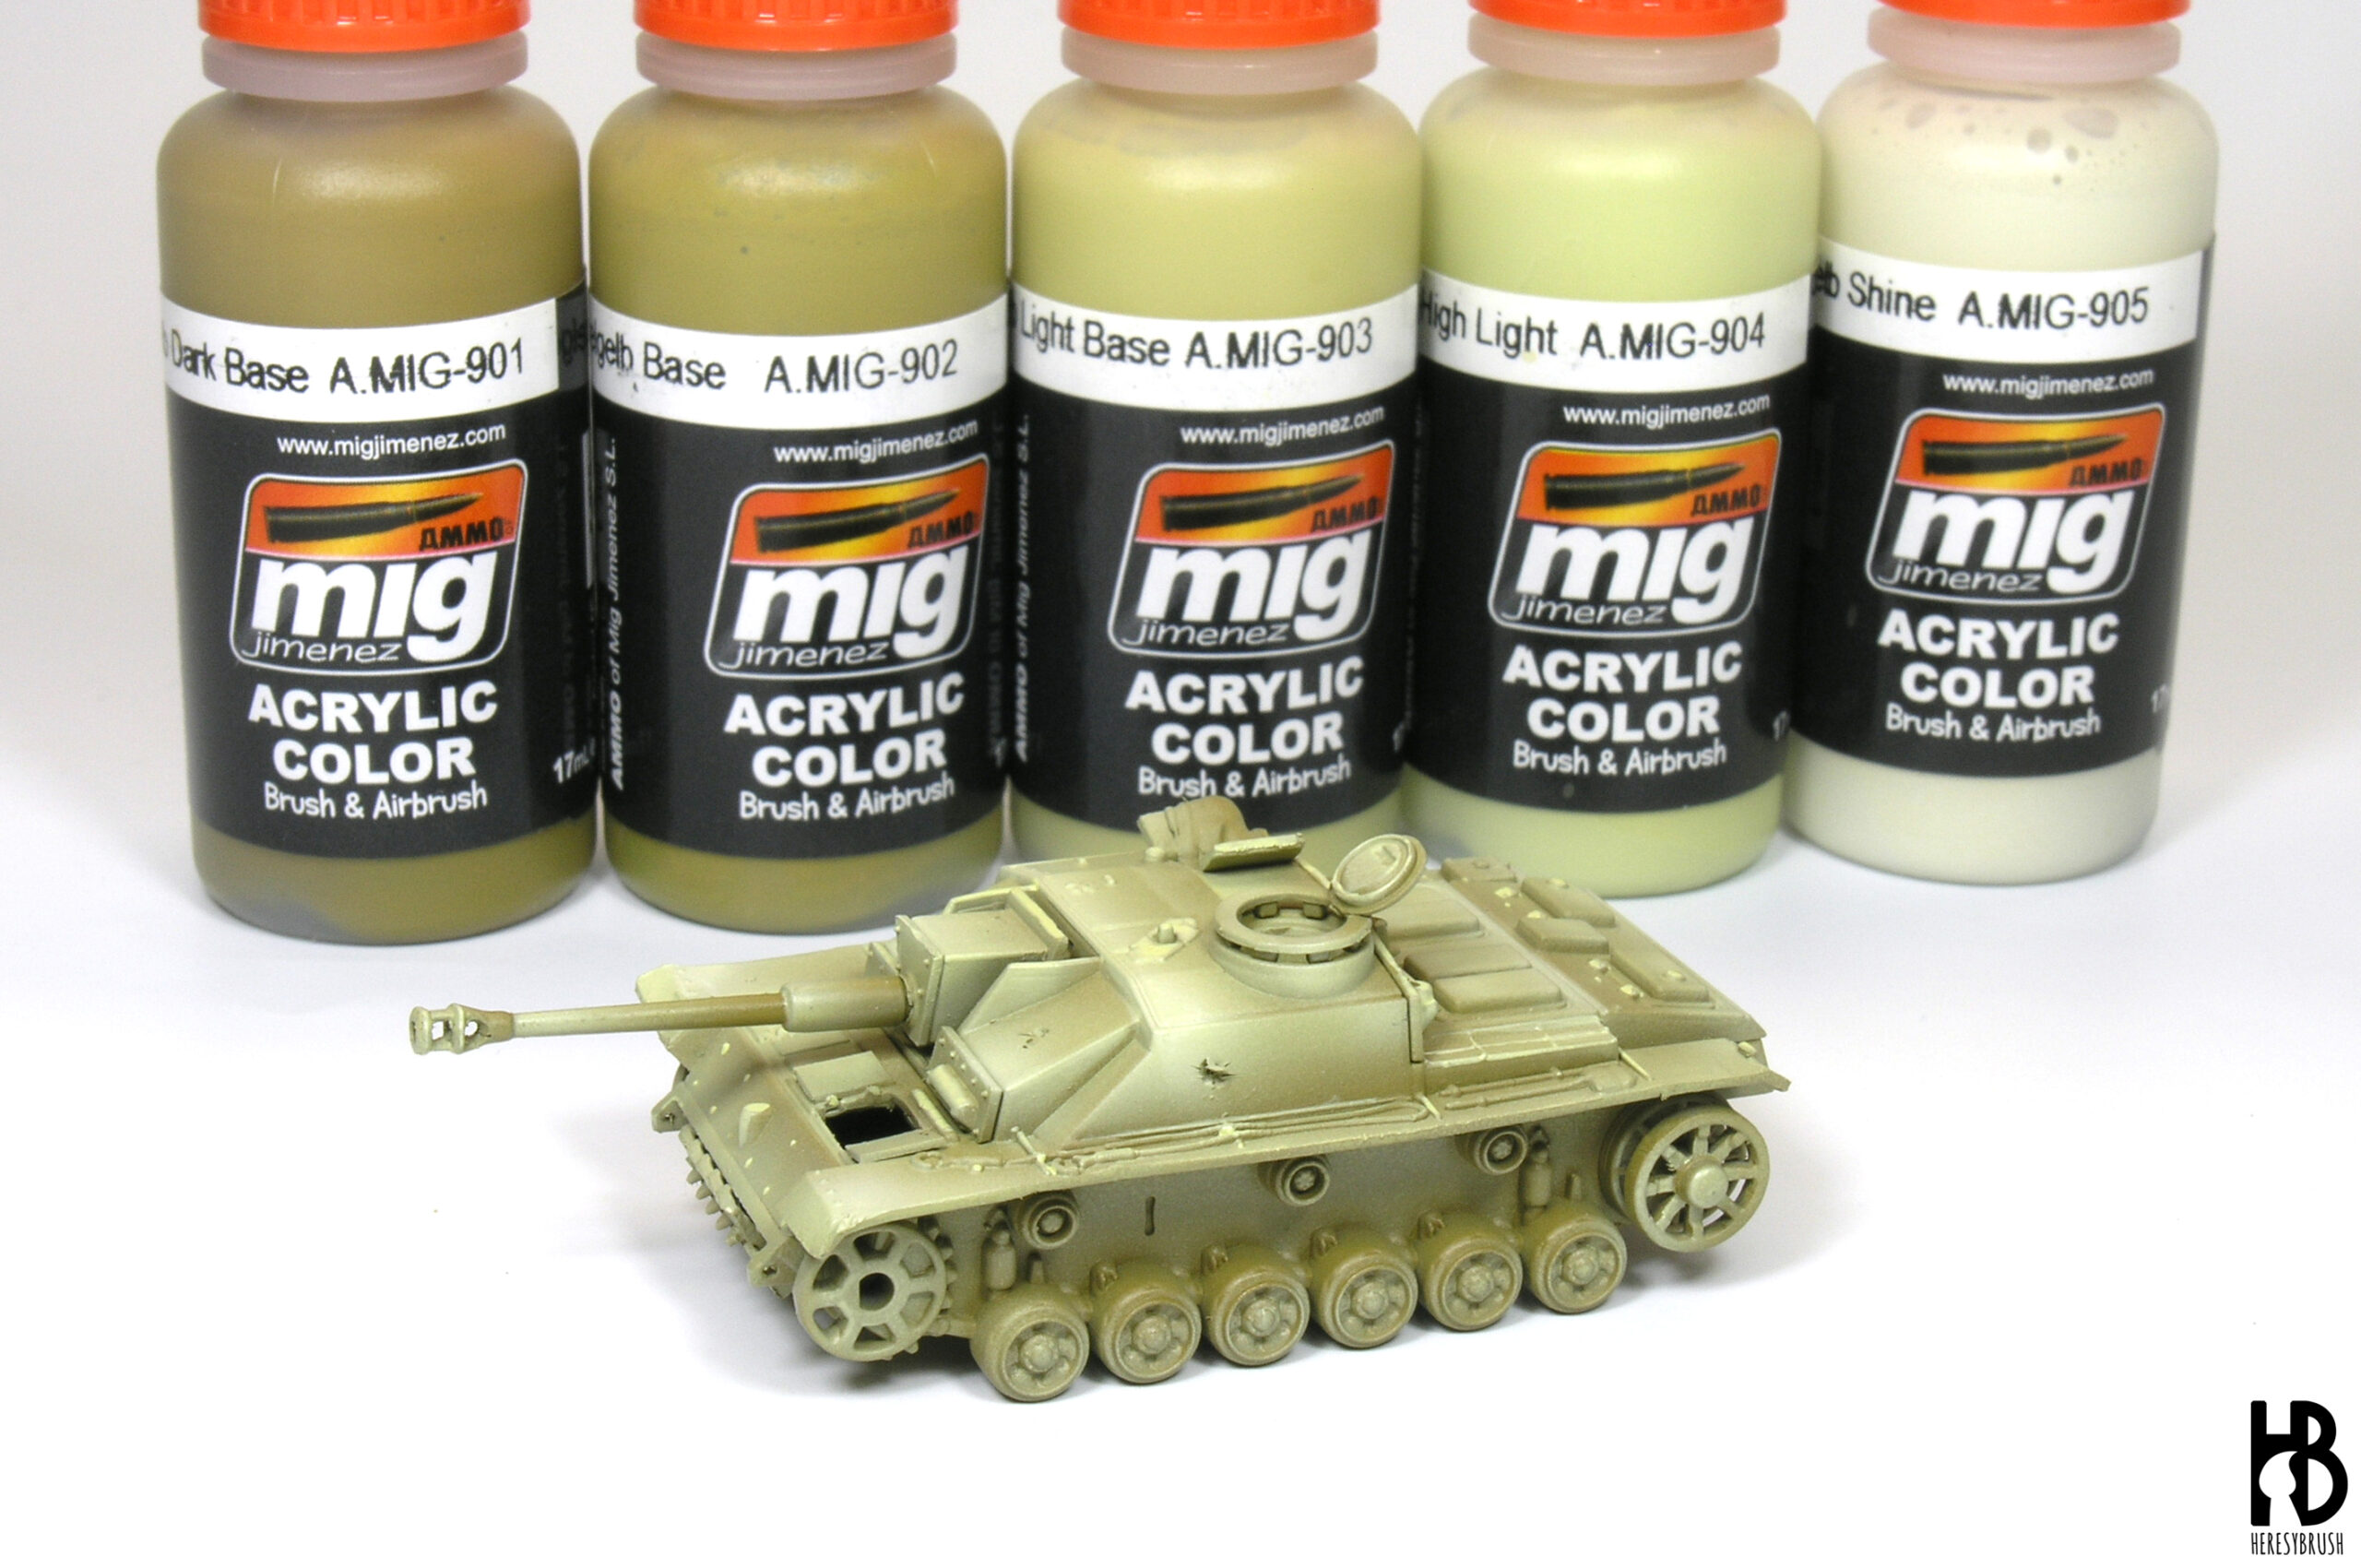
 We begin painting the base color of the tank following our favourite lighting system. In my case, the base color of this German Stug III is dark yellow or dunkelgelb, which both historically correct and the dominant color of the bitonal camo I want to paint. For the highlights, I applied a color modulation using the corresponding painting set from AMMO. You can read more about this particular lighting system in this other post. If you are not sure about which is the right base color in your camo, as a rule of thumb we start painting the color that will occupy the largest surface of the vehicle. This is the dominant color. In those cases when we want all colors of the camo covering a similar area, it does not matter which one we decide to use as base color.

Once the base color is completely dry, we start covering part of the tank with the masking putty. We roll small pieces of putty and then apply them on the tank following the camo pattern we want to represent. In this case, wavy lines going from one side to another. Remember, what we are covering now will not be painted with the new color. That is, if we want very thin green lines on top of the dark yellow base, we need to leave a very small space uncovered. Although this sounds obvious, in practice it is not. Our brain can fool us, since when covering part of the tank we might think that the uncovered area, which we can clearly see in the original base color, will remain in that color. I said this because it has happened to me several times.
Once we have all the pieces of masking putty applied on the tank, we use for example the edge of a brush to gently push the putty to adapt it to the irregularities of the surface. At the same time, we can do the wavy shapes of the camo by playing with the direction and pressure applied with the brush. It is important that the putty is properly adapted to the surface or the new layer of green paint can go beneath the putty. This issue is solved when using a specific masking putty for scale models.

After finishing the masking we are ready to apply the second color, in this case olive green, that we apply over the whole vehicle. Thanks to the masking work, we can also apply shades and highlights as we did with the base color. This would be impossible when painting a soft-edge camo. Once more, I followed the color modulation technique, and I applied the shades and highlights exactly in the same areas where I did it with the dark yellow. It is very important to follow the same lighting pattern we created initially with the base color, so that the final result is coherent.
If we want to add a third color to the camo we proceed in the same way: we apply a new layer of putty on top of the previous work (we do not remove the first layer of masking) and then paint the new color with shades and highlights.

Next, the funniest part starts: we remove the putty to reveal the final result. We remove carefully the chunks of putty, one at a time. Sometimes we can leave behind some traces of putty. We can easily remove them by using a little bit of fresh putty: we apply it on top of the trace, and then pull it.
 Finally, we seal the painting job with a thin layer of satin varnish. This will protect the acrylic paint used for the basic color and camo from the weathering effects that we will apply next and which are normally done with enamels and oils. Furthermore, the sating varnish will facilitate the application of some effects, such as the wash, since this will spread easily over the satin surface rather than over a matt one.
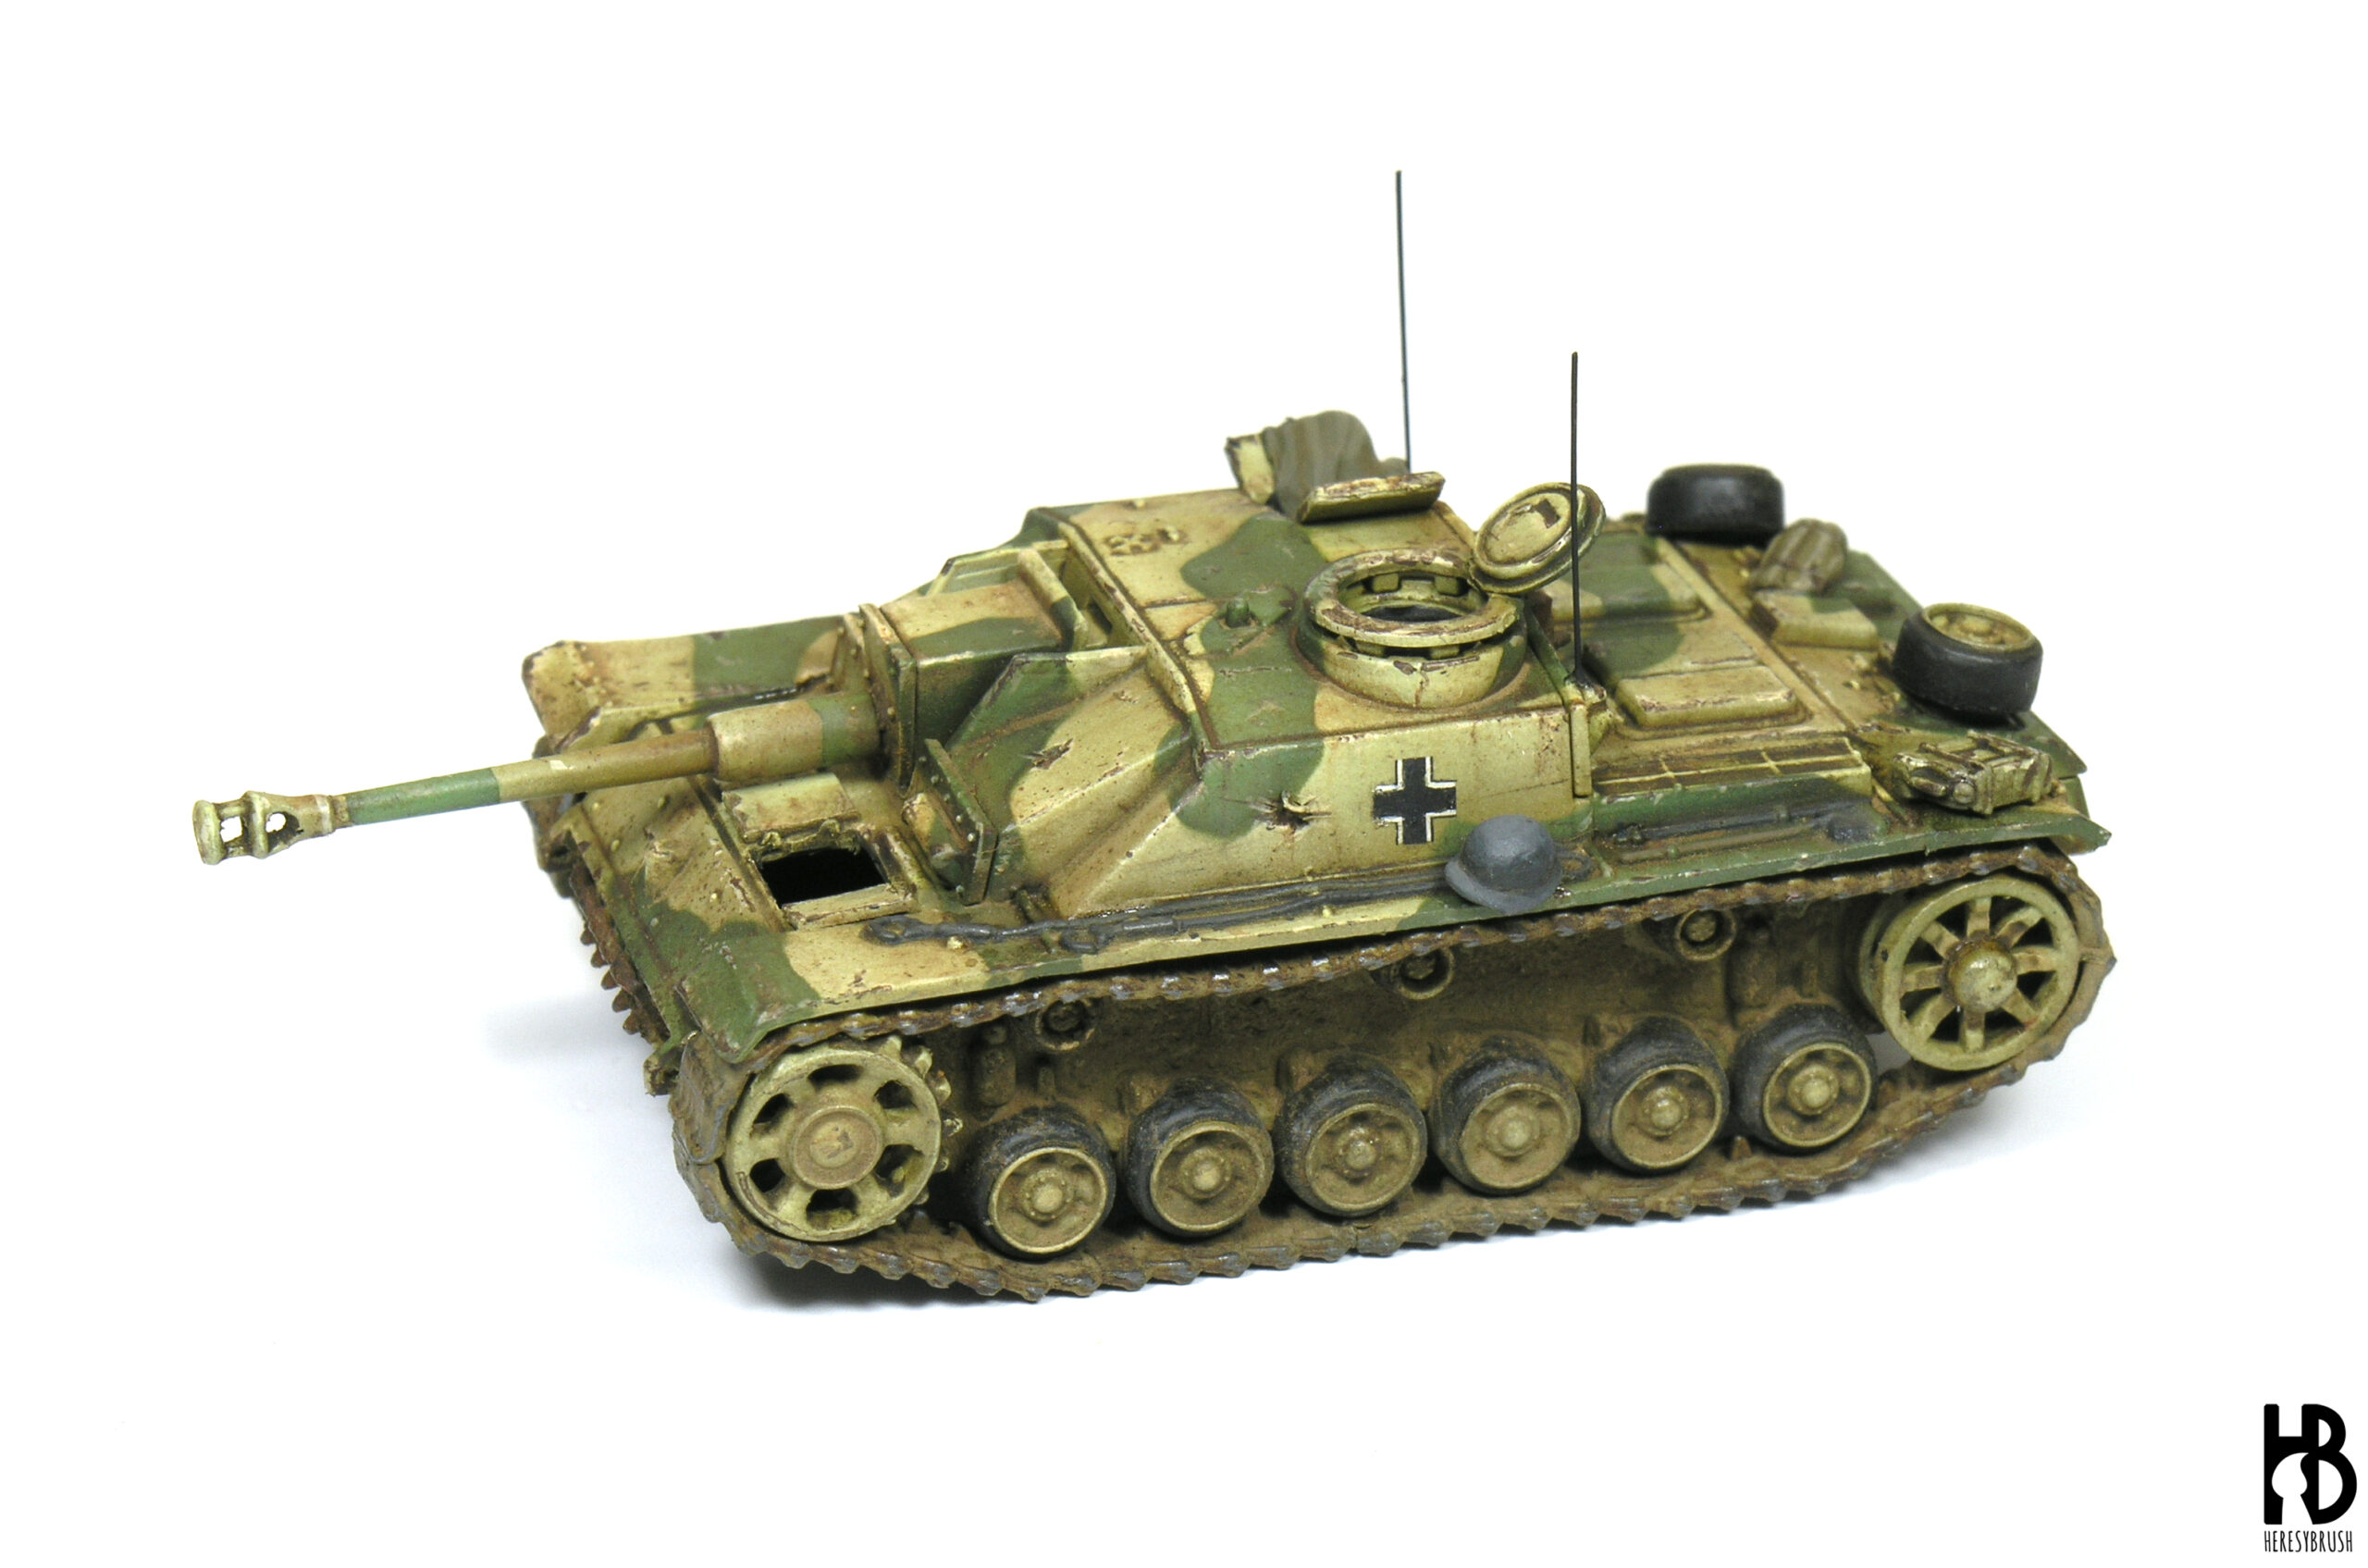
After weathering effects:
 To summarize:
- Paint the basic color of the tank
- Apply masking putty
- Paint the second color of the camo
- Optional: repeat steps 2 and 3 to add a third color to the camo
- Optional: apply decals
- Seal the painting job with a layer of satin varnish
- Apply weathering effects
Colors used for the modulation:


One thought on “How to paint hard edge camouflage with masking putty”