
In this tutorial, we will explore fast and simple techniques for painting 3D-printed houses made from filament, perfect for wargaming. Although we are going to paint a 15mm house for Flames of War, the same techniques can be applied to any theme and scale. The idea is to take advantage of colored primer cans for the base colors, and then create contrast using dry brushing and filters.
Step 1 – Preparation
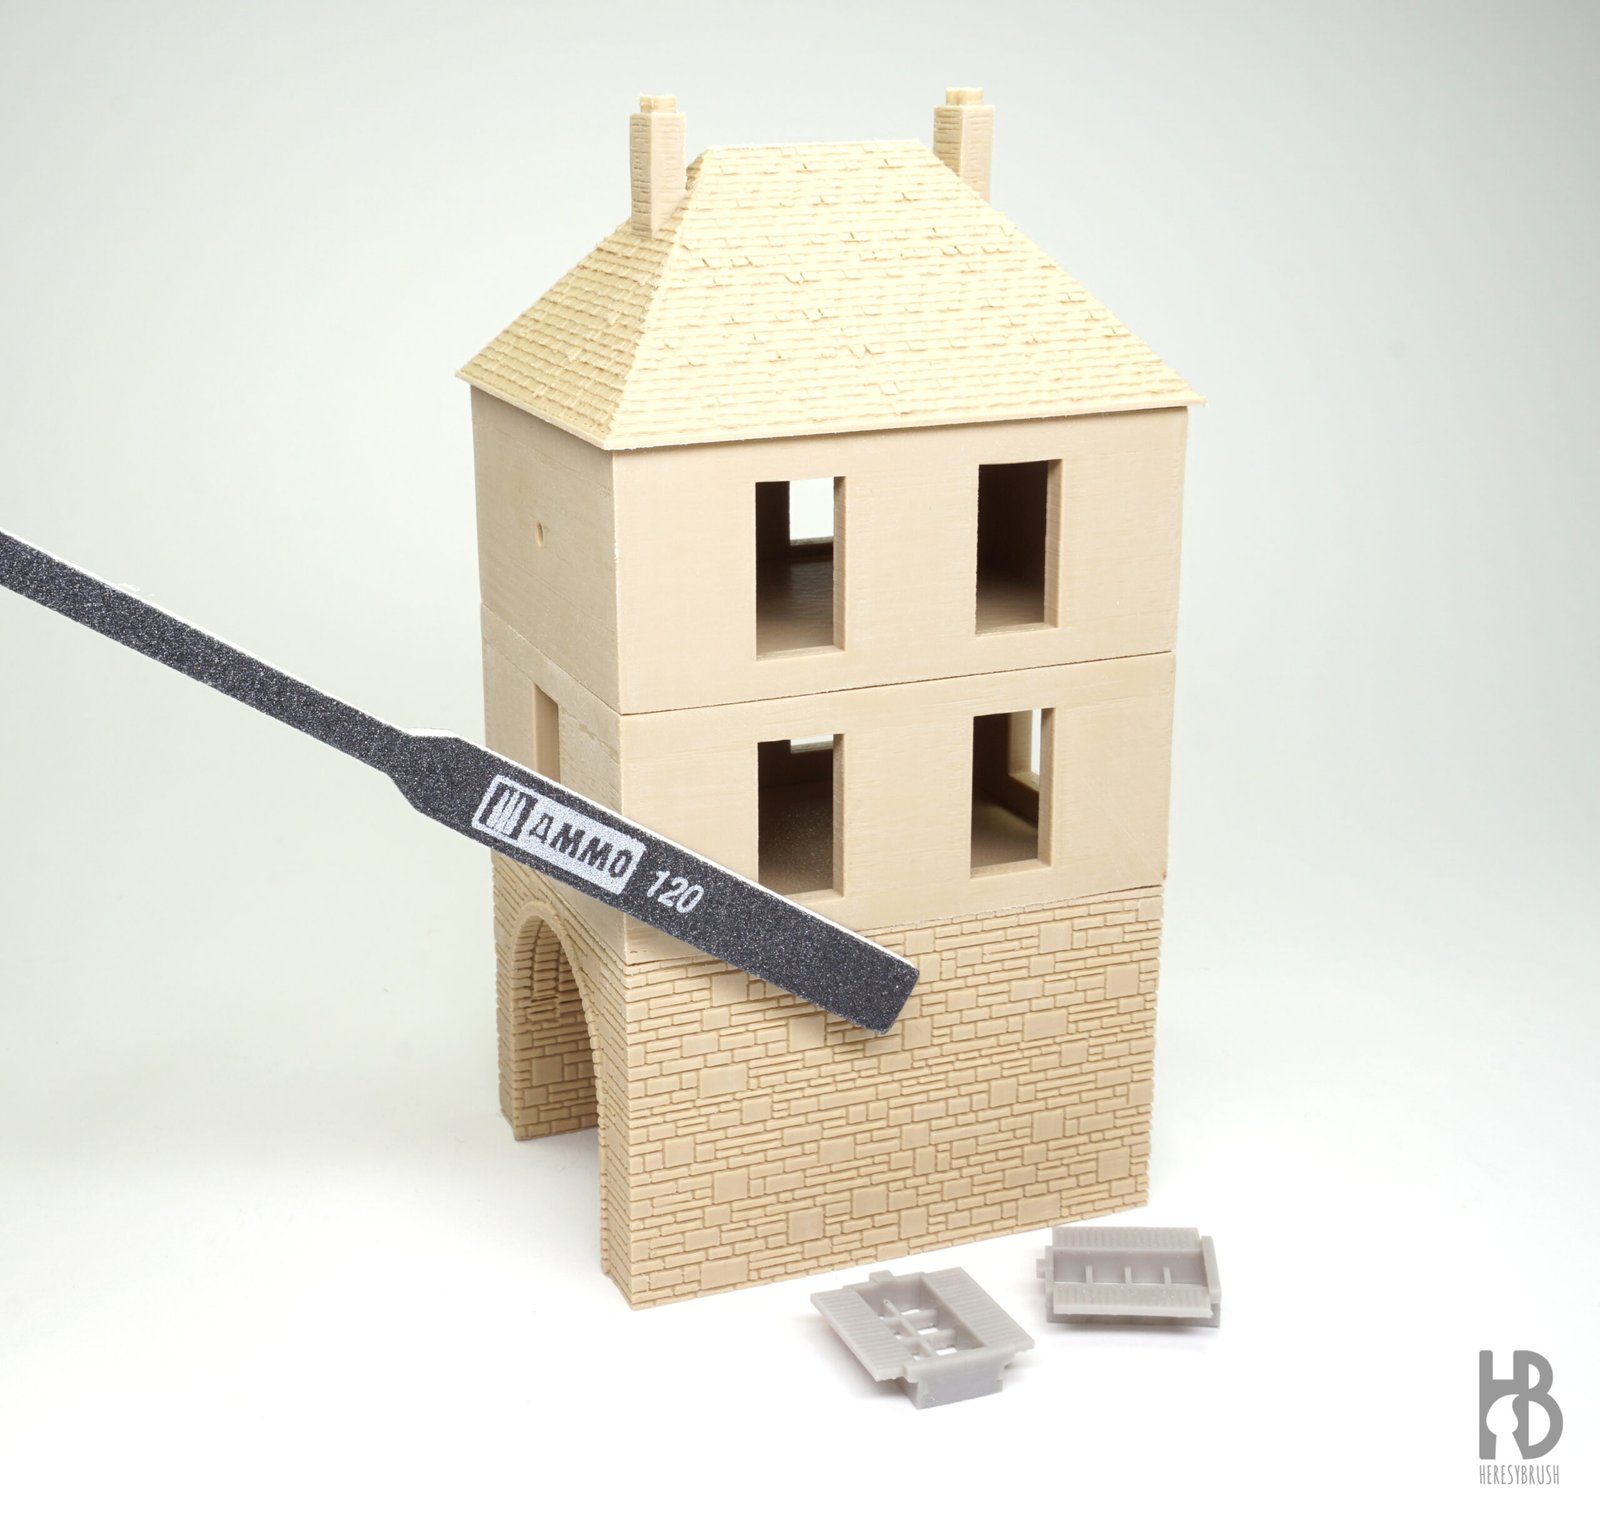 Filament printers are an amazing tool for creating scenery elements for wargames with ease. However, the inevitable downside of this type of printing is the resulting linear texture. To mitigate this issue, my brother modified the STL files by removing the window frames, blinds, and clocks (which were later printed using a resin printer that offers better resolution). This way, the resulting flat surfaces can be easily sanded using sandpaper. We do not need to achieve a completely flat surface; it is sufficient to partially remove the texture to eliminate the symmetrical appearance.
Step 2 – Basic colors
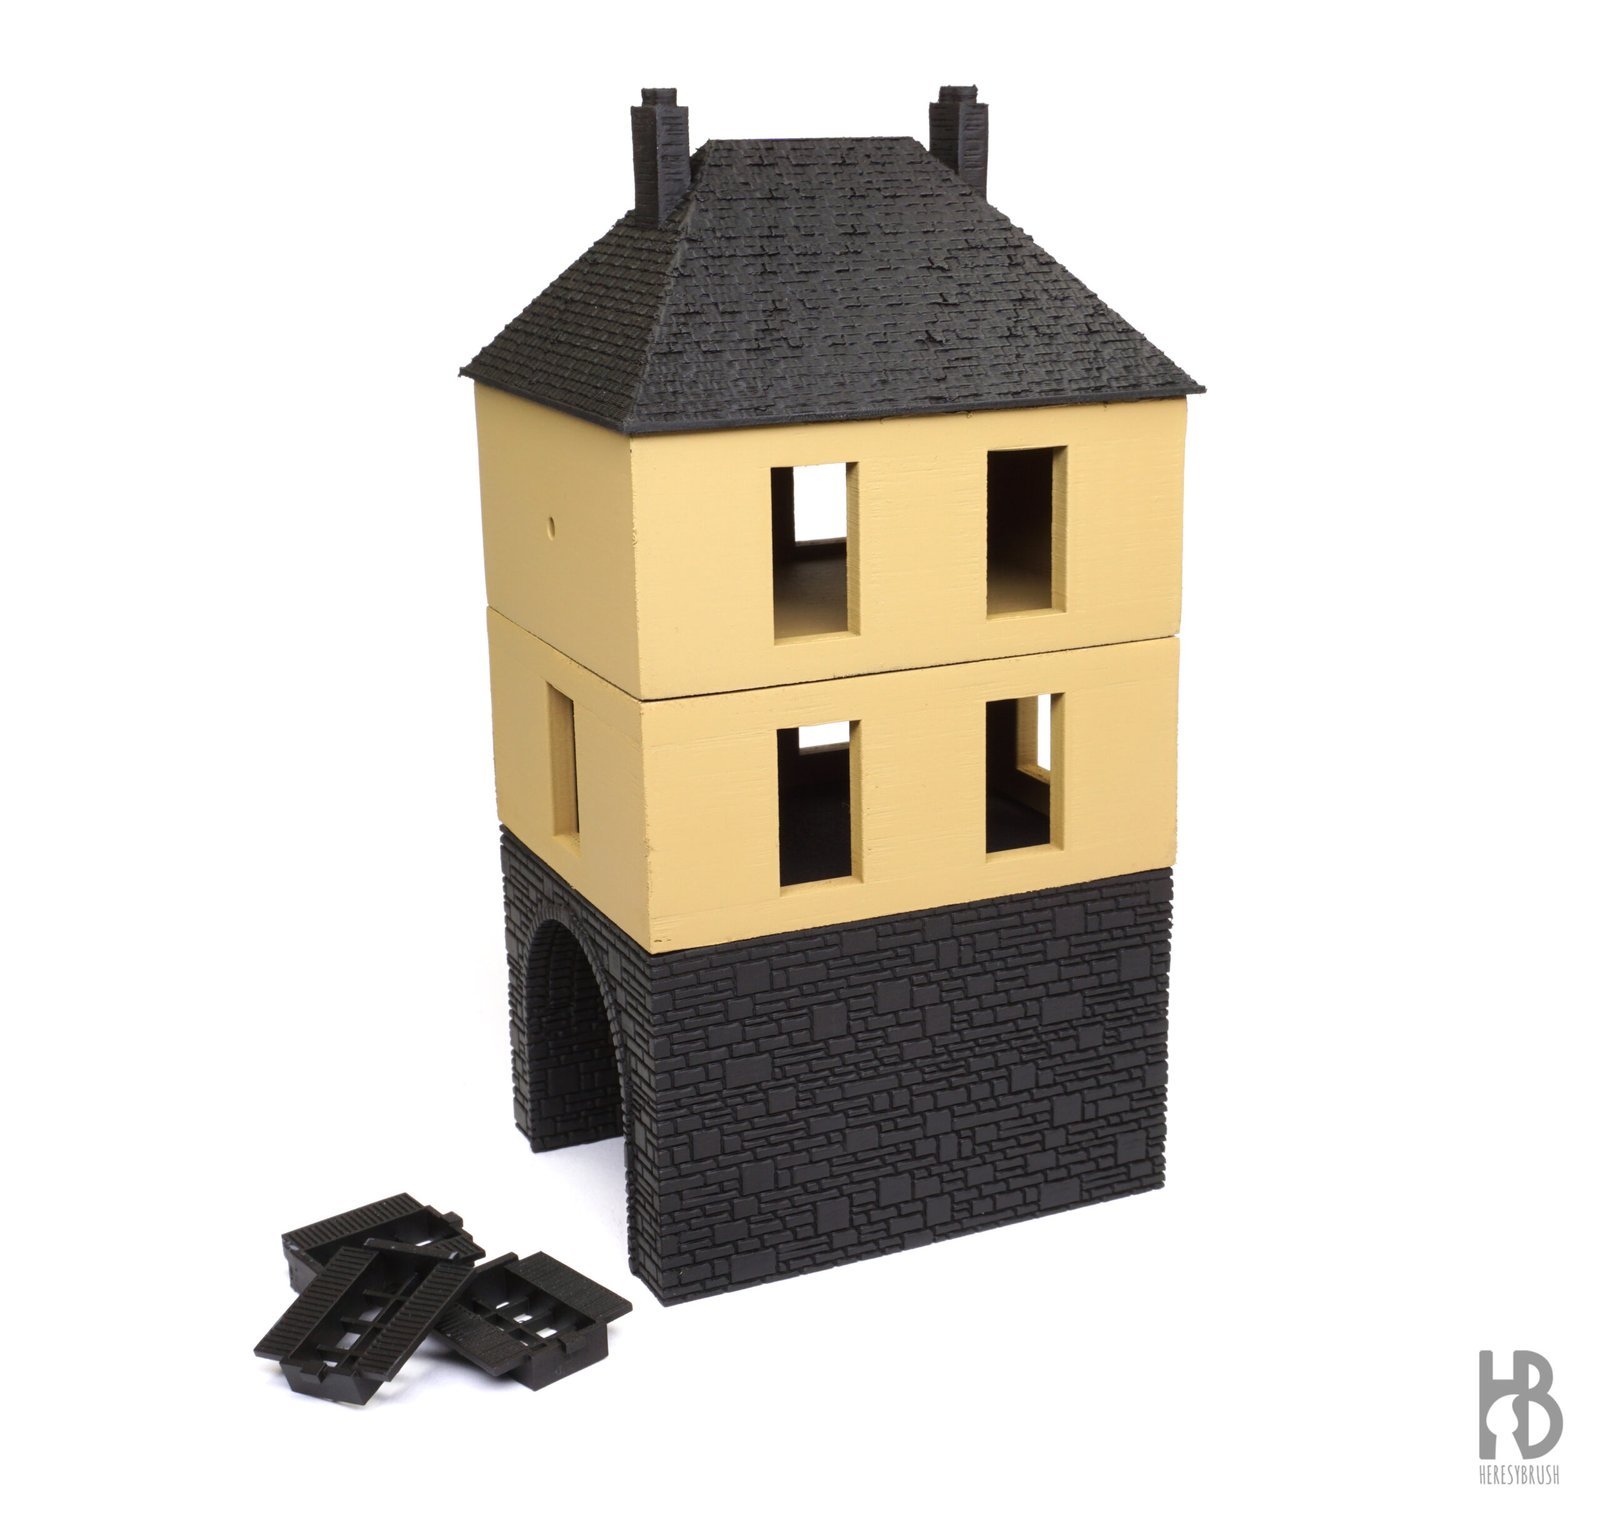 Following the classic design of Battlefront houses, my brother also prepared a modular building where each floor can be separated. This allows us to paint each part with a different color according to our needs. Alternatively, we can always use masks. To quickly paint the base colors, we use spray primers (such as TITAN spray cans from AMMO): black for the dark surfaces such as the masonry, roof, and window frames; dark yellow for the upper floors; and white for the clocks.
Step 3 – Contrast
 We enhance textures using the dry brush technique alongside specialized paints tailored for this method, such as the Dio Drybrush paints from AMMO. For each surface, we choose two distinct colors to create highlights, effectively building up contrast. For instance, to paint masonry walls, we begin with Basalt Grey (A.MIG-0603), followed by Light Grey (A.MIG-0601). Similarly, we apply two shades of green to window frames, two hues of grey-blue to roofs, and two creamy tones to walls. Details on the clocks are carefully painted with black using a fine brush.
Step 4 – More contrast
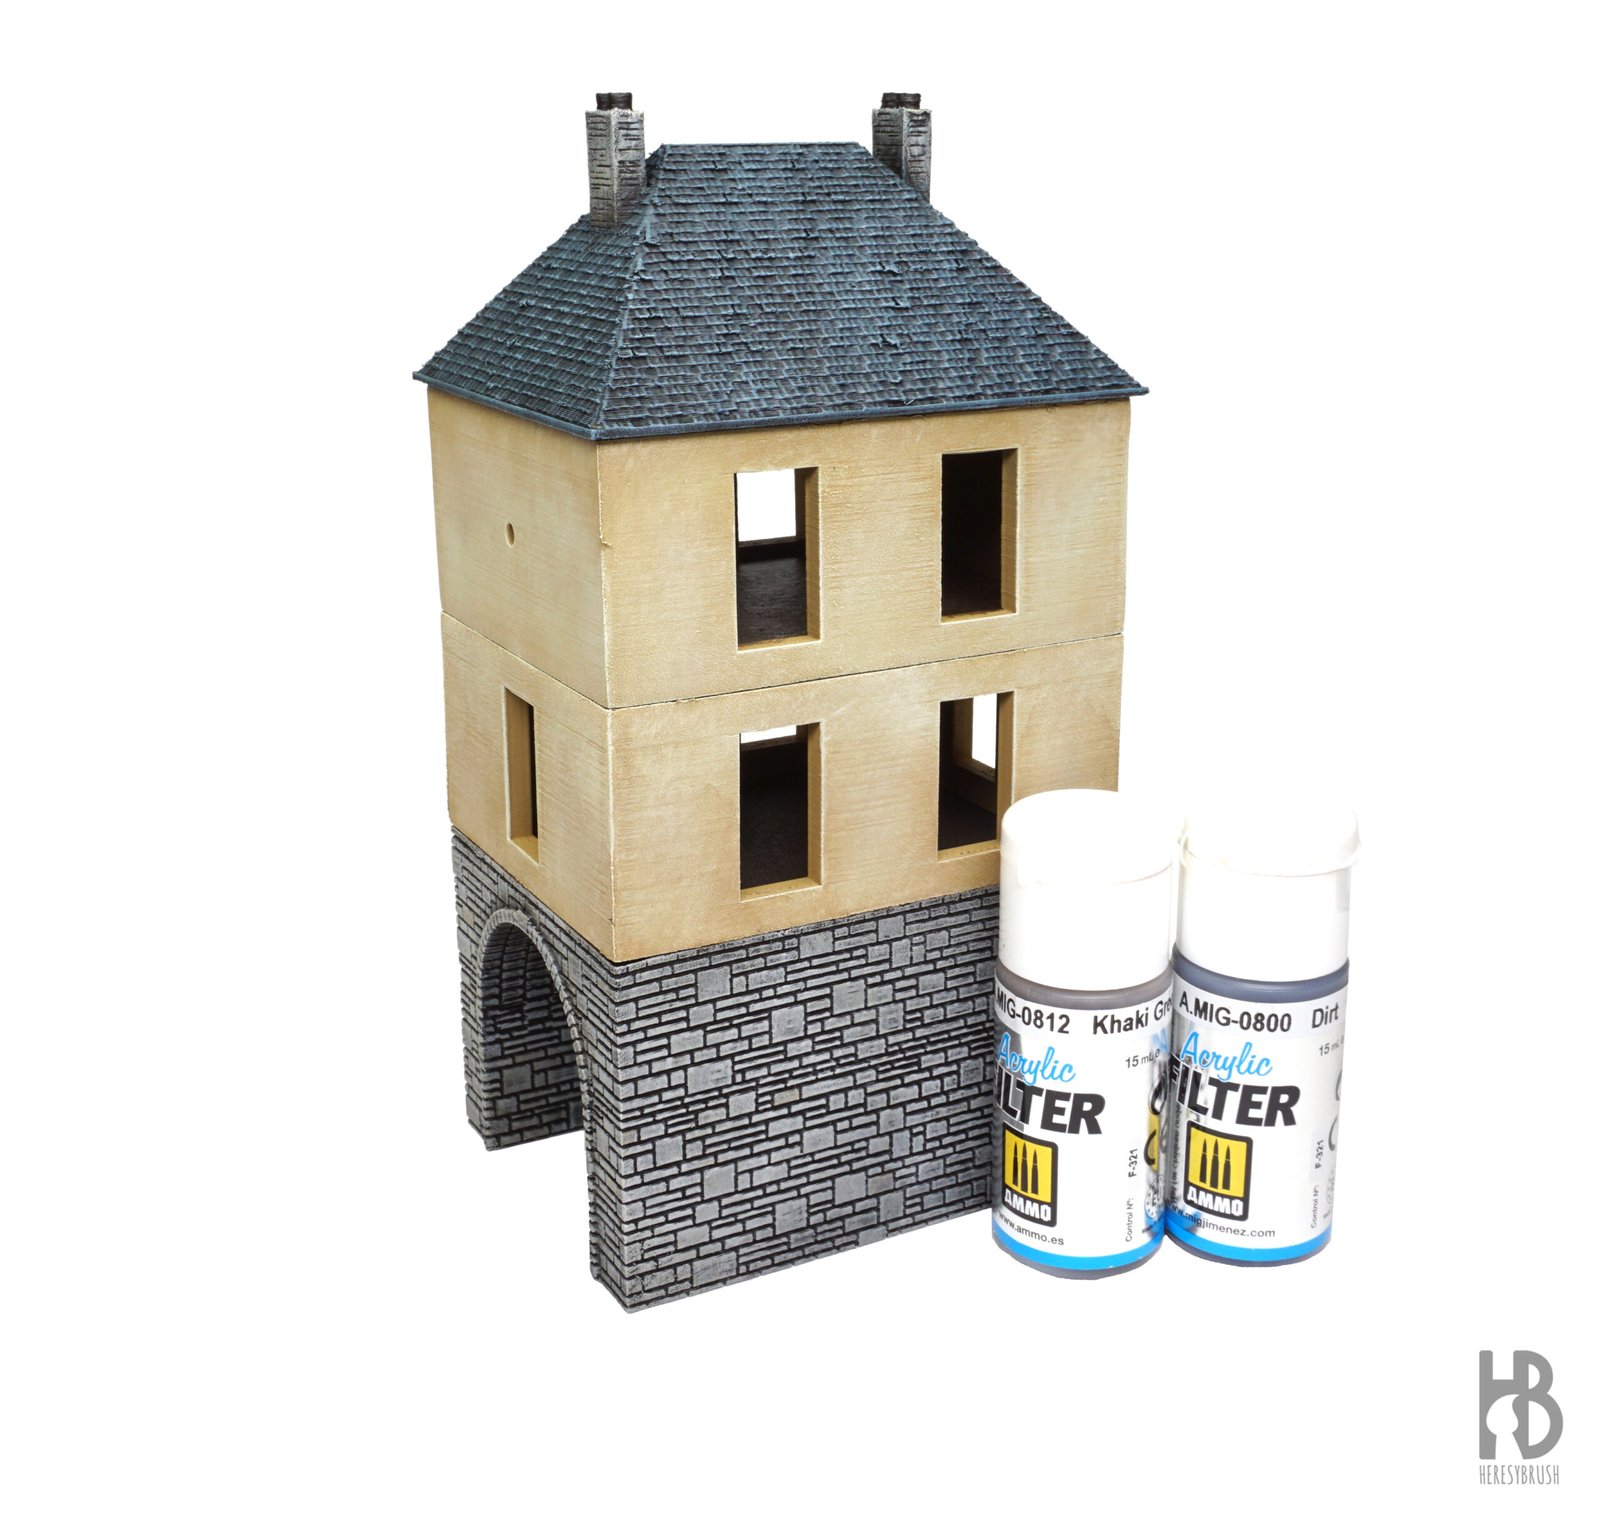 To further heighten contrast, we incorporate acrylic filters. As we have described before (here), this method involves subtly altering the surface’s color, introducing nuances and focal points of interest. We select filter colors based on the effect we aim to achieve. For instance, to simulate dirt, we apply a brown filter to both the upper and lower sections of the yellow walls. Alternatively, we utilize dark brown and green tones on the masonry to evoke weathering effects.
Step 5 – Final assembly
 To complete the process, we glue the window frames and clocks using a small amount of PVA glue. It is advisable to apply a layer of varnish to protect the final paint job. By painting these elements separately, we have significantly streamlined and accelerated the painting process. Just imagine having to paint each window frame without accidentally spoiling the adjacent walls!
Lovely cream tones on the walls
Hi where did you get the STL from and if it was free would you be willing to share the version with the frames separated?
Exceptional work! I absolutely love this clock tower piece as well, is the STL available anywhere??
Outstanding work! Really nailed the details, and I love that the windows are separate pieces.
Is this STL available anywhere??
PS This may be a repeat comment, my original wasnt showing up?