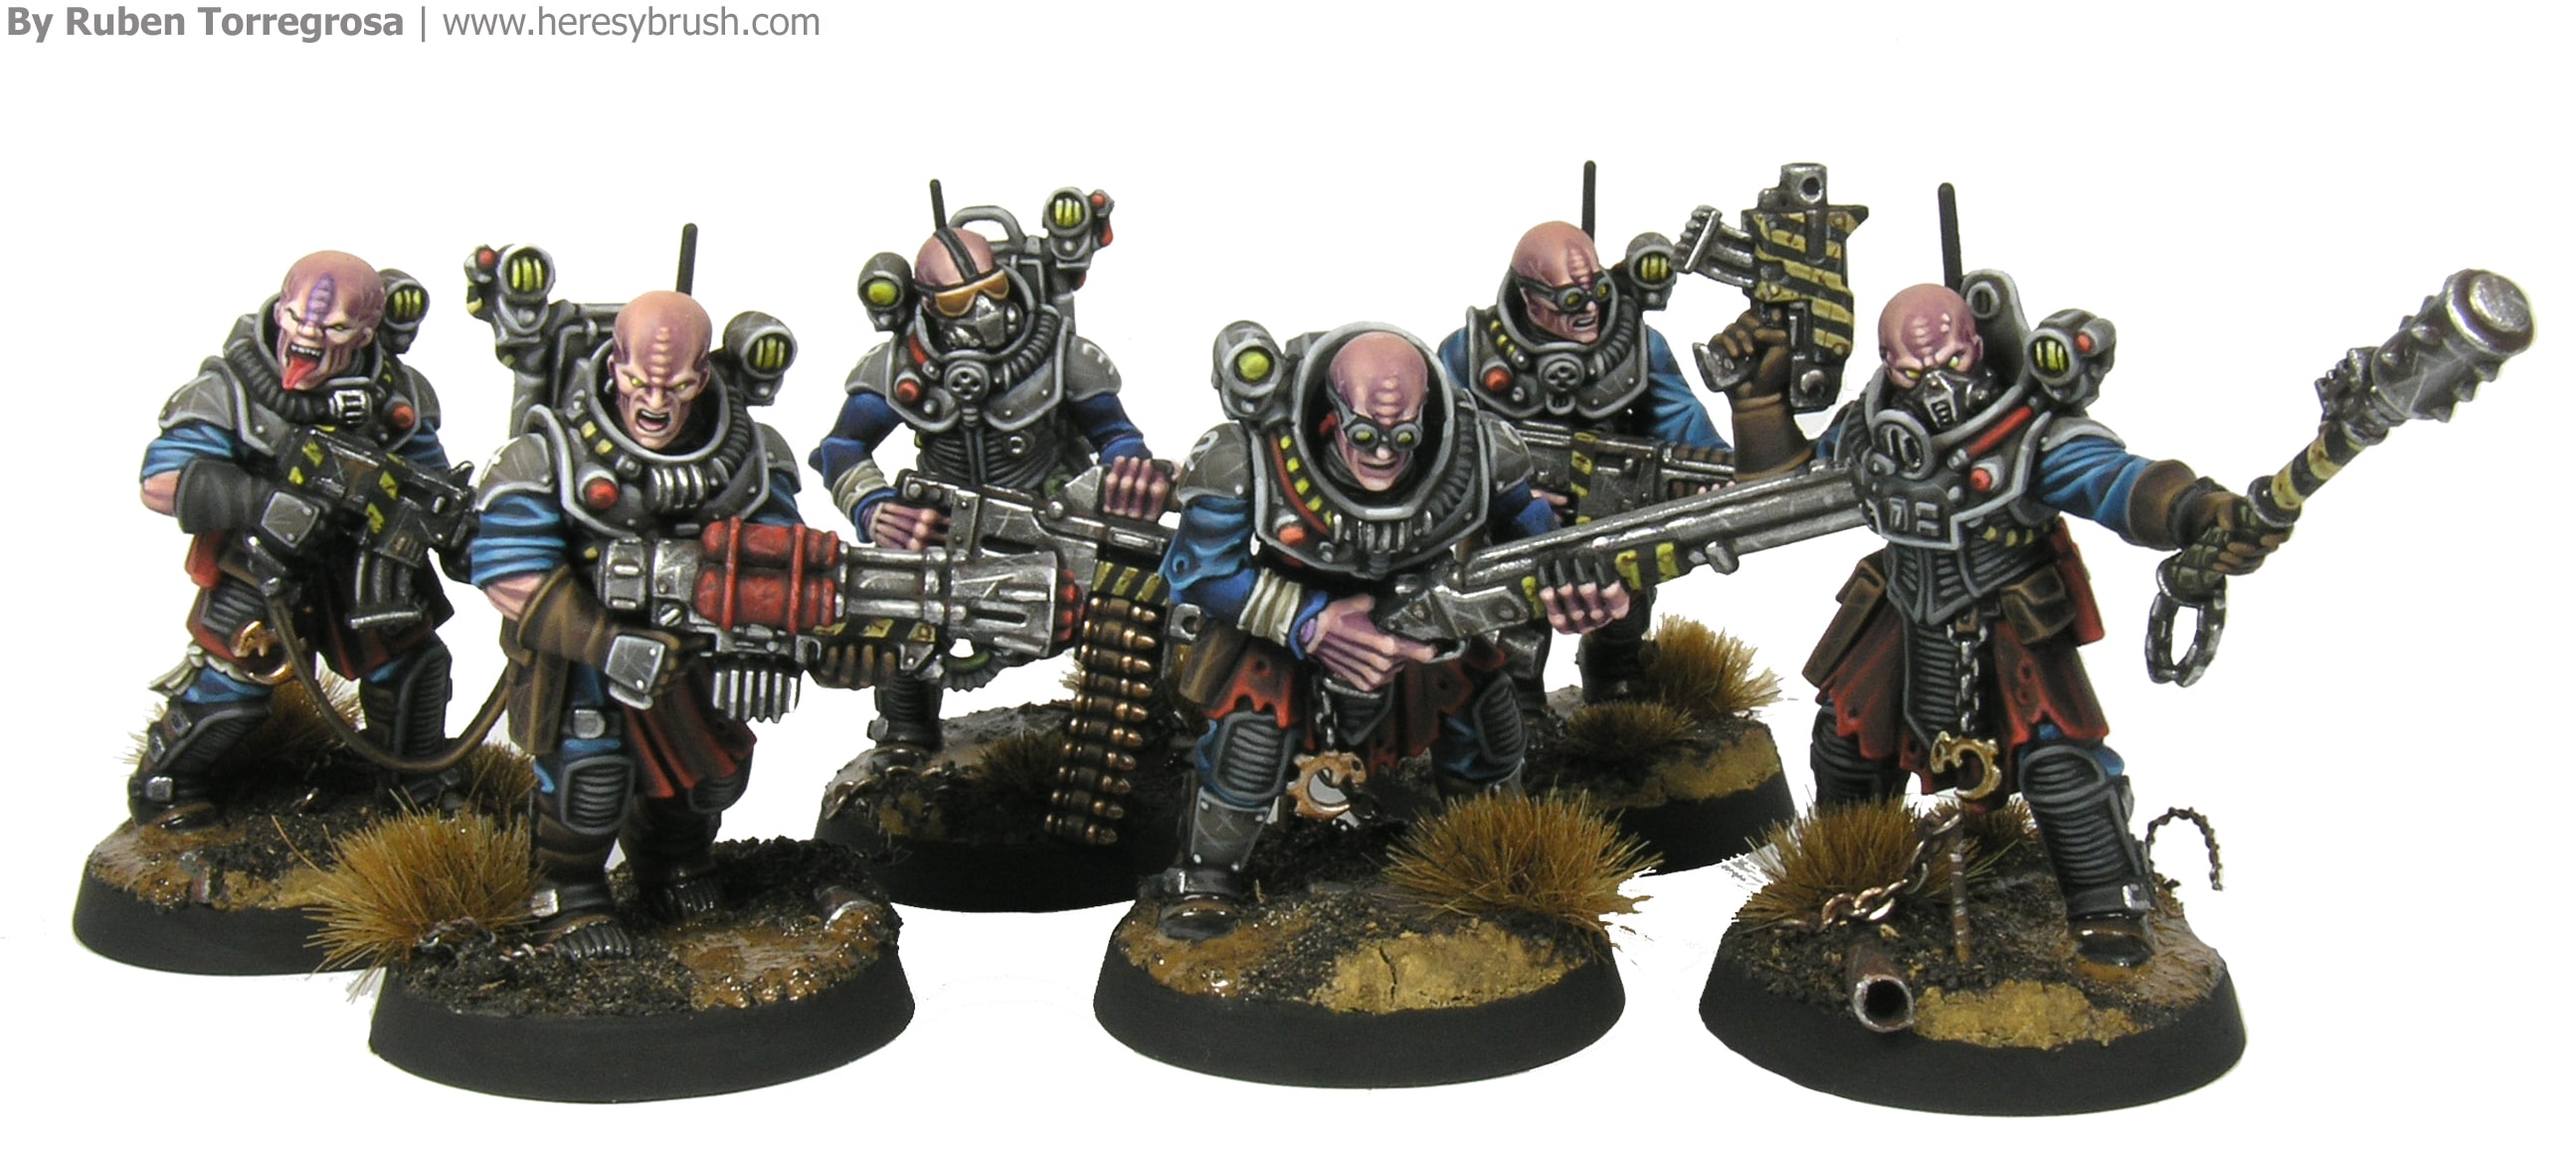
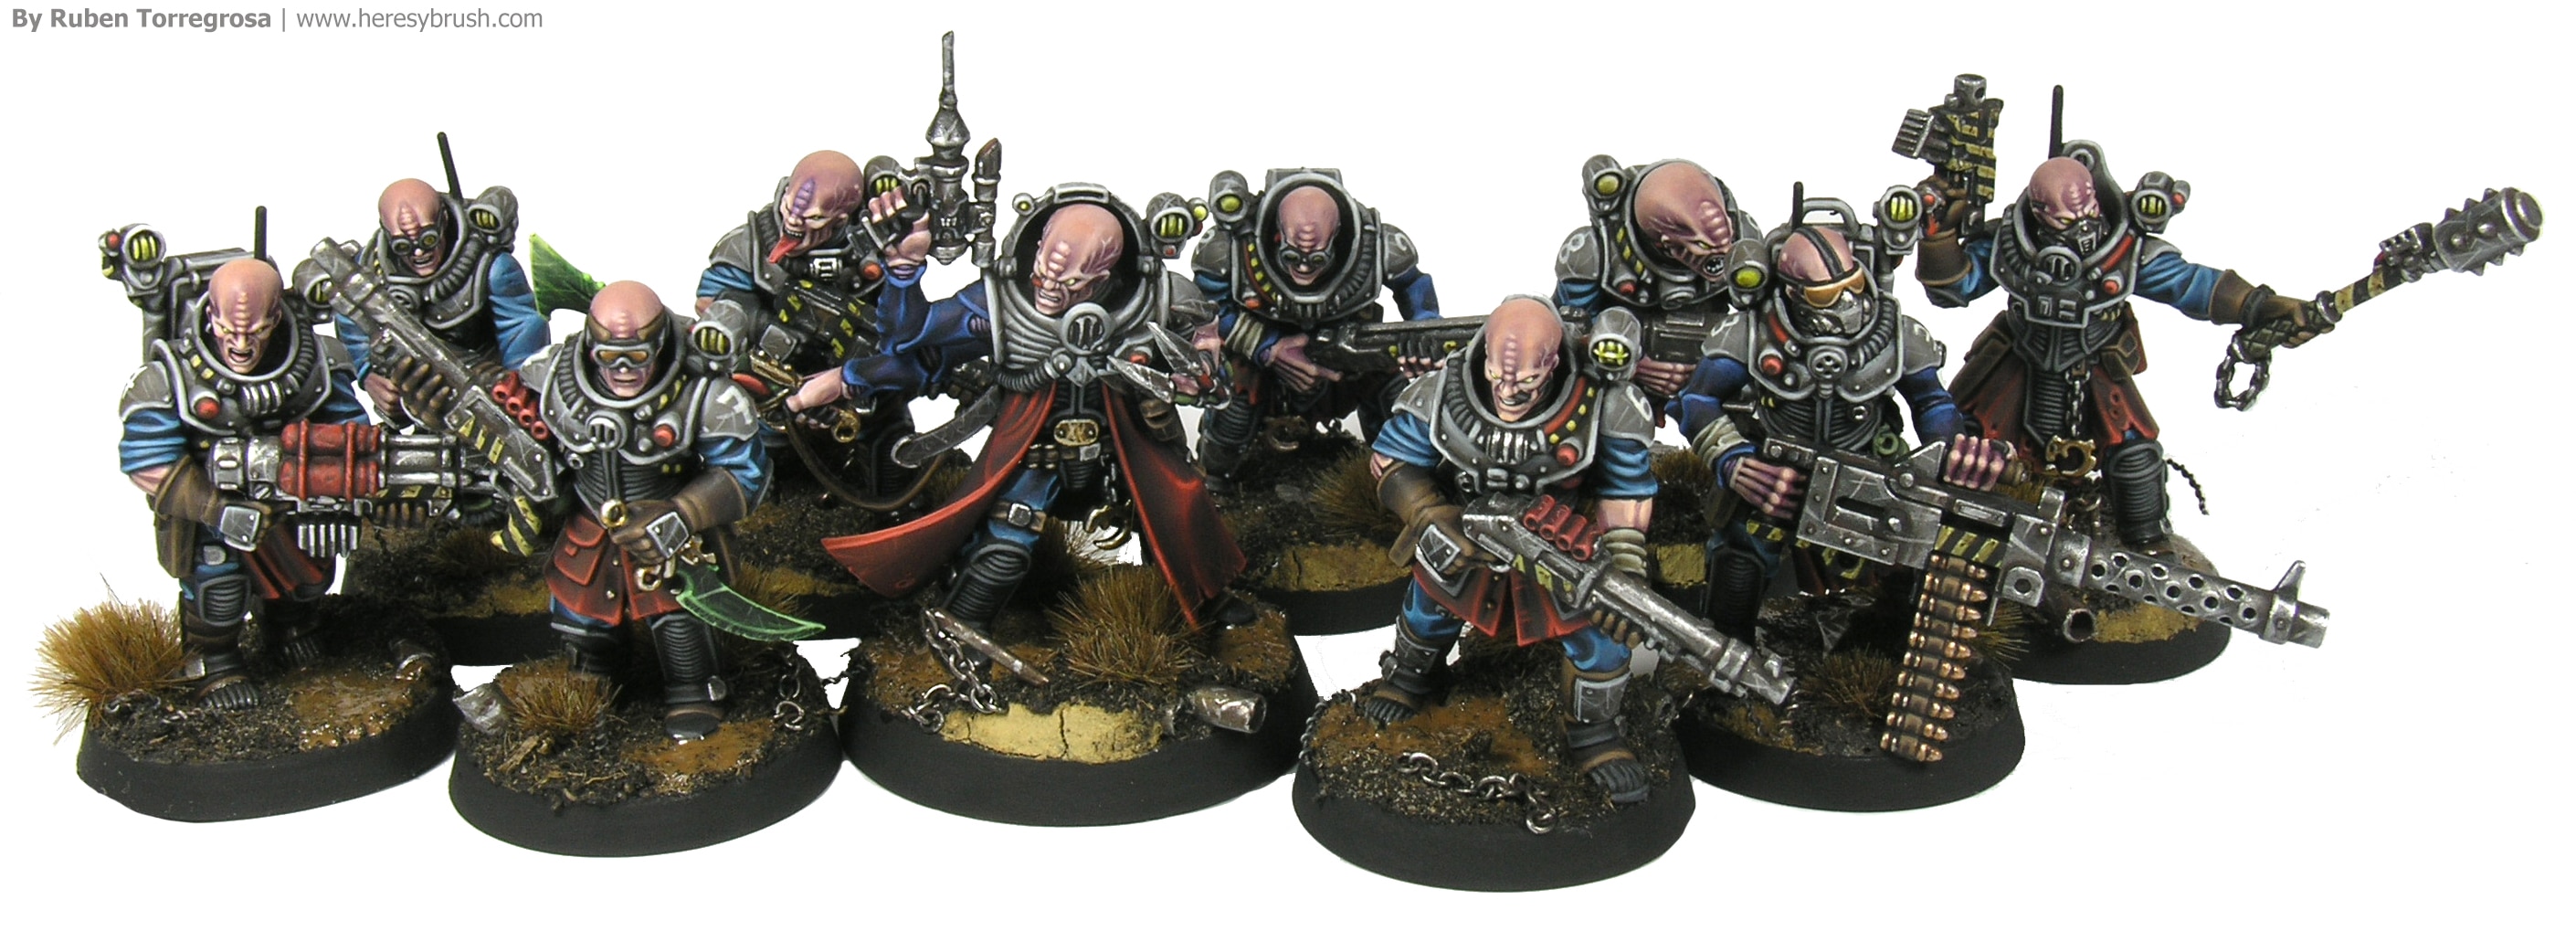
During the short –but amazing- visit of the ModelBrush.com team to Finland, we found a Shadow War: Armageddon box in the local shop. This was a grateful surprise as we thought it was absolutely sold out everywhere. After splitting it among the four of us, I was the lucky guy who obtained the rule book. Since I read the first news about this game I wanted to check it out. And now I had the perfect opportunity. But I needed a warband! At this point I remember that I had plenty of Cultists miniatures at home from the Overkill box, waiting to be assembled. I think that they were exactly waiting for this opportunity…since they fit amazingly well in the SW: Armageddon theme. After the MB guys left Joensuu, I quickly started assembling my warband; and I have to confess that this has worked as a time machine, as I felt the same as when I used to collect an Imperial Guard army long time ago. I love it! Thus, I wanted to share with you a bit of this enthusiasm with this painting guide. There is nothing new, since I just followed GW painting style. But I hope you like it!
Basecoat
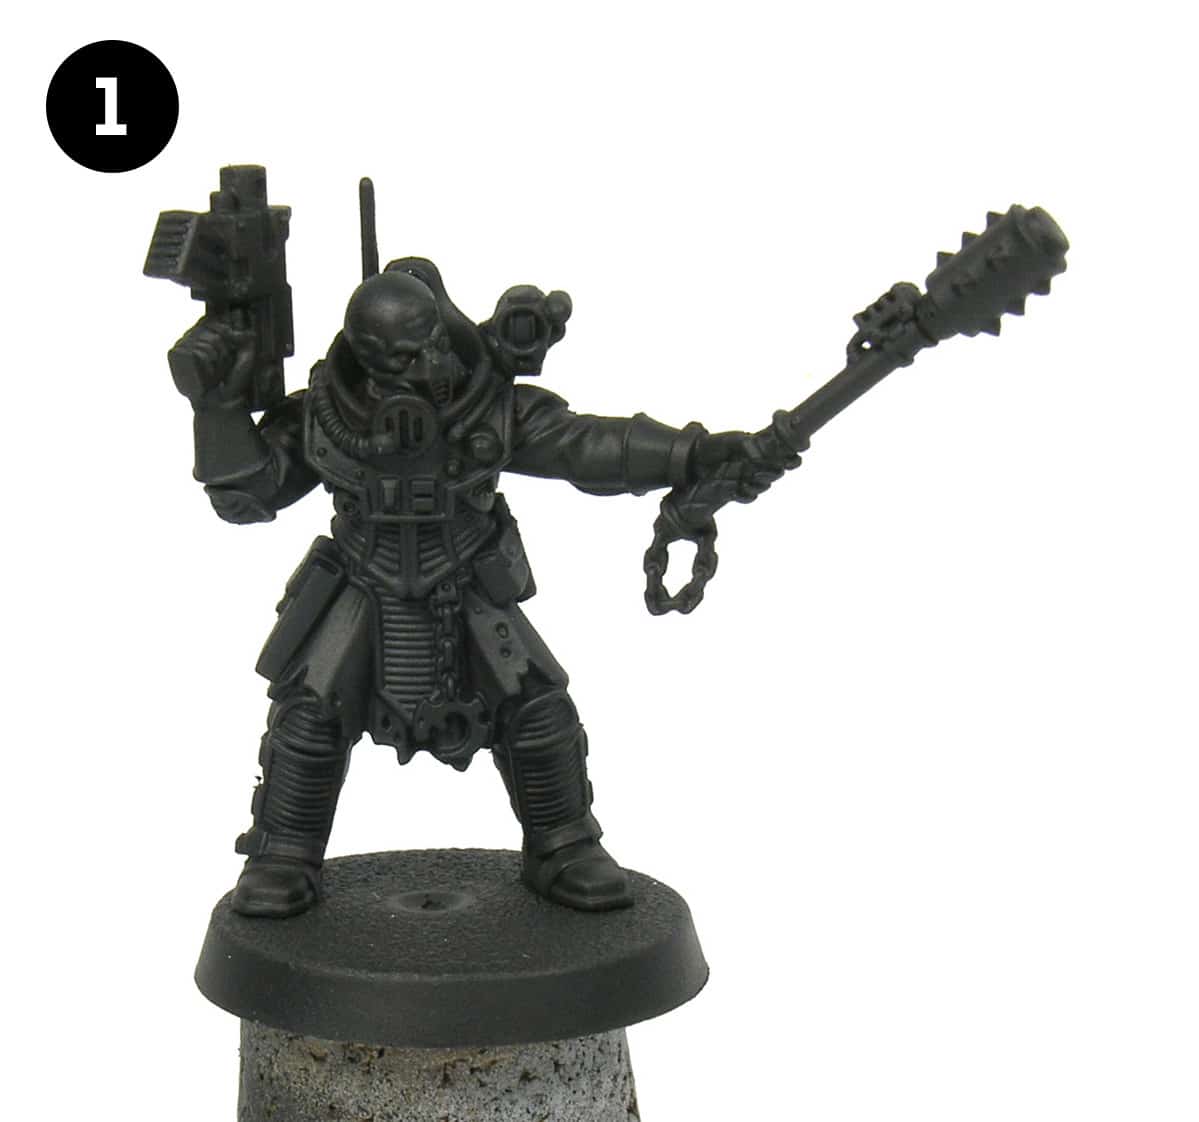
After removing the flashes with a modelling knife and assembling our miniature, we need to apply a primer. The primer is very important for two reasons, (1) will facilitate the subsequent application of the acrylic paints and (2) will increase the resistance of the paint (= if the miniature falls to the floor, you have more chances of preventing a chipping). I have chosen black because by using this color I am sure that all the details that finally I do not paint -because I cannot access with the brush or because I forgot them…- will be unnoticed. Another generally accepted reason is that any paint we apply on top of a black color will be slightly darkened. However, I do not think so taken into account the tiny surfaces we are working with. Here, I airbrushed the AMMO black primer. I recommend you to use either a spray or an airbrush rather than to use a brush. When using a brush you can leave some undesired marks!
Basic colors
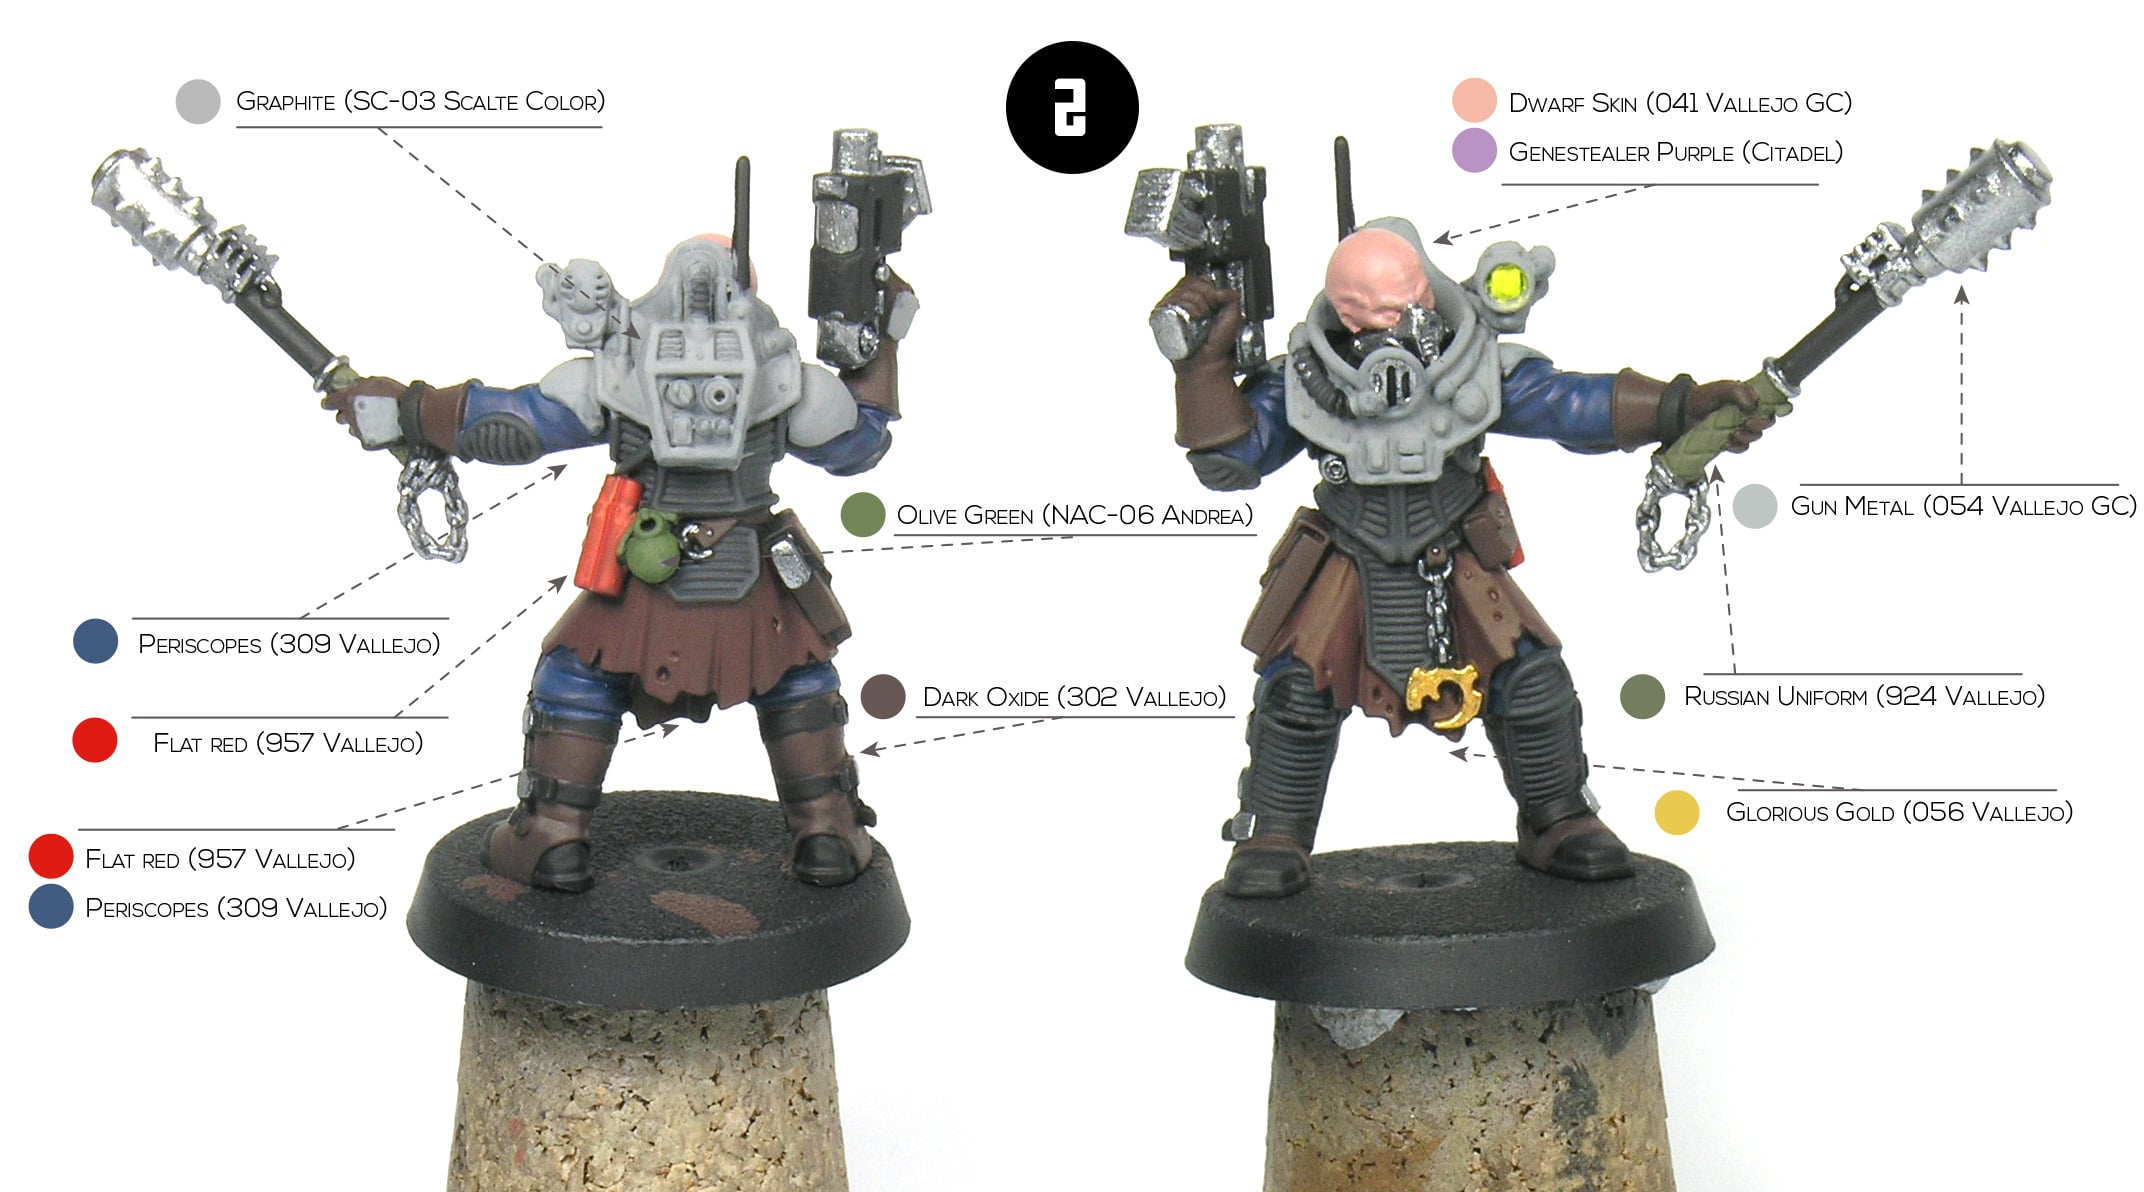
After leaving the primer drying overnight, we apply the basic colors on each part of the miniature. I prefer this way of working –instead of working part by part- because then I can freely use all the shades at the same stage. In the following picture you can see the colors I used. It is noteworthy to mention that you do not have to use exactly the same colors I used. Any similar color from any brand is perfectly valid. Remember to dilute a little bit the paints with water and do not accumulate much paint on the miniature. Work with thin layers and do not apply a new one until the previous one is absolutely dry.
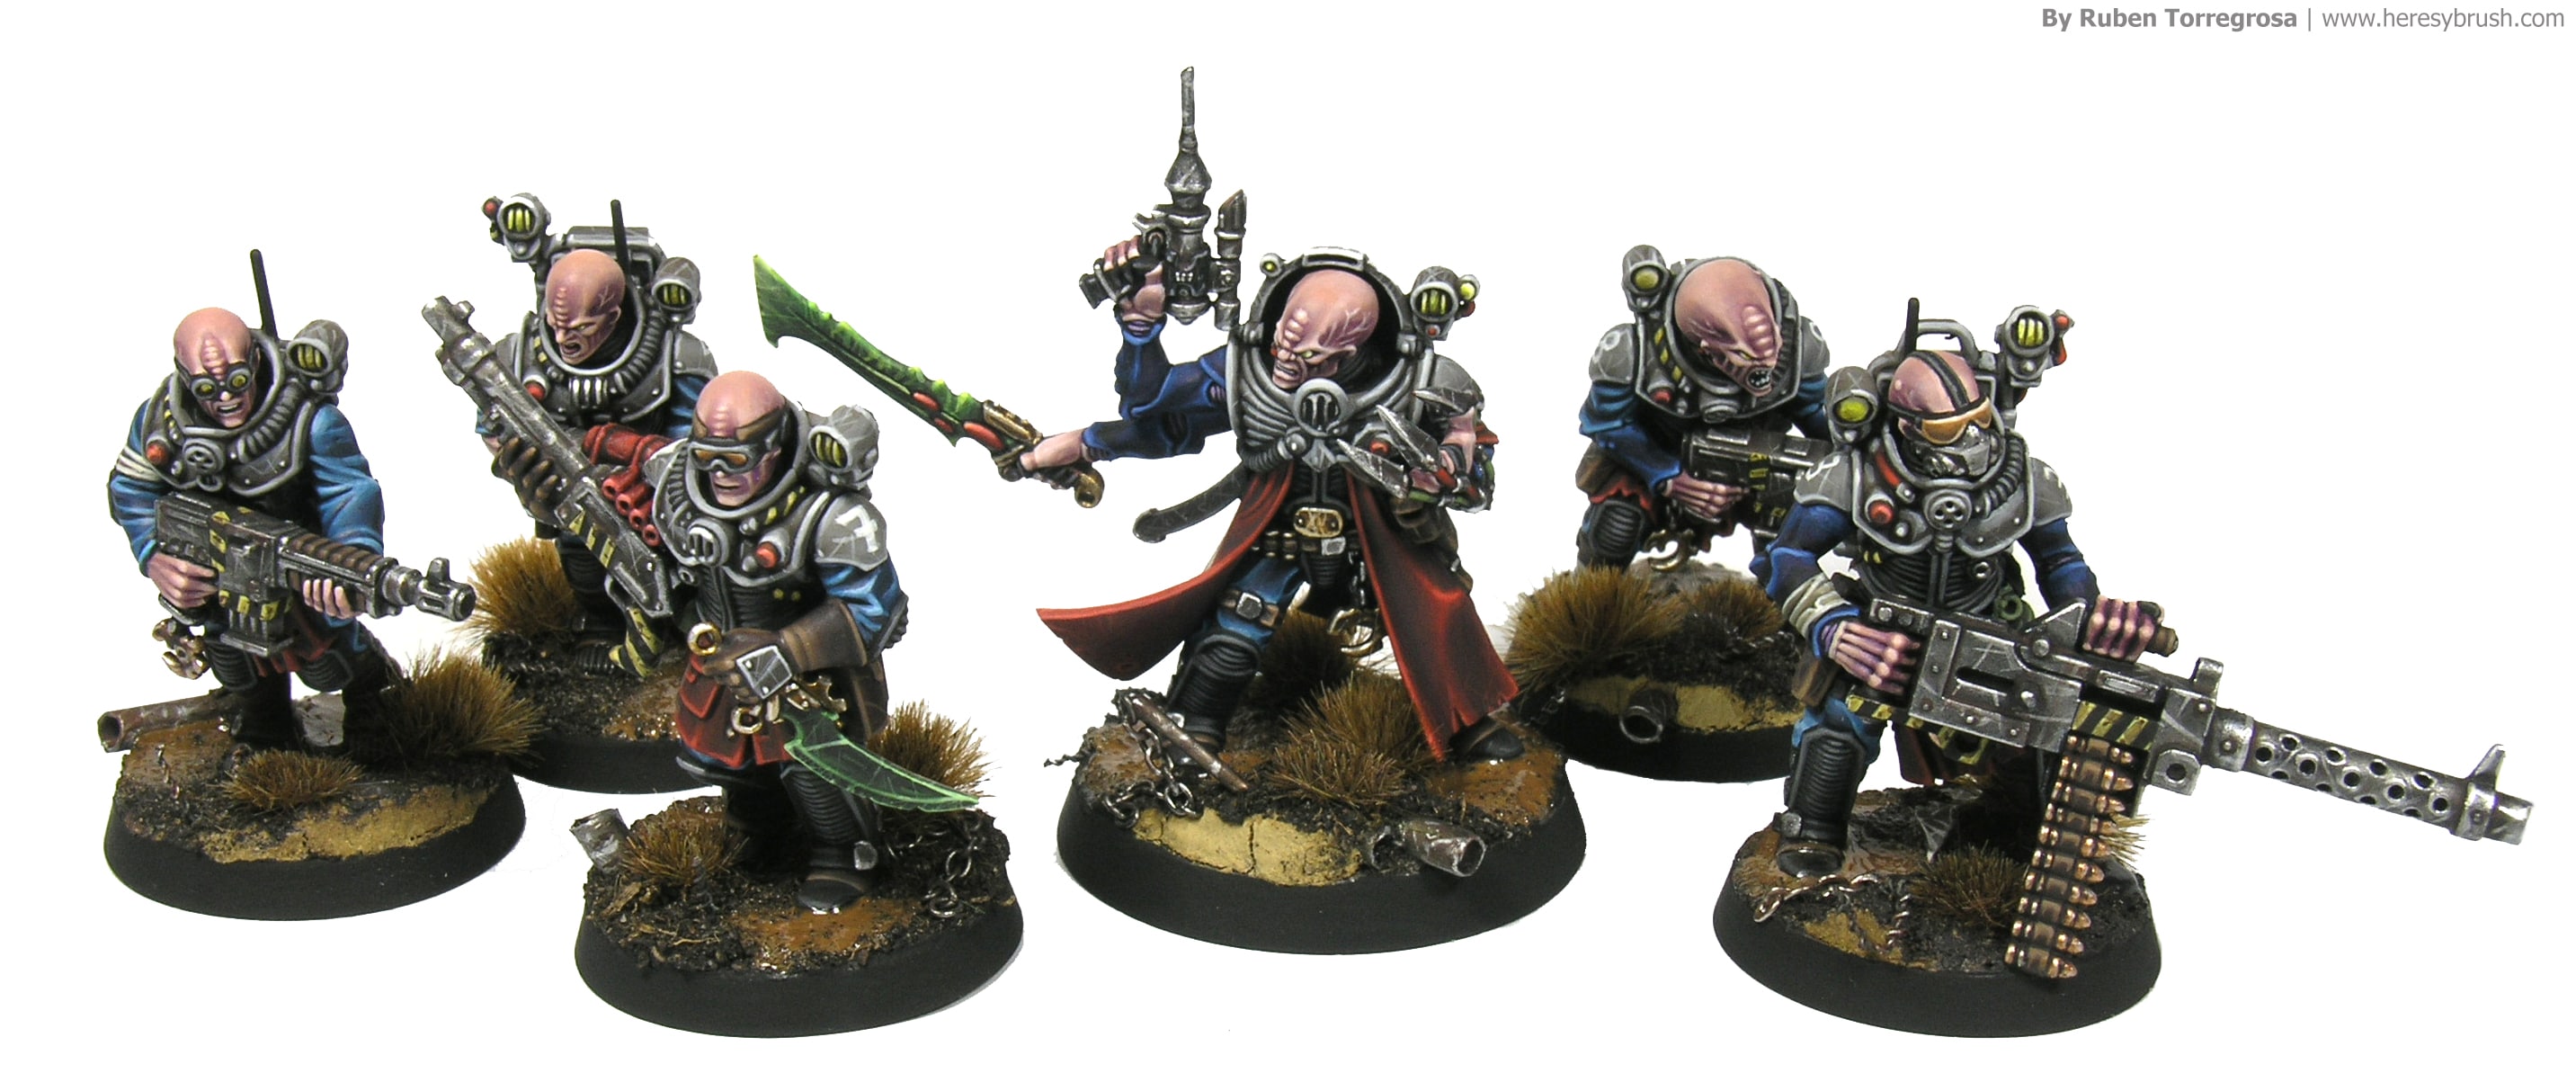
I would also like to discuss something regarding the choice of colors. I like to think that the “choice of colors” is as important as the technique or painting style we use to paint our miniatures. If we choose the wrong colors, even the best painter will obtain rather poor results. And the opposite is also true. I acknowledge that is difficult to determine what is fine and what is wrong in this regard; and definitely the experience influences a lot here. If you are not sure whether or not different colors fit together, you can always google “color theory” and check complementary colors, for example. Or you can try to find somebody´s work as an inspiration. For example, when I was contemplating how to paint these miniatures I took a look at the Genestealer cult codex, and I found an amazing painting scheme done by the HEVY METAL team which works amazingly well in these miniatures. Therefore, I decided to use it after changing only minor details.
Shades
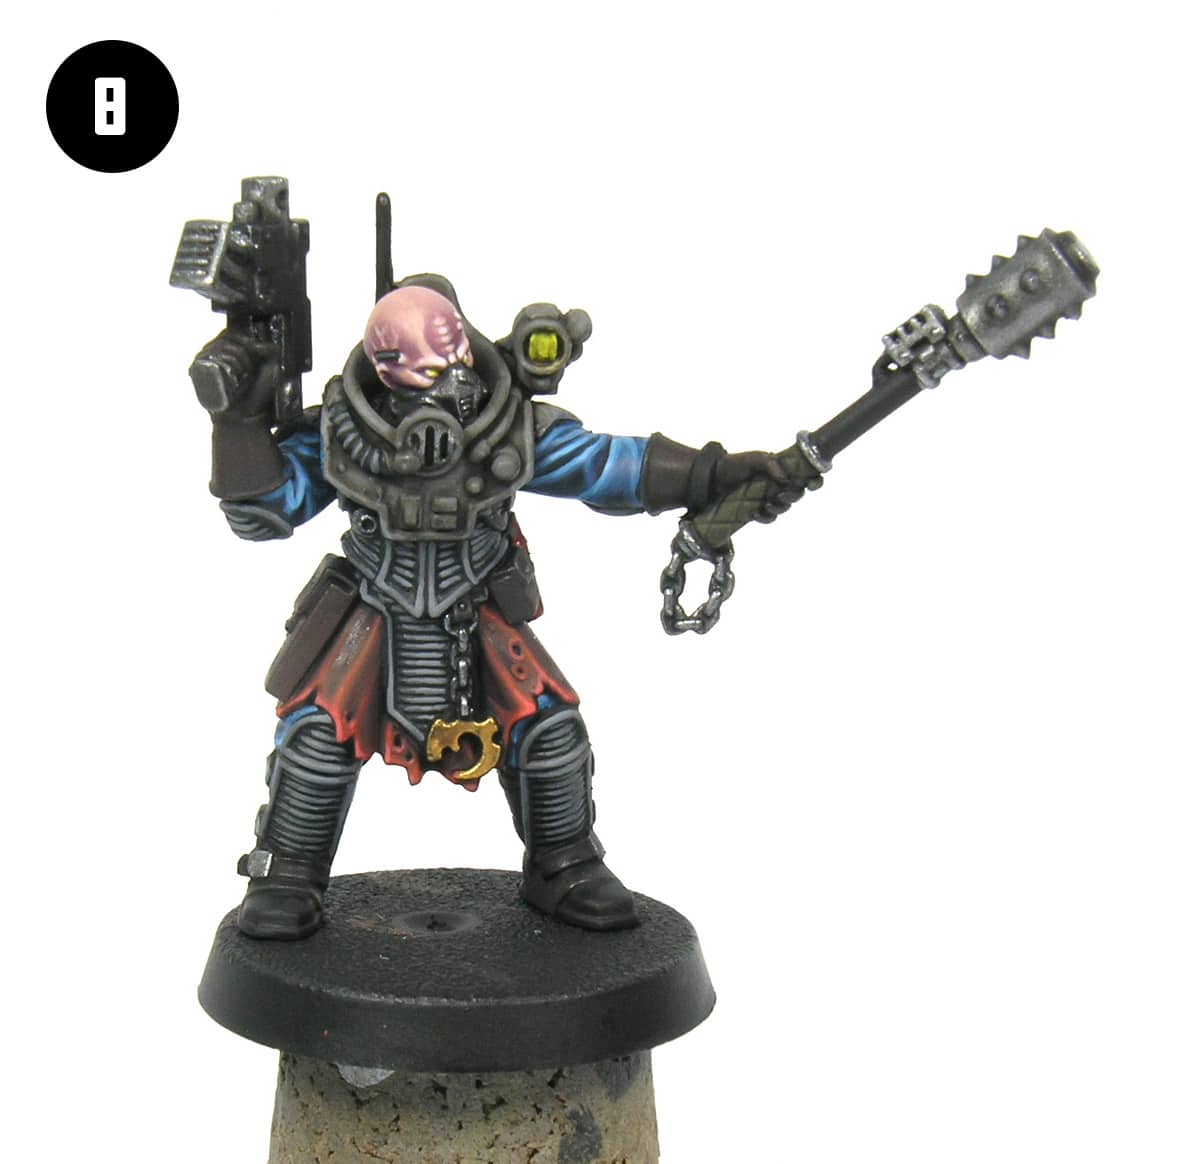
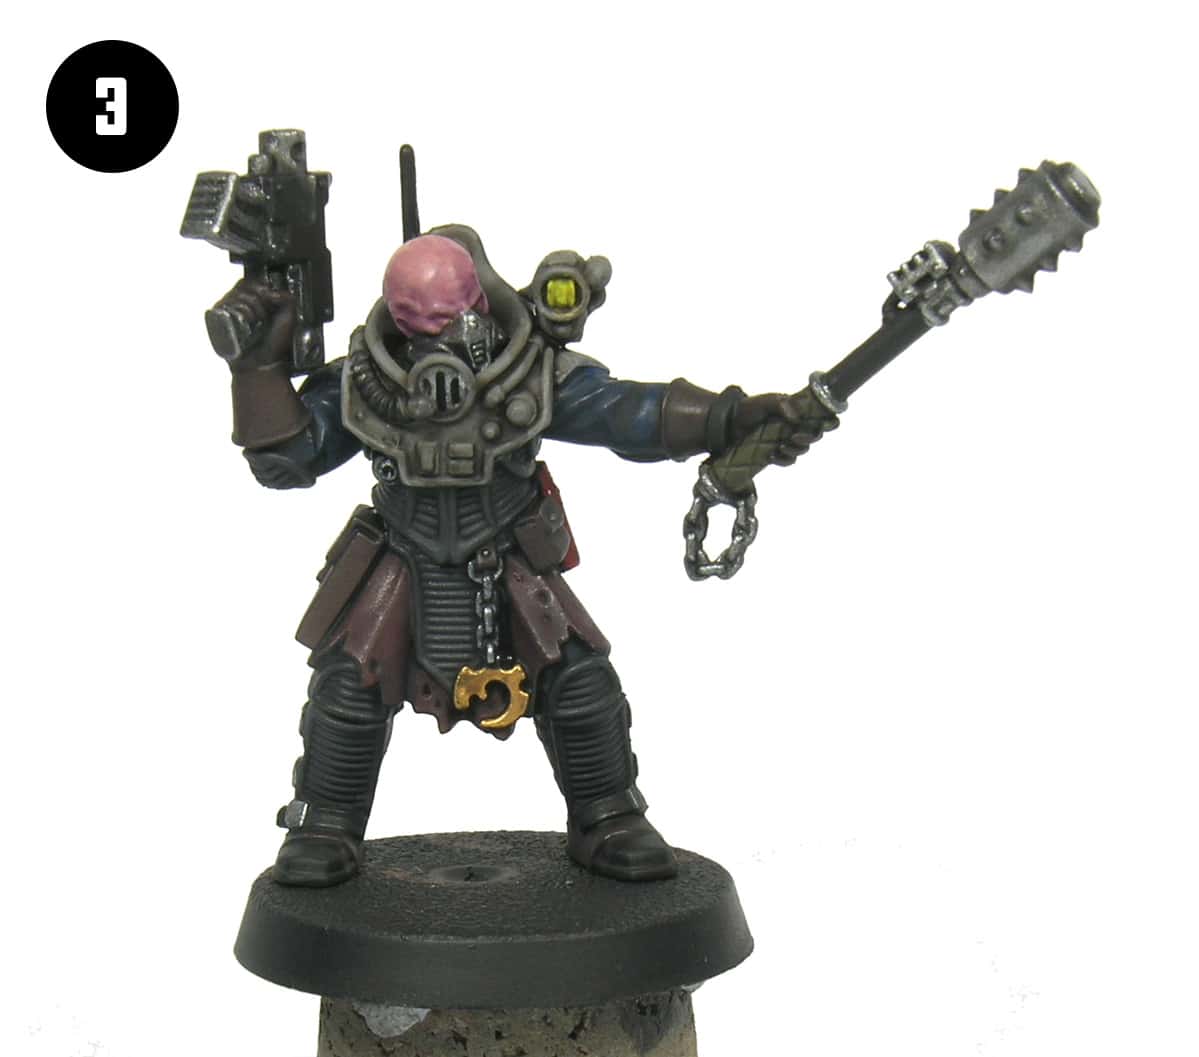 Now it is time to use the magic of Citadel paints: the shades. Once we are sure that the previous work is totally dry, we apply the shades with a thick brush trying to not accumulate much paint. It is very important to homogeneously distribute the shade around the element we are painting. Avoid huge accumulations! I have used only three shades: Druchi violet, Agrax earthshade and Nuln oil. As you can imagine, we use the violet one only on the skin areas; while Nuln oil is used to cover all the other colors BUT the light grey carapace armour. In this part we use a mix of Agrax and Nuln in the same proportion to add a slight brownish tone that simulate a worn effect.
Violet skin
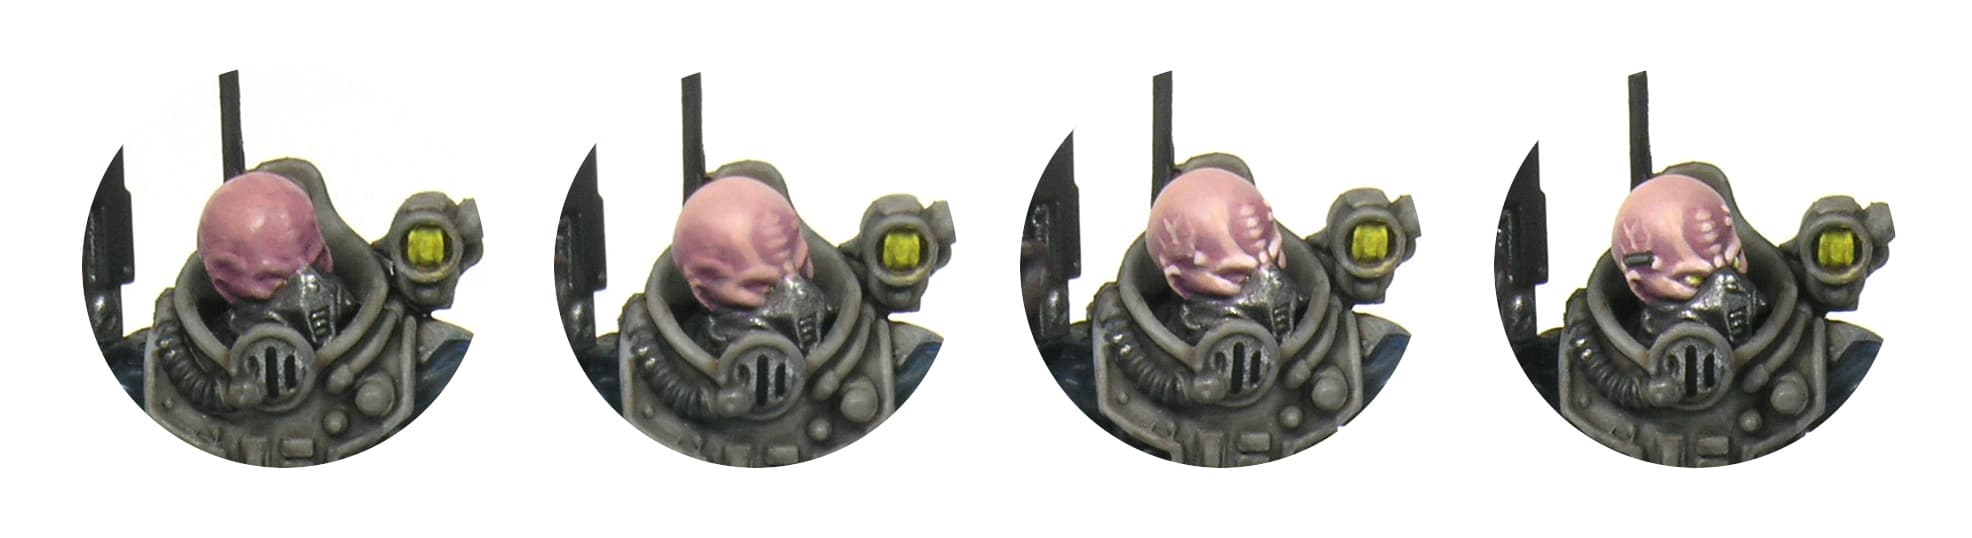
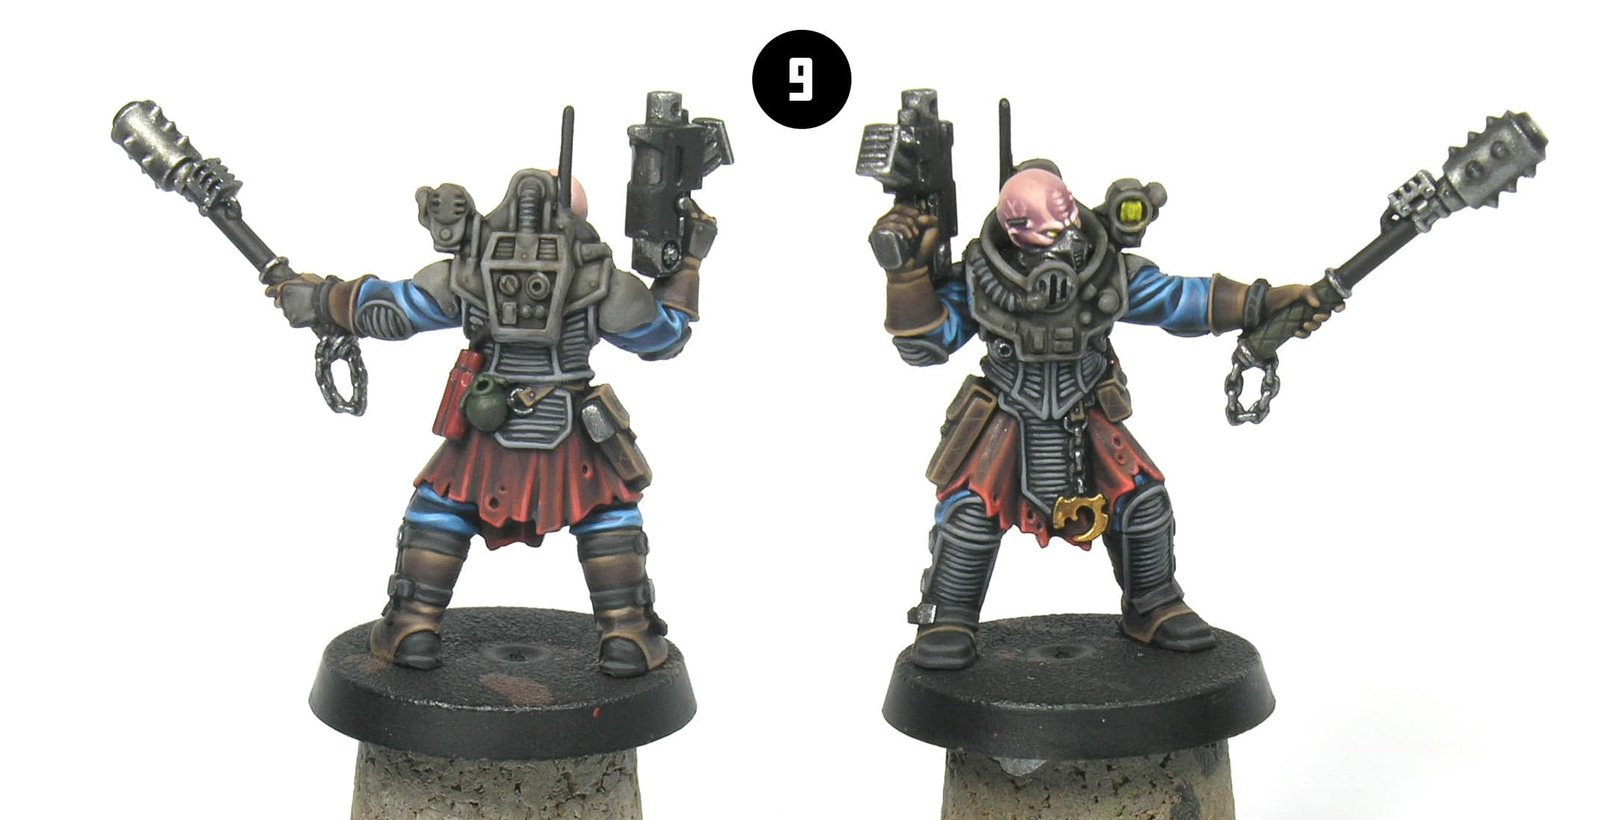
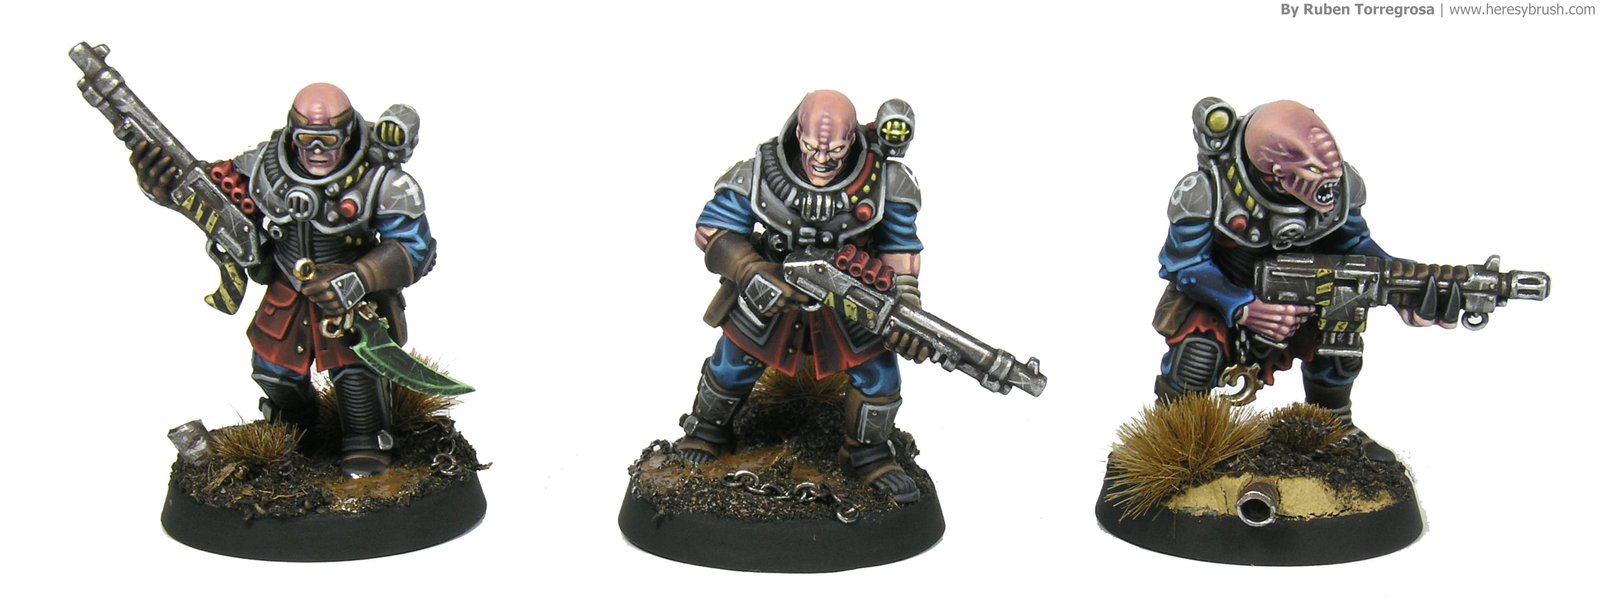
If you remember, we started painting the skin areas with a mix of Dwarf skin 041 and Genestaeler purple in a 1-to-1 proportion and then we applied the shade Druchi violet. Note that we do not apply this shade on the nape. We only want to mark the details in the face and hands.
Once the shade is dry, we use again the mix of Dwarf skin and Genestealer purple (1:1). We add a bit more of water to work with semi-transparent layers and then we start to recover the original color on the reliefs while leaving the shade only on the recesses. Take a look at the picture. We essentially recover the areas around the eyes, ear and sides of the forefront, besides the “genestealer” crest. It is very straight forward: we work the most prominent areas. Additionally, we work a bit the transition on the nape.
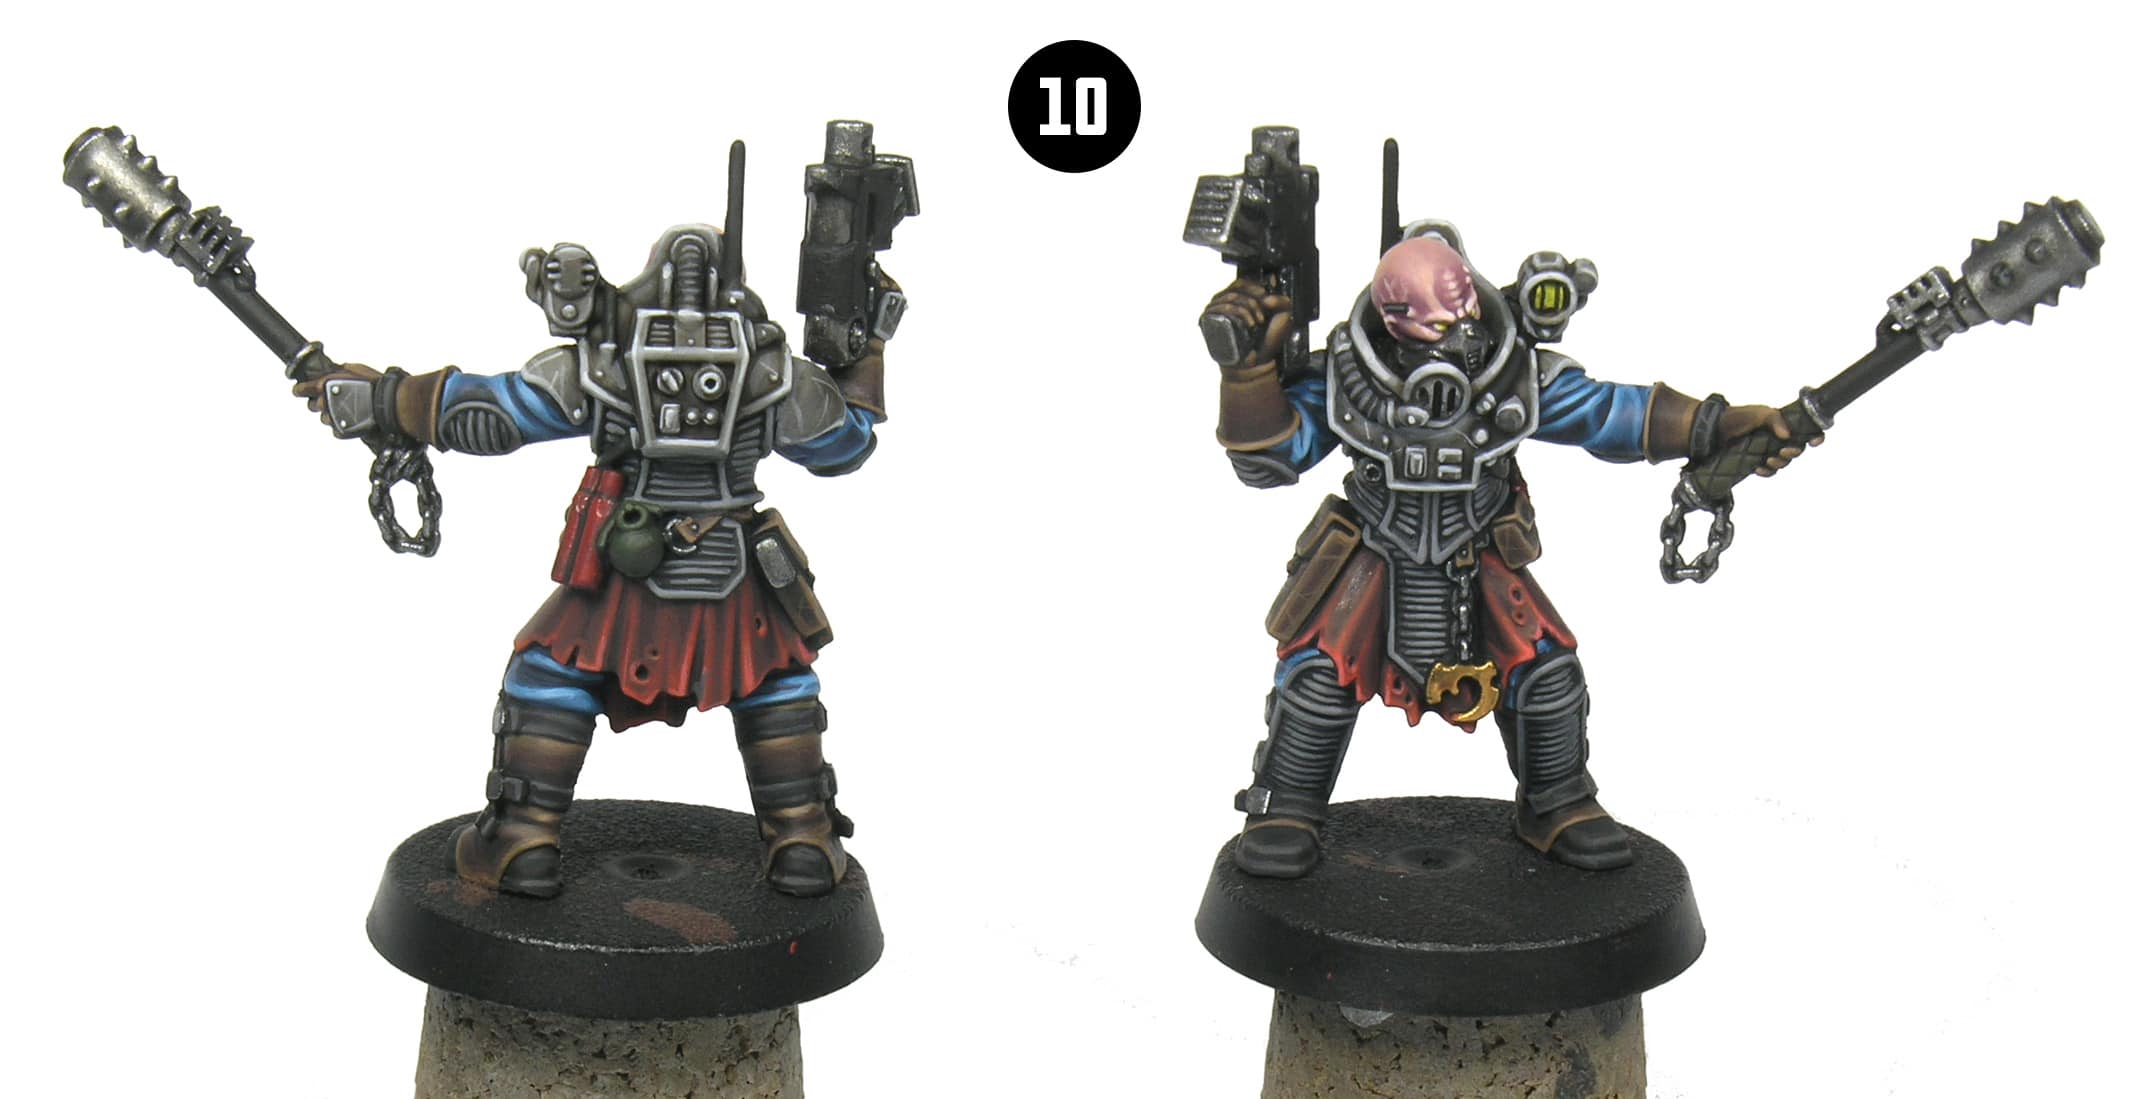
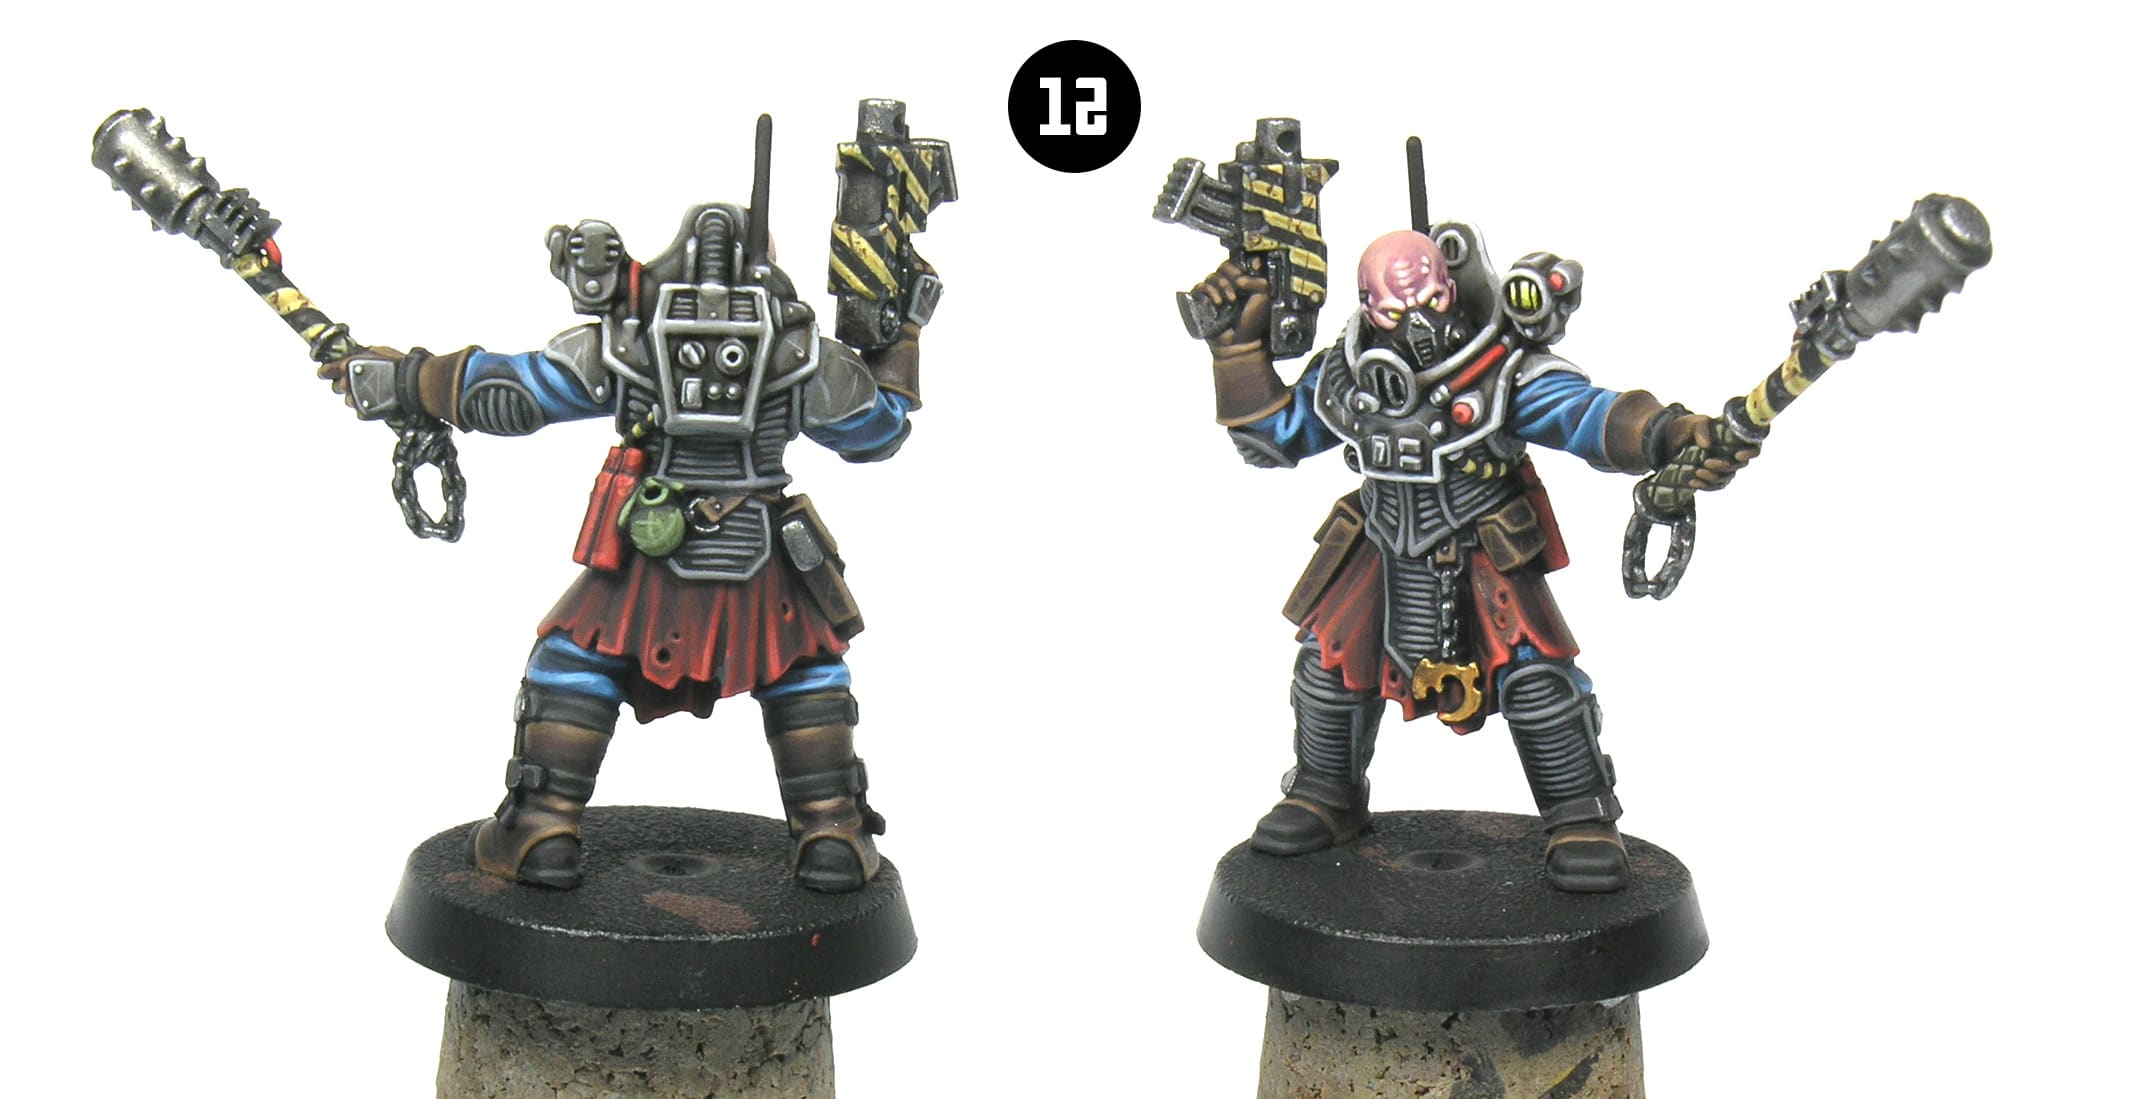
Now we add a bit more of Dwarf skin to the same mix to reach a 2-to-1 proportion; the double of Dwarf skin. Again we add some extra water and then we start focusing the lights to the more prominent areas. It is very important to do not cover the previous layer or we would lose the gradient effect. When applying the highlights on the face we should pay special attention to the eyebrows, nape and middle part of the “crest”. Furthermore, we can use this color to paint some fine veins on the sides using a thin brush. Finally, we add an final highlight by adding a bit of white to the previous mix (let say: 2:1:1; D. Skin : D. Violet : White, respectively) and carefully we paint a really small area on the extremes of each highlighted part. We can use exactly the same recipe to paint the hands, but focusing the light on the knuckles, joints and finger tips.
To finish the head, we paint the eyes with yellow and add a light with a bit of white on the sides. I painted the inserted tube with black and applied a highlight with grey; but you can use whichever color you want.
Blue
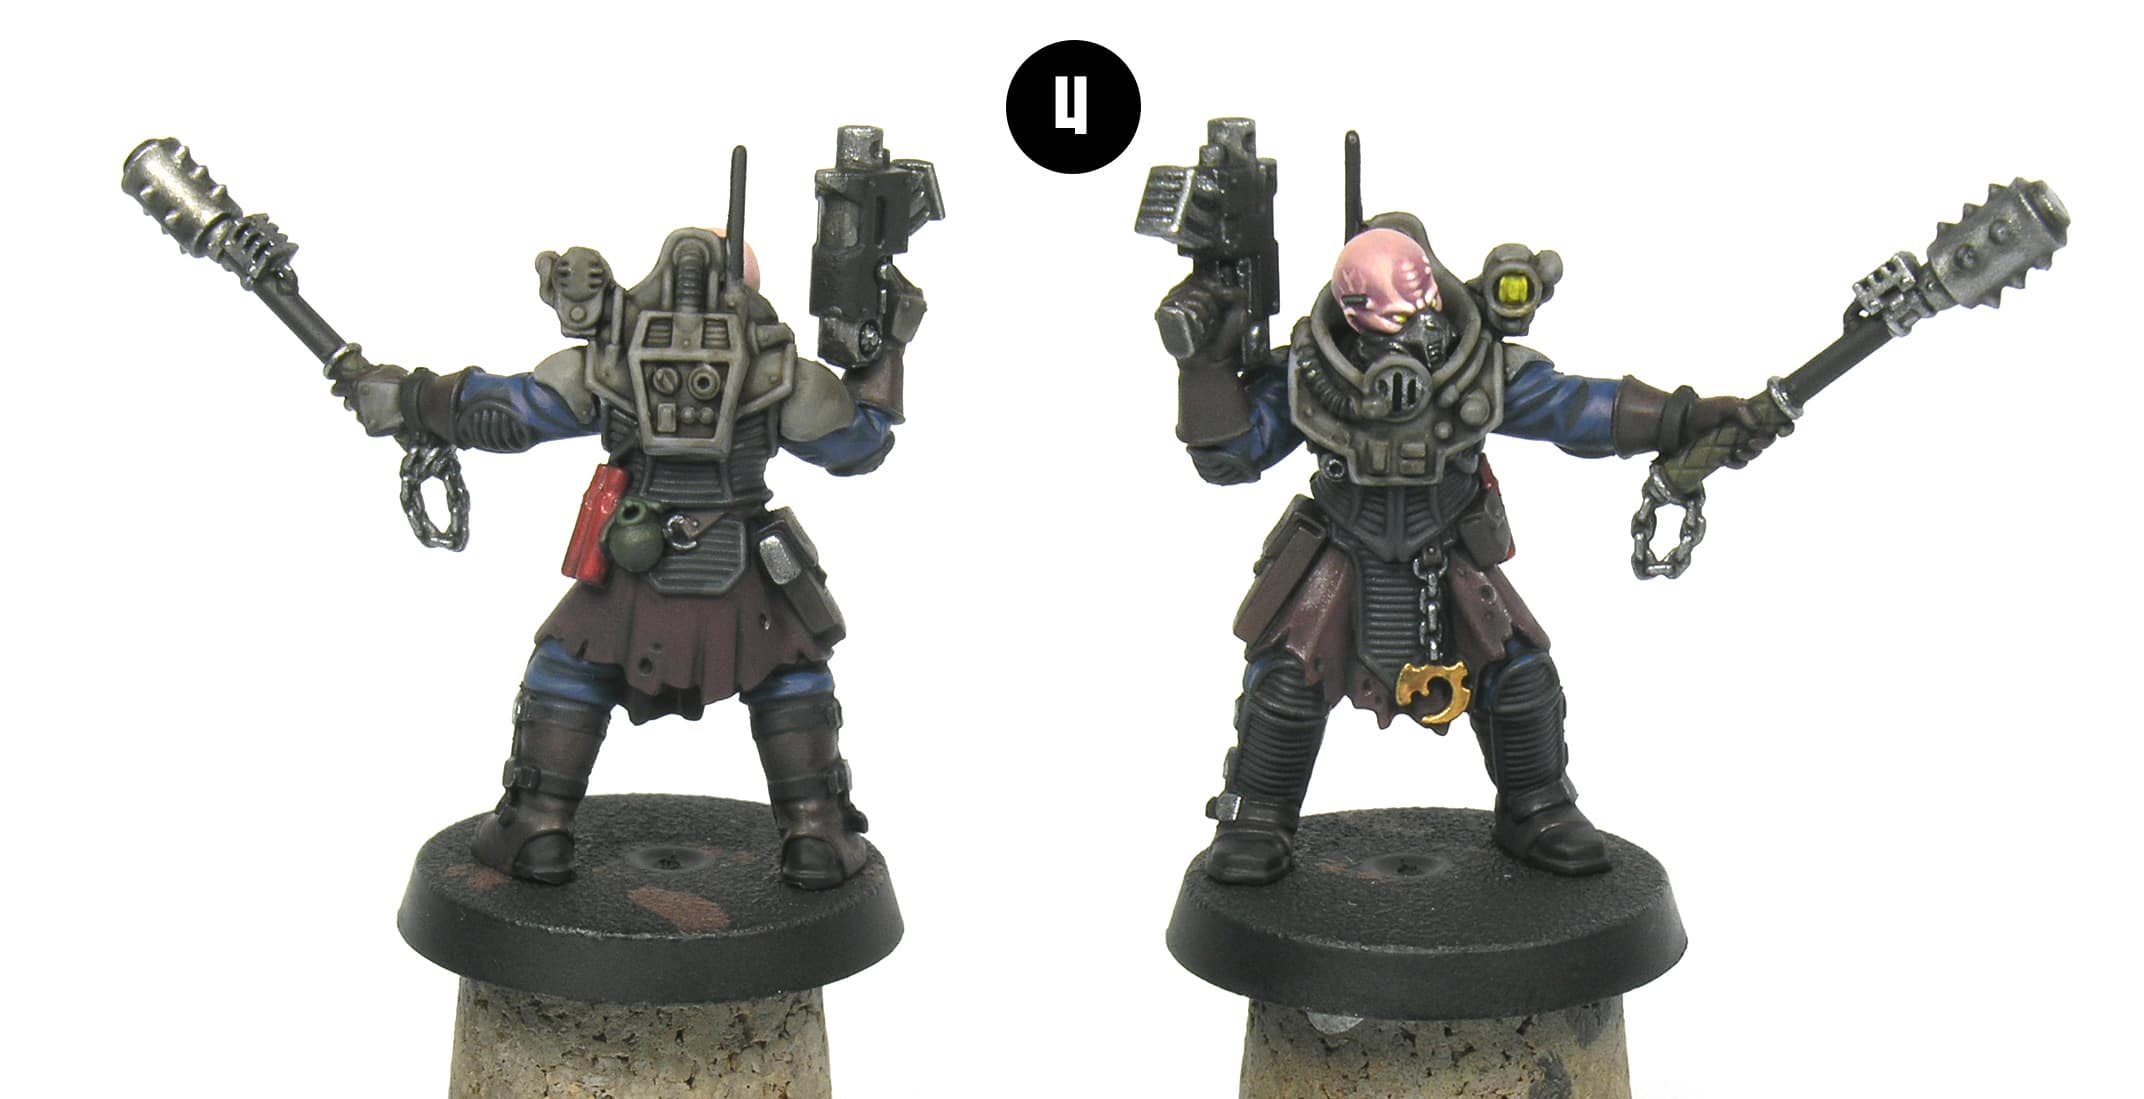
First and foremost, note that I have not used blue here, but a sort of turquoise. I did this in a purpose and that is why I chose Periscopes jar from Vallejo. First we need to recover this color from the shadening. We mix Periscopes paint with a bit of water and start working on the wrinkles, leaving the dark color on the recesses (Pic 4). Next, we mix Periscope with white in the same proportion (1:1) and apply the first light focusing on the reliefs (Pic 5). Remember, do not totally cover the previous layers. Finally we apply a final or maximum light by adding a bit more of white (1:2, the double of white) and with a thin brush apply a thin line around every wrinkle.
A couple of when applying the highlights: (1) remember to always thin the paints with a bit of water. This helps a lot. It makes the paint more amenable and also helps to create a gradient effect and soften the contrast between layers. (2) If you do not know where to apply a highlight, do not worry! Neither do I! Just follow the sculpted lines in the miniature. It is very straight forward especially in these cultists with very small surfaces. On the other hand, sometimes you can combine or put together a maximum highlight and a maximum shadow to create an interesting and striking effect. For example, take a look at the inner part of the elbow of the arm holding the club. This technique is widely used to paint tanks and is known as “color modulation”. However, do not abuse it since it is very unreal!
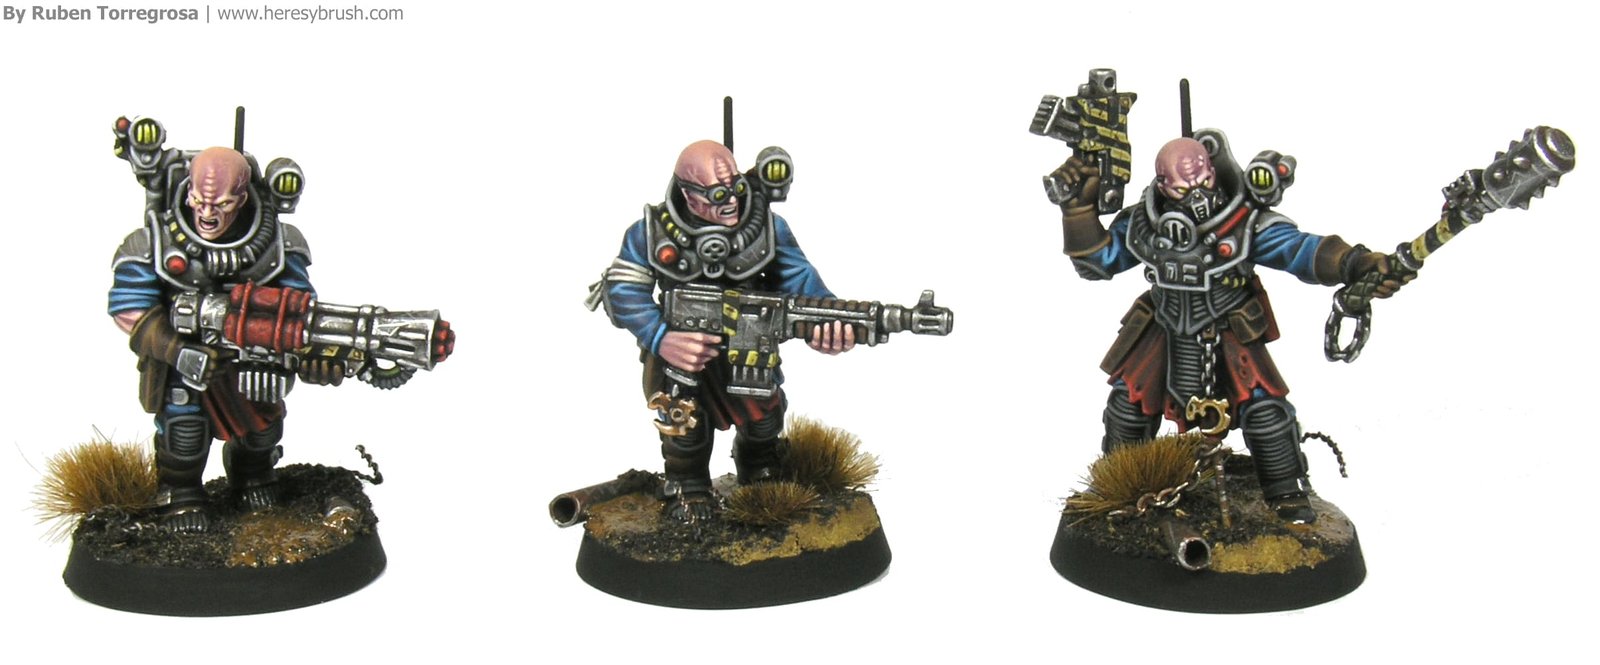
Although this miniature does not have any chitinous tissue (a vestige of its cousins the pure strain genestealer), some of the hybrids actually do have; such as my guy carrying the heavy stubber. To paint these parts we can use Navy blue (SC-54, Scale Color) and Flat blue to work on the highlights. Do not use white! We want a very different blue color from the blue we use on the fabric, and this is one way to enhance the effect (remember that we used white to highlight the color Periscopes). The Flat blue is enough to highlight the very dark Navy blue color.
Red
In order to paint the red tunic we start mixing Flat red with Periscopes (the color we used for the blue). I wanted to obtain an obscure and “old” looking red tunic, and blue works very nicely when simulating the shades in a red fabric. Once again, first thing we need to do is to recover the base color after the shading effect. We use a 1:1 mix of flat red and Periscopes (Pic 6), and then we increase the proportion of flat red in the mixture until we directly use flat red. Additionally, we can apply a final highlight with Albedaran red (SC-38, Scale Color) (Pic 7). Here, the technique to apply the highlights is a little bit different: we have now a big surface, mainly flat, with some vertical wrinkles. It is even easier than before! What we can do here is to apply vertical strokes, leading the highlights to the lower part, as you can see in the pics. Pay attention to the gradient effect: the upper part is darker while the lower part is very light. To achieve this effect it is very important to do not totally cover the previous layers!

Mining suit protections
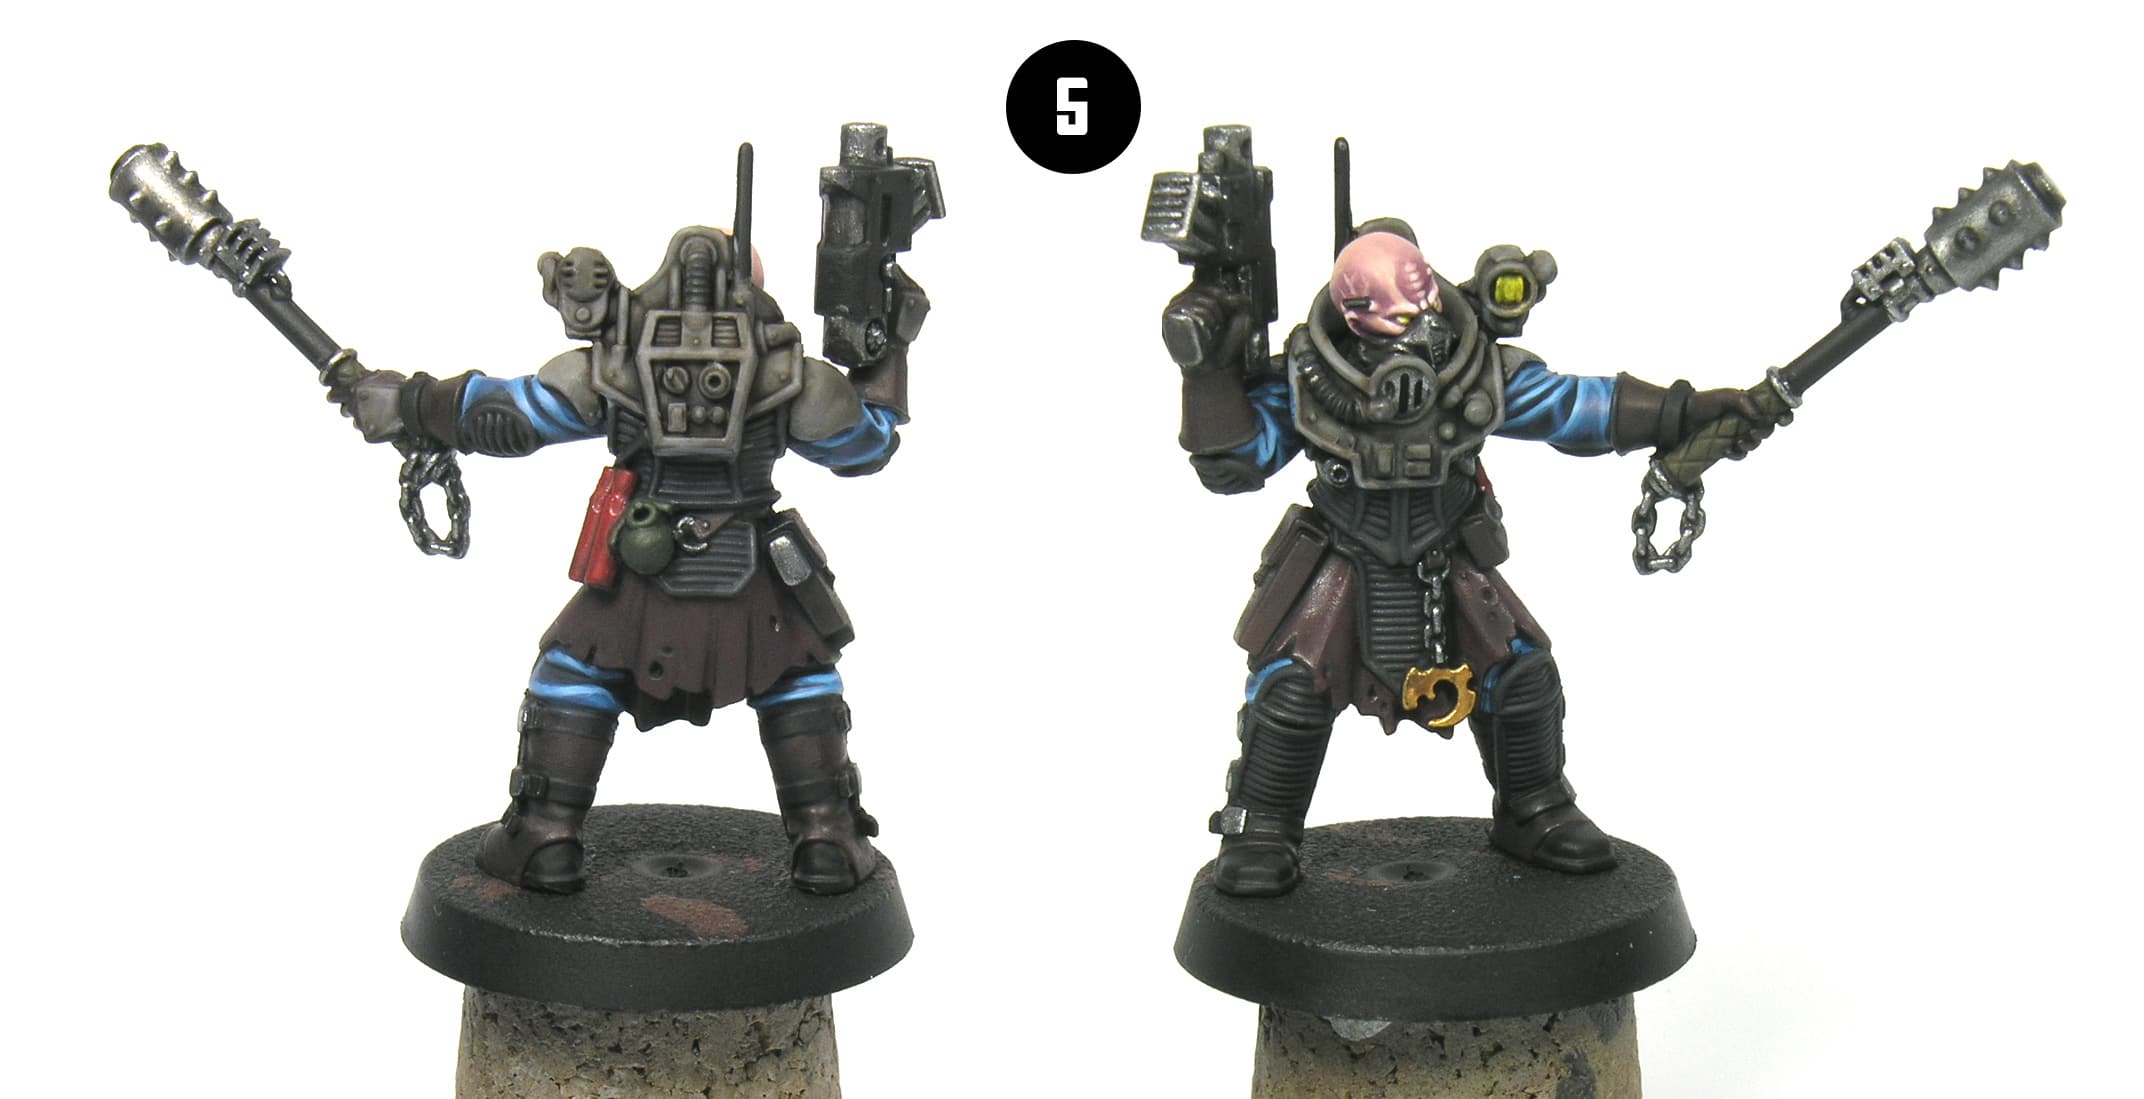
 To paint the “striped protections” first we need to stand the inner lines out. Actually, we already did this when we applied the shade. Now, we only need to work the outer lines. First we use Dark blue grey (867, Vallejo), and then we apply a mild highlight by adding a bit of white. When highlighting, we need to distinguish two parts in these protections: the stripes and the edges. To paint the edges we can use the brush horizontally (instead of using the tip we use the side part of the bristles) allowing us to obtain a perfect straight line. On the other hand, to paint the stripes we mainly use the tip of the brush (although in some circumstances we can use the previous technique) and carefully we paint the central part of the stripes, leaving a shading effect on both sides. We can use this recipe to paint the fluted tubes on the carapace armour.
Leather
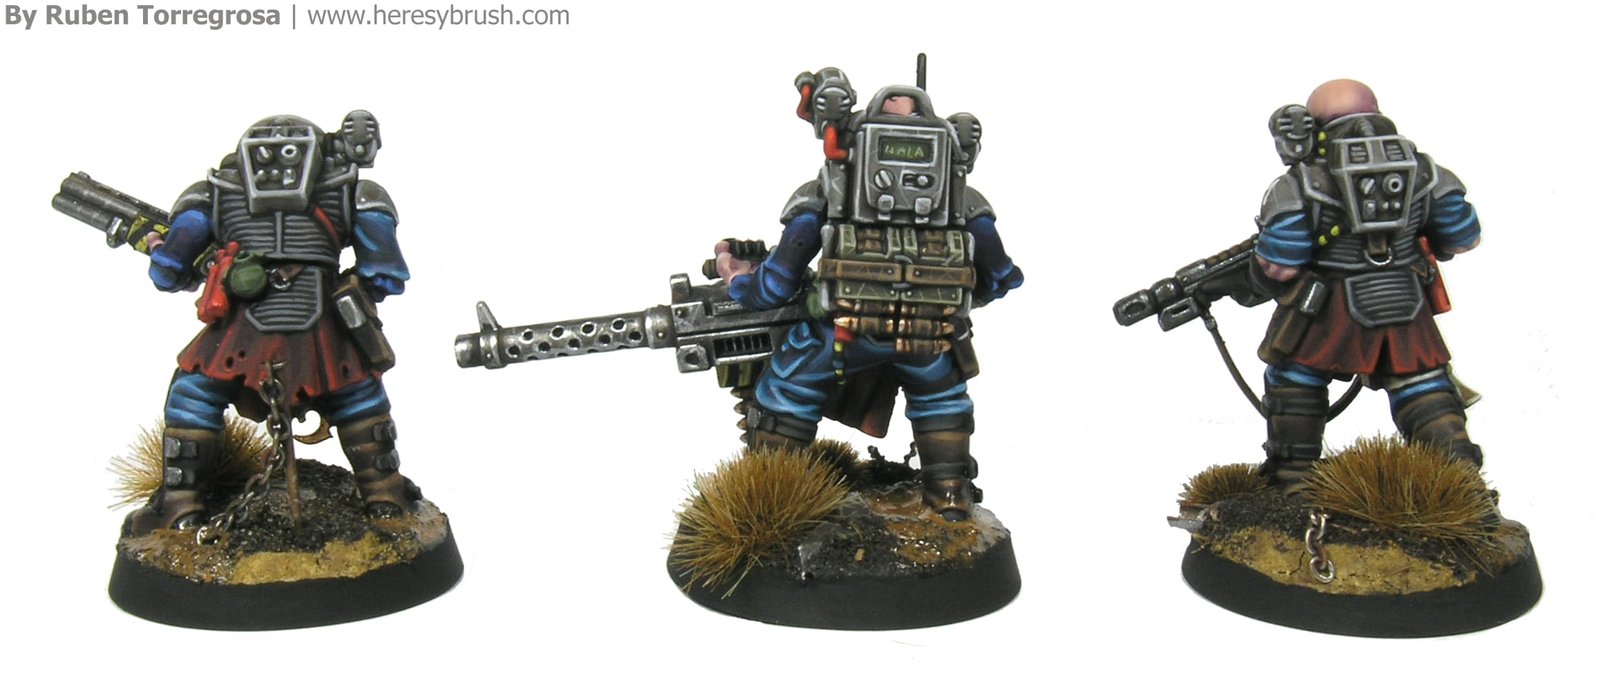
In my painting scheme I decided to use dark brown leather on the boot’s leggings, gloves, holster and pouches, as well as any sling coming from the armour; while I used black to paint the boots, the slings around the leggings and the sling holding the club’s chain. To paint the dark brown leather parts, first we use Dark oxide to restore the basic color and then we mix it with Beige brown (875, Vallejo) in increasing proportions until we use pure Beige brown as a final highlight. To apply the highlights in these areas we can mainly focus on the upper parts, as you can see in the pictures. Additionally, we can apply a profiling on the edges of each element (stand out the edges with the lightest highlight); and in the case of the gloves, we can also highlight the knuckles and tip of the fingers. On the other hand, take a look at the holster and pouch. I added some scratches effects by simply painting very thin lines in random directions. This detail makes our miniature a little bit more “alive”. Exploit it! On the other hand, the black leather was highlighted using…rose. I mixed black with a bit of rose in two subsequent highlights that were applied on the boot’s tip, the slings holding the leggings and the one in the glove holding the club. These highlights are warm (because of the red tone of the rose color) and therefore they result more real. Try it! Nevertheless, remember that we must limit the highlights applied on black surfaces or otherwise we can accidentally turn the black into a grey color.
Carapace armour
After thinning the Graphite paint with a bit of water, we start marking the edges of the armour mainly using the brush horizontally, as we discussed previously. This first layer will cover a big surface, although always keeping the previous one visible. For the following highlight we mix Graphite with white in the same proportion and repeat the process, but covering a smaller area in every edge. Finally, we use almost pure white color to apply the final highlight on the corners and other equally exposed parts. Try to play a bit with the contrasts. For example, take a look at the pic and notice how the lights on the ruff were applied. We can also use this final mix to randomly add some scratches. This recipe can be used to paint the shoulder pads and the protections on the gloves and boots (if the miniature have them).
Black and yellow stripes and other accesories
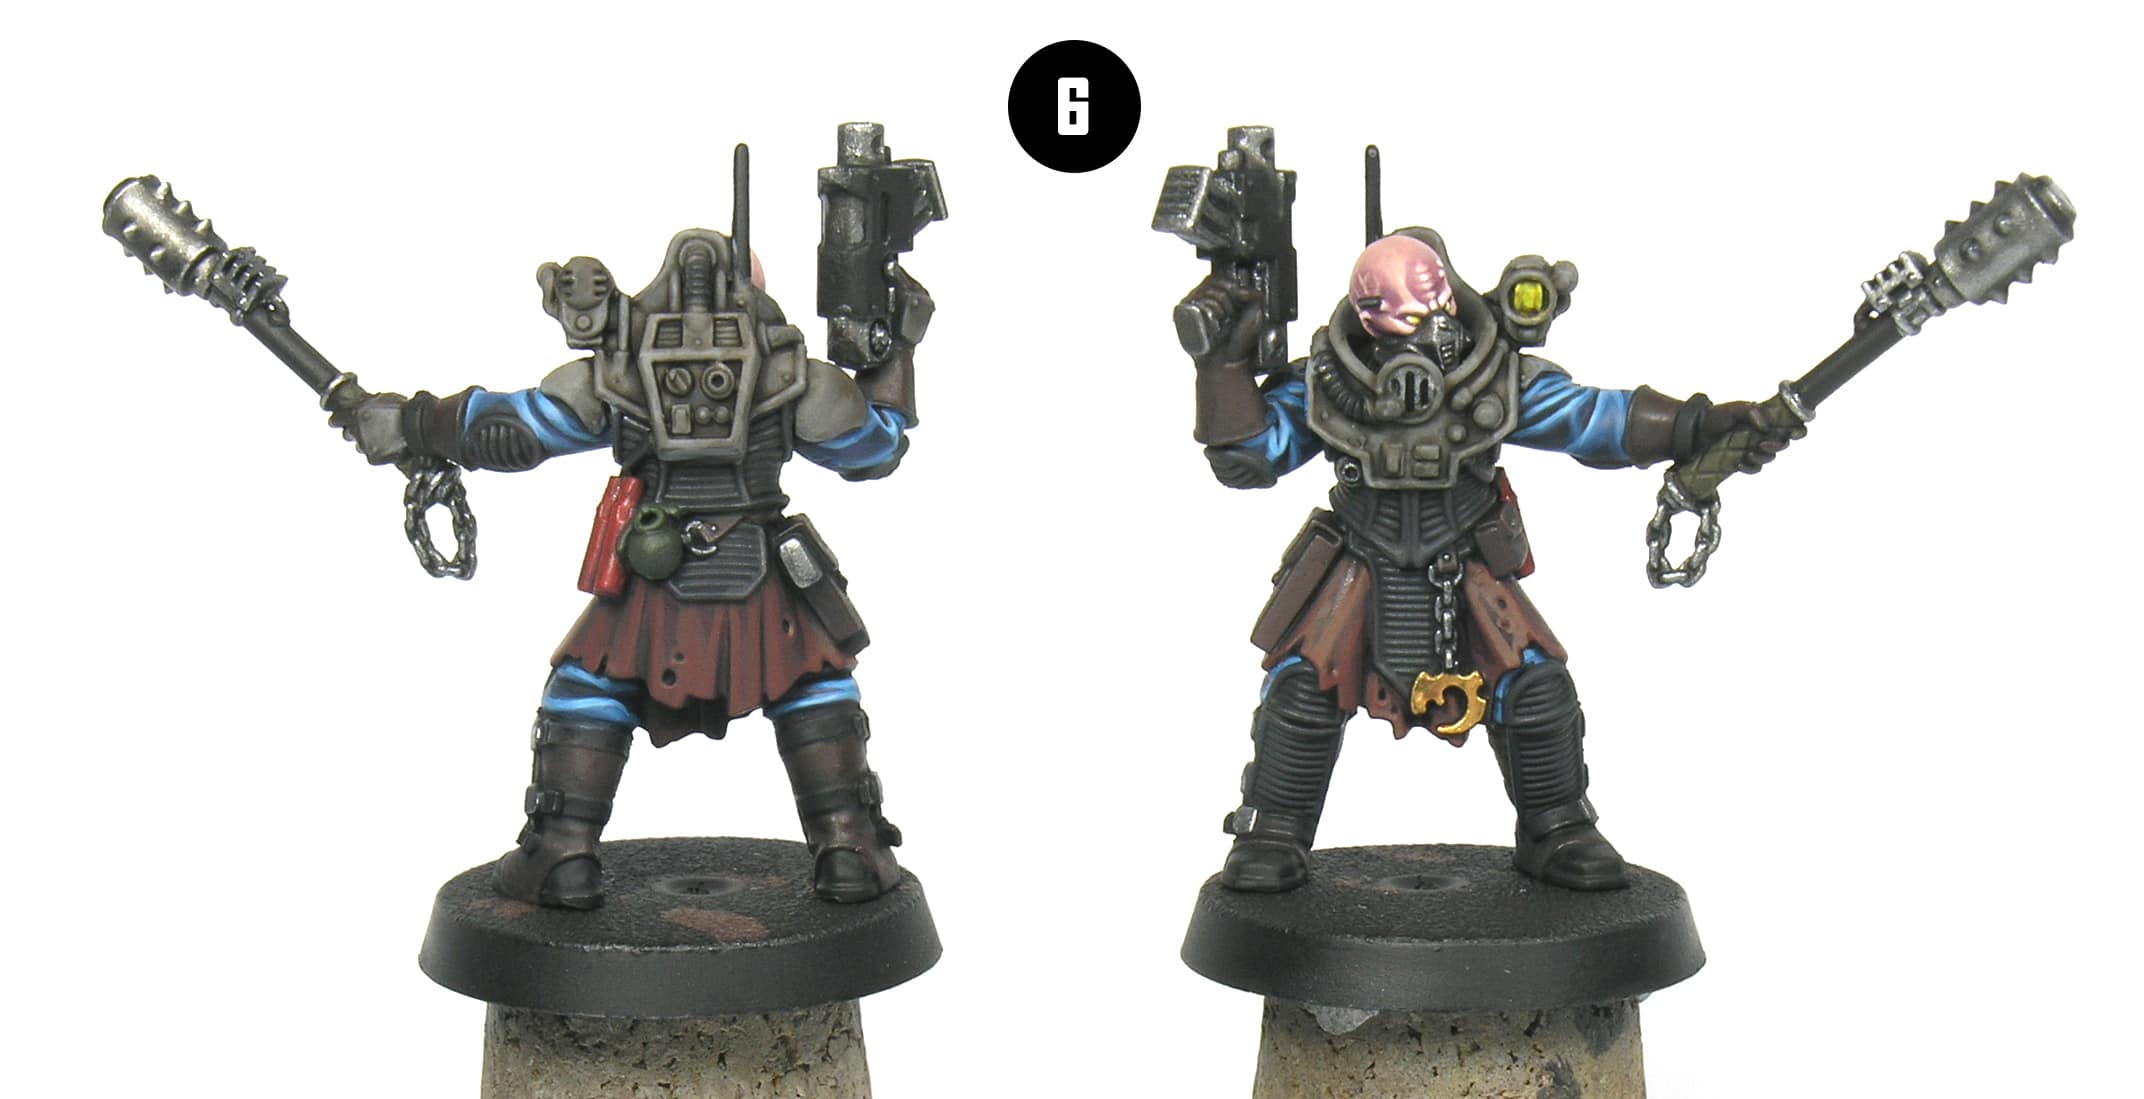
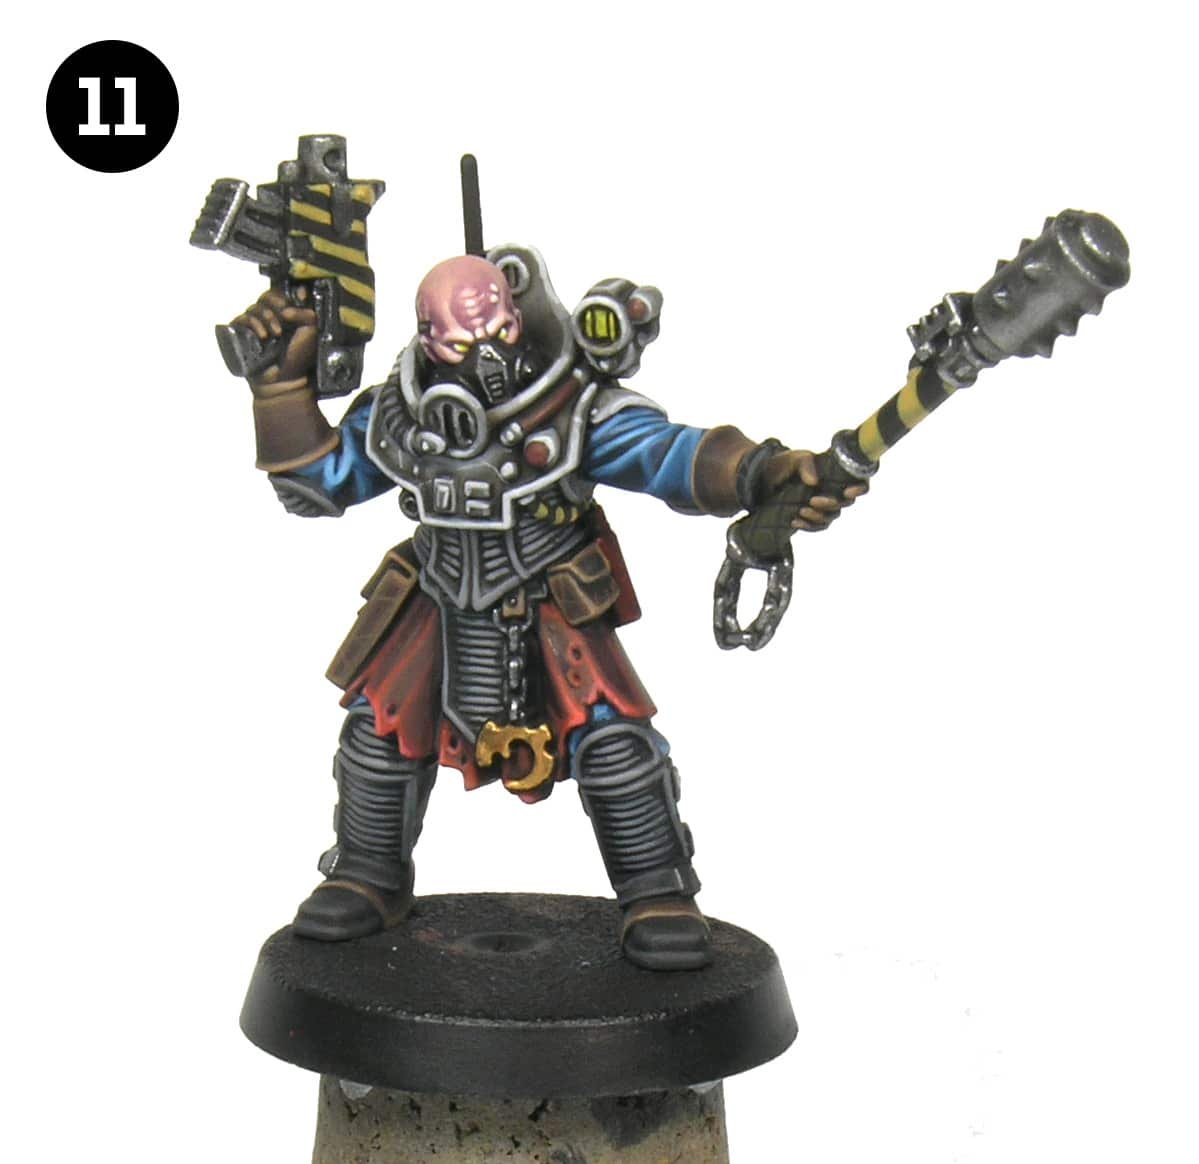
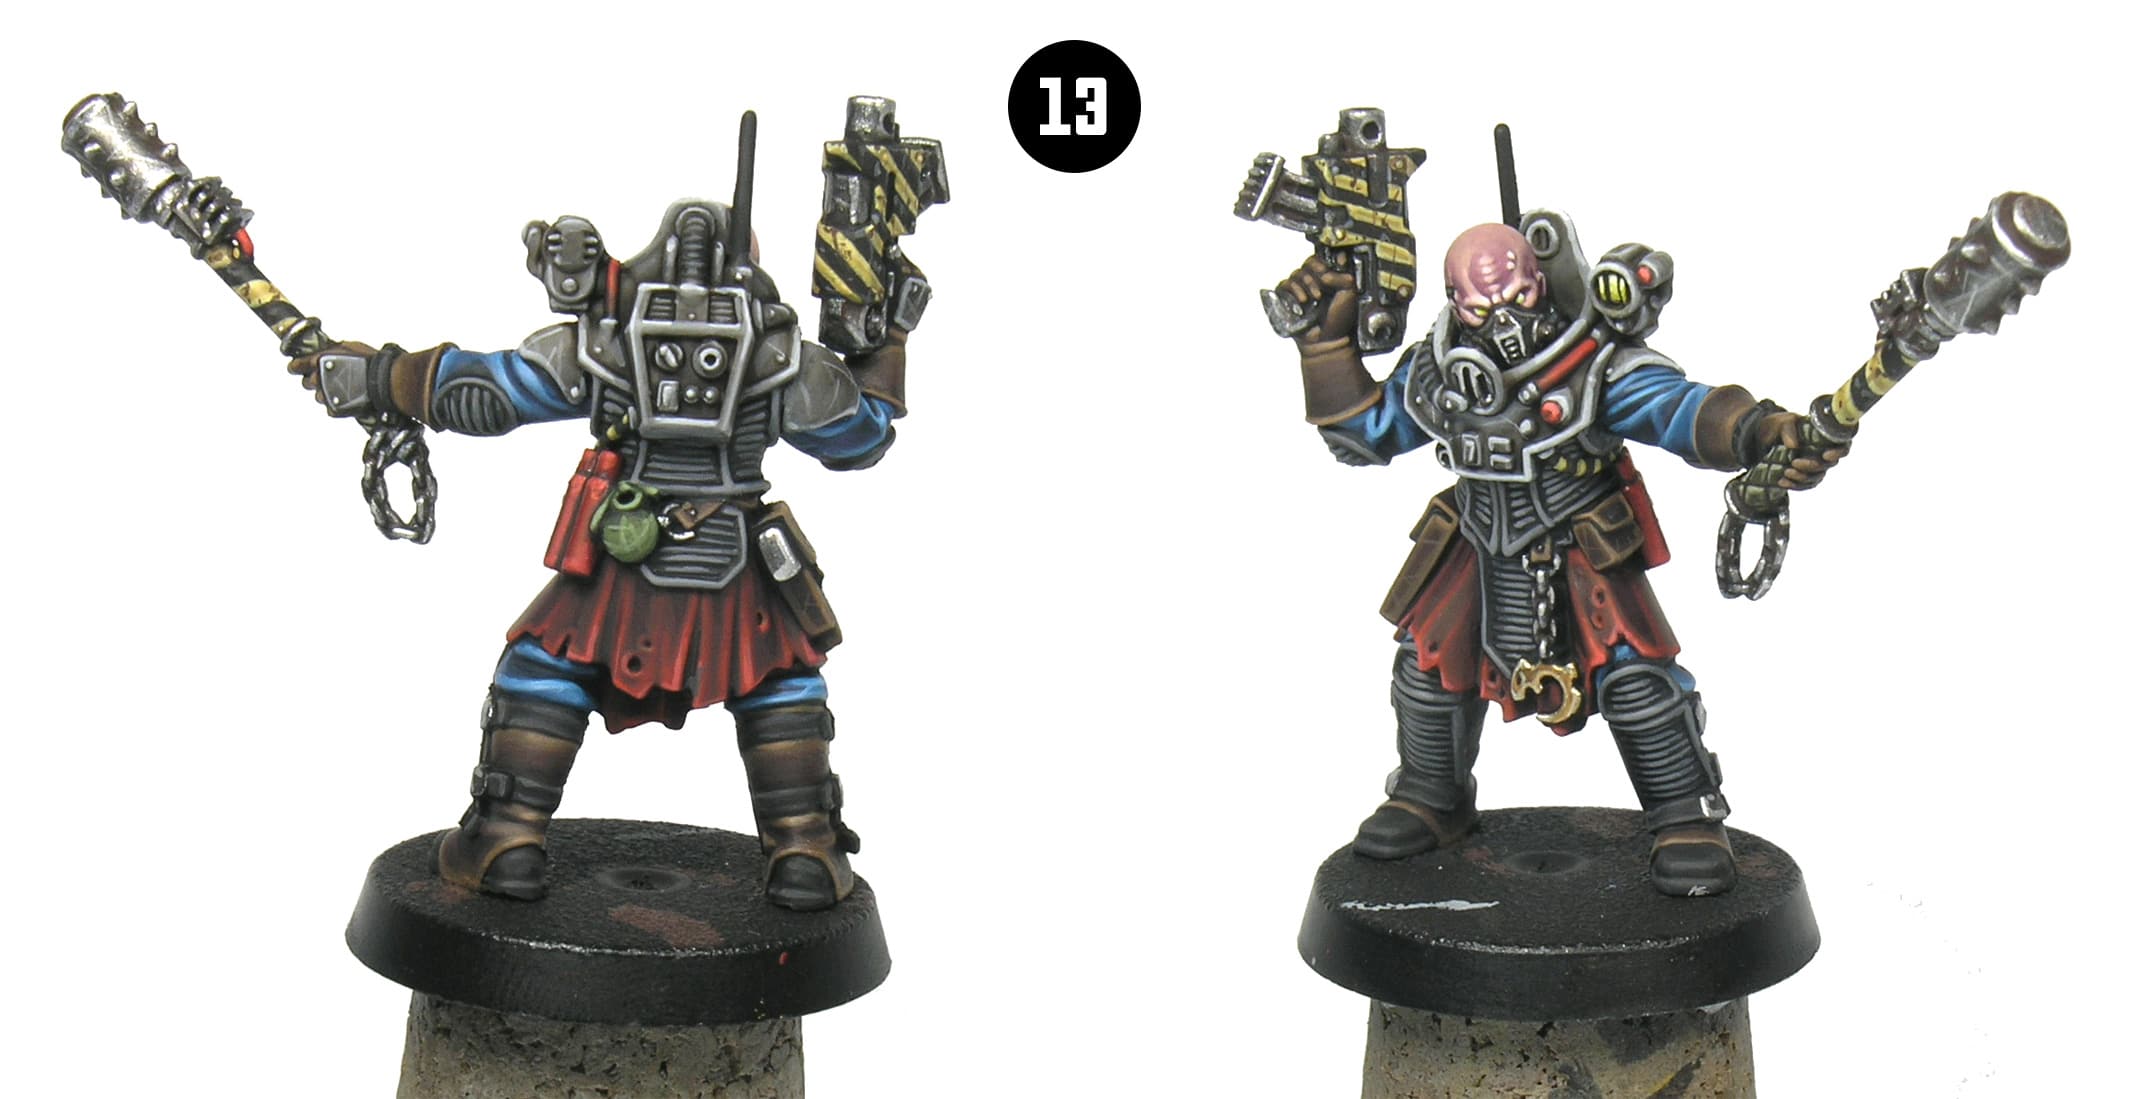
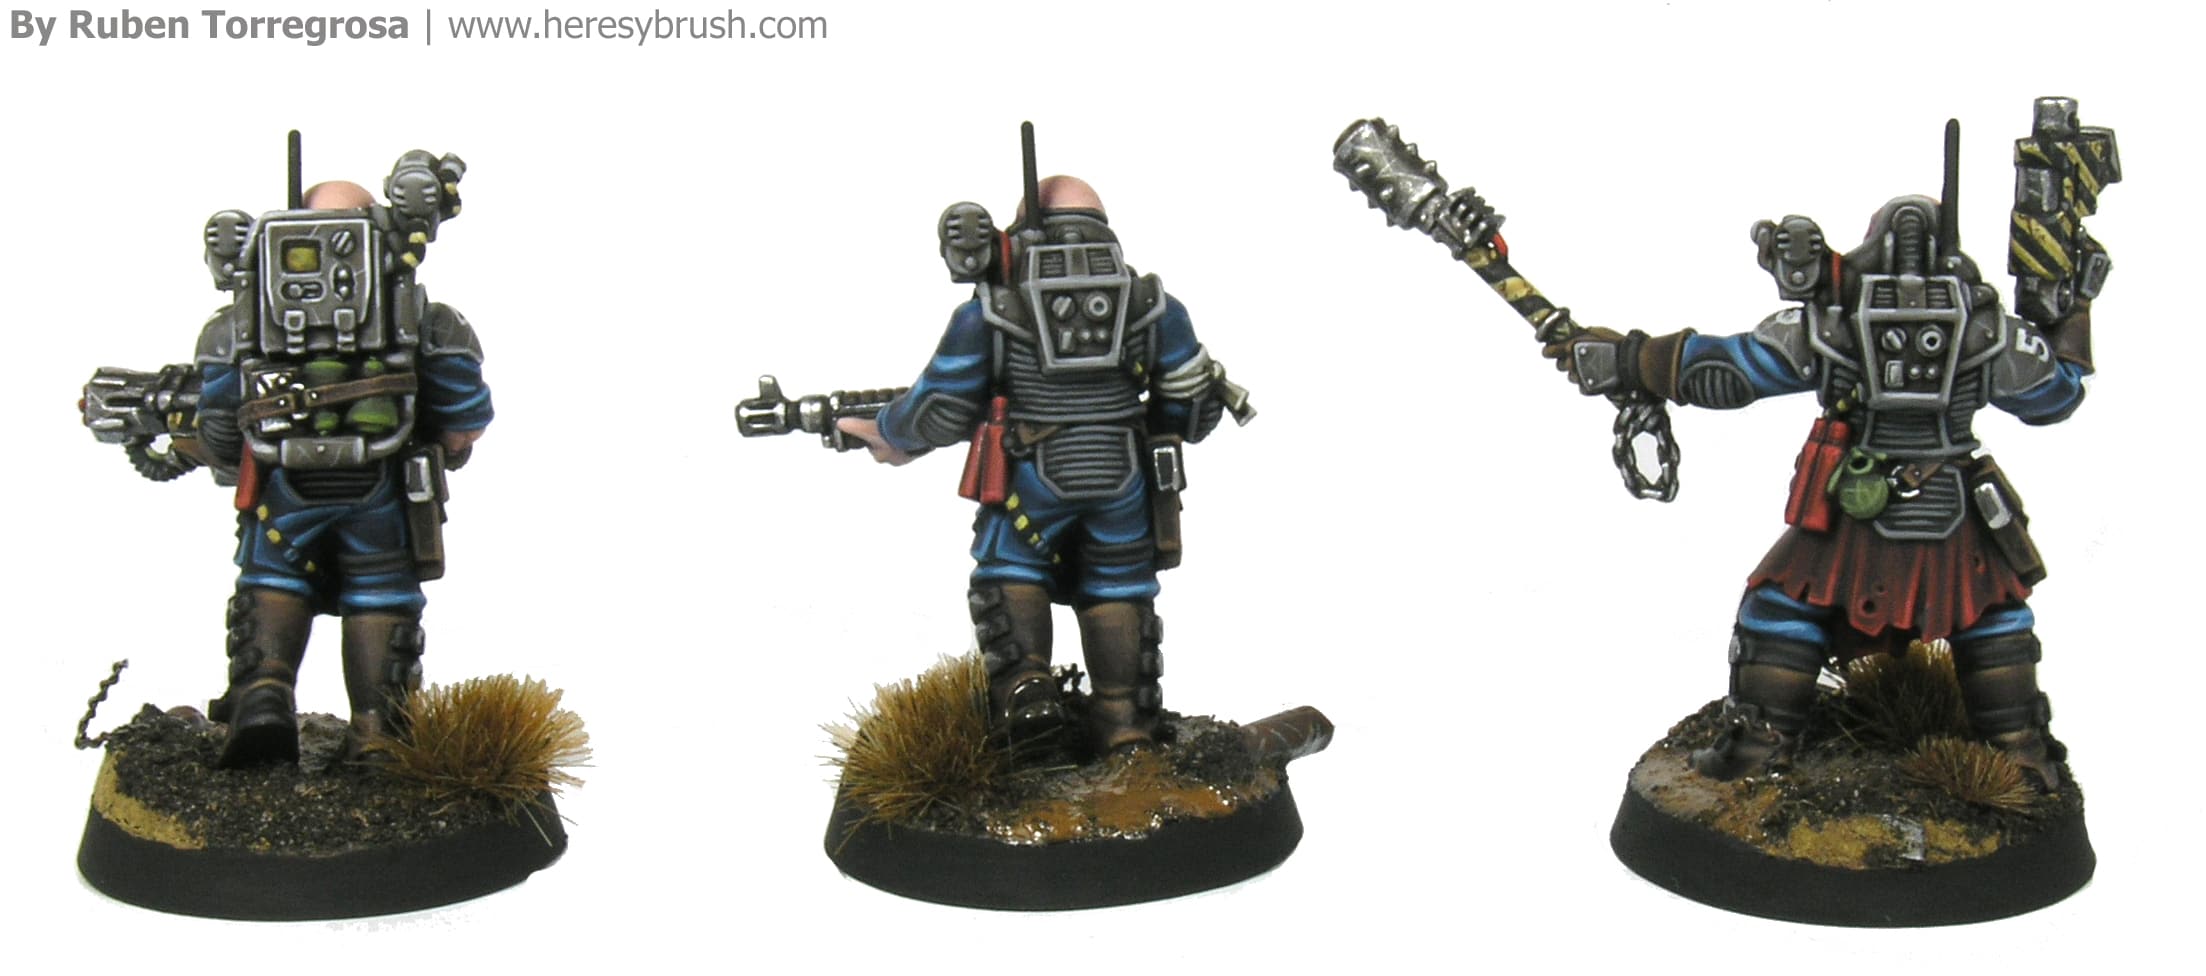
At this point, the miniature is almost done and only the weapons and other small details remain unpainted. First, I will explain how to highlight the red and green explosives or grenades that are holding from the belt. In both cases we use the original color (Flat red or Olive green) to apply a general highlight covering the most part of each element. Then, we add a little bit of white to each color and did a profiling on the edges. In the case of the green grenade, we can add some scratches (Pic 12, back). To highlight the padded part of the club’s handle we mix Russian uniform with a bit of white and paint thin lines around every rhombus.
To paint black and yellow stripes first we must repaint these areas with black to have a proper foundation, and then carefully paint diagonal stripes with Ger C. Orange ochre (824, Vallejo) (Pic 11). Note that you can use any other ochre color you have at home. Then, we use Golden yellow (948, Vallejo) to paint a thin line around each yellow stripe (Pic 12). Again, this is a profiling. We do not do the same on the black parts with grey to prevent the saturation of these tiny pieces of equipment. We can add some rust or chipping effects with dark oxide (yellow parts) and grey (black parts). To do it, we just paint some random small dots and scratches.
Metal
To highlight the golden parts –essentially the Cult’s symbol-, first we use Glorious gold to mark all the edges; and then we mix this color with a bit of Silver (063, Vallejo Model air) to add the final highlight. We focus on the edges. Note that the Model Air range from Vallejo uses an ultra-thin pigment; and therefore, these metalic colo is amazing!
To highlight the steel, first we use Gunmetal and afterwards Silver (Model air). In this case we also focus on the edges of every steel element, including the sling’s buckles, chains and mask. And of course, we pay attention to every single detail on the weapons. We can use Silver to add some scratches on the weapons. Additionally, we can simulate a rusty effect by applying a very thinned (like a wash) of Dark oxide around some details such as rivets. Take a look at the club, for instance.
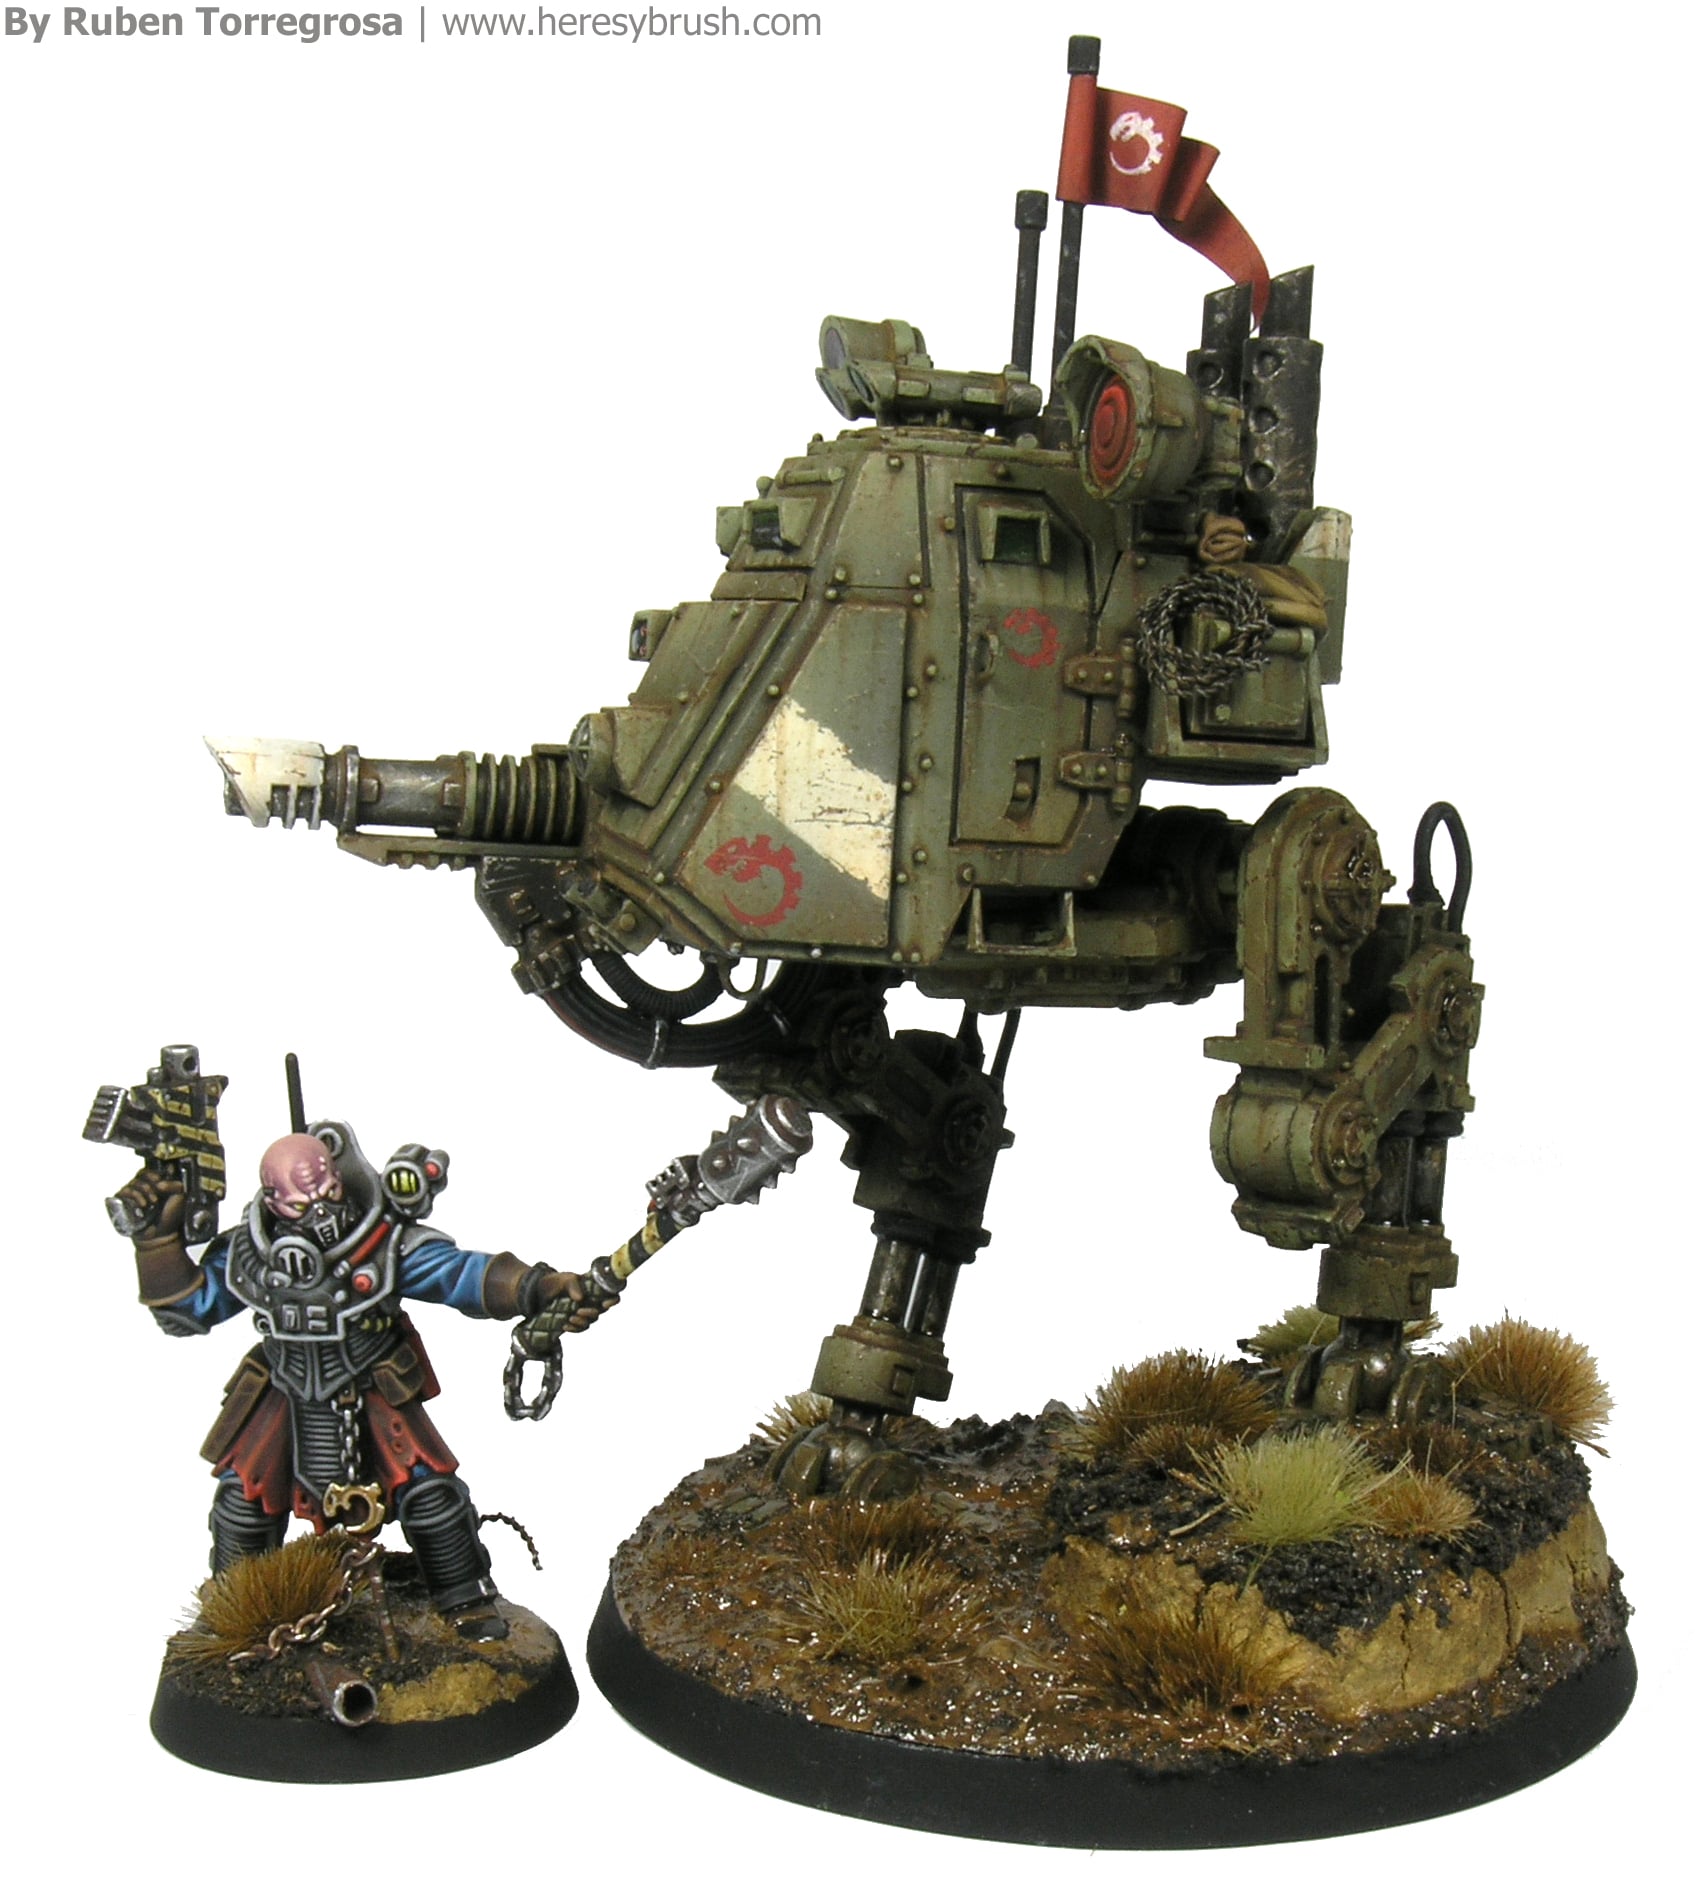
And that is all! Notice that I have not explain how to paint some small details such as the flash light or the red lights. But I guess that you can follow the instructions we have seen here to elucidate it. Finally, we only need to prepare an adequate base for these miniatures. In my case, since these miniatures also form part of my army for 40k, I followed the same effect I used in the Sentinel’s base which I painted long time ago, trying to simulate a muddy industrial area.


3 thoughts on “Genestealer Cult, Warhammer 40.0000”