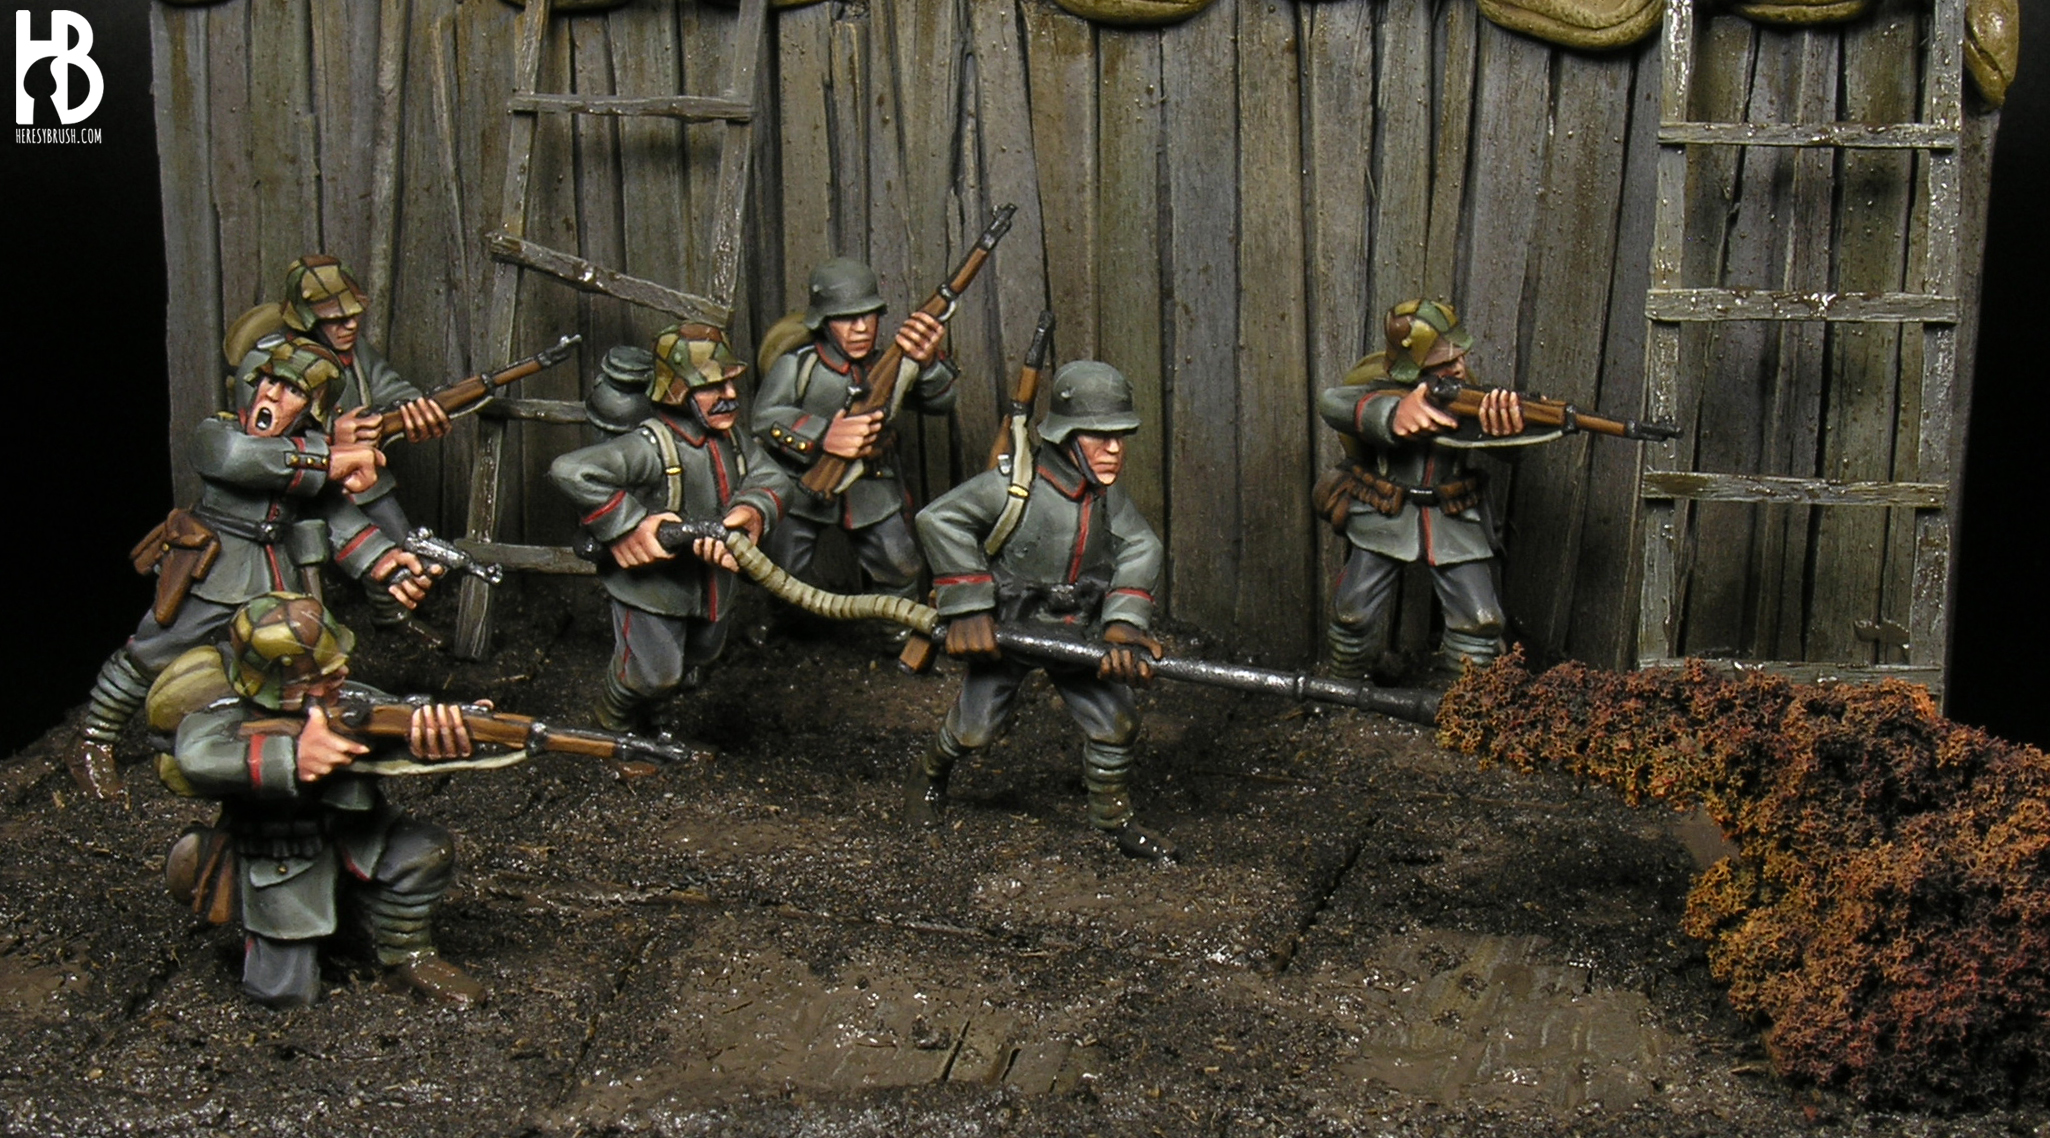
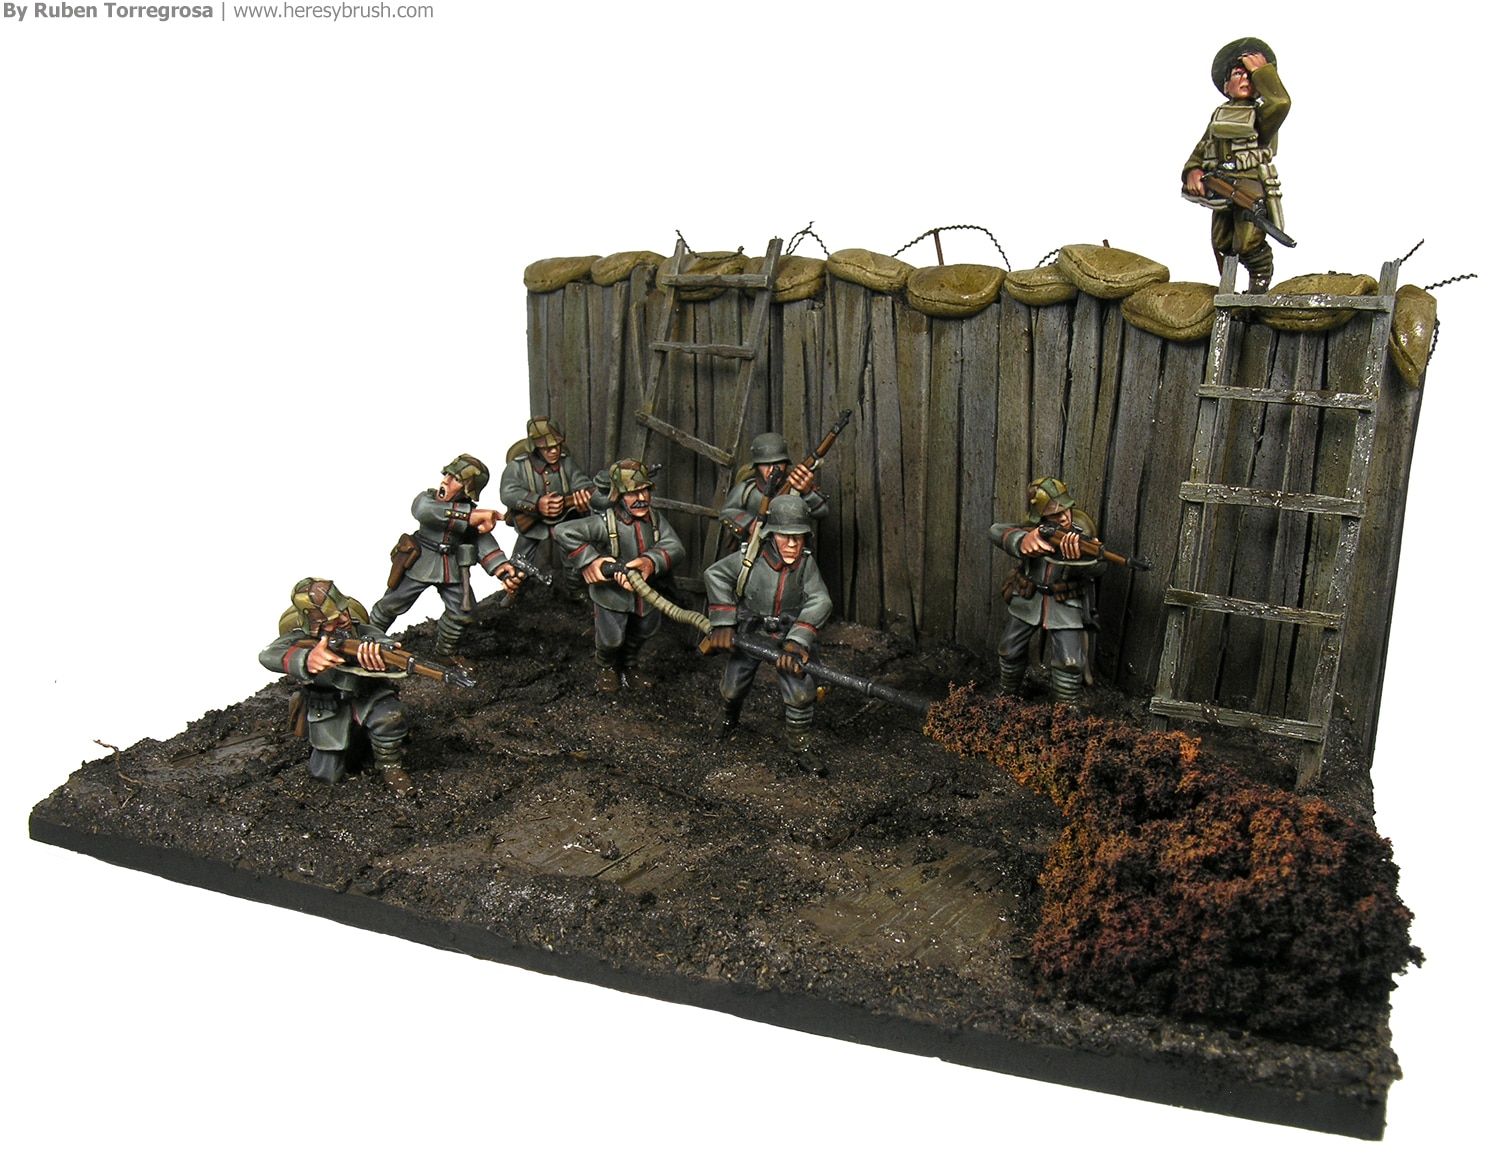
 I had the great opportunity to prepare a diorama for the cover of Wargames Soldiers and Strategy #90, where I have represented one of the probably most charismatic scenes of the last century wars, a trench raiding. More specifically, a German counter attack to take a trench section back. I wanted to share with you some details addressing the preparation of this diorama, although you will actually find more information inside the magazine. Additionally, in this very same WSS issue I have published a complete step-by-step painting guide of the Spanish 1898 colonial army, using the new miniatures from 1898 miniaturas. You cannot miss this issue!
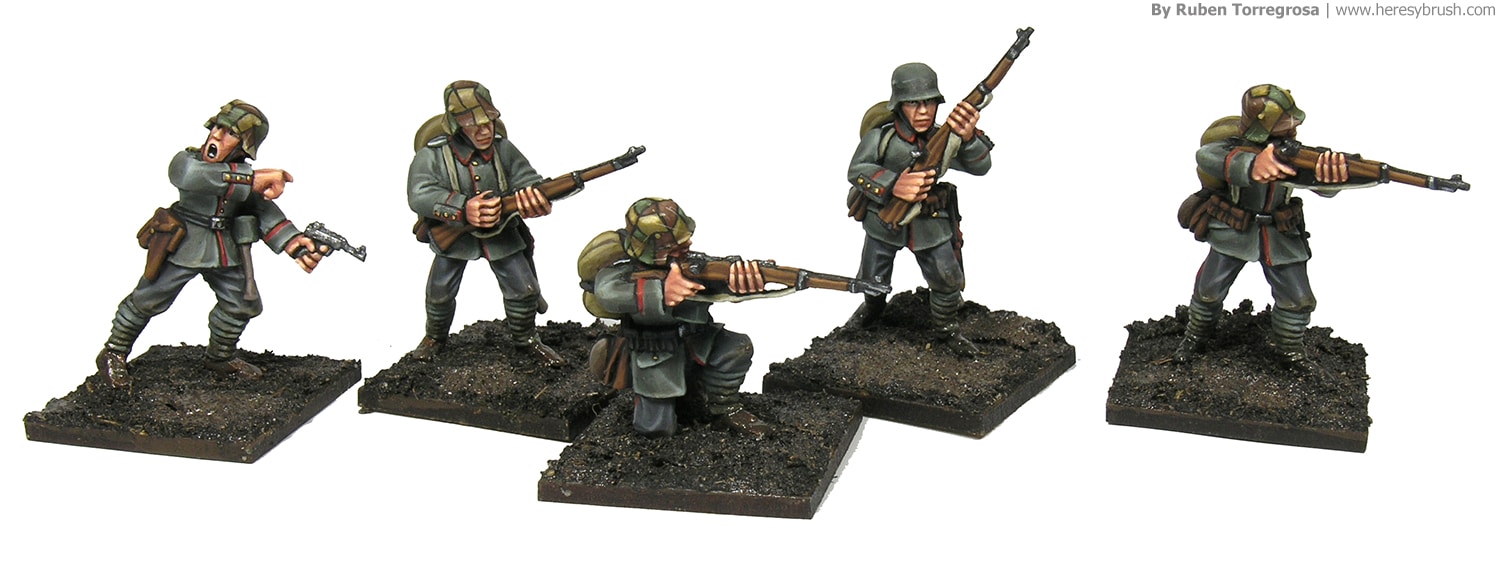
WWI uniforms

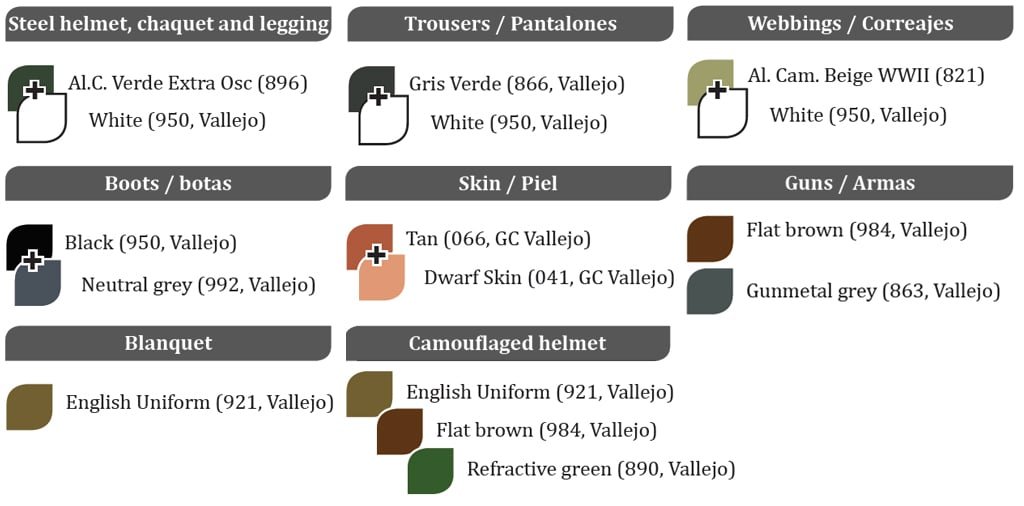
Camouflaged helmet M16
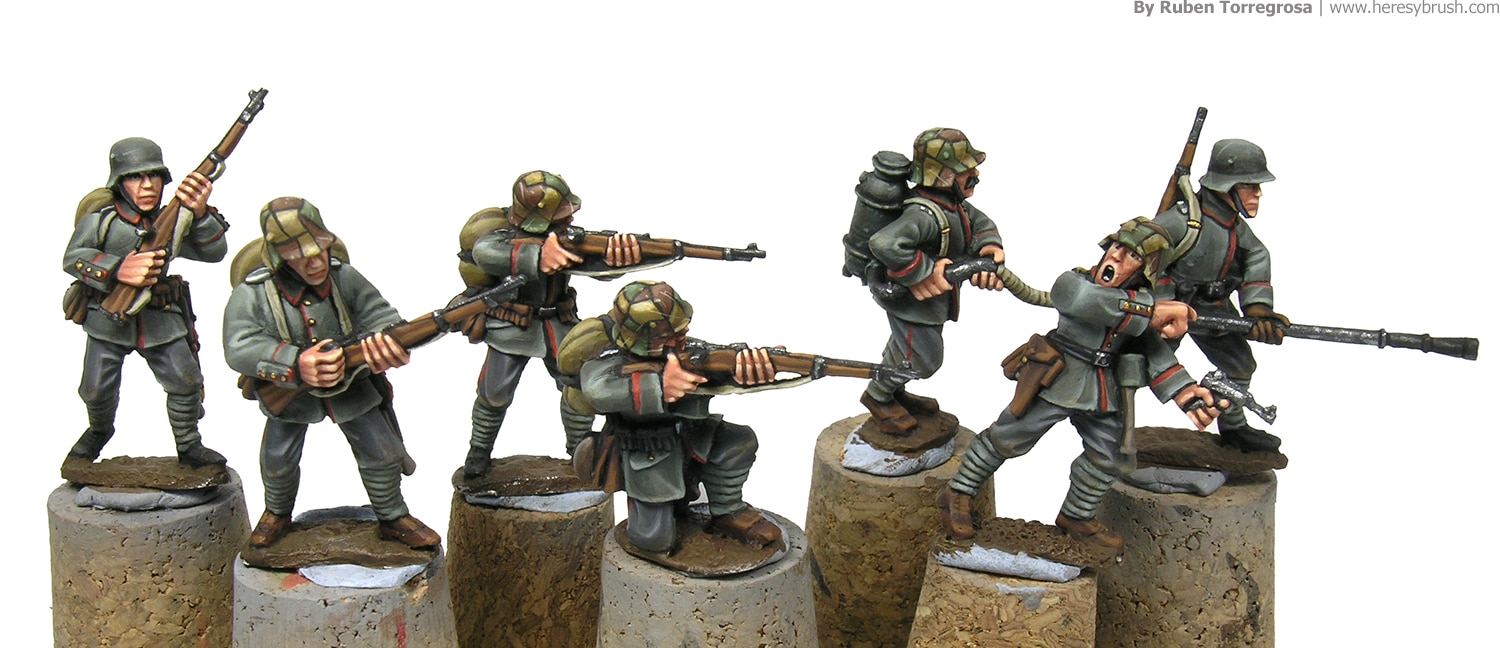
- Paint the entire helmet with English uniform (921, Vallejo)
- Paint random spots in different shapes and sizes with Flat brown (984, Vallejo) and Refractive green (890, Vallejo).
- Paint a thin black line around each camo spot.
- Highlight each camo color. Use white to highlight the English uniform and light yellow (949, Vallejo) to highlight the green and brown colors. Lights should be applied on the upper part of the helmet and lower edges.
- Add some scratches and chipping effect with Iraqi sand (819, Vallejo). Use a thin brush and thinned painted.

Diorama
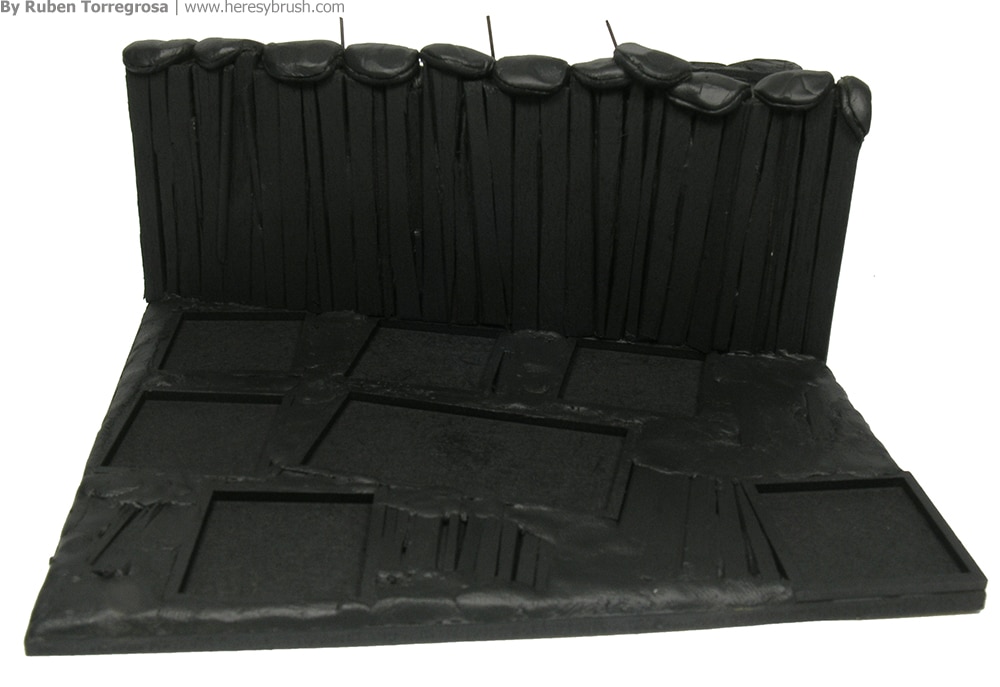
I started building the base of the diorama with DM (thanks to WarBases), forex (foamed PVC) and ice cream sticks, as you can see in the photo. After determining where the miniatures with their bases would be placed, I used modeling putty (such as Milliput) to cover the gaps and create an uneven surface. I used the same putty to sculpt some sandbags. Then, I let it dry overnight. Next day, I airbrushed a generous layer of black primer from AMMO and let it dry for several hours. Aside obvious reasons for using a primer, I applied this generous priming layer since wood and the modelling putty tend to absorb the paint (liquid) and I do not want to face difficulties when applying the actual colors.
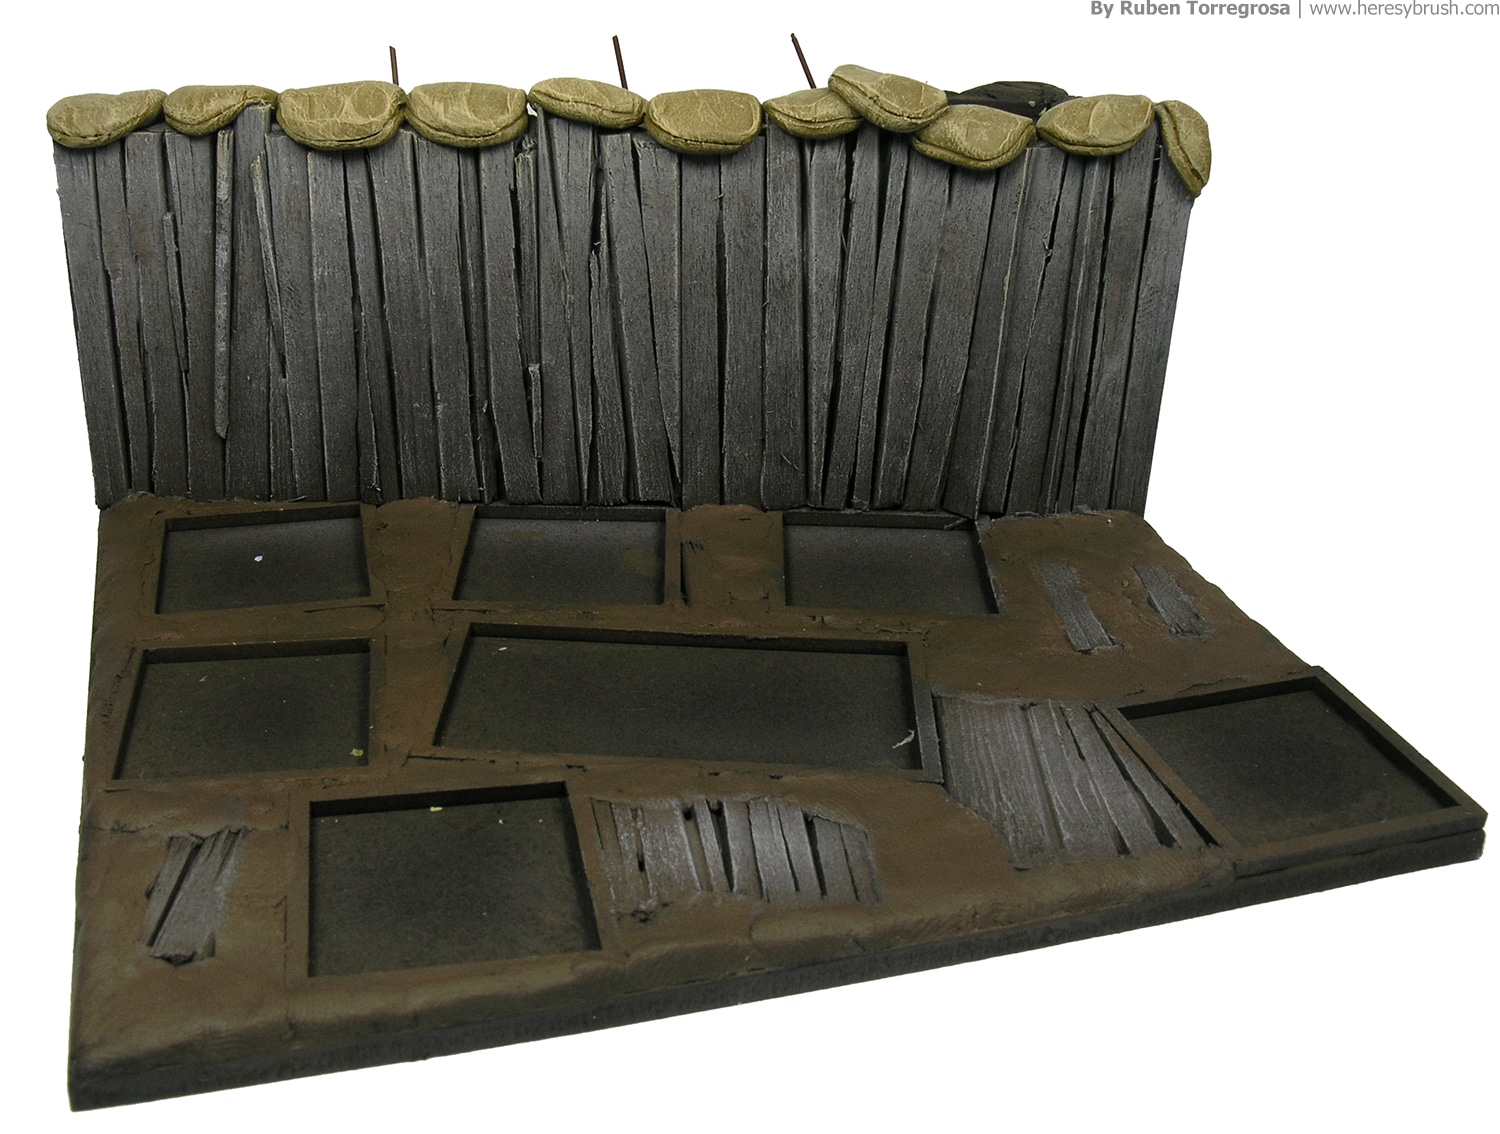
 Once the primer was dry, I used the airbrush again to paint the base with Chocolate brown 872 and the wooden wall in grey. Then I used the brush to carefully paint the sandbags with English uniform (921, Vallejo). Finally, I used the dry-brush technique to highlight both the sandbags and wooden parts. In each case I added 50% of white to the original color to apply a single highlight. Remember, when using the dry-brush technique we must discard the most part of the paint on a cloth or napkin before applying it.
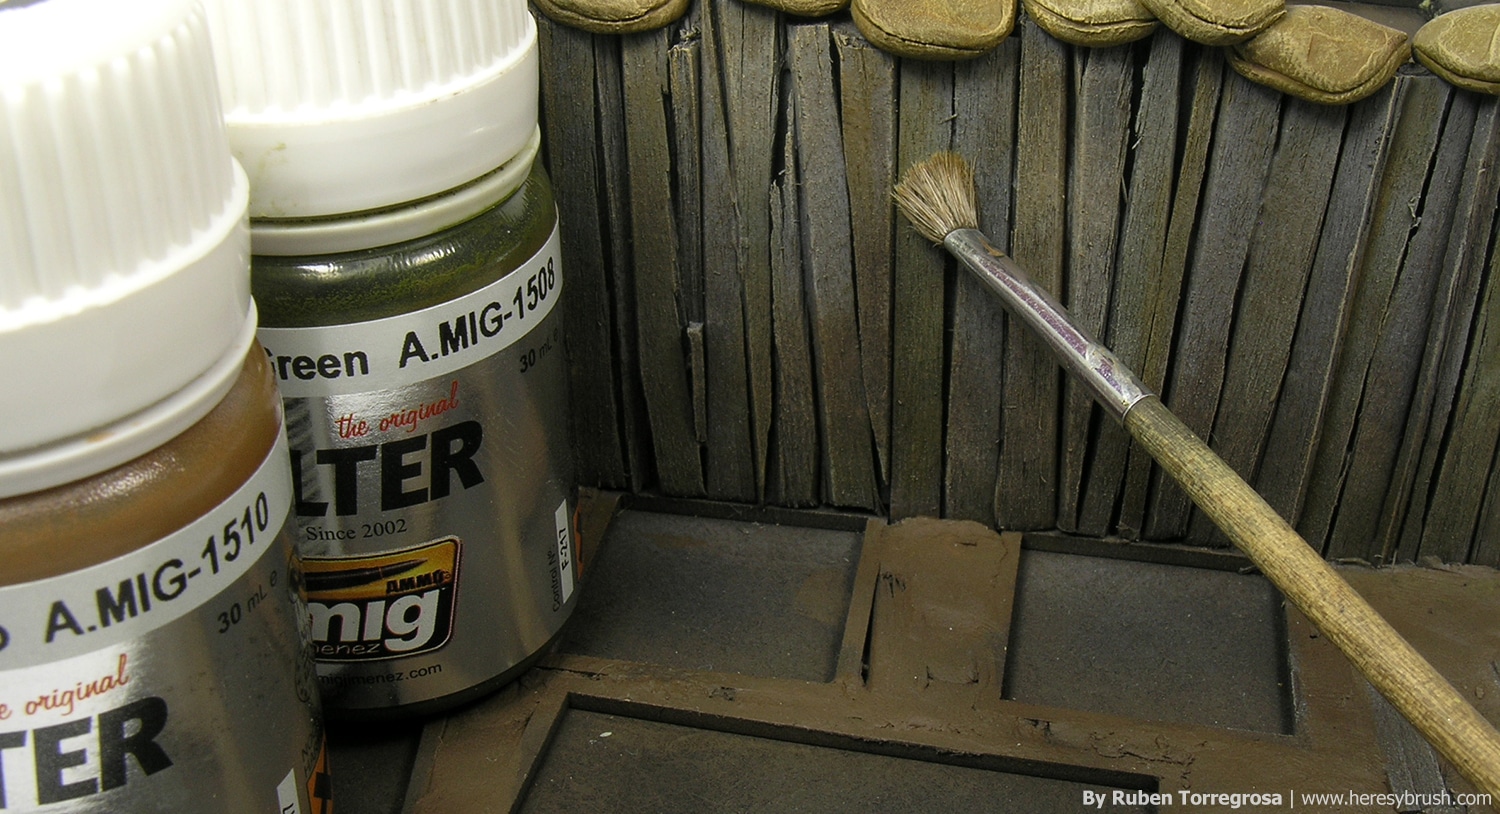
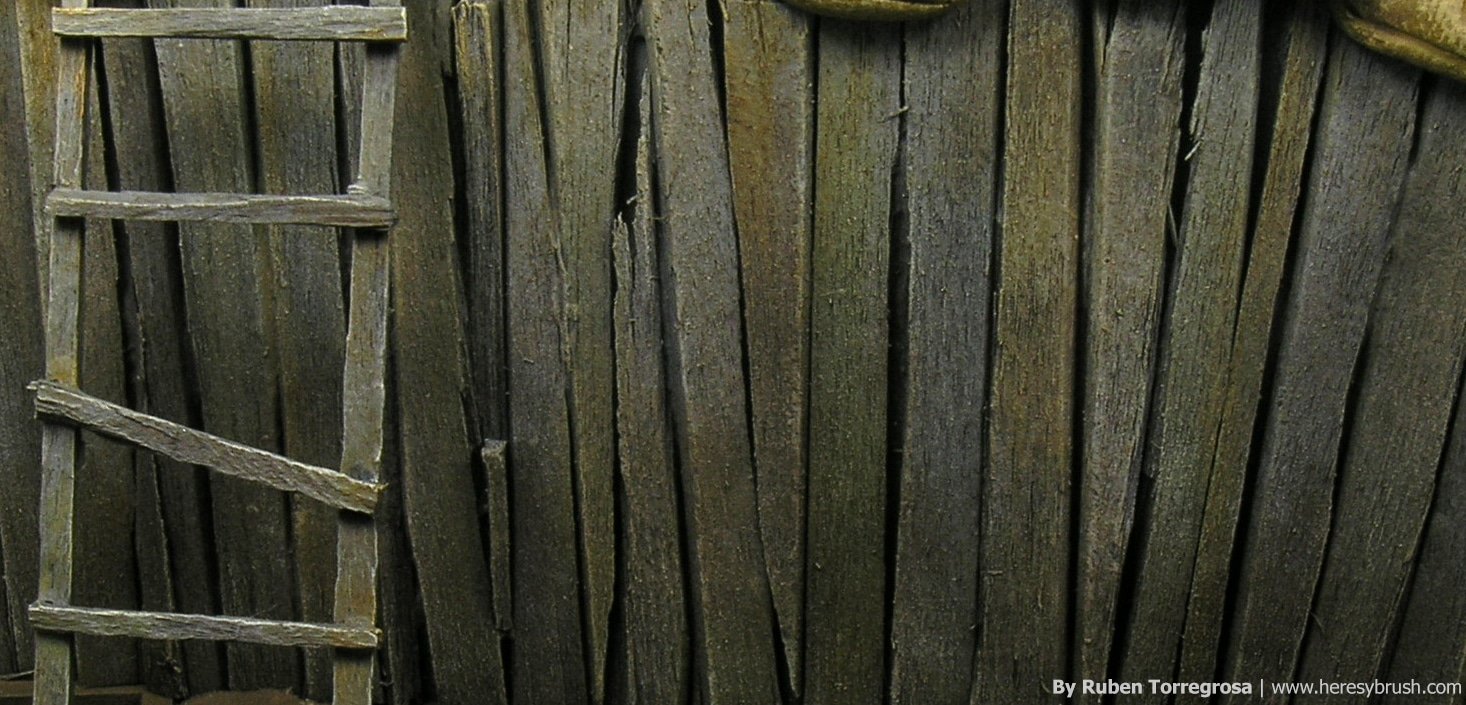
Nature is variation. Wooden ribbons might proceed from different trees, have differently aged and so forth. That is, we can add some variation among the ribbons to increase the contrast and make them a bit more real. For this purpose I used several filters from AMMO. These filters are much thinned (1 to 10) enamel paints that slightly change the color of the surface we are painting over. I used three different colors: reddish, greenish and yellowish. After discarding the most part of the paint on a napkin, I applied the remaining paint on different ribbons and different parts. For example, I applied the green color every three ribbons; sometimes only on the upper part of the ribbon, sometimes the lower part and sometimes the entire ribbon…Remember, variation! As you can imagine, the more layers of filter you apply, the more intense the final result will be. We can also add some color variation on the ladders and sandbags.
I have already discussed several times how to simulate soil and mud (here and here). I do not paint it, but I directly use real soil. Long time ago I collected several bunches of soils and clays from the mountain; and after drying it, I crumble and strain it. Now, I only need to mix it with water and white glue in the same proportion (1:1:1) to obtain an easily manageable paste that I spread with a spatula. I used it to cover the base on the miniatures and the diorama. Note that I do not use any paint at all. I was lucky and in my excursion to the mountain I found samples of different colors. Because here I wanted to simulate a wet soil (or mud), I used the darkest one.

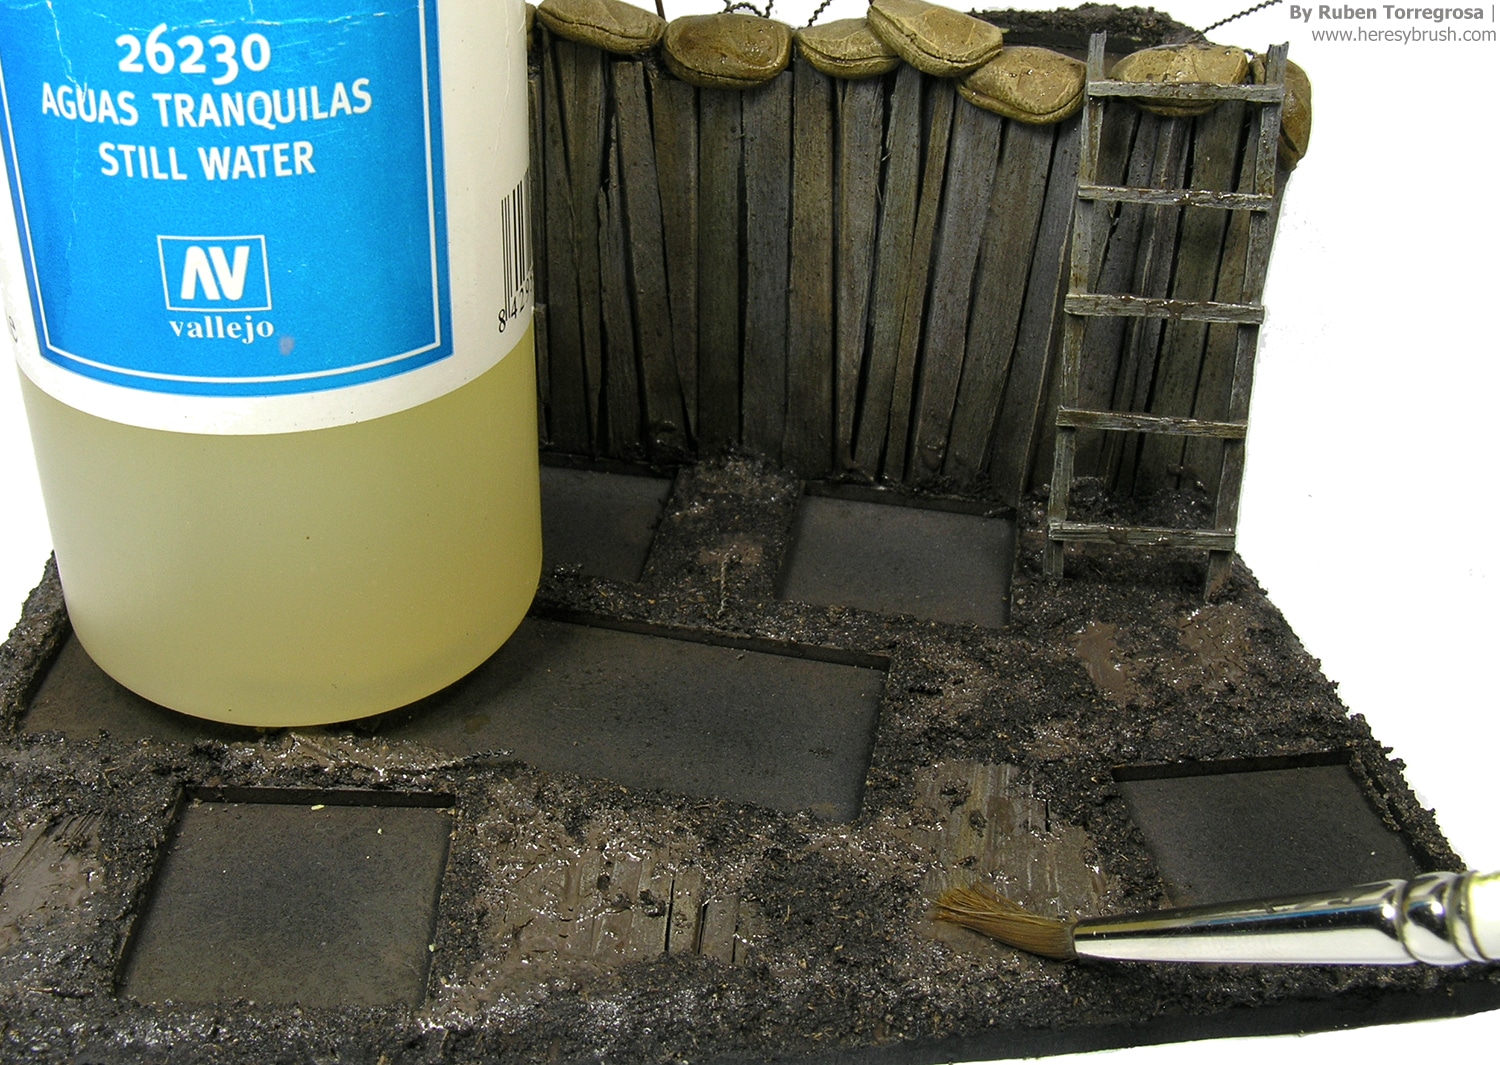
After 24 hours, I added “water” to simulate a muddy trenches. I used the Still water product from Vallejo for this effect, an acrylic resin, which is perfect to simulate the small level of water / mud I wanted to achieve. The resin is transparent when is dry; but since it is acrylic, we can mix it with any acrylic color. Since mud is brown (or greyish), I mixed 1 drop of chocolate brown and 10 drops of the resin, and then applied the liquid mix with an old brush around the whole base, varying the amount of mud in different areas. I did the same on the bases of the miniatures. We can apply as many layers as we want to enhance the effect. But it is very important to let dry each layer for at least 12 hours.
Finally, to simulate mud splashes on the soldier´s uniform, ladders and wall I used several mud effects from AMMO, who have two different series: mud splashes and heavy mud. The difference between these two is thinned the paint is. Splashes effects are very thinned, while heavy mud are very dense; and they are used to simulate different effects (as their names indicate). Interestingly, we can find both mate and satin effects in each series. We can combine these to simulate old and fresh mud (dry and wet, respectively). I used two different colors of mud splashes to stain the soldiers ‘ boots and trousers, while I applied some heavy mud on the ladders and sandbags (left behind by the soldier’s boots or caused by explosions). These are enamels products, which means that if we do not like an effect for any reason, we can easily remove it with a brush moistened with white spirit. To create the fire jet I basically followed this tutorial, but you will find more detailed information and a step-by-step tutorial in Wargames Soldiers and Strategy #90.
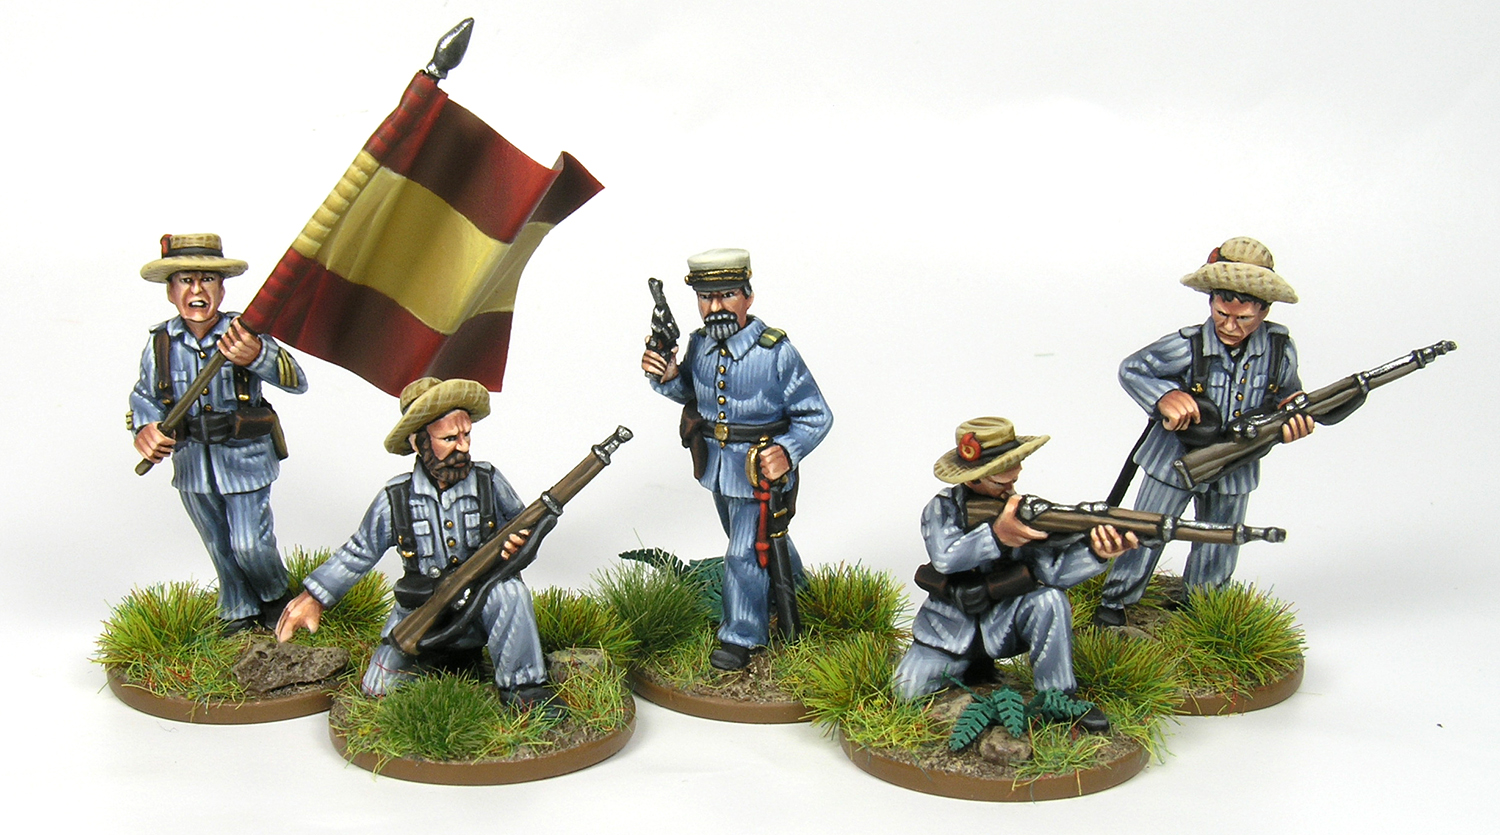
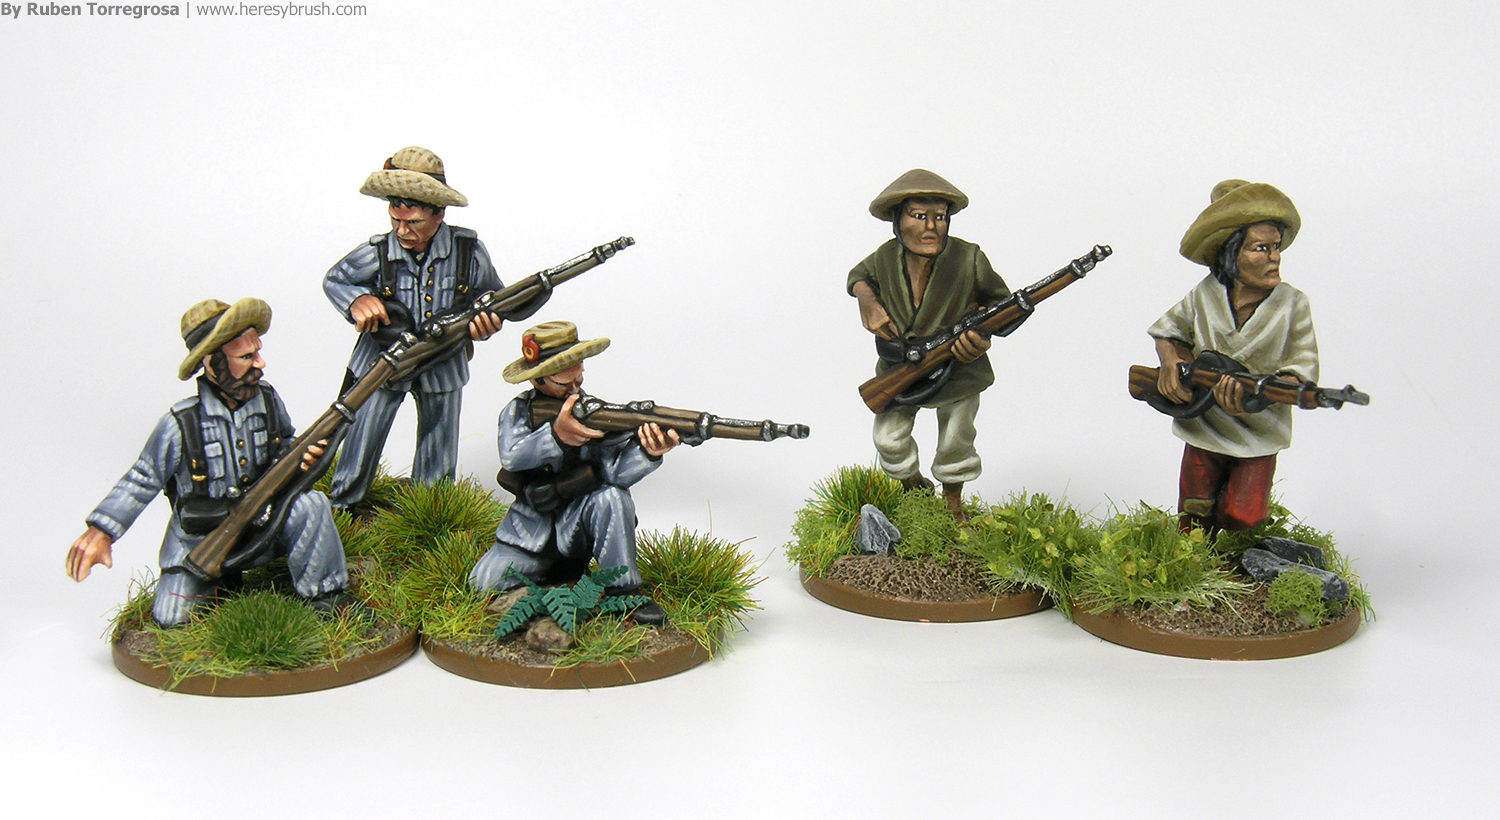
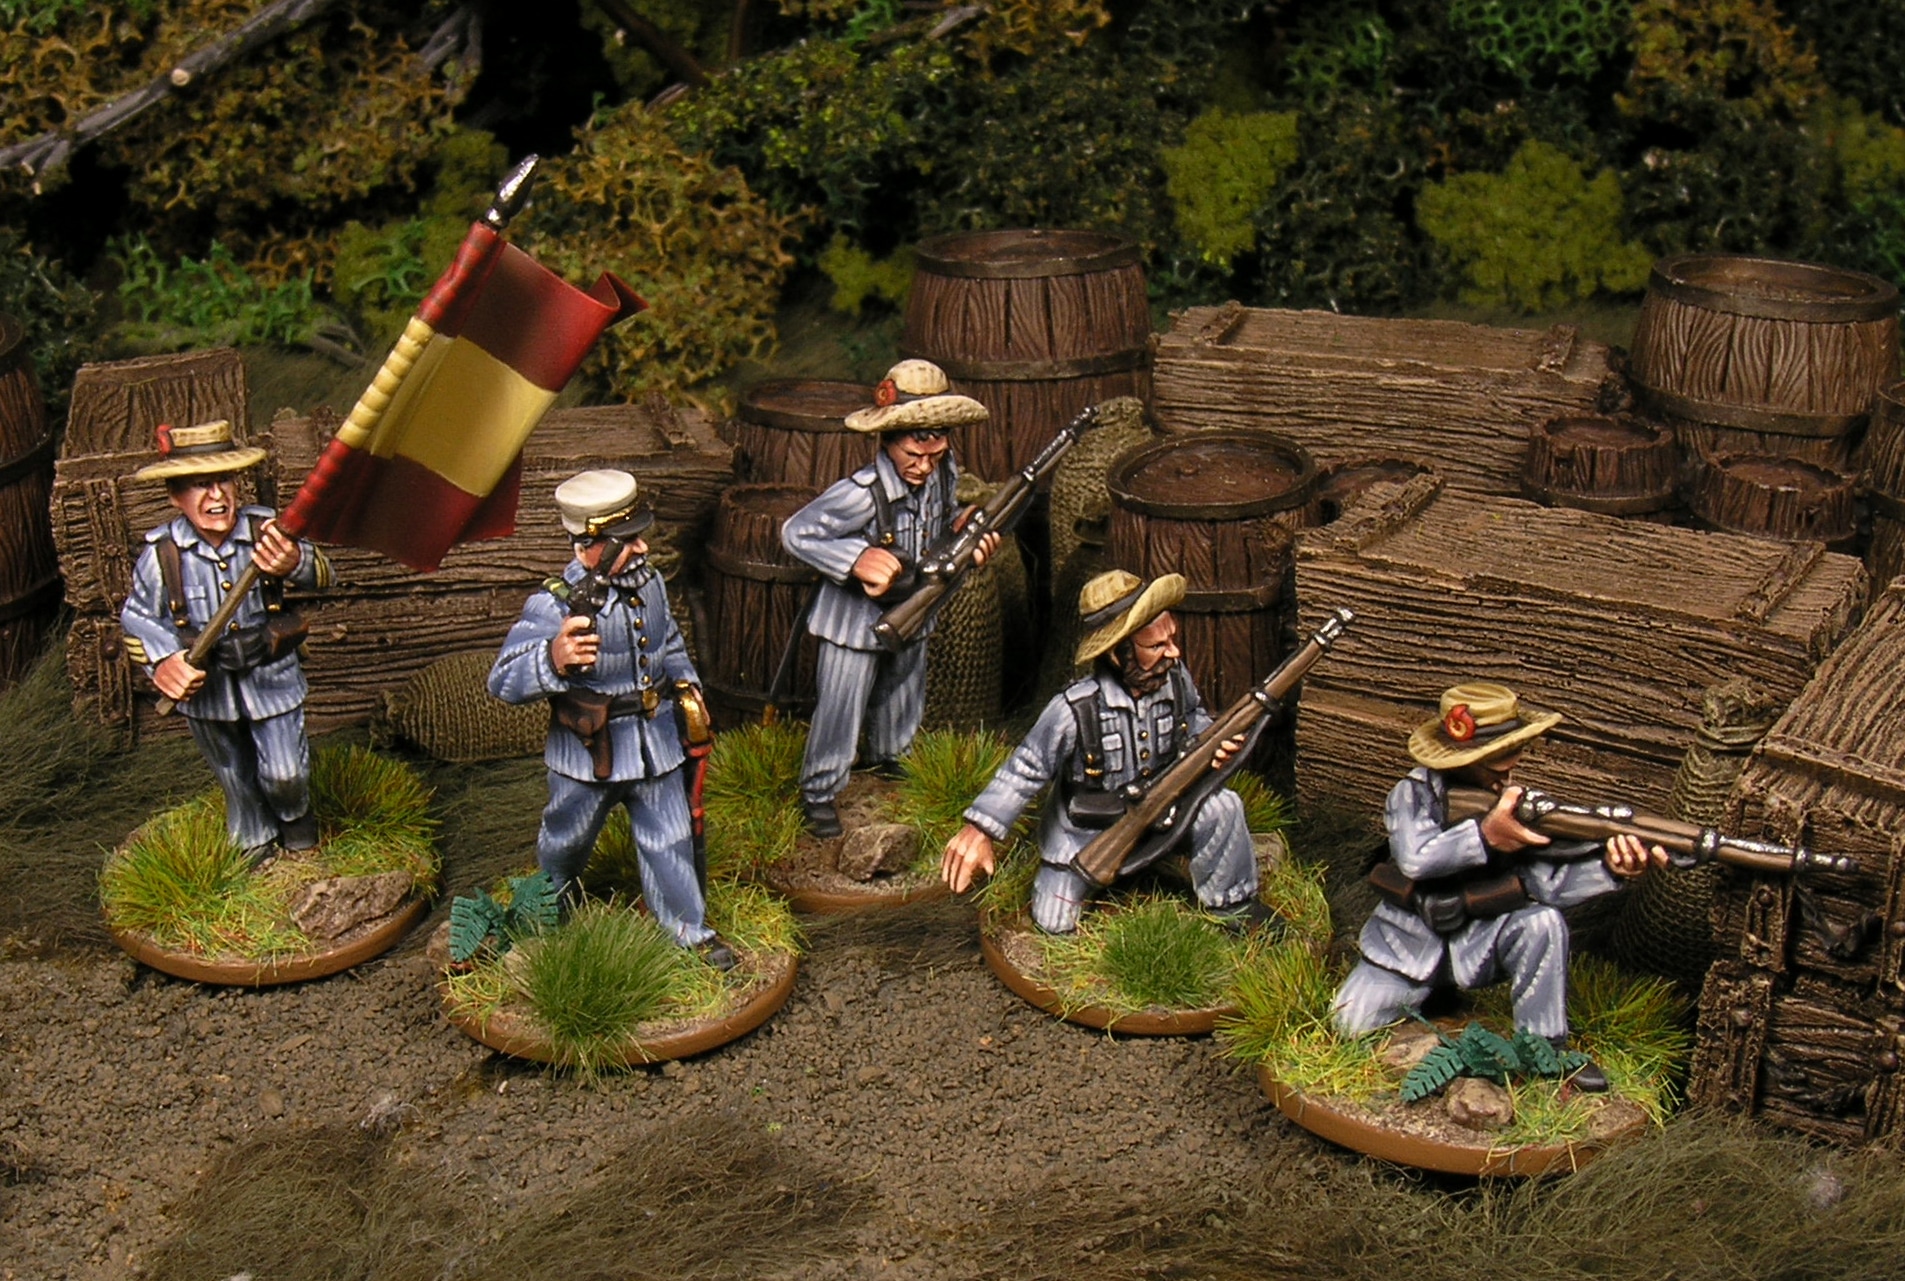
As I mentioned earlier, in the same WSS issue you will find a painting guide of the “rayadillo” uniform of the 1898 Spanish army, featuring the new miniatures from 1898 miniaturas.