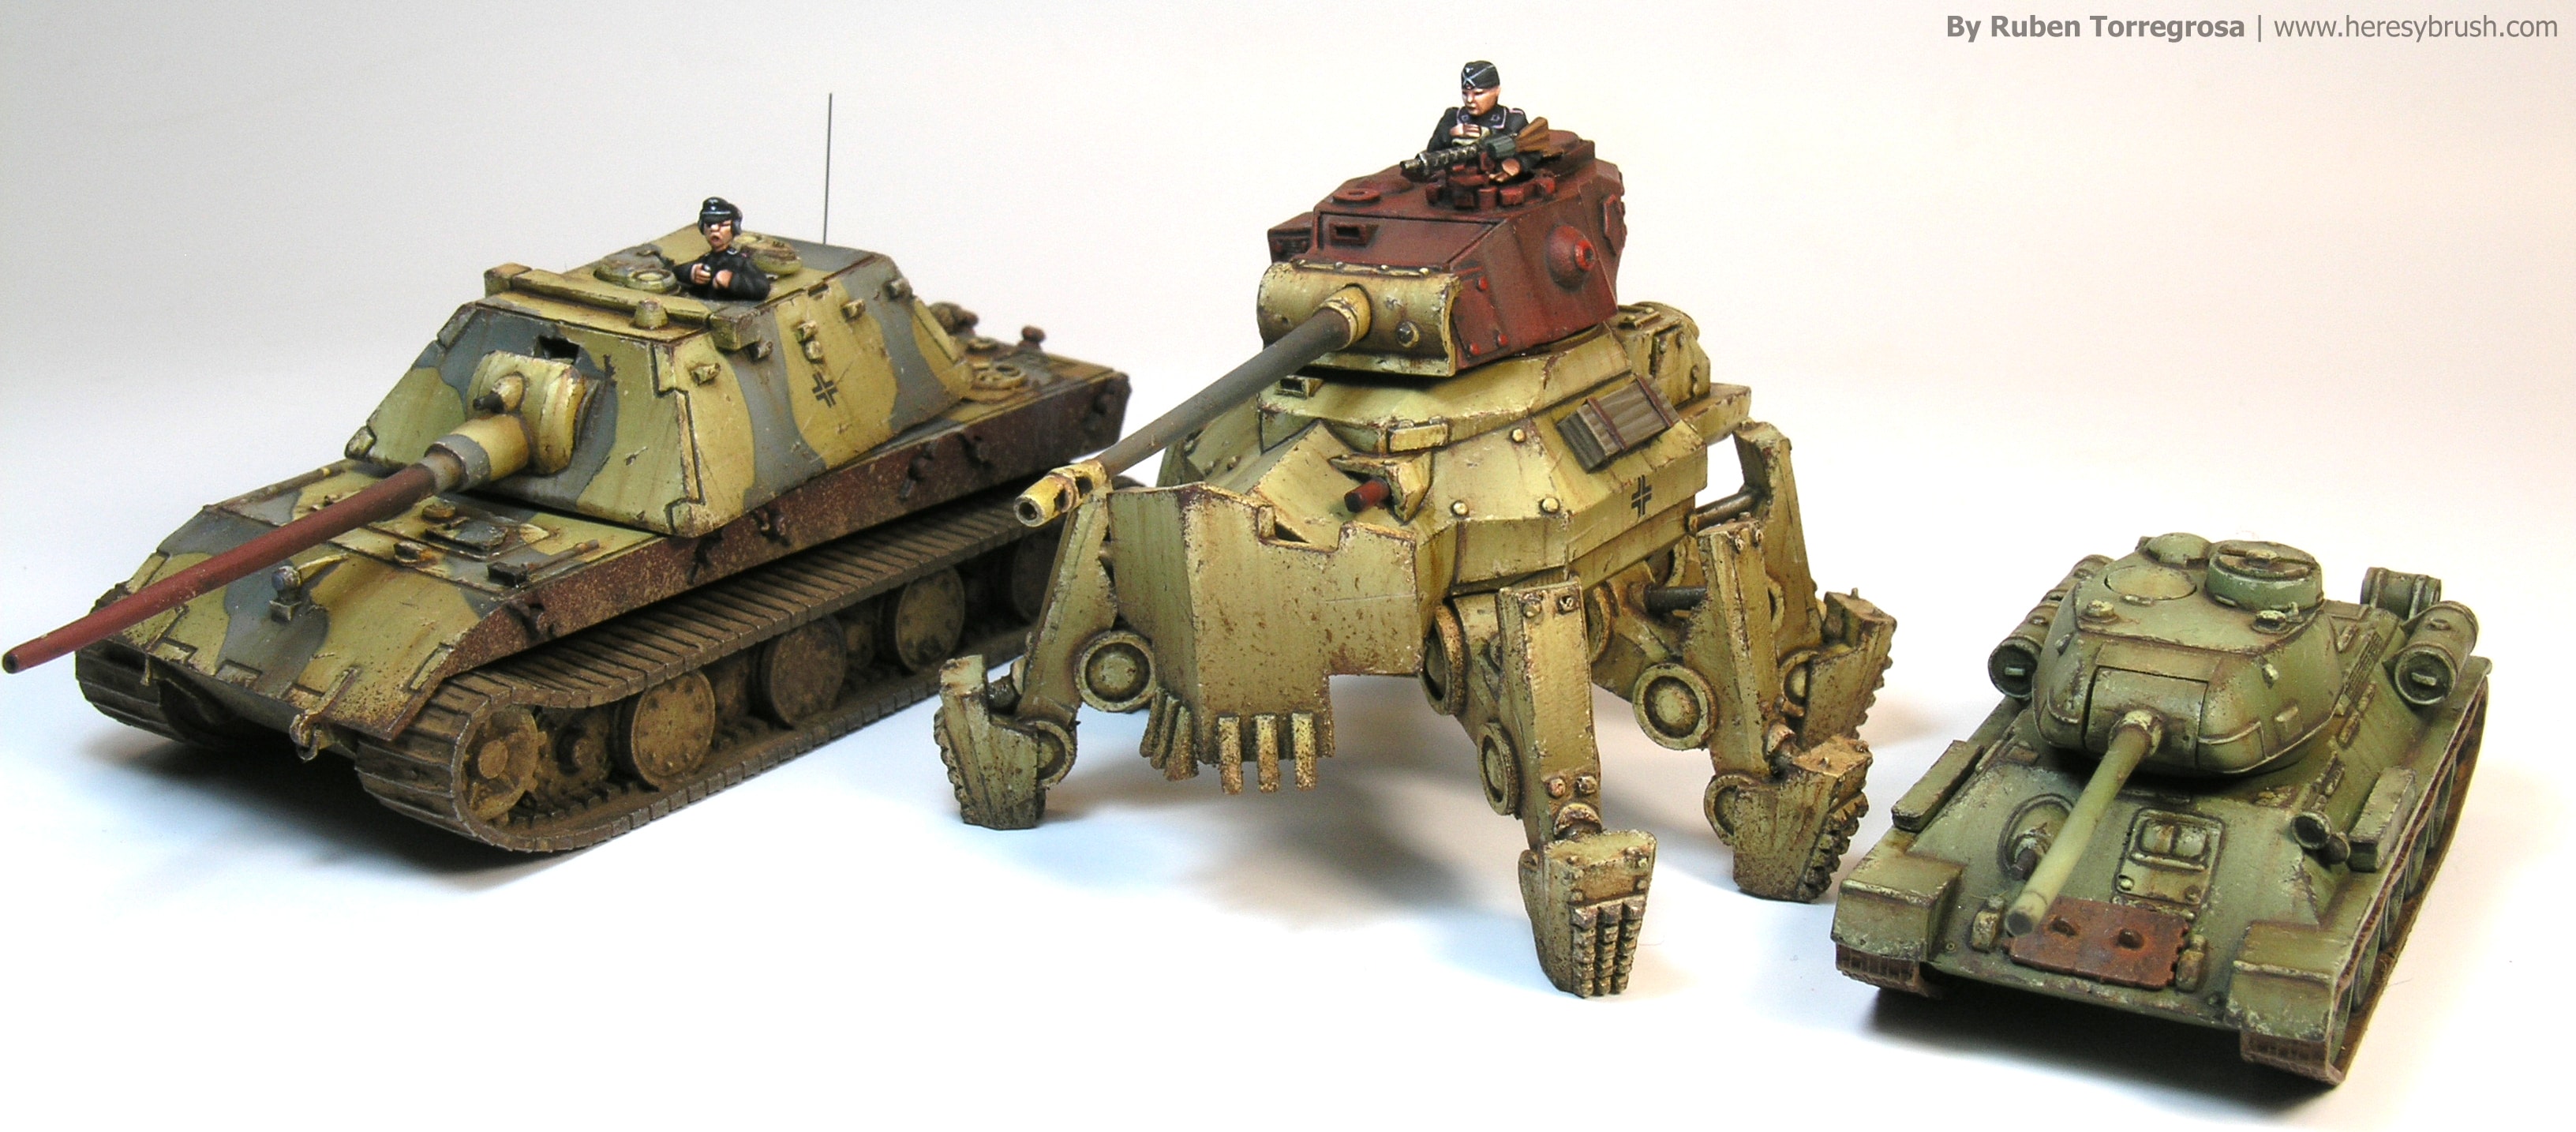
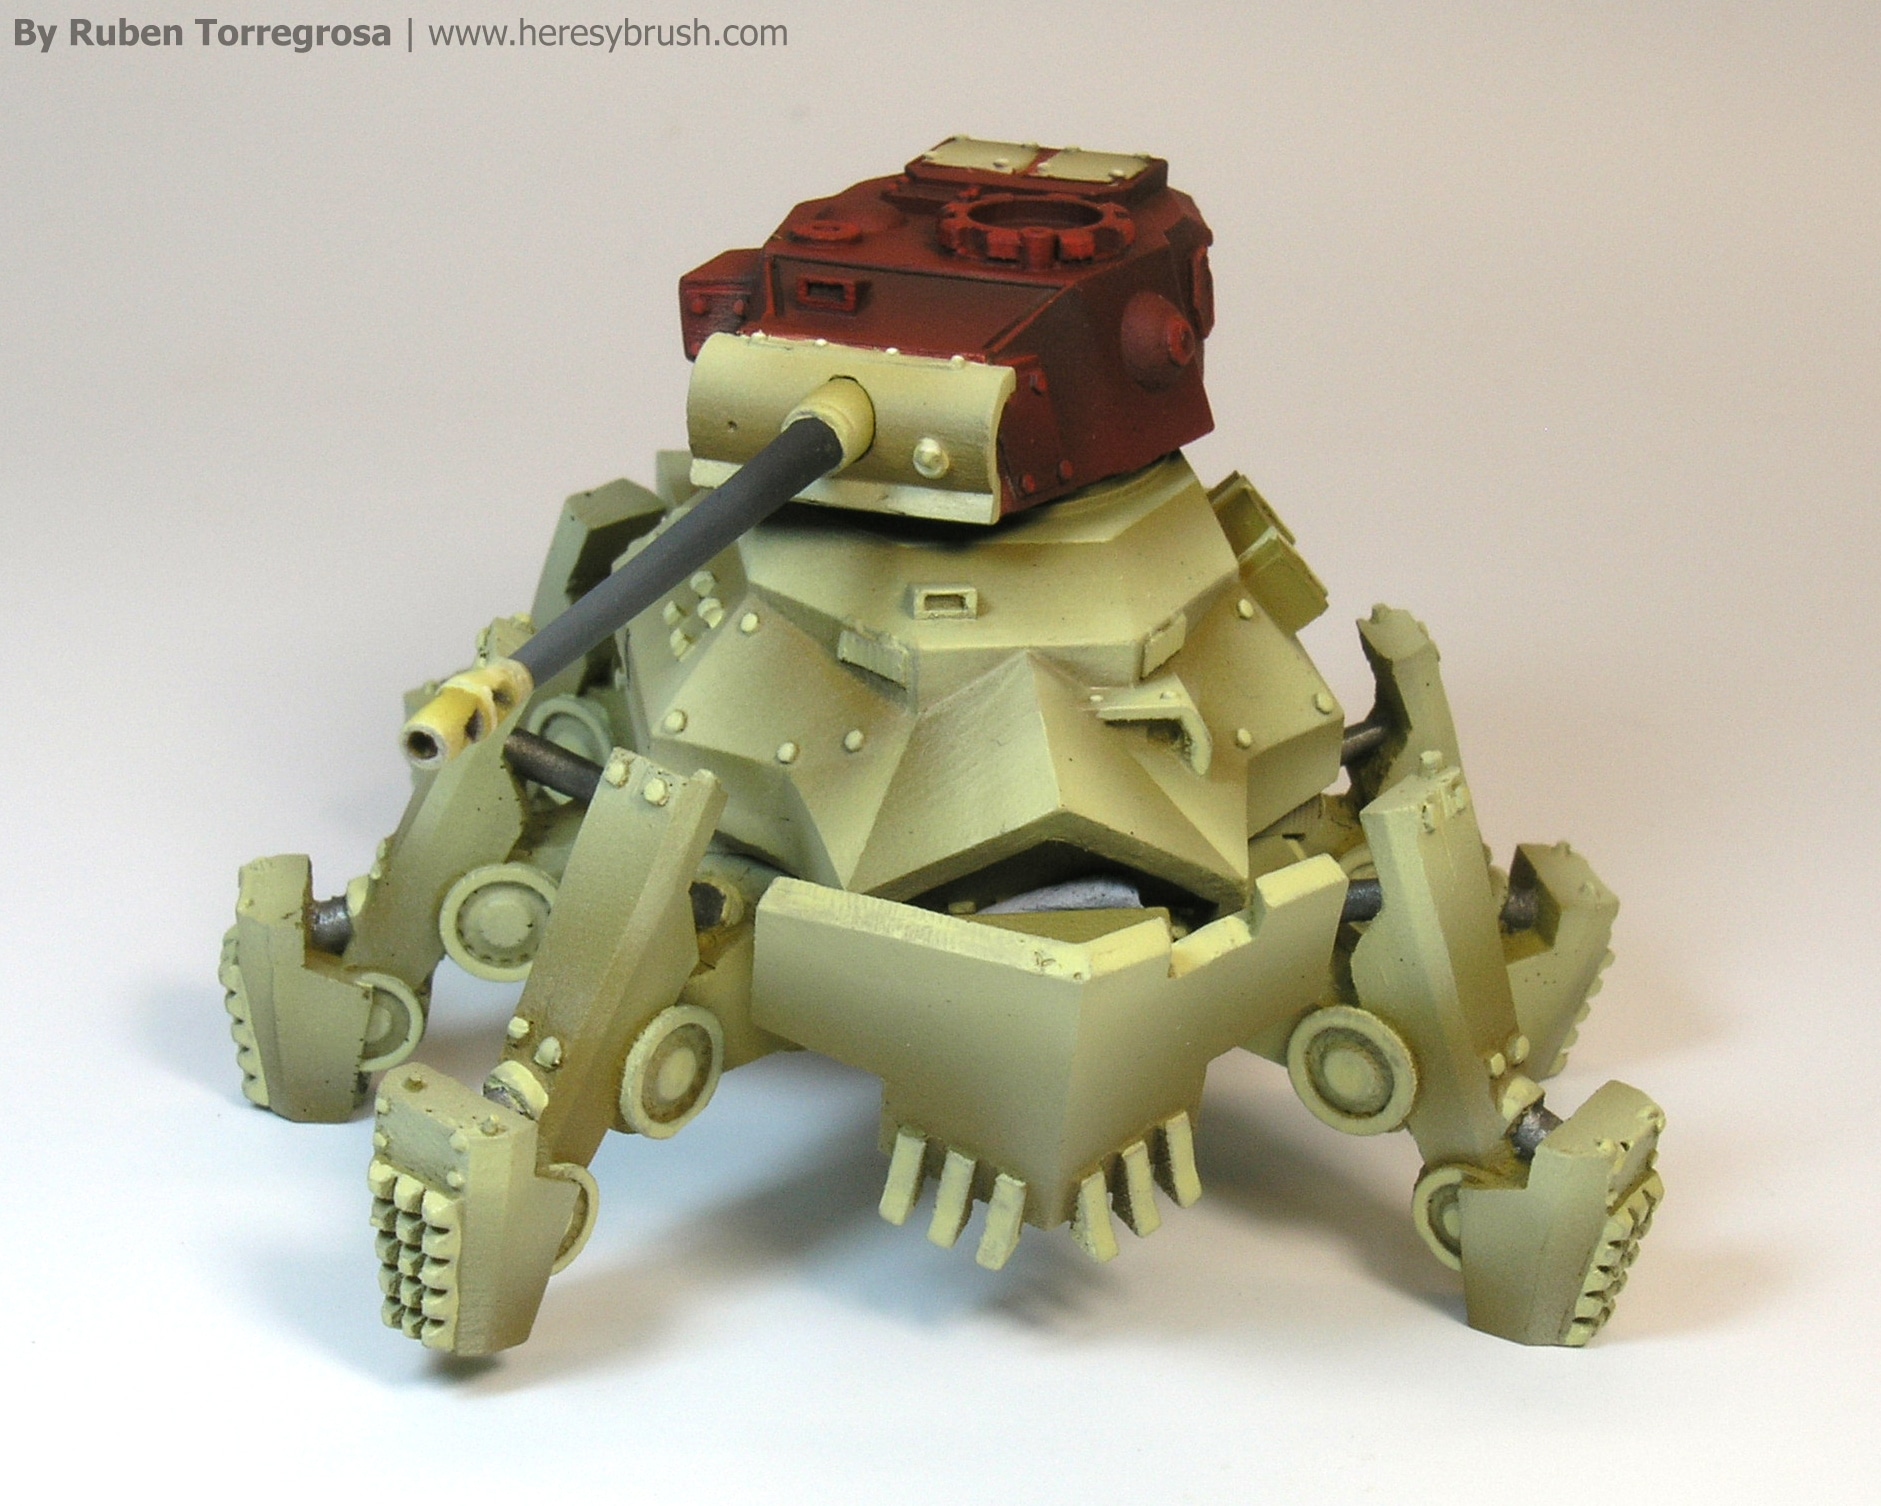
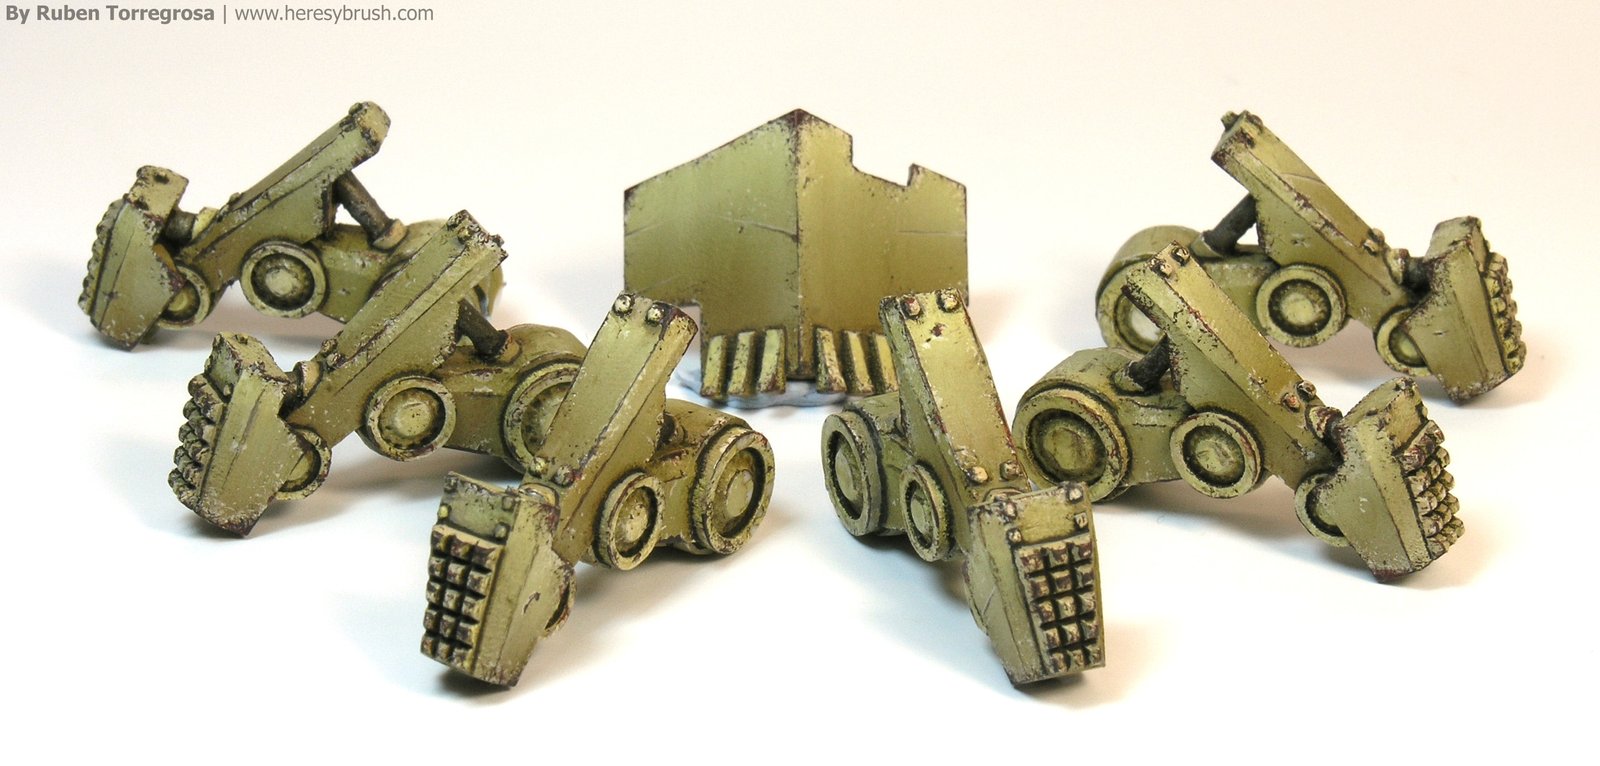
While I am learning new hobbies (and sports) in this lovely Finish land, such as ice swimming, ice hockey or cross-country ski, I had enough time to paint and prepare a painting guide featuring an interesting Panzermech from ClockWork Goblin miniatures. I love this theme! In the past, I painted a couple of walkers from DreamPod9, and I currently attempt to paint as many E-series tanks as I can from Forged in Battle or Heer46. All in 1/100 scale or 15mm, of course!, my preferred scale.
In this occasion, I’ve prepared a complete painting guide. However, I want to notice that my “protocol” it’s only one between thousands. I follow this steps because after painting dozens of tanks I find in them the easier way. Nevertheless, sometimes I skip some steps or I add another ones, depending on the project. Therefore, it’s very important to practice and practice and finally you can find your best protocol. In the following guide I will try to be brief in the explanations, and I’ll show as many pictures as I can of every step. Click in pictures to enlarge them. Note, althought in this guide I’m using a sci-fi vehicle, the techniques are the SAME when you paint historical vehices, from the t34 to the Merkava.
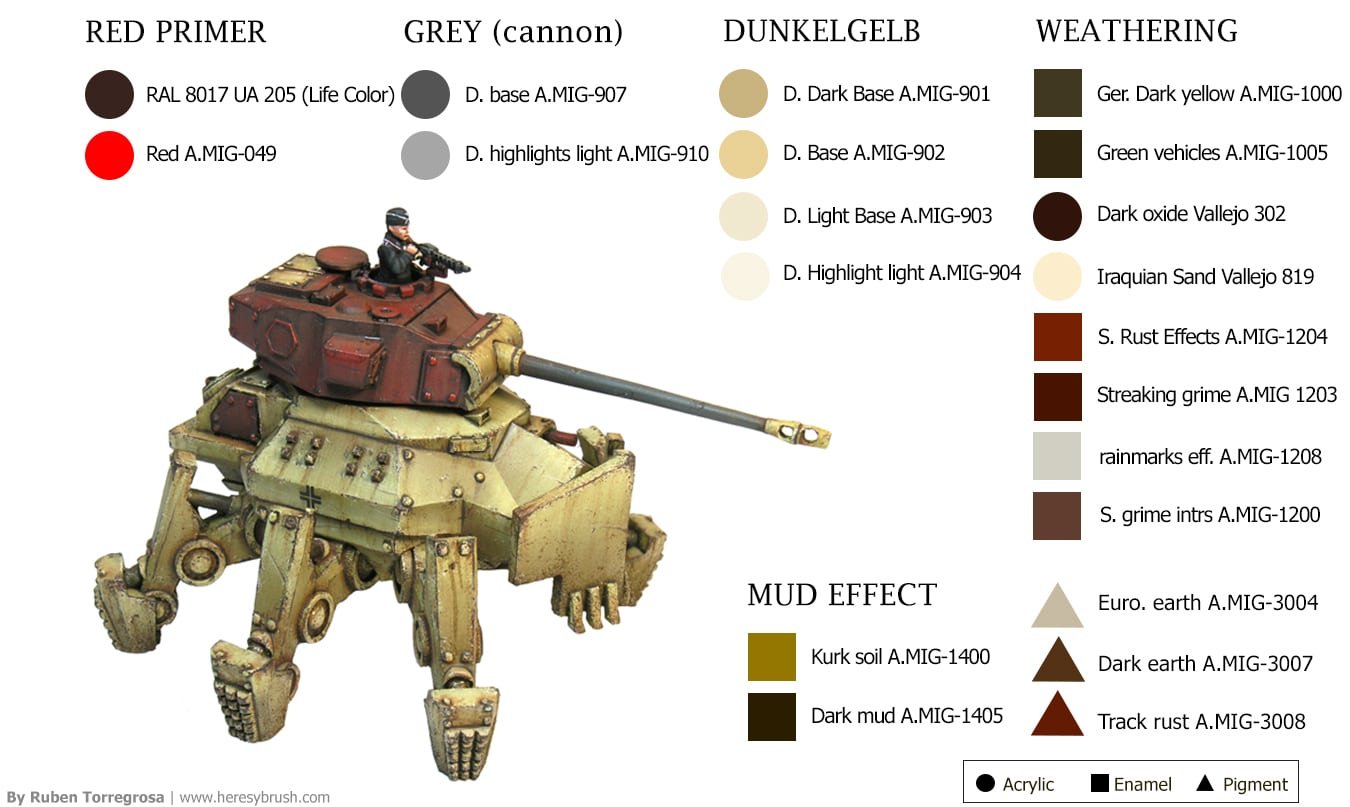
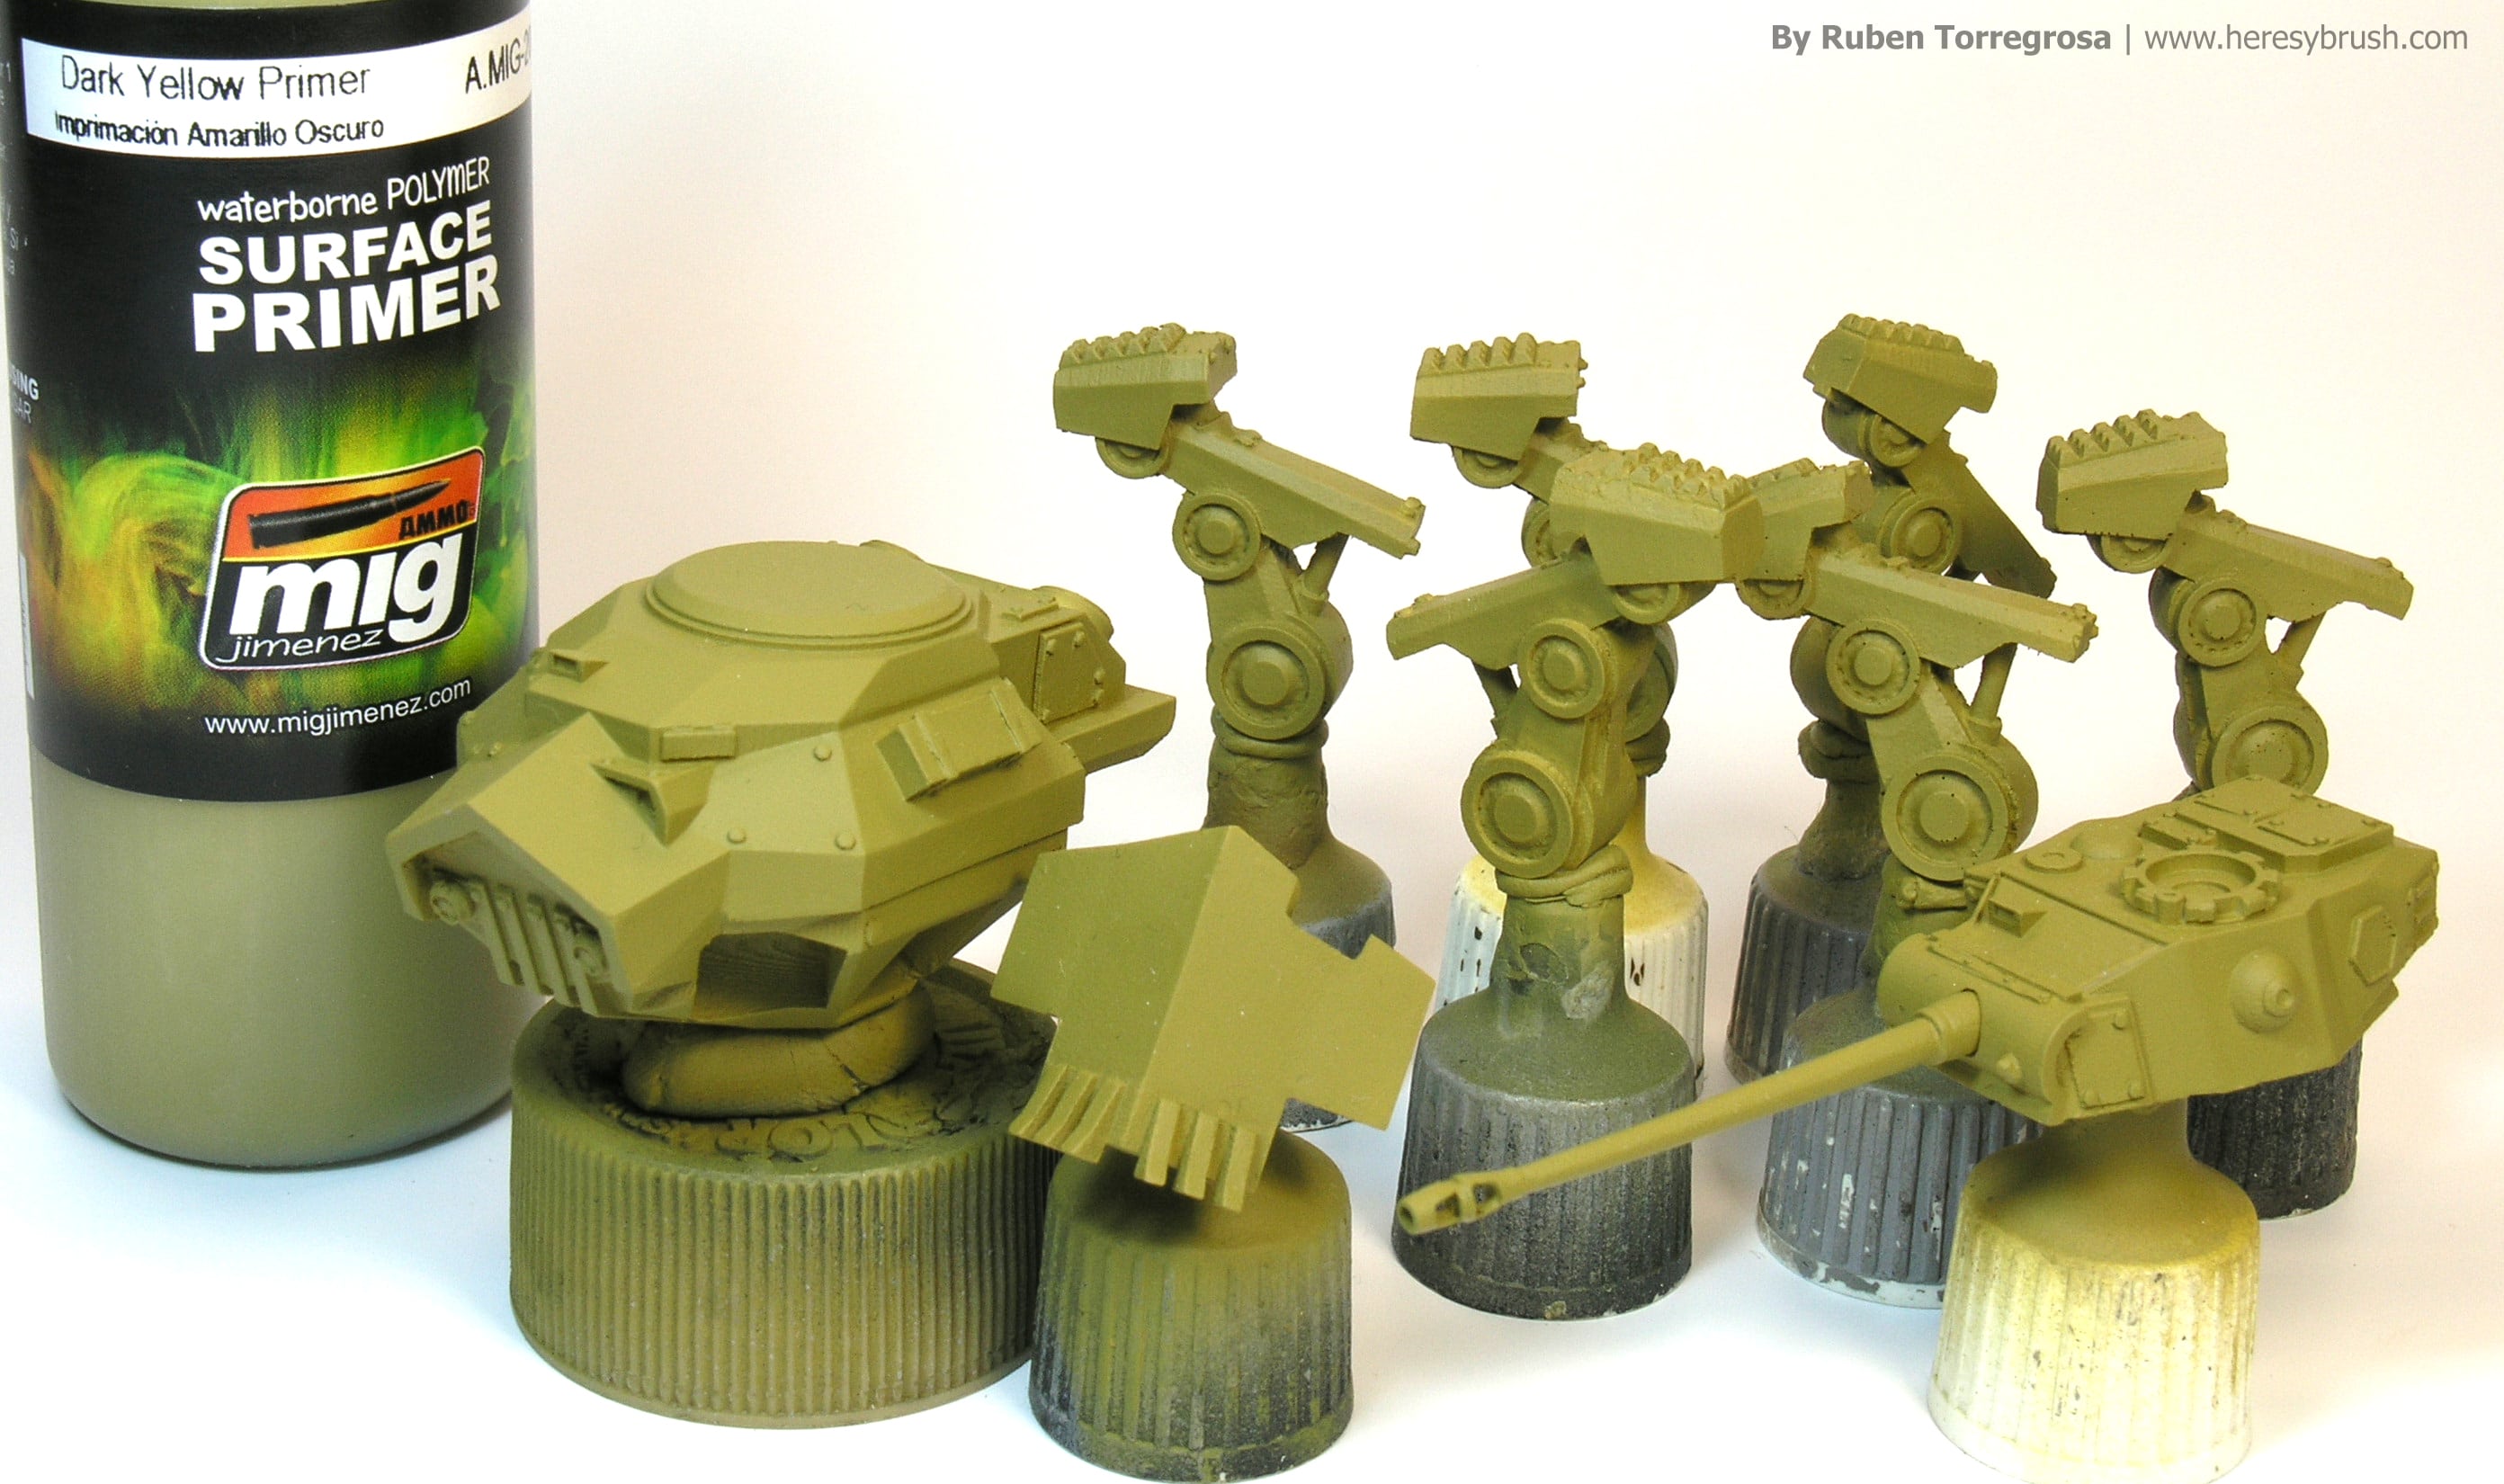
The first step will be to apply the primer on the whole model in order: to ensure the following painting layers are properly applied and to protect the painting from impacts and scratches. I’ve use the dark yellow primer from Ammo of Mig, applied by airbrush. I’ve applied a couple of layers until obtain a uniform layer.
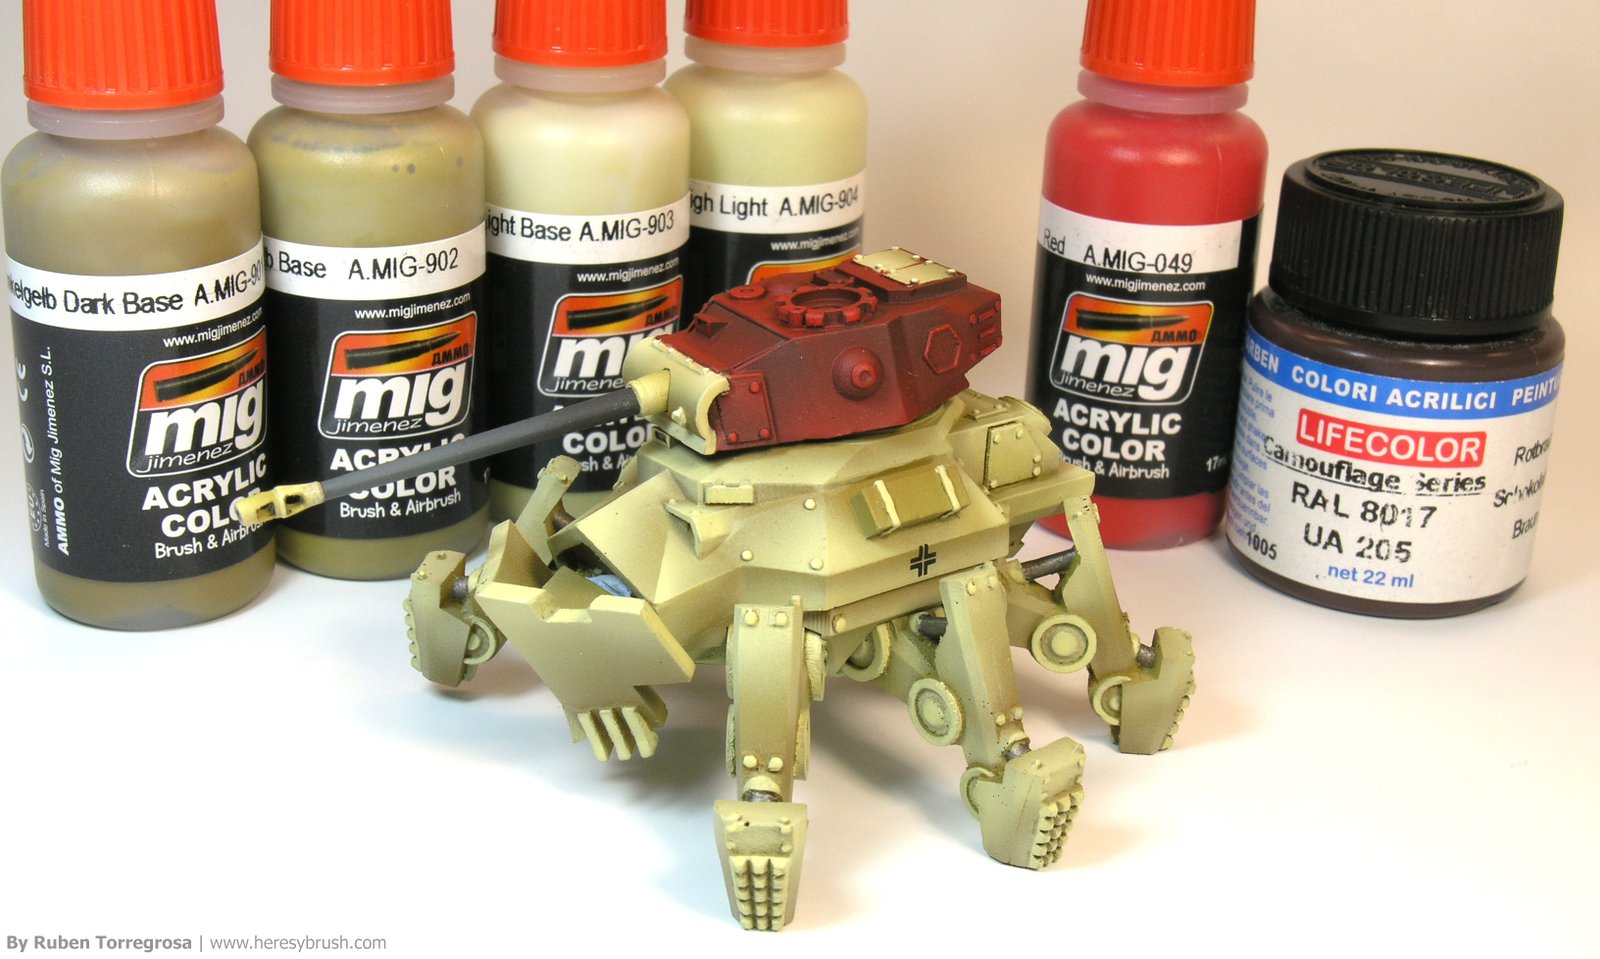
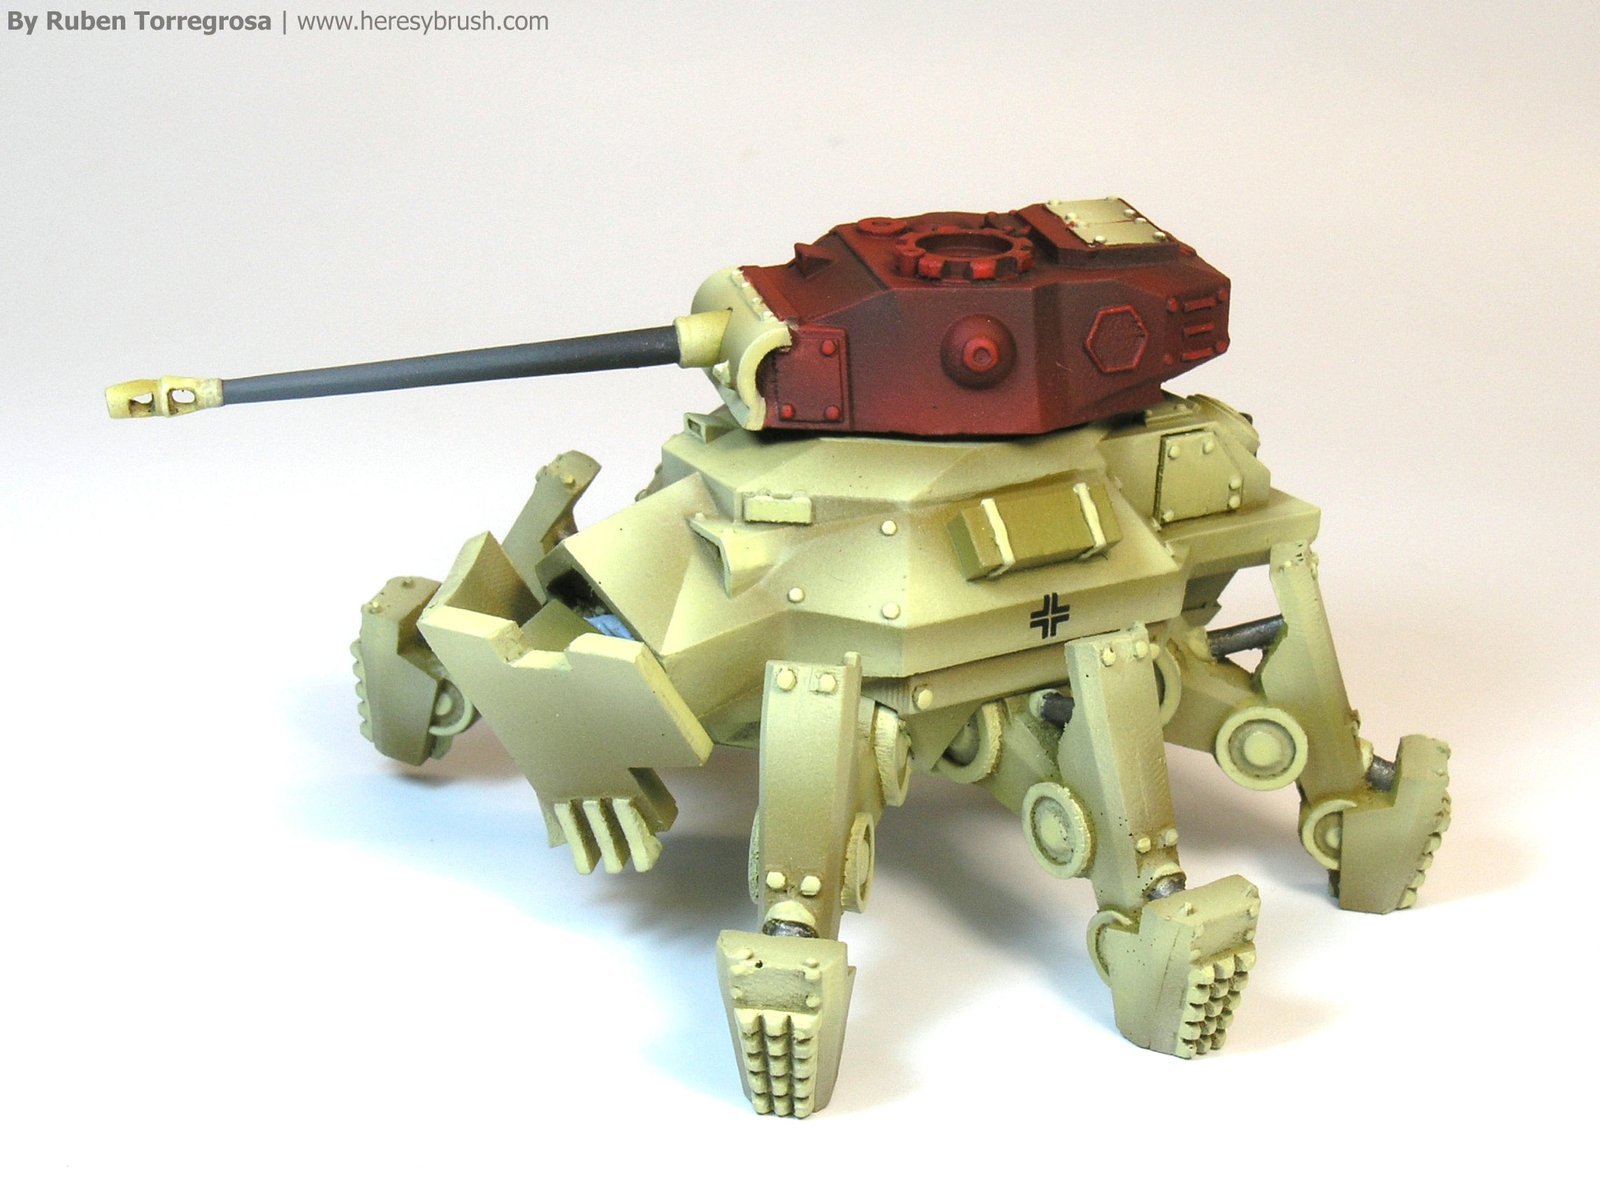
Now I start one of the most interesting steps for me, the color modulation. This way of apply highlights in our models is too unreal, since we consider plenty of light focus instead only one (the sun). But the result is too contrasted, and therefore, too striking. In my opinion, this is the best illumination method for 15mm or 1/100 scale. Thus, you compensate in part the small size of these miniatures. You can check this other post about color modulation (it’s in Spanish but you can change the language using the translator tool placed in the upper right corner). Before continuing we should varnish the model. It’s recommendable to use satin or gloss varnish because we create a polished surface in which oils and enamels spread easily.
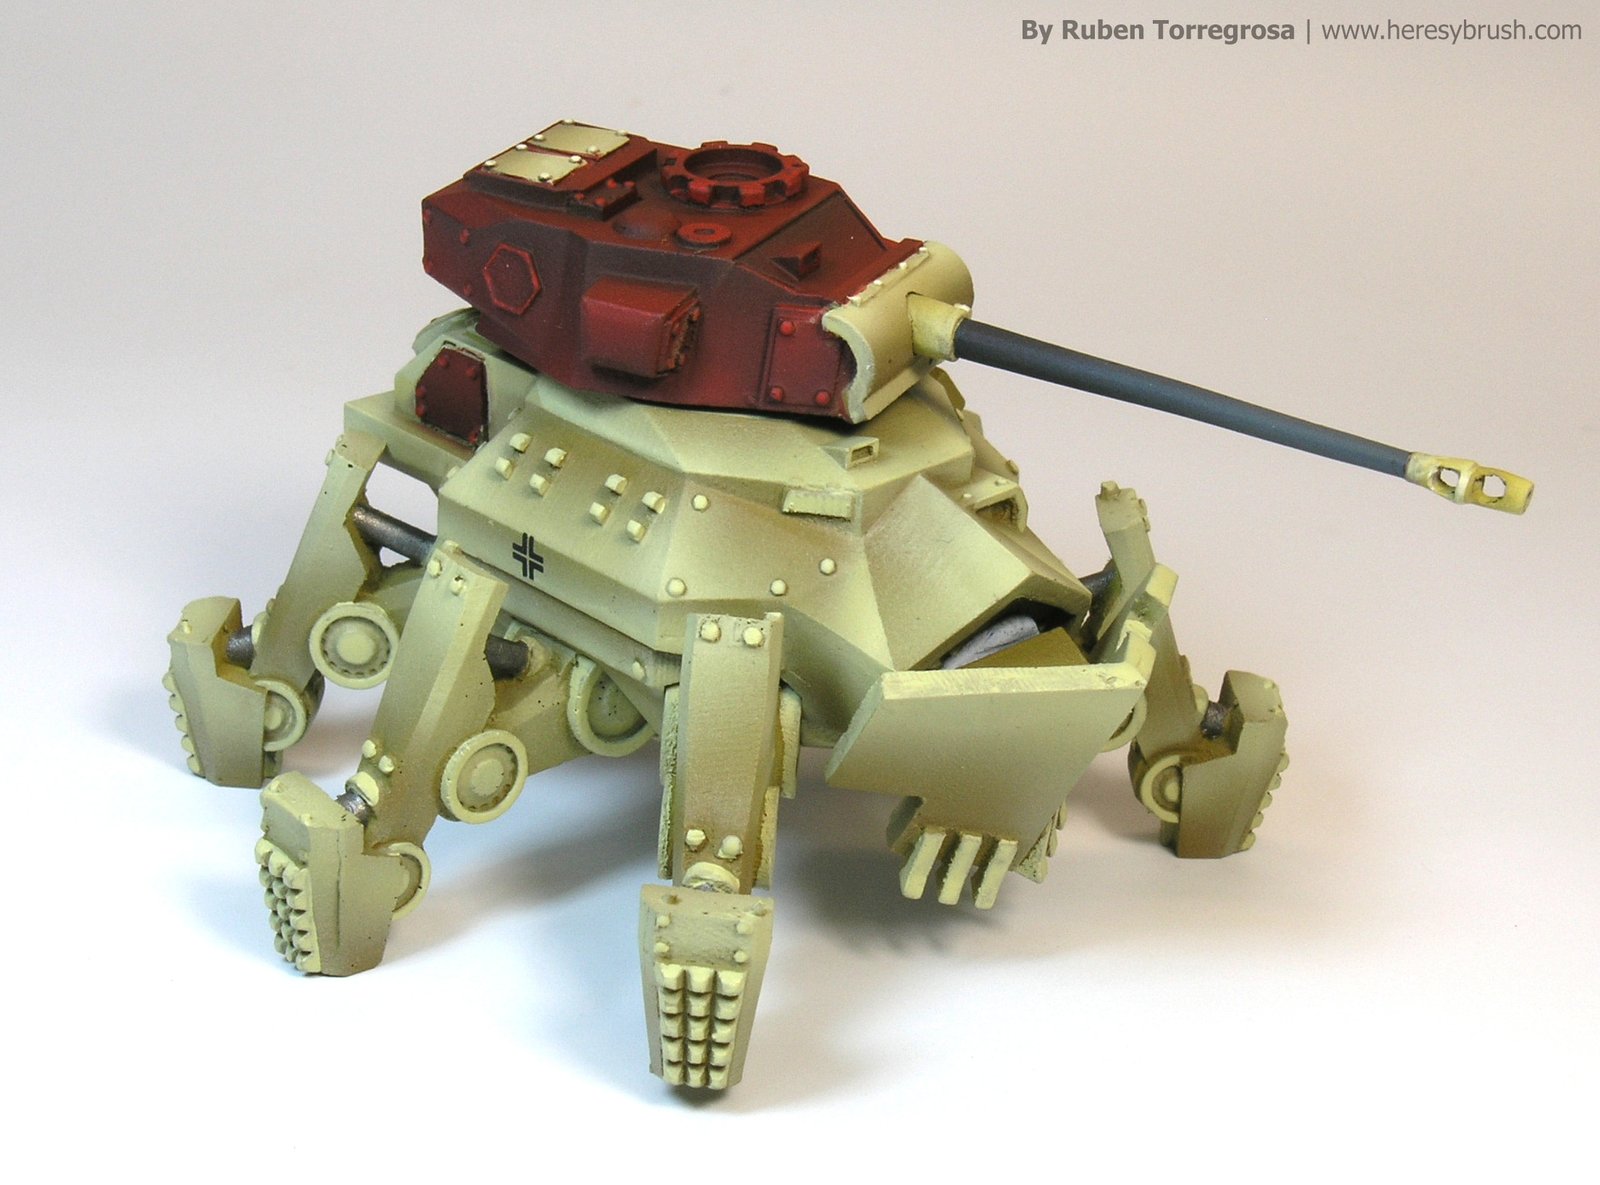
After painting color modulation we can apply a filter. We can use ready-to-use ones, or we can create our own filters. Usually I don’t like to use filters, because we can mask part of the modulation work. Anyway, next step is the wash or pinwash. That’s apply a dark enamel, such as or oil only in recesses, NOT in the whole model. If you apply in the whole model, you can darken all surfaces. And we usually don’t want that!. Check this post if you need more info about filters and washes. I’ve use two ready-to-uses washes: brown wash for German Dark yellow A.MIG-1000 for the dark yellow color, and Dark brown wash for green vehicles A.MIG-1005 for red one. Is better to use enamels or oils than acrylics in this step because we can remove the excesses easily with a brush moistened in thinner.
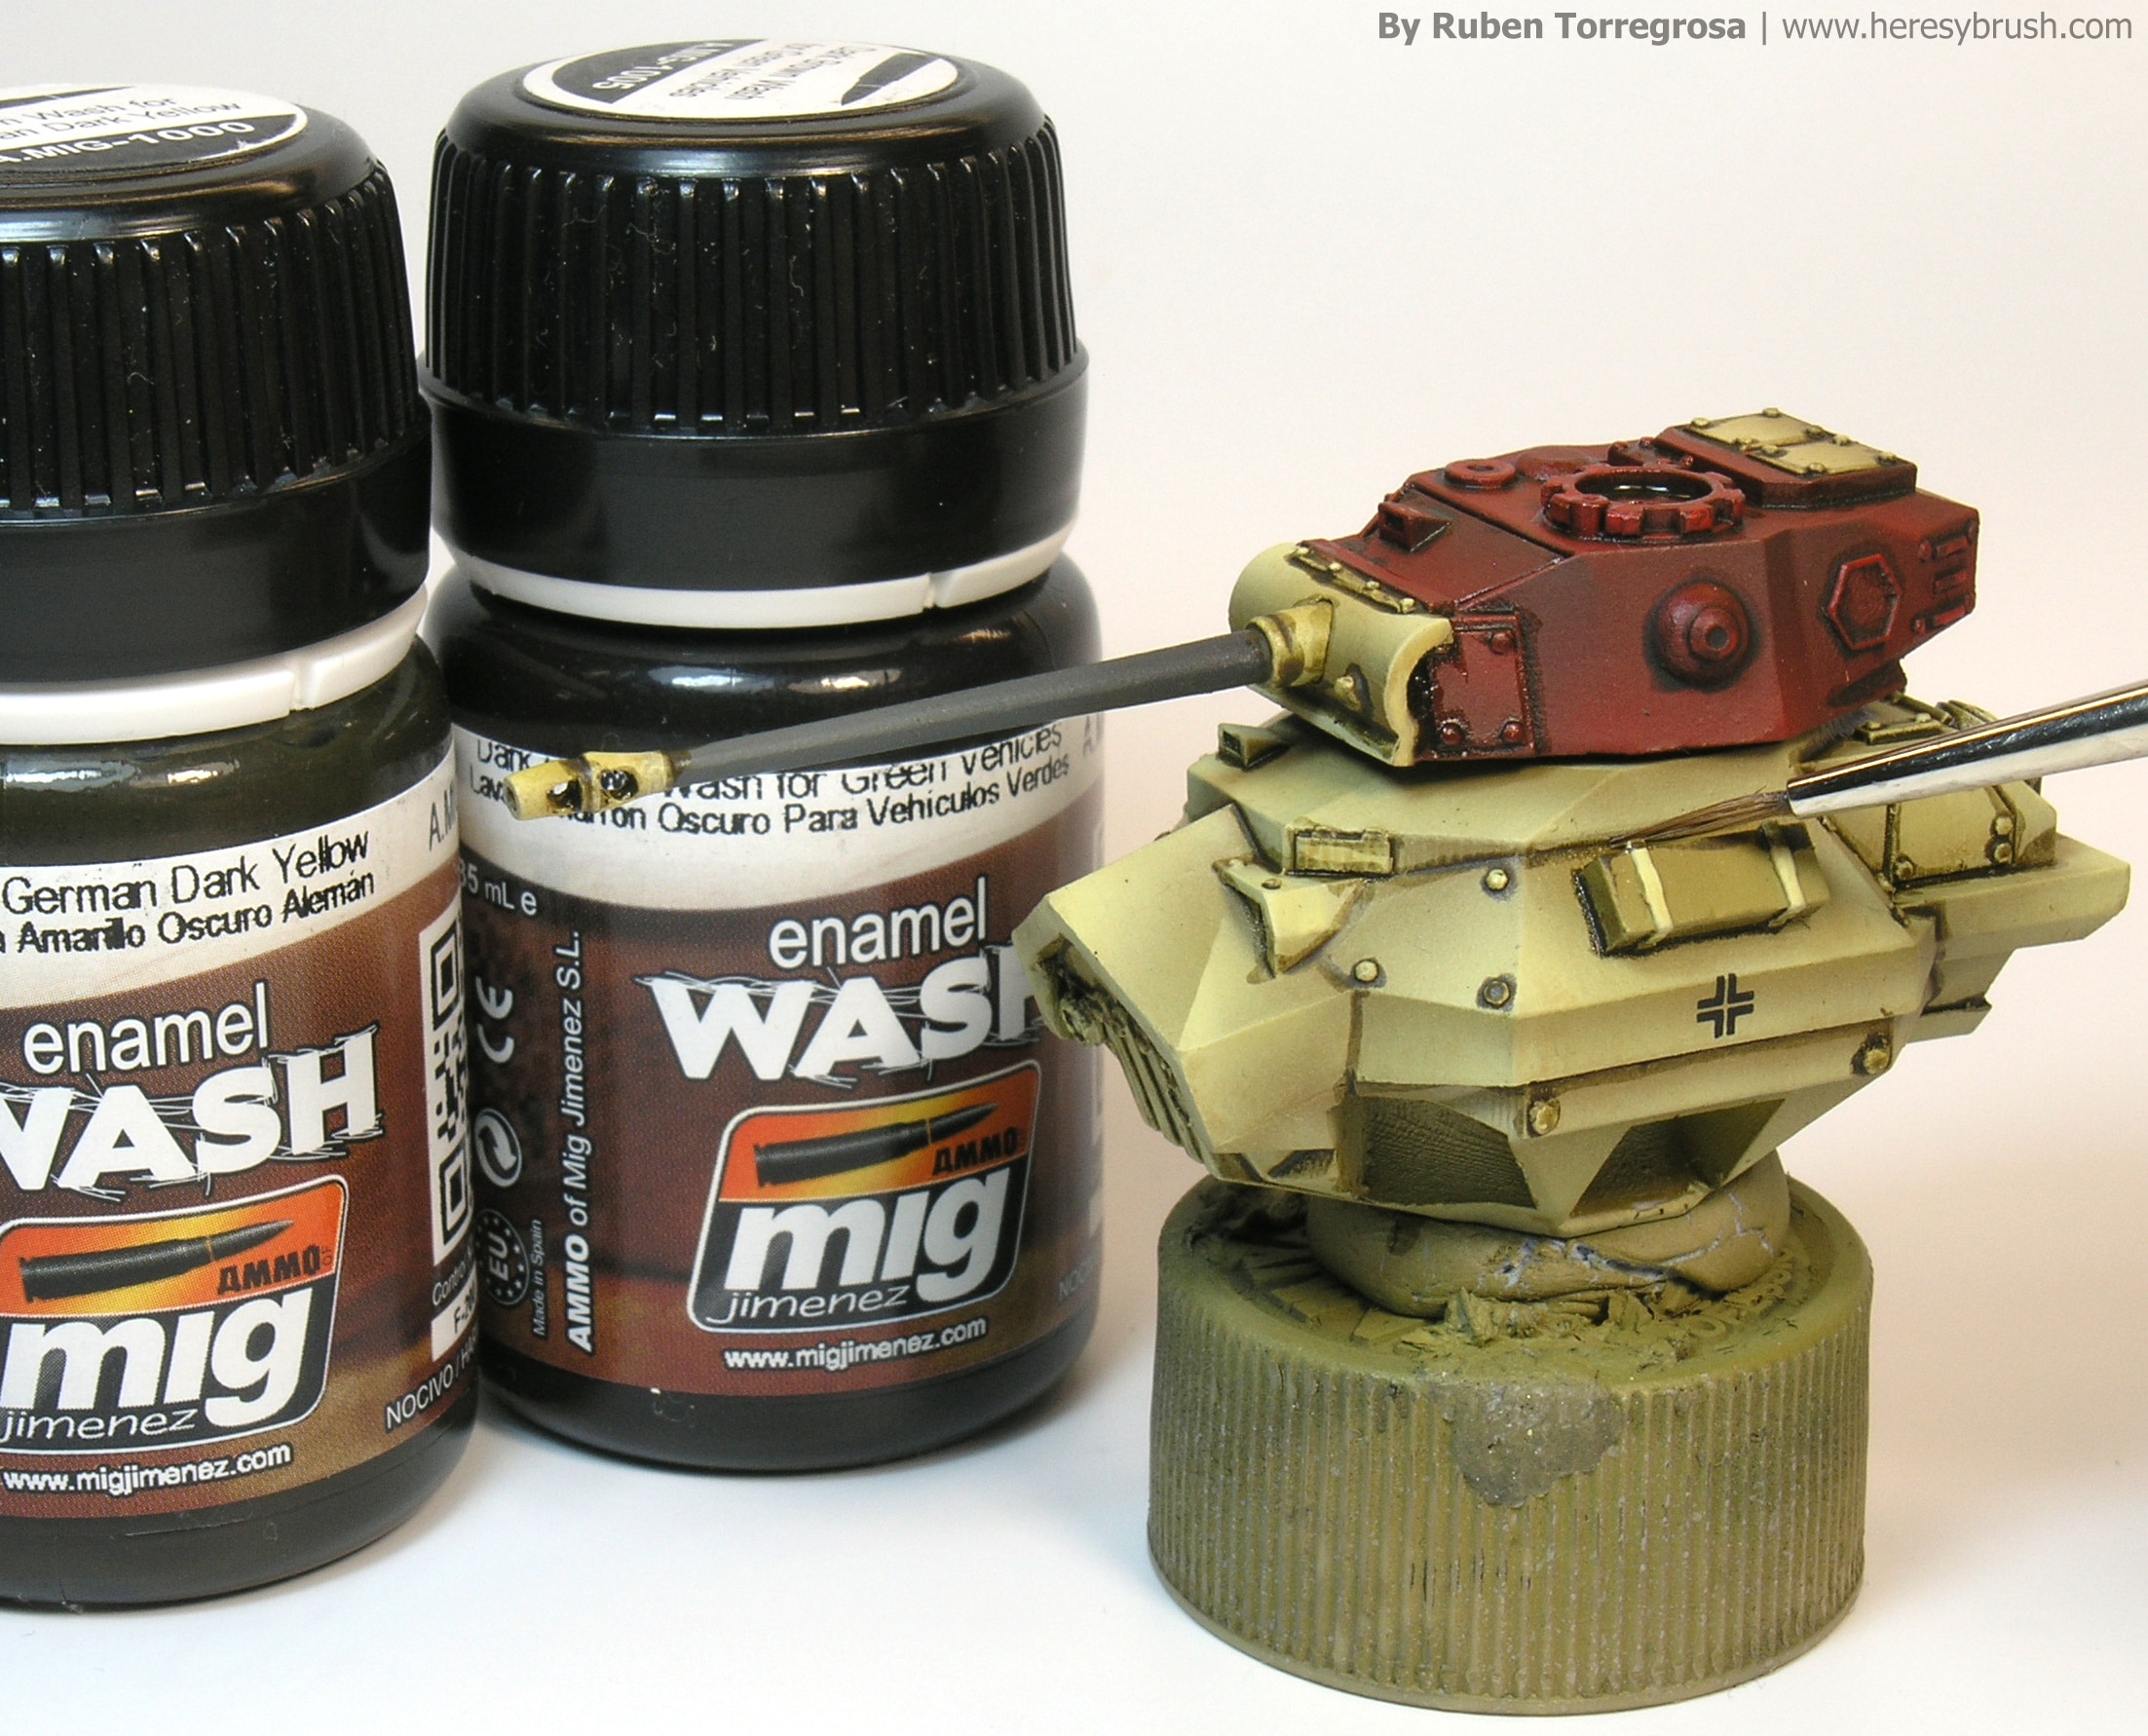
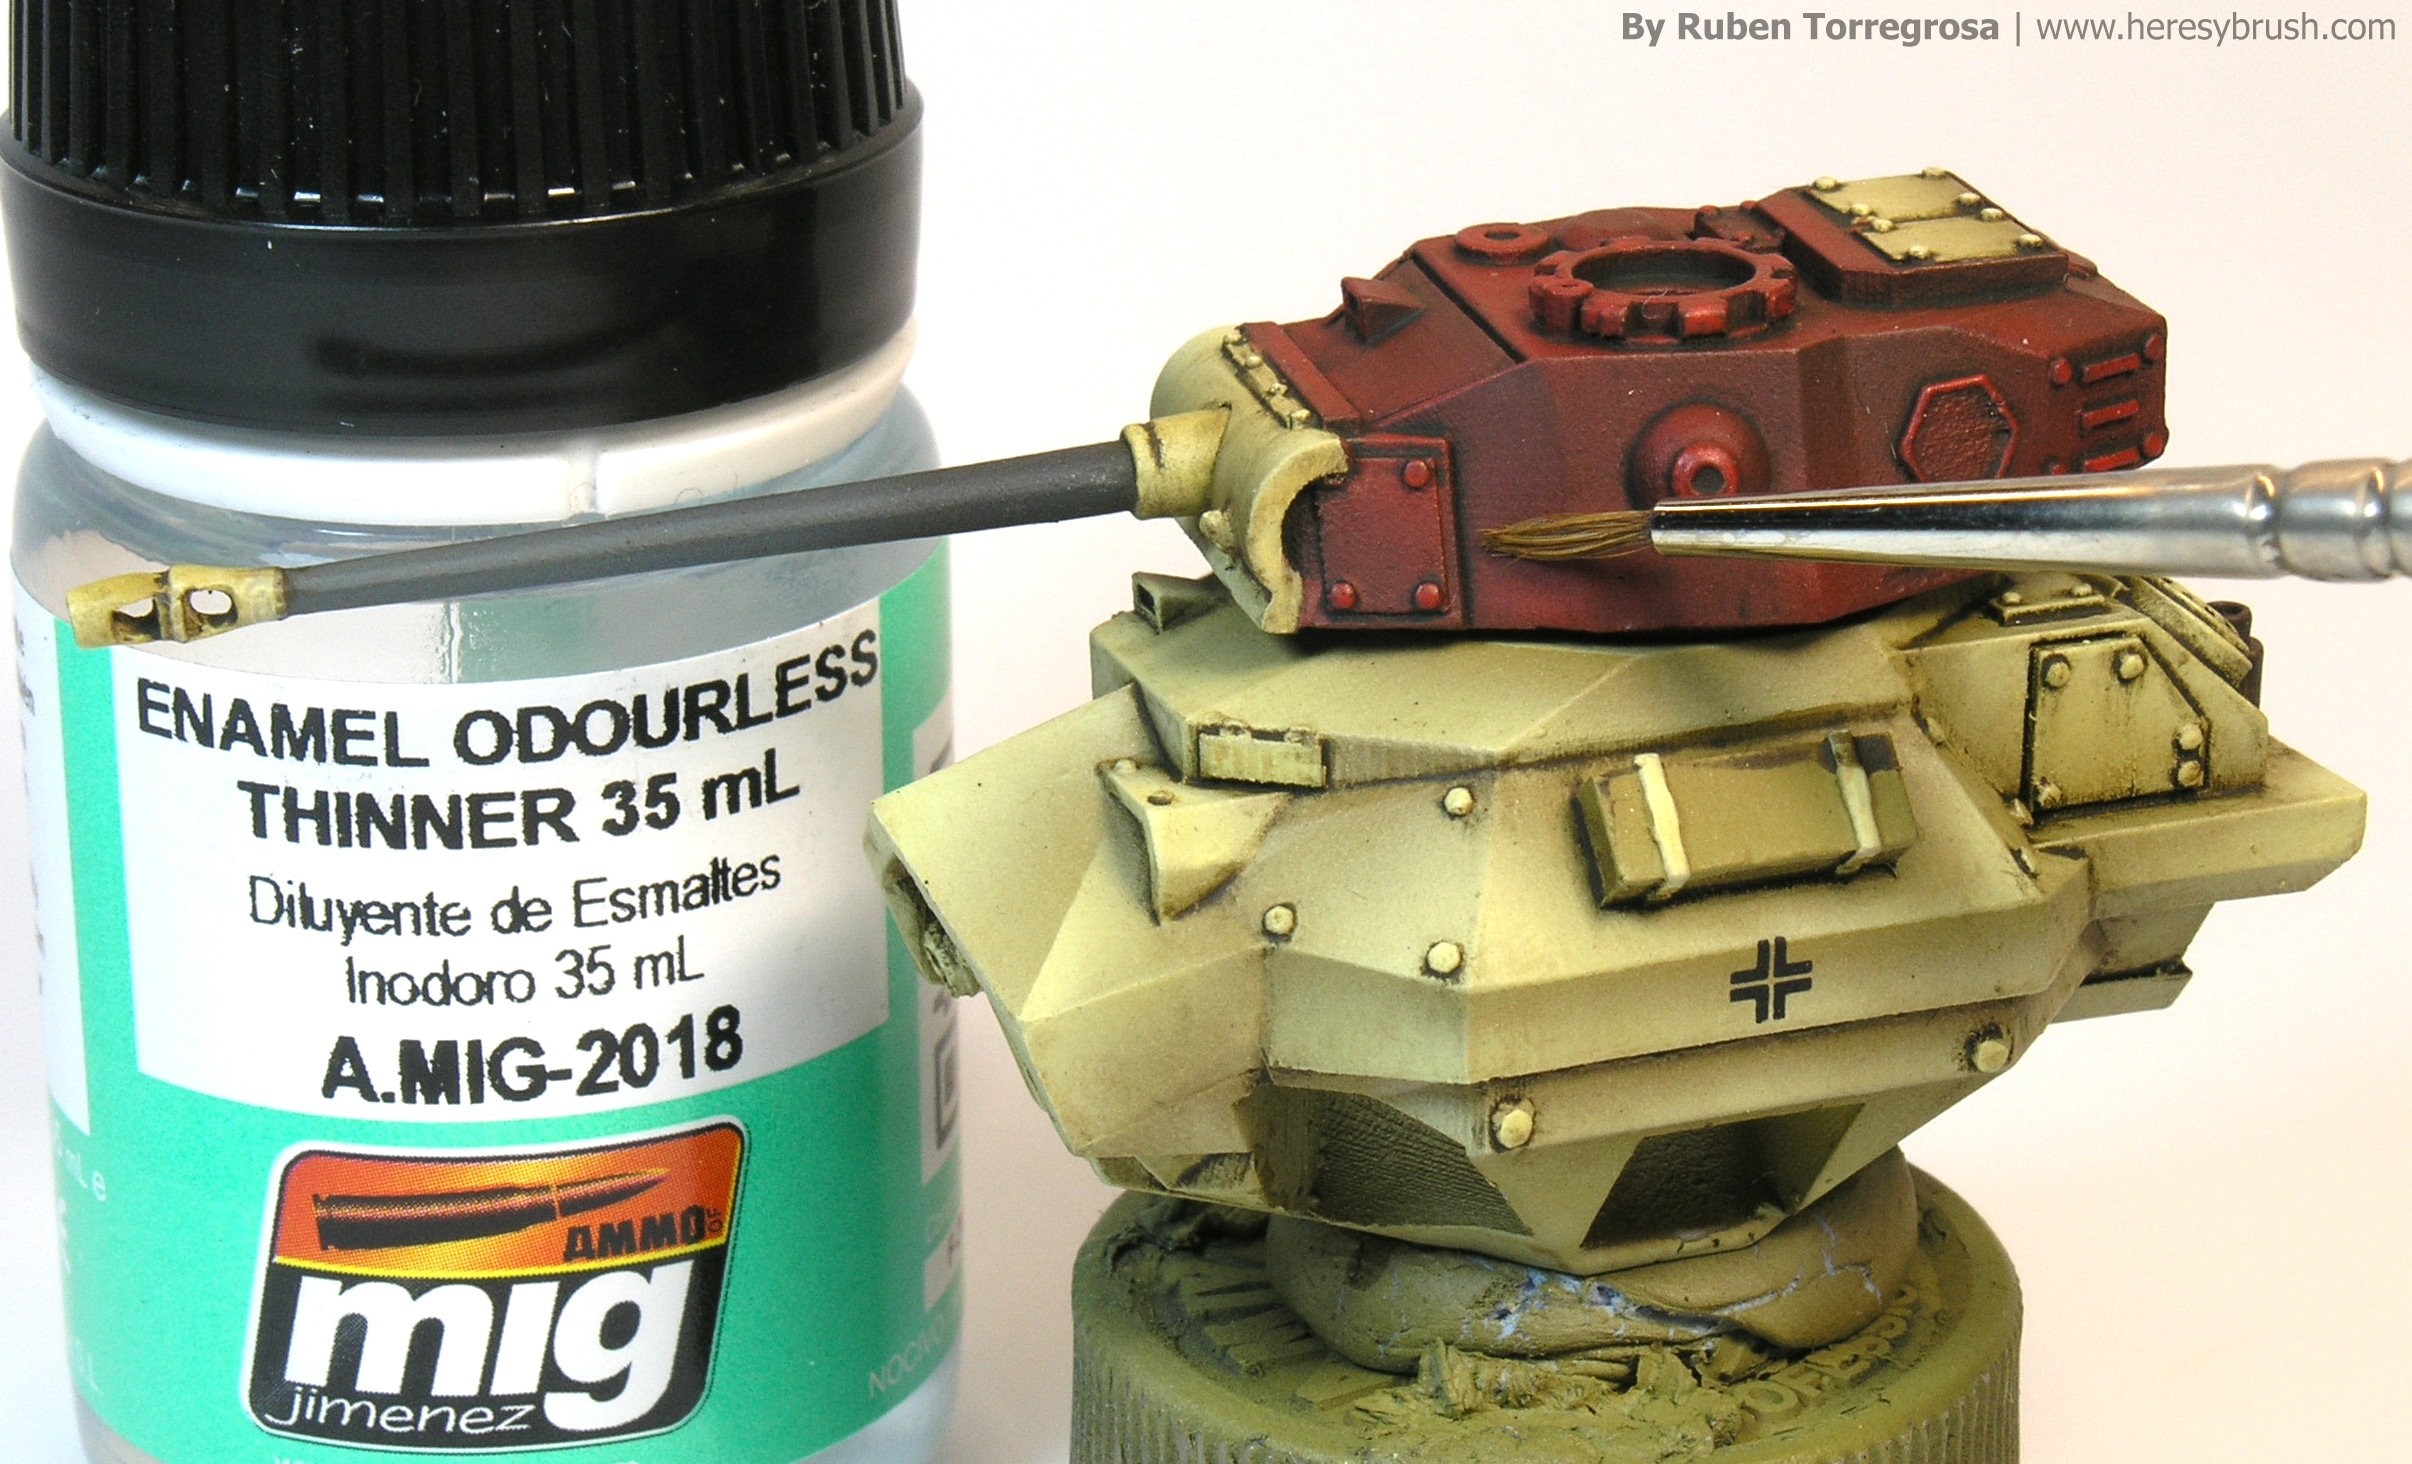
After a while, once the enamel is dry, we can remove the excess easily with a brush moistened in white spirit.
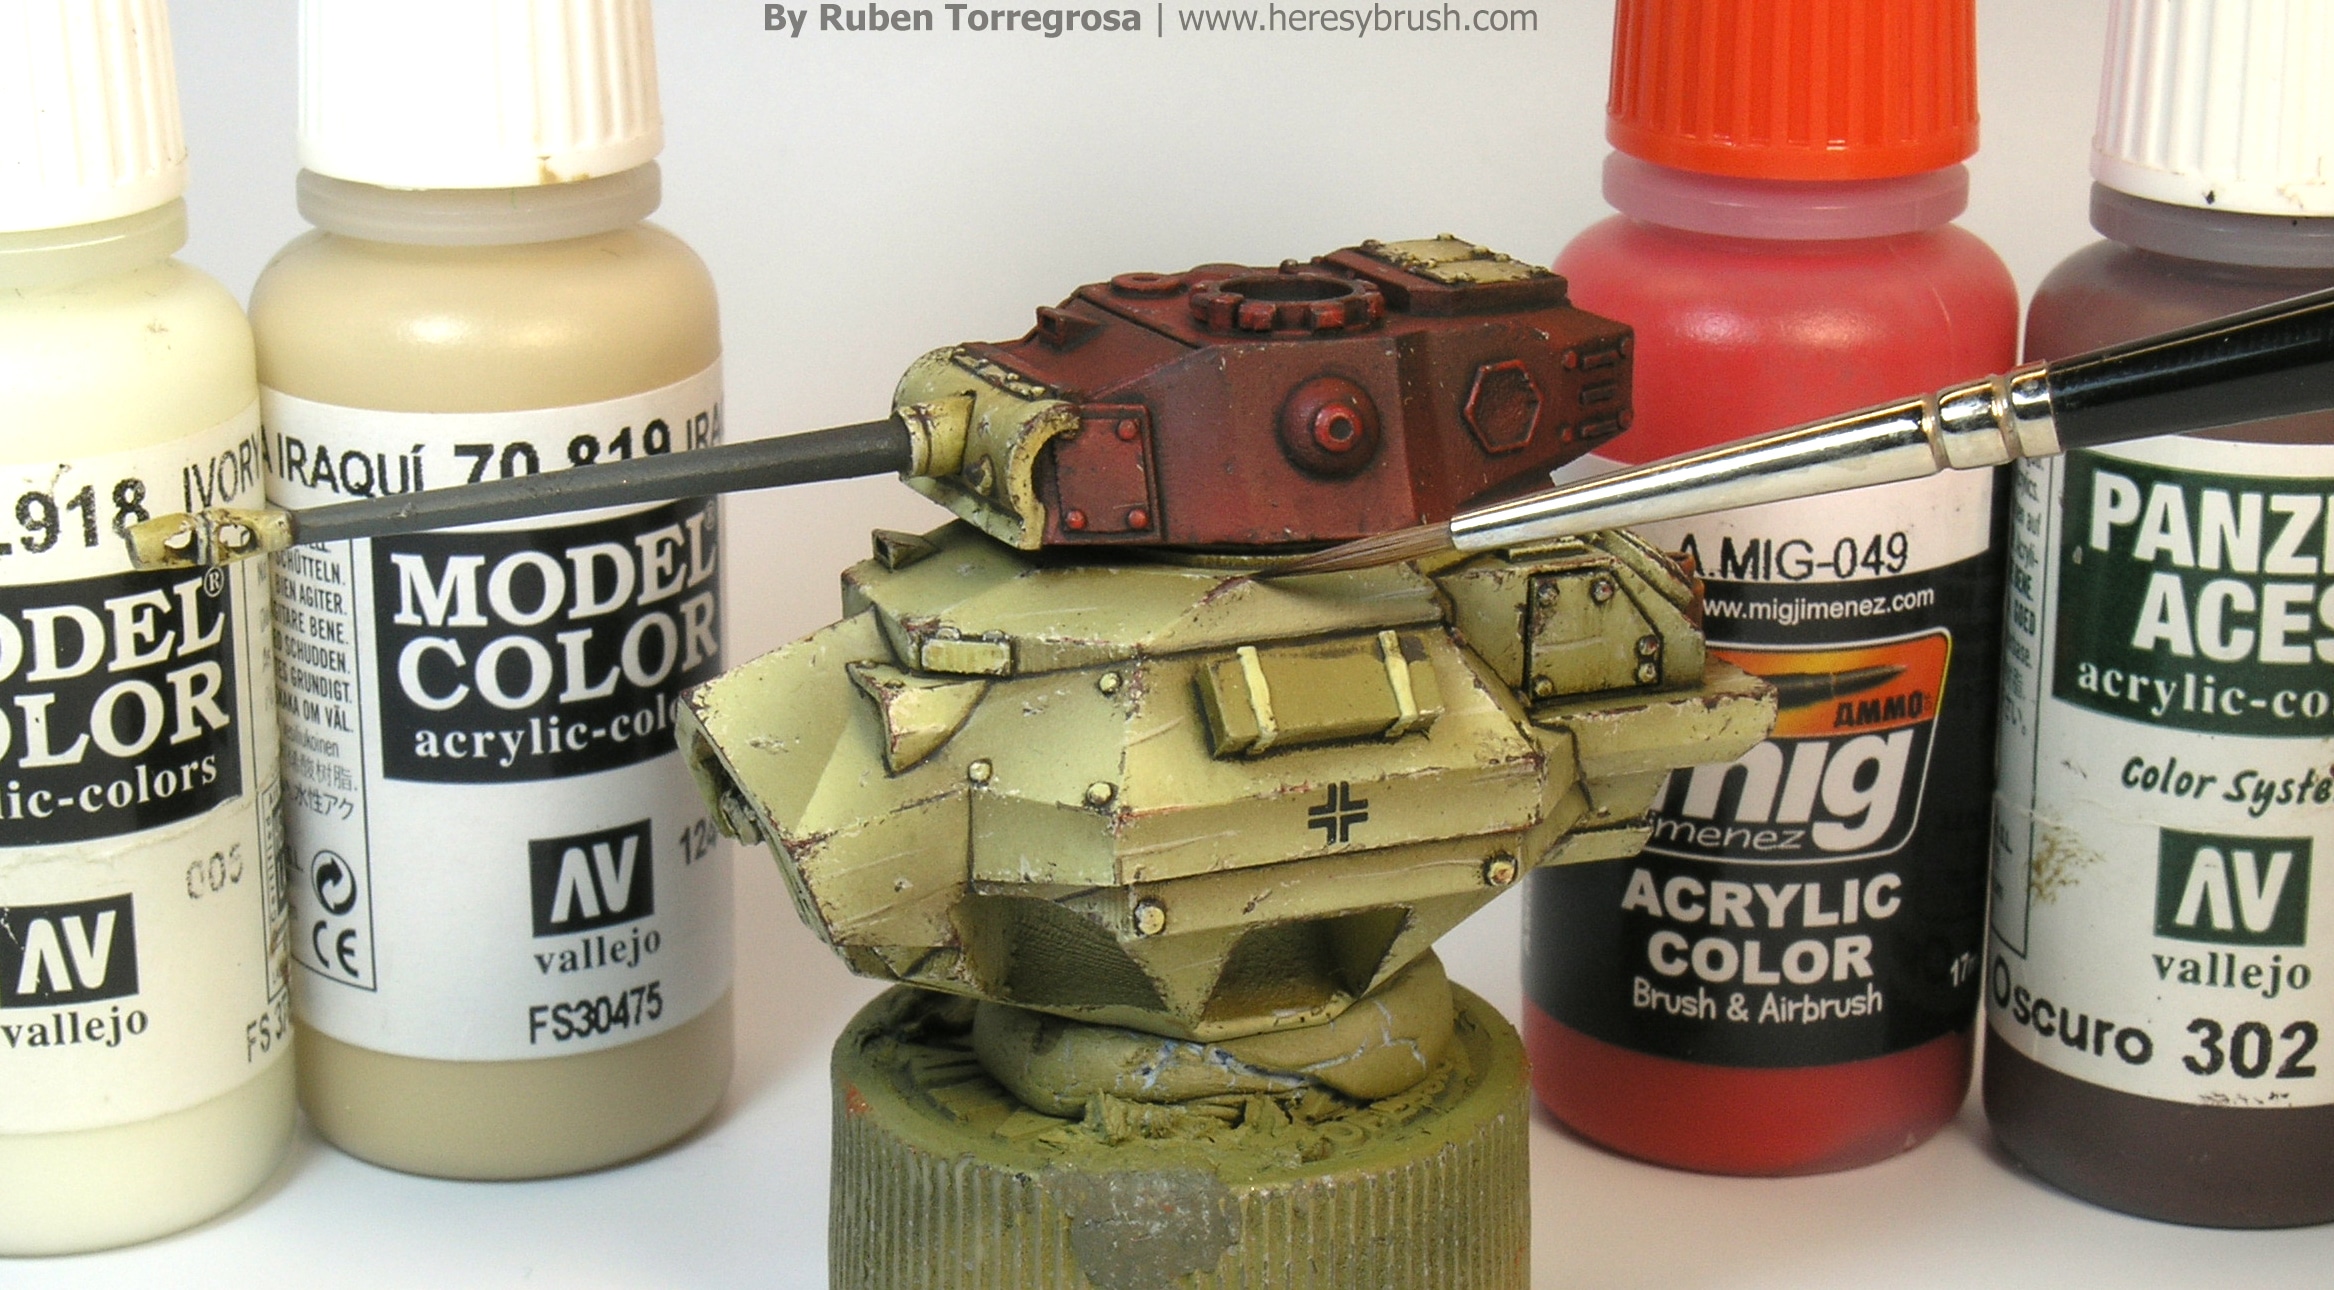
Now start another funny step: the chipping effects. To recreate these effects I usually follow two phases: light and dark color, and I use two tools: sponge and brush. Therefore, first I apply the light color, and “inside” of this color, I apply the dark one. Thus I create a deep effect. For the light color we should use a lighter tone of the same color of the surface. For example, in my case I’ve use a mix of Iraqi sand (819, Vallejo) and Ivory (918, Vallejo). About the dark color, in this case I’ve applied two different tones: dark brown and red, in order to recreate different deeps of chipping. Red chippings show the red primer color, while the dark brown color represent the oxidized metal. About tools, I usually use first the sponge to create real and random areas of chipping in the most exposed parts of the vehicle, and then I add details with a brush. You can check this post to see other method to reflect chippings.
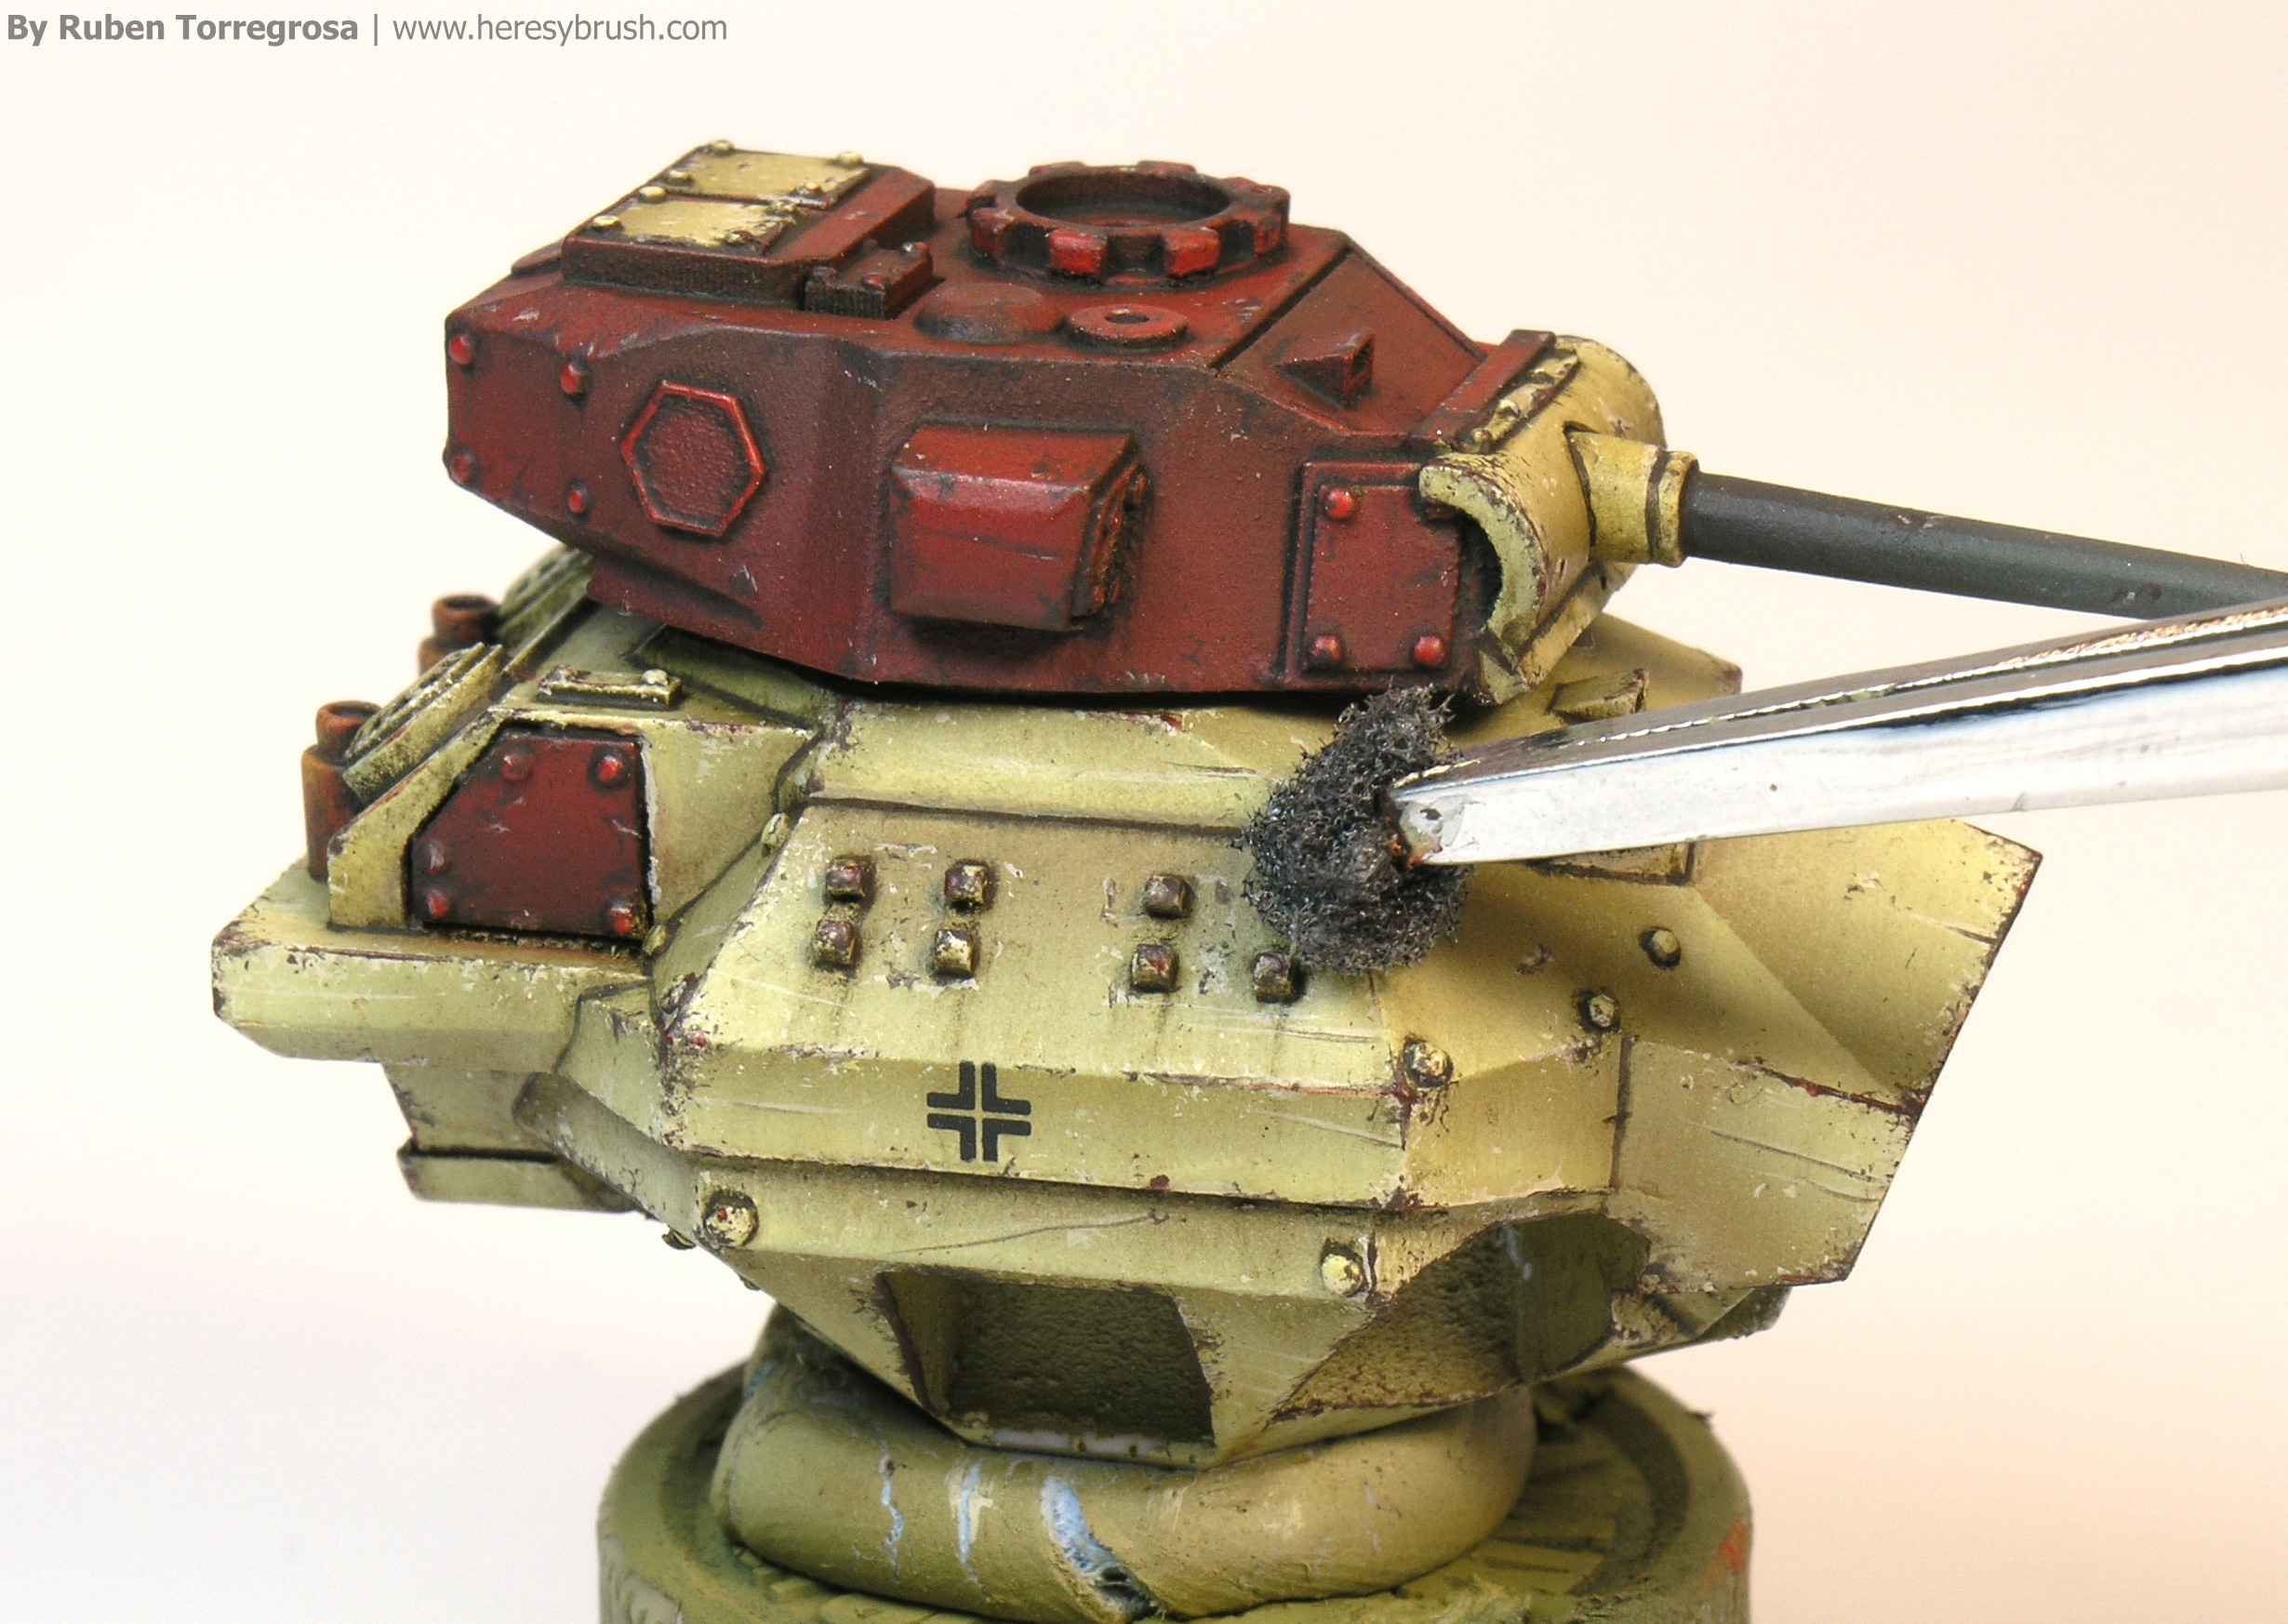
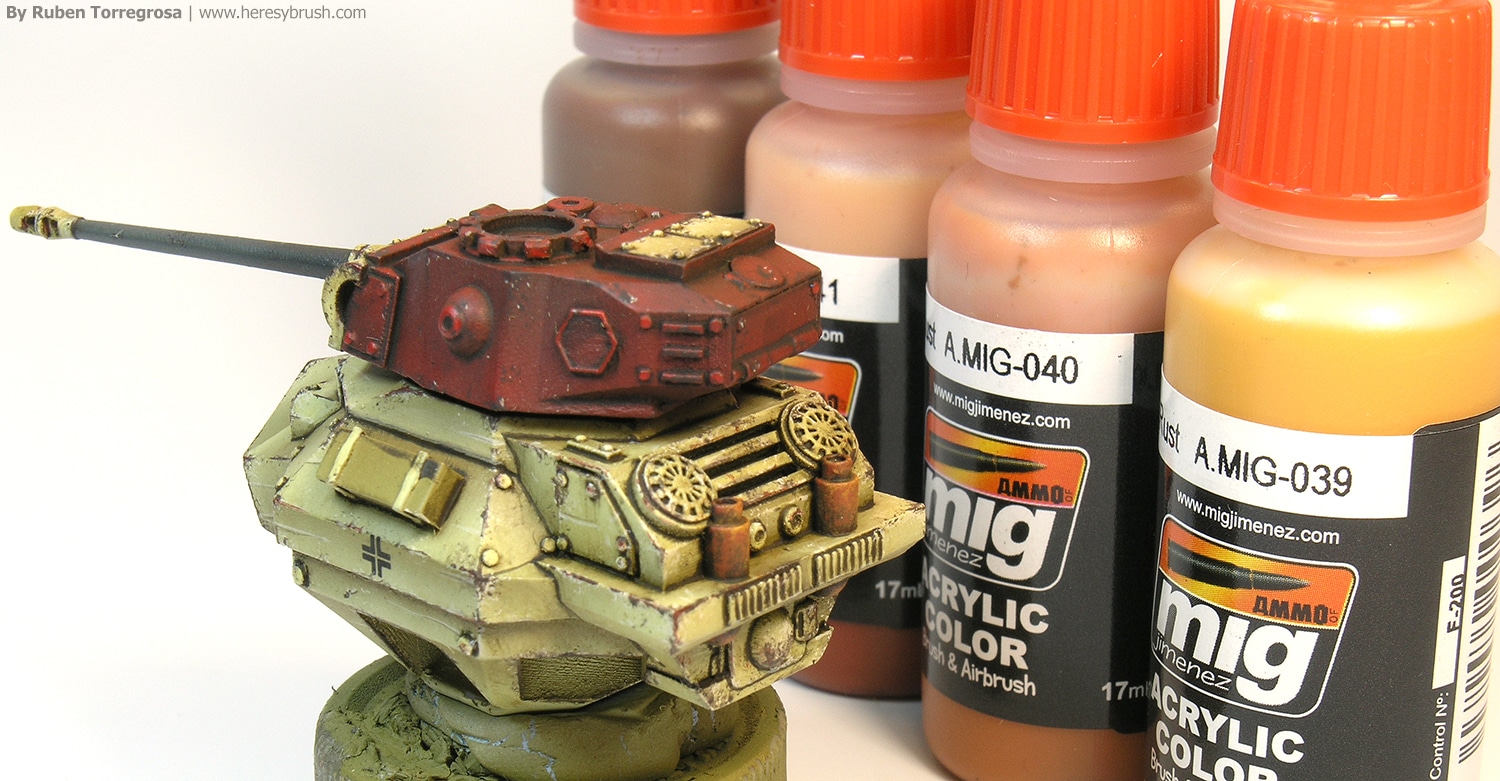
 We can use a similar method to represent the oxidized exhaust. I’ve use the oxide set color from Ammo of Mig. The combination of different brown and orange tones let us to get a real oxide effect.
Then, we should add more life to our model by including streaking and dirty effects on vertical surfaces. To simulate this effects I’ve selected different enamels from Ammo of Mig: rainmarks effects A.MIG-1208, Streaking grime for interiors A.MIG-1200, Streaking grime A.MIG 1203 and Streaking Rust Effects A.MIG-1204. The idea is to use the lighter colors in the red areas, and the darker ones in desert yellow regions. This is because darker enamels are not too much visible on a dark base, and viceversa. Anyway, I’ve use all in all areas, varying the proportions to get different tones and effects. You can follow the second video of this videotutorial to know how to apply this effects.
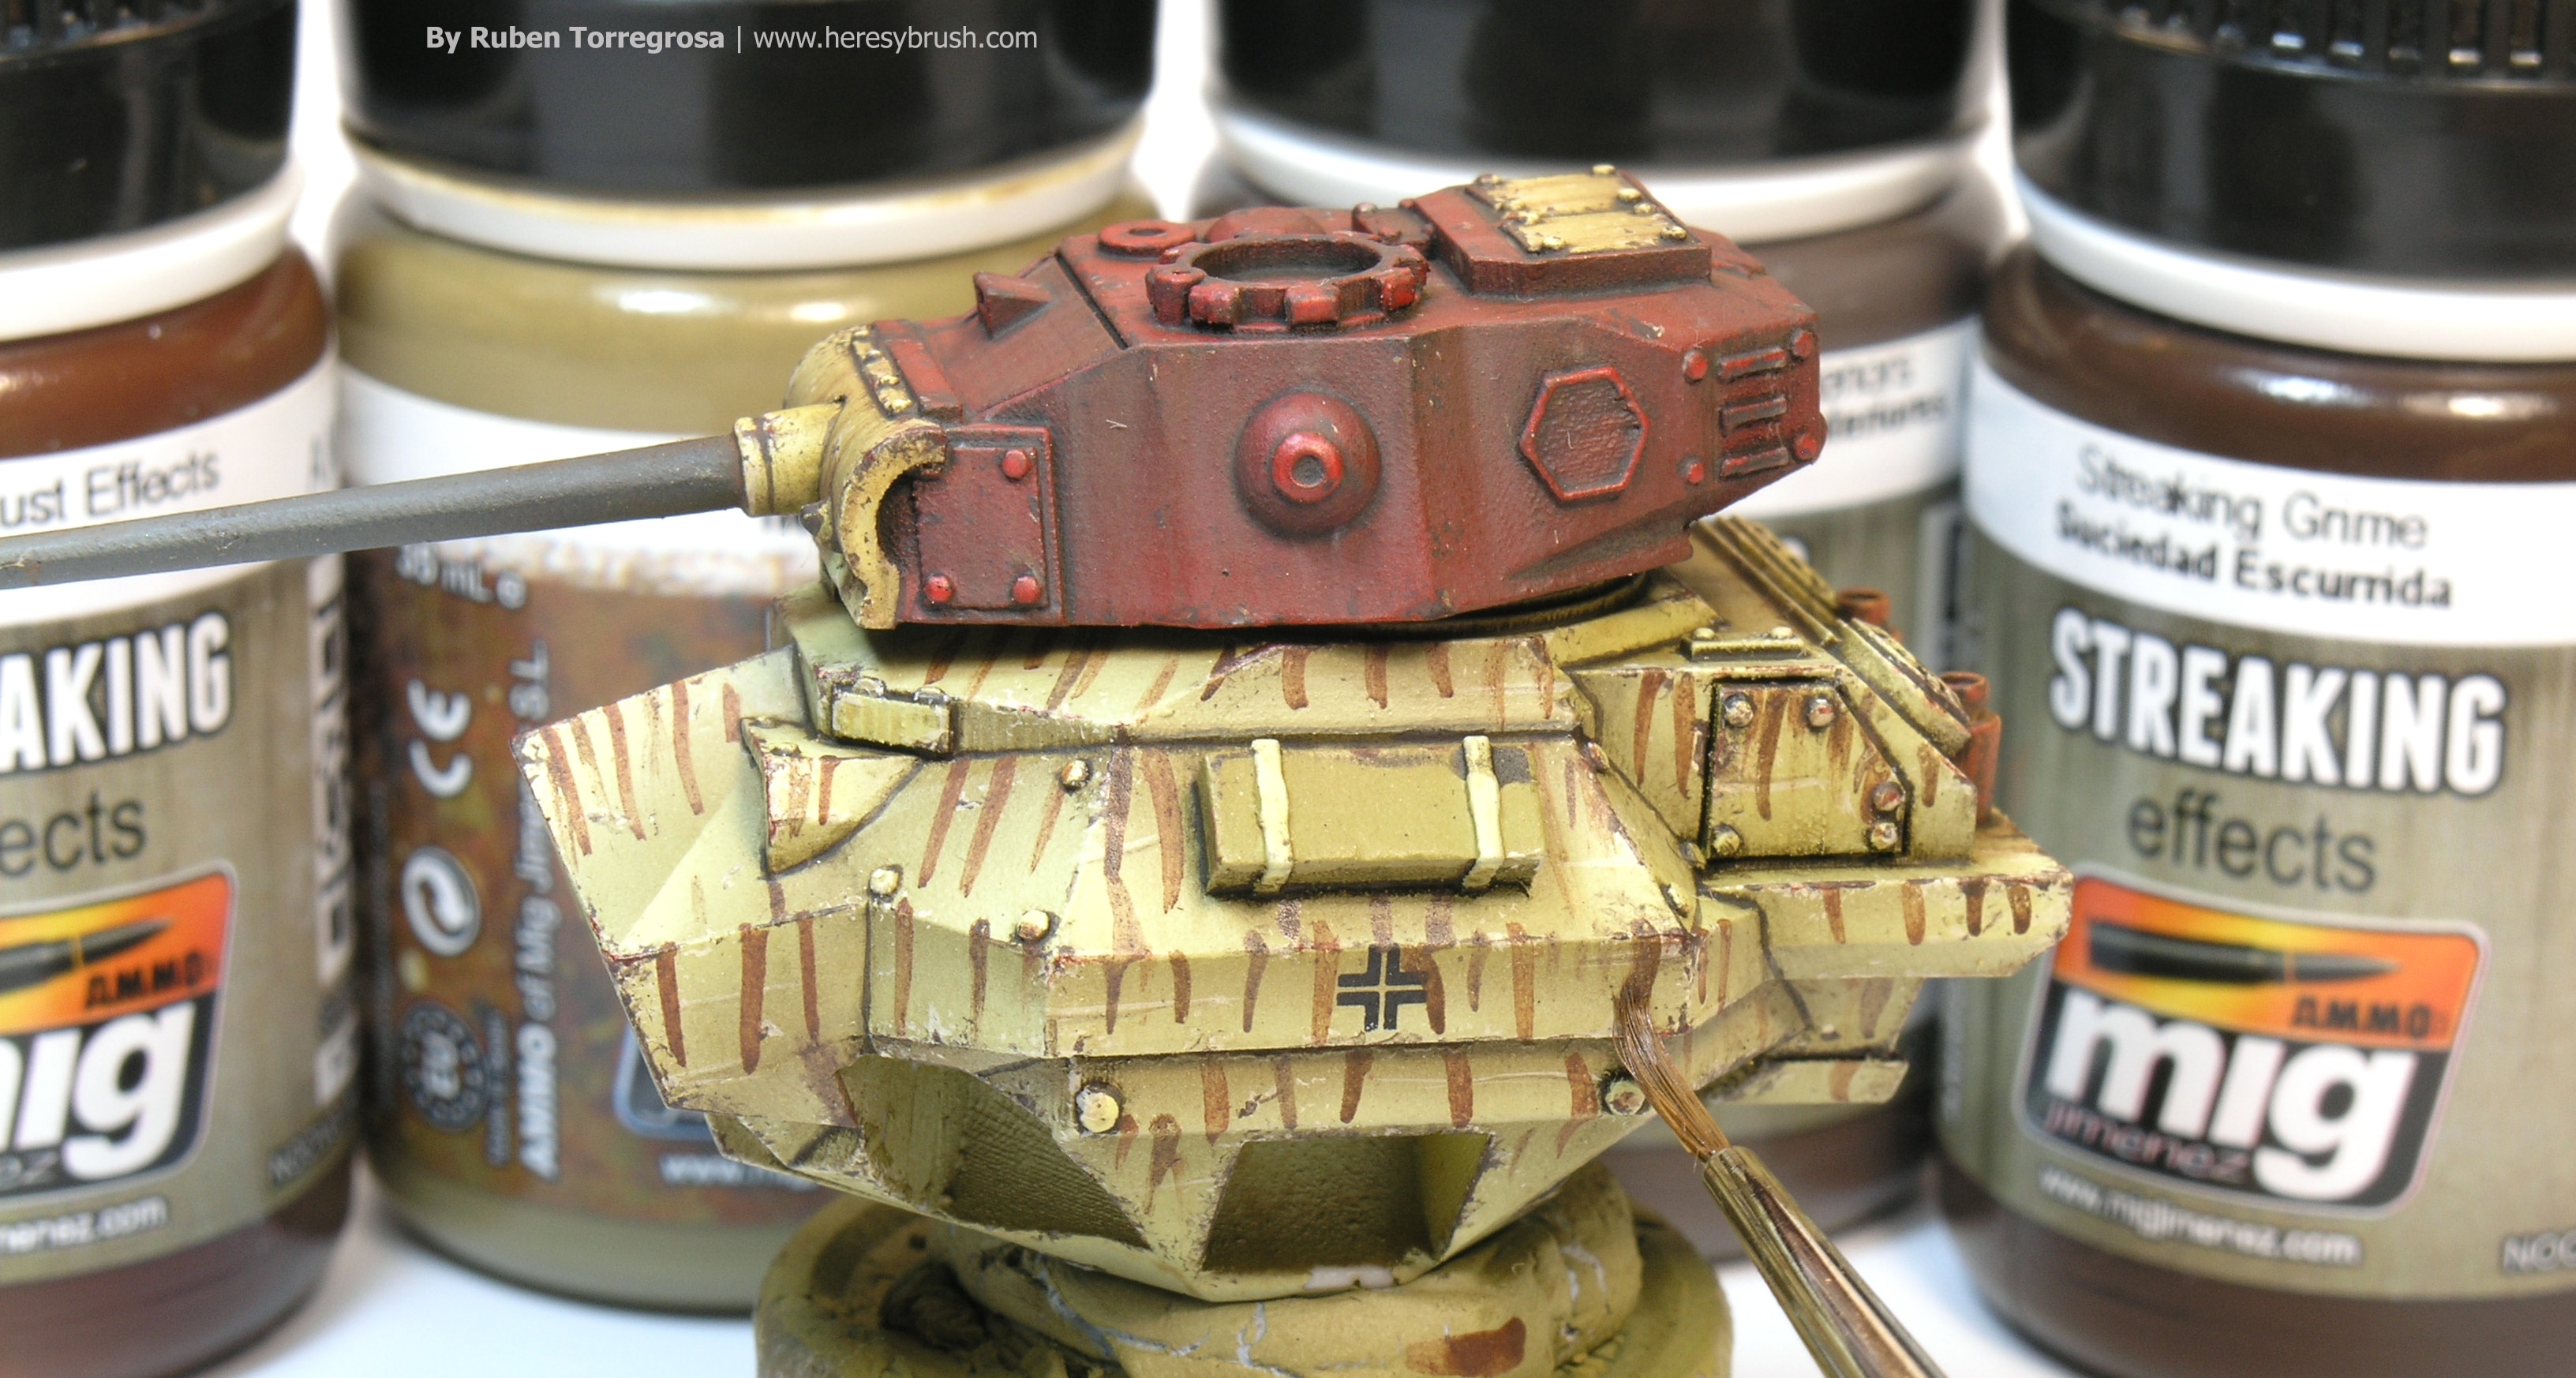
After 5 minutes, with a brush moistened in white spirit we blur the streaks. Don’t worry if you remove the most part of the paint, because the idea is work in several layers until obtain a good result. And anyway you can work independently some streaks to get a hard contrast.
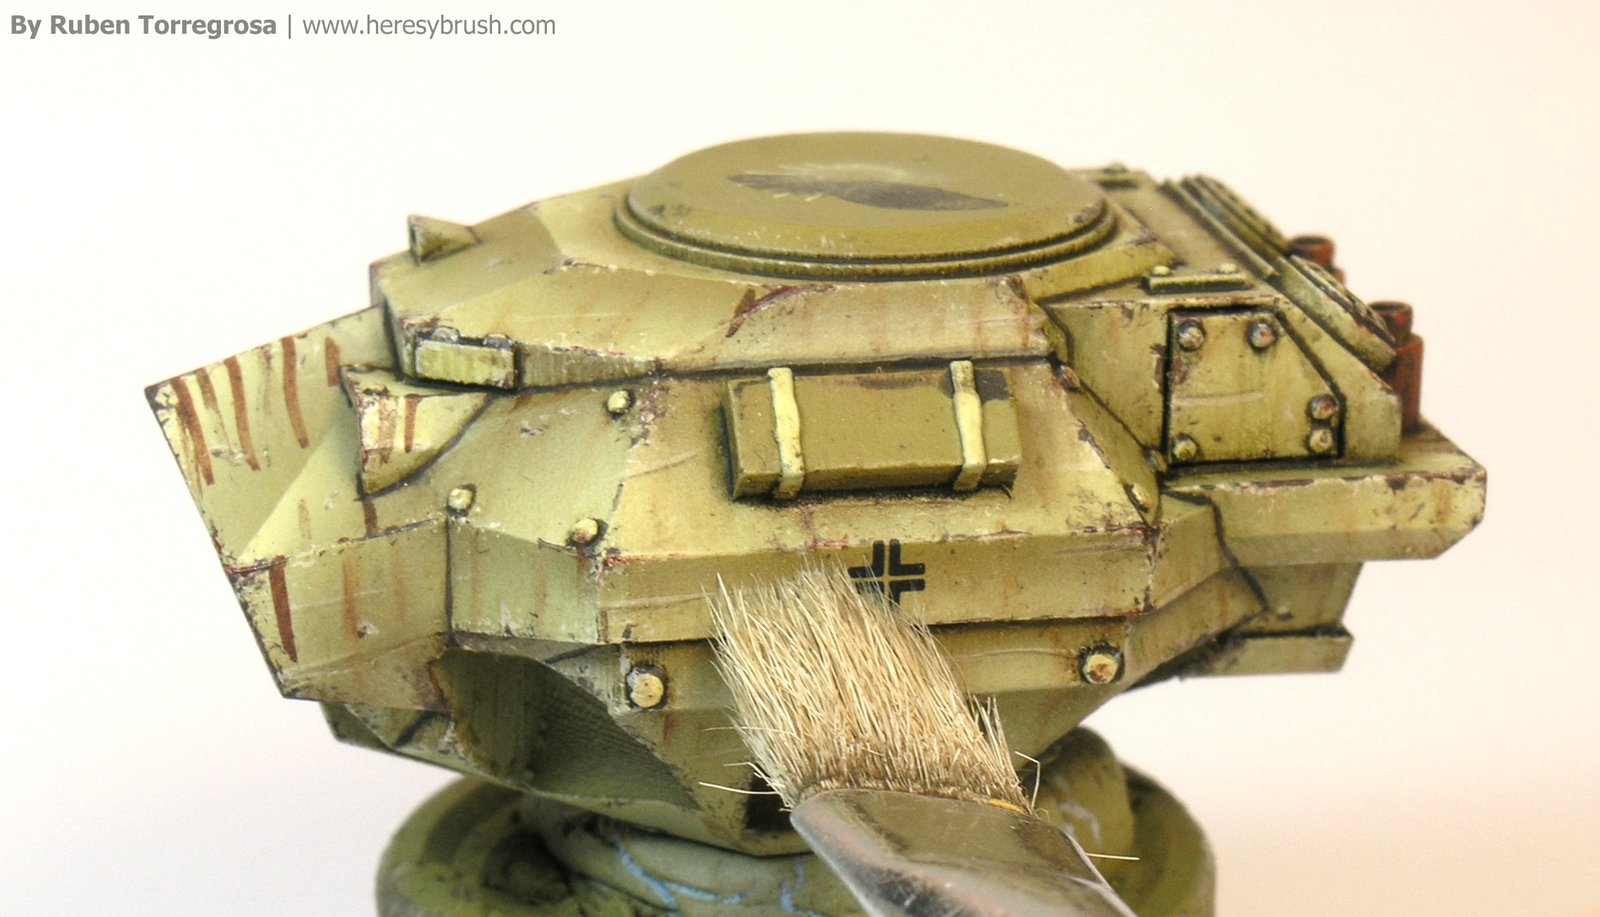
Because in the latest step we worked the vertical surfaces, now we should do the same with horizontal ones. We can use once more enamels or even oils of different tones to represent accumulations of dirt around hatches and so on. Indeed we can reinforce some vertical effects now with new tones. You can take a look in this post for more information.
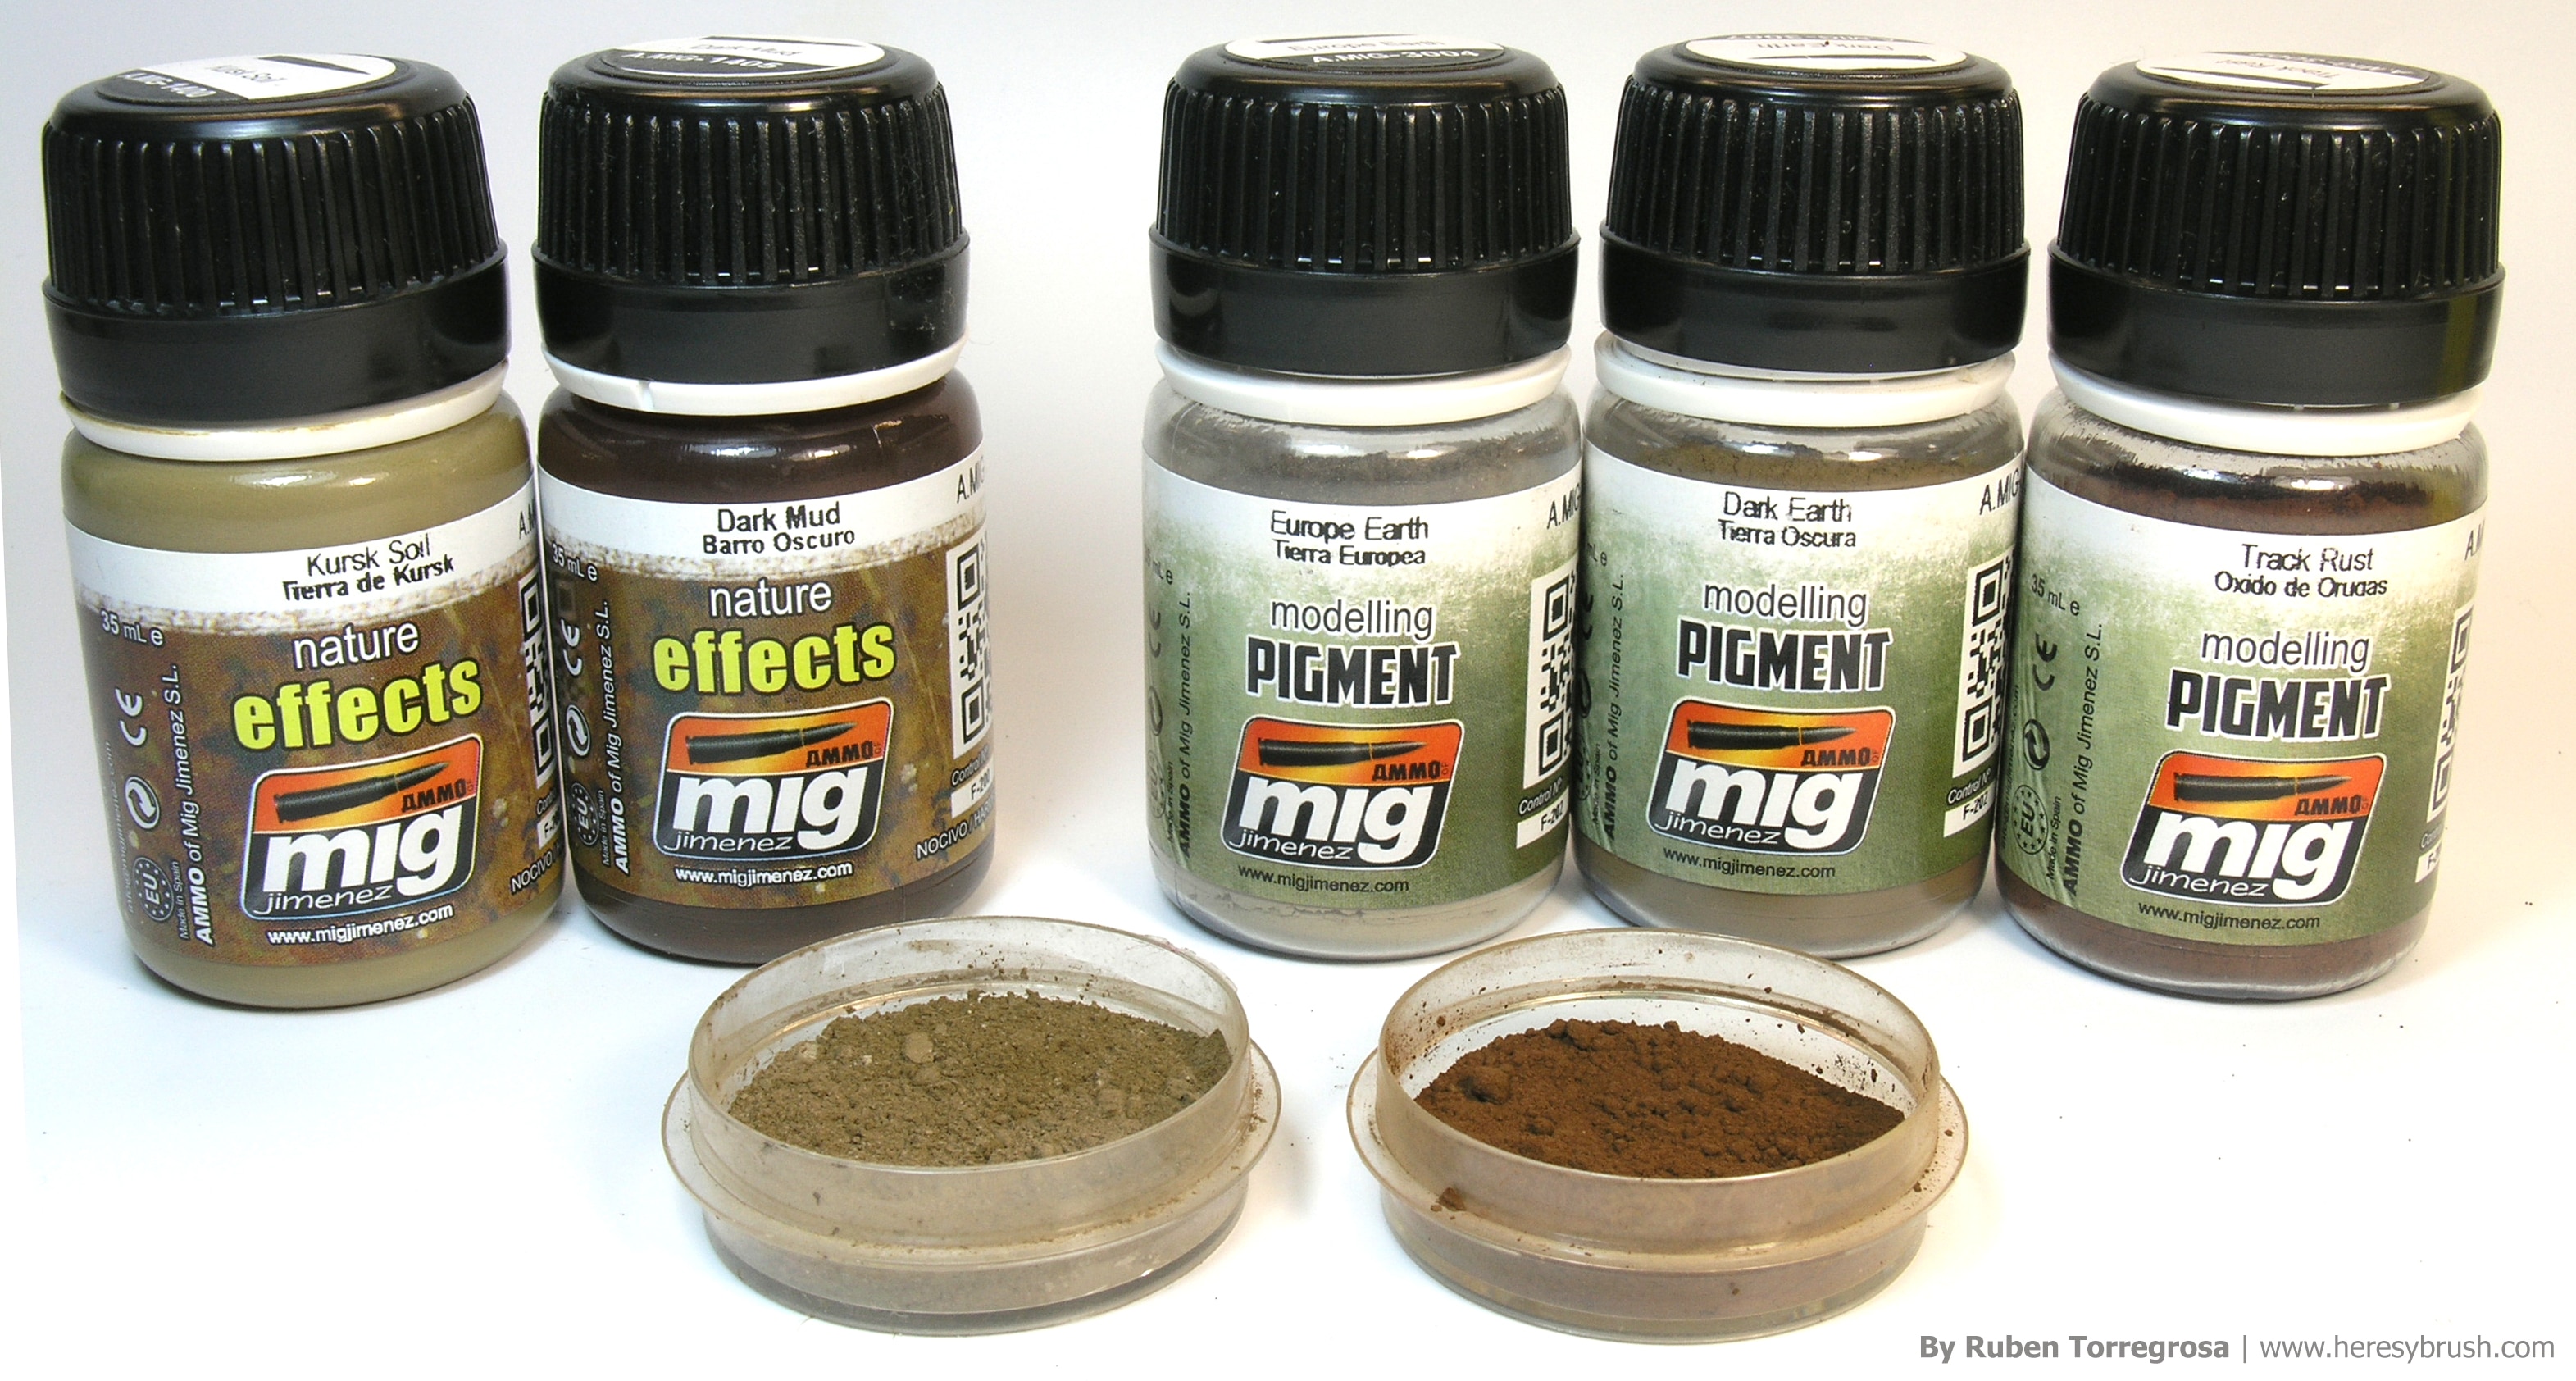
We can add splashes of mud easily using a brush with thick bristles. First we prepare the mud effect by mixing several tones of pigment and enamels. For example, I’ve use three pigments: light, medium and dark color. But mixing different proportions I’ve obtained two different tones: light (dry mud) and dark (wet mud). It’s important to use the same pigments colors to maintain some coherence in the mud effect (for instance, if the dry form is red, the wet form should be similar!). I use enamels to dilute the mixture until I obtain a texture similar to honey. I use a light or dark color for the same reason. Once the mix is ready, I load the brush with thick bristles and I tense bristles with a stick. Then I remove the stick and the bristles “fire” the mixture in our miniature. You can repeat this process as many times as you want!. First you should apply the dry color, and then, the wet one in the inferior area. You can check this post to discover other way to work with pigments.

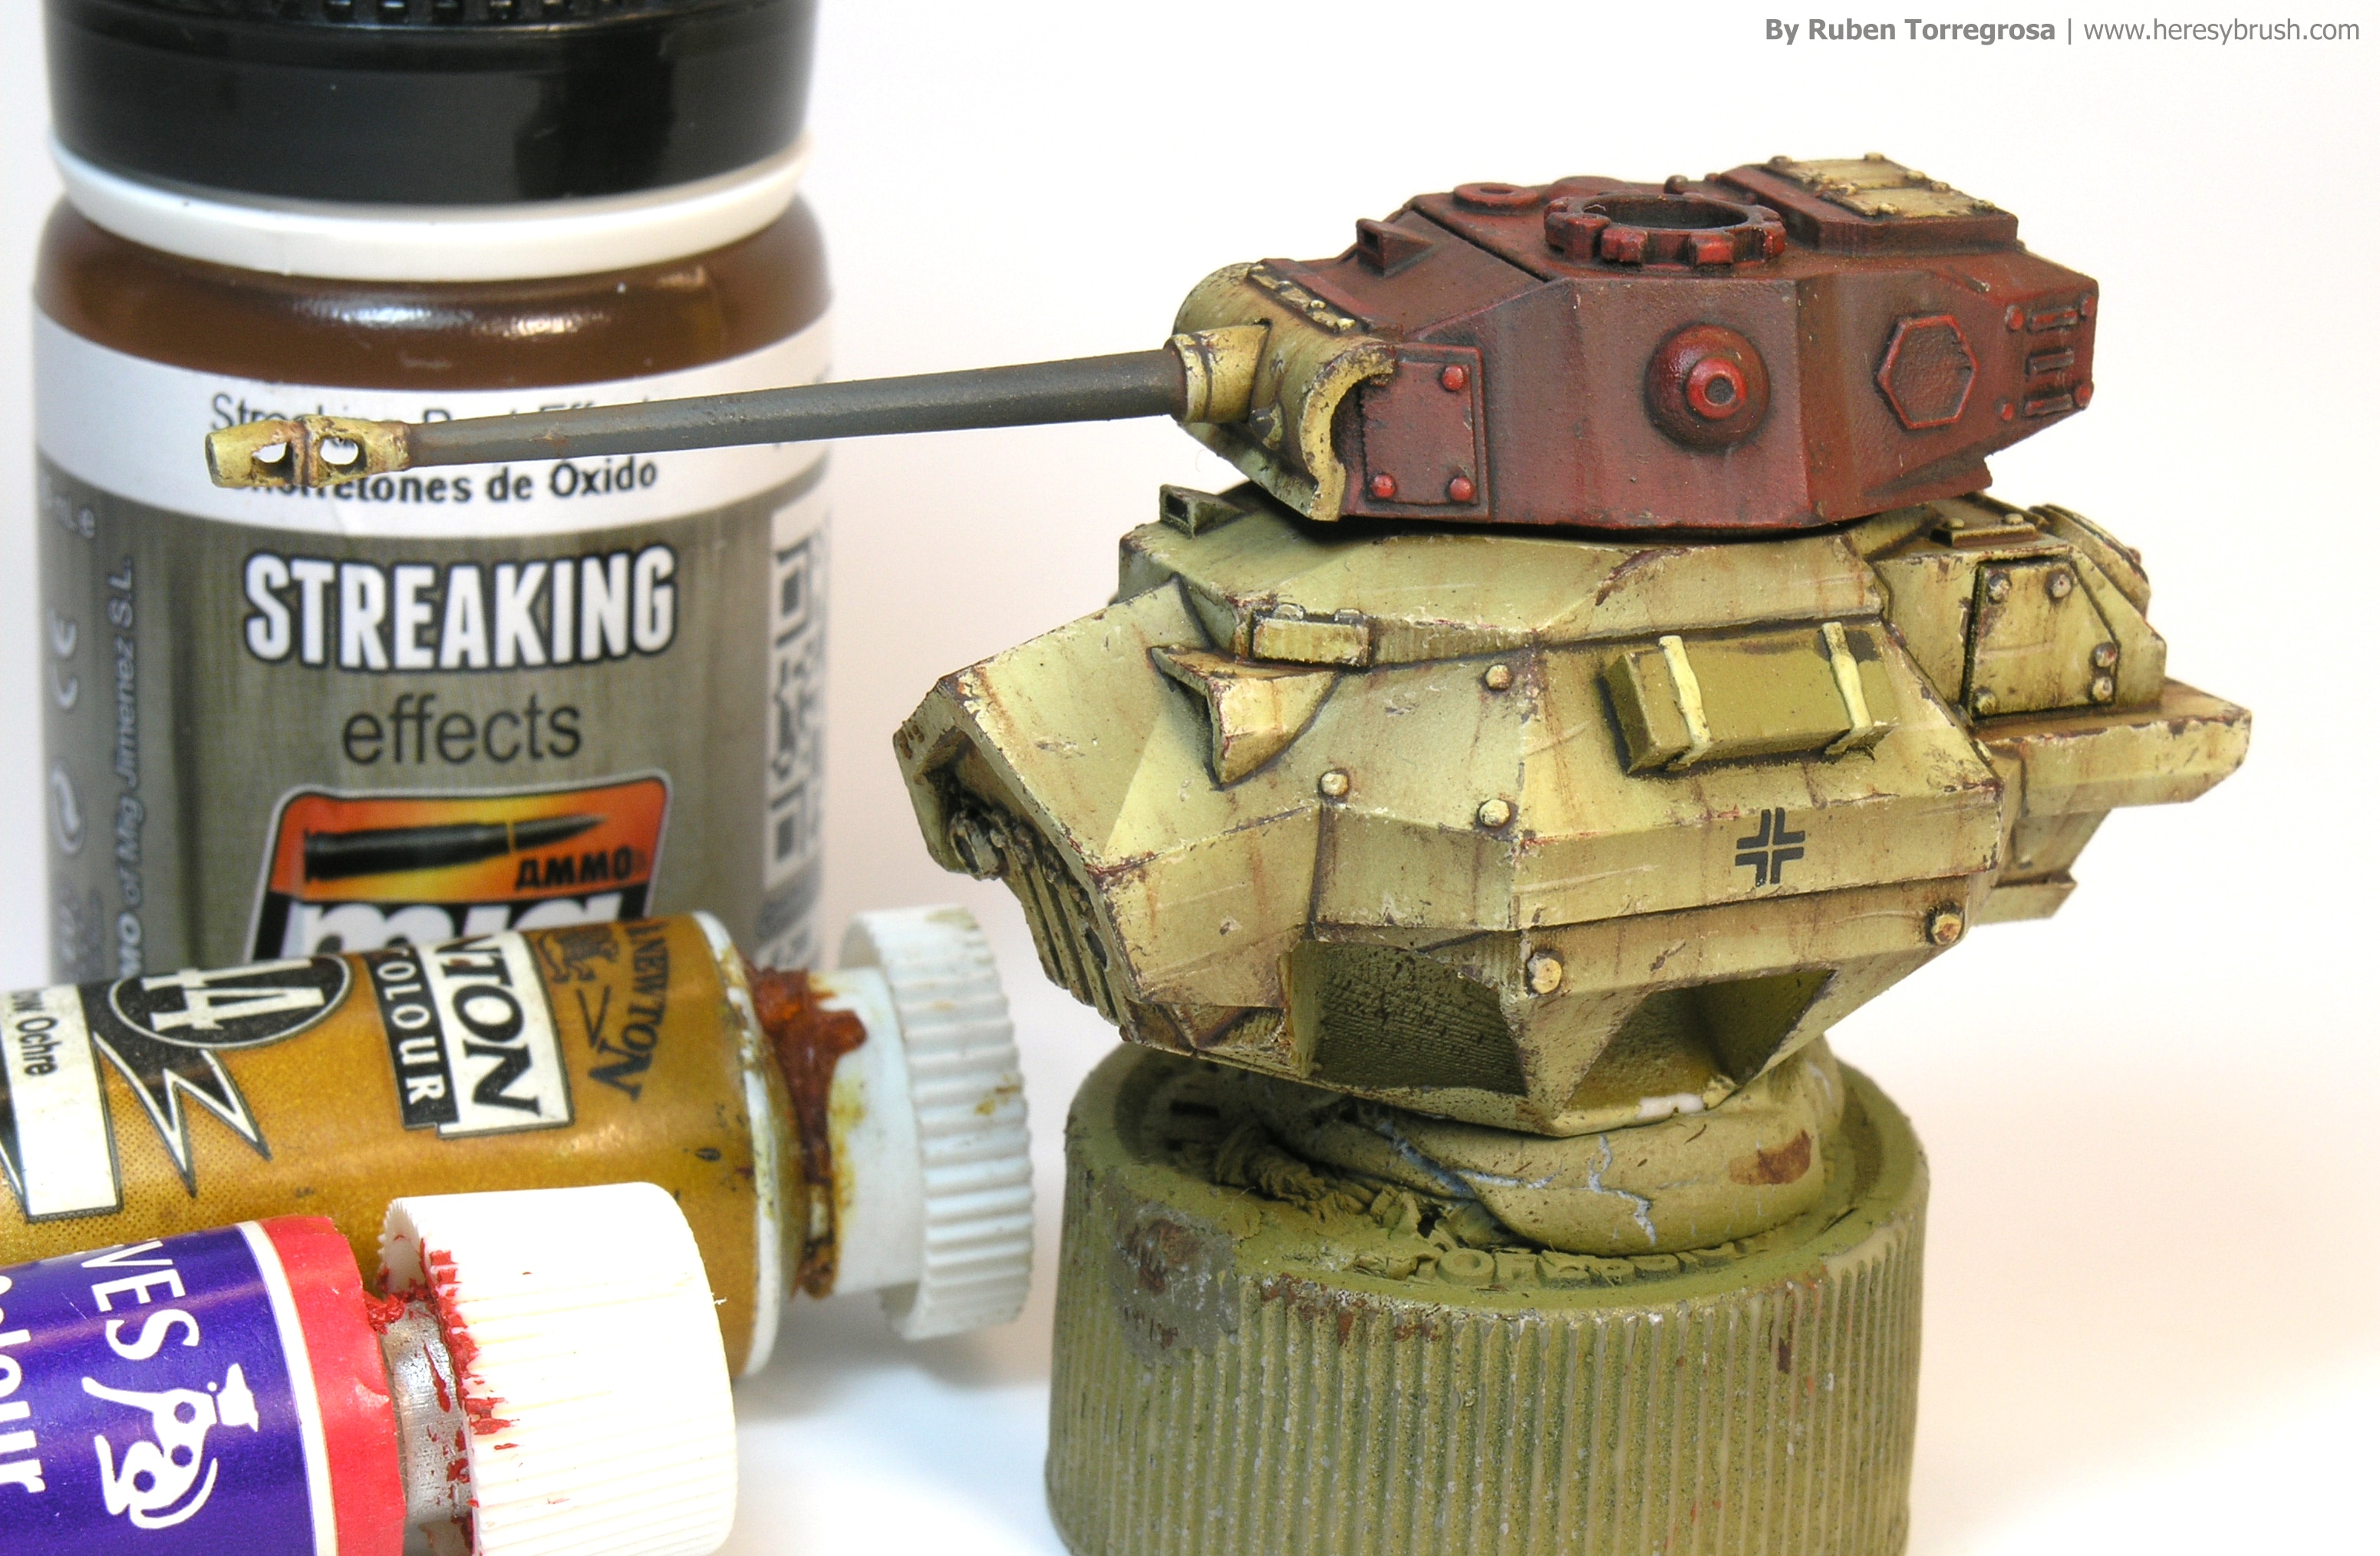
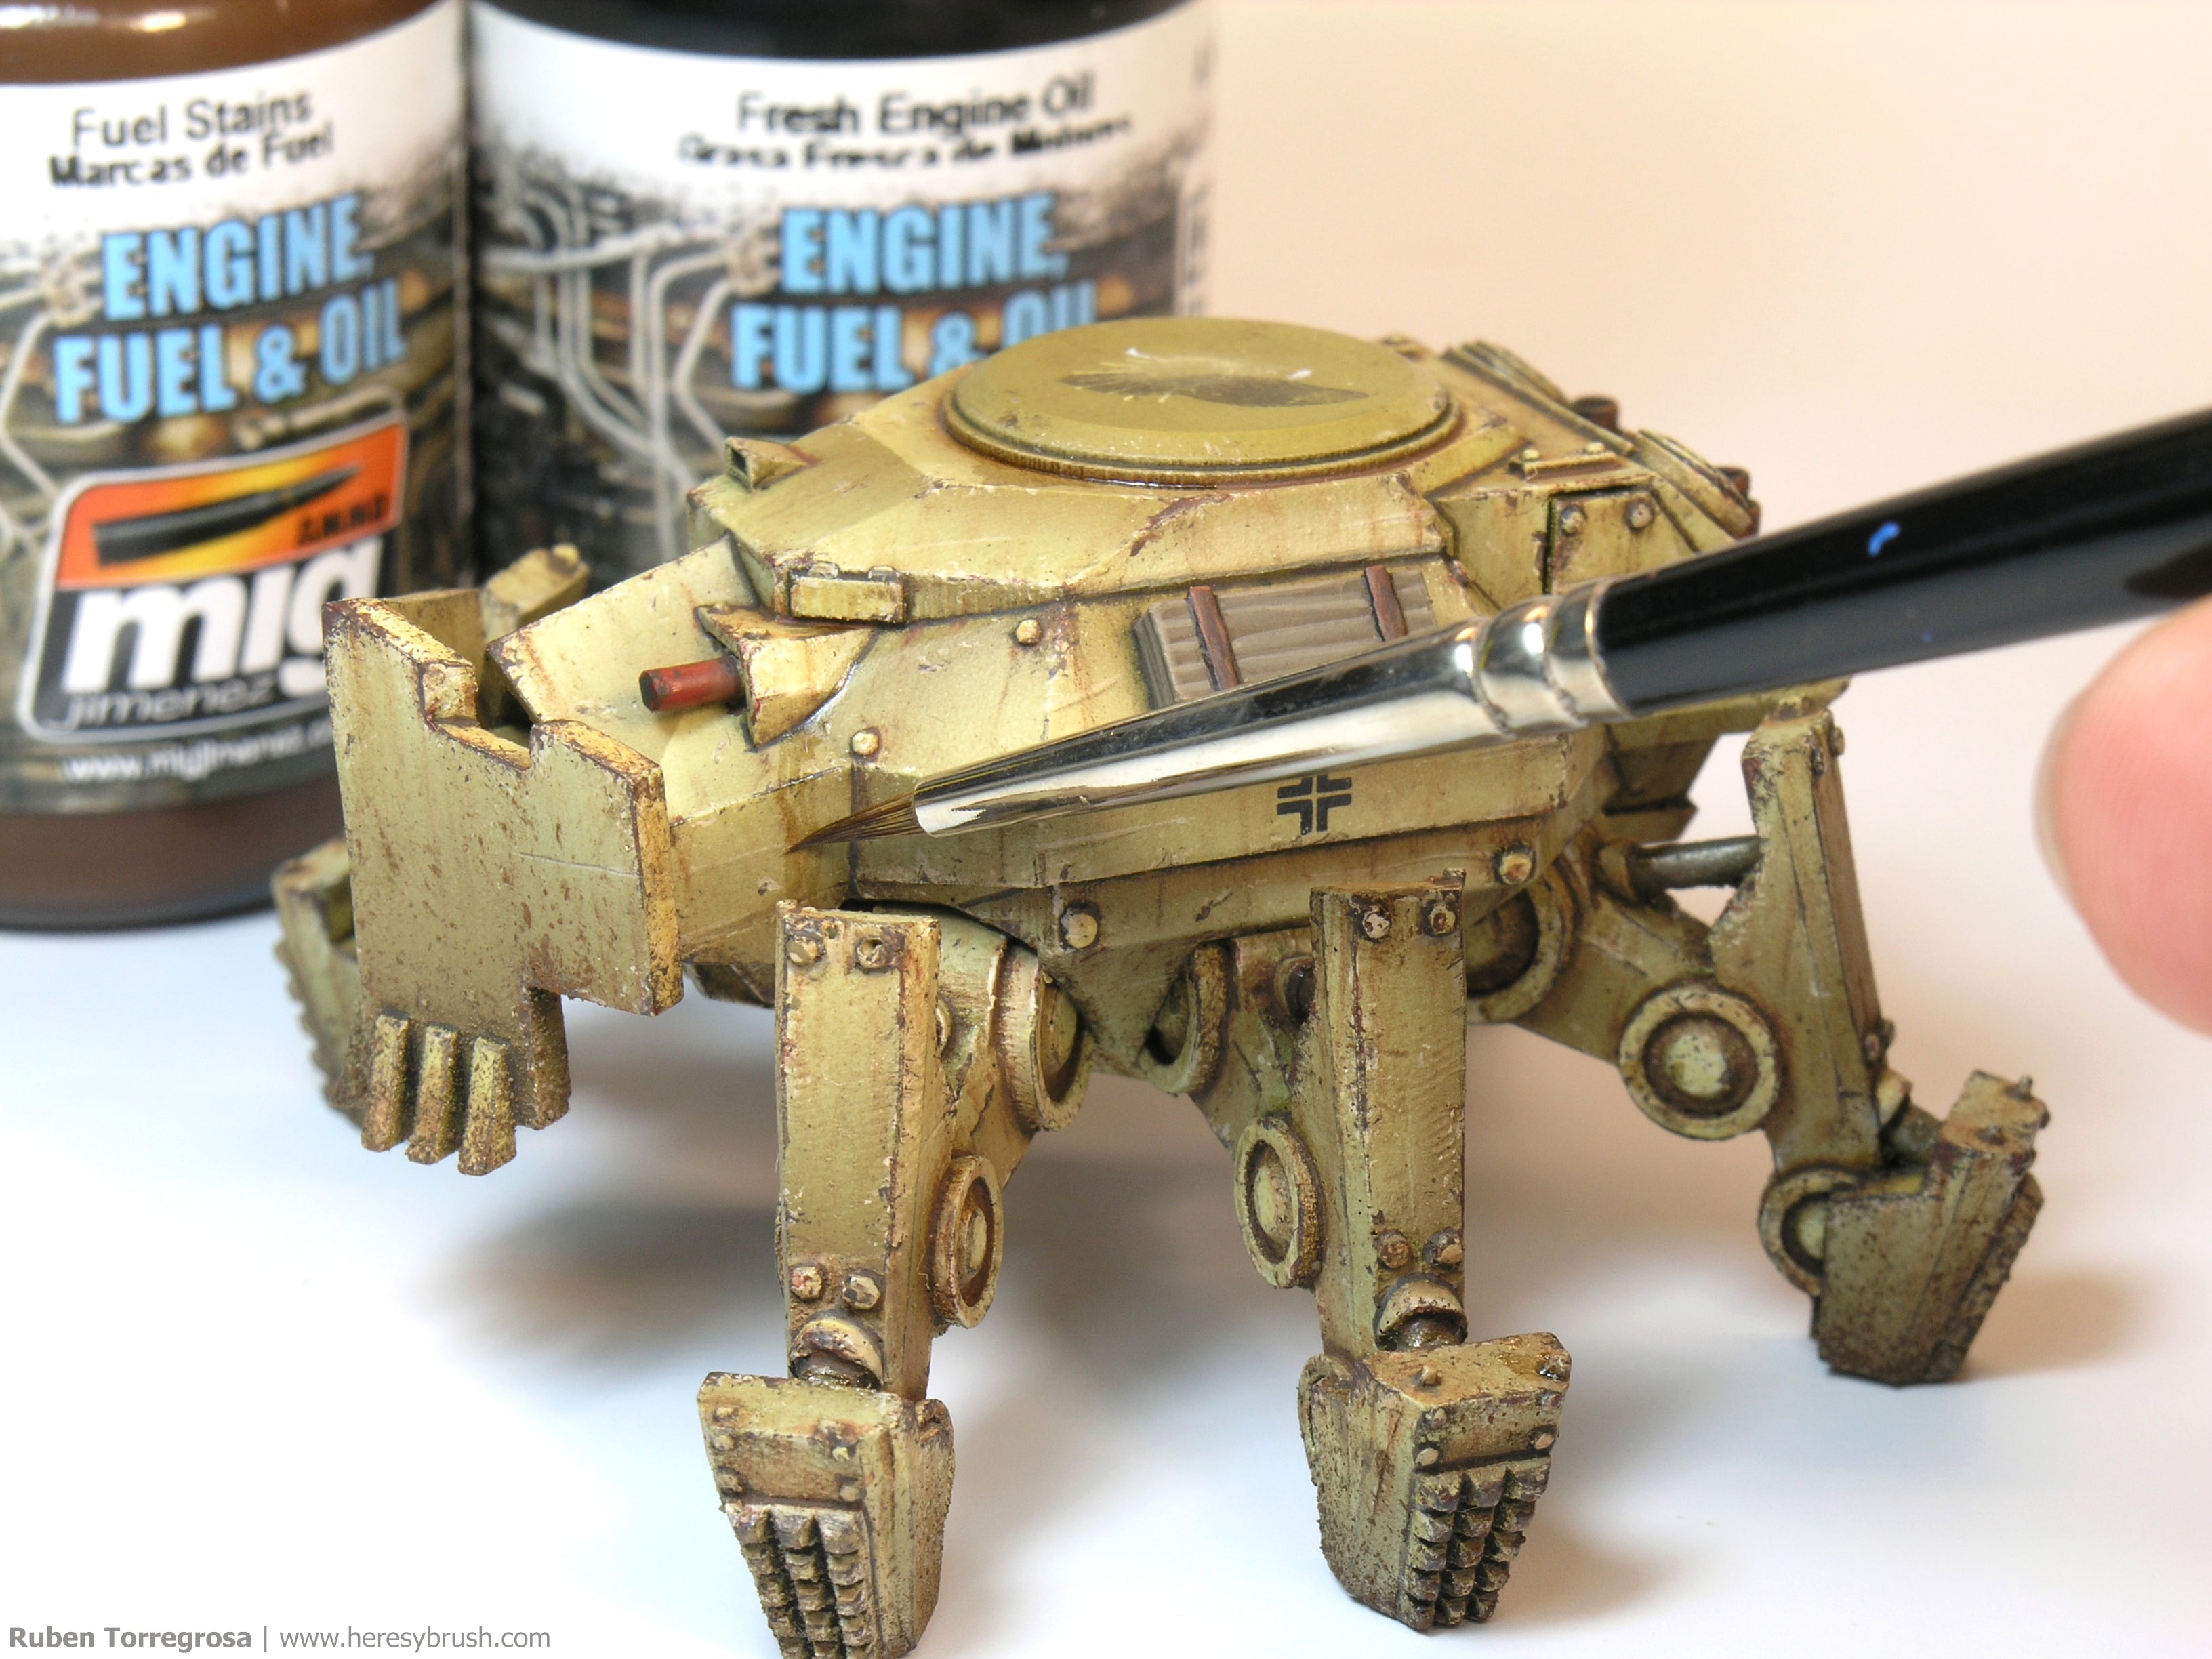
Finally, we can add some fuel or oil stain effects using two products of A.MIG: fuel stains A.MIG-1409 and fresh engine oil A.MIG-1408. These effects are gloss, so the contrast will be too interesting in our surface. In addition, we should paint additional details with acrylics, such as boxes, crews, etc.
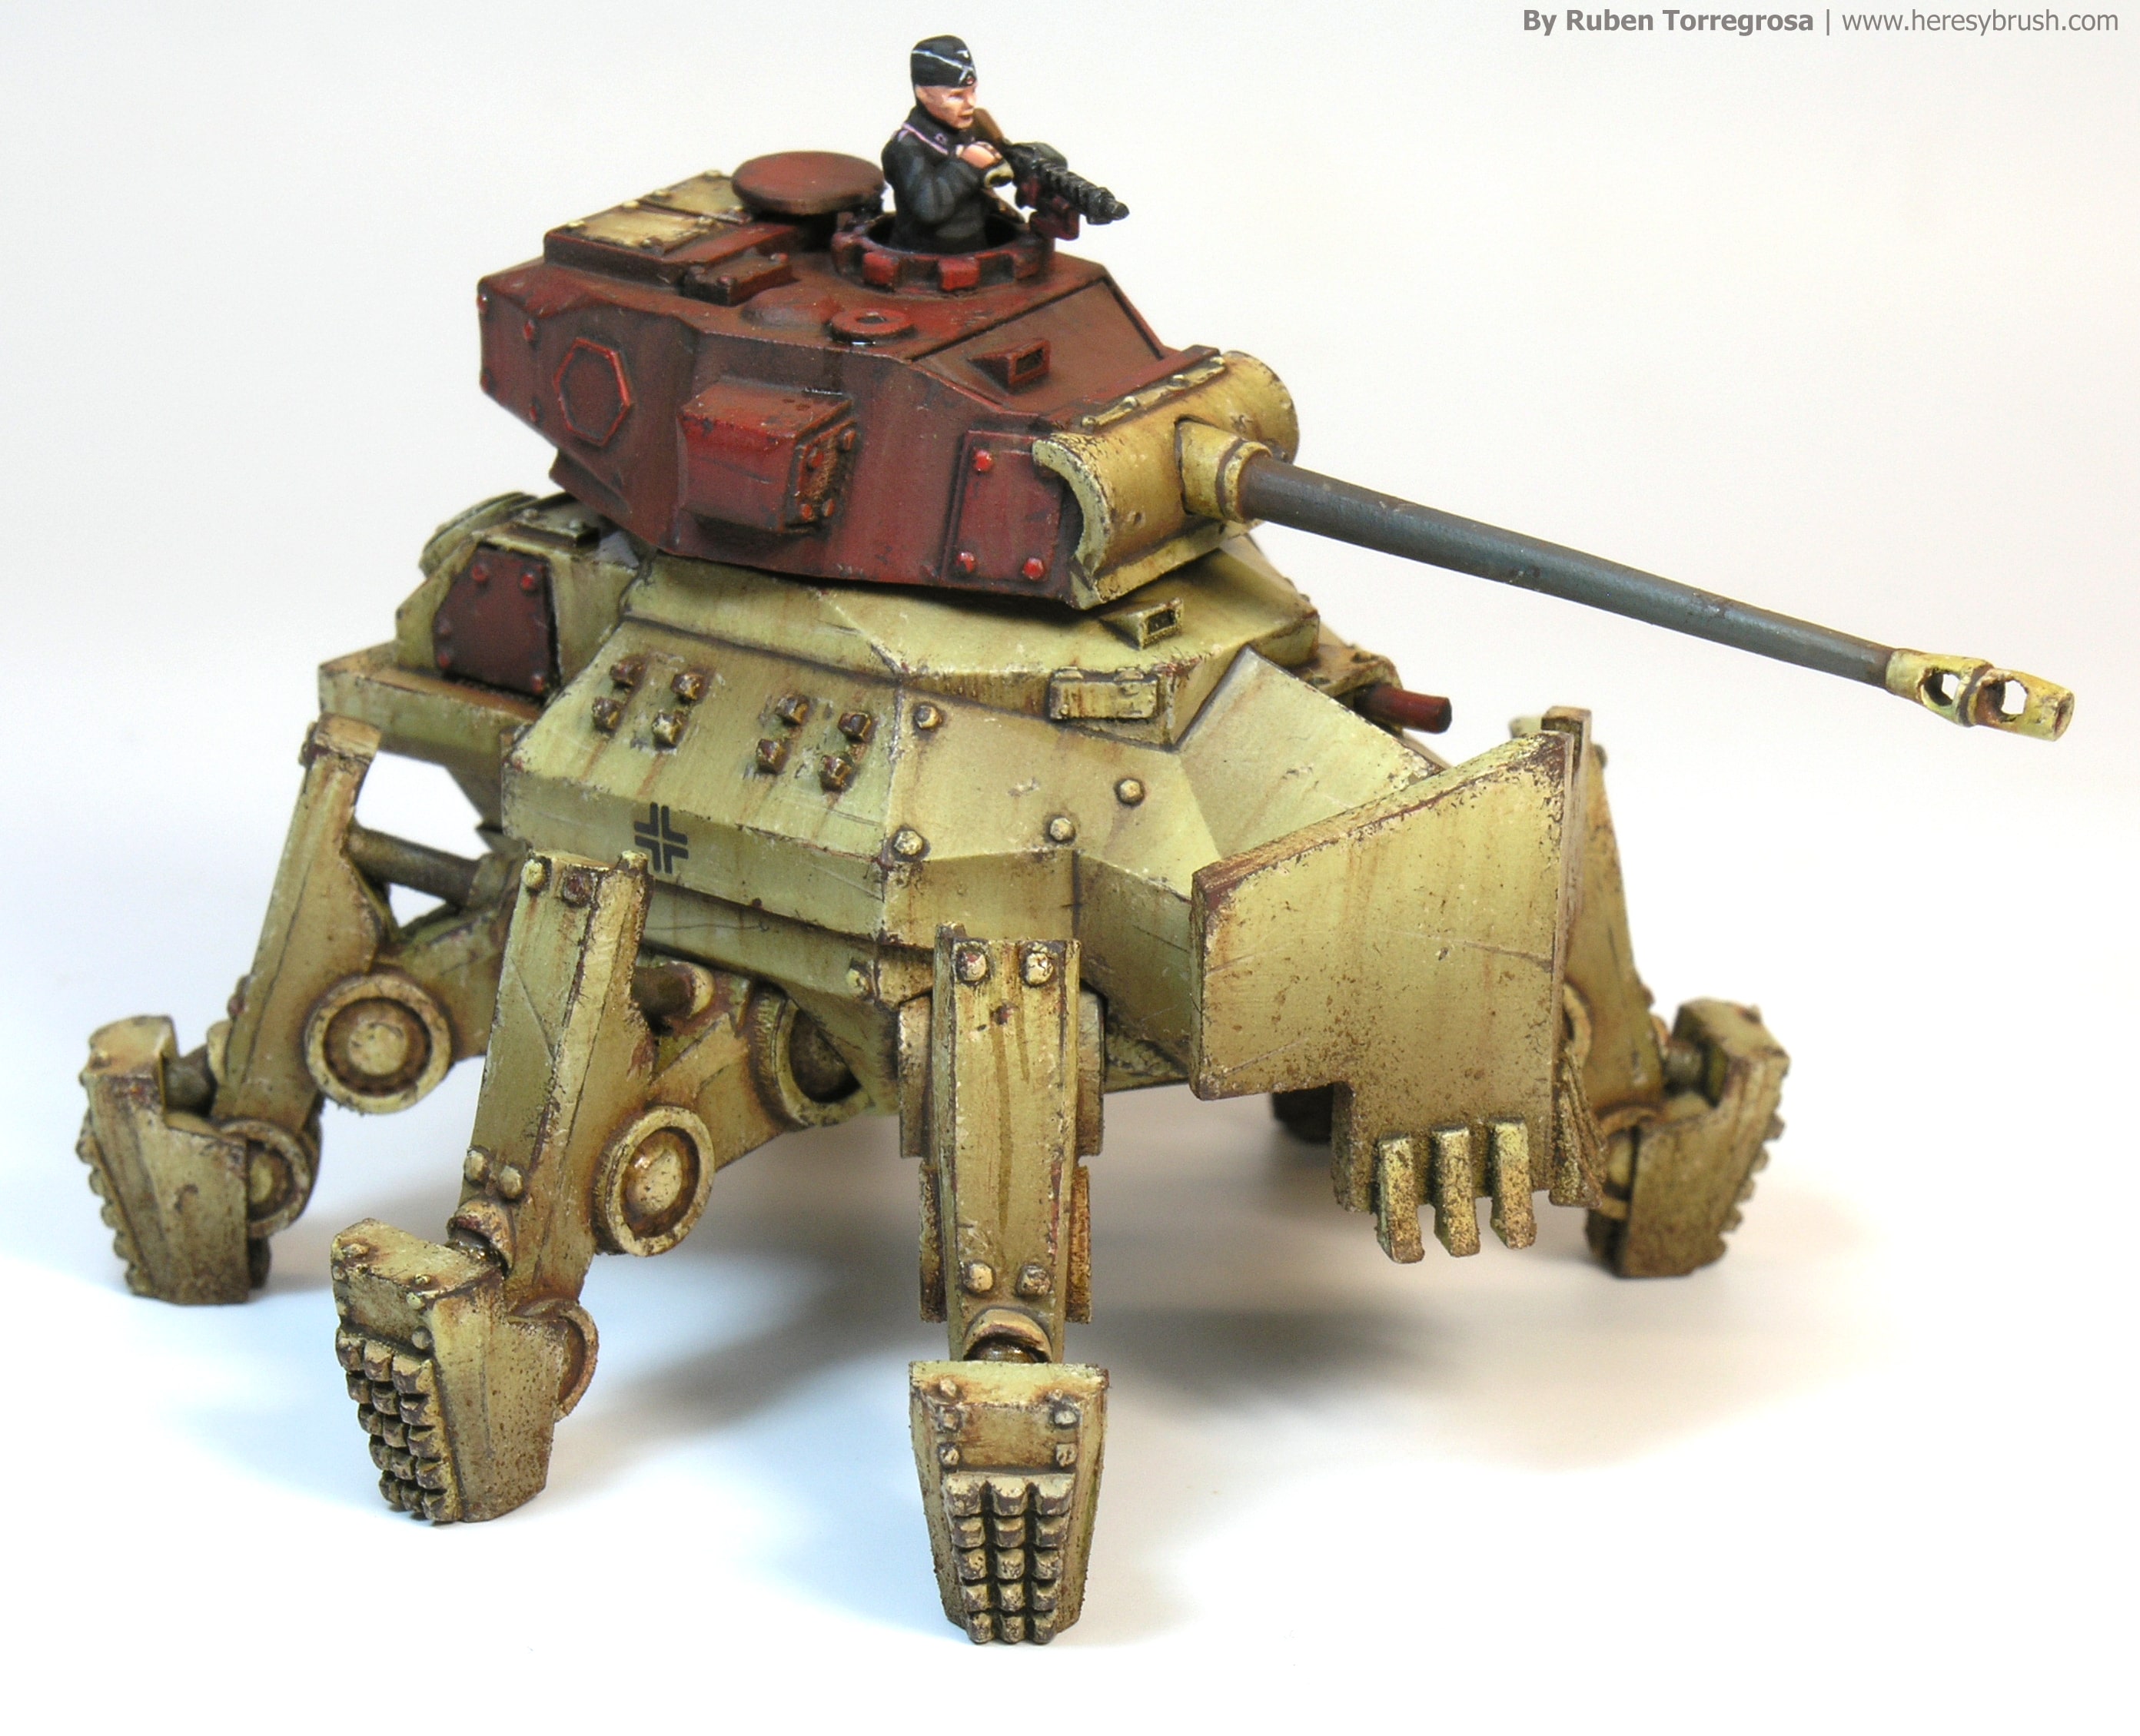
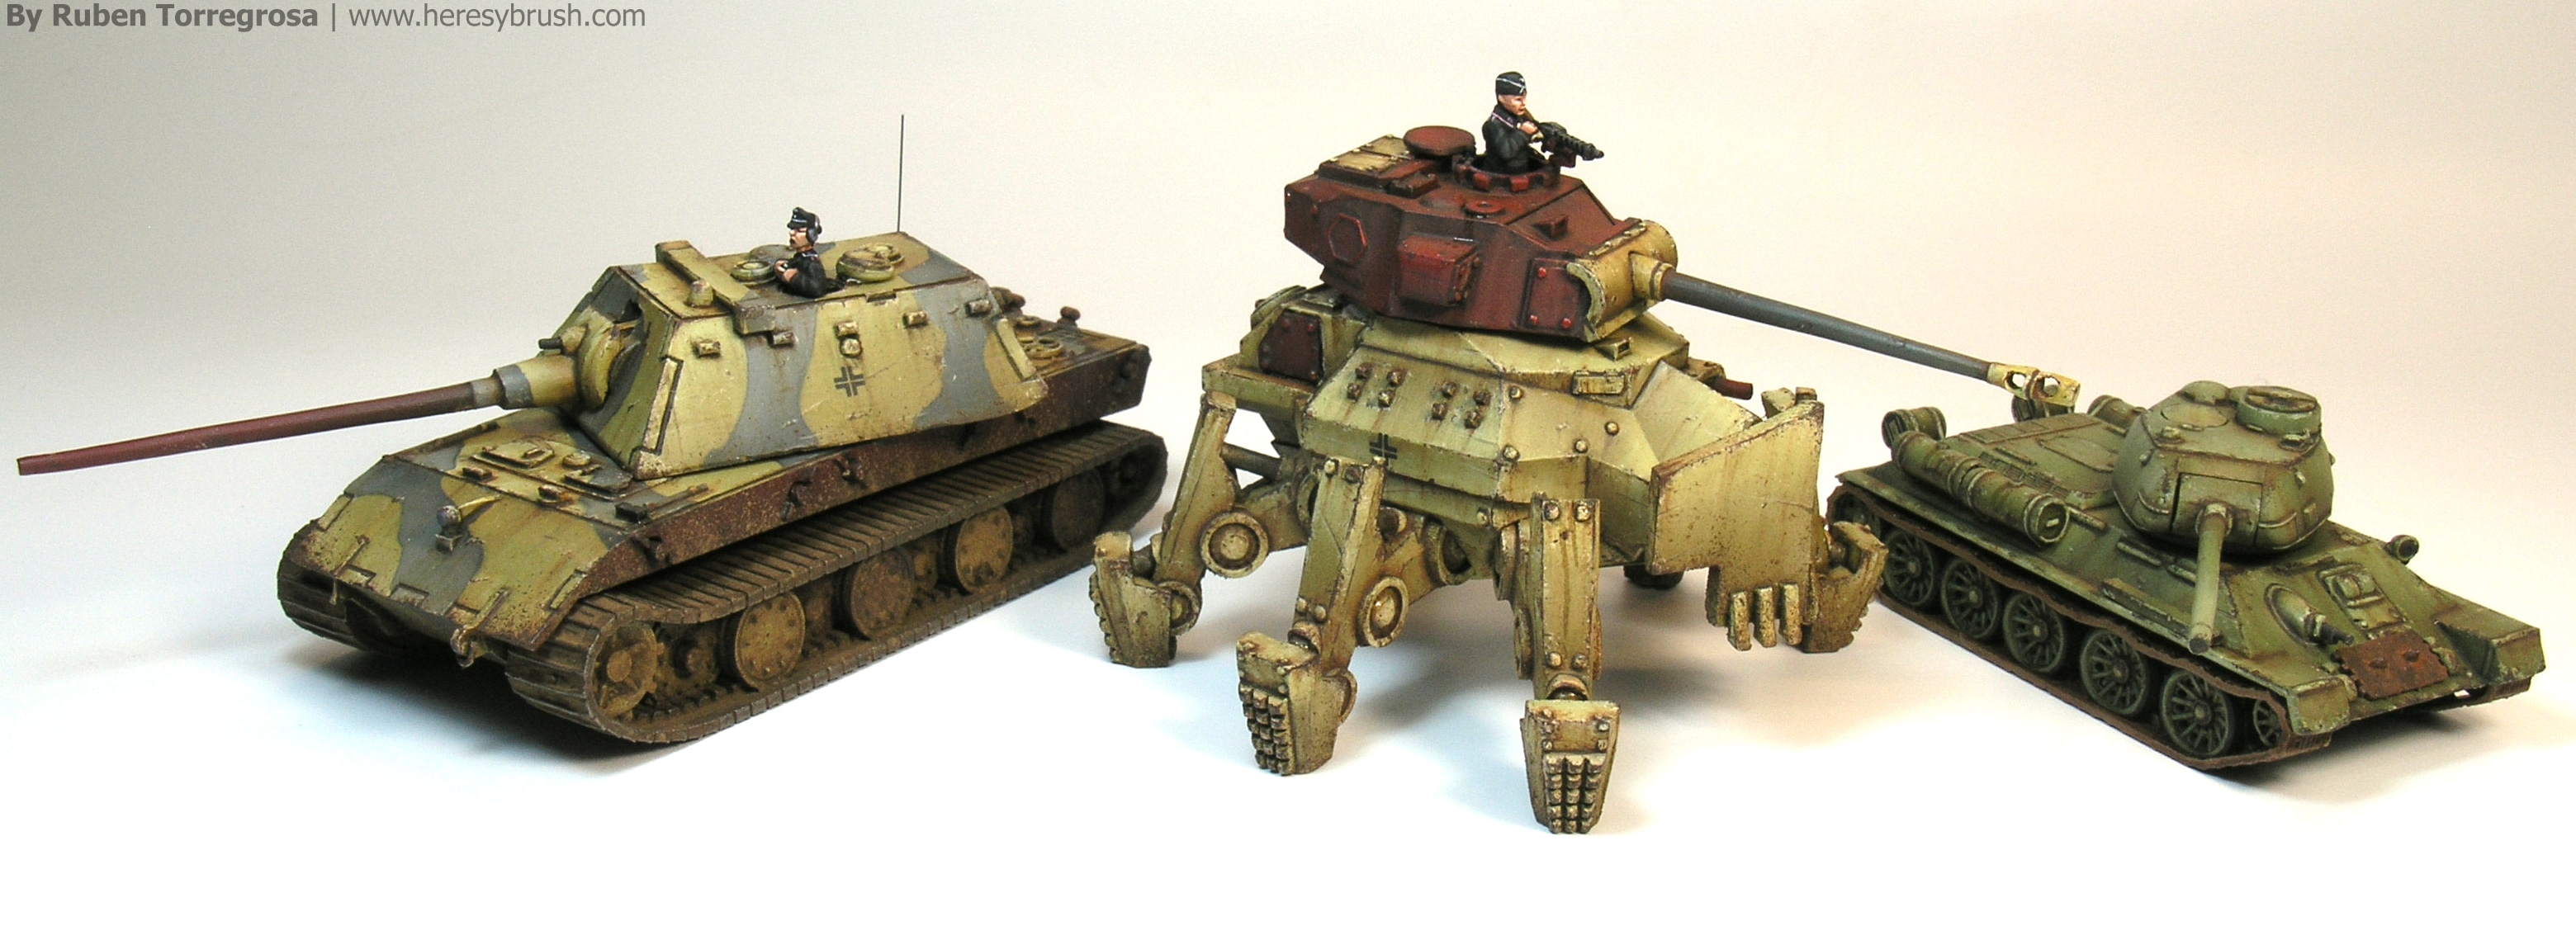
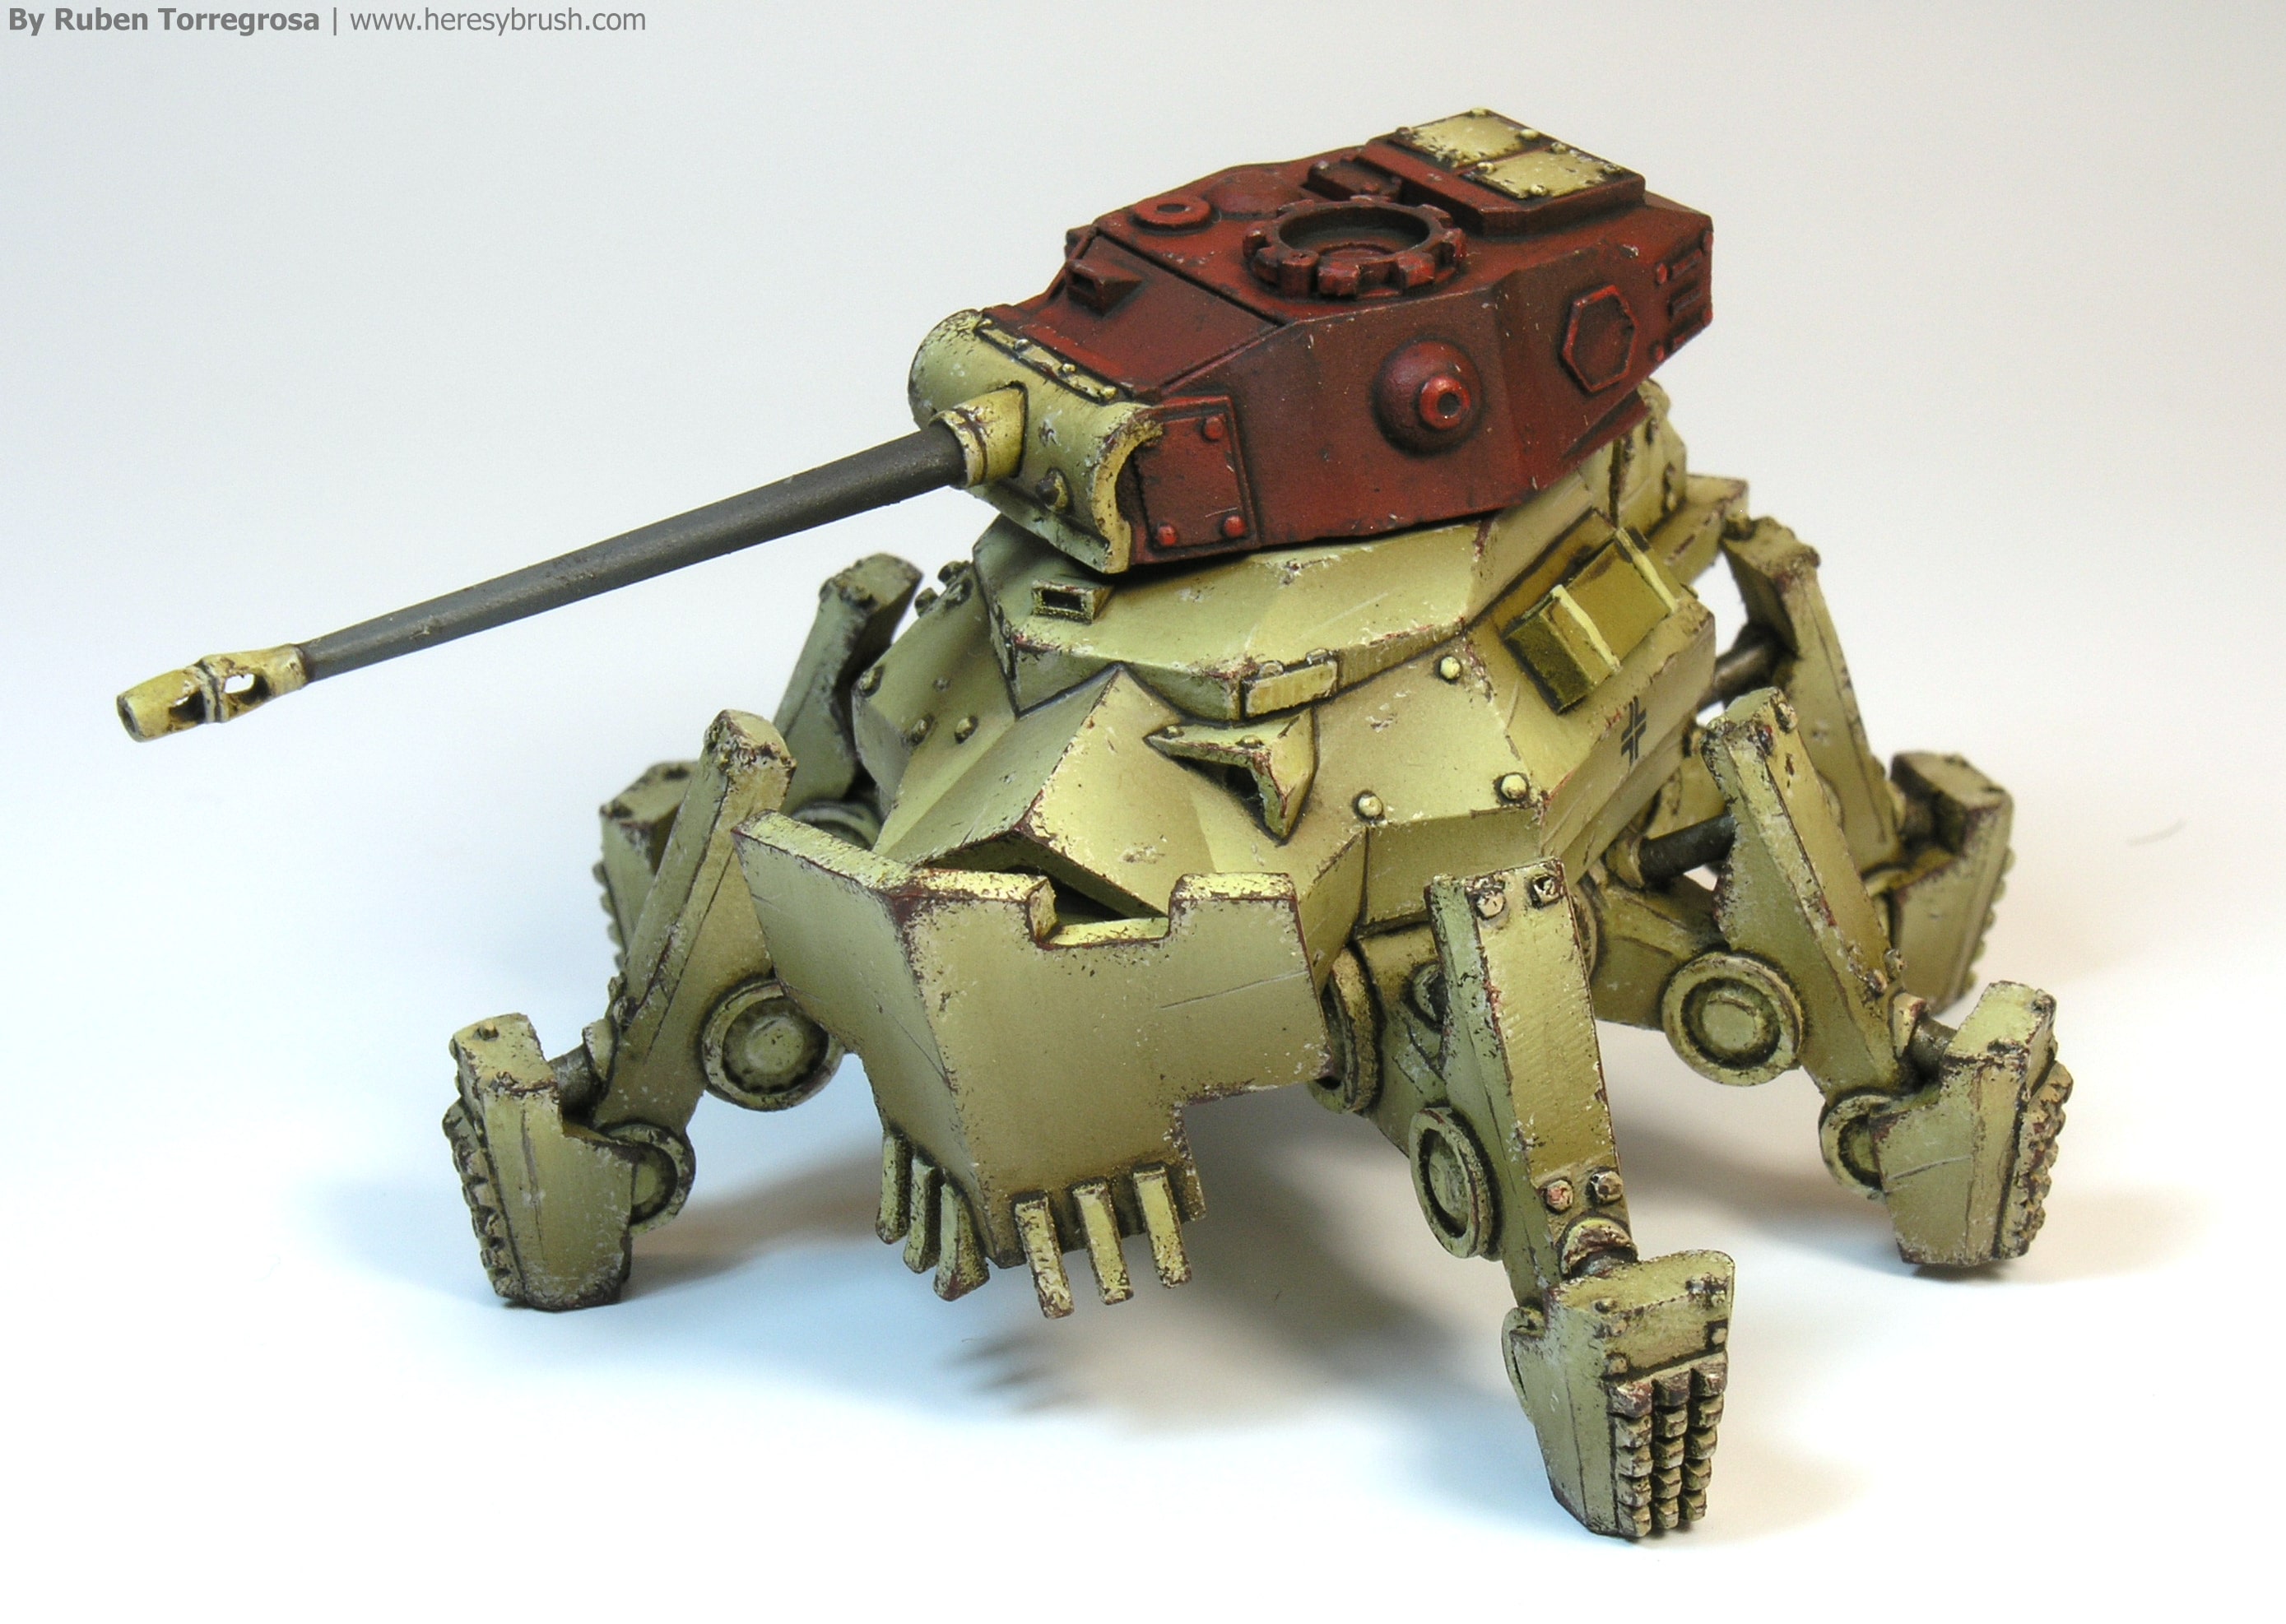
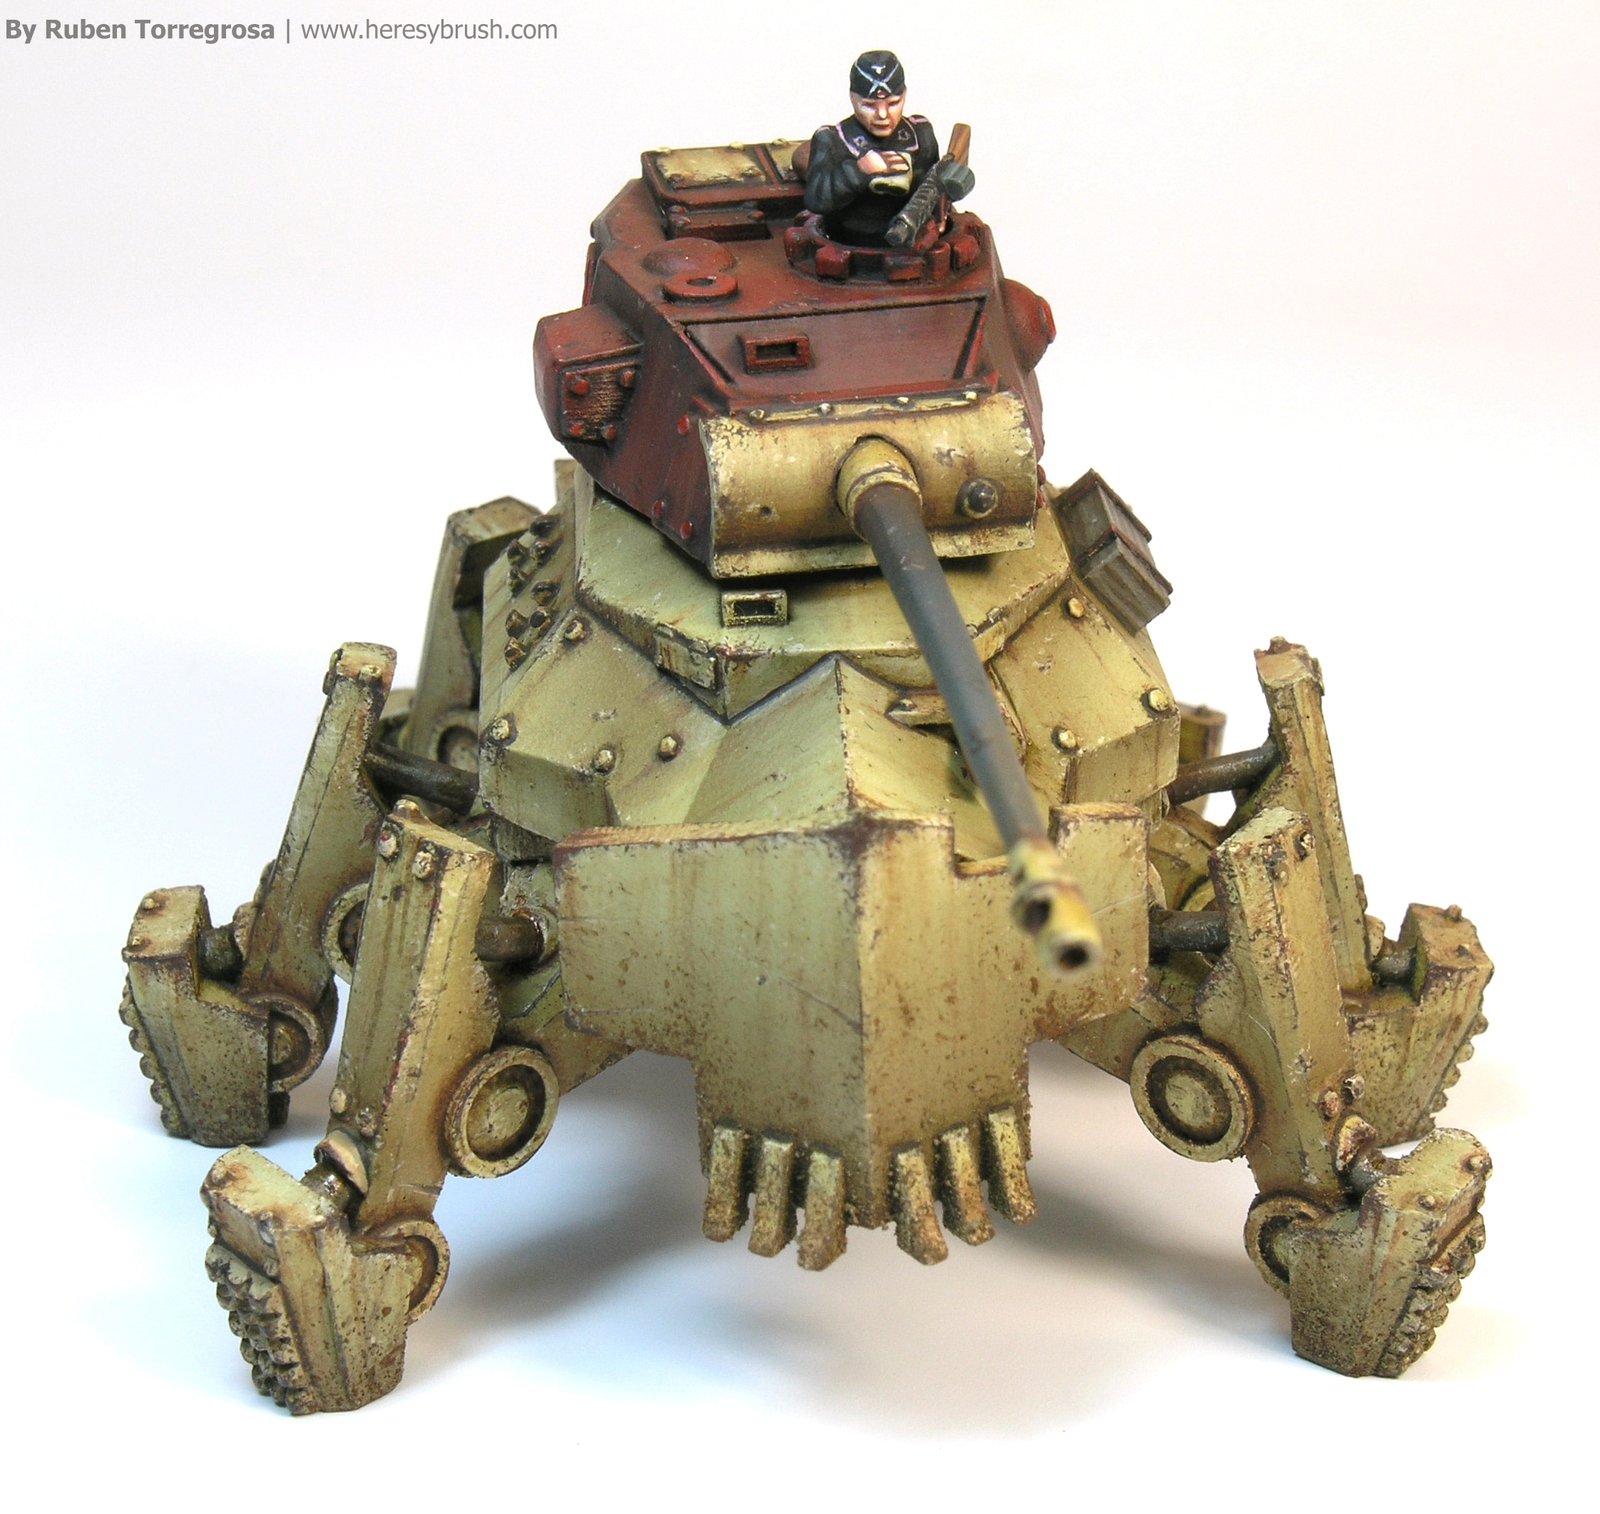
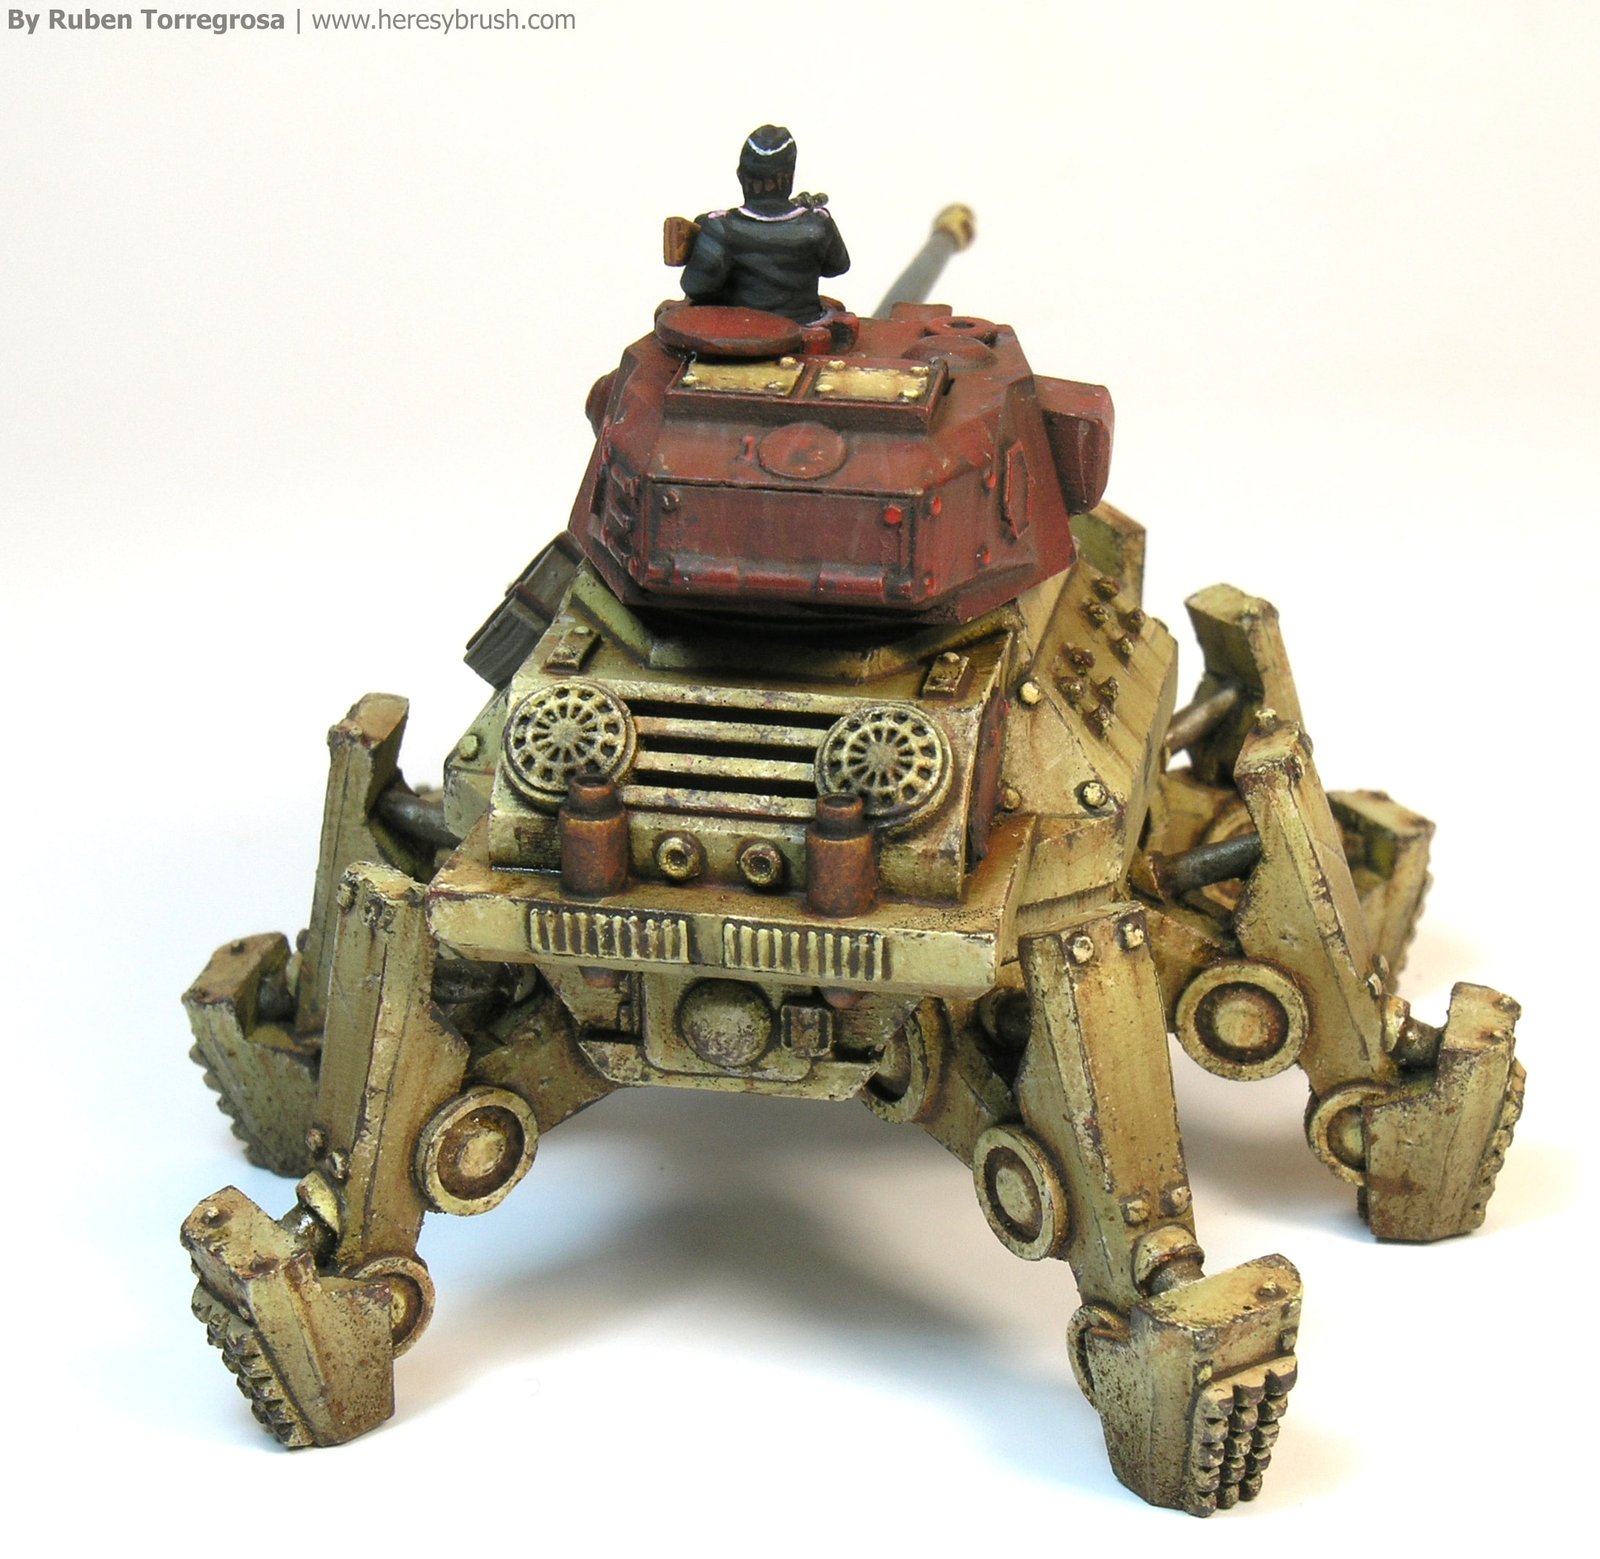
Pictures of the finish model:

SUMMARY
ENGLISH:
1. Primer
2. Modulation
3. Apply satin varnish
4. Apply or not filters in several layers (or not)
Wait 15-20 min between layers
Wait over night
5. Pinwash with dark brown
Wait 30-60 min
6. Remove the excess with a brush moistened in white spirit
7. Chipping effect with brush and sponge
8. Streaking effect on vertical surfaces
9. Dirty effects on horizontal surfaces
10. Mud splashes
11. Fuel and oil stains
12. Details with acrylics