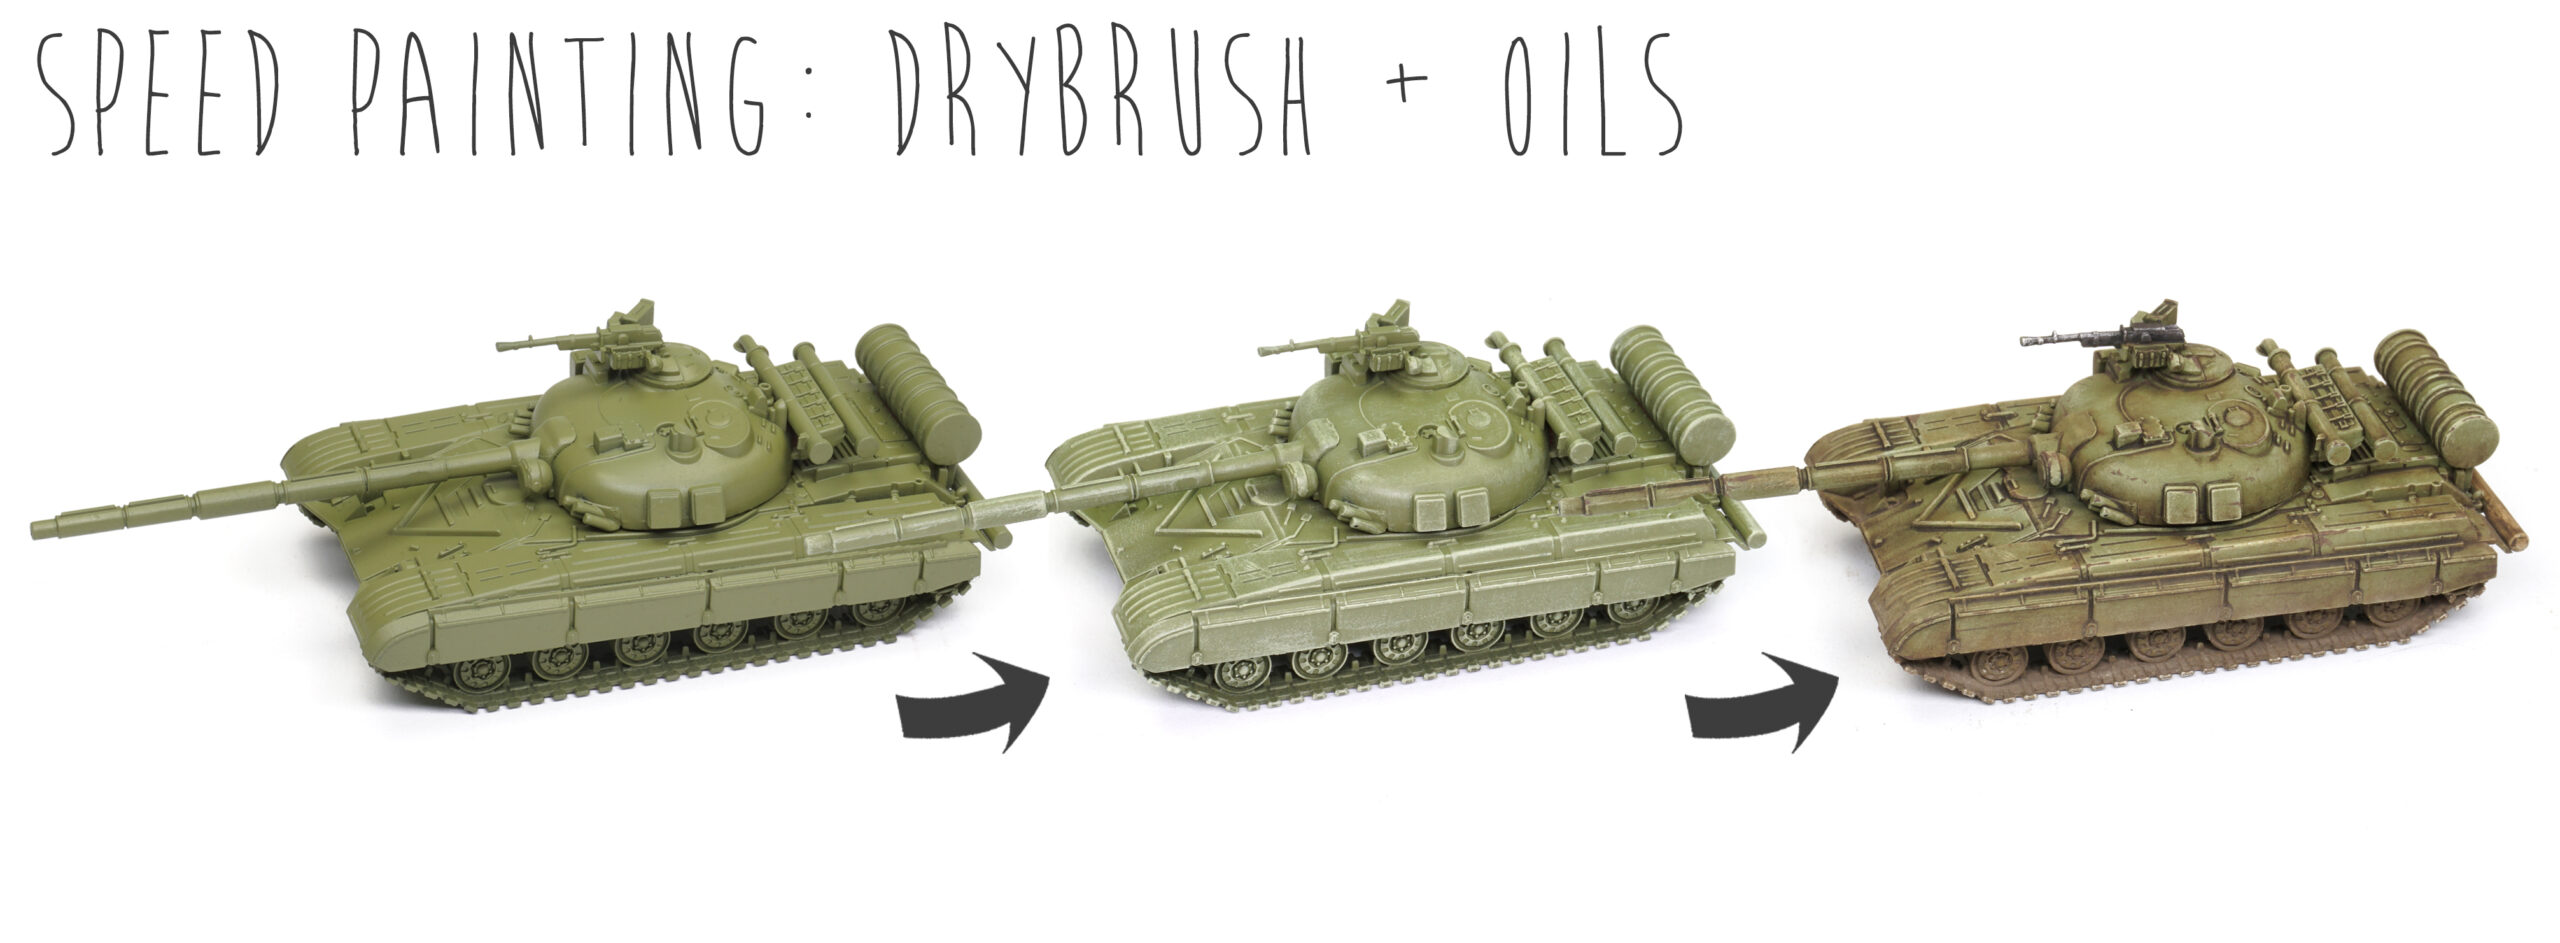
 In this tutorial, we will explore techniques for enhancing a basic paint job using oil paints. Unlike acrylics, oil paints require an organic solvent like White Spirit or turpentine (which is toxic, such as Enamel Odourless Thinner A.MIG-2019) instead of water; and take hours to dry, as opposed to mere seconds with acrylics. However, this extended drying time lends oils the advantage of effortless blending, allowing for the creation of multiple effects. For instance, we can employ this property to generate shadows, thereby enhancing the sense of volume, or to simulate various weathering effects such as dirt or dust accumulation. These techniques collectively contribute to elevating the overall visual appeal of the painted tank.
Step 1: preparation
 We clean each plastic component of the tank using a modeling knife and files, with particular emphasis on removing any mold lines. Subsequently, we assemble each part using plastic cement. This specific glue for plastic models offers superior efficacy compared to instant glue (“Super glue”), as it chemically melds with the plastic, forming a robust and enduring bond.
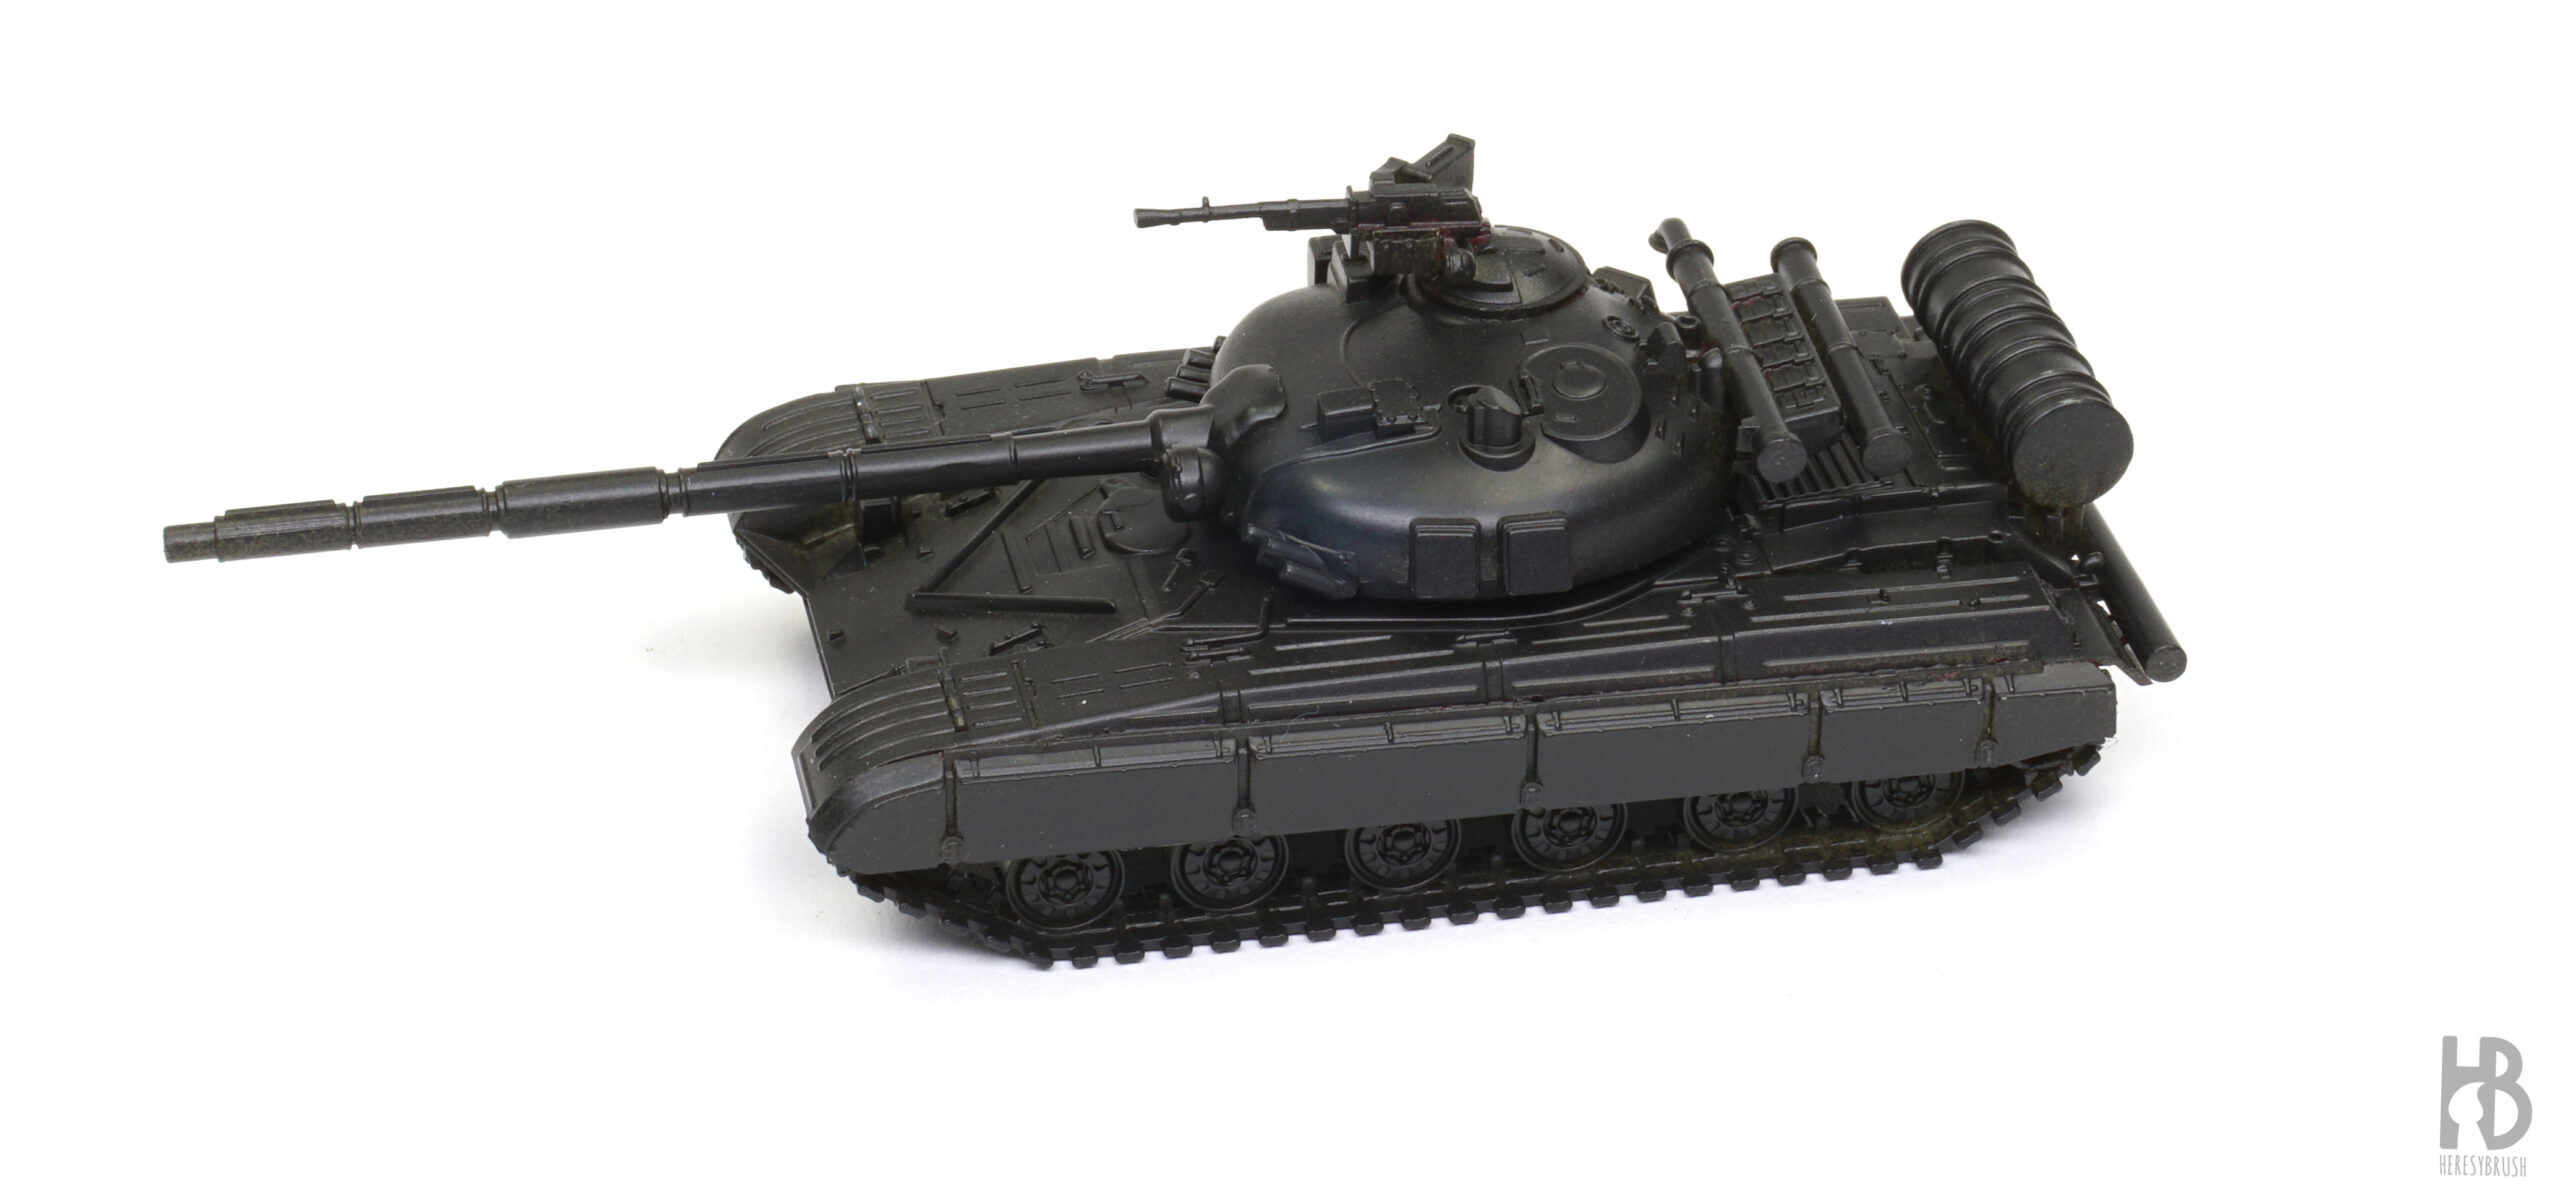
Next, we apply a layer of primer to create a proper foundation for the subsequent painting process. The primer serves a dual purpose: it improves the adhesion of the paint to the tank and enhances its overall durability. For 15mm models, opting for a black undercoat is recommended as it allows for the retention of shadow-like tones in deeper areas. Ideally, we apply the primer using an airbrush or a basic spray can such as TITANS HOBBY: Black Matt Primer TTH100. Alternatively, to speed up the painting process, we may opt for using a spray of the base color of the tank.
Step 2: base color
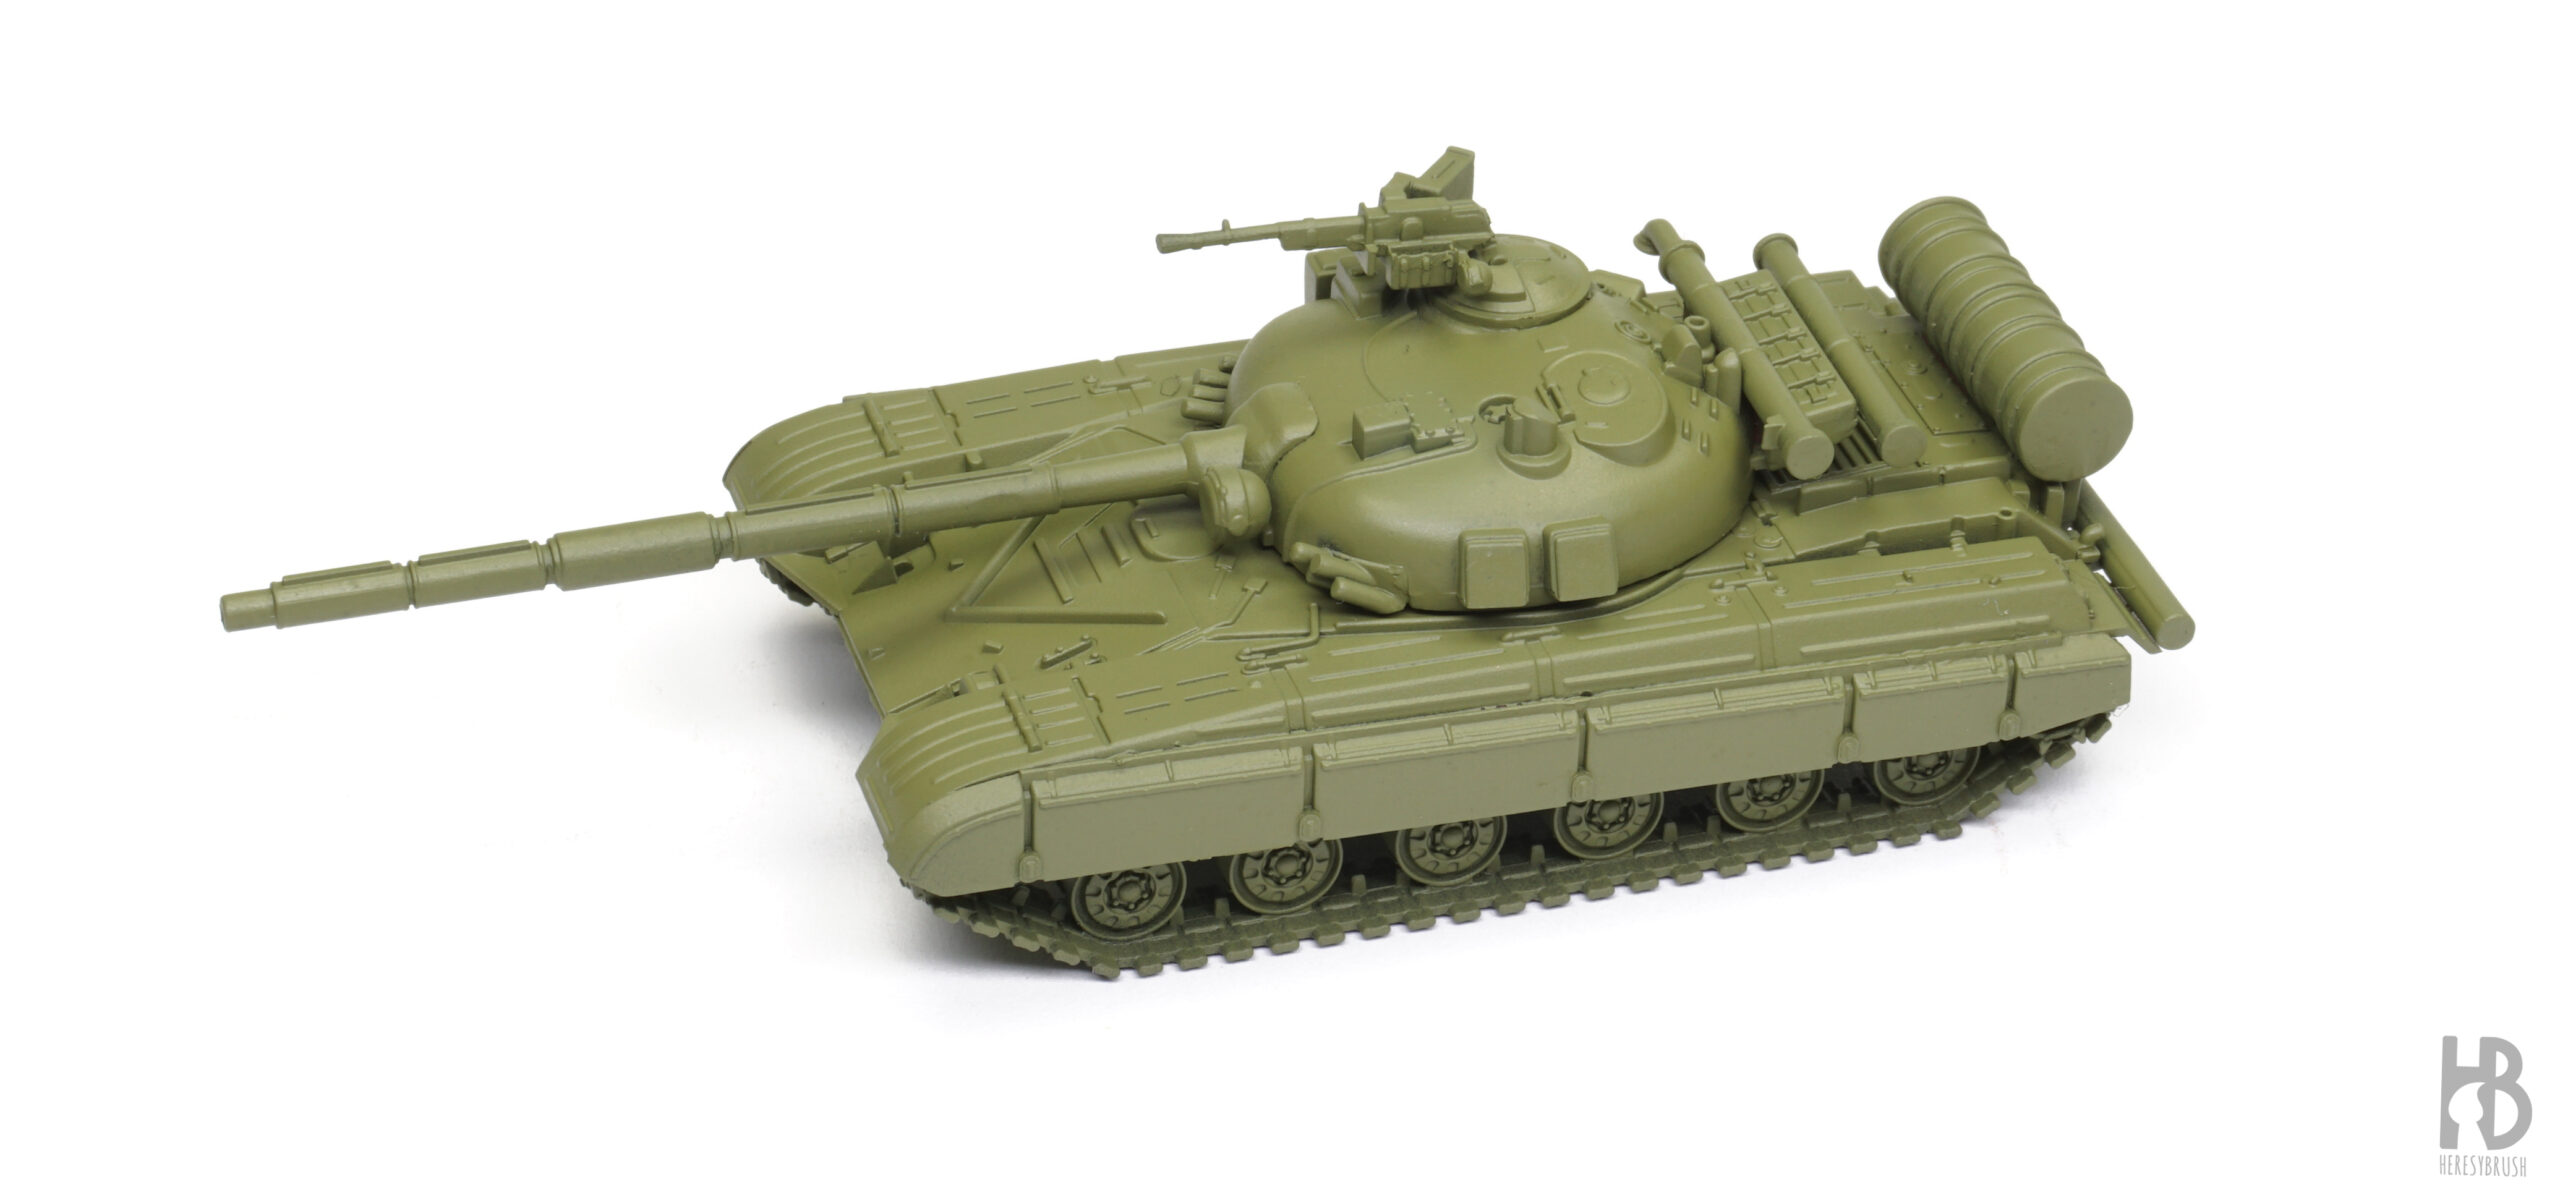 After deciding the painting scheme, in this instance, flat green, we proceed to select the appropriate color. When painting 15mm miniatures, it is advisable to opt for slightly lighter shades than the desired final color. This precaution is necessary because the smaller size of these miniatures reflects less light, causing colors to appear darker than anticipated. Hence, for the traditional dark green of modern Russian vehicles, we have opted for a lighter variant, Russian Green 4BO ATOM-20071. Moreover, the lighter color choice provides us with more flexibility to create shadows using oils during subsequent stages.
We apply at least two thin coats to get an even surface. Preferably, we use an airbrush and thin the paint with 30% Acrylic Thinner or water for optimal results. It is also possible to apply it with a brush after diluting the paint with 20% water, but caution is required to avoid masking the details.
Step 3: highlights
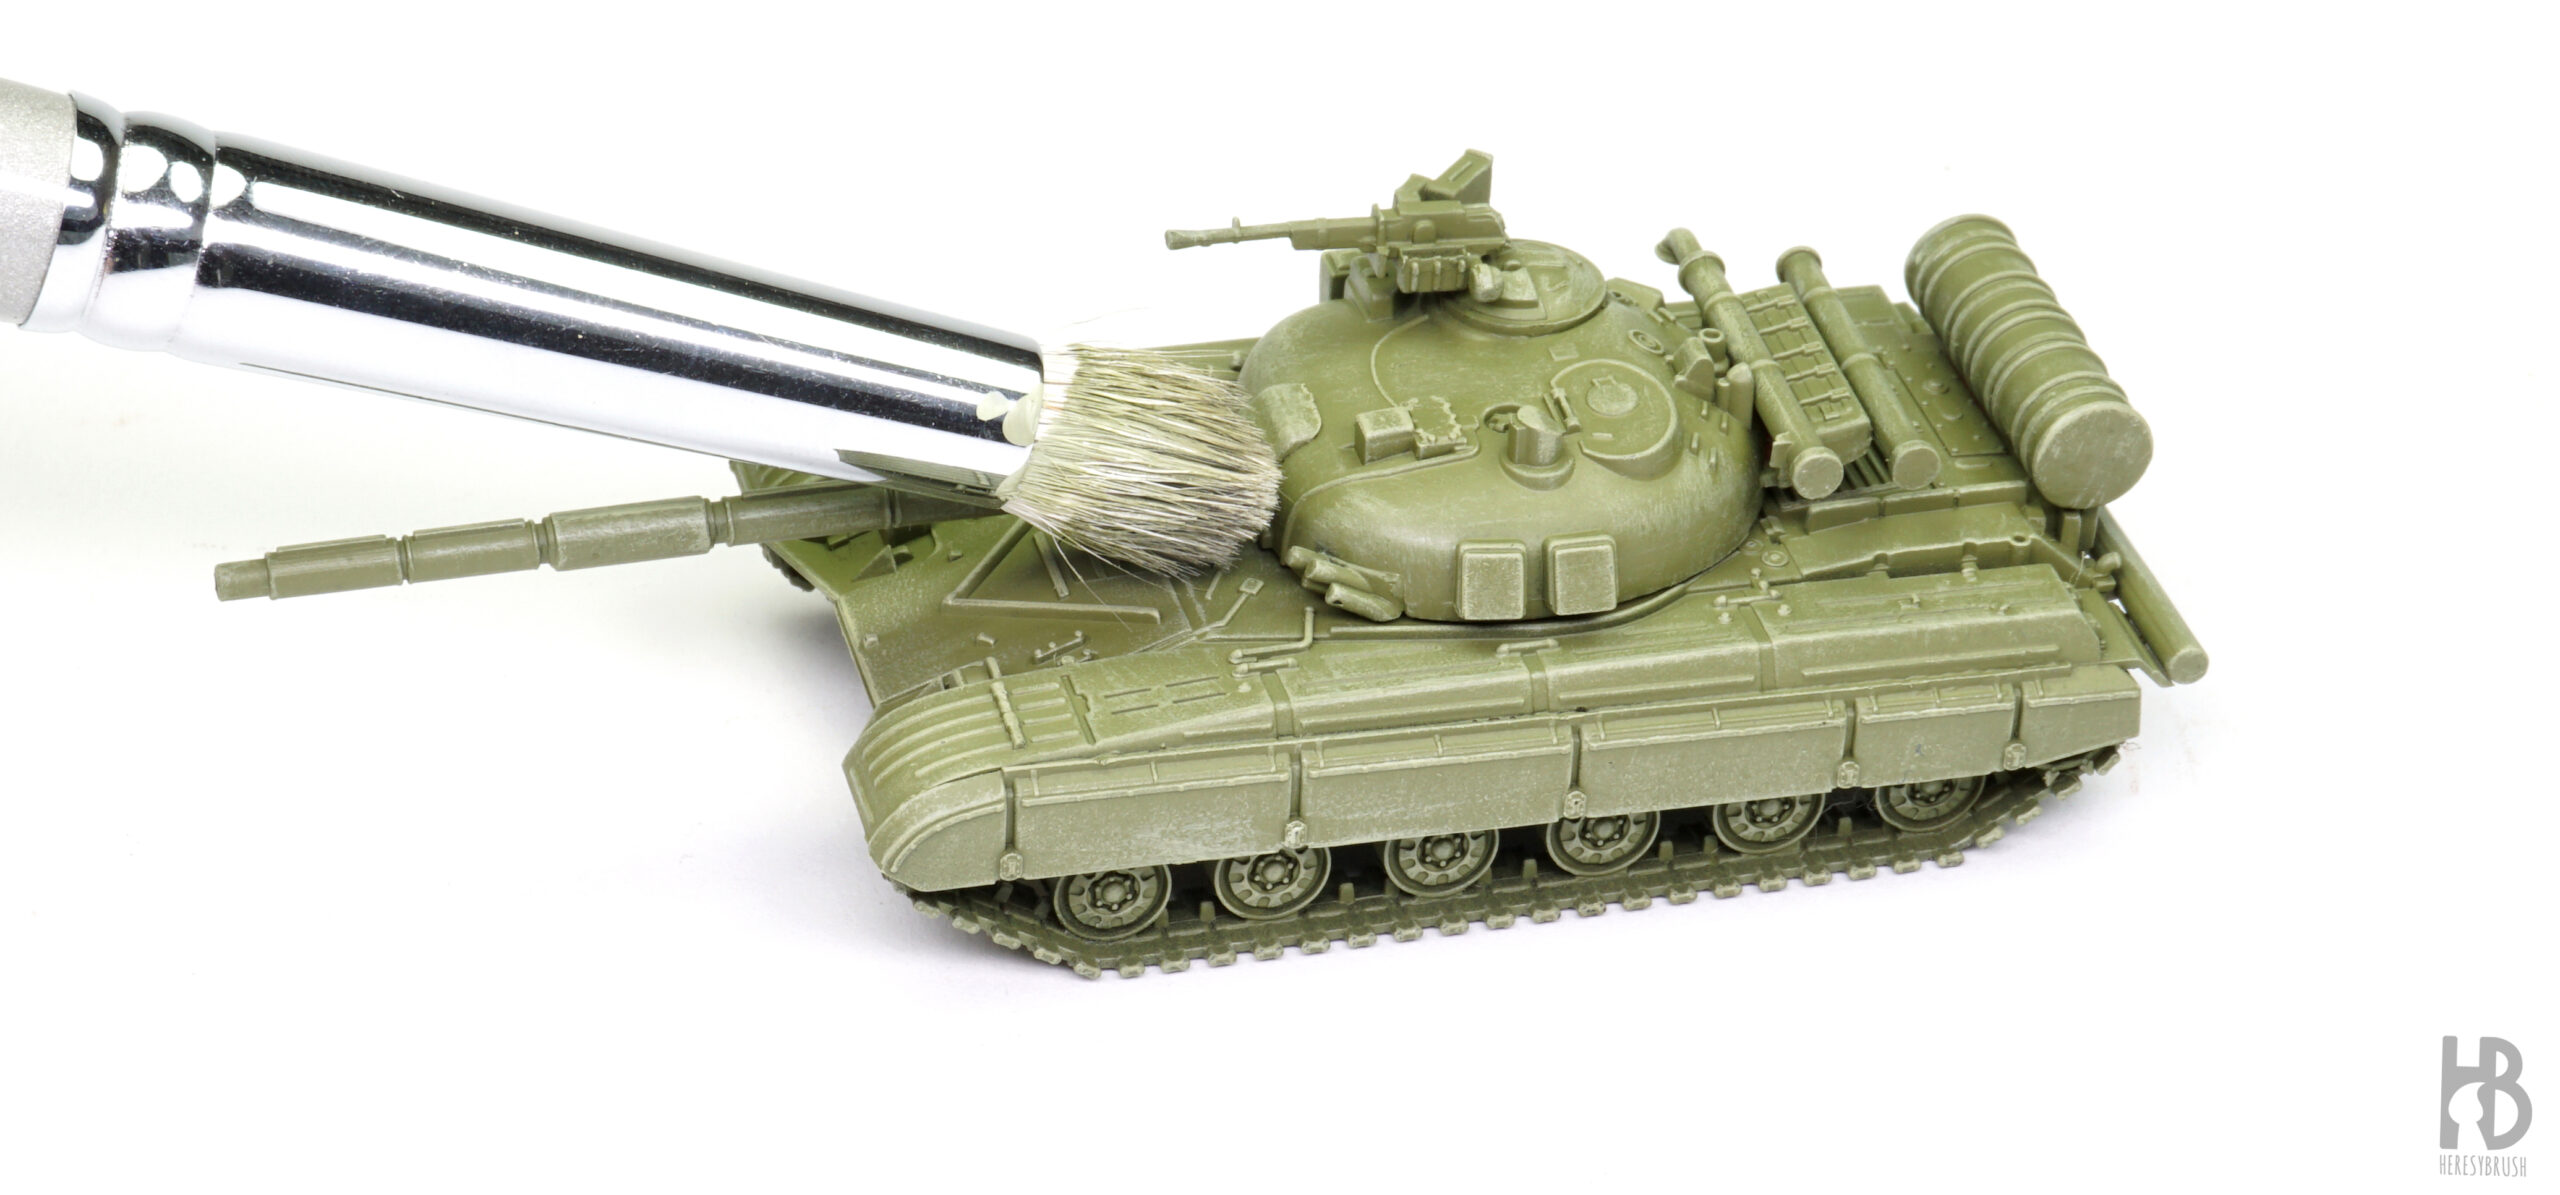 While it is possible to proceed just with the flat green color, especially when painting 15 mm models, it is advisable to add some form of highlights. This is particularly important to compensate for the small size of these models. The quickest and easiest method to achieve highlights is by employing the classic “dry brush” technique using a lighter color. We opt for a slightly lighter green shade by mixing Russian Green 4BO ATOM-20071 with Dio Drybrush medium Green A.MIG-0606 in the same proportion (the latter belongs to a specialized range of paints for dry brushing, known for their dense consistency, ideal for this technique). To apply the dry brush, we utilize a thick brush, akin to those used for makeup. After removing most of the excess paint on a piece of paper or cloth, we proceed to highlight all the details on the tank.
Step 4: highlights II
 Optionally, we can further enhance the highlights by applying a second layer using the dry brush technique with an even lighter color, such as Dio Drybrush medium Green A.MIG-0606. This time, we focus on smaller areas, particularly edges and specific areas we wish to emphasize. One drawback of this technique is the limited control over the paint, resulting in a somewhat messy outcome. However, we will address and refine this issue later using oils.
Step 5: details and tracks
 Next, we proceed with using acrylic paints to paint the remaining parts and details of the tank. We start by painting the tracks using a 1:1 mix of Zimmerit ATOM-20144 and Chipping ATOM-20064. Once dry, we create metallic reflections by applying a dry brush technique with Dio Drybrush Light metal A.MIG-0621. Similarly, the HMG is initially blocked in black and then highlighted with Light Metal. The trunk at the rear is painted with Zimmerit, while the mantlet canvas is coated with Olive Drab ATOM-20069. For this, we utilize a thin brush after diluting the paint with 20% water.
Step 6: sealing I
 Before proceeding with the wash, it is recommended to apply a thin layer of acrylic glossy varnish to the surfaces. This can be done using an airbrush, preferably with a product like A-STAND Aqua Gloss Clear A.MIG-2503. Alternatively, if an airbrush is not available, you can use a spray varnish such as TITANS HOBBY Gloss Transparent Varnish TTH114. The glossy varnish helps create a smooth and polished surface, ensuring optimal application and distribution of the wash.
Step 7: dark wash
 To accentuate all the recesses and emphasize the details, we apply a dark wash using an enamel product (which function similarly to oils). Unlike when painting infantry, we selectively apply the wash only to the recessed areas, not all over the surface. The choice of wash color varies depending on the tank but should be dark enough to highlight the recesses without being overly pronounced. In this instance, we utilize Dark Brown WASH for Green Vehicles A.MIG-1005, applying it with an old or synthetic thin brush. Given that this is an enamel product, we clean the brush using an enamel thinner such as Enamel Odourless Thinner A.MIG-2019.
If you want to know more about washes, check this another article.
Step 8: removing the excess of wash
 We allow the enamel wash to partially dry for 30-60 minutes (it will completely dry overnight). Once the wash is no longer very wet and has a matt appearance, we use a cotton swab moistened with a small amount of Enamel Odourless Thinner A.MIG-2019 to remove the excess wash. We gently rub the surface, dragging the excess wash preferably downward, while simultaneously creating streaking effects. If necessary, a fine brush can be used to delicately remove the wash from specific areas.
Step 9: sealing II
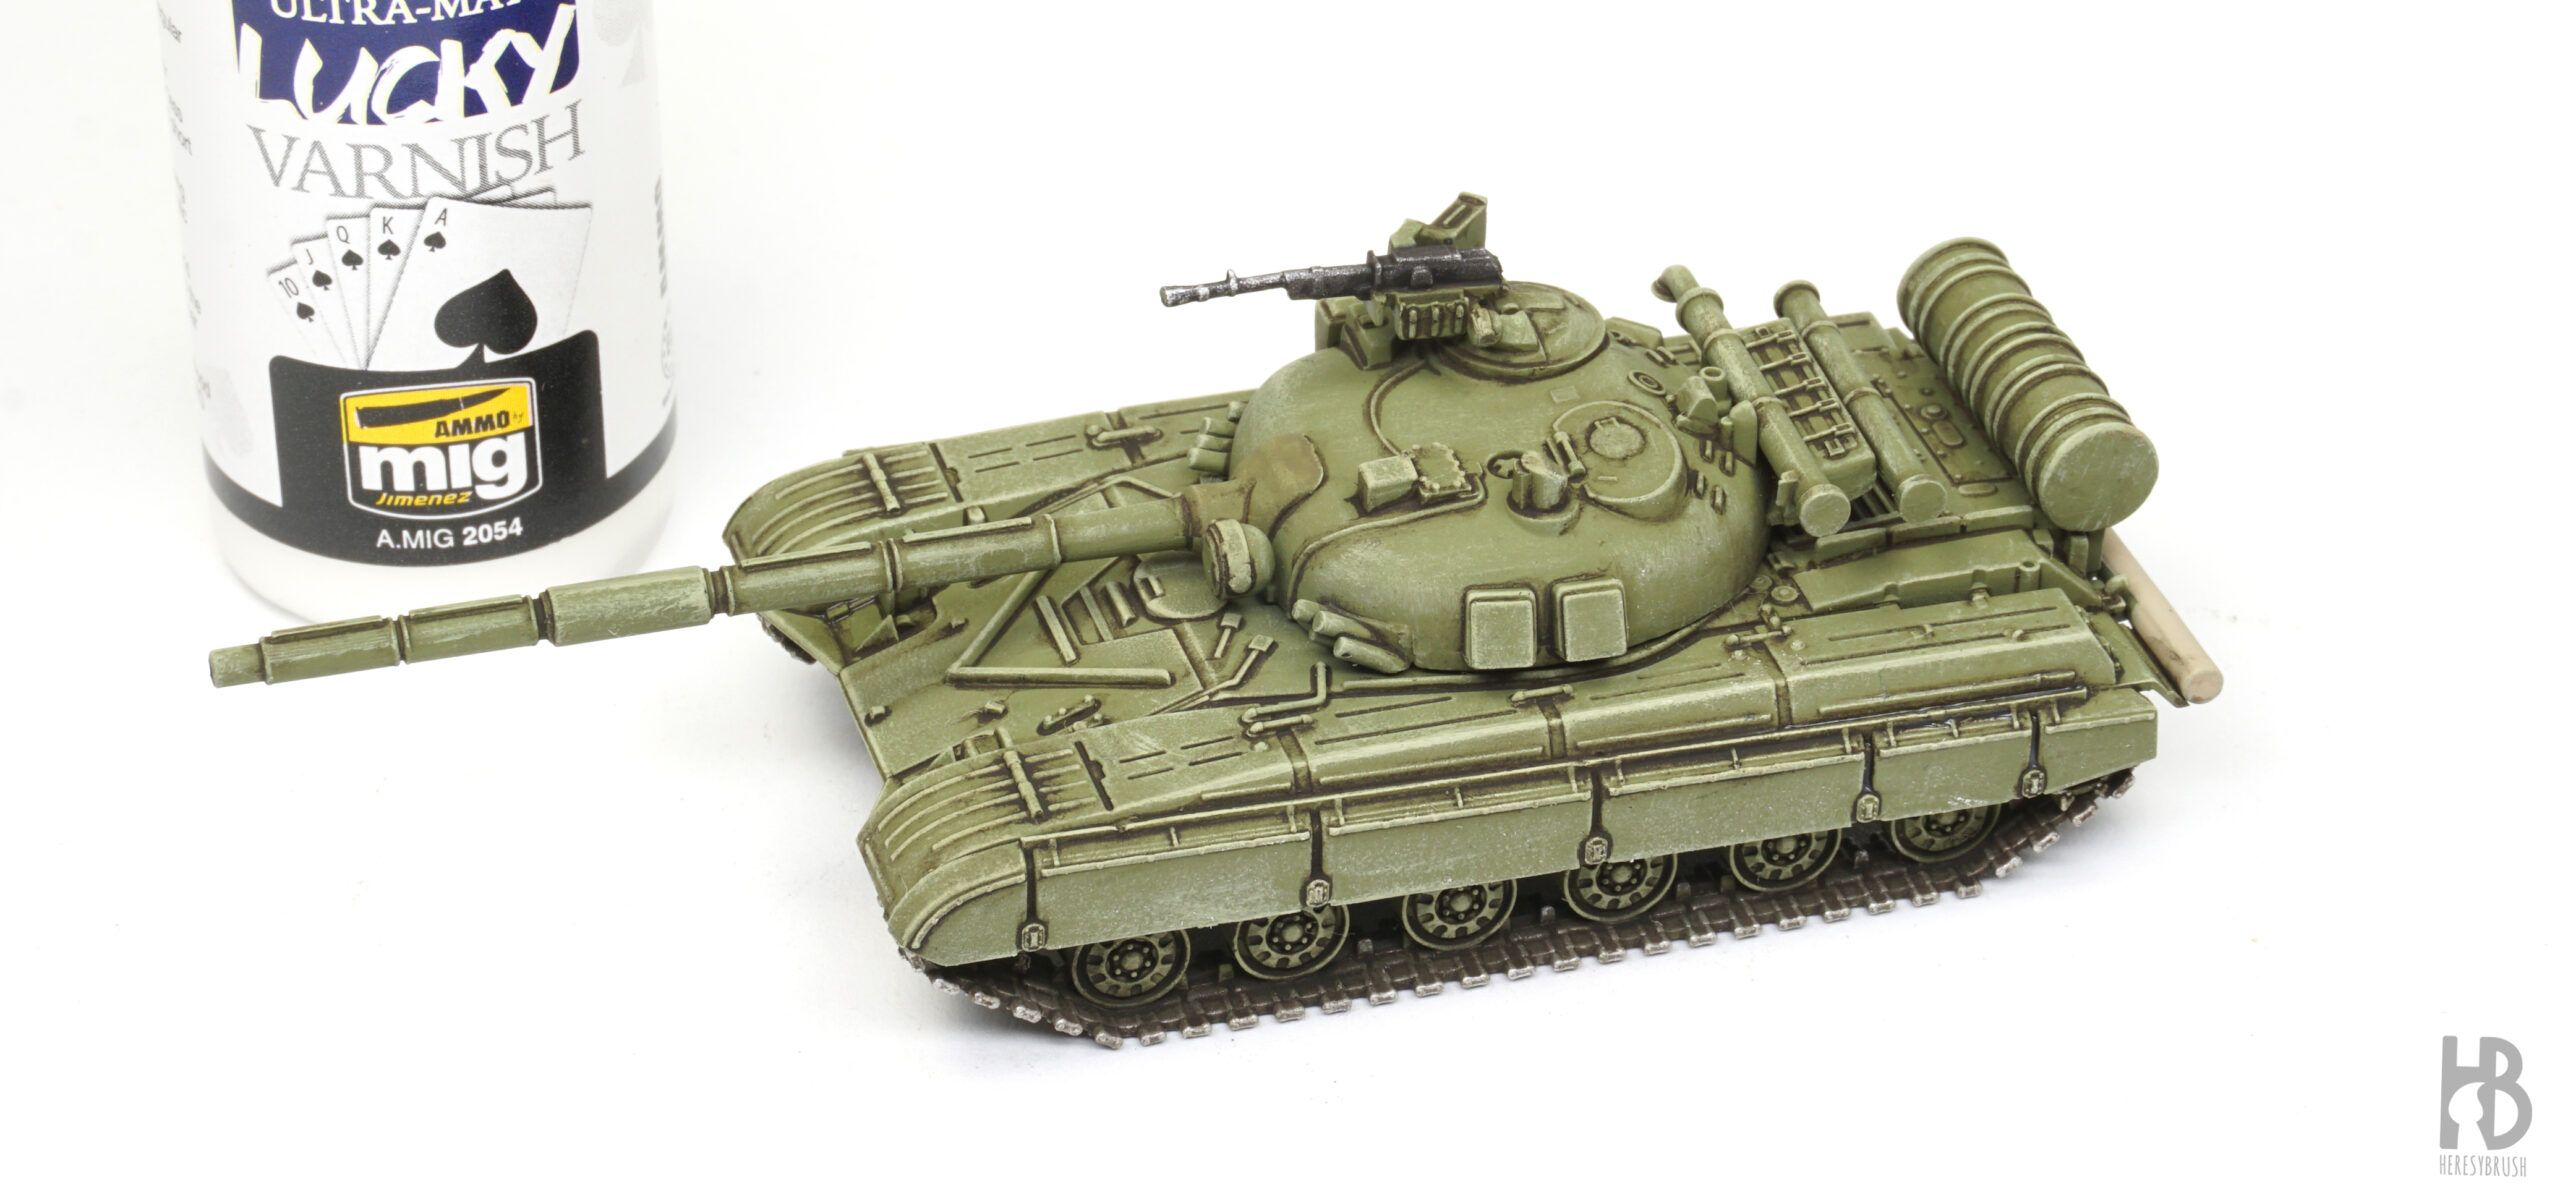 Since we no longer require the glossy surface, we proceed to seal the previous paint job and eliminate the shiny effect by applying two thin layers of an acrylic matte varnish, for example applying Ultra-Matt Lucky Varnish A.MIG-2054 using an airbrush. Alternatively, we can achieve a similar effect using a spray varnish such as TTH110 TITANS HOBBY Transparent Matt Varnish.
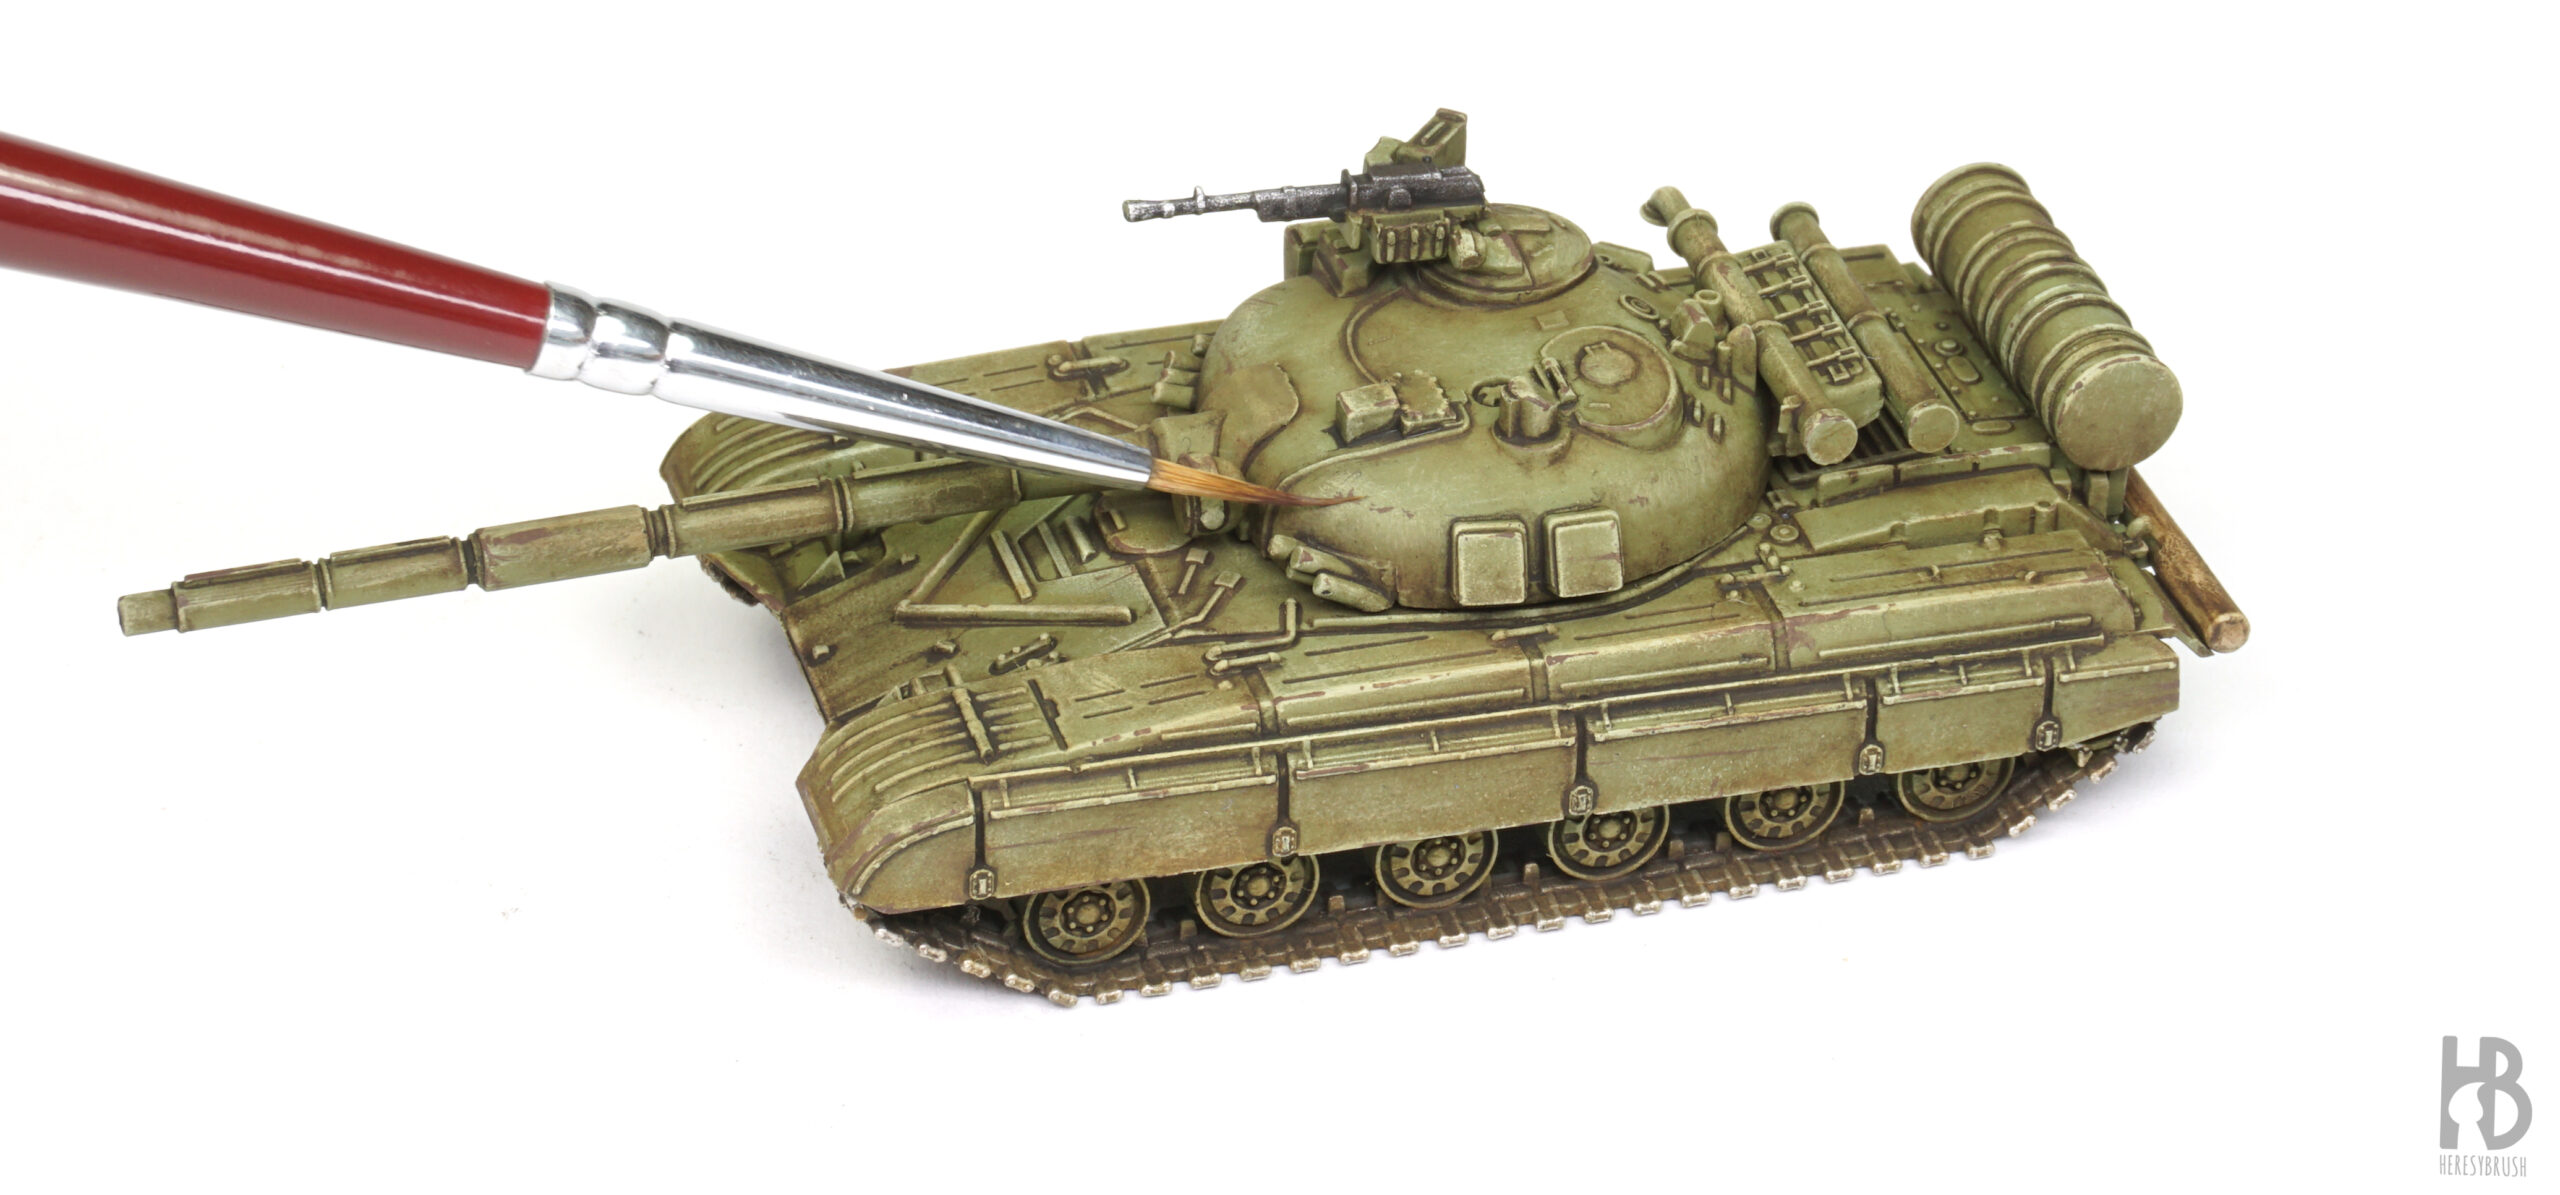
Step 10: oils application to create shadows
 Now is the moment to refine our previous paint job, which may have appeared somewhat simplistic and messy, using oils. For this purpose, it is advisable to utilize oils specifically formulated for scale models. While artist oils are of high quality, they are primarily intended for use on canvas and tend to be much oilier and slower to dry. The Oilbrushers range from AMMO are oils specially designed for painting tanks, featuring a partially thinned consistency and incorporating a brush within the bottle.
With oils, we can effectively create shadows to enhance the sense of volume using darker colors. For instance, we can apply a touch of Oilbrusher Dark Brown A.MIG-3512 to the lower part of the frontal panel. The objective is to establish a clear contrast between shadows and highlights across different panels, thereby darkening certain areas of each panel accordingly.
Step 11: oils blending to create shadows
 Immediately afterward, we employ a brush dampened with Enamel Odourless Thinner A.MIG-2019 to blend the oil, ensuring that most of it remains in the area we intend to be the darkest.
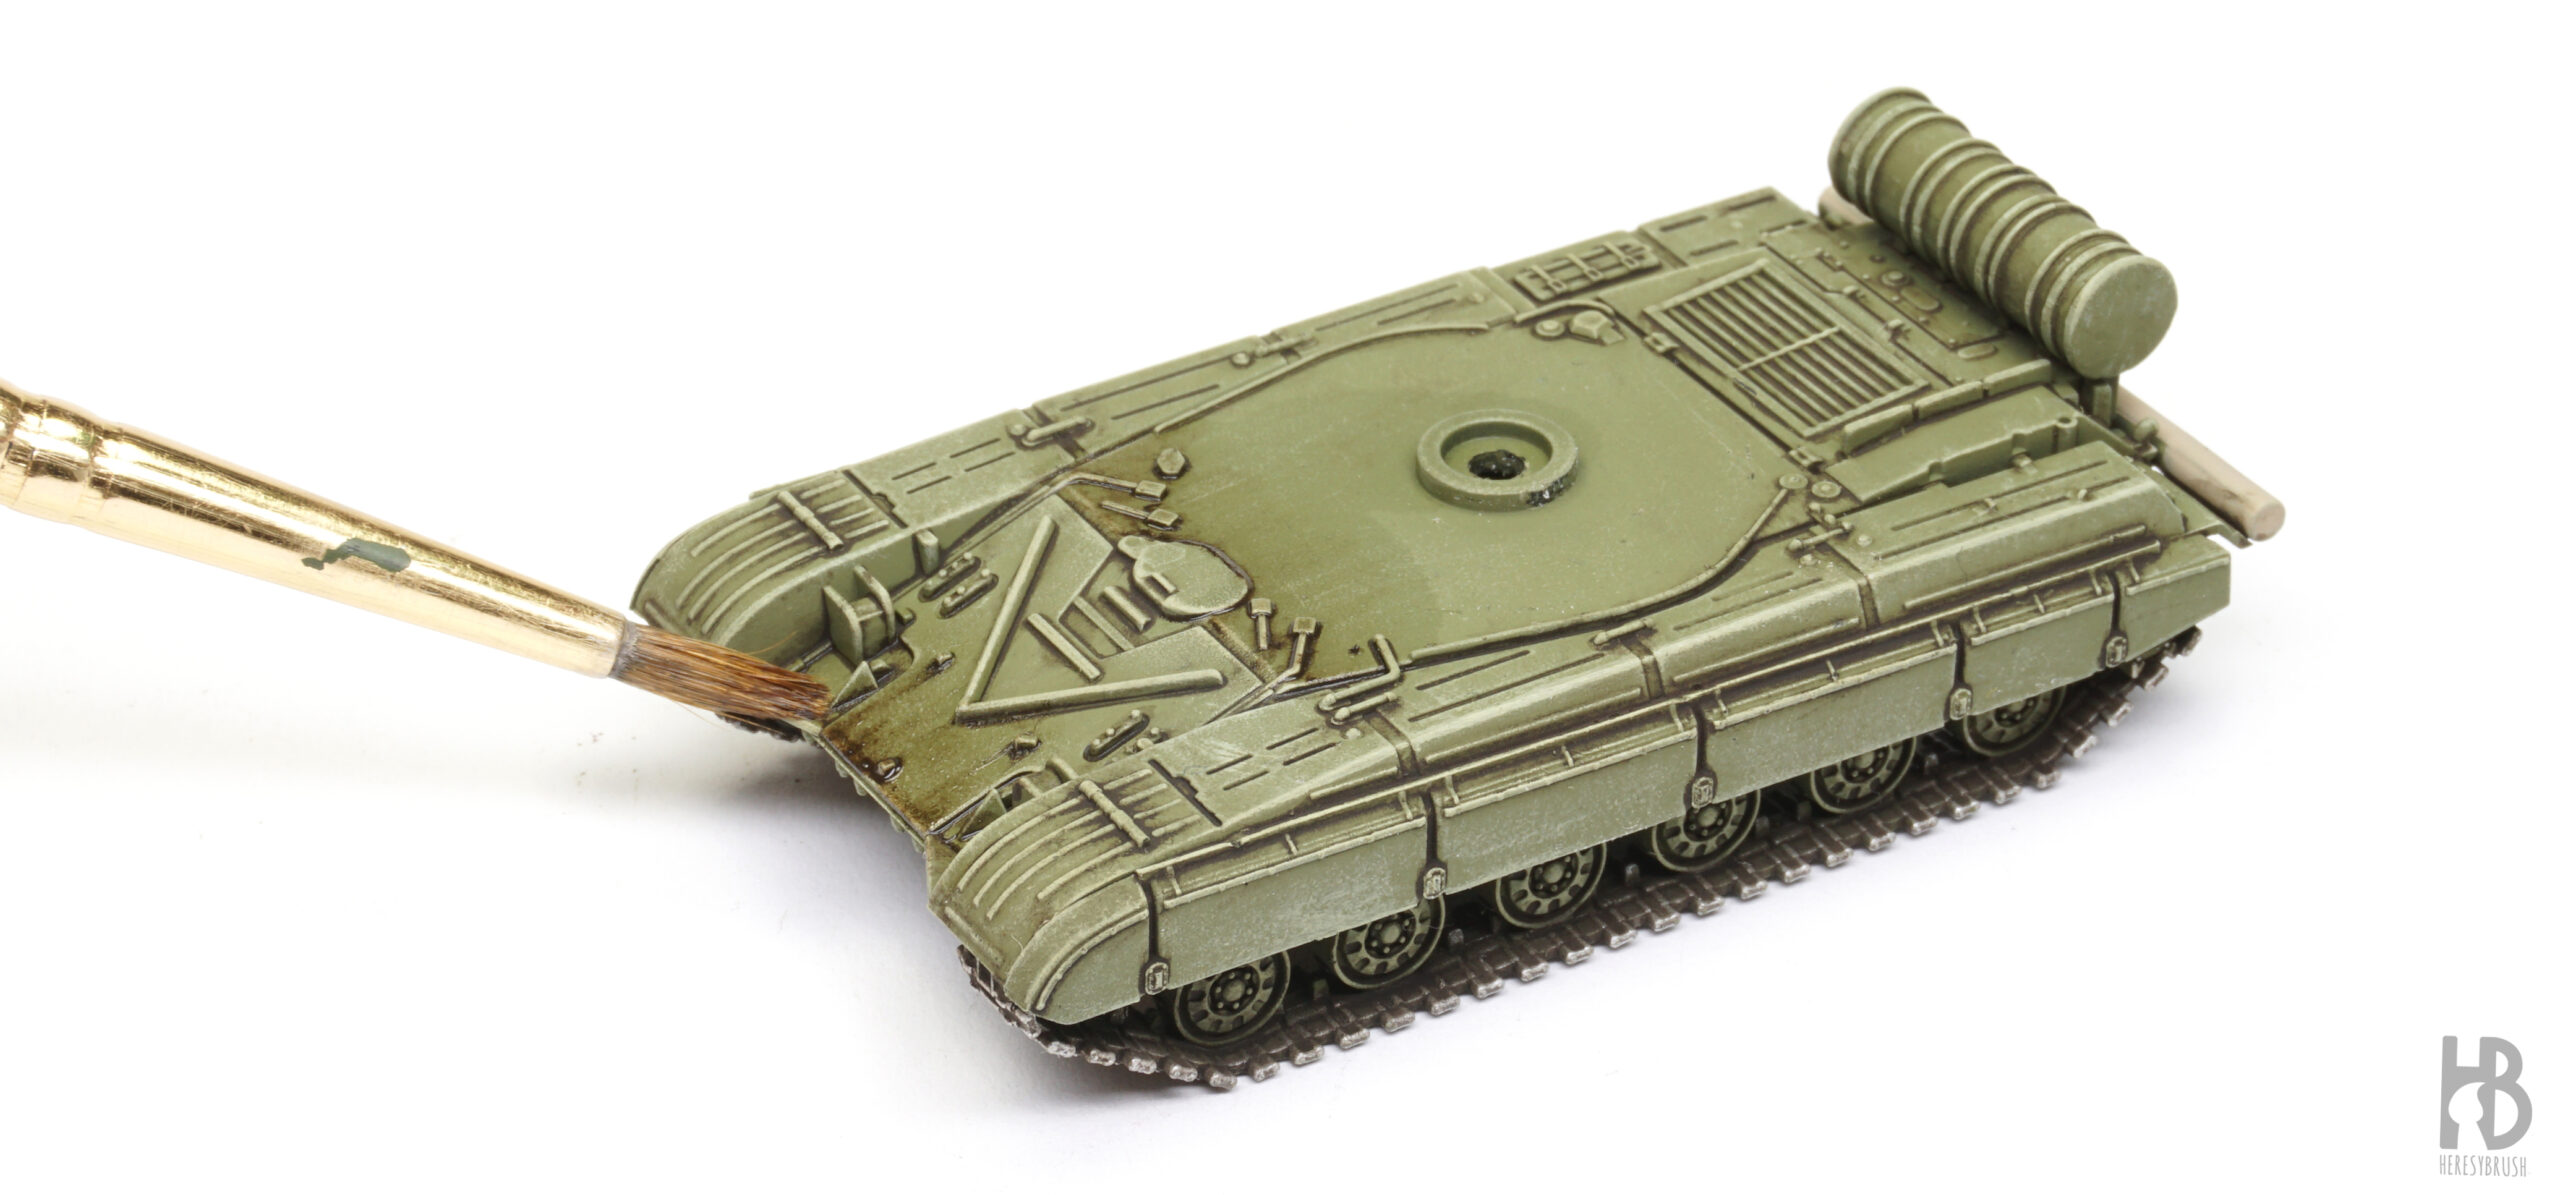
Step 12: oils application to create dust/dirt effects
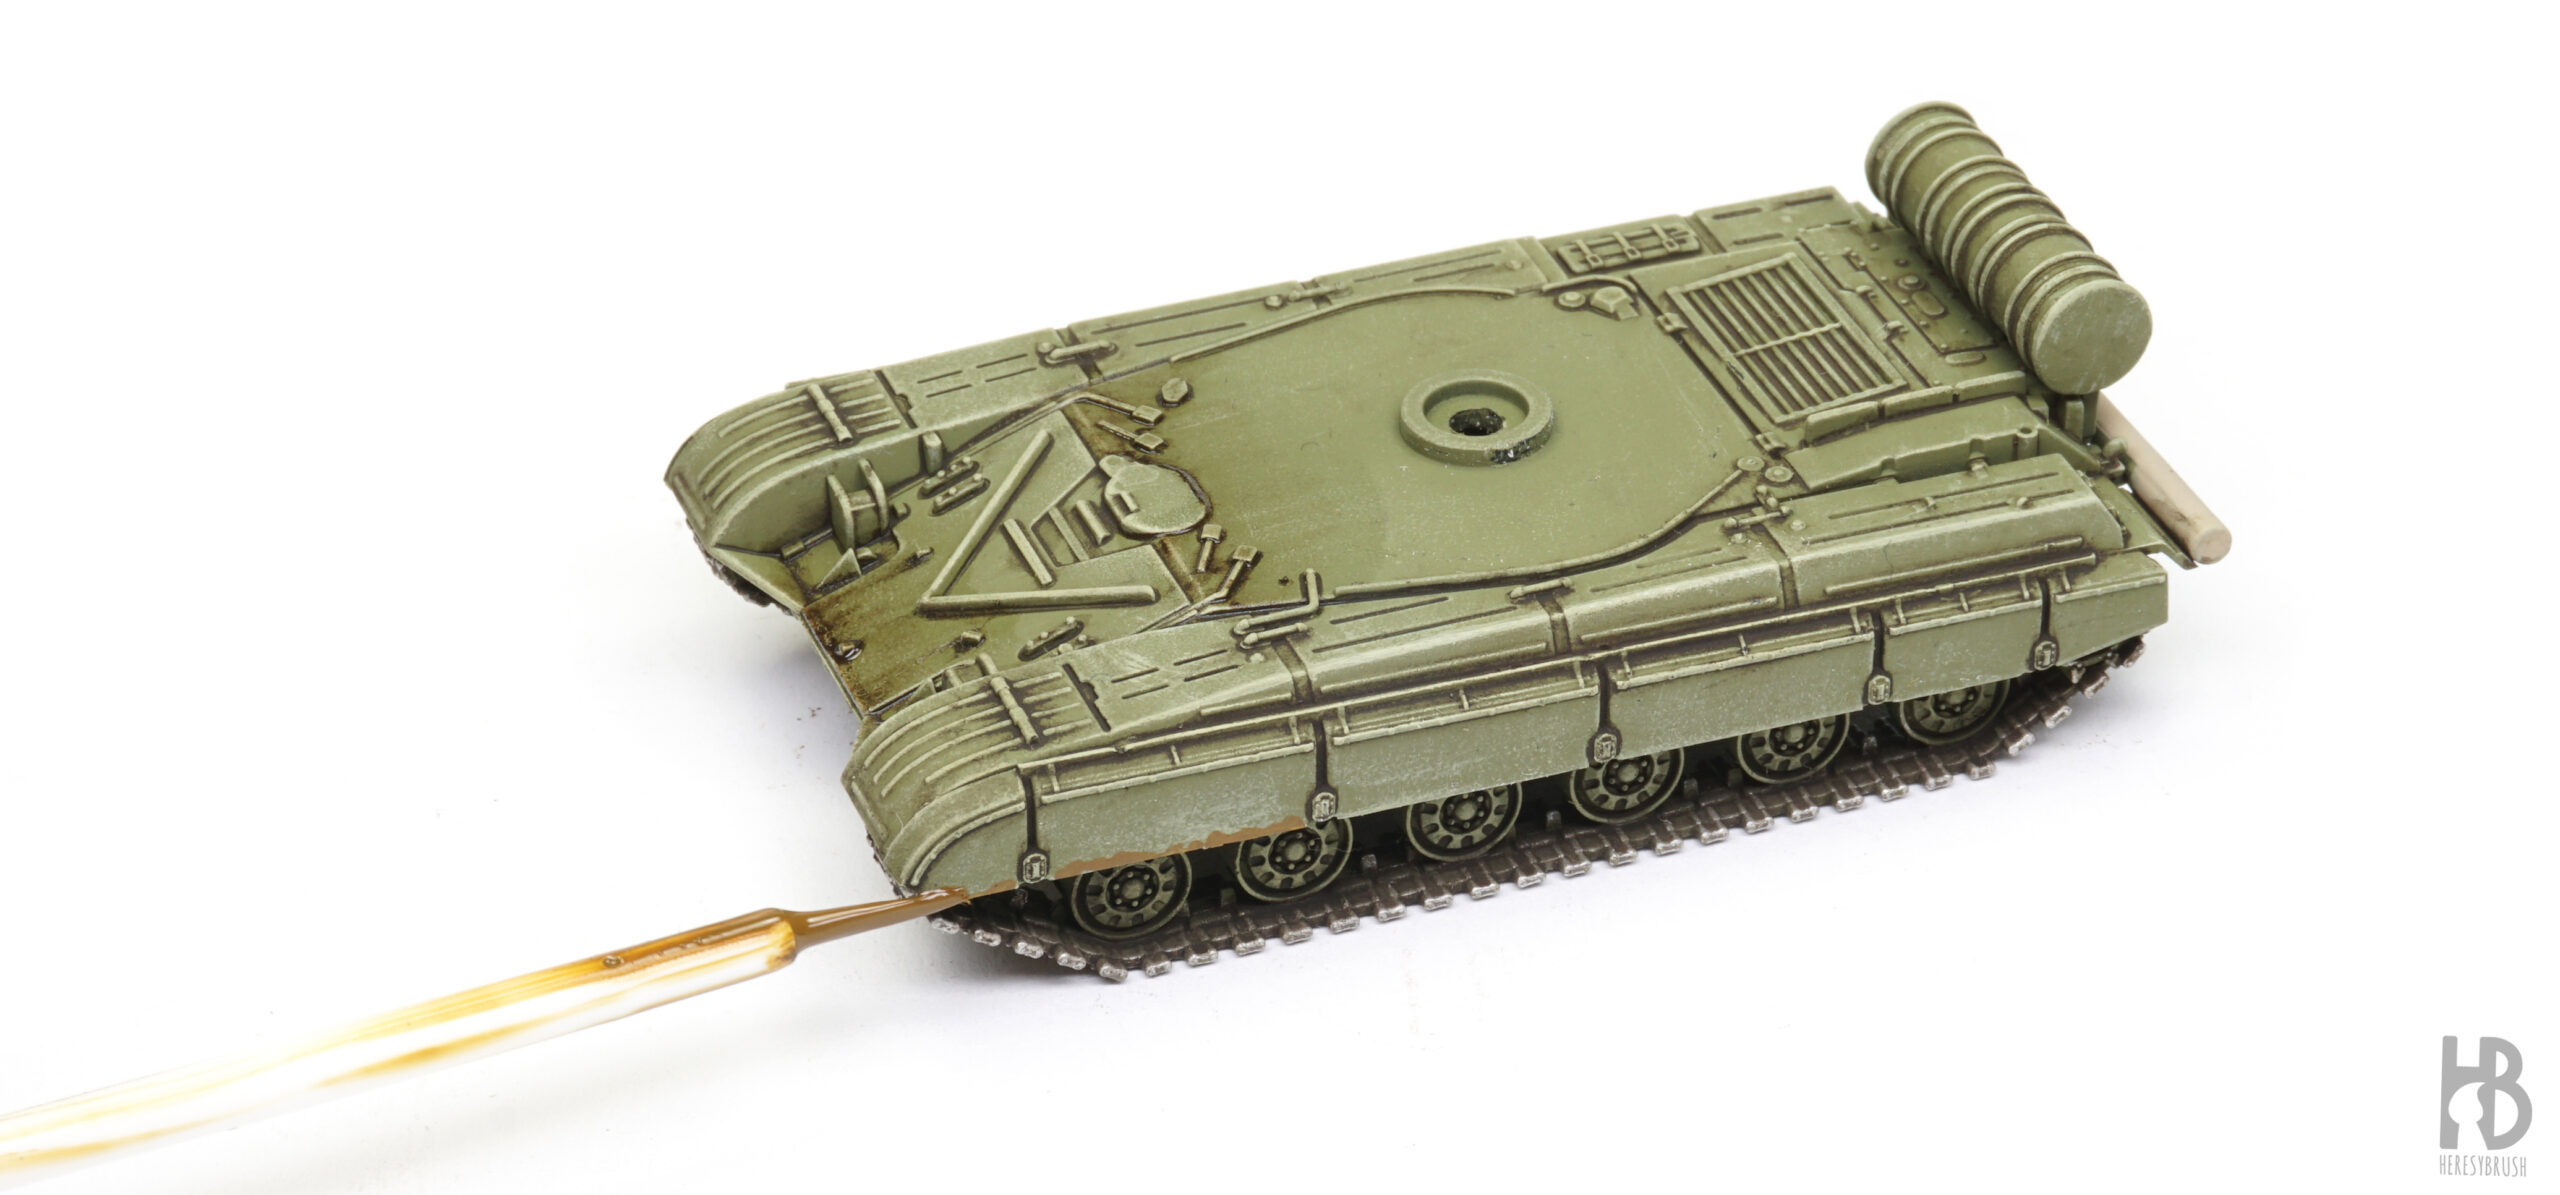 Similarly, we can use a light brown oil paint to simulate weathering effects, such as dust or dirt, for instance, on the lower part of the side skirts. Following the previous procedure, we start by applying a small amount of Oilbrusher Earth A.MIG-3514 along the lower edge of the mudguards and skirts using the brush incorporated in the bottle.
Step 13: oils blending to create dust/dirt effects
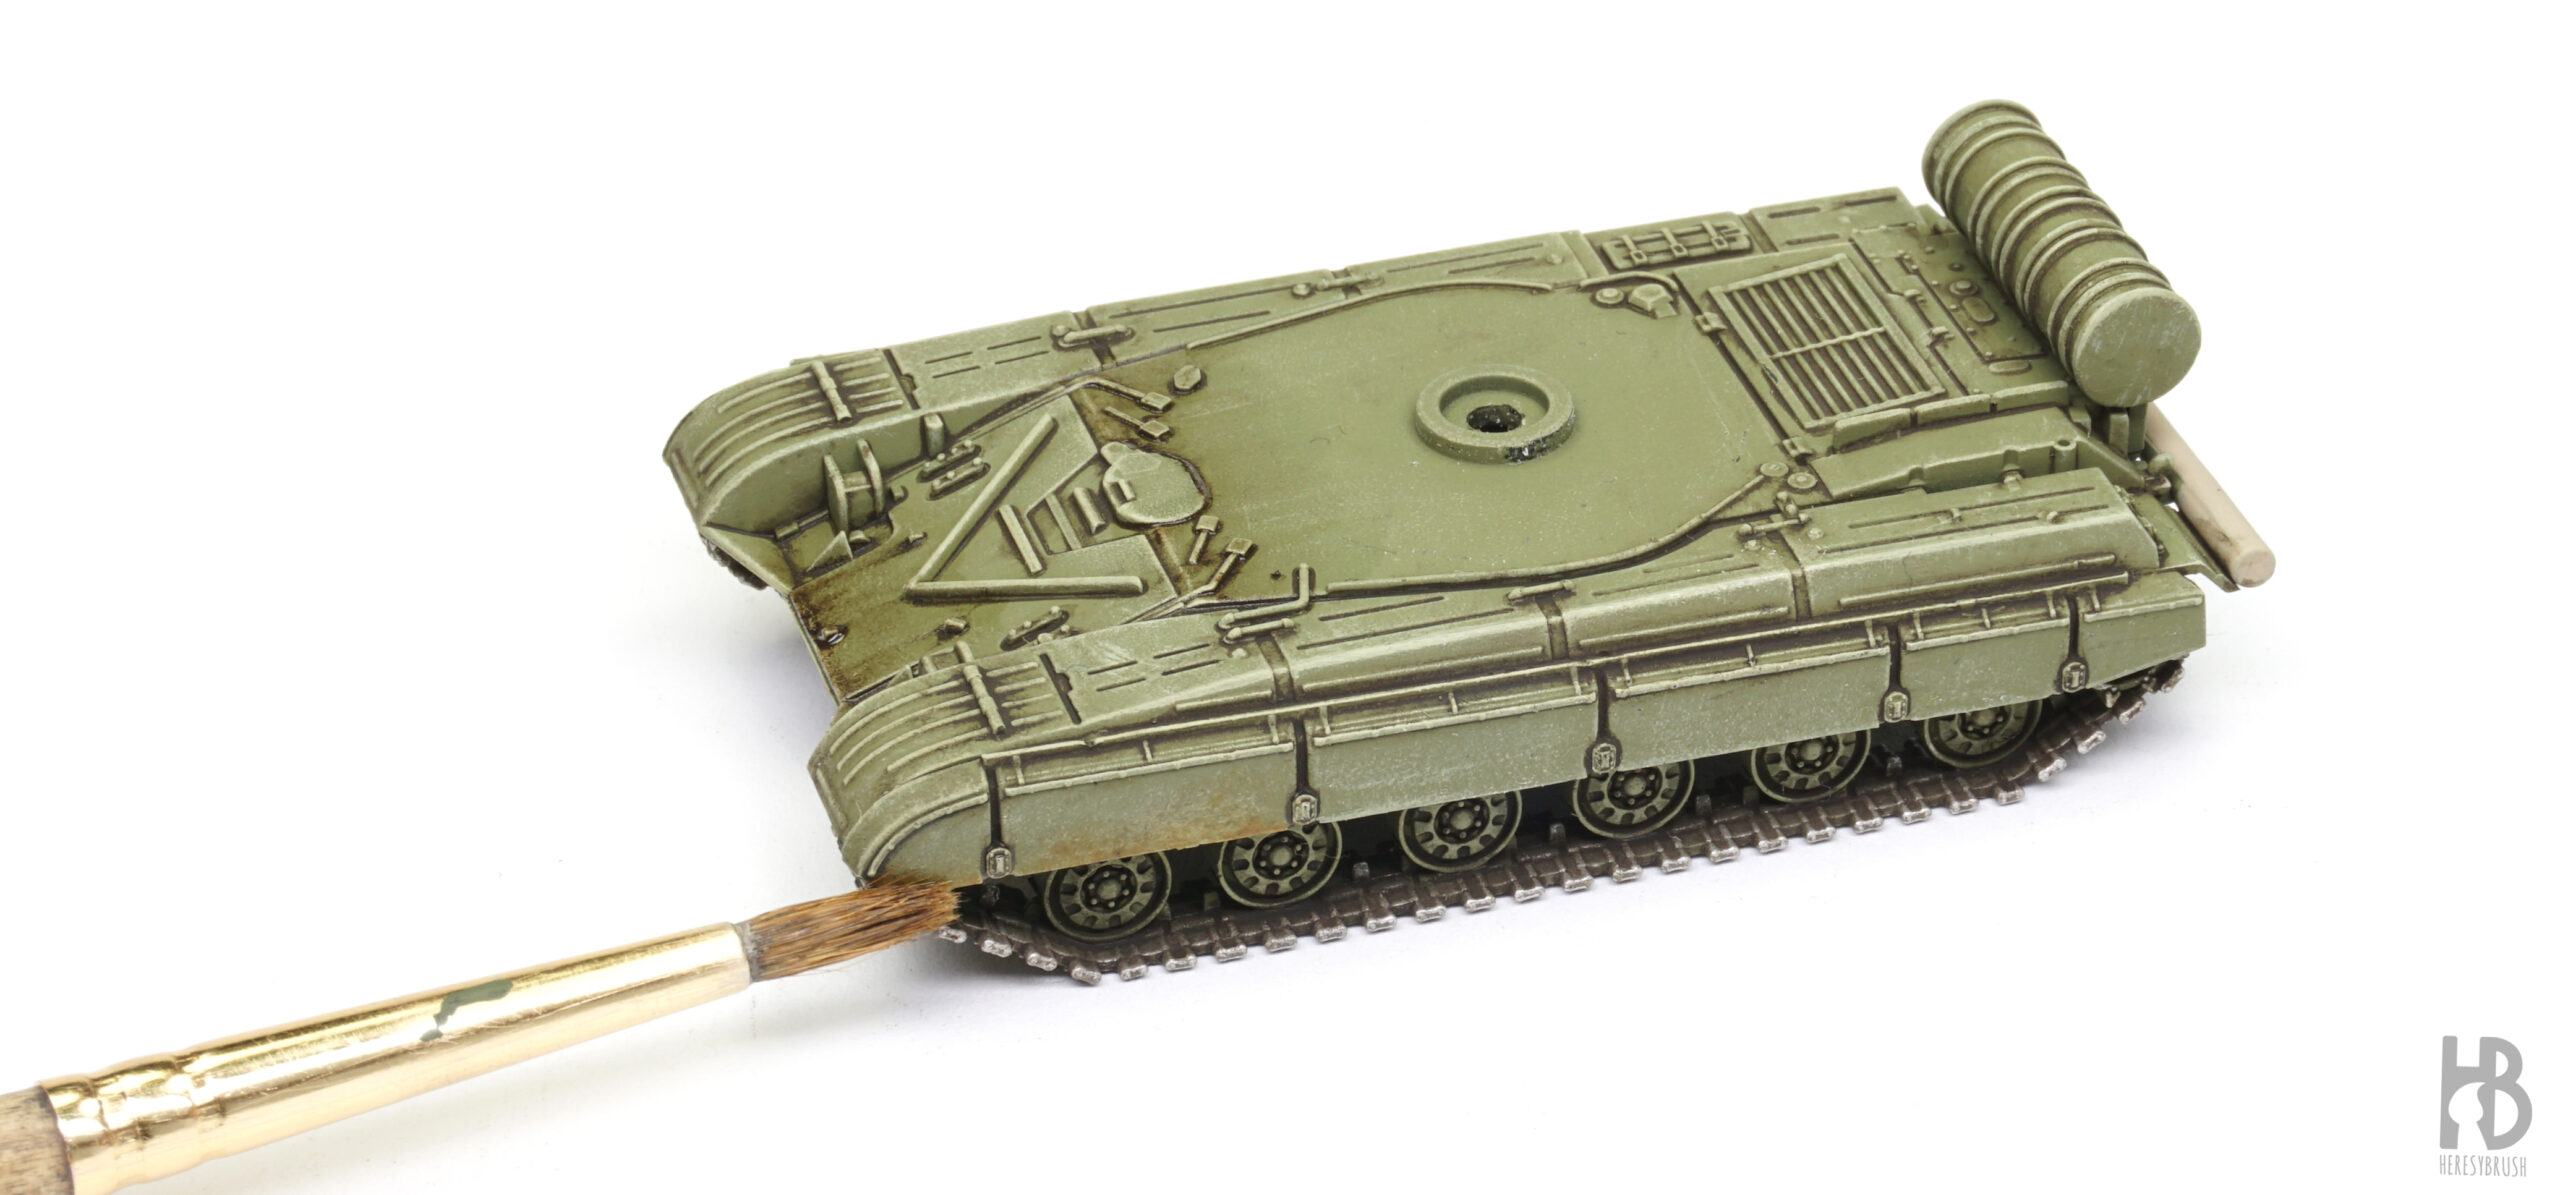 And then, immediately, we blend the oil using a brush dampened with the organic solvent. Our goal is to softly blend the edges of the oil spot, focusing on achieving a seamless transition, rather than removing the paint entirely.
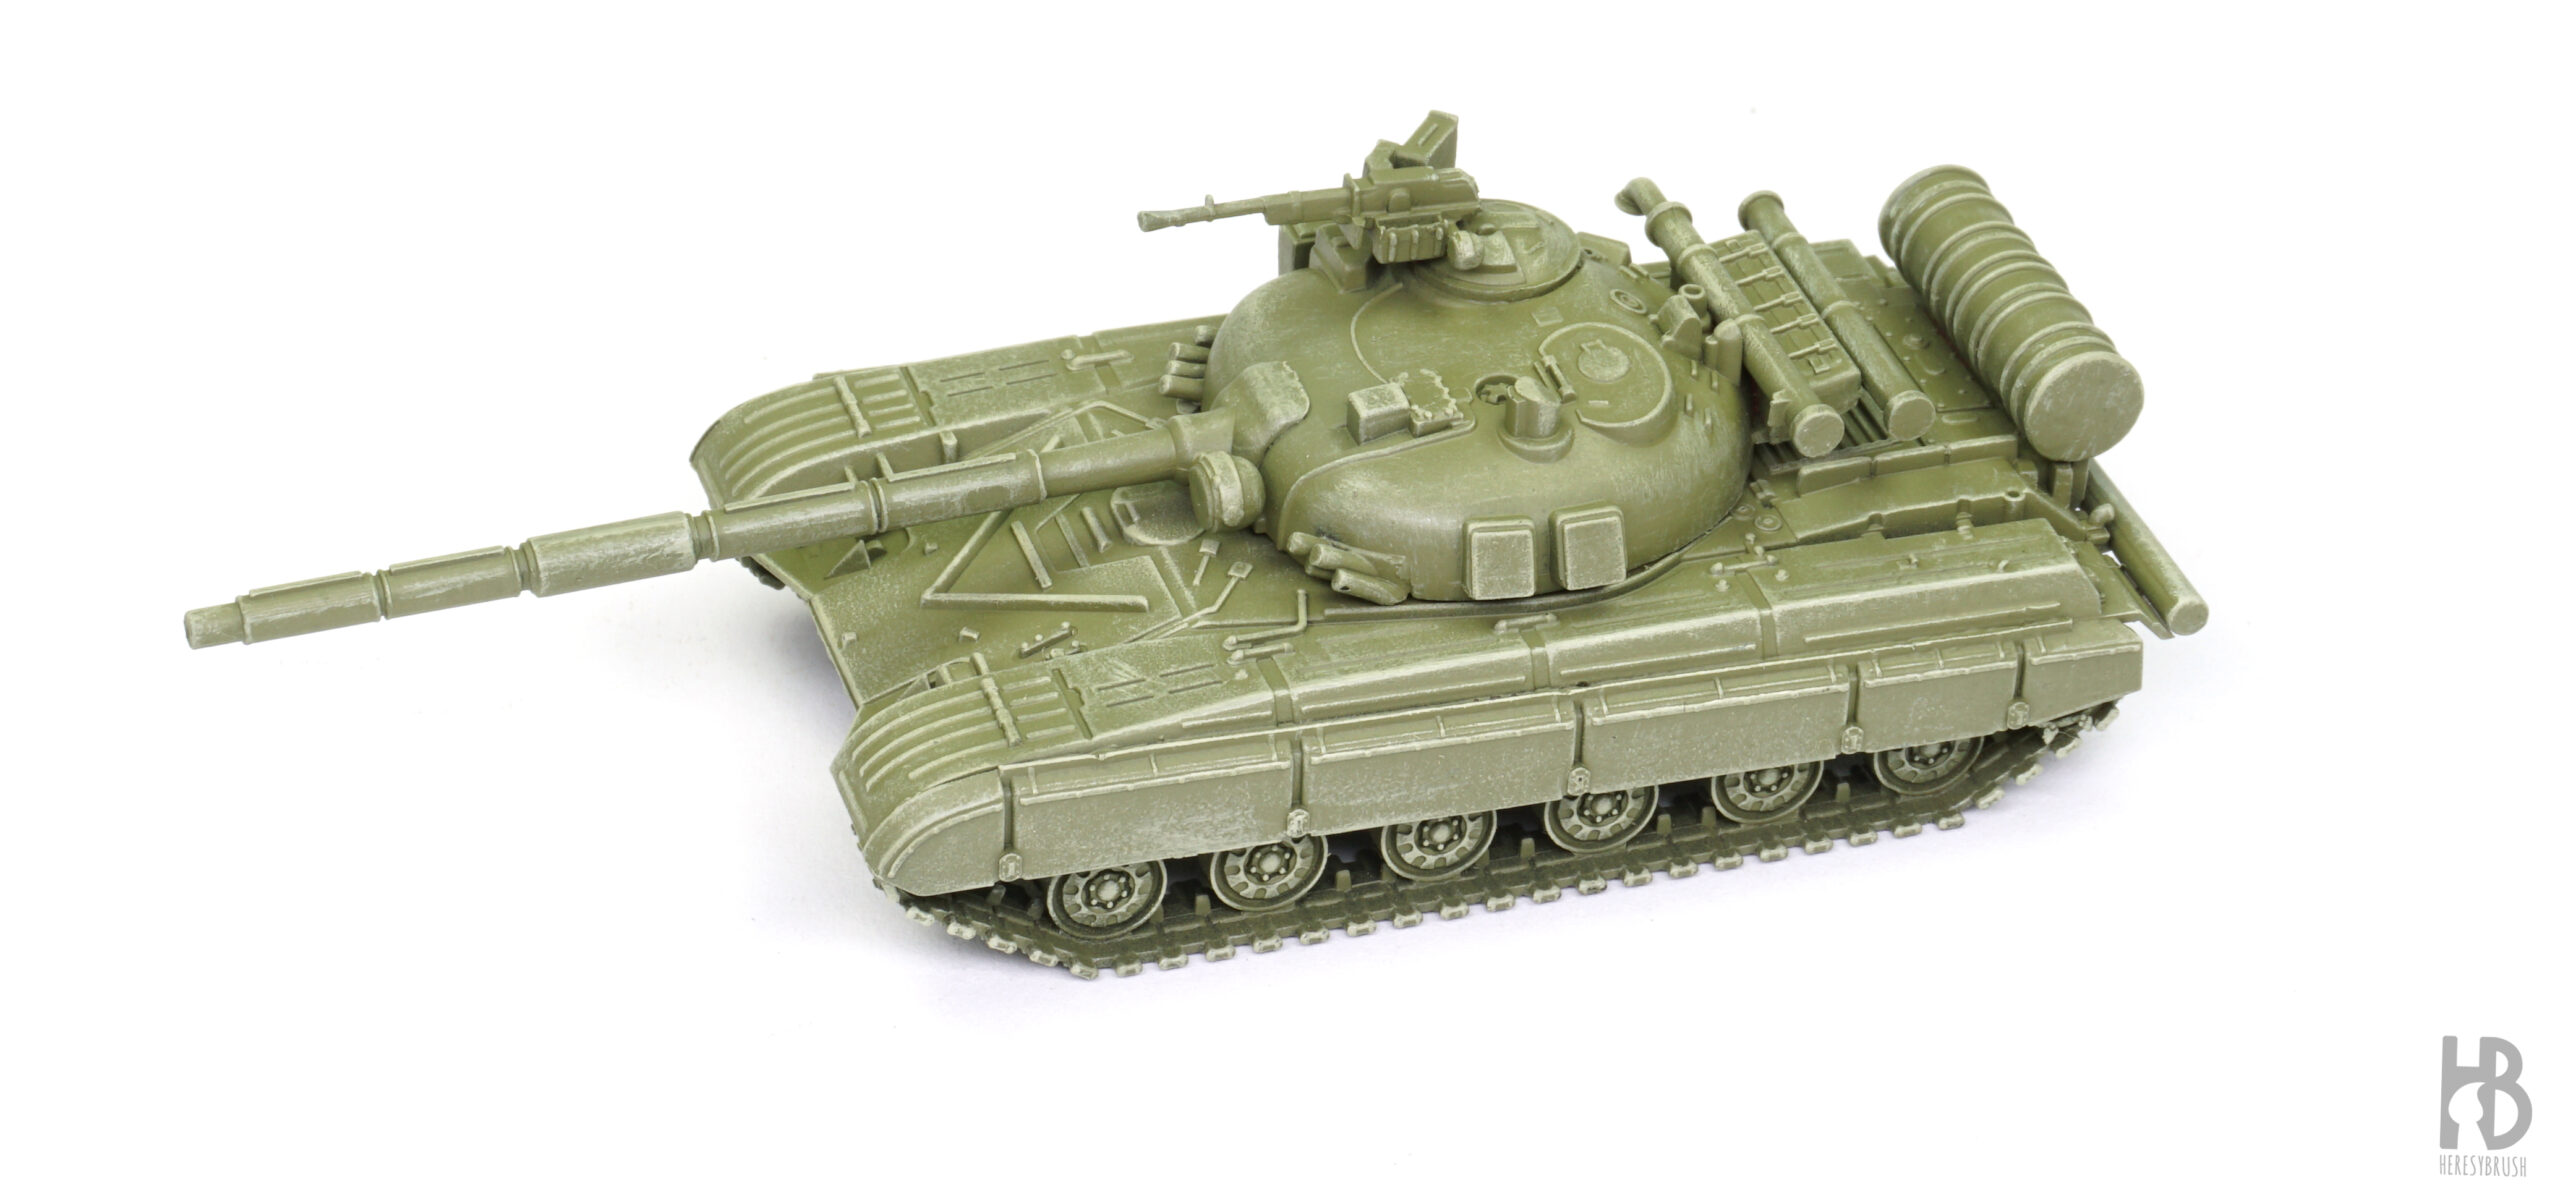
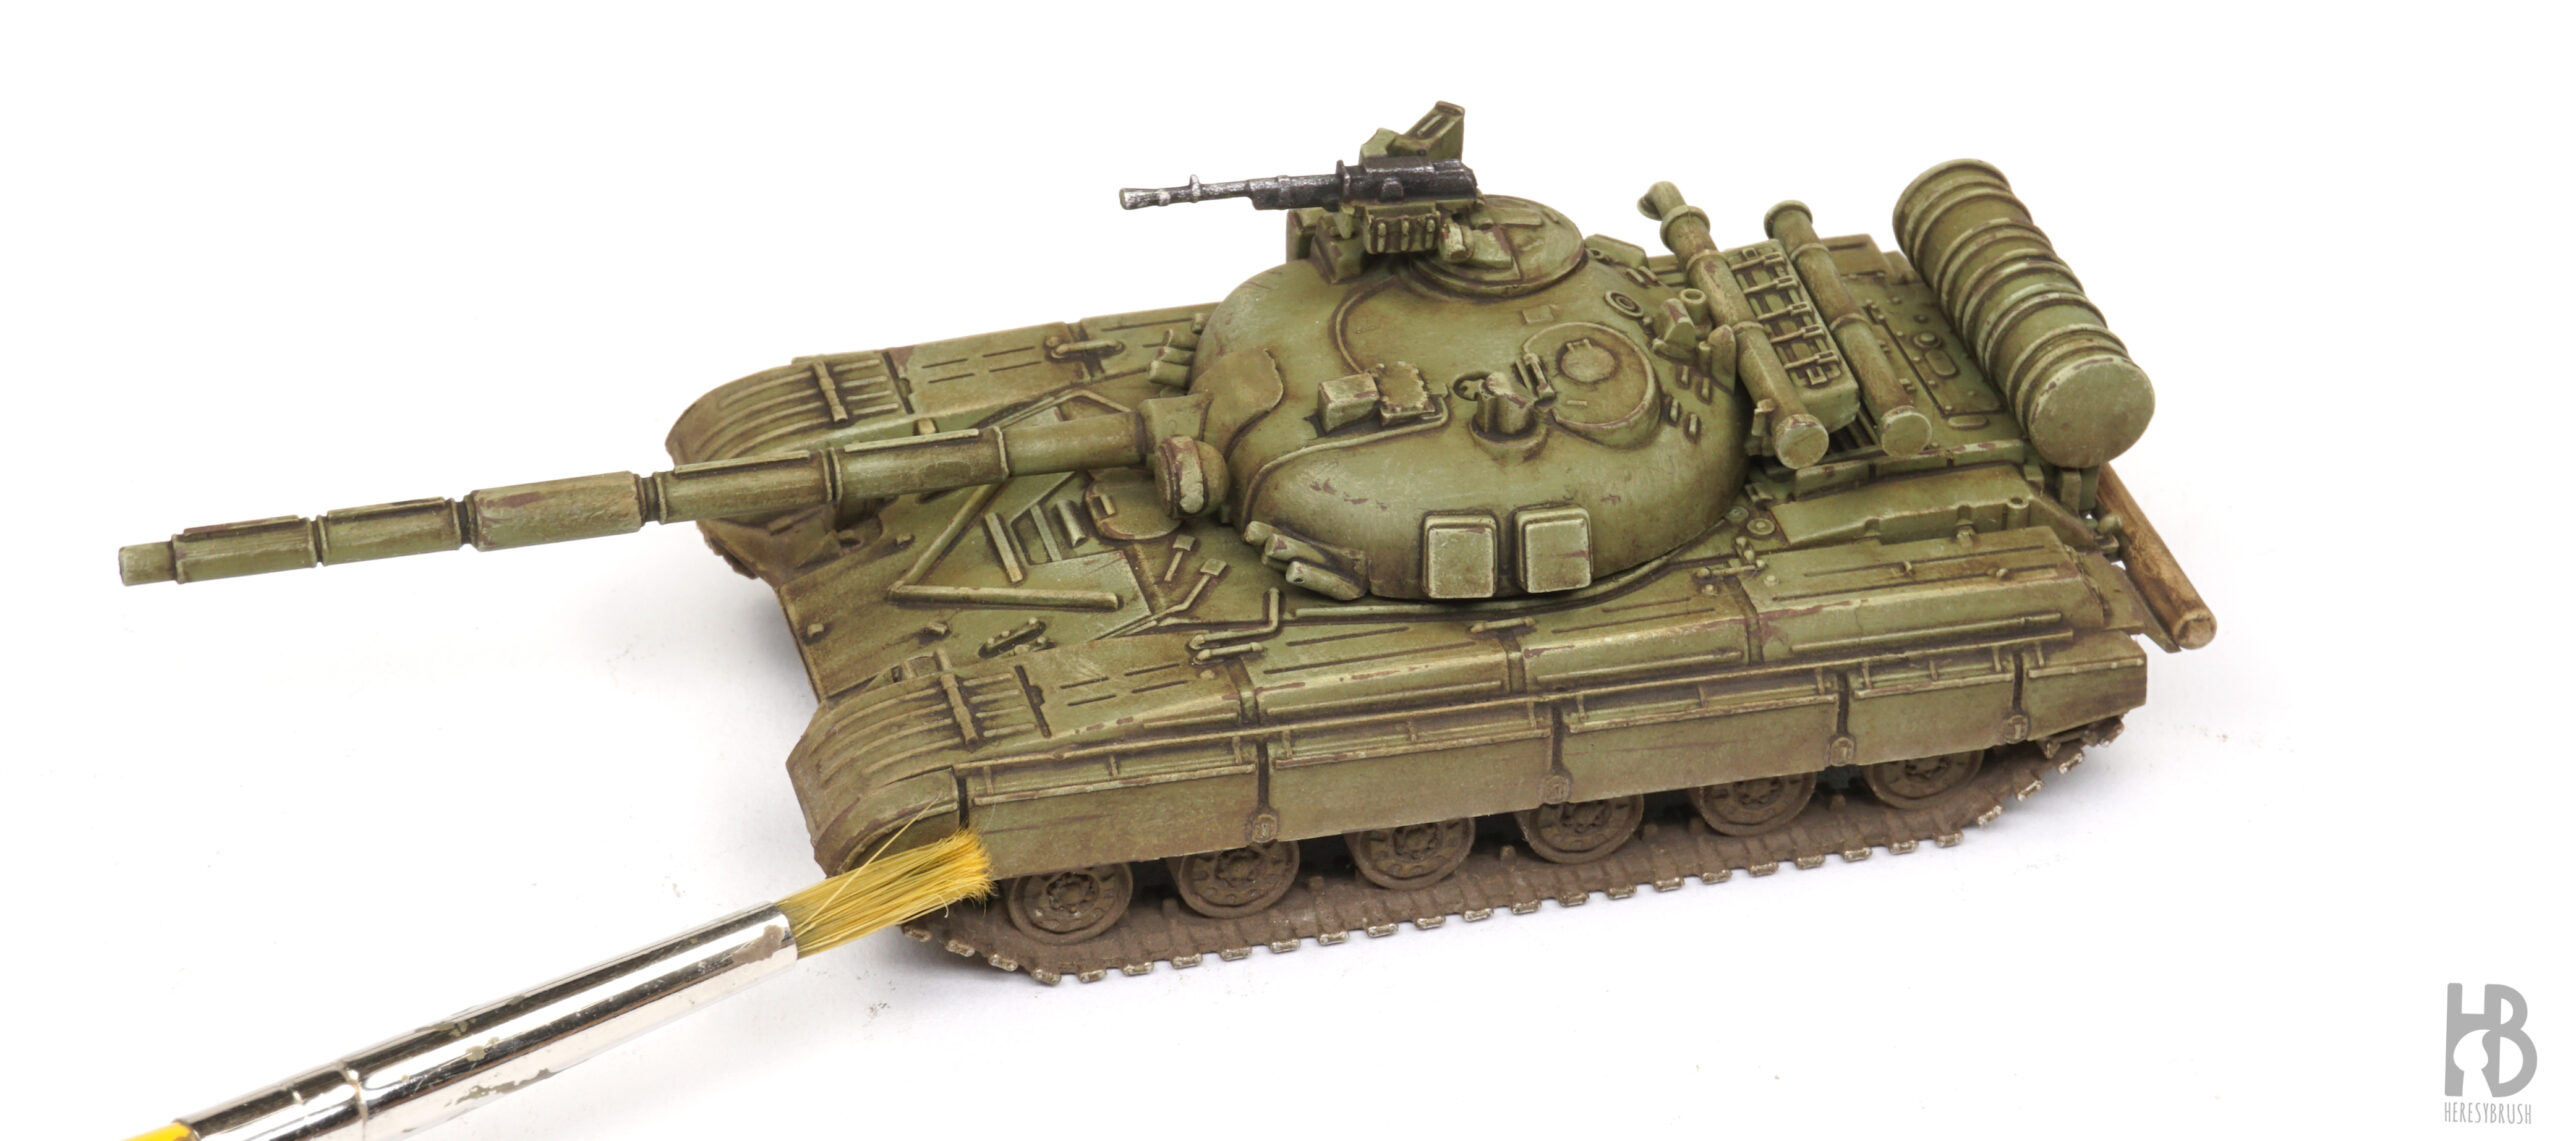
Step 14: evaluating the results
 Using this method, we gradually work on different panels or sections of the tank. We can also utilize the technique to establish more pronounced contrasts between panels, such as consistently darkening specific areas of each panel (noting the darkest tones on the right parts). In addition to the previously mentioned oils, we can introduce another darker brown shade like Oilbrusher Dark Mud A.MIG-3508 and a reddish tone such as Oilbrusher Rust A.MIG-3510 to introduce additional nuances and intriguing colors. It is crucial to be cautious when using the reddish oil, as it can result in exaggerated contrasts. However, if needed, excess oil can be easily removed using a bit more of the Enamel Odourless Thinner.
Since oils take hours to dry, we cannot immediately apply a new layer on top of the previous one. However, we can speed up the drying process by using a hairdryer. This allows us to apply new layers of oil paint to enhance specific areas or effects. It is not necessary to achieve perfection at this stage. The goal is to create some contrast to enhance the visual appeal of the tank while addressing any messy results from the drybrush technique.
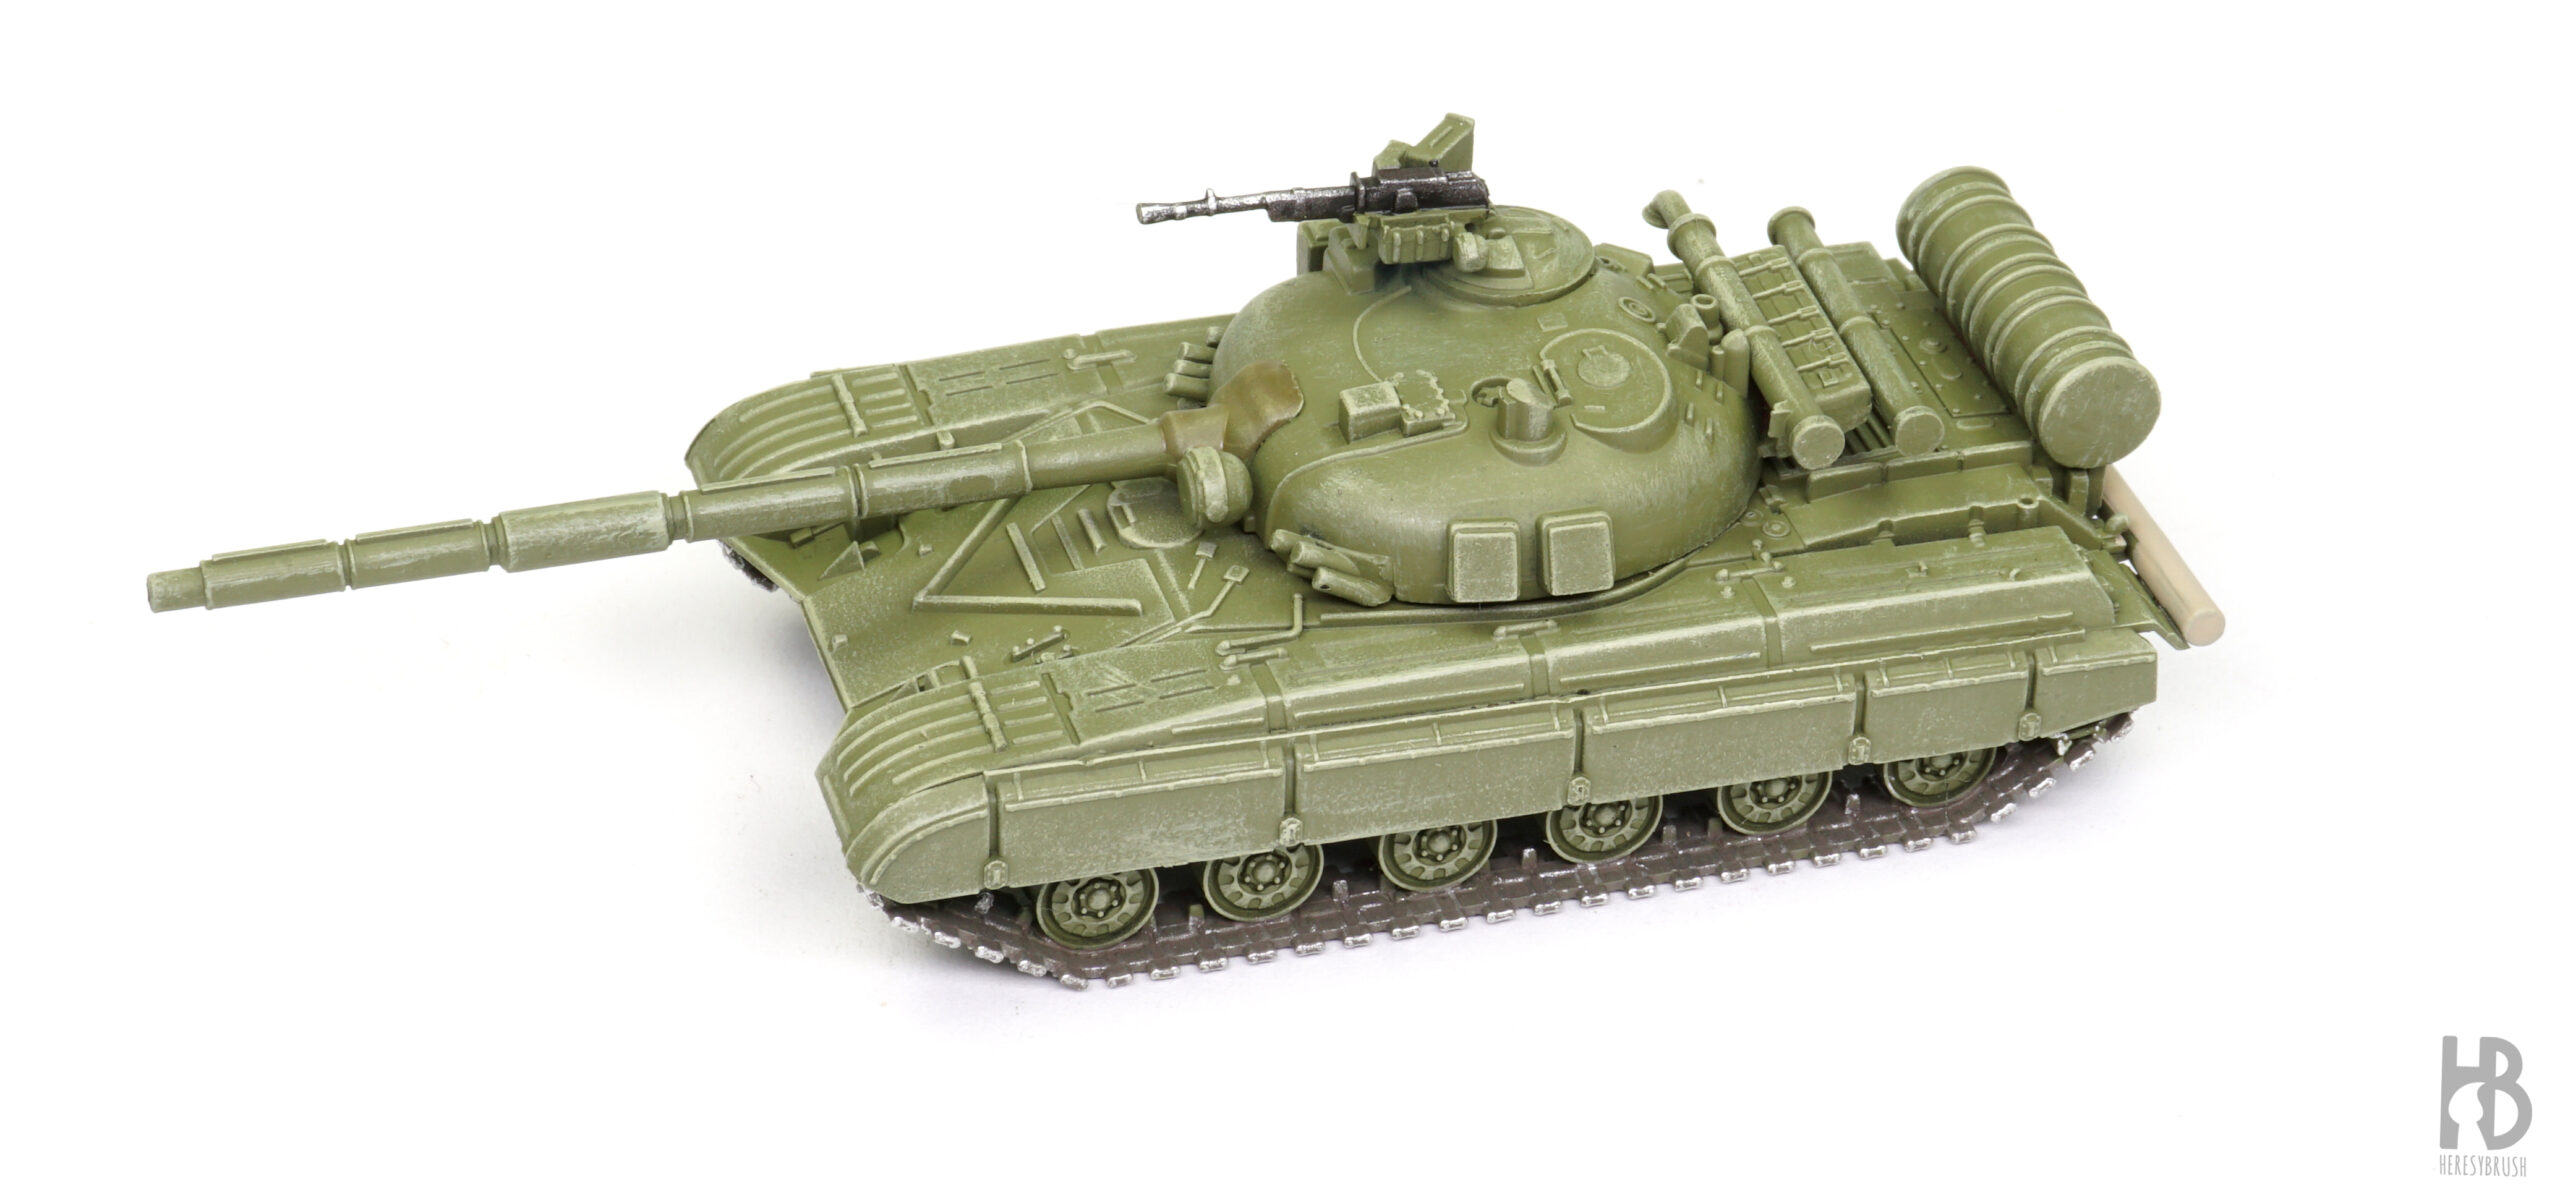
Bonus step I: chipping
 Optionally, we can introduce chipping effects to further enhance the visual interest of our tiny tank. To achieve this, we utilize a thin brush and an acrylic paint, such as Chipping ATOM-20064. Using the tip of the brush, we carefully apply very small spots or lines sporadically across the surface. It is importnat to exercise restraint and only apply a few of these chipping effects, particularly around movable components like hatches and edges. Additionally, these chipping effects can serve to conceal any errors or imperfections from the previous steps, adding to the overall realism of the tank.
After incorporating these chipping effects, the previously messy appearance resulting from the drybrush technique is transformed. Now, it closely resembles realistic combat damage, adding authenticity to the overall look of the tank.
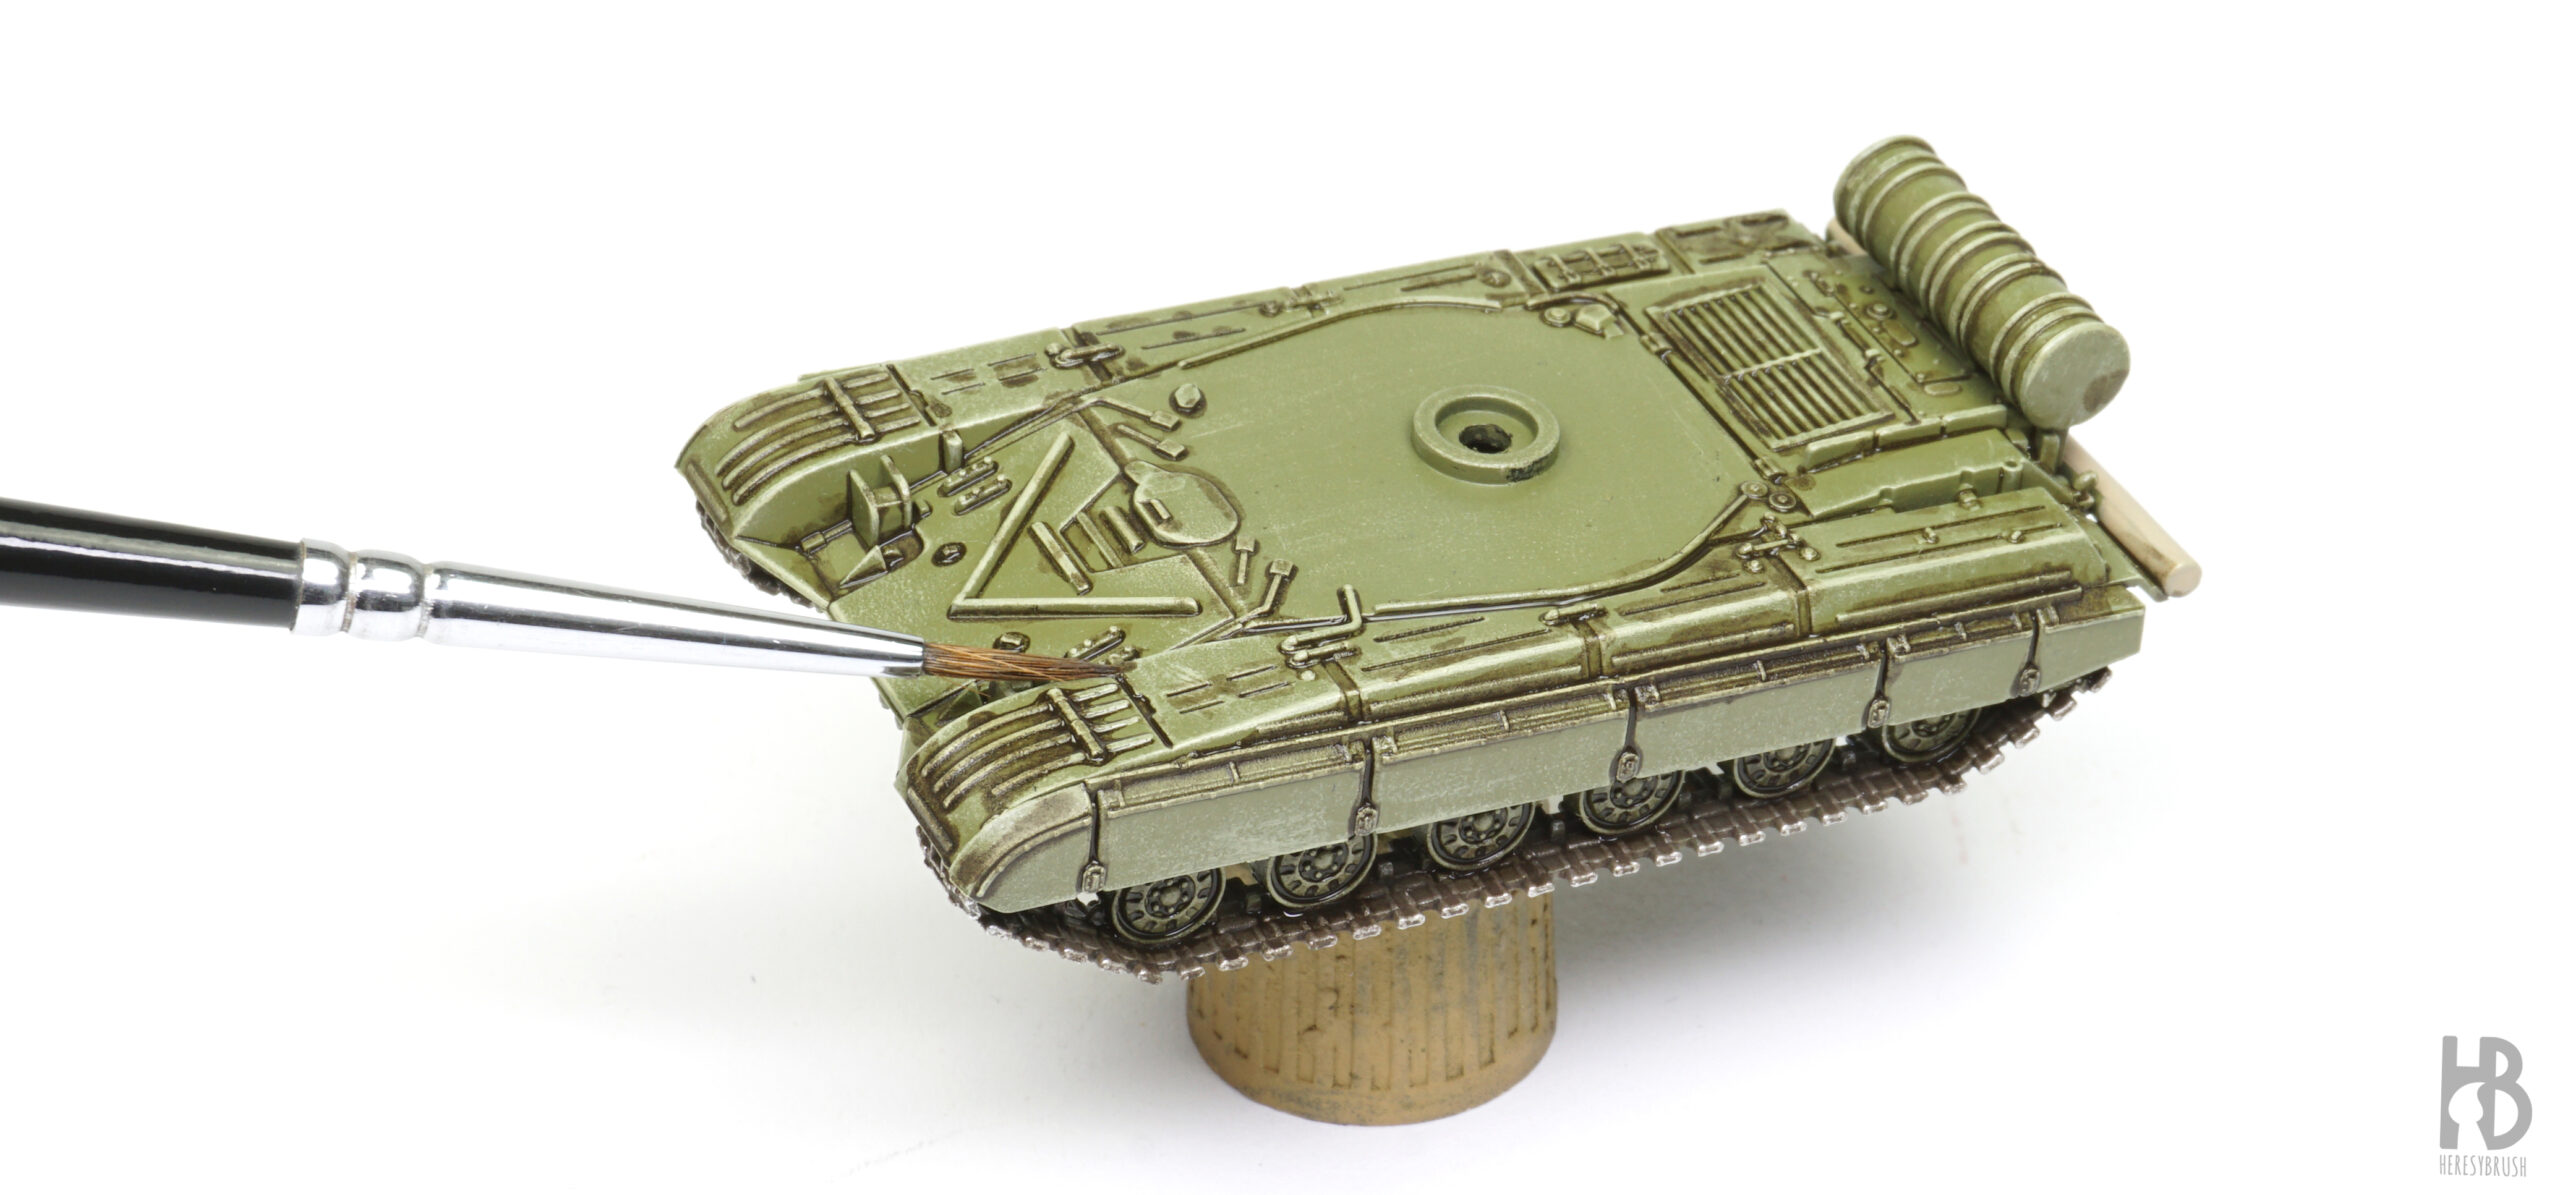
Bonus step II: pigments
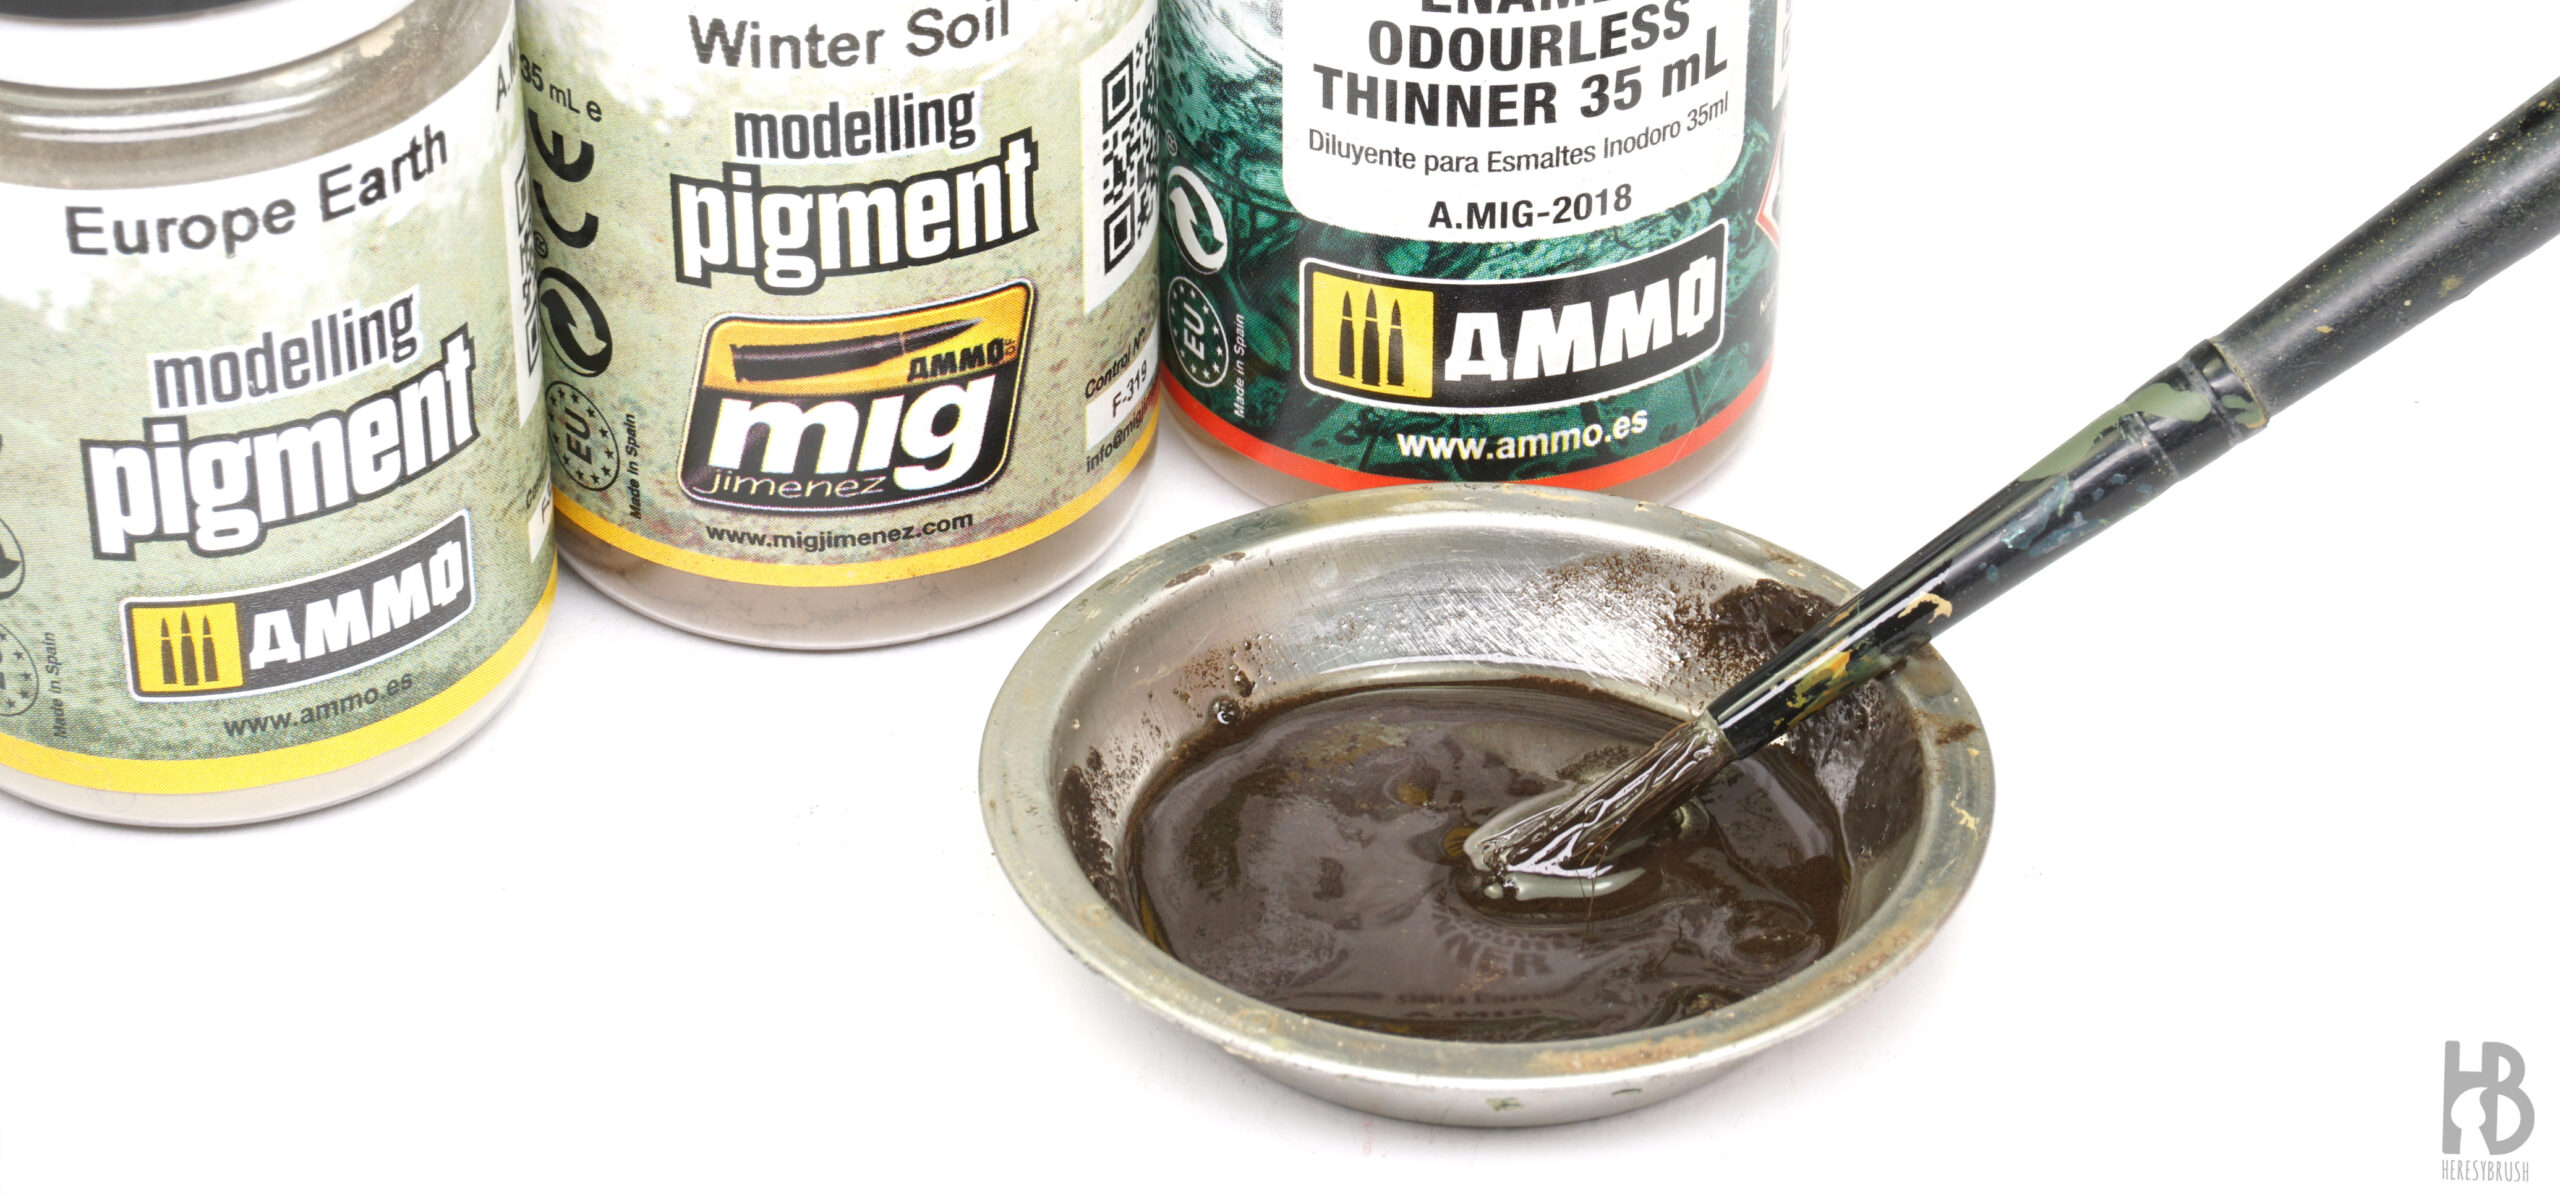 Additionally, we can employ another straightforward technique to replicate dust or dry mud effects on the tracks and lower sections of the tank. This involves using pigments, which are colored powders. After choosing a couple of suitable colors, we mix the pigments with 50% Enamel Odourless Thinner A.MIG-2019 to create a “wash.” The intention behind this wash is for the pigments to gather in the recessed areas, mimicking the accumulation of dust or mud.
Bonus step III: applying a wash done with pigments
 With a synthetic or old round brush, we carefully apply the wash onto the tracks, wheels, mudguards, and lower sections of the side skirts and hull. It’s crucial to allow the wash to dry completely until the pigments regain their regular appearance, resembling dust. If necessary, the drying process can be accelerated using a hairdryer.
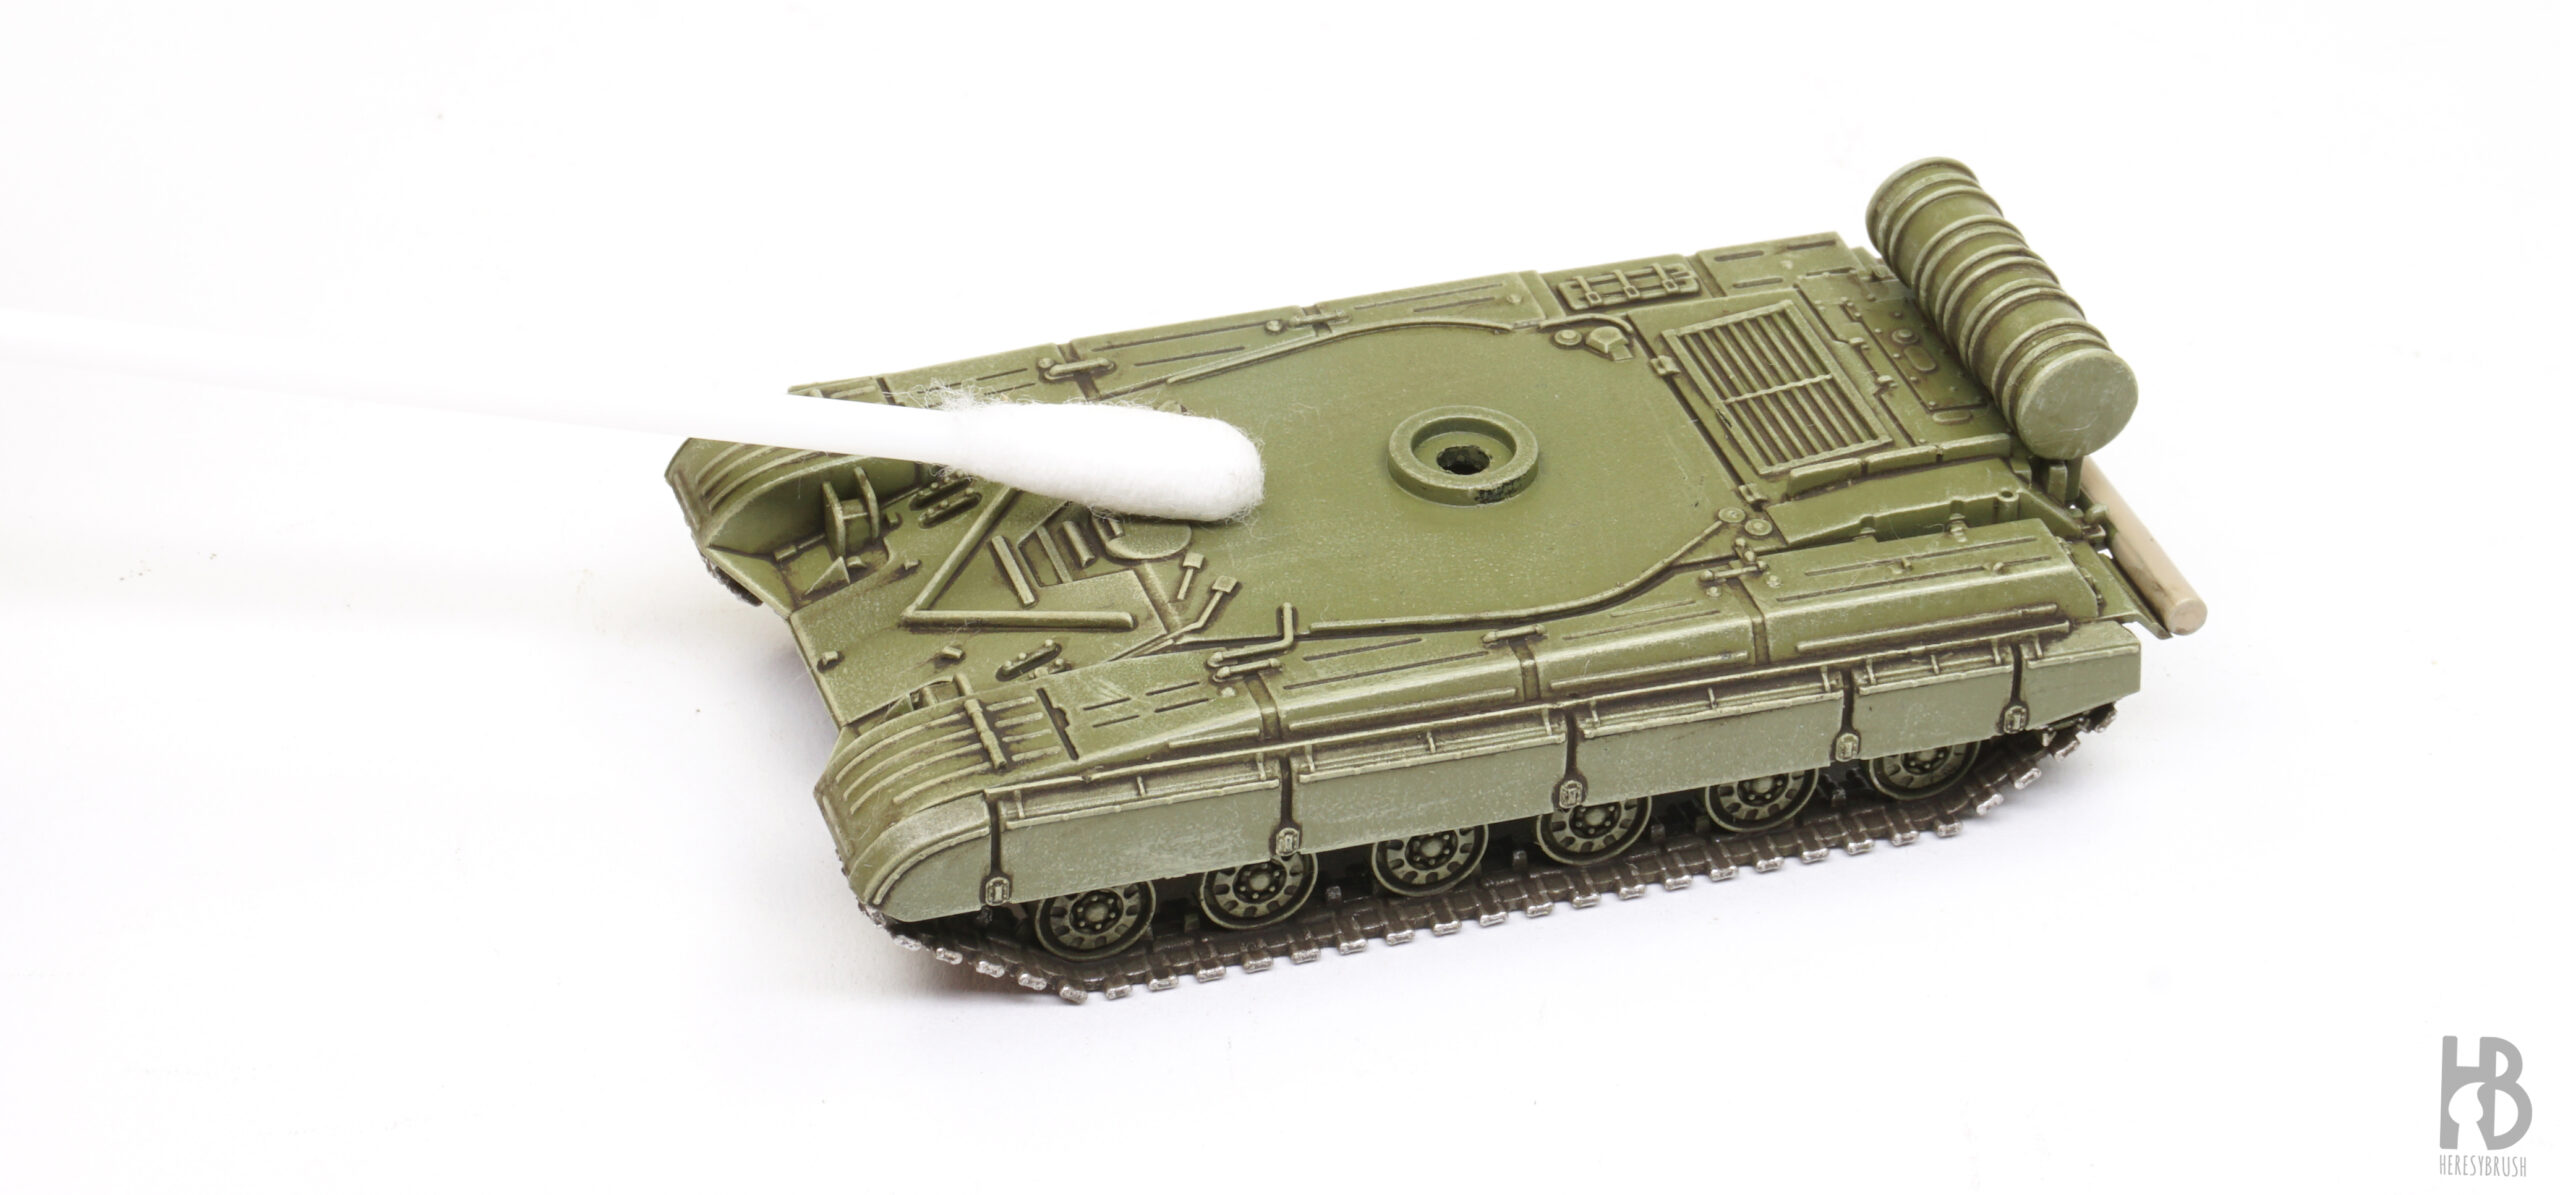
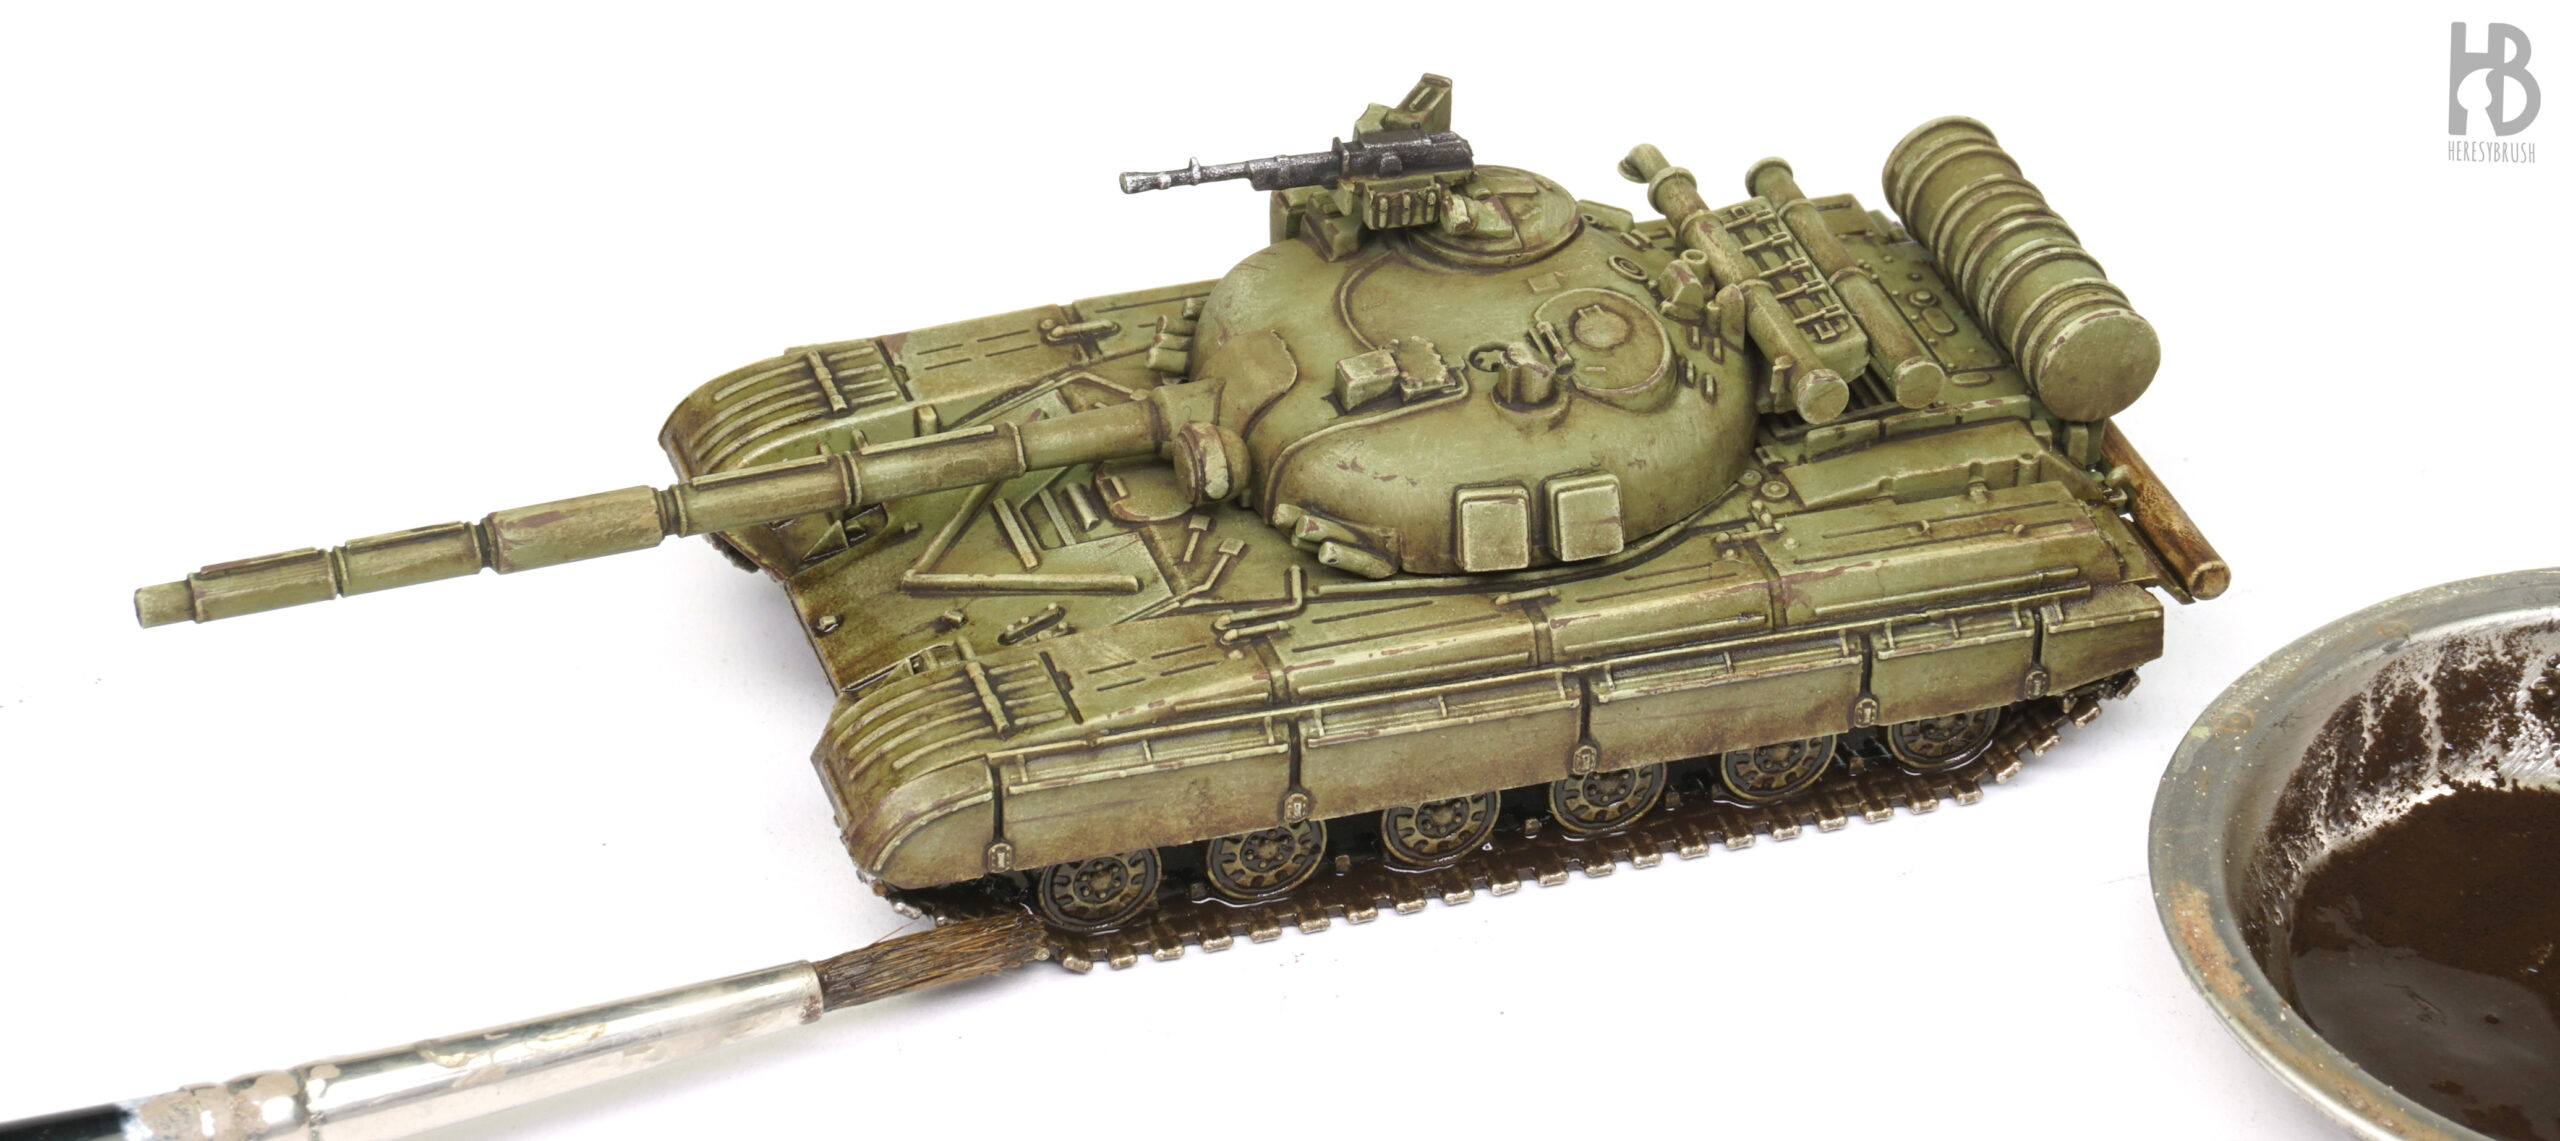
Bonus step II: removing excess of pigments
 Once the wash is dry, we can achieve a more natural appearance by gently removing the excess pigment using a cotton swab or brush. Simultaneously, we can extend the pigment slightly to create a more realistic effect. With this step, our tank is now complete! It’s important to note that the pigments will be semi-permanently fixed when using Enamel Odourless Thinner. While this is generally suitable for most wargaming tanks, for a more durable option, we can apply a few drops of Pigment Fixer A.MIG-3000 by capillarity after removing the excess pigment.
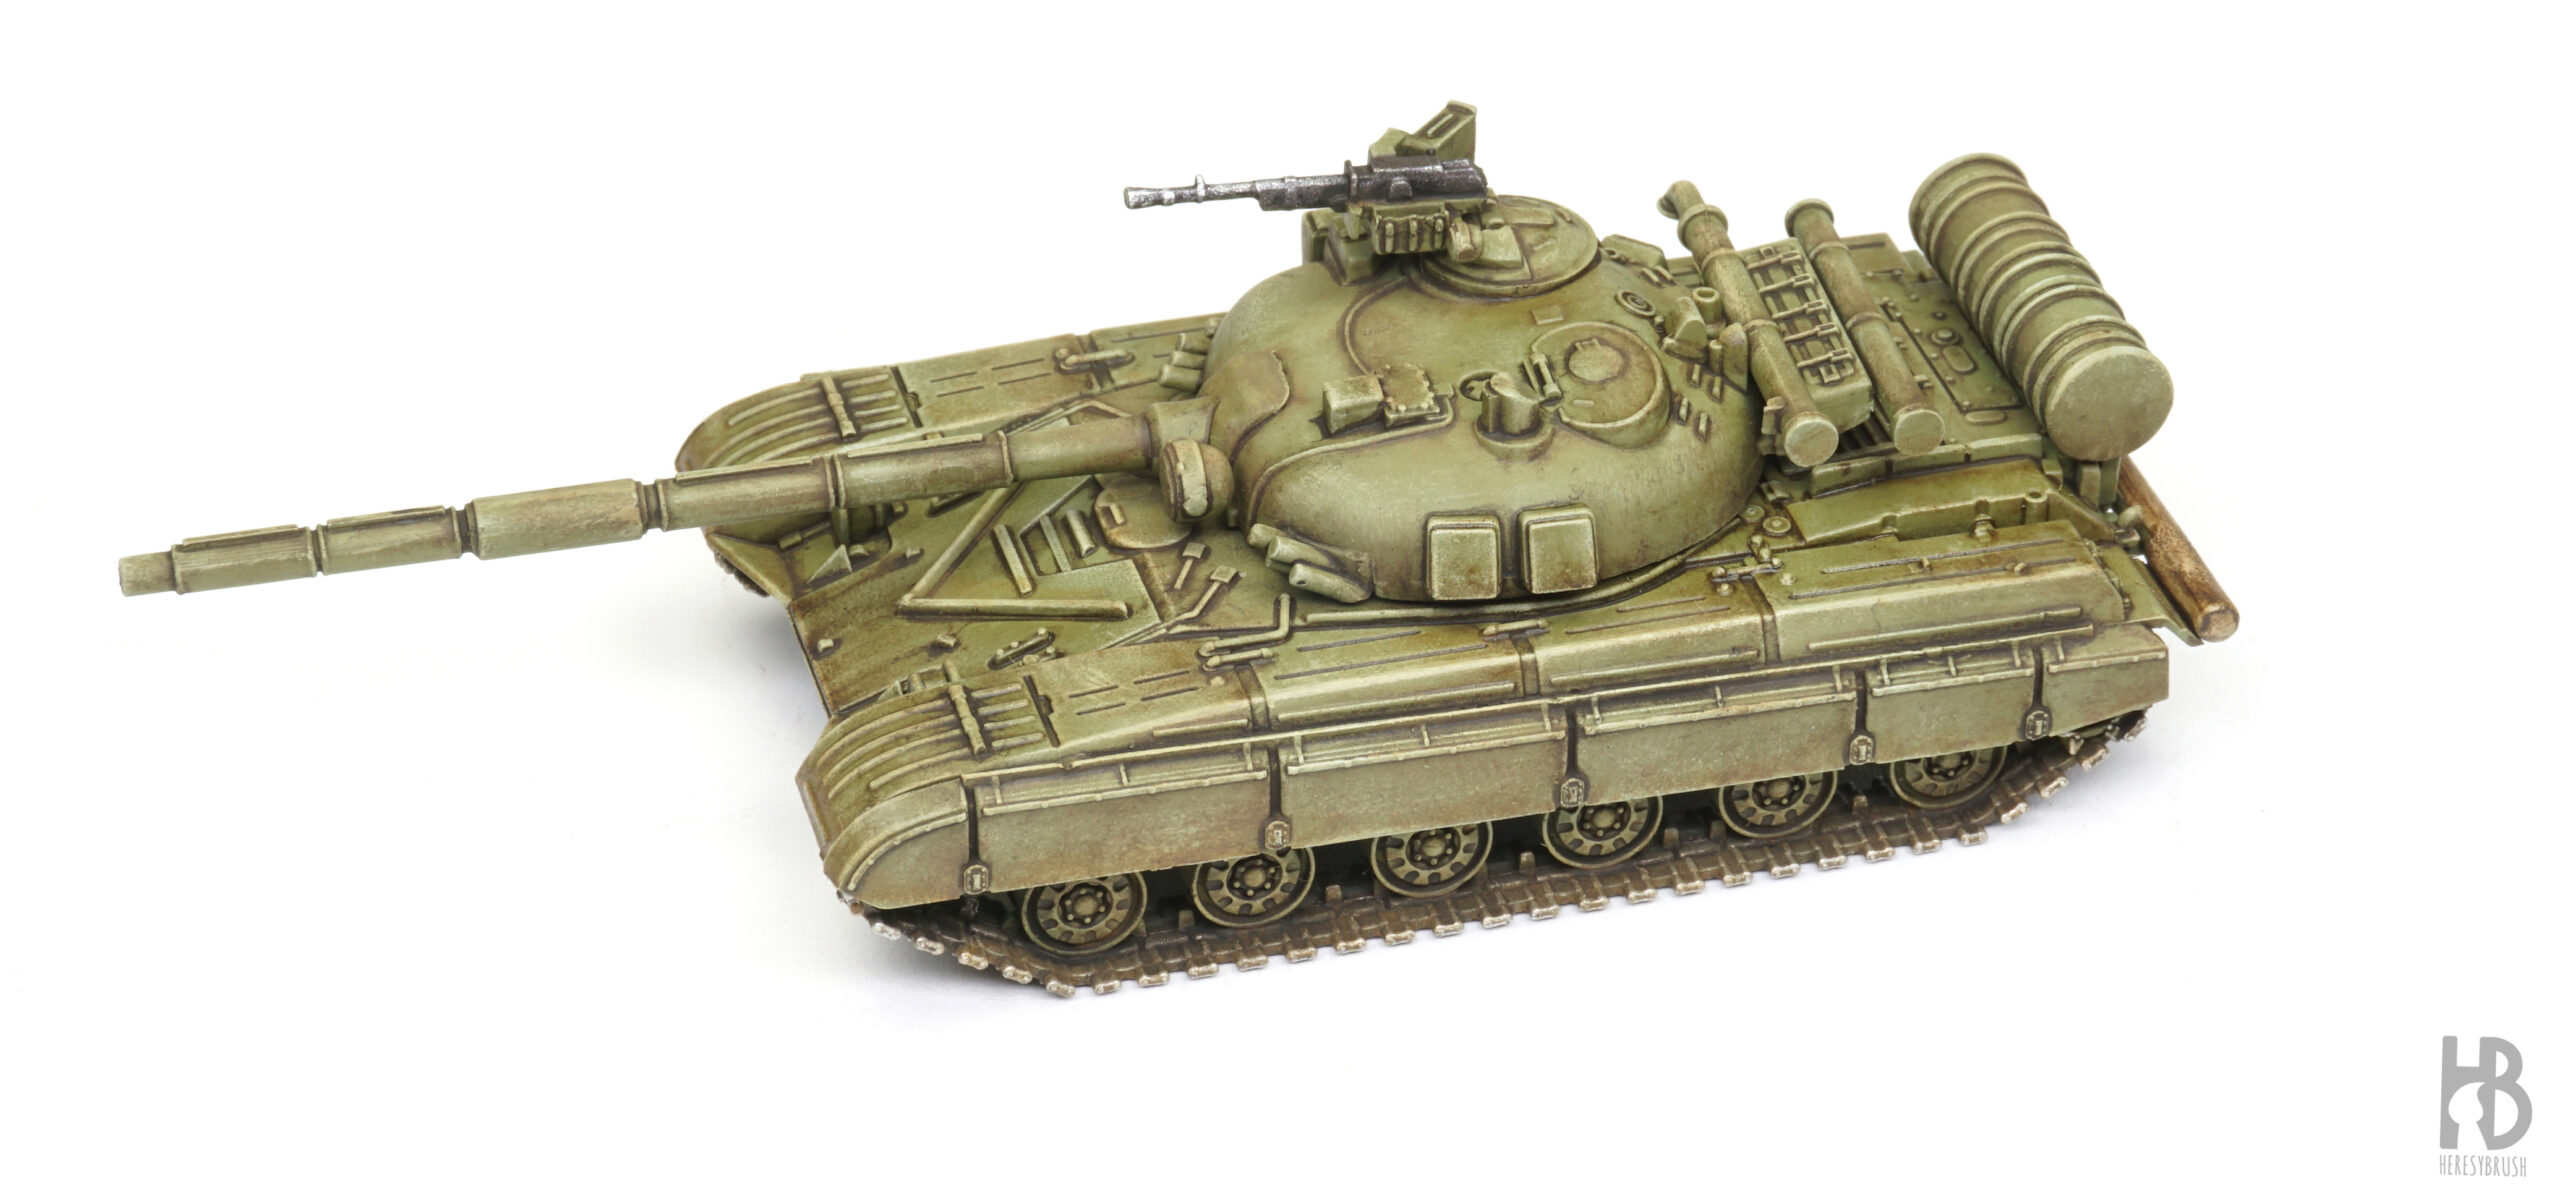
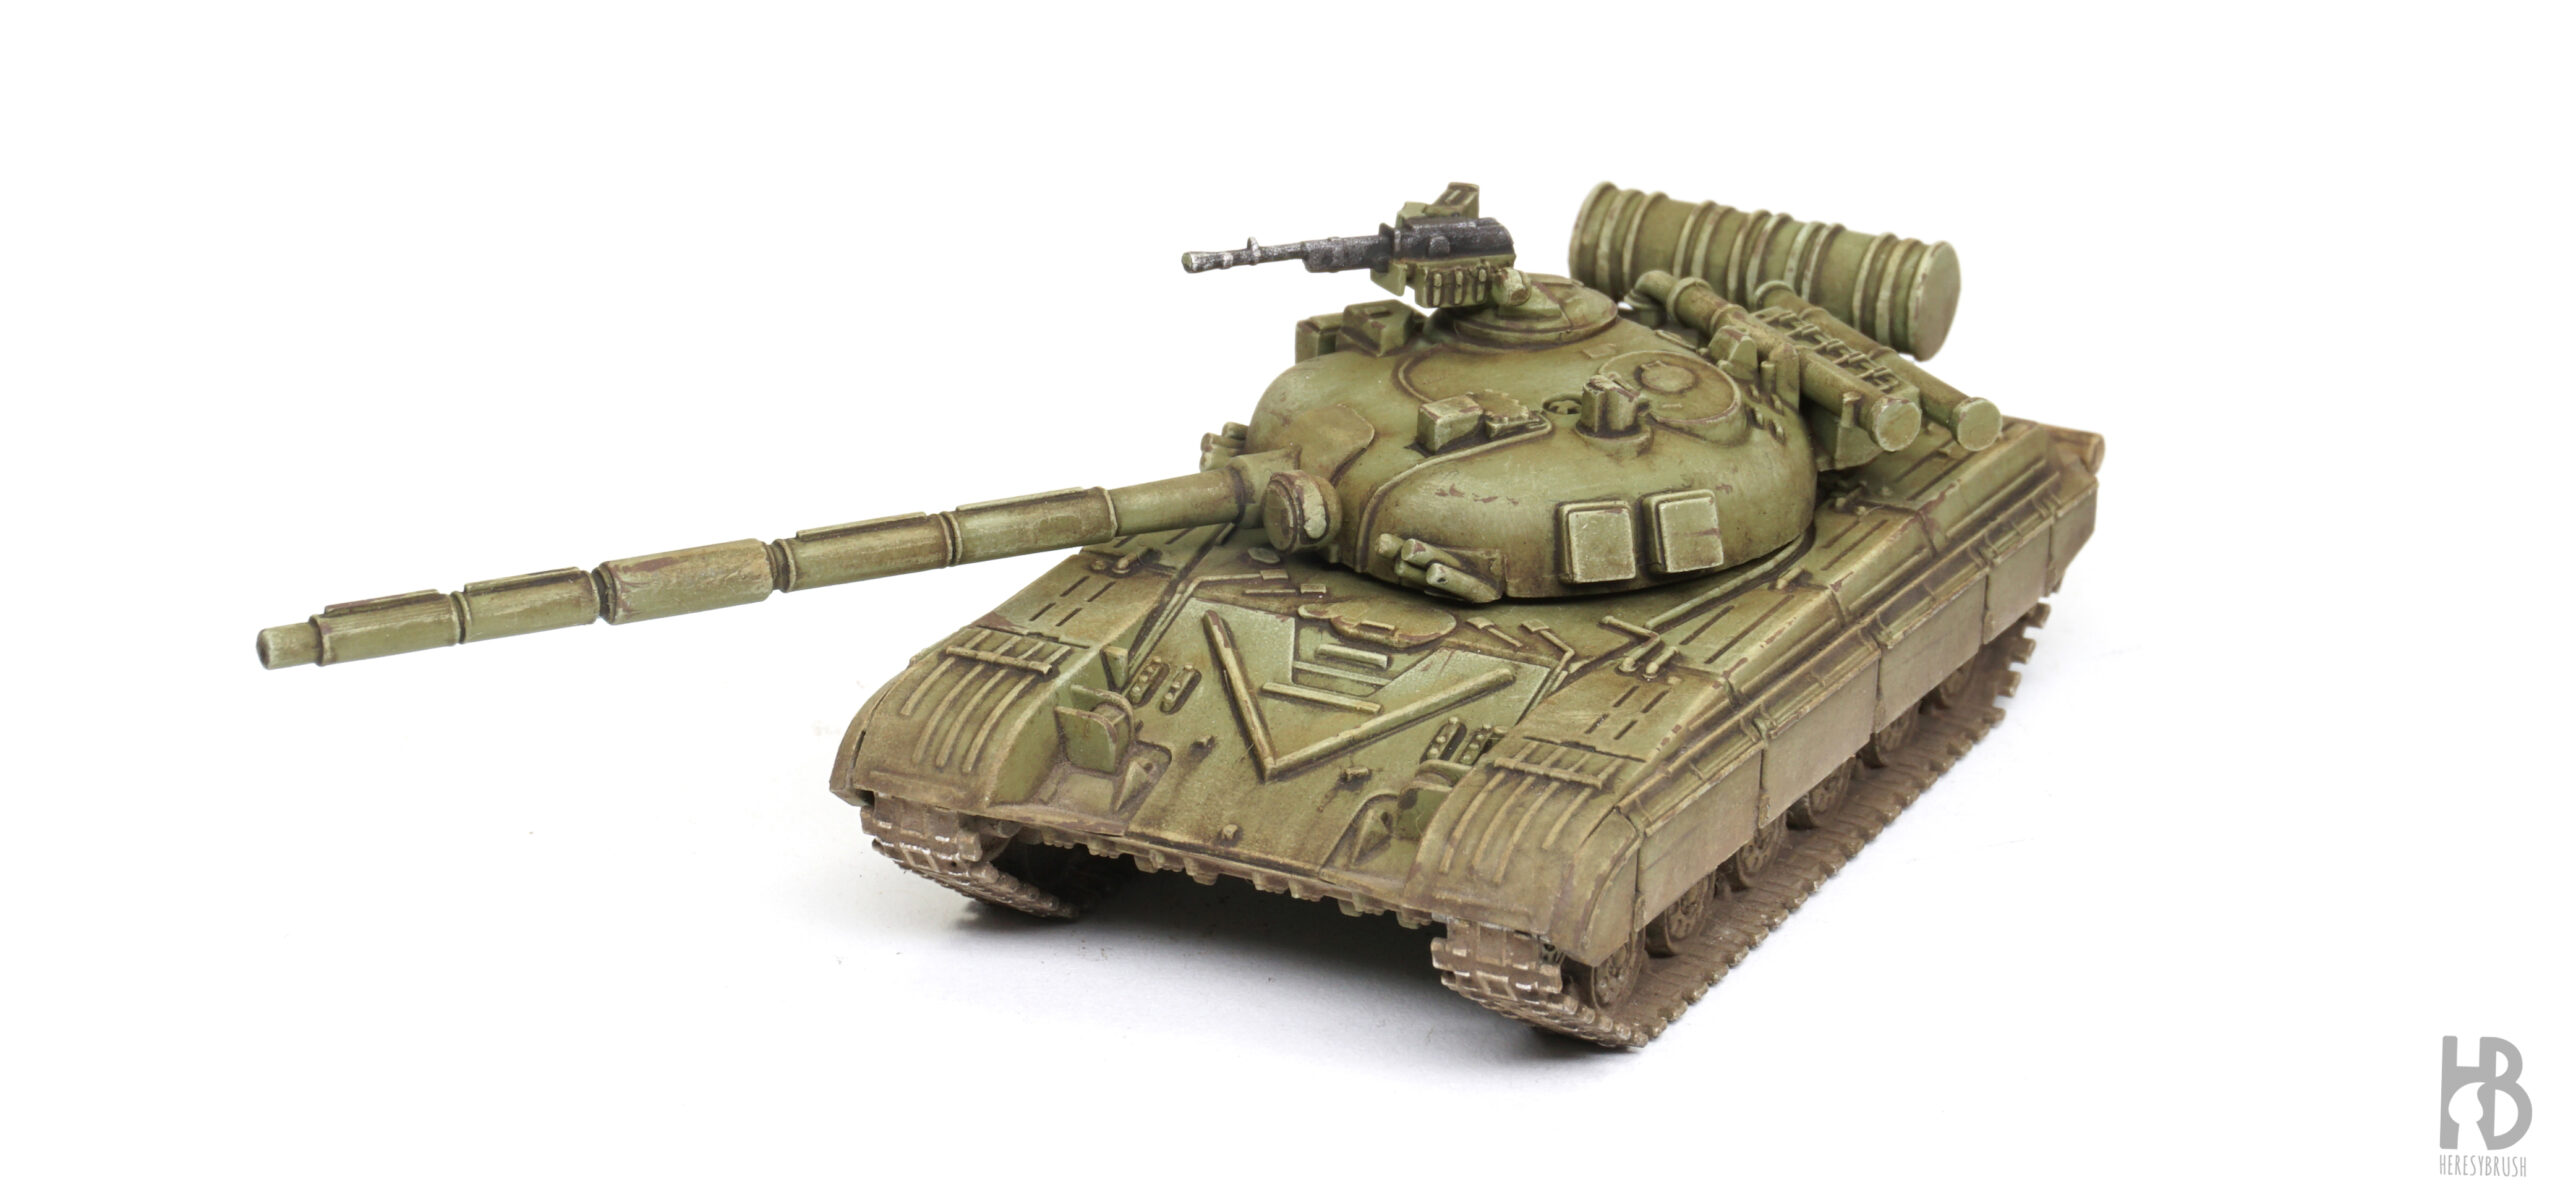
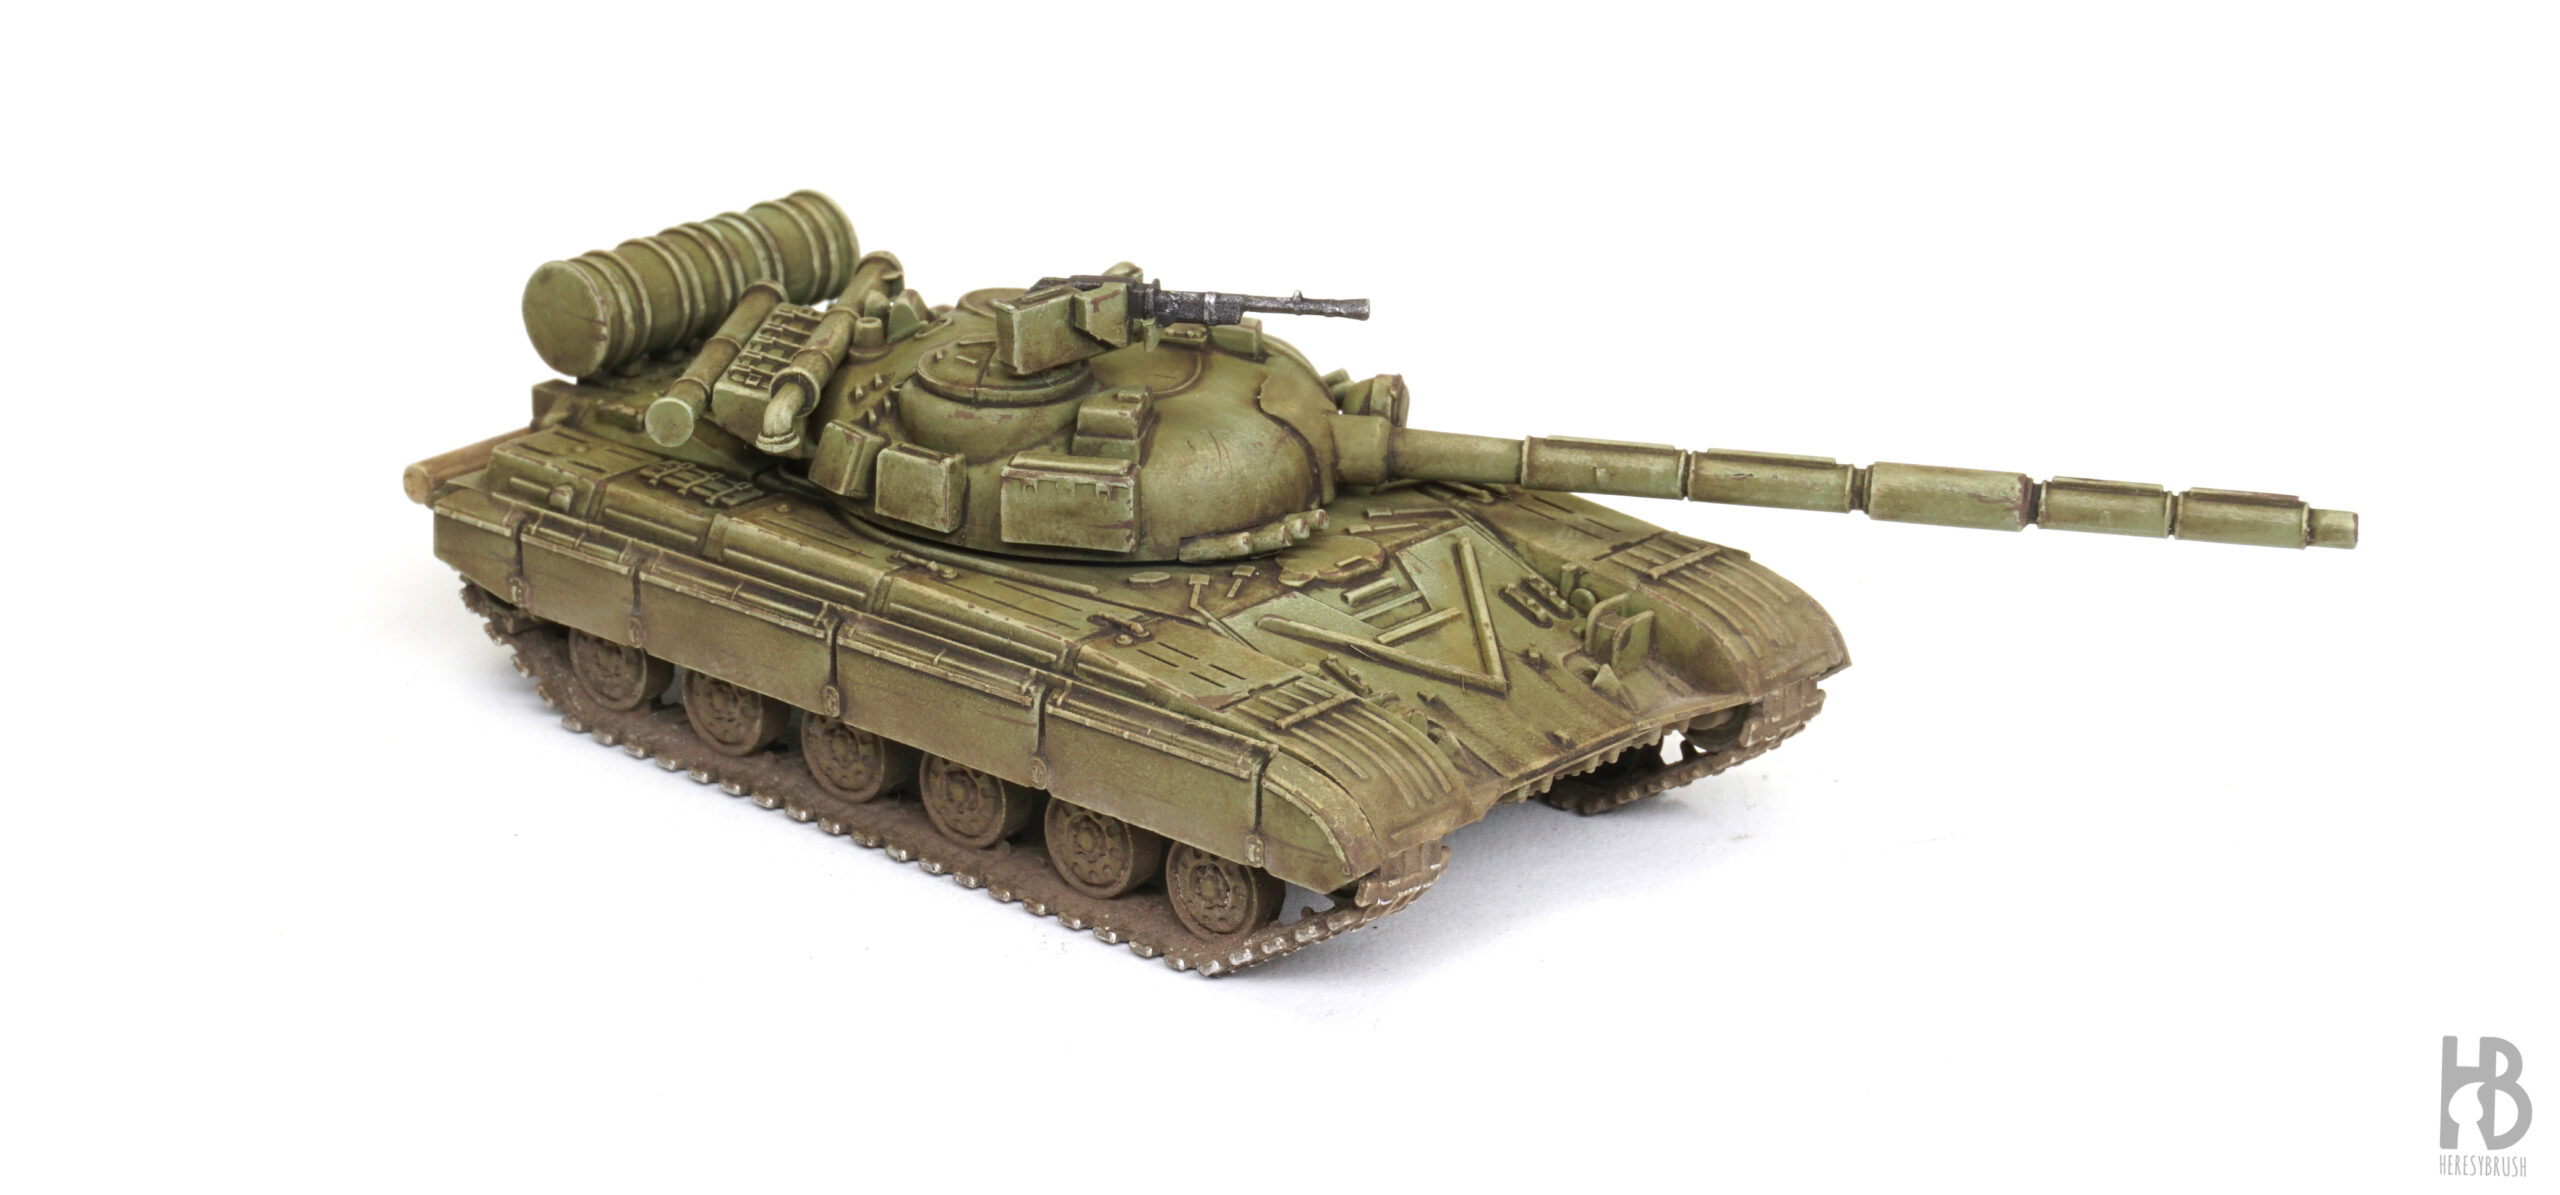
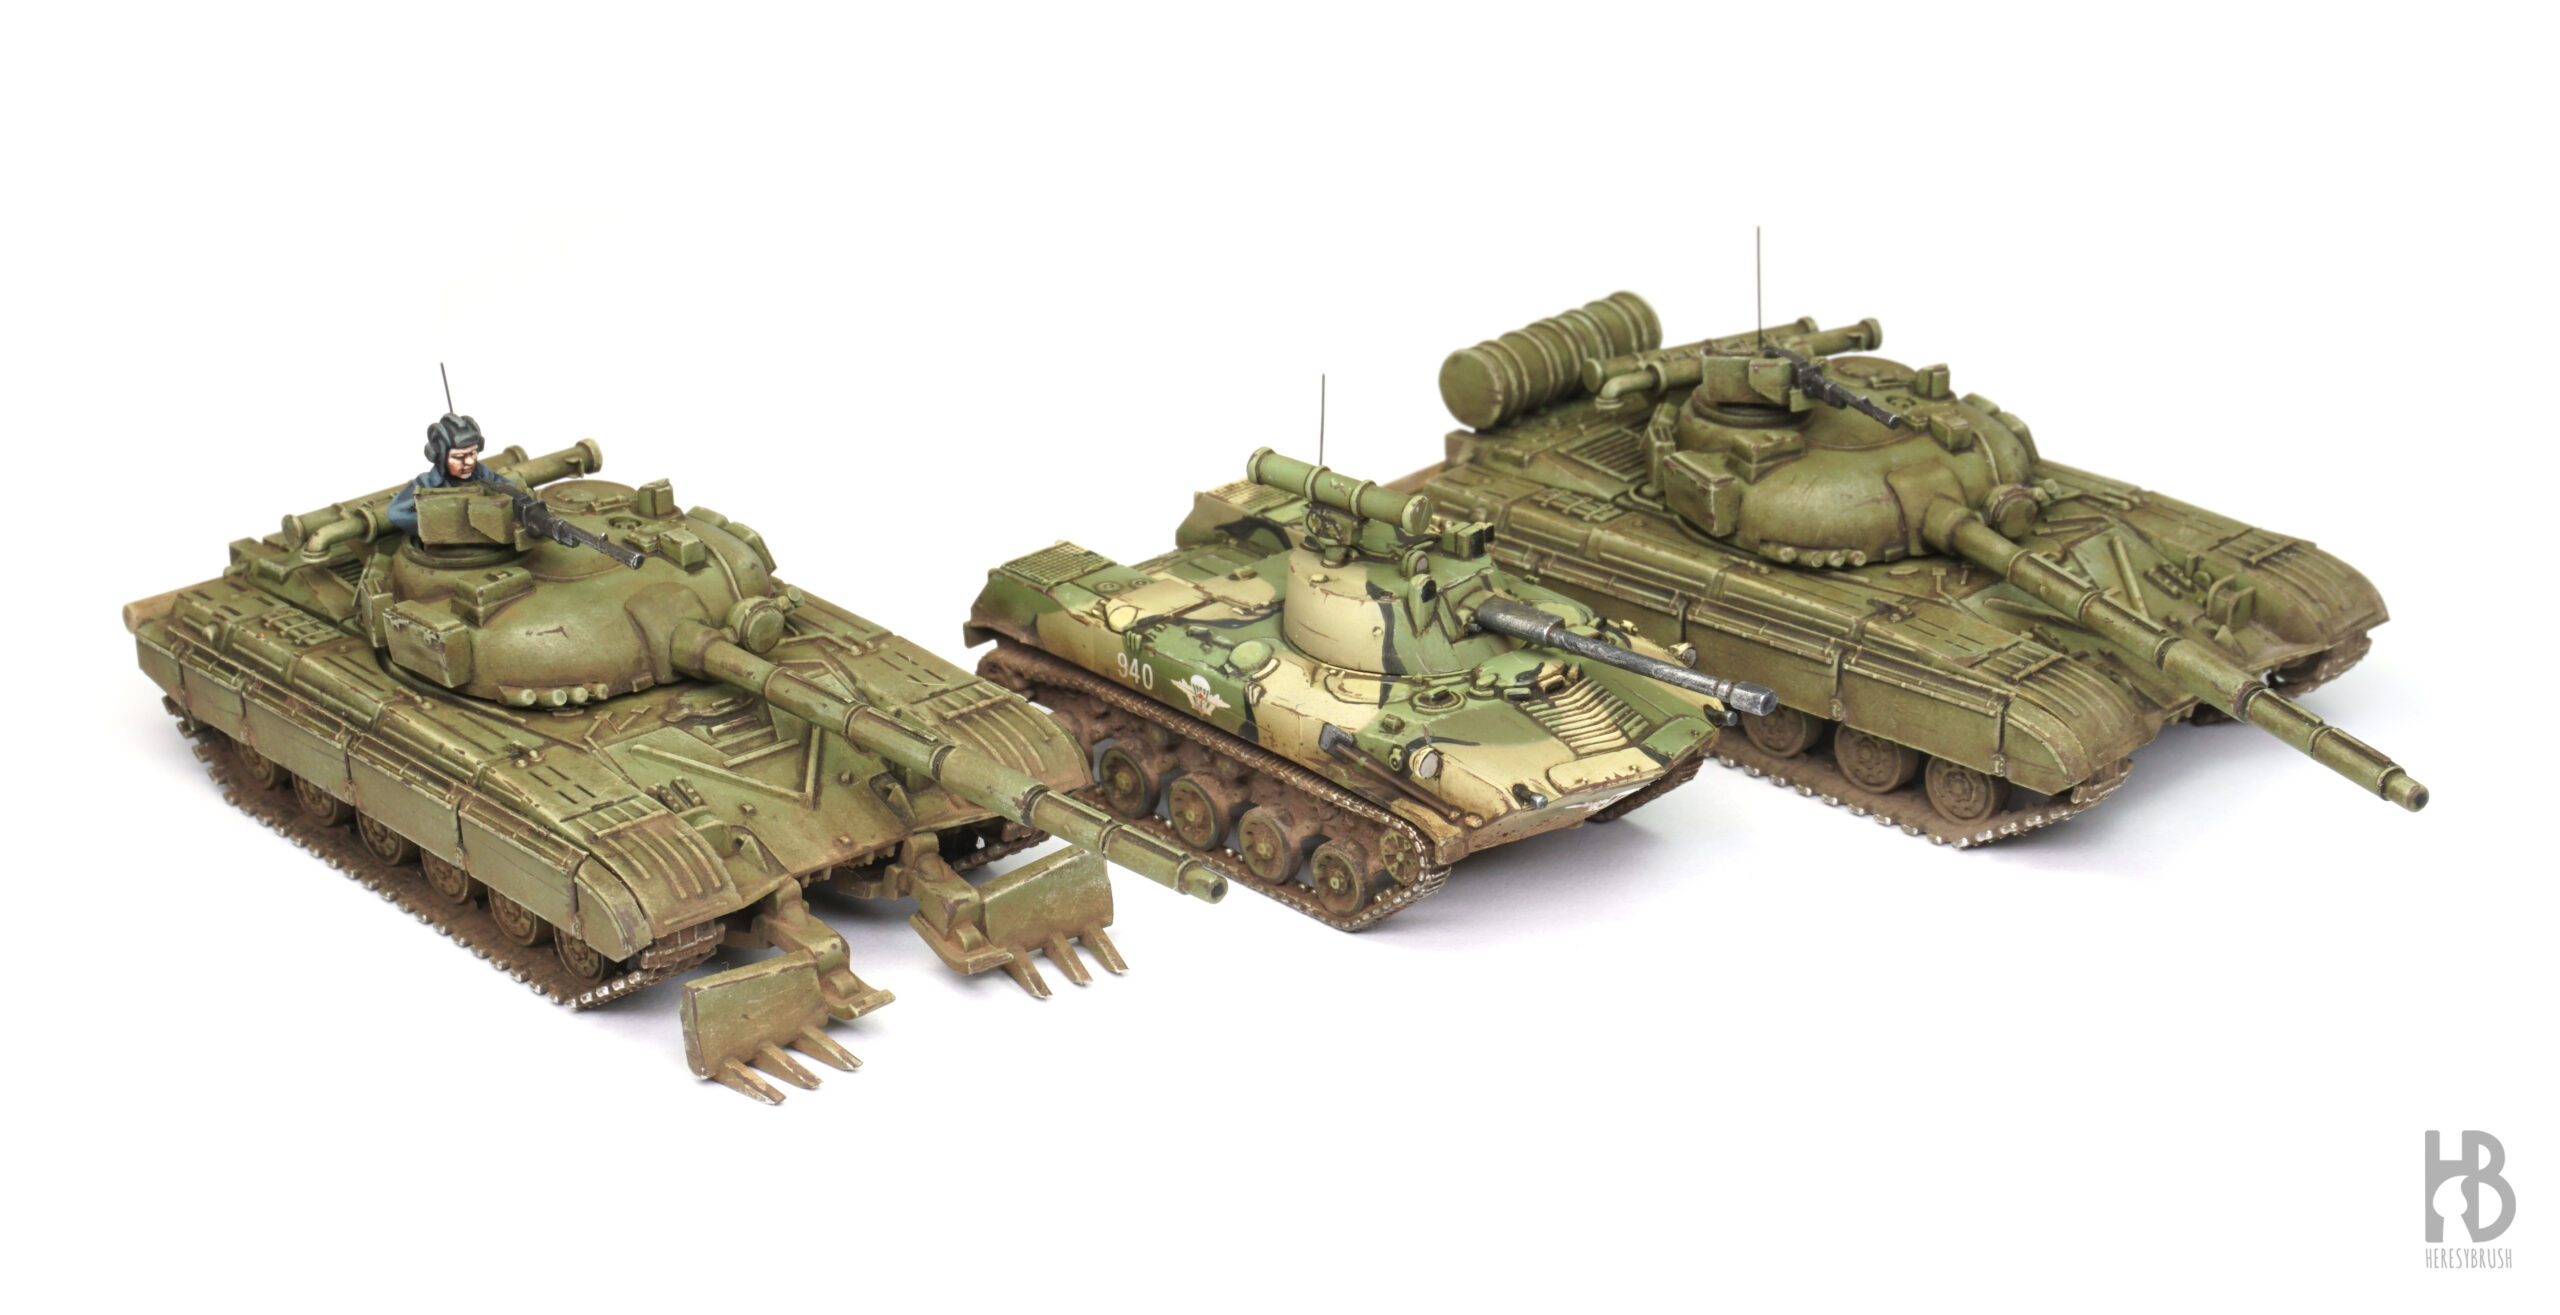
Final pics:
That varnish can’t bond to the surface of oil paint, so sealing it will do nothing other than cause issues off gassing.
Not to mention in order to put a varnish over the oil you need to wait at least 6 months, this includes an oil wash.
Also acrylics cannot bond to oil so they will just flake off.
if you want information about this there is a ton of resources that exist out there from different companies like justpaint, to conservator blogs, and museums.