 Last week we saw how to paint true metallic metals; and today, using the same miniature we will see how to paint different types of leather: black, dark brown and light brown (this recipe can also be used for canvas).
Once again, in the following lines I will describe my own method or recipes to paint leather. But this is not the best (or the worst) method to do it. This is just part of my own style. I would encourage you to check other tutorials and videos to learn different ways to paint leather. And this, you will be able to pick the method that fits better your painting style. And remember, the best teacher is practice!
 To paint black leather -hat and scarab- we need only two colors: flat black and a lighter color to create the shine. I personally love the black color from Scale Color. It is ultra matt and I find it very easy mix with other colors. Regarding the lighter color, the first option coming to our mind is “white”. This is the lightest color we can find in our painting table, and the most commonly color used for highlights. However, I do not like it when working with black. Instead, I prefer to use pink or light yellow. These two colors are warmer; and therefore, we can use them to create more “natural” highlights. Or in other words, “less striking” lights.
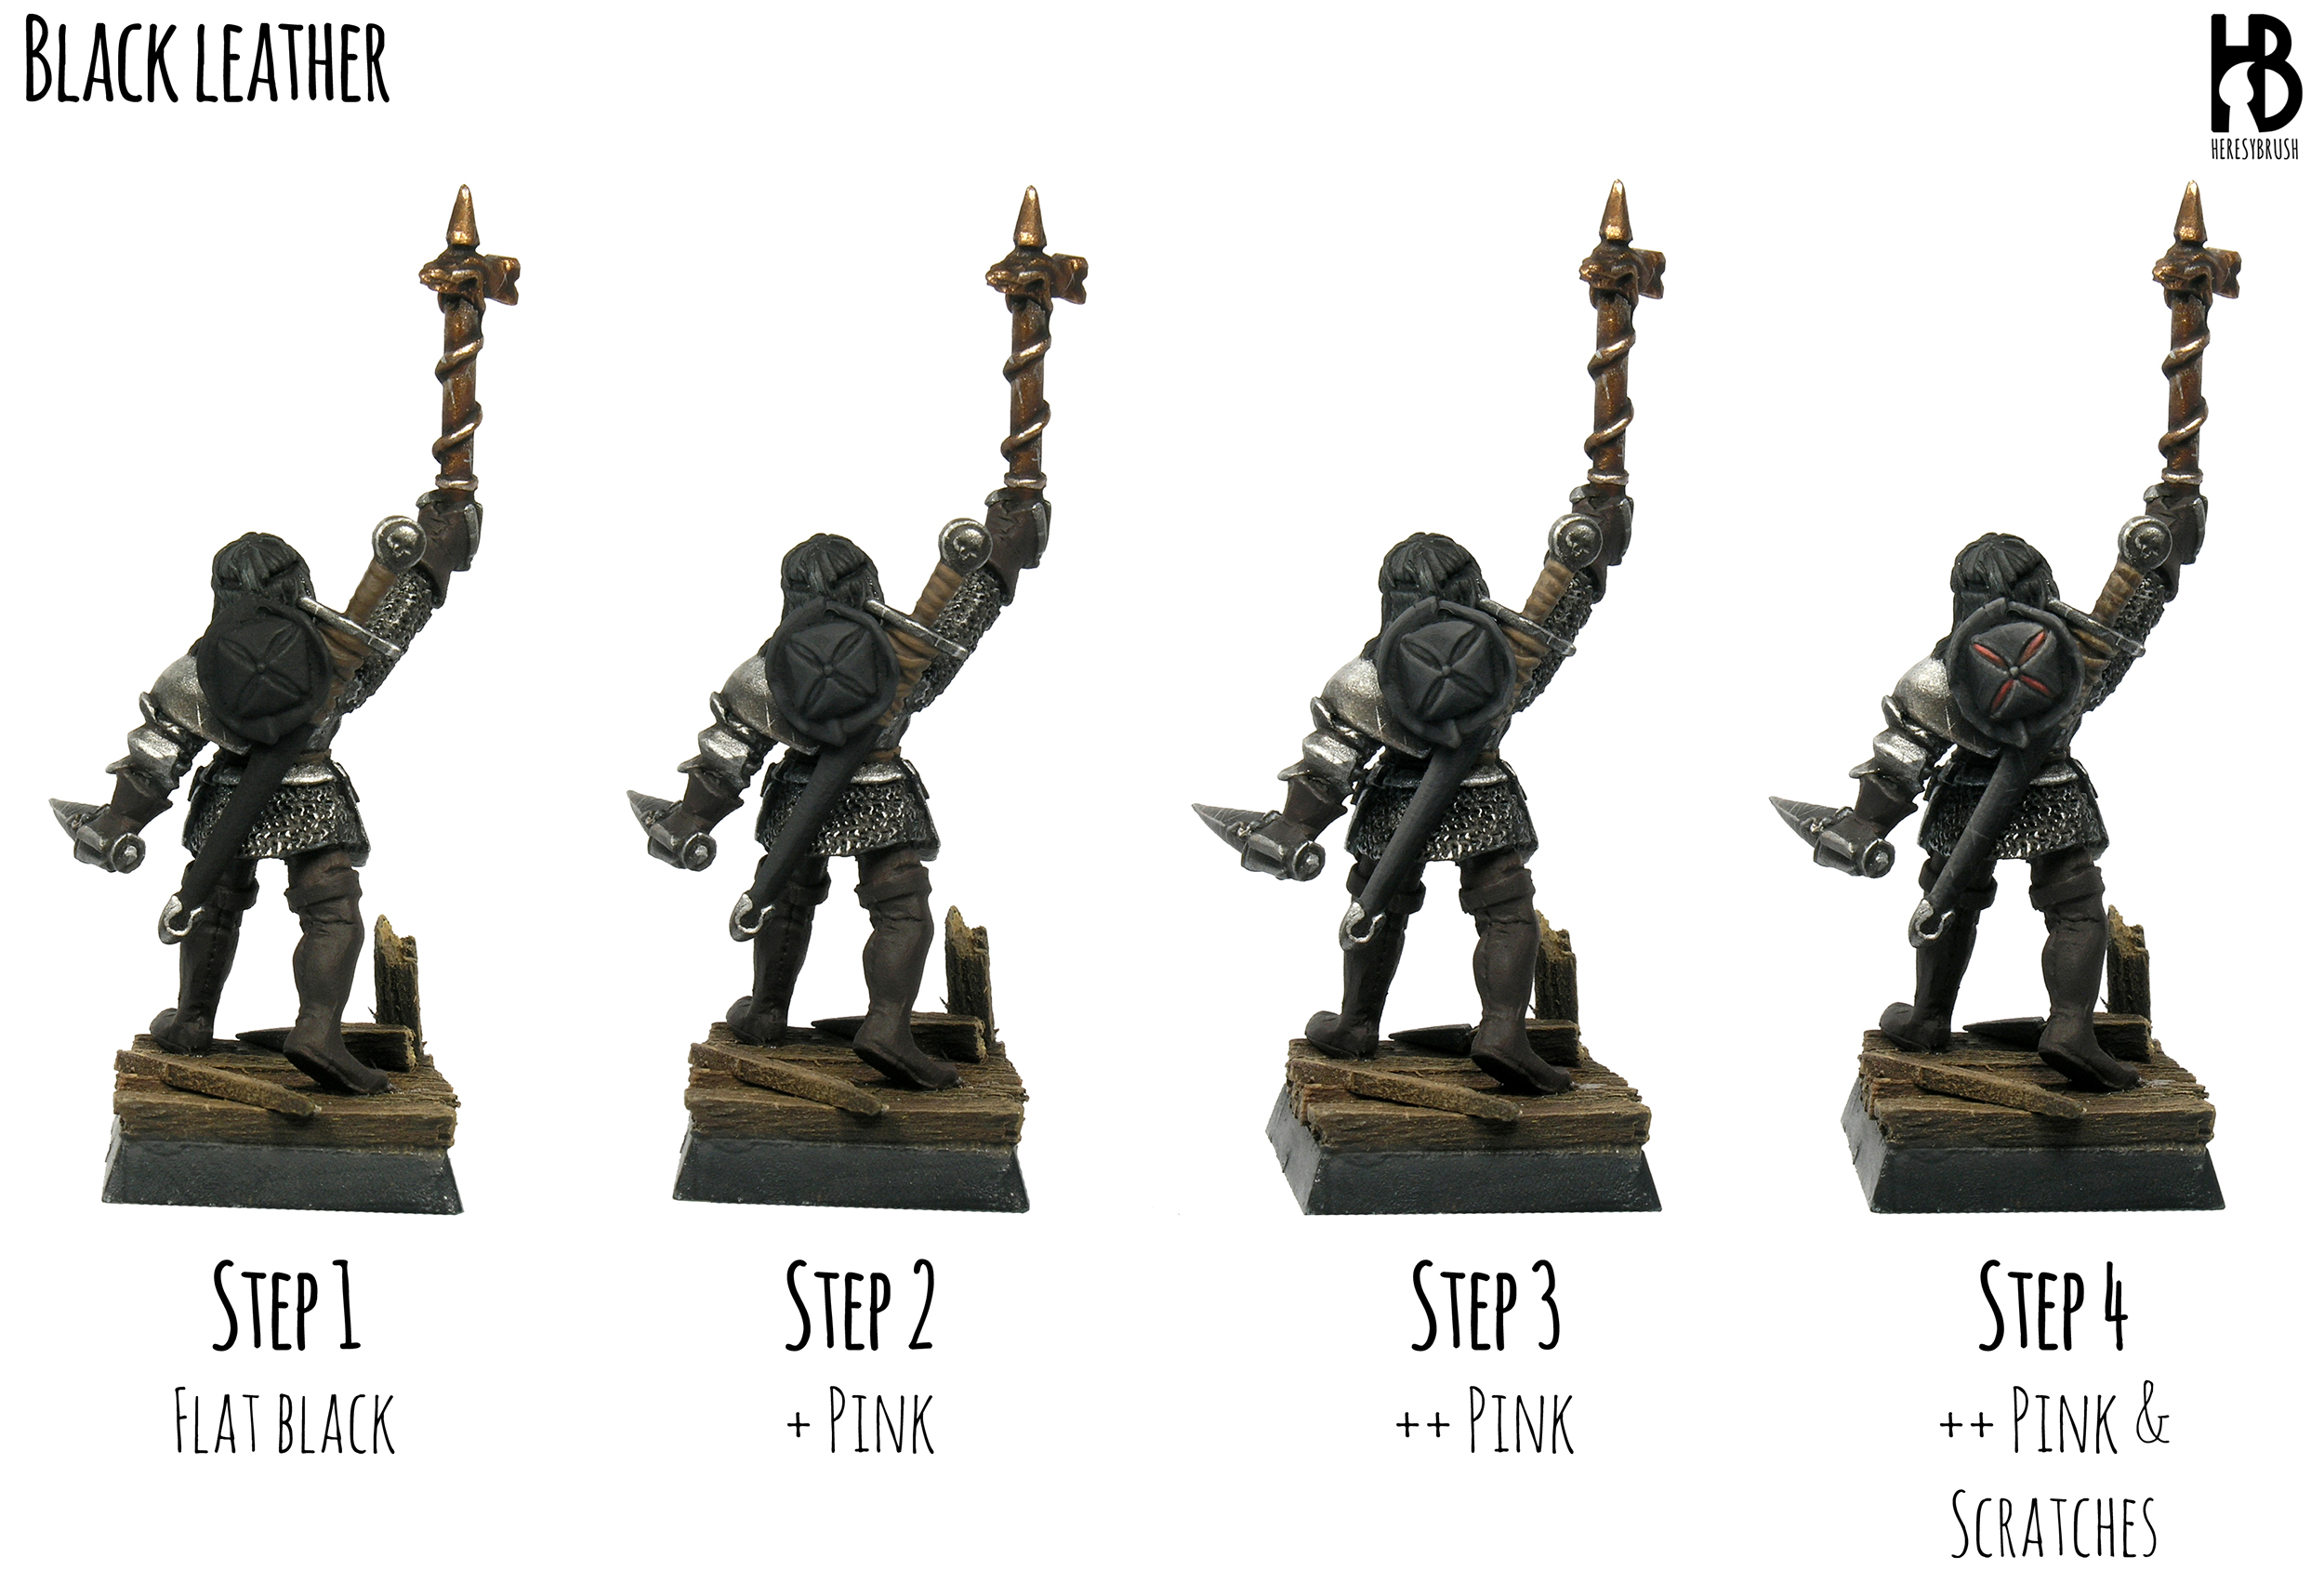
The recipe is as follows:
- Paint the whole surface with flat black. Apply couple of layers to obtain an homogeneous coverage.
- Mix flat black with a little bit of pink. For example, two drops of black and one of pink (2:1). Depending on the lighting method that you are following (i.e. zenithal) you should lead the lights toward one part of the element. For example, I leaded the lights toward the upper part in each detail of the hat; and more clearly, I only highlighted the upper horizontal part of the scarab.
- Mix flat black with more pink. For example, one drop of each paint (1:1). Repeat, but covering a smaller area. Remember to thin the paint down with a little bit of water to create a semi-transparent layer, so that we can generate soft transitions between colors.
- Mix flat black with even more pink. For example, one drop of black and two of pink (1:2). Here you can add a little bit of white if you want to force the shine. Repeat the previous step. In addition, we can create a texture and add some scratches. For the texture, we can use the dotting technique, by which using thinned paint we do not paint the highlight as a straight line, but we paint successive and irregular dots. For the scratches we can just use a thin brush a paint a very thin line here and there.
 To paint dark brown leather -boots and gloves- I like to use the following triad: Dark oxide (302, Vallejo) as a shade, Flat brown (984, Vallejo) as a base, and Orange brown (982, Vallejo) as a light. This will generate a reddish / orange leather effect. Another option is to replace the flat and orange brown by Beige brown (875, Vallejo) and white, respectively. This will create a more grayish leather effect.
In this other example I did not created any texture, and instead I tried to create nice and soft transitions or gradient. Remember, to achieve soft transitions is extremely important to thin down the paint with water to create semi-transparent layers. And as we saw in the true metallic metals article, we should also use glazes.
The recipe is as follows:
- Paint the whole surface with a mix of Dark oxide and black (1:1). Apply couple of layers to be sure that the whole surface is properly covered.
- Apply the first highlight using pure Dark oxide. This first light is more general and serves to define both the shades and the areas that are going to be highlighted.
- Continue applying highlights by mixing Dark oxide with flat brown (1:1), and then use only flat brown. We start clearly defining the highlighted areas here. Choose your lighting method and lead the highlights accordingly. For example, I focus on the upper part of the boots and gloves. As you can see, there are some wrinkles in the leather. These were sculpted and I just followed them when painting the lights.
- Apply the last highlights by mixing flat brown with orange brown (1:1), and paint the final highlight with only orange brown. The final light should be very small, just a dot. Here, I put it on the tip of fingers and upper edge of the gloves, and in the knees and tip of the boots.
 To paint light brown leather or canvas -webbing / straps- I normally use Beige brown (875, Vallejo) over a darker base of Chocolate brown (872, Vallejo). If you prefer a more yellowish tone, you can use English uniform (921, Vallejo) instead. For the highlights, we have two options: we can use white if we want more grayish effect, or Light Yellow (949, Vallejo) for a yellowish and warmer effect. You can even combine all these distinct options in different parts of the miniature.
To highlight the straps I normally start painting a straight line on each edge using the bristles of the brush horizontally rather than using the tip. By doing this we can easily generate a very straight line. And it is super fast! With the last or two last highlights I try to create a texture by using the dotting method we discussed before, and I also add some scratches. Do not paint many scratches, only here and there.
The recipe is as follows:
- Paint the given element with two layers of Chocolate brown. Remember to thin the paint with water to facilitate its application.
- Apply the first highlight with a mix of Chocolate brown and Beige brown in the same proportion (1:1). As I said, paint two straight lines on each edge.
- Apply a second highlight with only Beige brown. Idem, but cover a smaller area.
- Apply the last highlight with Beige brown mixed with white or Light yellow (1:1 or even more). Here I have used Light yellow and applied two layers. First one with a 1:1 mix, and the second with twice the amount of yellow. I used these two highlights to create the texture as I described before.
And this is all. Now the miniature is finished. Note that I decided to use red to paint some other details of the miniature, such as the trousers, the lining of the hat and the eye patch. The idea behind this was to create a little bit of contrast. The miniature was quite monochromatic before with the steel as the dominant color. And the different leather parts did no bring much contrast. Therefore, I decided to use a striking color, such as the red, to gain more contrast and make the miniature more attractive. The name tag is a decal from Scumb4g Kustoms. Following another suggestion, I will try to cover next time how to paint the wooden part of weapons such as axes or spears. If you have any other idea, please do not hesitate and leave a comment discussing what you would like to see!
6 thoughts on “How to paint leather”