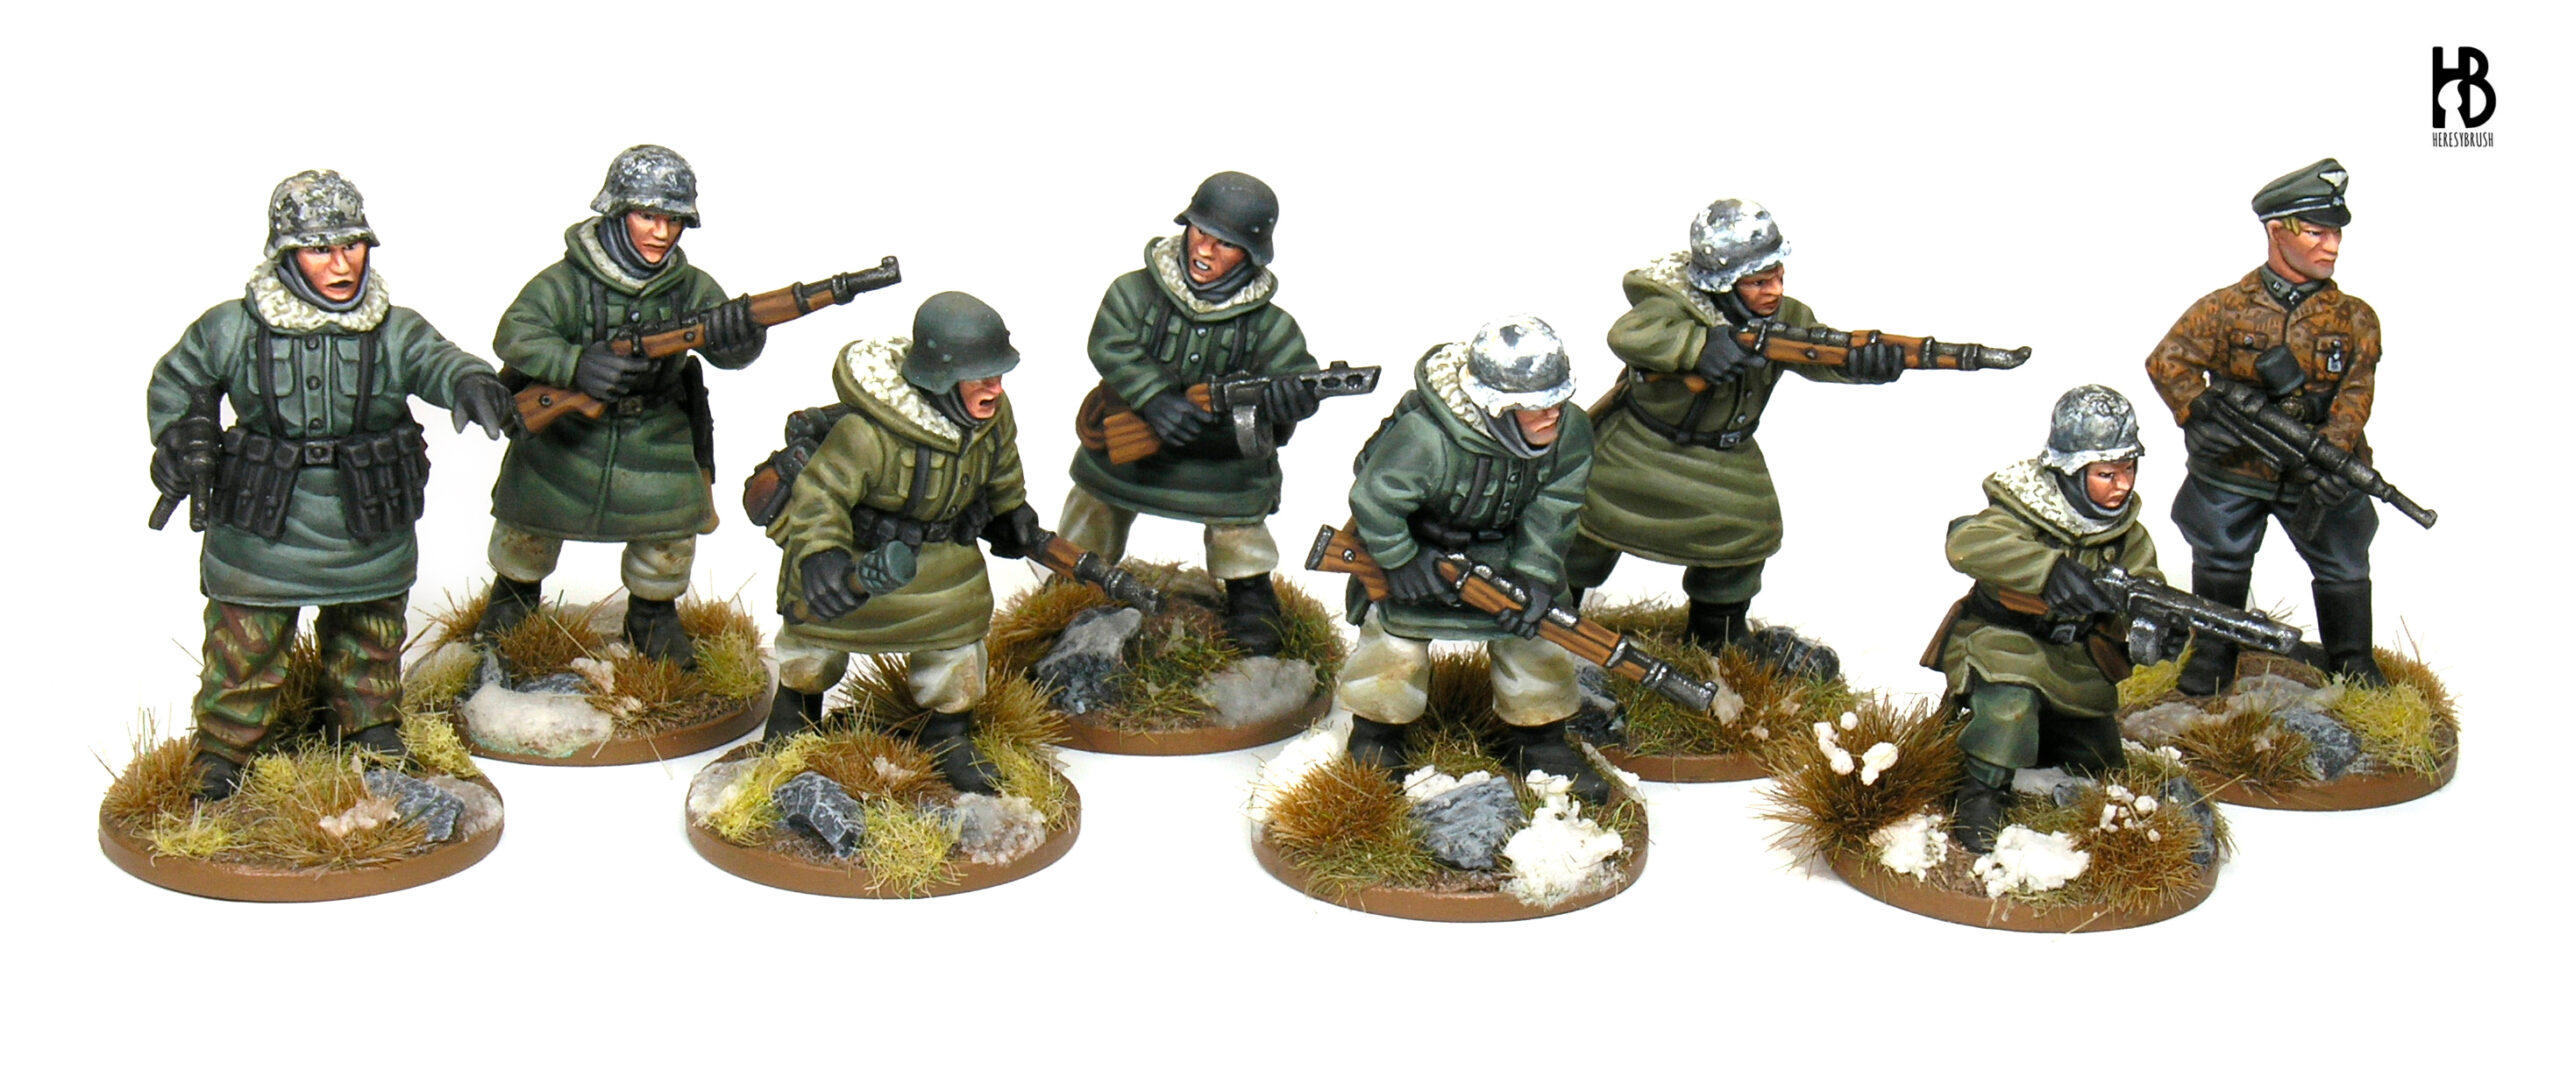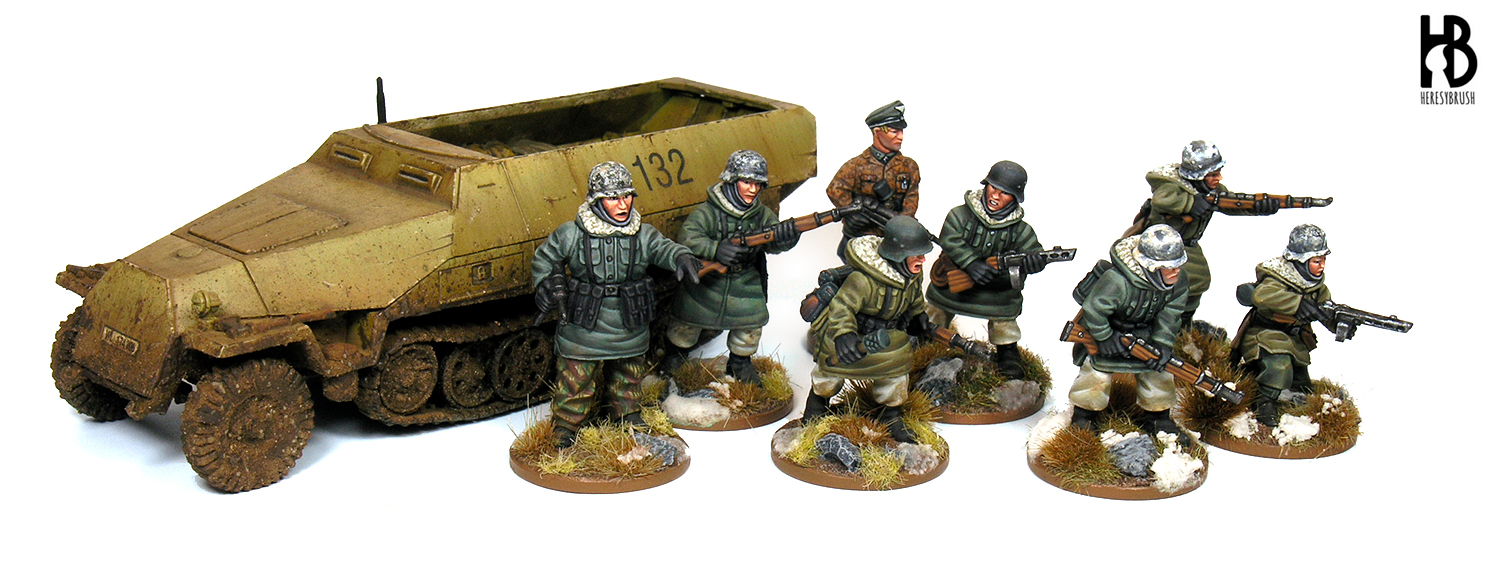
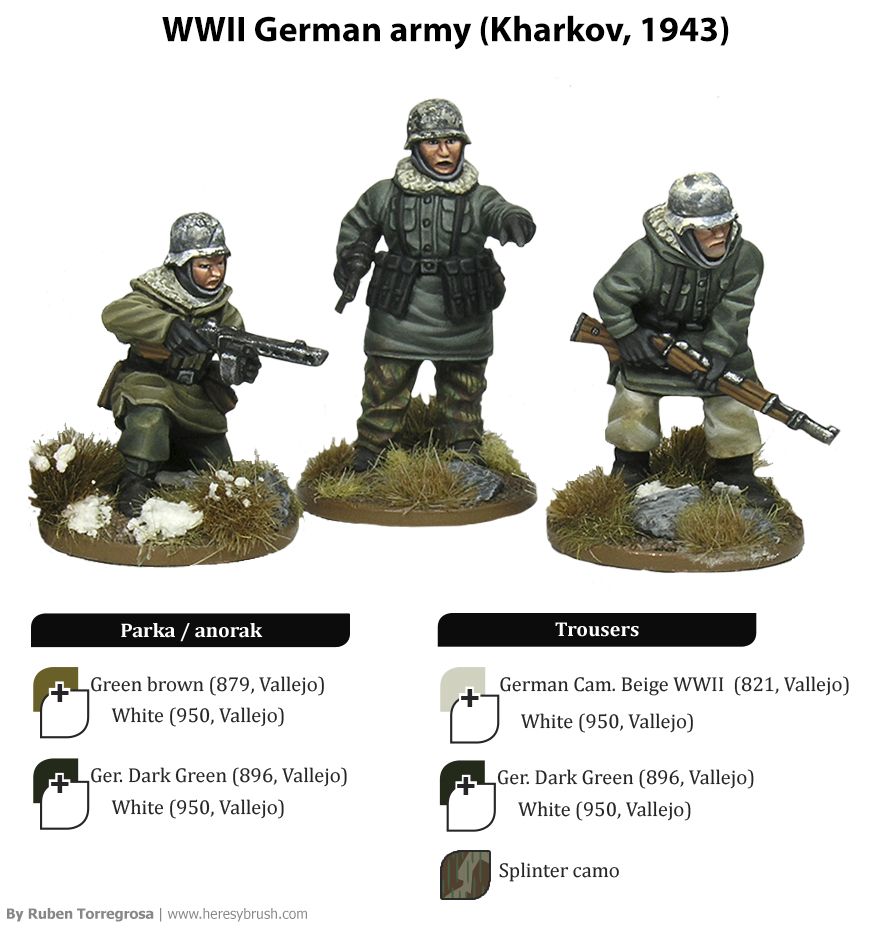
A few years ago, in collaboration with Heer46 miniatures and the PaintingWar editorial group, I prepared several mini painting guides featuring WWII German soldiers in 28mm. Now, you can download some of them for free! In this post you will find how to paint German soldiers in Kharkov parka, whereas in this other one I explain how to paint Gebirsjägers.
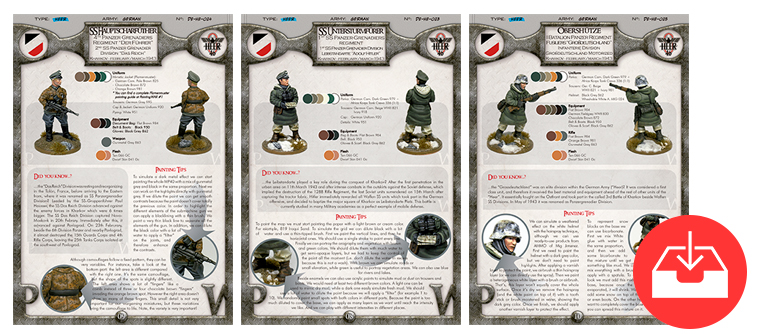
In each guide you will find a short step by step tutorial to paint the different parts of a miniature, followed by painting sheets showing the color chart, painting tips and some historical facts of three different miniatures. These mini guides resemble what you can find in the PaintingWar books, given that they were created following exactly the same structure.
If you liked these painting guides, you can get a third painting guide about Fallschirmjäger from Heer46 webpage; or you can get the WWII German Painting War book which include dozens of painting guides as well as almost 40 unique painting sheets. You can find a review about the book here. And, if you like the Spanish Civil War, do not miss this another book.
Free download:
Or, you can directly read the step by step here. I noticed that my English in the original mini guide was a little bit broken. You can find an updated version below. All the color references are from Vallejo.
Step 1 – Preparation
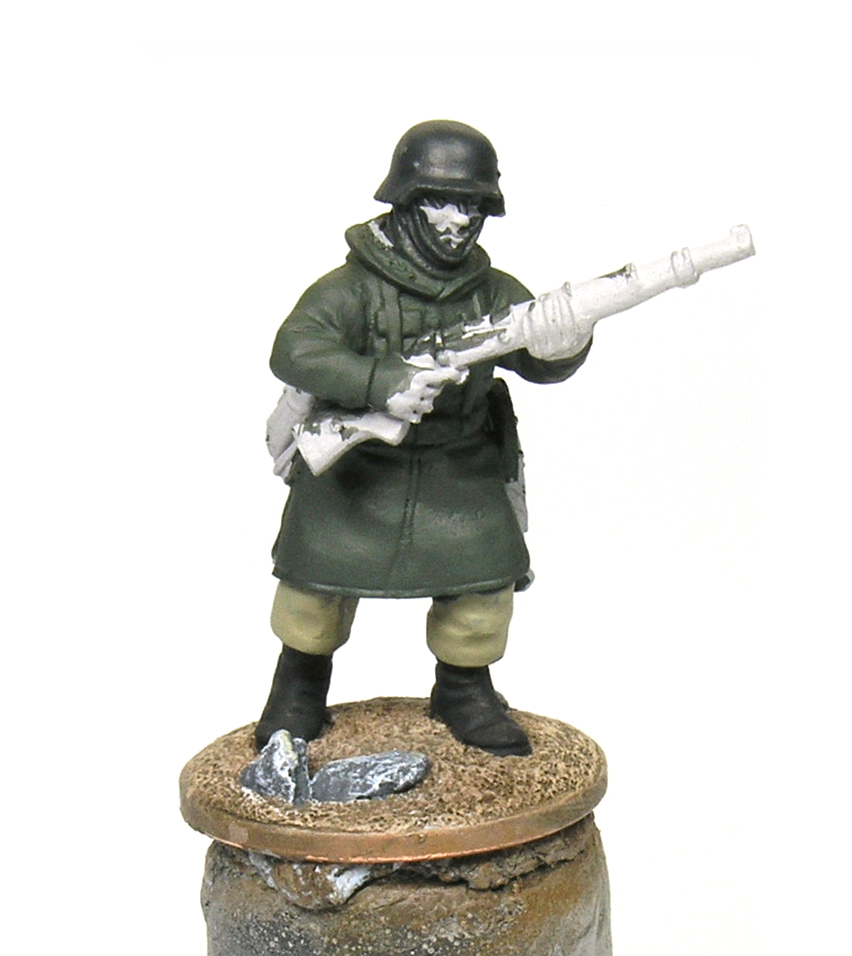
First, we remove the casting lines with a modelling knife and files. We can wash the figure with soap and water to remove the release agent from the molding process. I usually prepare the base now with modelling putty and some natural rocks. Alternatively, you can use glue sand using PVA. Before starting the painting process we must apply the primer. This is essential given that it does not only facilitate the application of the paint, but it increases its durability (since we are going to play with these models, this is very important). I prefer to use an airbrush or spray rather than a brush because the undercoat layer is thinner and more homogenous. With the brush we can accidentally cover some details or create weird textures. And I like using grey primer because any other color cover it very well.
In addition I like to paint the base now because we can easily apply dry-brush strokes without spoiling the painted model. I usually use brownish and yellowish colors, and I paint rocks in grey to get some contrast.
Step 2 – Uniform
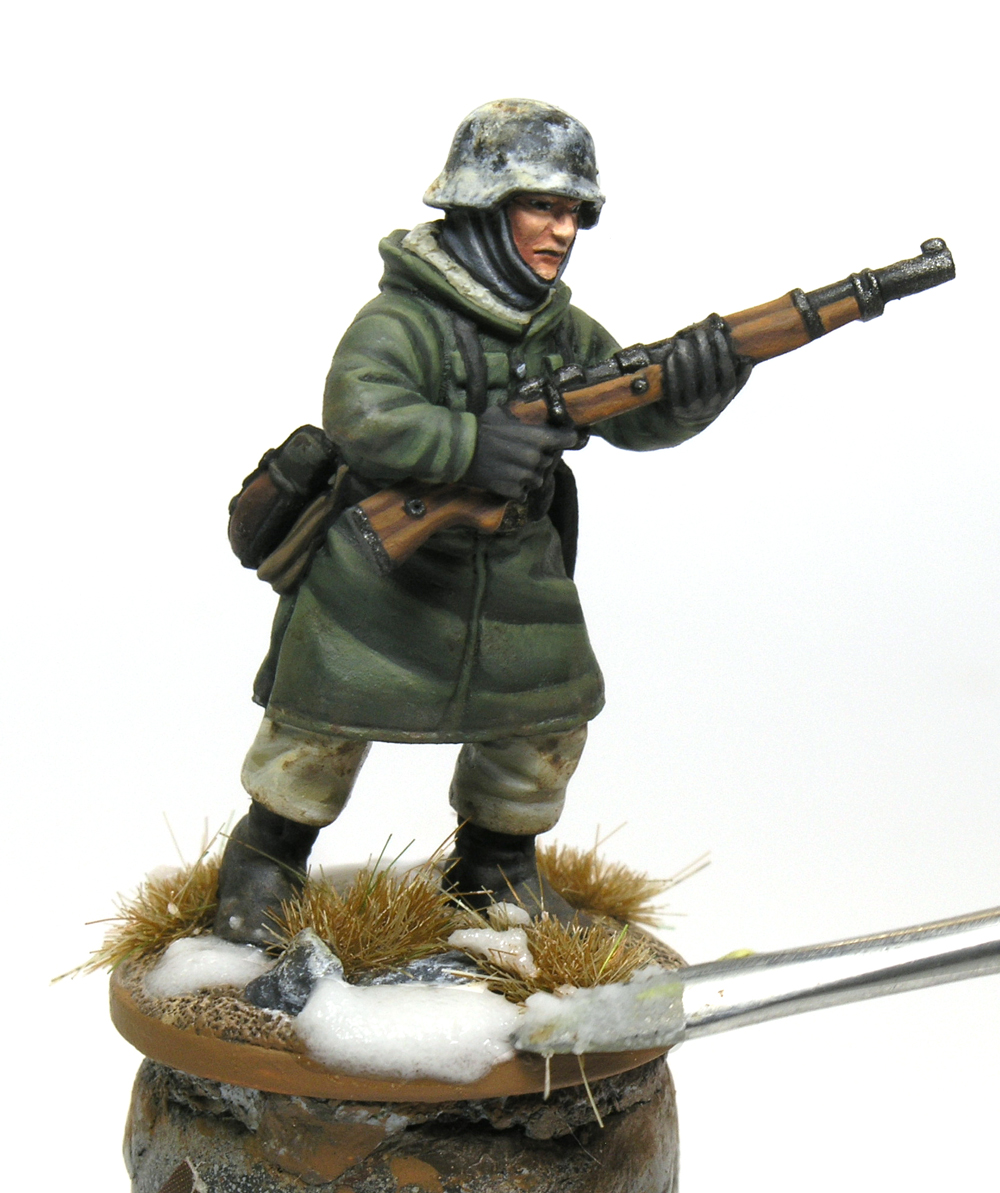
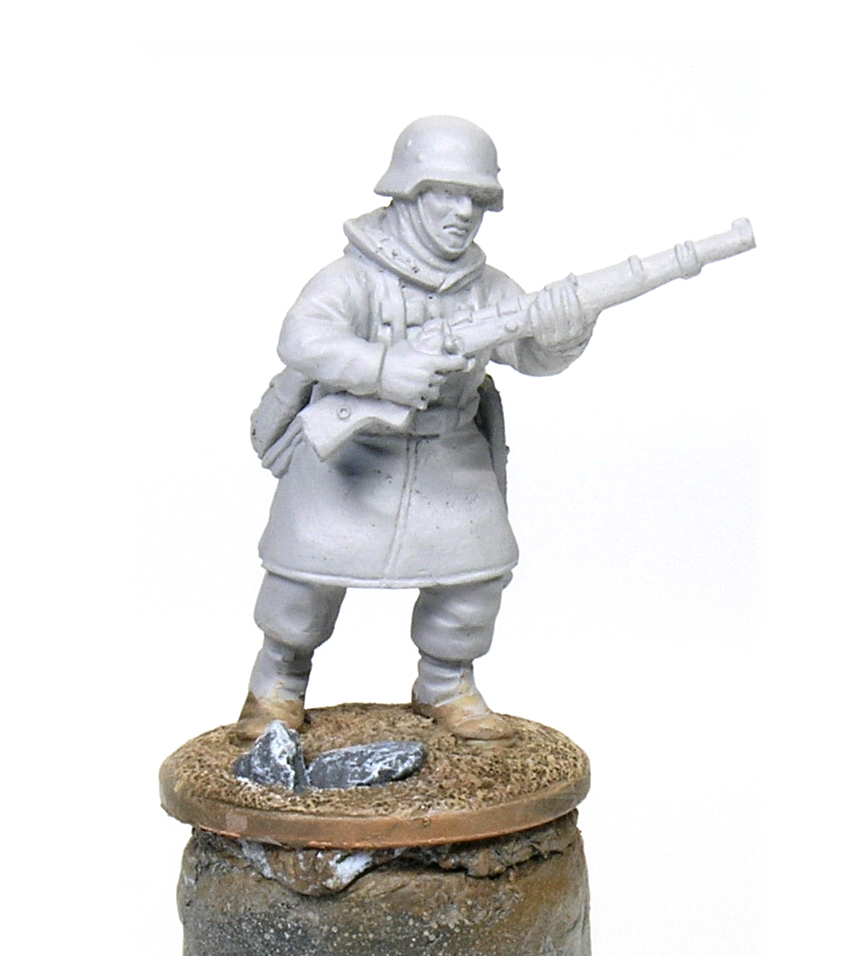
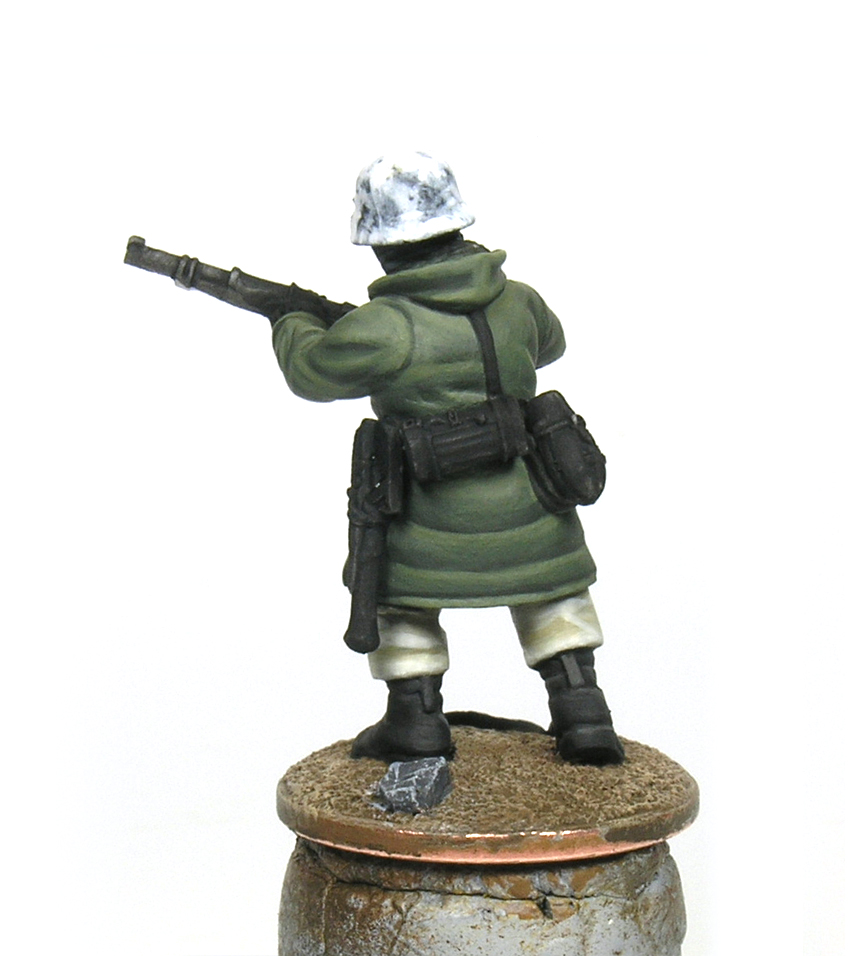
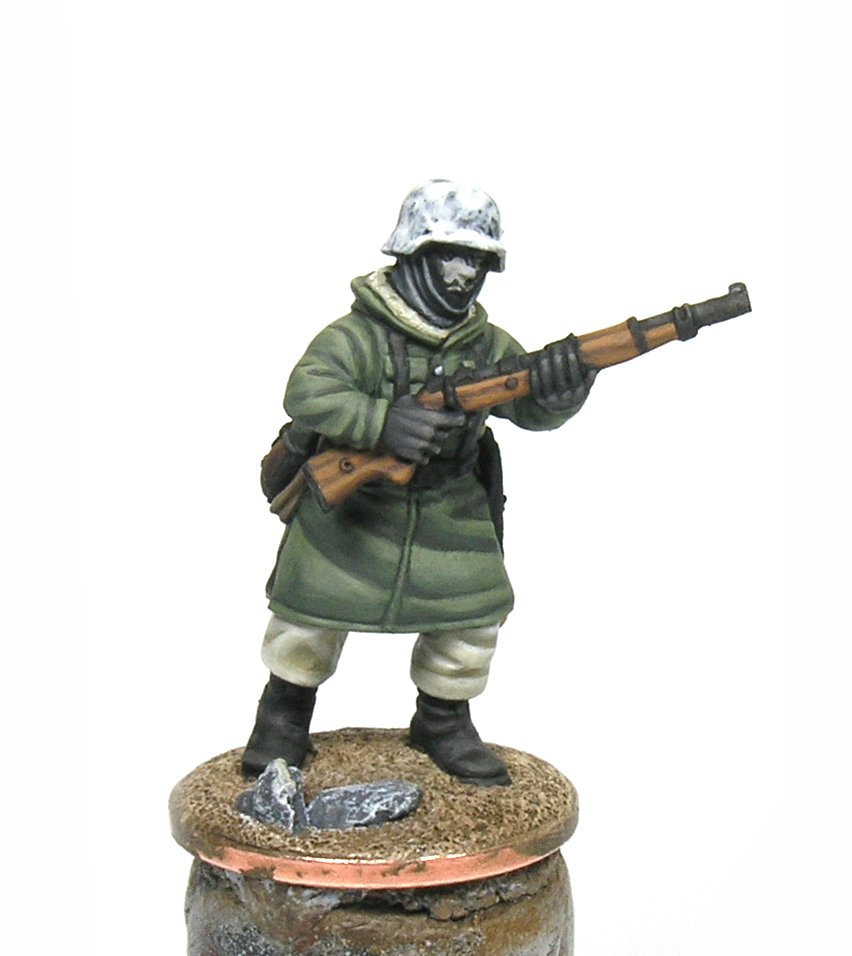
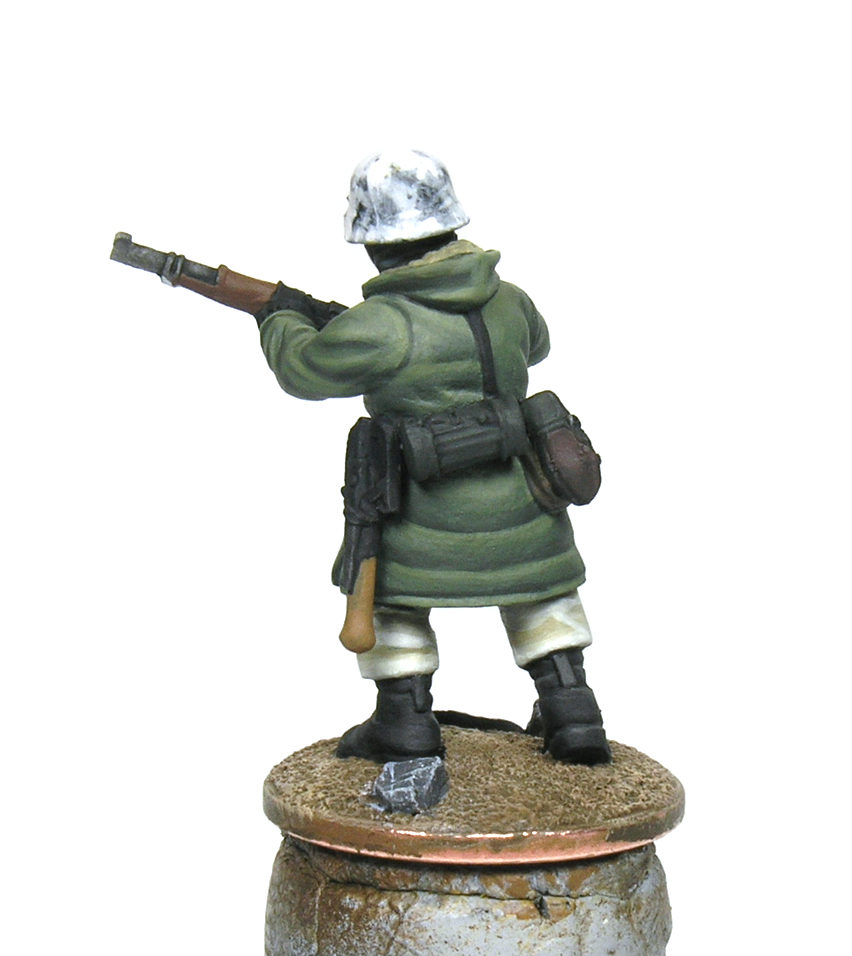
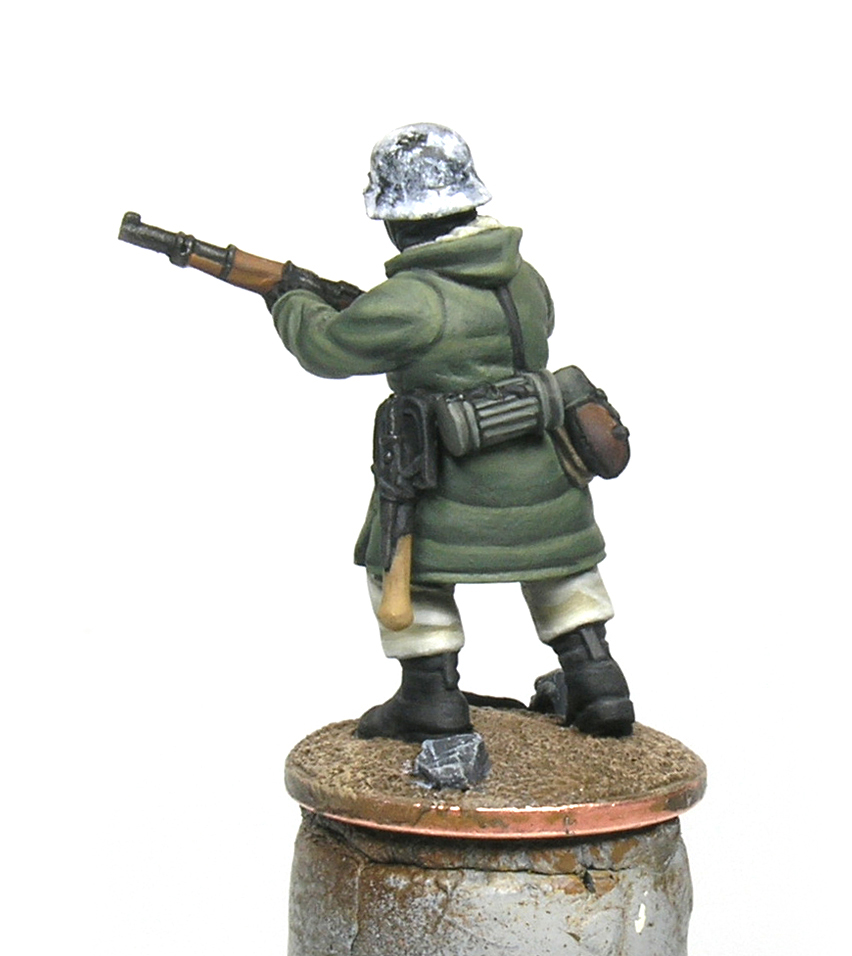
Waffen SS M1940 Kharkov fur lined parka
Probably the most interesting element of these models. The Kharkov parka color used to be green grey, although depending on the manufacturer, the use, etc, the color could vary. Remember that is very important to thin acrylic paints with water, given that it will be easier to apply them and we can create nice blending effects between layers.
My painting style follows the layering method (or painting by layers), which means that I apply around five layers, from the shade to light. Schematically, it looks like this:
Shade > Intermediate 1 > Base > Intermediate 2 > Light
The intermediate colors are the result of mixing the two flanking colors. For example, intermediate 1 is the mixture of the shade and base colors in the same proportion (50%/50%). The combination of multiple layers and thinned paint serves to create a smooth transition or gradient from the shade to the light. You can simplify this method and use only three colors (a triad system): shade > base > light. This will save time at the expense of “smoothness”.
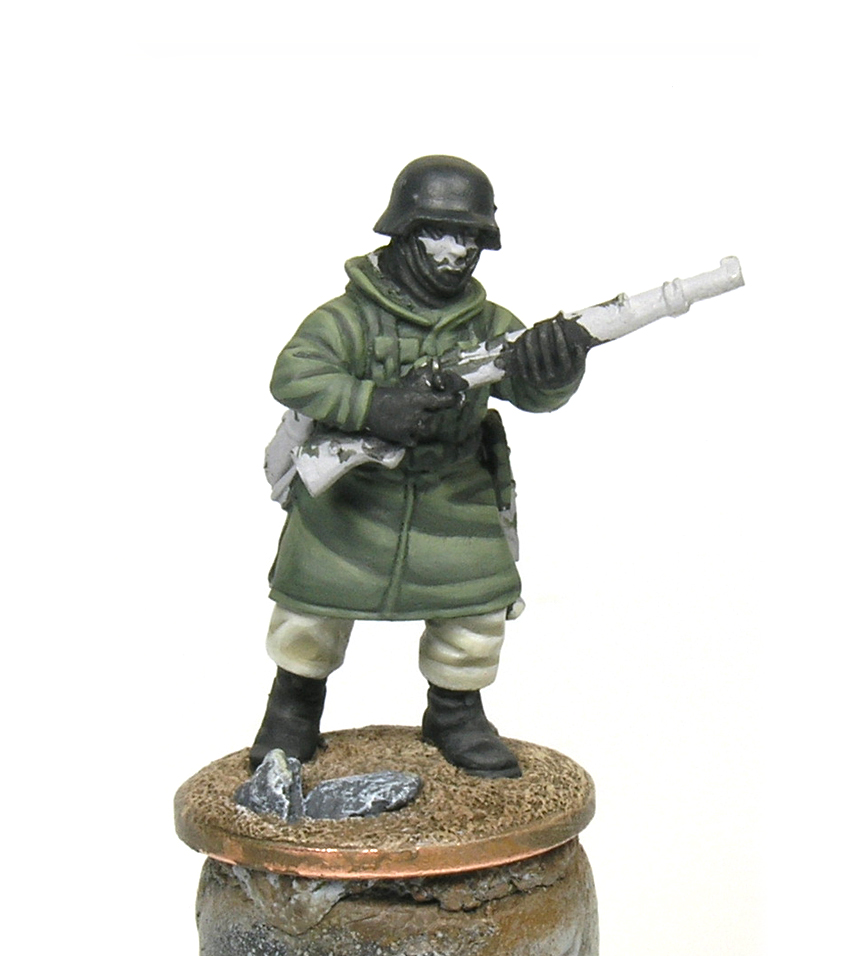
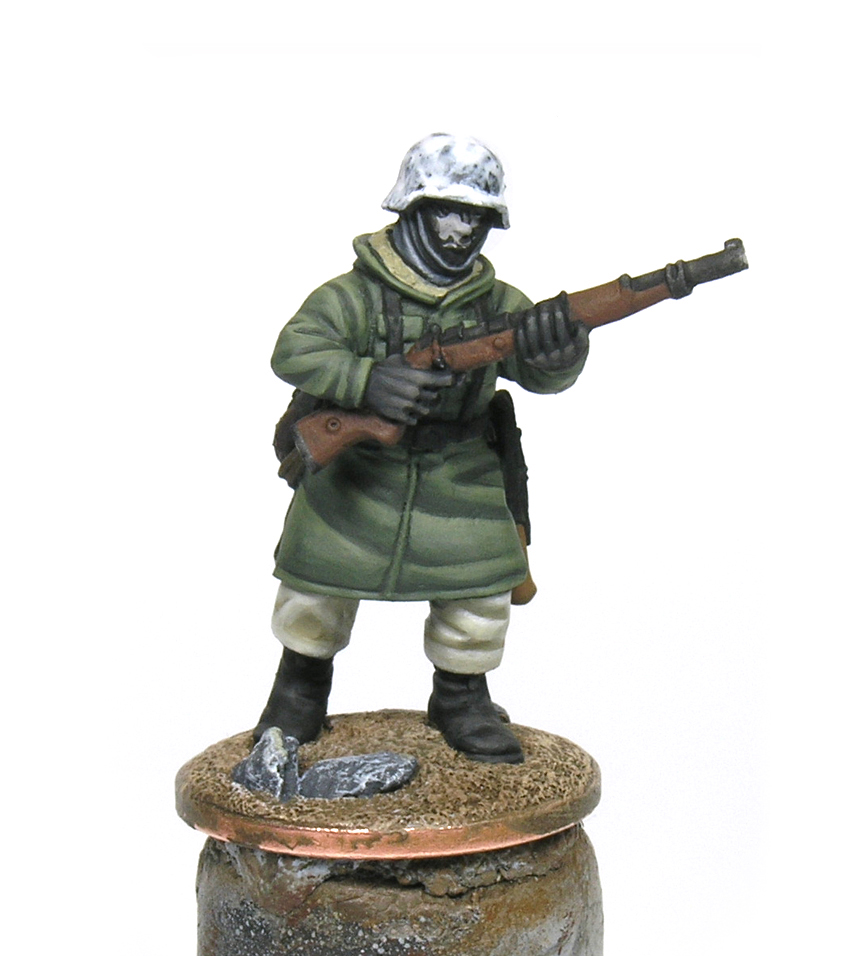
Following the layering method, we can start painting the shades of the parka with 979 German Cam. Dark Green and then mix it progressively with 336 Afrika Korps Tank Crews. The final highlight is done with pure 336. You can also use white for the highlights, although by using white you will loss the value of the green color. That is, the final color will be greyish rather green. By using a lighter green we can keep the green hue. You can play with this and try different combinations even within the same unit: some parkas can be greener, other more grey and others more brown. For a more brownish color you can use 879 Green brown as shade.
The layer after the shade, which I called Intermediate 1, will cover the most part of the surface, except the deeper areas where we keep the 979 color. Consecutively, for each new layer we will increase the proportion of 336 and paint a smaller area. The final highlight is just a thin line or dot in the extreme of the highlighted area. These models have very nice sculpted wrinkles, and therefore we only need to follow the sculpts: the final highlight will be placed in the more protuberant part and the edges of the parka. Remember to thin the paint with water, and do not totally cover the previous layer when applying the next one. In order to create a gradient or smooth transition effect all layers must be visible, from the shade to the final highlight. Finally, you can always use again the shade color, 979, to repaint some dark areas if needed.
Trousers
When painting white we have two options for the shade color: grey or beige. Here, I used the later because it is warm color (it contains red and a little bit of yellow), and I like more how it looks like. Note that pure white does not exist in nature, but it appears always tinged with another color (think about the blueish icebergs, for example). Accordingly, I normally use 918 ivory rather than pure white. Following the same idea we discussed before for the green, you can mix 821 and 921 progressively and use pure ivory for the final highlight.
Step 3 – Black profiling
Before painting the details, such as the rifle, straps, holsters and so forth we can apply a black profiling. For me is easier if I paint the whole element with black. Otherwise, use a thin brush to paint a thin line around each element of the figure. The idea is to separate each part with a black line. Do not confuse black lining with the shades. The black profiling separates two different elements, but do not to simulate shades. The goal is to gain contrast and definition.
Step 4 – Equipment
Boots, gloves and scarf
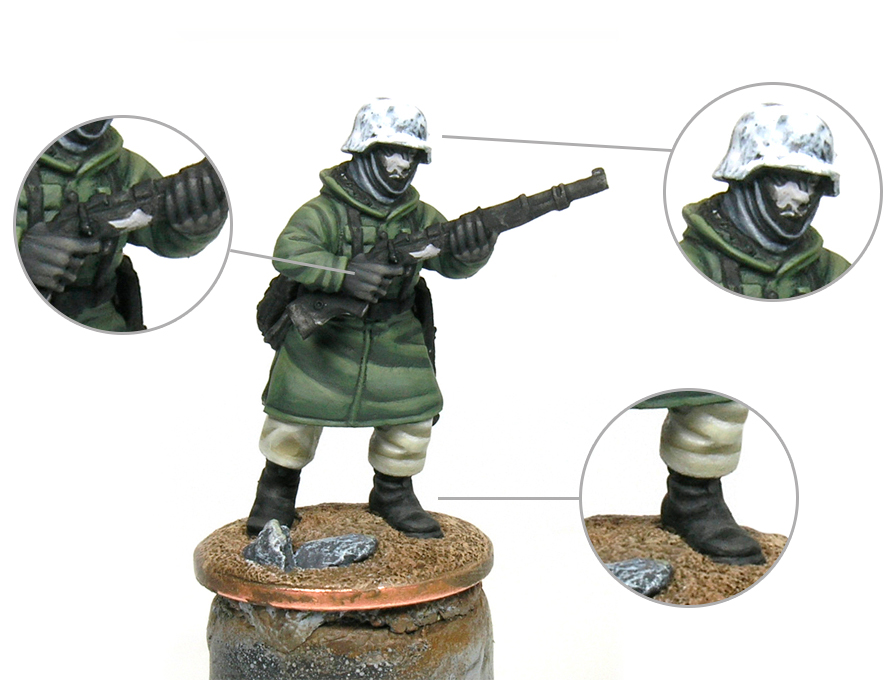
To paint the black leather of the boots and straps we can use 950 Black. When highlighting this color we need to do it carefully, given that if we go too far with the lights we can accidentally create a grey hue rather than black. And we do not want that! So we can apply only couple of subtle highlights by mixing black with a little bit of pink. Yes, you read right. Instead of white or grey, we can use pink. Pink contains red, a warm color; and therefore, the lights will be warm, and in some extent, more natural. We can focus on the edges of the different sculpted parts.
We can follow the same instructions to paint the gloves. But the gloves were indeed grey! Thus we only need to increase the proportion of pink. In this case we can apply the lights on the knuckles and fingertips. Regarding the scarf, we can use white instead of pink to get a different tint of black / dark grey. Note that is also important to add some chromatic variation.
Rifle:
To paint the wooden part we start painting the whole surface with 984 Brown Flat. When applying the highlights we can simulate a veined effect by painting horizontal lines using 981 Orange Brown. Next, we can do another black profiling to separate the metal from the wooden parts. Then, we can paint the metal with 863 Metal Grey, followed by a black wash with Nuln oil (Citadel) or just thinned black paint.
Gas mask, bag and water bottle:
For each element we can start applying the shade color. If we do not have the right shade or dark color, we can always mix the base color with black. To paint the gas mask canister we can use 830 German Fieldgrey WWII. First, we paint this piece of equipment with a mix of 830 and black in the same proportion; and after applying the shade, we apply pure 830 on the sculpted relief. You can use the brush horizontally rather than the tip to easily paint the metal relief. Finally, we can apply a single highlight by mixing 830 with ivory in the same proportion. We can use the same color to paint the beaker on the canteen. To paint the water bottle we can use 984 Brown Flat. After mixing 984 with black in the same proportion, we apply pure 984. Then, we can apply a single light with 984 and a little bit of 981 Orange Brown. We can paint the lights on the upper part of the bottle. Finally, to paint the bread bag we can use 872 Chocolate Brown, and then apply a highlight following the wrinkles by mixing 872 with ivory.
To paint the black straps, holsters and the shovel case we can follow the same recipe we used for the black boots. We can use a pale brown to simulate the wood of the shovel handle. For example, 977 Desert Yellow. Note the parka has a fleece lining which is only visible on the hood. We can paint it in white like the trousers.
Helmet

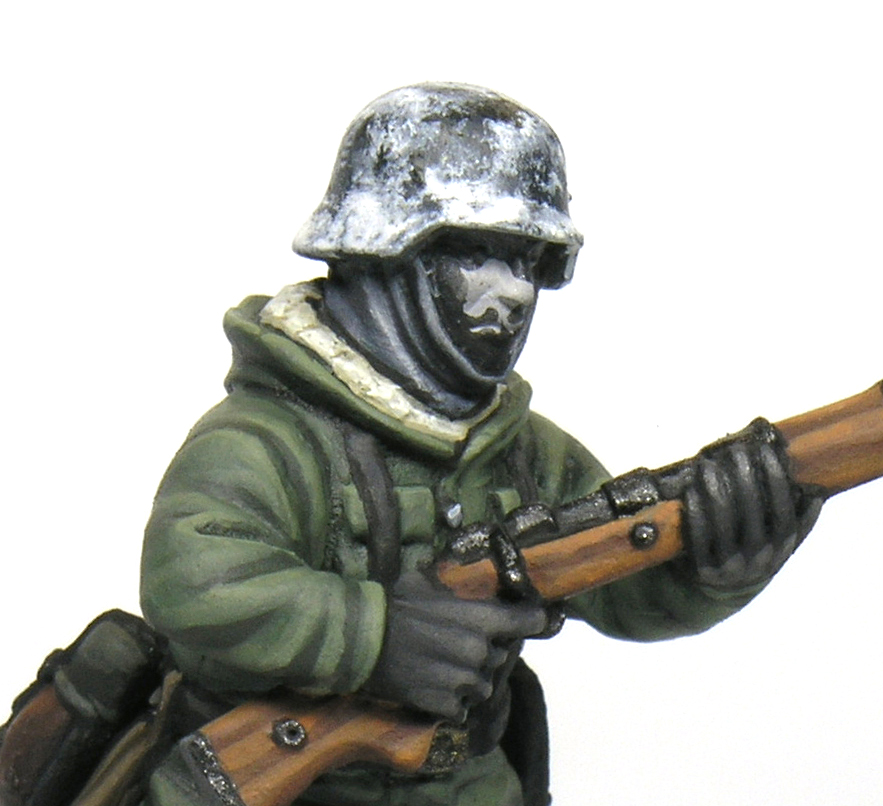
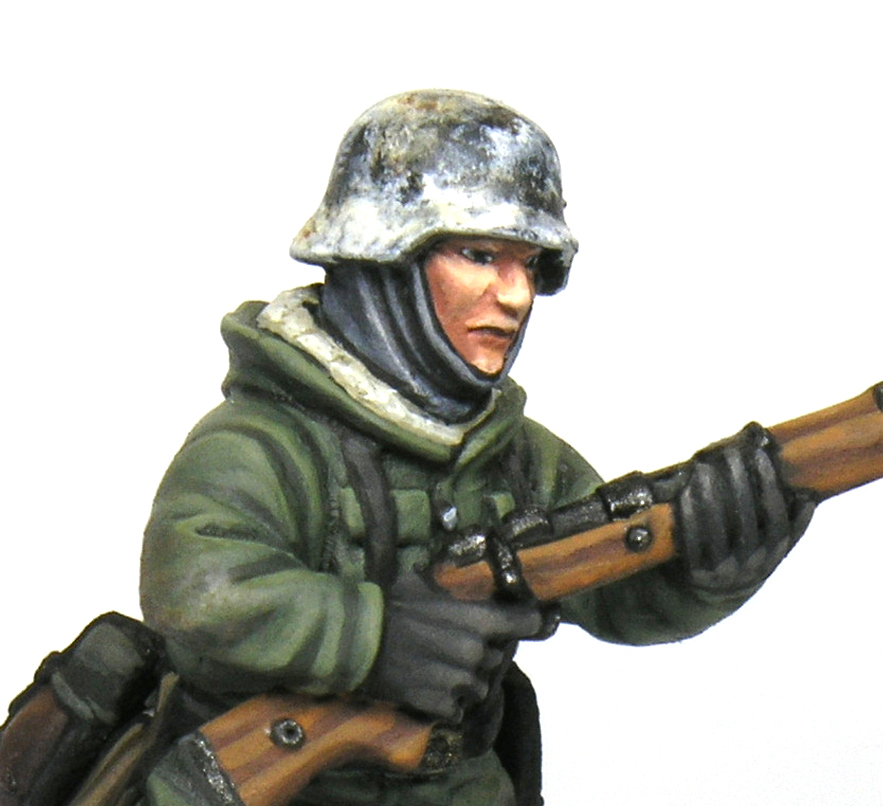
- Step 1: we paint the steel helmet with 862 Black grey. We do not need to paint the lights if we are planning to simulate a white wash.
- Step 2: to simulate the white wash we can use the special paint from AMMO, washable white (A.MIG 024). We can apply this paint either with a brush or airbrush. Do not cover the whole surface homogeneously, but create different opacities.
- Step 3: with a brush moistened in water we star removing little by little the paint. The stronger the stroke, the more paint we remove. You can also use a toothpick to create some scratches.
- Step 4: we can apply some brown colors here and there to simulate dust or mud. I used two enamels (see next section). First we apply a little bit of enamel with a brush, and then we blend it with a brush moistened with white spirit.
Step 5 – Skin
To paint the skin you can find a complete step by step in the PaintingWar book (or here). In short, first we paint the eyes given that now there is no risk to spoil a painted area. First we paint a white oval and then a black line in the middle. Then we apply the skin shade with 066 GC Tan. We paint the whole face excepting the eyes. For the first light we mix 066 with 041 GC Dwarf Skin in the same proportion, and for the second we can use directly Dwarf Skin. We can apply an extra highlight by mixing Dwarf Skin with ivory in the same proportion. Basically we focus the lights on the forehead, cheeks, lips and chin. We can paint the lower lips with 066 Tan to create some contrast.
Step 6 – Weathering:
We can simulate mud or dust on the trousers and the lowest part of the parka with some enamels. Enamels are not acrylics. We do not use water with this type of paint. Enamels are thinned with White Spirit or turpentine. Furthermore, whereas acrylics cannot be modified or removed after couple of seconds, enamels cure in hours and can be easily manipulated during this time. This property makes enamels a perfect tool to simulate weathering effects since we can easily blend the paint to create different effects. We can use two different enamel colors, dark and light brown (such as A.MIG -1400 Kursk Soil and A.MIG-1405 Dark Mud), representing dust and mud. First, randomly apply some drops of enamel on the boots, lower part of the parka and elbows with a brush. Then, blend them with white spirit.
To create the snow you can use baking powder mixed with PVA glue and water in the same proportion (1:1:1), and then apply the mix with a small spatula.