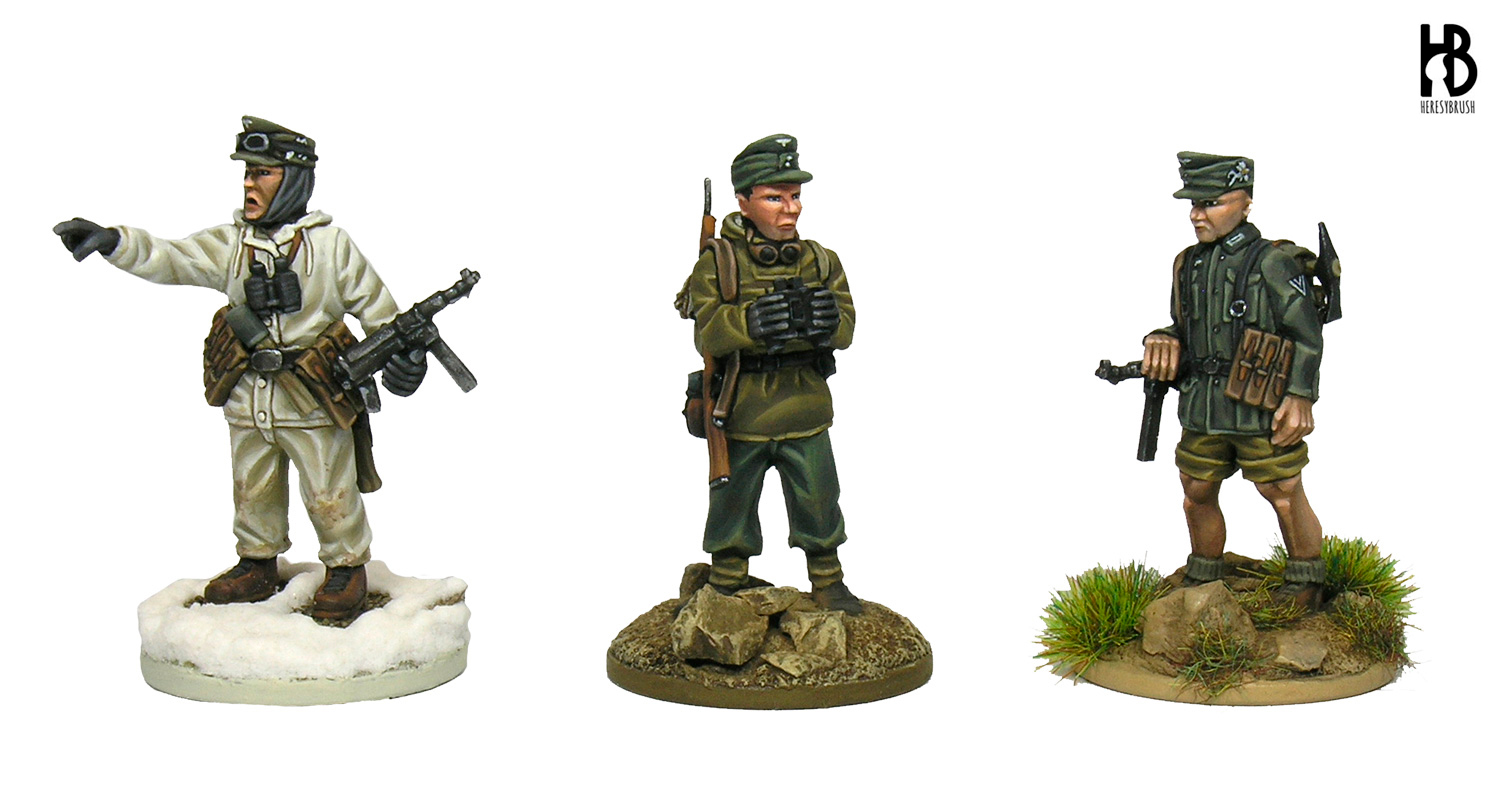
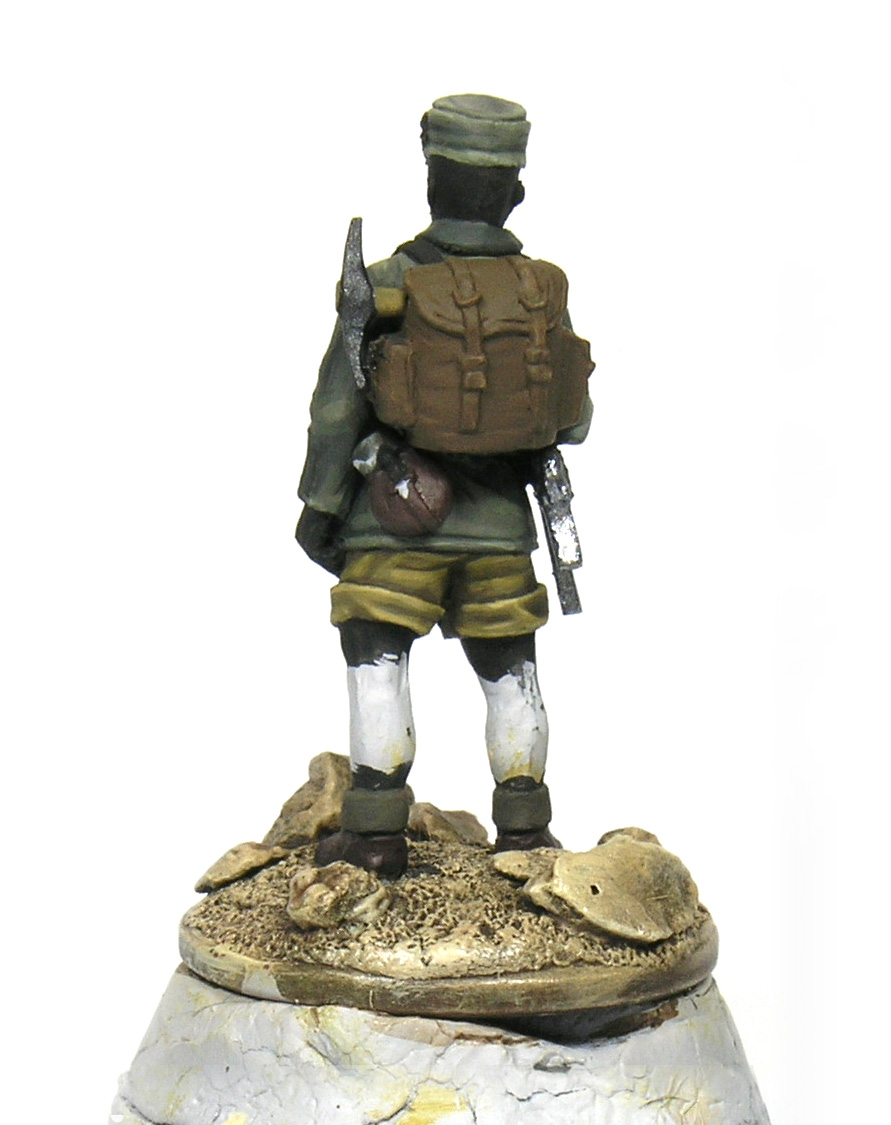
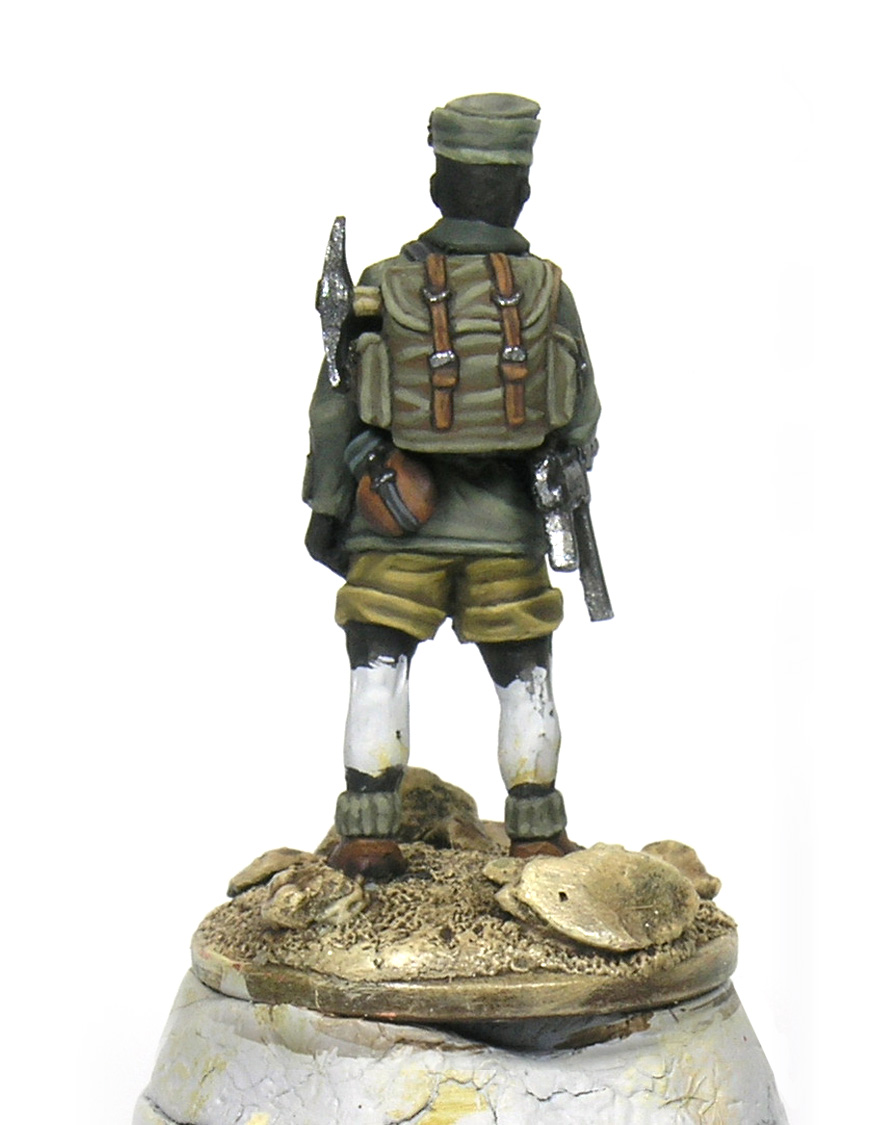
A few weeks ago I shared with you a painting guide featuring how to paint 28mm German soldiers in Kharkov parka (1943), which was the result of a collaboration with Heer46 miniatures and the PaintingWar editorial group. Today, I will share another painting guide about how to paint Gebirsjägers.
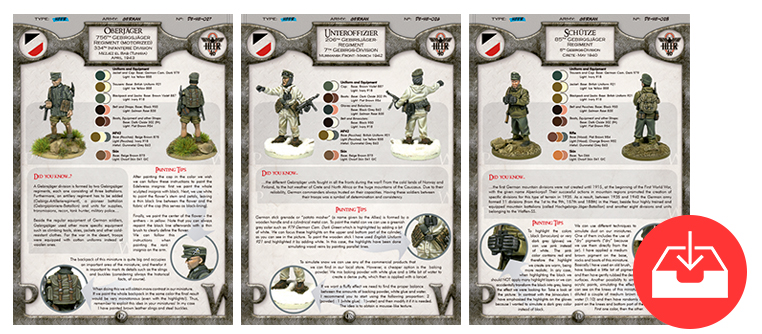
In each guide of these guides (Kharkov and Gebirsjägers) you will find a short step by step tutorial explaining how to paint the different parts of a miniature, followed by painting sheets showing the color chart, painting tips and some historical facts of three different miniatures. These mini guides resemble what you can find in the PaintingWar books, given that they were created following exactly the same structure.
If you liked these painting guides, you can get a third painting guide about Fallschirmjäger from Heer46 webpage; or you can get the WWII German Painting War book which include dozens of painting guides as well as almost 40 unique painting sheets. You can find a review about the book here. And, if you like the Spanish Civil War, do not miss this another book.
Free download:
Or, you can directly read the step by step here. I noticed that my English in the original mini guide was a little bit poor. You can find an updated version below. All the color references are from Vallejo.
Step 1 – Preparation
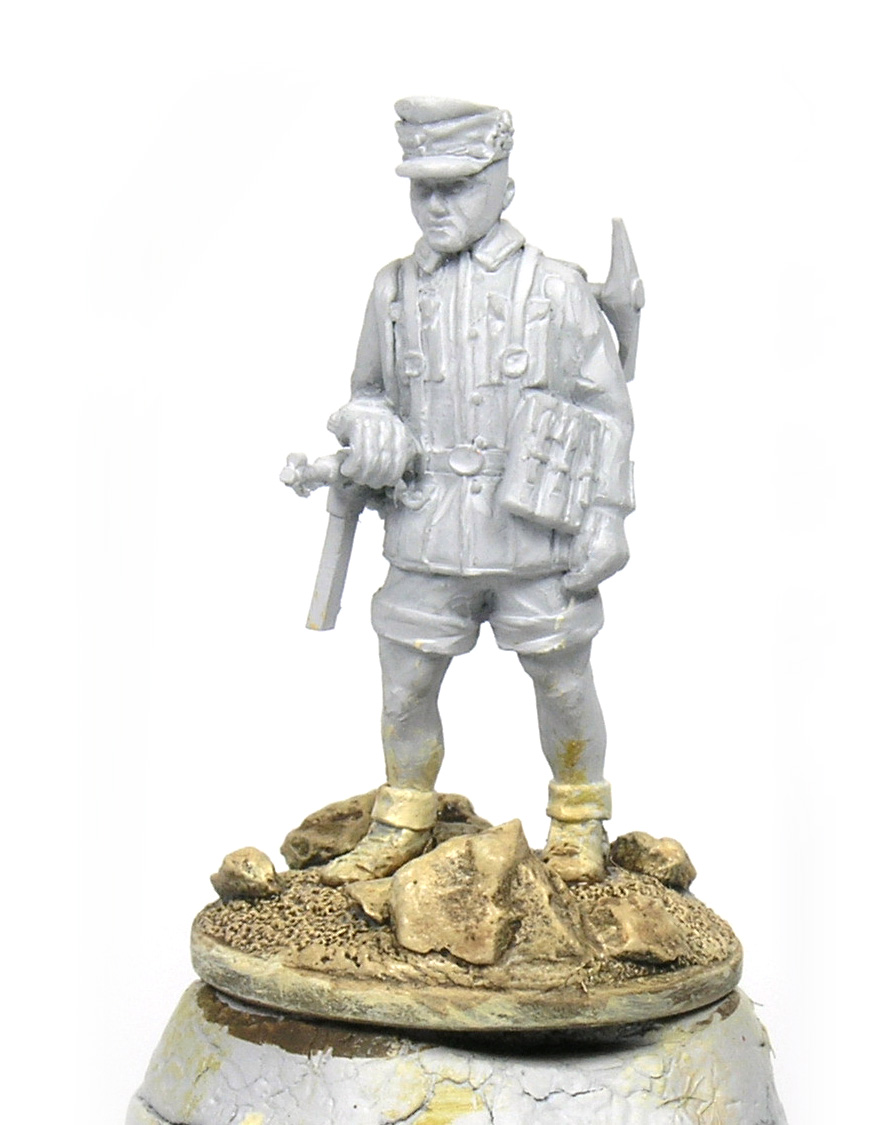
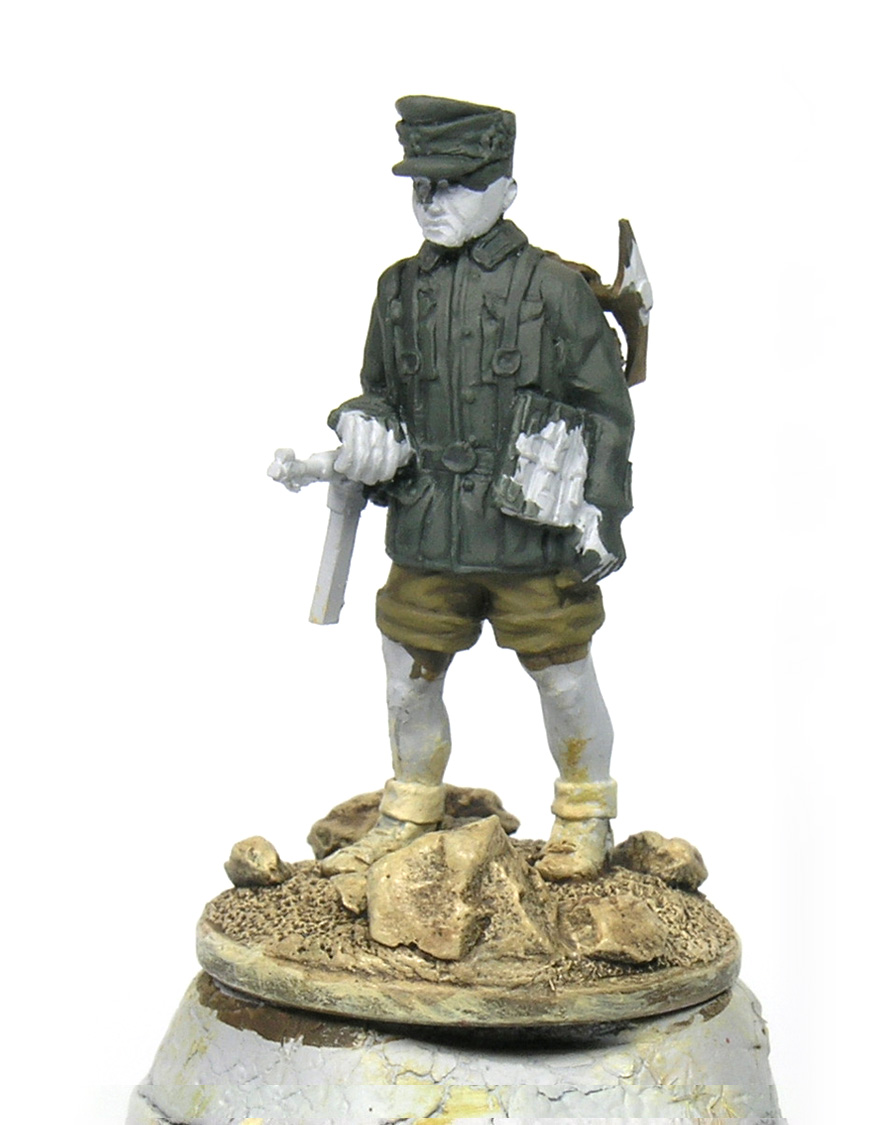
Before starting to paint the miniature, it is important to remove the traces of the casting process with a modelling knife and files. It is also advisable to wash it with soap and water to remove the releasing agent used during the casting. Then, we can glue the miniature on the base. I usually prepare the base with modelling putty texturized with a toothbrush and some natural rocks. Alternatively, you can glue some sand with PVA glue. Finally, we must apply the primer.
The primer serves for two major purposes: (1) it facilitates the adherence of the paint onto the surface, and (2) it makes it more durable. Therefore, we should always apply the primer or undercoat, specially when we are planning to use the miniature to play. I prefer to use the airbrush or a spray to apply the primer, given that in this way we obtain a very thin and homogenous layer of paint. With a brush, we can accidentally leave some marks or even hide some details. I usually use grey primer because this colour is easily covered by any other colour and the effect of grey on these is neutral.
Finally, I prefer to paint the base at this moment because I can easily apply the dry-brush technique without ruining any painted part (which usually happens if you apply the dry-brush at the end). In this case I have painted the base with Chocolate brown (872, Vallejo) and then have dry-brushed two consecutive colours: first Beige brown (875, Vallejo) and then Iraqi sand (819, Vallejo). If you want you can paint the rocks in a different color, such as grey, to create some contrast. Here, I left them in brown.
Step 2 – Uniform
Jacket and cap
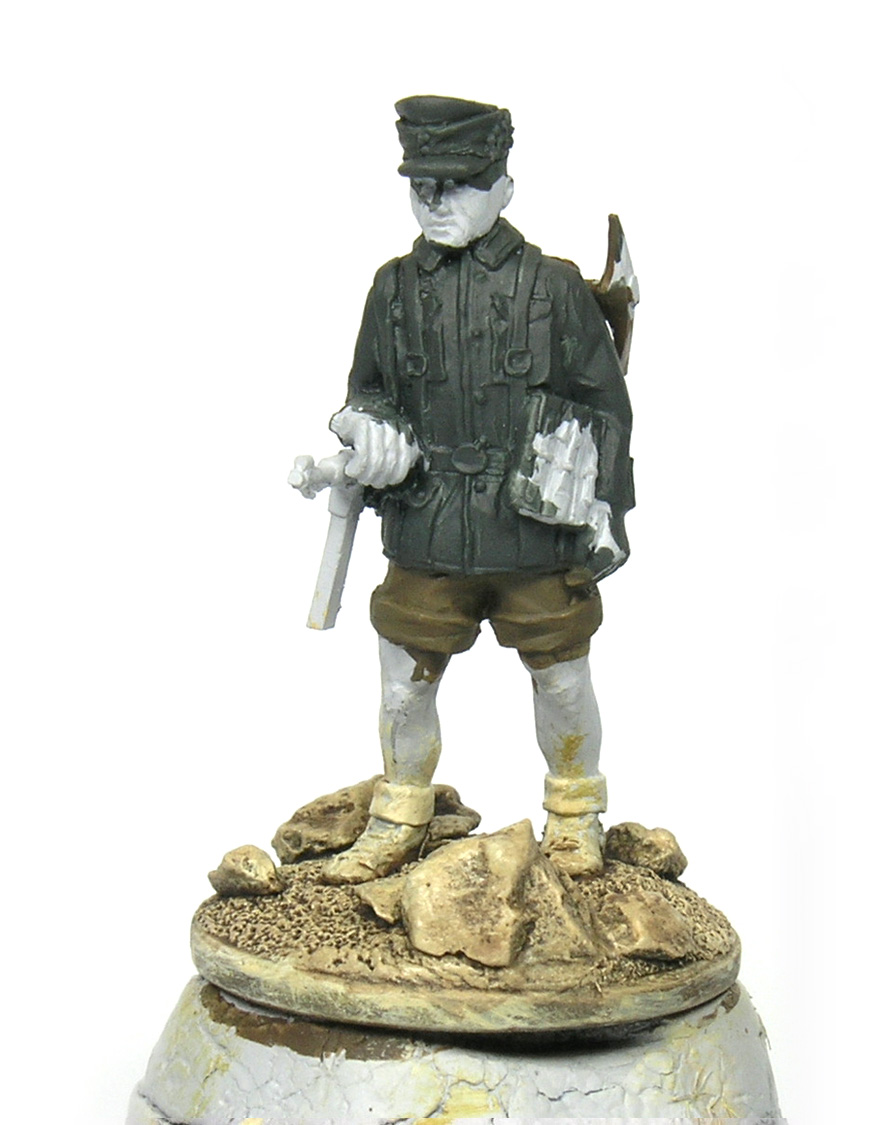
After checking some color references, I decided to paint the cap and jacket with the classical German Feldgrau or green grey and the trousers with a medium brown color.
Remember that it is very important to thin the paint with water. It is not only easier to apply it, but it also prevents the creation of weird textures typically associated with dense paint. I usually thin the paint 50% with water, which means that sometimes I have to apply several layers in order to get a proper coverage. That is the point! This is very useful when applying the highlights, since we can play with the intensity of the colour to create smooth transitions between layers, as you will see later.
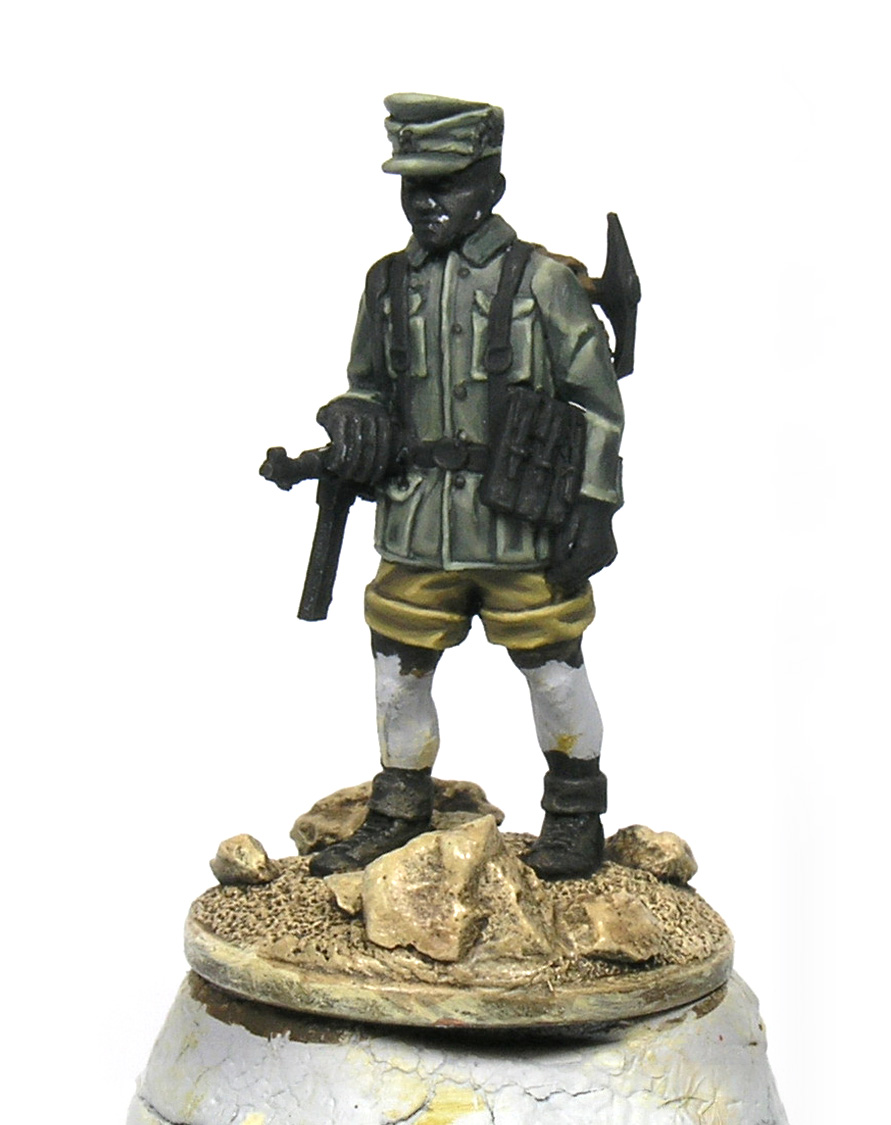
We start painting the jacket and cap with German Cam. Dark Green (979, Vallejo), the darkest colour or shade. To highlight this colour we have three options: (1) we can use white to mute the colour ( = it will look greyish), (2) a yellowish color such as Ice yellow (858, Vallejo) to obtain warmer lights, or (3) a lighter green color such as Afrika Korps Tank Crews (336, Vallejo). All the options are fine, and it will depend on what you want to represent or which combination you like the most. Normally, most of us use white to highlight any colour. However, personally, I do not really like it here because the green color would turn too much into grey. Instead, I prefer to use a yellowish color that preserves the green. The light green colour 336 works exactly in the same way (we preserve the green colour). However, here I finally decided to use Ice yellow because of I am going to use it as well when applying the highlights on the trousers. And by using the same colour to highlight both elements of the uniform (green jacket and brown trousers) we will obtain a more coherent looking in the entire uniform. Therefore, Ice yellow.
I have applied a total of four highlights, by mixing the German Cam. Dark Green with increasing amounts of Ice yellow. You can use the following proportions as a reference: 3:1 > 2:1 > 1:1 > 1:2, where the first number is the amount of green and the second the amount of yellow. This method is the so called painting by layers or layering technique, and the idea is to create smooth transitions from the shade to the final highlight by using at least 5 layers (shade > intermediate 1 > base > intermediate 2 > highlight). This is a little bi more elaborated version of the classical triad system (shade > base > highlight).
When painting the highlights we need to consider couple of points in order to get smooth and nice looking transitions between layers:
- First, we begin applying a general highlight (the 3:1 mix) covering a generous area of the miniature. We basically cover the whole surface except the deepest or darkest parts that are left painted in the dark green color. Next, for each new highlight we progressively reduce the painted area. The final highlight will cover a very small area, just a dot or thin line on the extreme of the a wrinkle, for example. This means that we should never totally cover the previous colour.
- Second, to facilitate the transition between different layers of highlights it is very important to use thinned paint (at least 50% with water). The thinned paint is not fully opaque so that the previous colour will be still visible. The more layers of this thinned paint we apply, the more opaque or intense the colour will be. We can play with this to create smooth transitions (indeed, this is what we know as glaze).
Where to apply the highlights? The easiest option is to follow the wrinkles and other details sculpted in the miniature; and as a rule of thumb, lead the highlights toward the upper part of each area (imagine that the sun is on top of the miniature).
Trousers
Keep in mind the ideas previously discussed. To paint the trousers we start painting the shades with British Uniform (921, Vallejo). Once again we have several options to apply the highlights on this color, including white, yellow or a lighter brown paint such as Iraqi sand. But as I mentioned before, we are going to use Ice yellow (858, Vallejo) here: first to obtain warm lights and second to keep the coherent tone of the uniform.
And once more, I followed the layering technique to paint the highlights. I applied four additional layers by progressively increasing the proportion of Ice yellow in the mixture. That is, 2:1, 1:1, 1:2 and 1:3 (British uniform:Ice yellow). Remember to reduce the area that occupy each new highlight and direct them towards the more exposed areas, such as wrinkles and the folded part of the trousers. To clearly separate the folded part we can paint a very thin line with Chocolate Brown.
Step 3 – Black lining
Before painting the gear such as straps, gun, backpack and so forth we can apply a black line around these elements. I like this because every part of the miniature will be clearly defined, resulting in a clean and sharp painting job. It helps to identify the different parts of the miniature. To do it we can use a thin brush to paint a thin black line surrounding every elements of the miniature: around the straps, a line to separate the jacket from the trousers, etc. I personally find easier to paint the whole piece of equipment with black, as you can see in the picture. Note: do not confuse black lining and shading. The black lining is meant to separate different parts of the miniature, not to paint the shades of a given colour.
Step 4 – Gear
Pouches and Slings
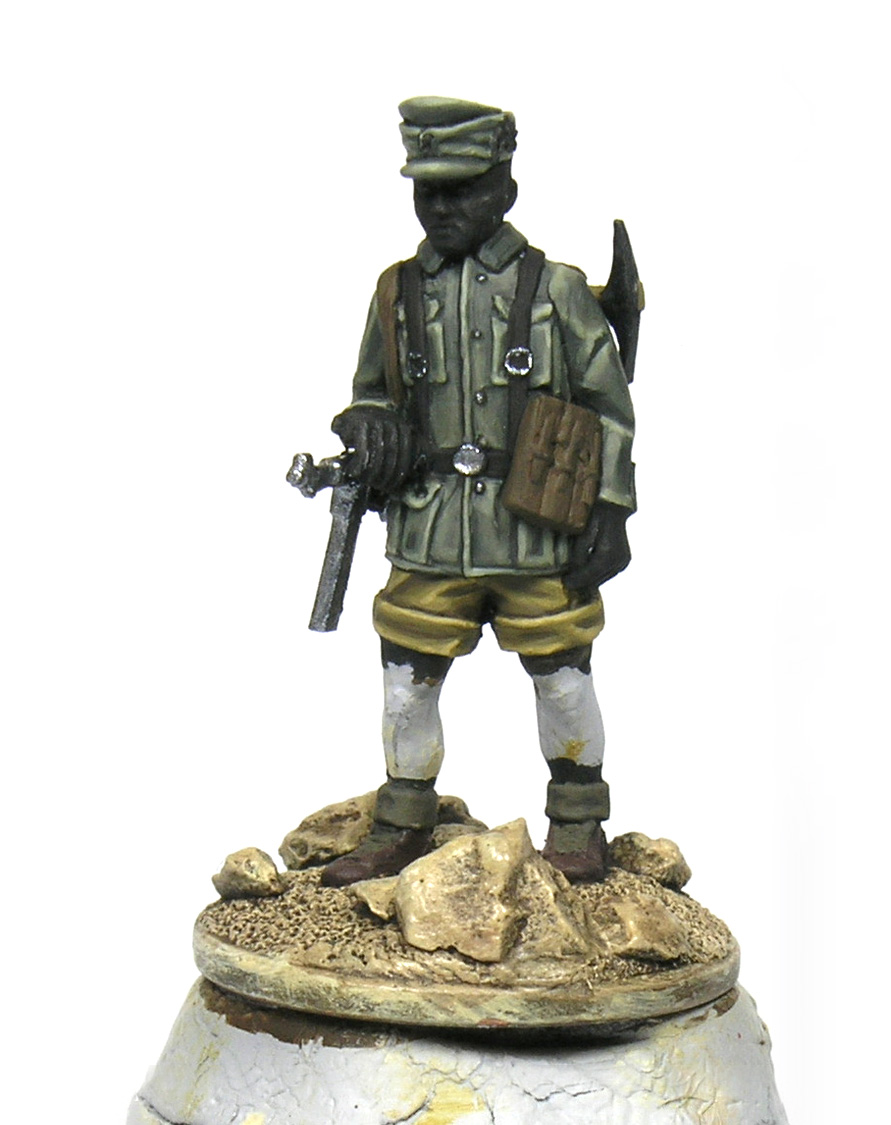
I painted the belt and straps in black leather, and the gun sling and magazine pouches in canvas or beige brown.
To paint the black parts we start painting them with Black, in case we did not do it during the black lining step. To highlight it we can use white or grey (the more obvious options), although I prefer to use pink or Ice yellow. Pink and ice yellow are warm colour (they contain red and yellow respectively), resulting in somehow more natural highlights. The main issue I find using white or grey is that we can easily transform the black into grey. Additionally, we should limit the number of highlights when painting black. I normally apply only two.
To paint the brown pouches and the MP42 sling we start painting these elements with Beige brown (875, Vallejo), which is then mixed with ivory (918, Vallejo) to paint the highlights. As you can see, here I decided to use white/ivory for the highlights rather than ice yellow. Although the resulting brown will be muted (looking grey), it is totally fine and it will create some contrasts with the rest of the miniature. Once more, the choice depends on what you want to represent. If you still want to have everything highlighted in a similar way, you can use ice yellow.
Where to apply the highlights? When highlighting the straps the easiest option is to paint a thin line on each edge of the strap, as you can see in the photo. It is not only visually attractive, but it is also real: the edges are easily worn out. In the case of the pouches, we paint each pouch separately and apply the highlights in the edges. Additionally, we can add more contrast if we paint the straps of the pouches in a different color (which is also real). I painted these straps using the same colours I used for the boots (see below).
MP42 and Pickaxe
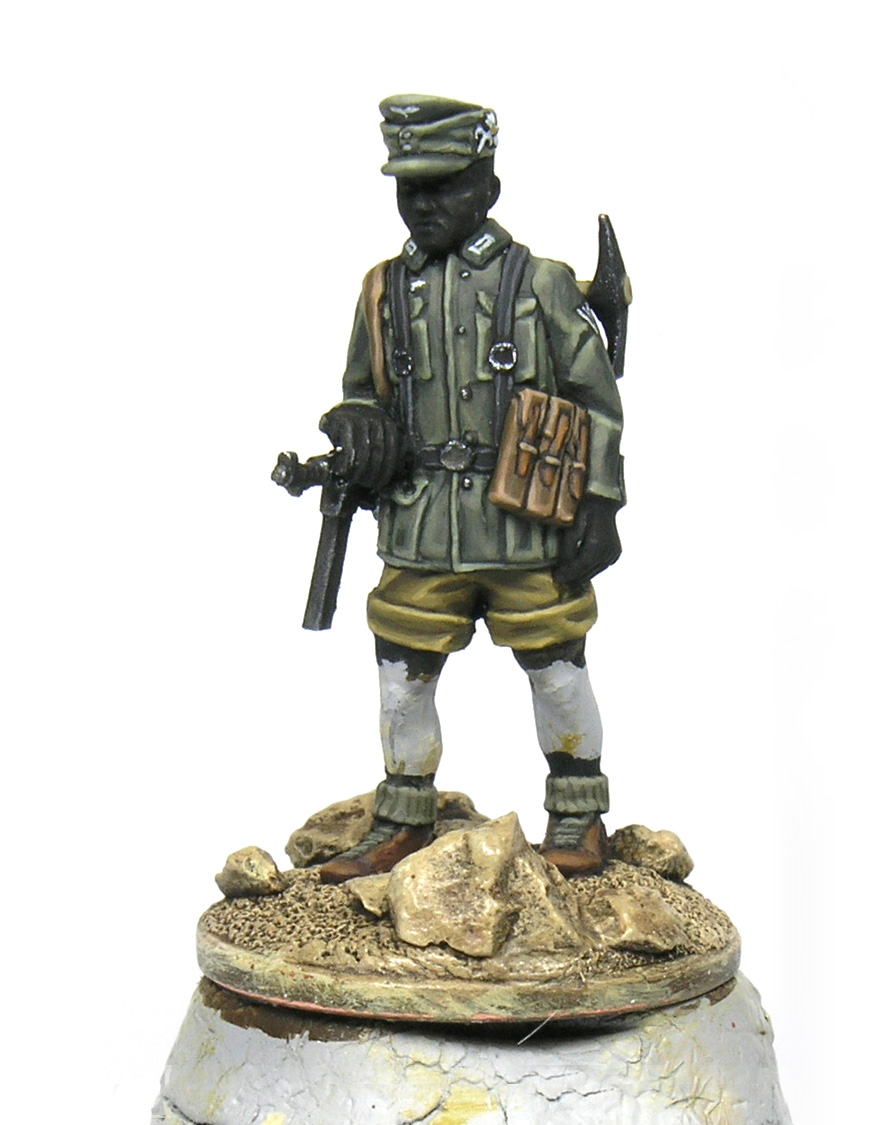
To paint the metallic parts of the MP42 and the pickaxe we can use first Gunmetal grey (863, Vallejo). Then we can apply a black wash such as Nuln oil from Citadel. Or we can mix black paint with water (1:10, where 10 is water). After that, we recover the metallic colour with Gunmetal grey any doing a profiling on the edges of the gun and pickaxe. That is, we paint a thin line on the edges. We can also use this recipe to paint the buckles.
Backpack & Socks
To paint the backpack and socks I have used the same color, Brown violet (887, Vallejo). After painting these areas with this color, we can start applying the highlights by mixing it with ivory or white (once again, you can use ice yellow if you want). Note that I used the same light colour to highlight each colour of the uniform (ice yellow), but I am using white for the gear. The idea of this is to create contrast.
I also normally apply only couple of highlights when painting the gear (normally the surface are much smaller than the uniform, and therefore, we have a smaller are to work). Accordingly, I only apply two highlights. The first was a 1:1 mix of Brown violet and ivory, whereas the second was 1:2. The first one is a general highlight, while the second is limited to the most exposed areas (we follow again the ideas about highlighting discussed before).
In the case of the backpack we follow the wrinkles, while on the socks we paint vertical and parallel lines to simulate the classical pattern of the socks. Additionally, if you want a little bit more of contrast in the backpack (which is quite big) we can add an extra shade with a little bit of Chocolate brown (872, Vallejo). We can paint the straps of the backpack in a different color to get even more contrast (same recipe as the boots).
Boots , straps & canteen
To paint these elements I use the same recipe to paint dark brown leather. First, we paint the whole area with Dark Oxide (302, Vallejo). Next, we apply the first highlight directly with Flat Brown (984, Vallejo). Finally, we apply a second highlight by mixing Flat Brown with Orange Brown (982, Vallejo) in the same proportion (1:1). This pretty much resembles the triad system.
We have already discussed how to apply highlights on straps. To highlight the water bottle we can apply the lights on the sides; and we can use German Cam. Dark Green to paint the lid / beaker that is highlighted with a bit of white. On the other hand, to apply the lights on the boots we can focus on the tip and sides. Note that the bootlaces arepainted in the same color used for the socks, Brown violet.
Step 5 – Skin
To paint the skin you can find a complete step by step in the PaintingWar book (or here).
In short, first we paint the eyes given that now there is no risk to ruin the painted face. First we paint a white oval and then a black line in the middle. Then we apply the skin shade with Beige brown (875 Vallejo) or Tan (066 GC Vallejo). You can chose one or the another depending on what you want to represent. I personally used Beige Brown here to simulate a hardened-skin caused by the challenging conditions of Crete during the Mediterranean summer. In contrast, the Tan color is more reddish. Either way, we paint the whole face except for the eyes. For the first light we mix Beige brown with Dwarf skin (041 GC ) in the same proportion, and for the second we can use directly Dwarf skin. We can apply an extra highlight by mixing Dwarf skin with ivory in the same proportion. Basically we focus the lights on the forehead, cheeks, lips and chin. We can paint the lower lips with 066 Tan to create some contrast. In the case of the hands, we focus the highlights on the knuckles and finger tips. We can paint the space between fingers with Chocolate Brown and a thin brush. Regarding the legs, we can direct the lights toward the upper part of each muscle and focus on the knees.
