
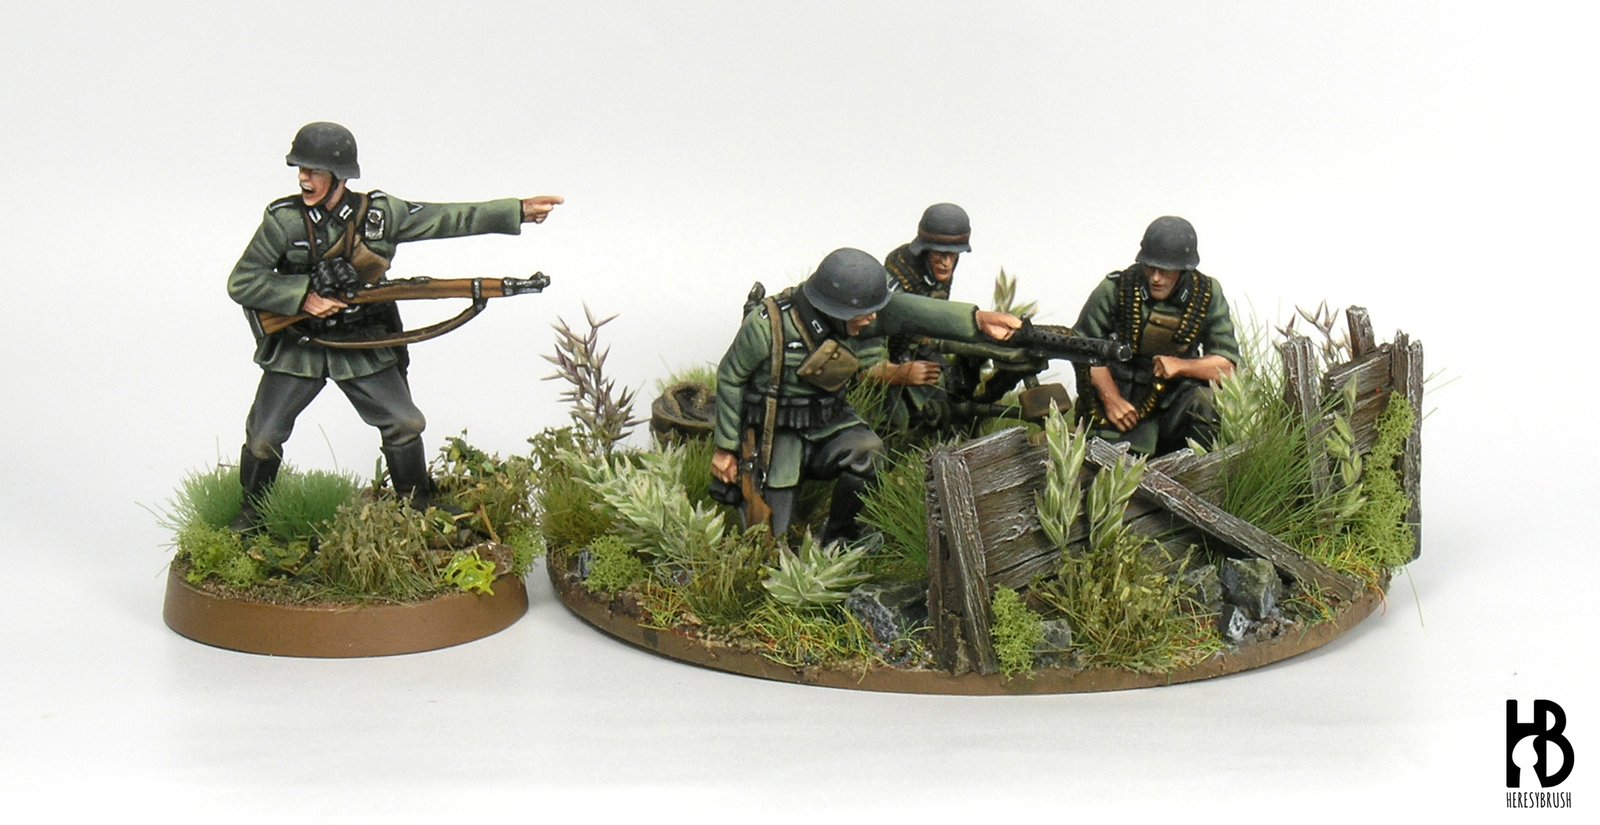
One of the most important part of a miniature -although some times ignored- is the base. Even a poorly painted miniature will look more interesting when placed in a nicely decorated base. And vice versa, sometimes a poorly decorated base might hamper the quality of a very well painted miniature. Today we will see how we can combine different materials to create interesting mixtures of grass and bushes in our wargaming bases. I will use as an example a German HMG team in 28mm by Kromlech Historical. If you wonder how to paint the German uniform, check this guide.
Remember that we have discussed different strategies to create textures and vegetation several times in the blog, but today we will focus more on how to use natural plants. These are some old posts:
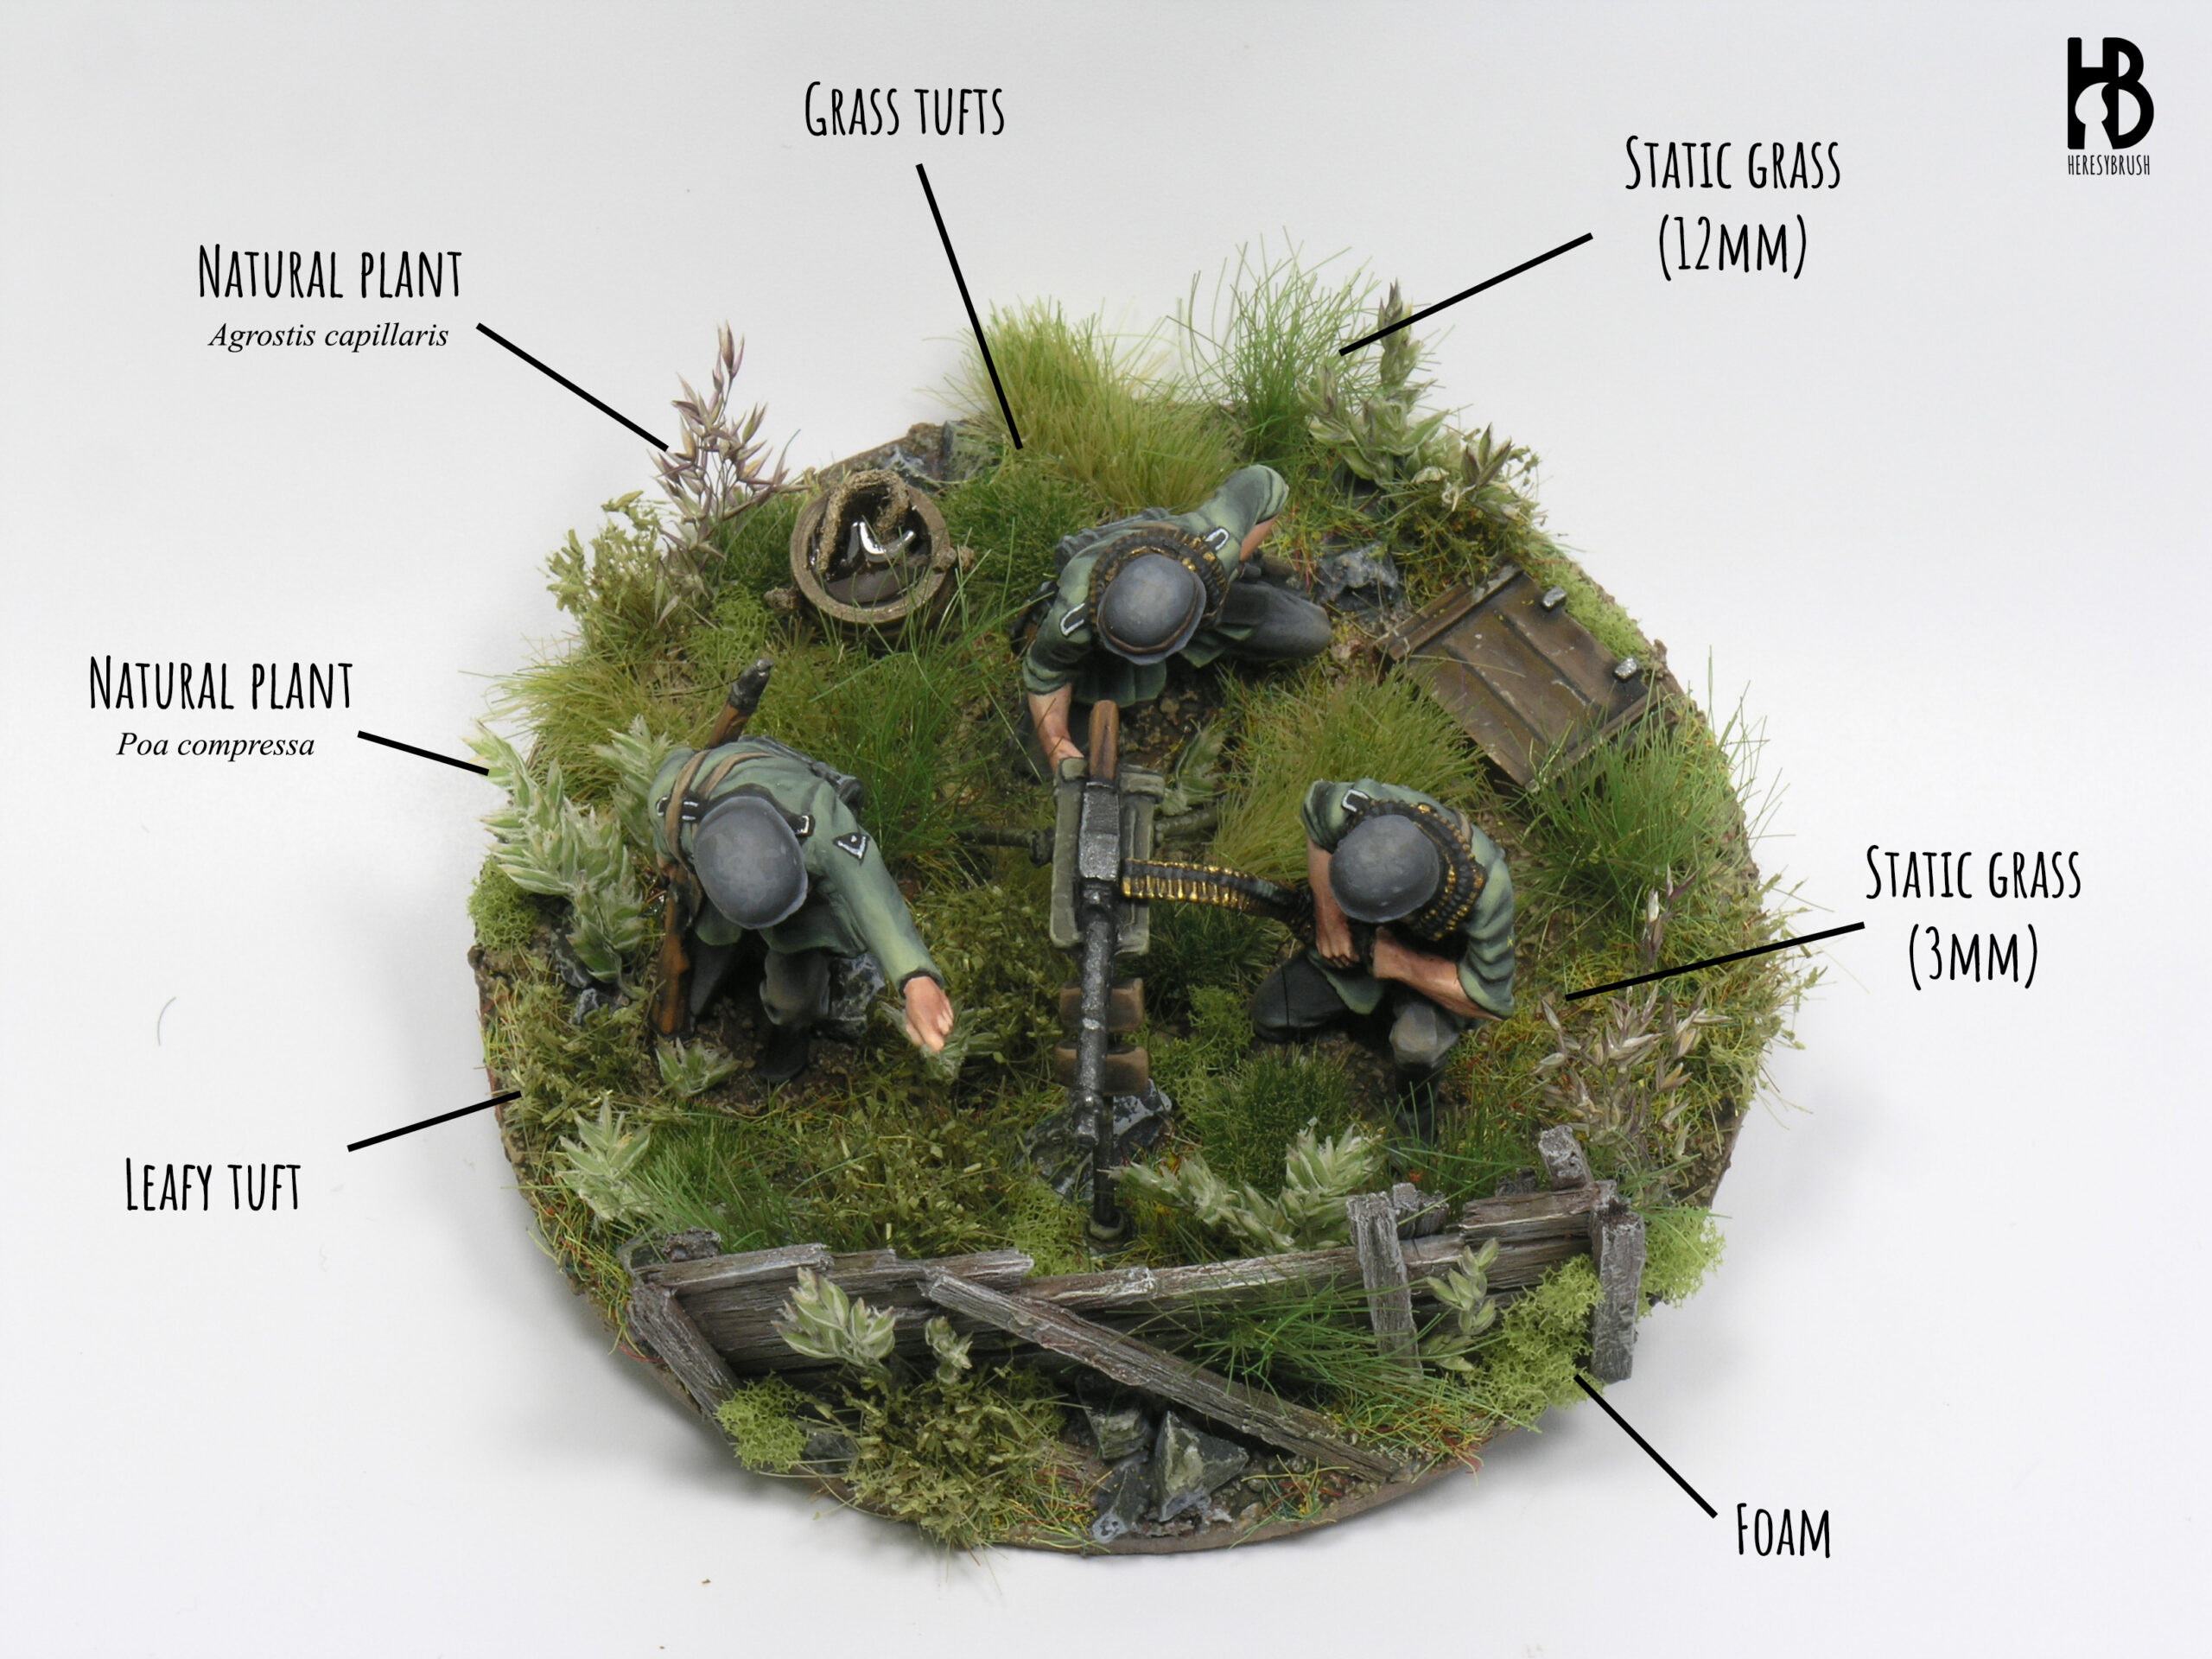
In this particular HMG team I used the textured paint of AMMO Vietnam ground (A.MIG-2109) to create the initial texture, which was applied using a spatula. The great advantage of these textured paints is that they are easy to apply, create an interesting rough texture and are already colored! They save a lot of time. While the textured paint was still wet, I fixed some small modelling rocks. Since the reddish orange color did not fit with the miniatures (Poland, 1939), I repainted it with dark brown tones such as Chocolate brown (872, Vallejo), Beige brown (875, Vallejo) and Iraqi Sand (819, Vallejo) using the dry brush technique. For the rocks I used Graphite (SC-03) followed by a dry brush with white. Before starting to glue the grass and other vegetation materials, we can add green shades on the base using acrylic paints or oils. Here I used a green wash from Citadel (Anthonian Camoshade), applied here and there. Do not cover the whole base, but instead create different points of interest.
If you have the chance you can also add some other elements to the base and try to tell a story. Here, I built a fence using small wooden pieces given that I could imagine the HMG team trying to find a nice cover from where to fire to the enemies. I painted it using different brown colors from the Contrast range of Citadel, followed by a dry brush with Iraqi sand. In addition, I added some green tones as described before.
For the vegetation, we have a big selection of products in the market nowadays. From the classical electrostatic grass to ultra detailed photoetched plants (normally for bigger scales such as 54mm). However, we do not need a lot of these products. We can combine a few them to get interesting results. For example, for the HMG team I used the following:
- Static grass, short (3mm): a “summer” mixture of light green, yellow and brown, plus some green fine sawdust. I prepared this mixture myself, although you can use any ready-made product. Note that I normally use very short grass (3mm) for 28mm and specially 15mm miniatures.
- Static grass, long (12mm): long fibers. I used a dark green color from Greenstuff world.
- Grass tufts: these are quite trendy nowadays and we can basically find any color, size and texture. I personally love the selection and quality of Tajima1. I used two green tones of different sizes, as well as leafy tufts. All from Tajima.
- Tree bush (foam): small pieces of green foam from Greenstuff world.
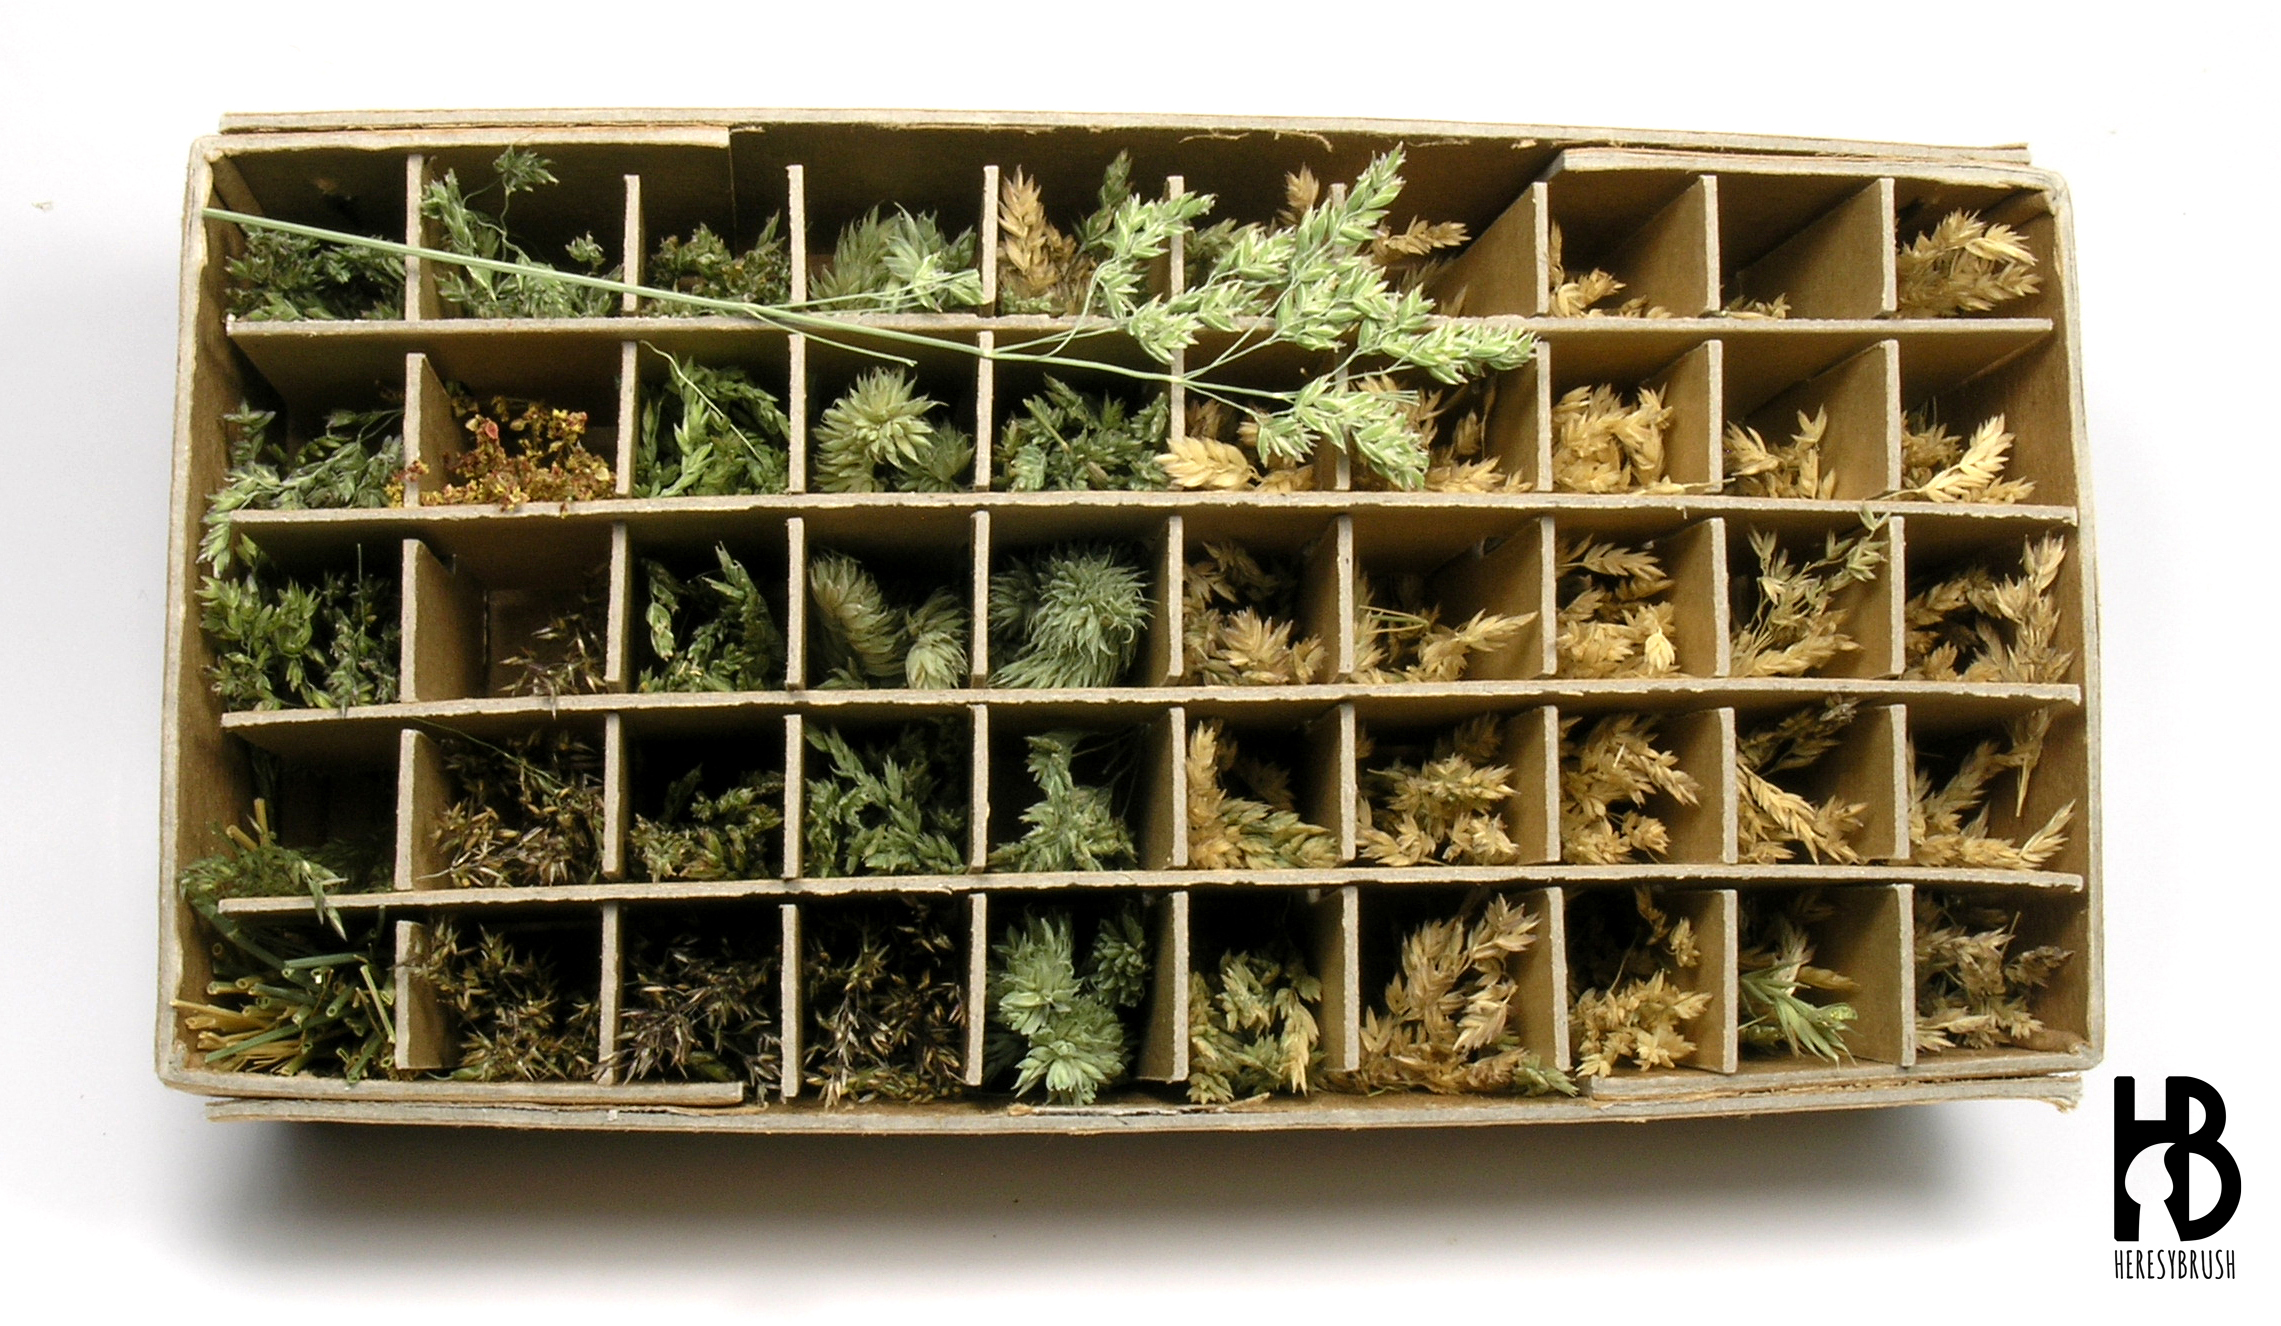
- Natural plants: although risky (they might be out of scale), the textures and colors of natural plants create very interesting contrasts. And… they are real!
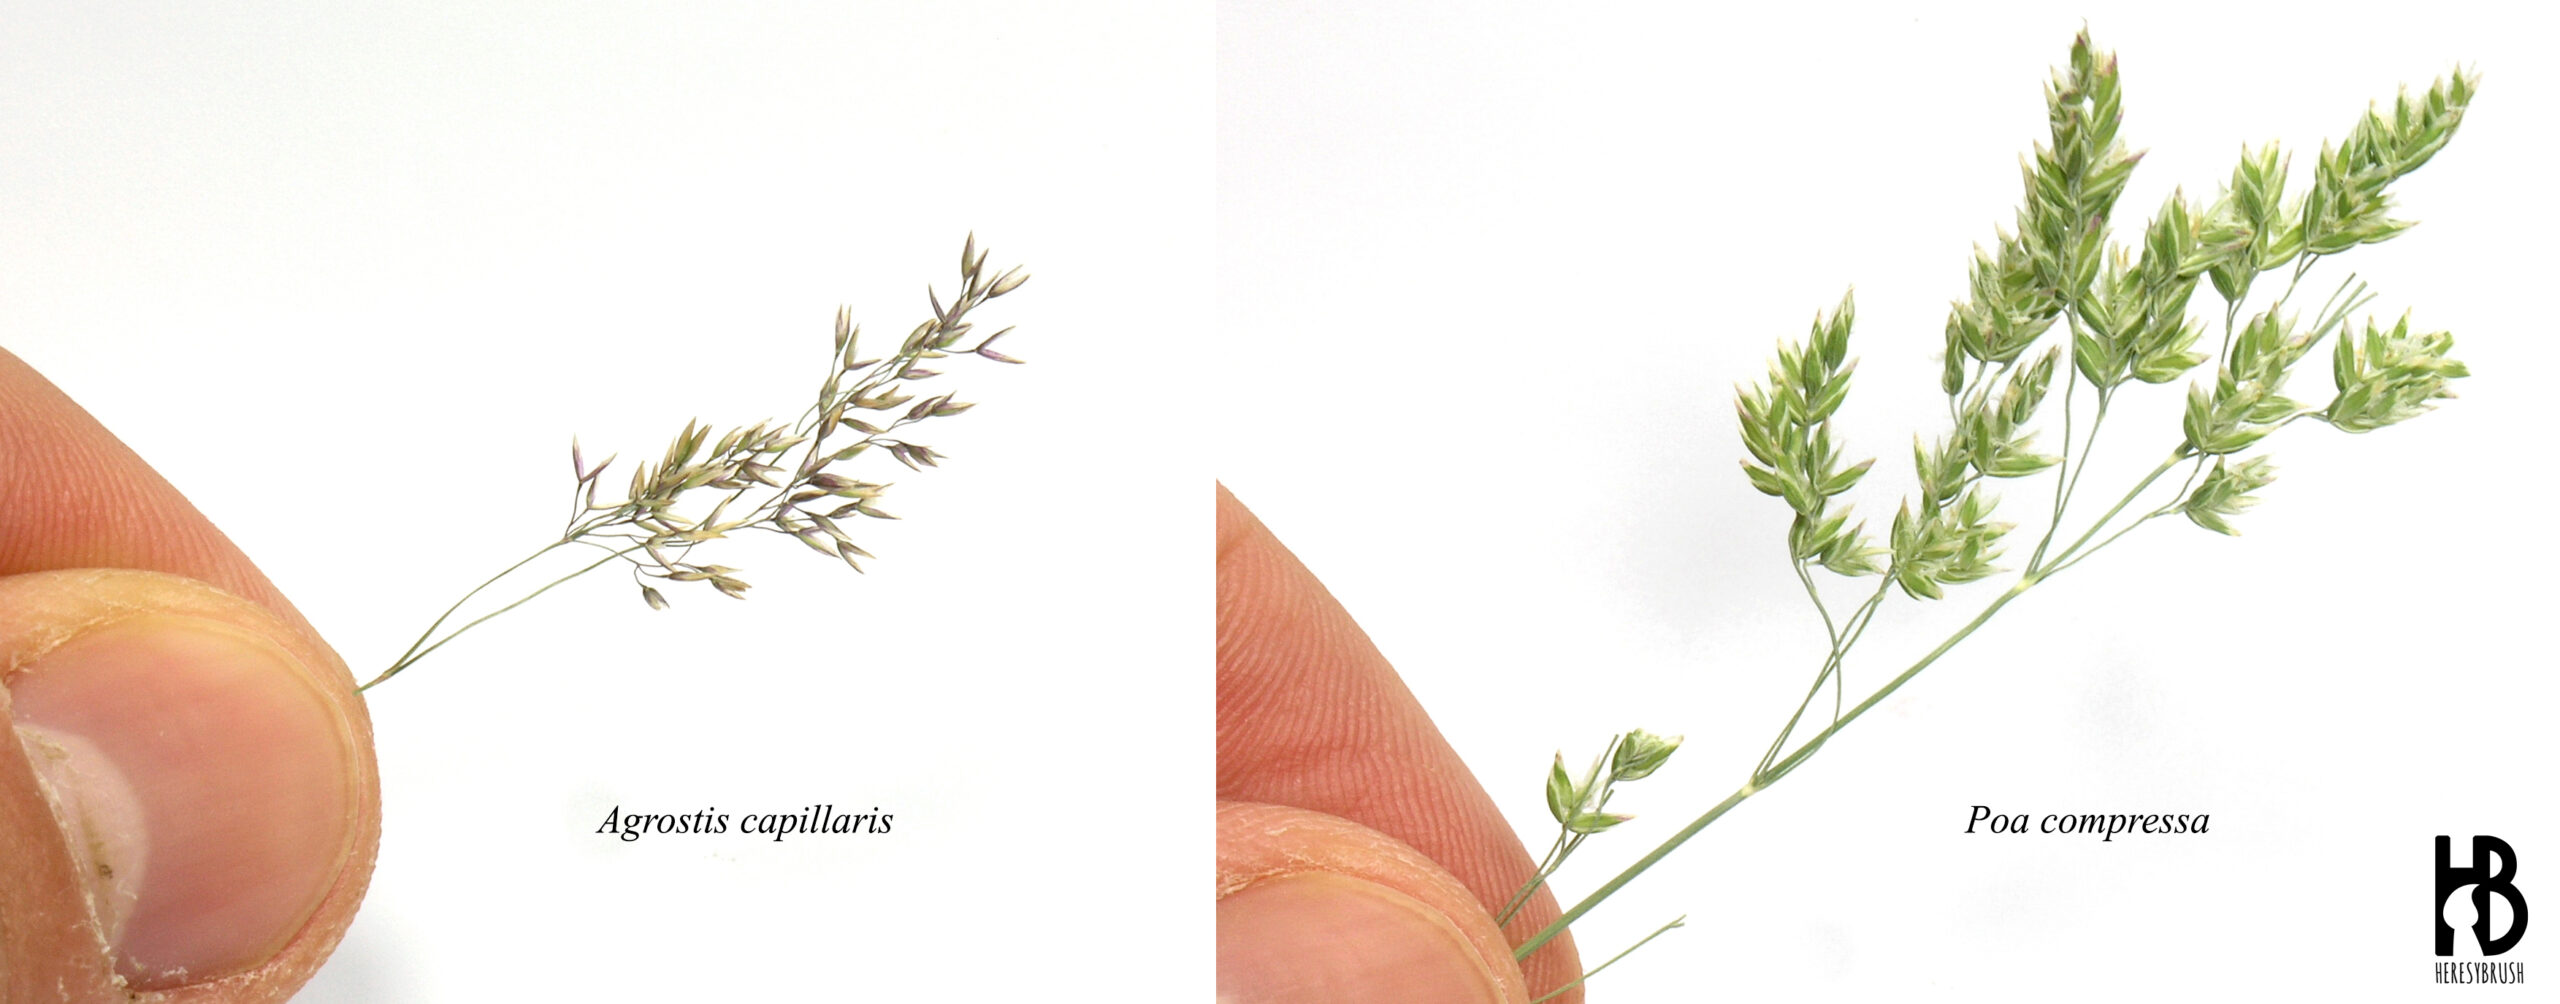
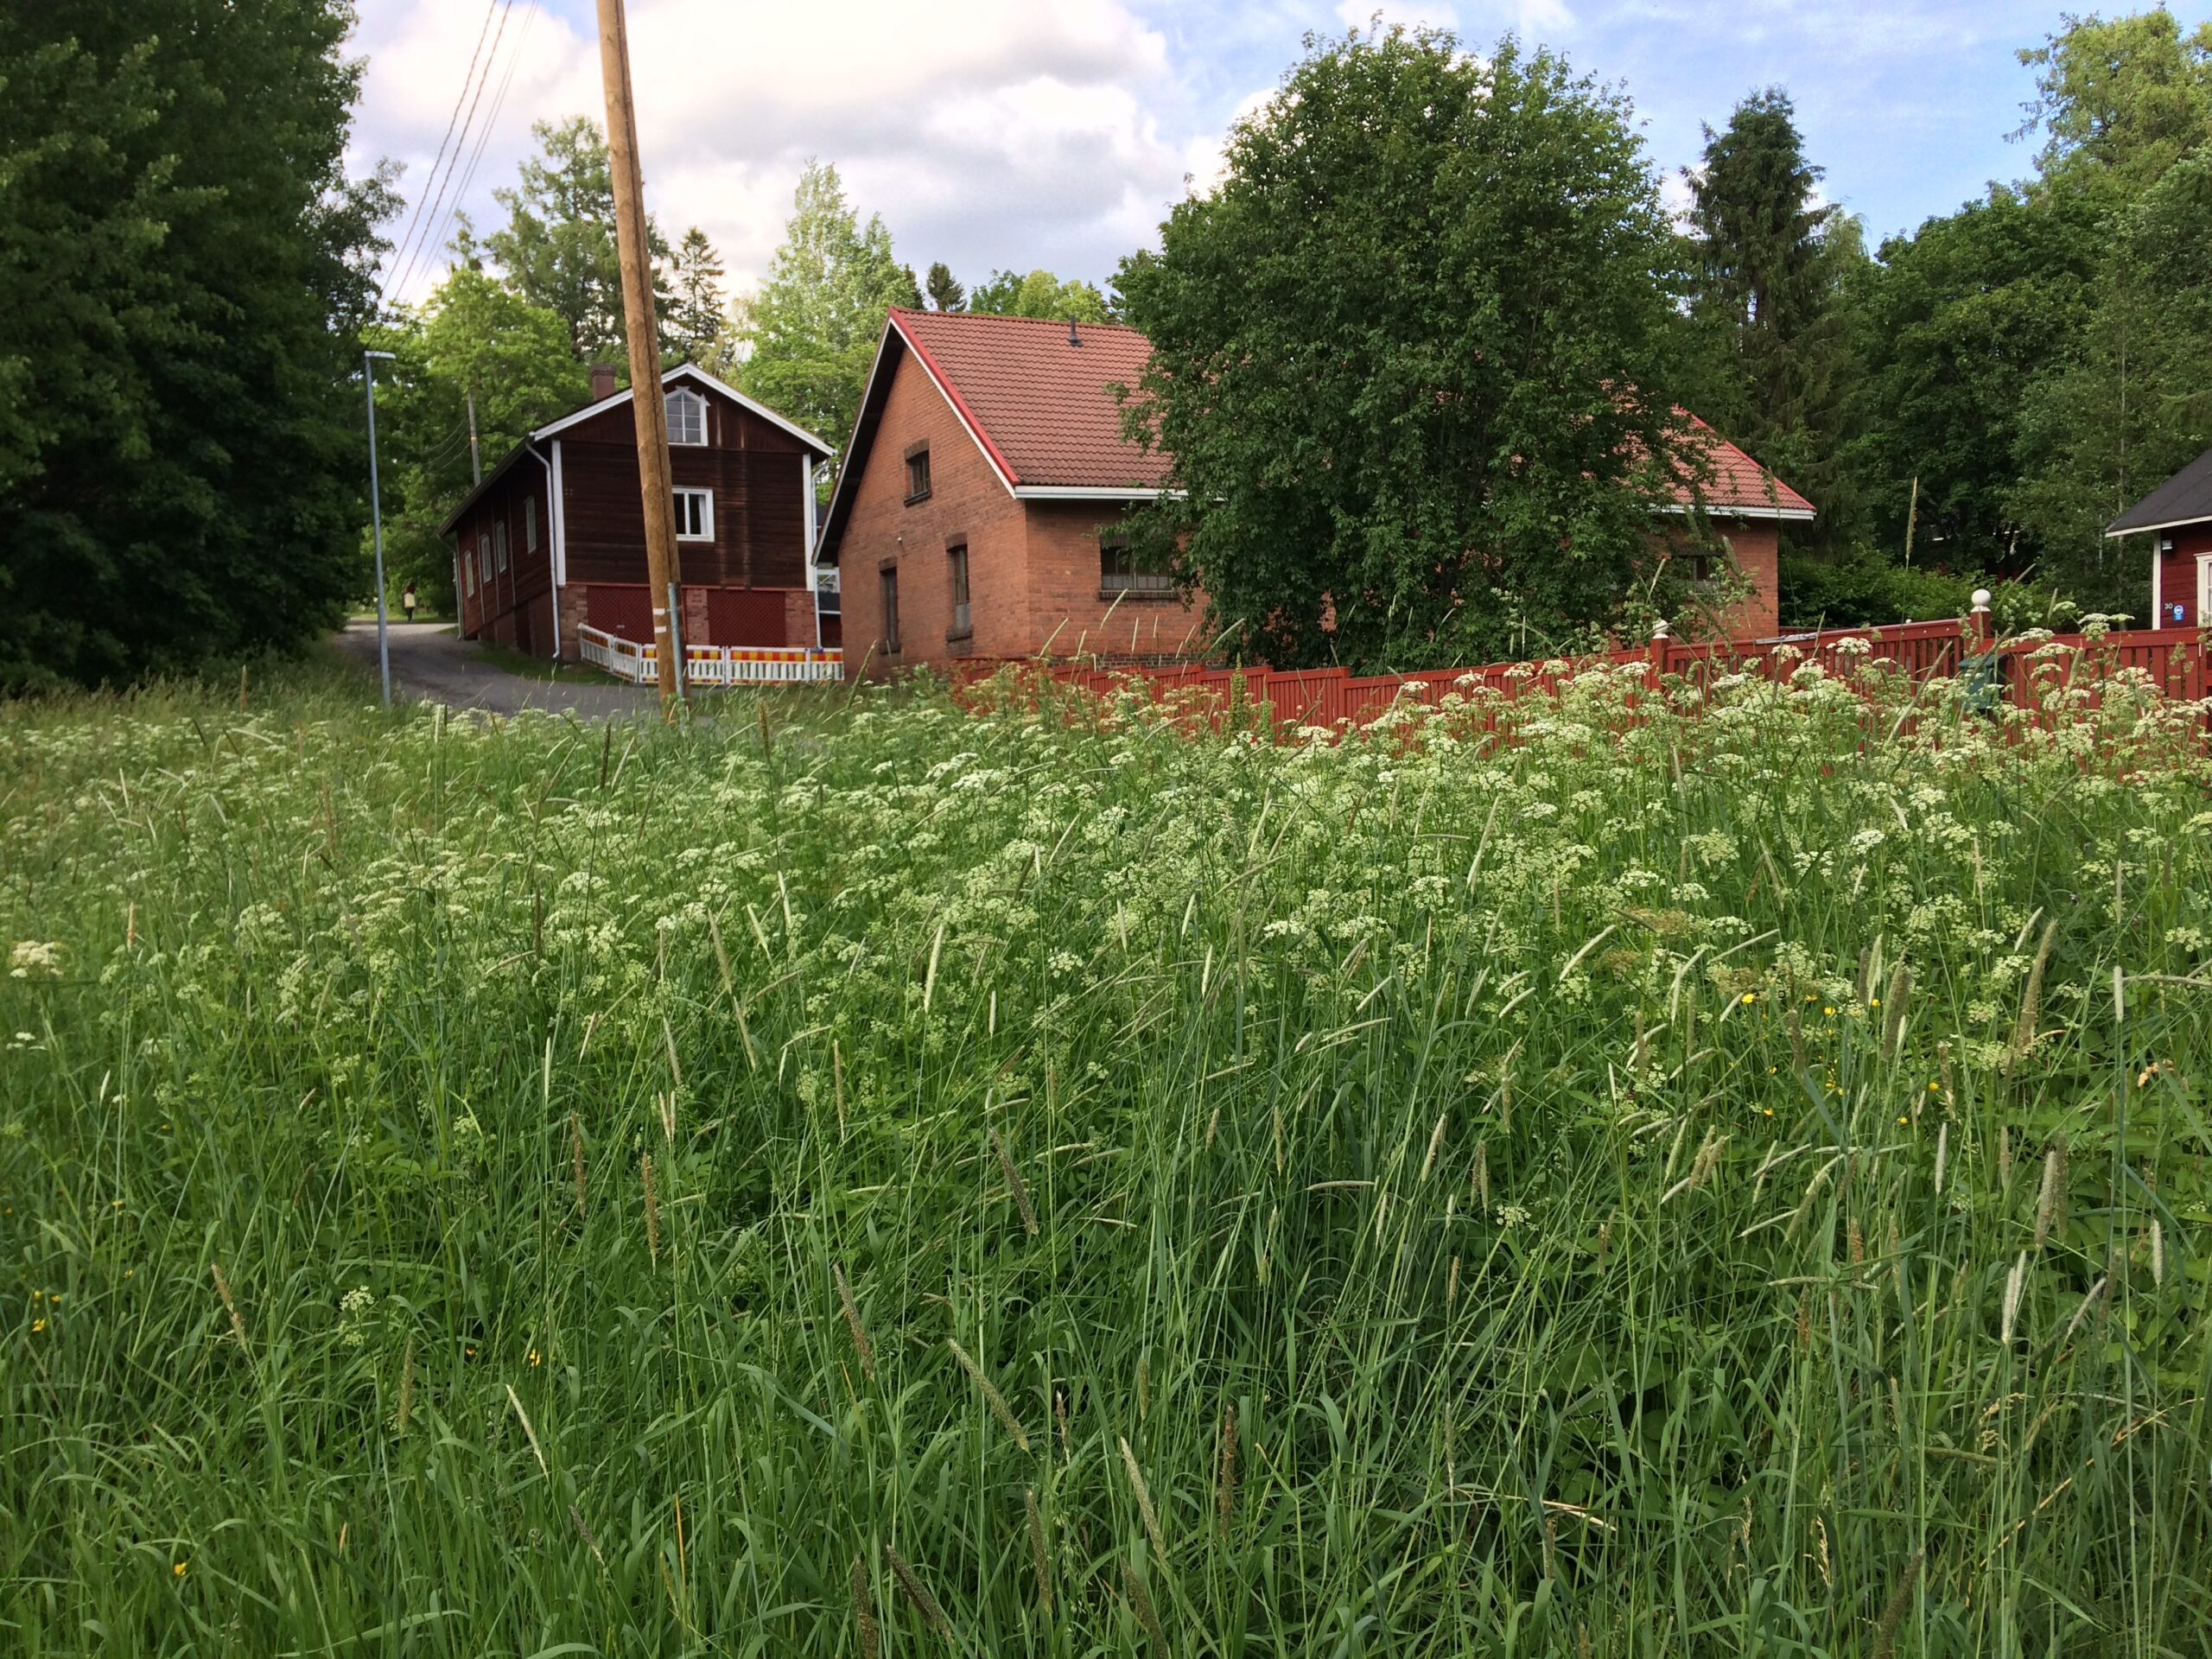
I have actually never used real plants on my miniatures before. But inspired by other modellers, I decided to give them a chance. Last summer, while visiting some of my girlfriend’s relatives I found an idyllic Finnish landscape full of poaceae plants. While having a walk I started to collect a bunch of plants, which I think had the right size for my tiny wargaming models. I particularly found very interesting two species: Poa compressa and Agrostis capillaris, which I found in different shades of green and yellow. Just have a walk in the nearest park or countryside area and have a look at the plants growing around! The options are infinite. However, although the size of most of these plants is fine for 28mm miniatures, for 15mm we need to be more careful.
Although I read somewhere that I should somehow fix the natural plants before using them, I followed what I learnt in the botany course during my years at University. I put the plants on top of a pile of newspaper and let them dry for one week (I did not put anything on top of them!!). After that, the colour of the plants was slightly paler, but the green plants were still green and the yellow ones, yellow. In addition, they were still flexible. That is, the small leaves did not fall apart. After cutting them in more handy pieces, I put them in a box.


Said this, this was the process I followed to create the vegetation:
- I started gluing the mixture of small static grass (3mm) using PVA glue thinned with a little bit of water. First I applied the glue with a brush, and then I added the grass. I only covered a small part of the base with this, since I was planning to add many more plants and I also wanted to leave some soil visible.
- I used the long static grass (12mm) to create some sort of bushes or long plants. I took a bunch of fibers between two fingers and sort them so that all the them were aligned. Then, while holding the bunch of fibers from one extreme, I put some PVA glue on the other extreme. And I finally placed it on the base.
- I added grass tufts, once again, randomly. Try to combine different sizes and do not follow any pattern. For example, you can put several tufts together in one part of the base, while in the other part there is only one. Try to be asymmetric! The leafy tufts (and flowers) are very cool, but do not put too many since they catch too much attention.
- I normally use the foam to simulate creepers, although you can also buy specific products for this. For example, here I put several pieces of foam “climbing” the fence and in several random places.
- Natural plants! After cutting them, I used PVA glue to fix the stem on the base using tweezers. Once more, try to avoid patterns.

And this is all. In addition, you can slightly paint the vegetation using the dry brush technique if you want to change the color of some plants. For example, after gluing everything you might realize that one particular type of grass tufts is too yellowish rather than deep green. Therefore, you can apply a green dry brush to change the color. Or you can use this approach to create a more harmonic combination of colors by dry brushing the same color all around.
This is really lovely work. I’m impressed by the natural plants you used.
You are very kind! This was the first time using natural plants, but I was quiet pleased with the results 🙂