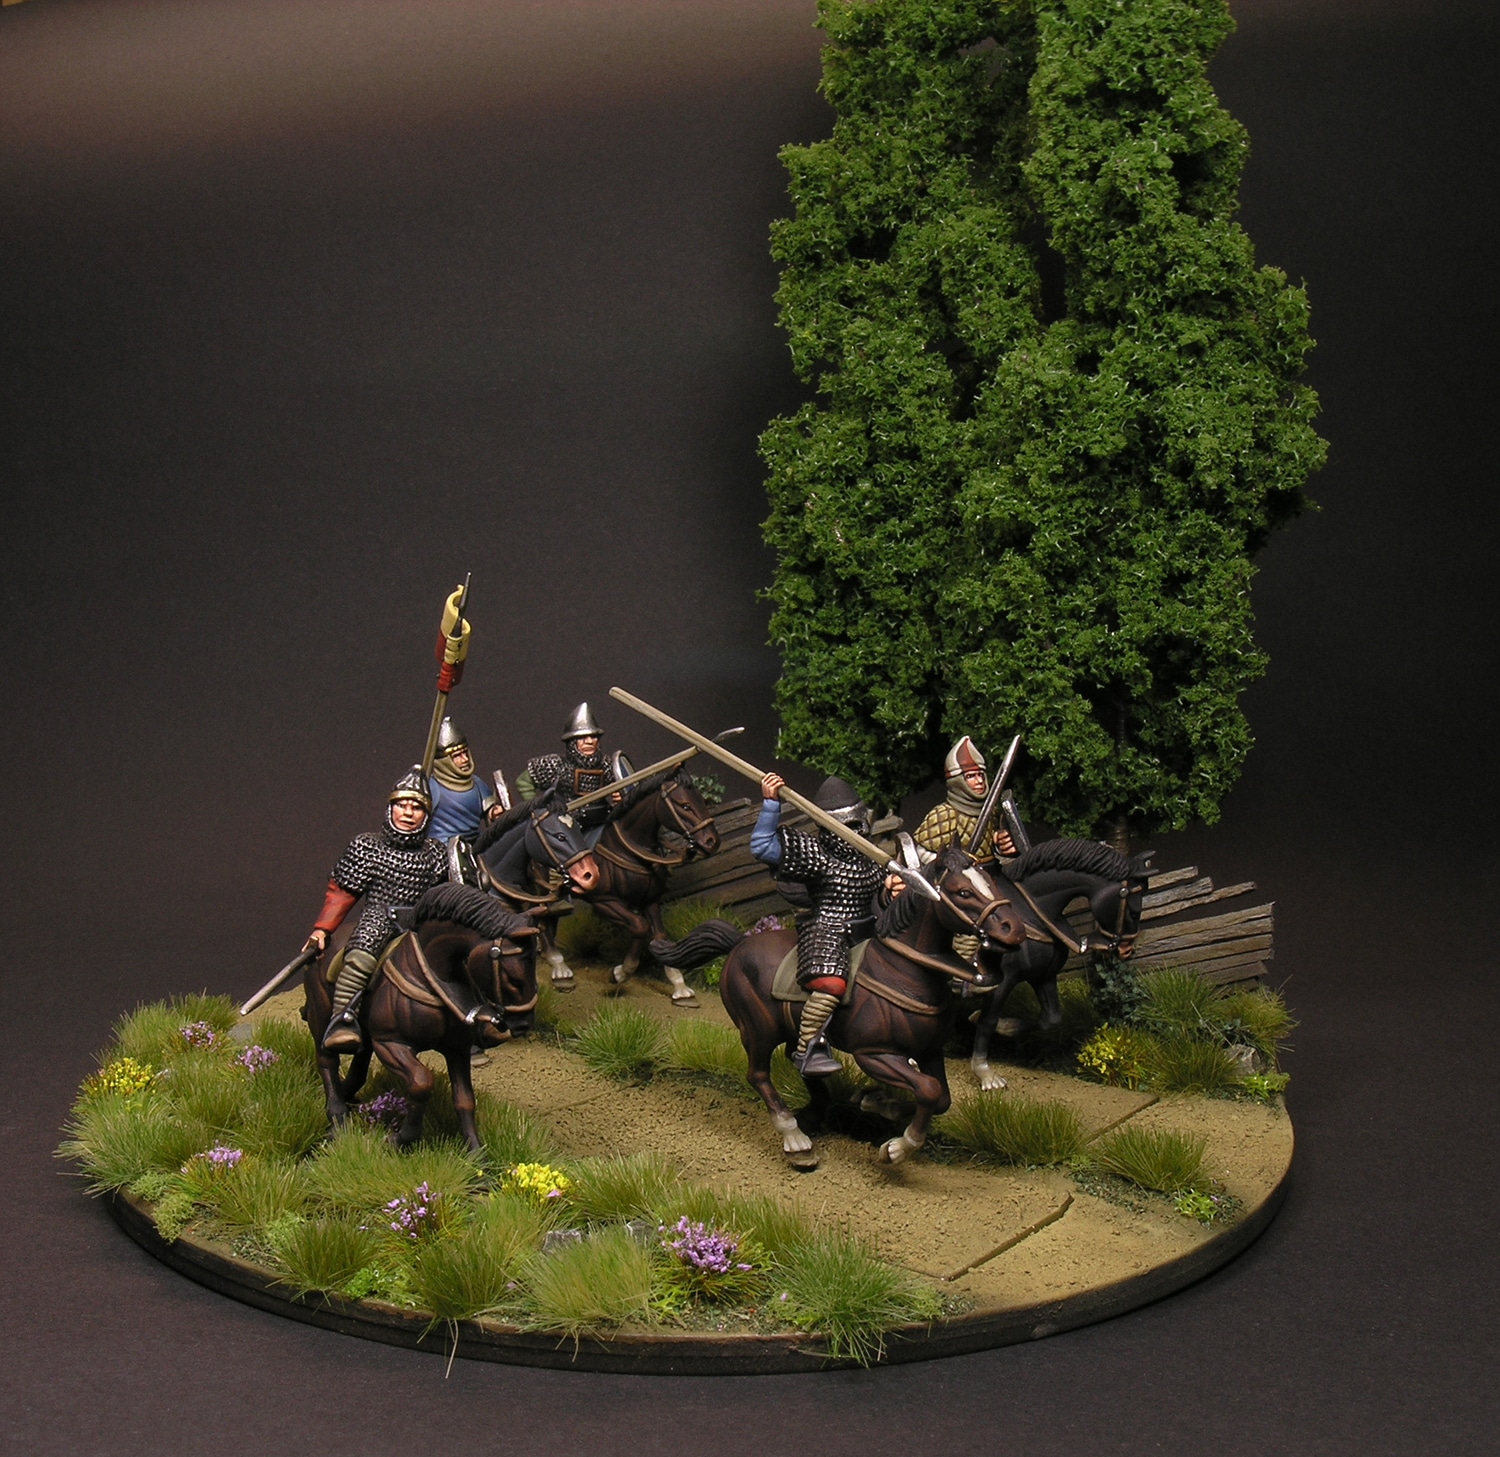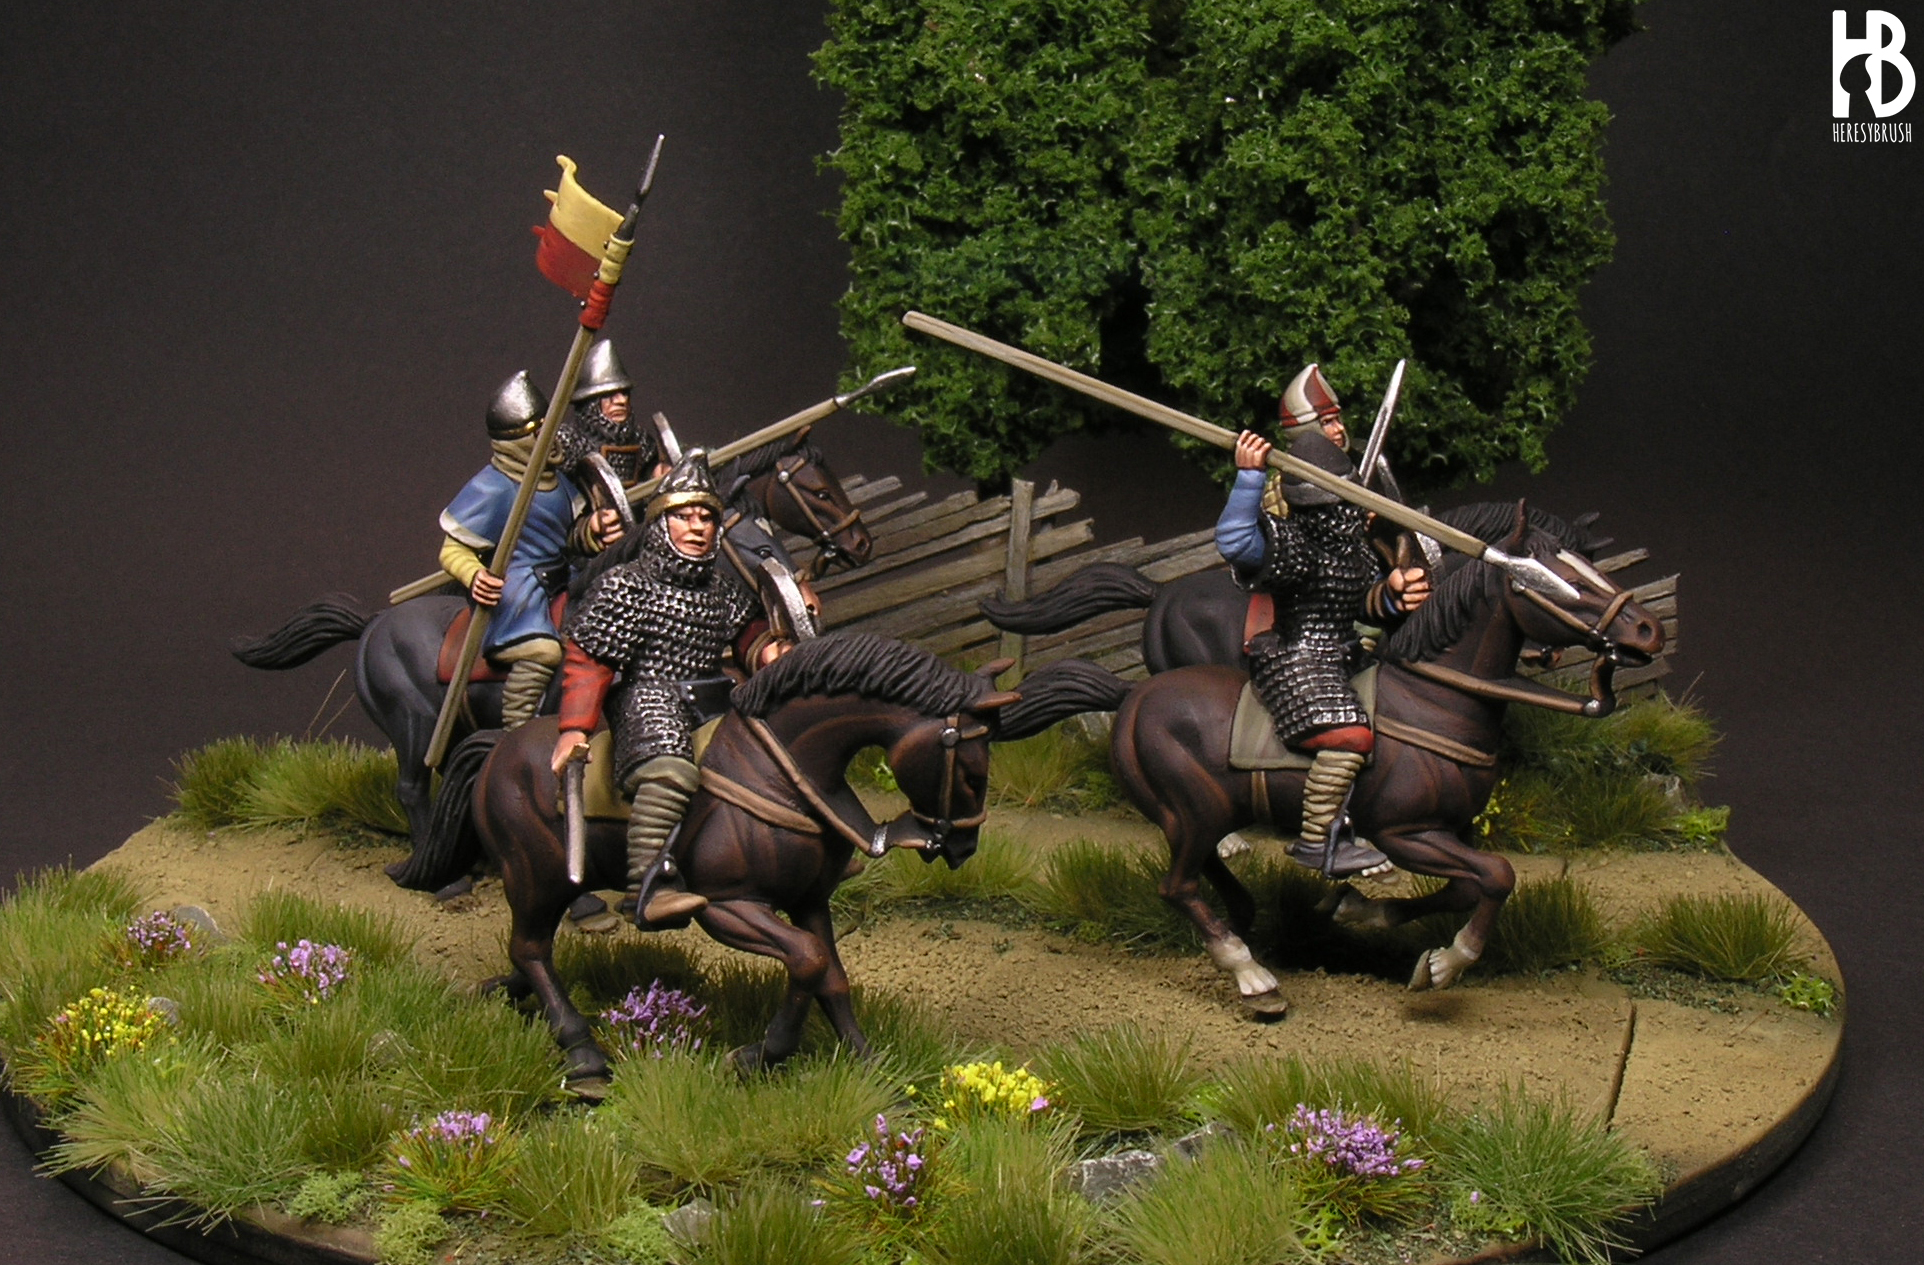
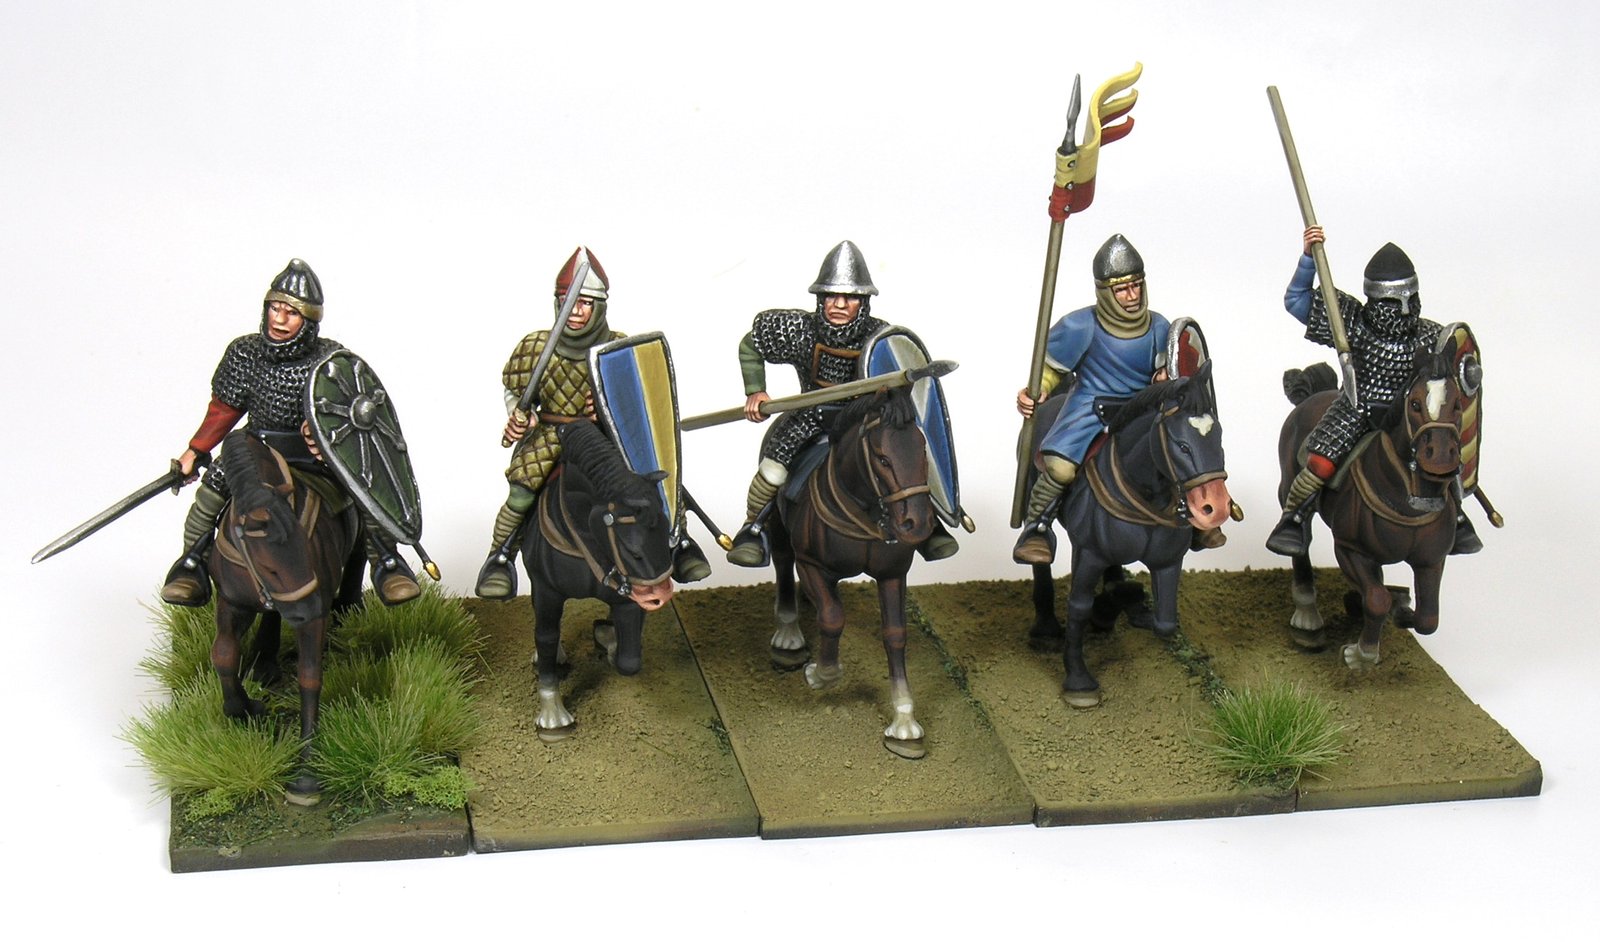
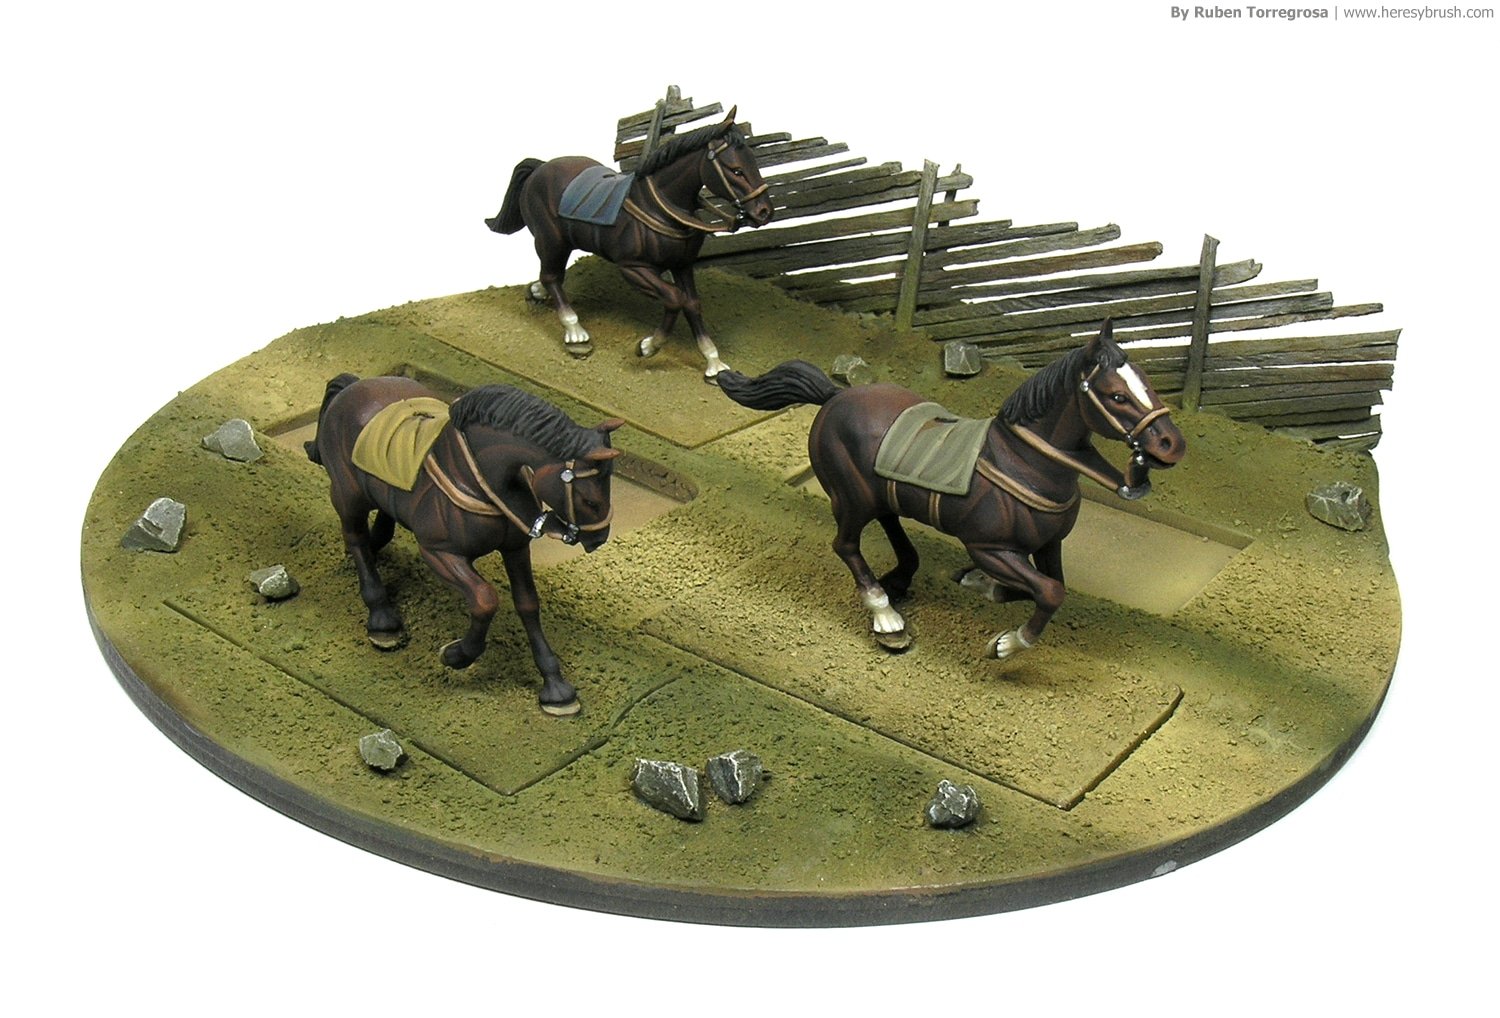
I was so fortunate when people from Wargames: Soldiers & Strategy asked me for preparing a cover for the special Salute issue. They wanted me to prepare a vignette or small scene with some 28mm Italo-Norman knights from Conquest Games; and I decided to build a diorama where a number of knights are crossing a meadow. I would like to share with you some hints about how I built it, although you will find more information in the WS&S 84 issue.
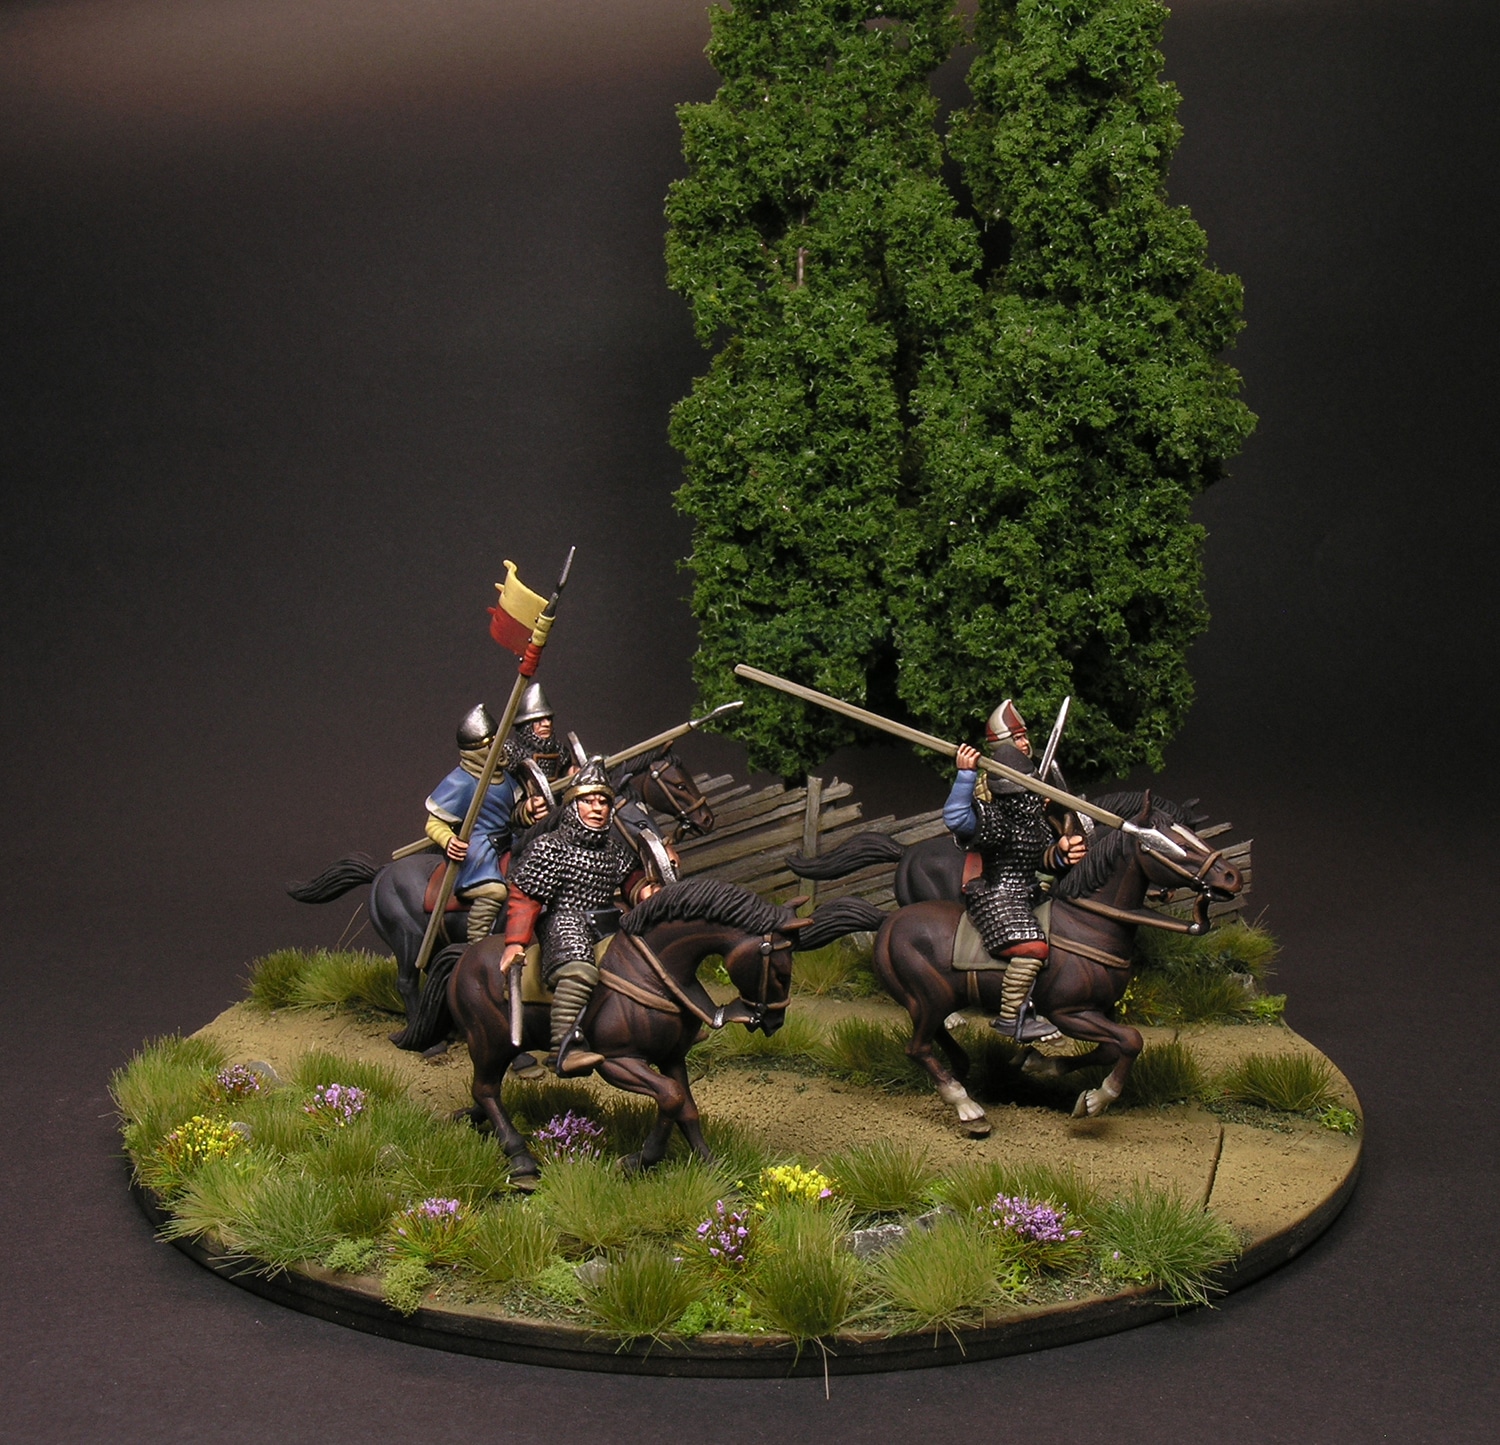
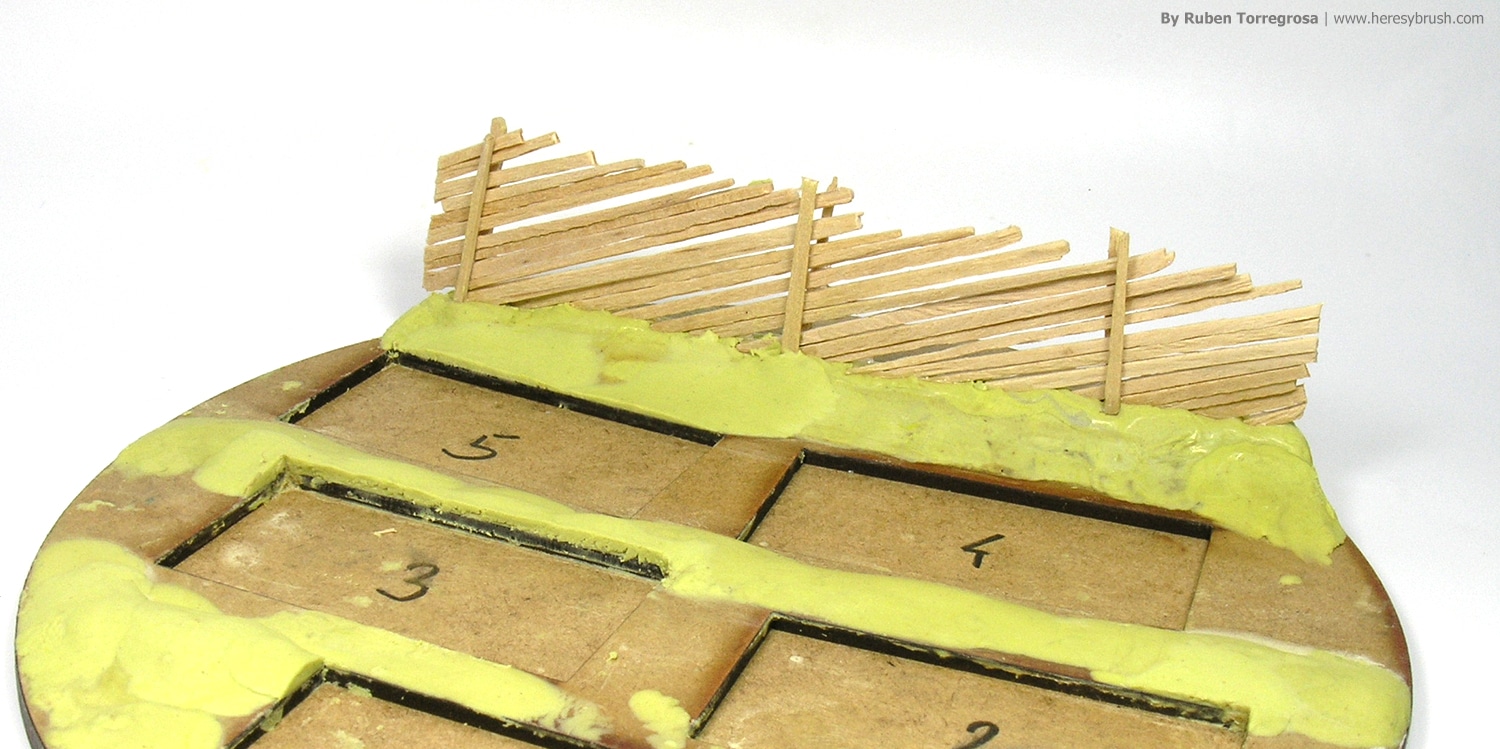
Prior taking the putty and knife, I took a piece of paper and a ruler in order to design the vignette and determine the size of the base and the distribution of the miniatures and other elements. I decided to use five knights and a 15 cm circular base. And I concluded to cover two thirds of the base with a meadow crossed by a road with a couple of trees in the back (from 4Ground) separated by a wooden fence. Because of the special occasion, WSS people were able to obtain from Warbases the specific DM base that I needed with the holes for the horse bases. Actually, the idea was to have the chance to remove the knights from the base and play with them, and of course to facilitate the transport.
The “putty time” finally arrived! I used standard Milliput (red box) to create some irregularities on the terrain. I created the road with two elevations on both sides, plus a smaller elevation on the center. The elevation in the back was higher in order to create a good base for the fence. If you have never used this type of putty, it is recommendable to use a bit of water when handling it. Nevertheless, it is not needed when you mix the two components (actually, this is not a good idea because as soon as the putty is hydrated, it is very difficult to keep it together). To build the fence I simply used matches and white glue. To be honest, I do not know if the style of the fence was common in Italy by that time. But I had never seen it before coming to Finland, and I really like it. I basically sunk three pair of sticks or matches at regular positions; and I piled on more matches diagonally between each vertical pair, as you can see in the photo.
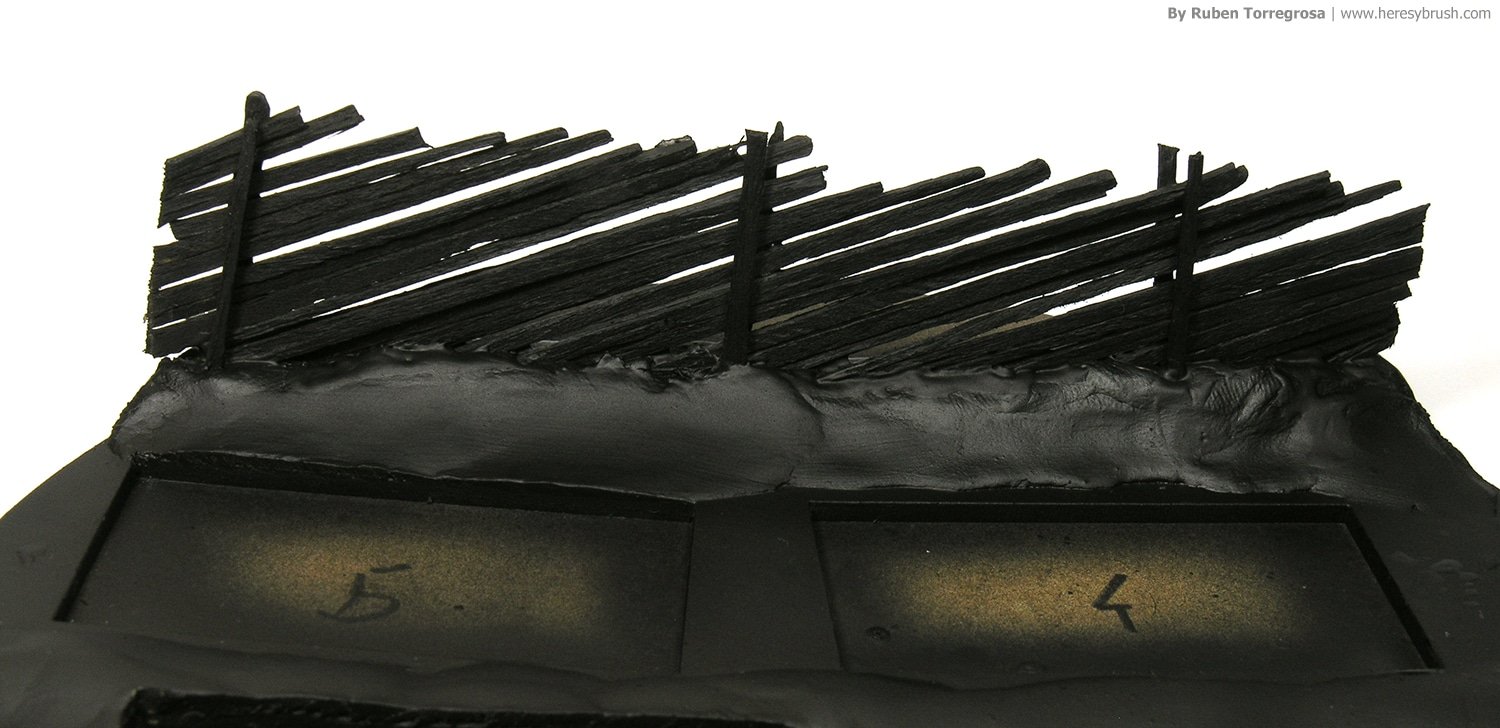
The putty cured overnight and then I applied a substantial black primer coat using the airbrush and Surface Primer from AMMO. Note! Primers are never diluted!
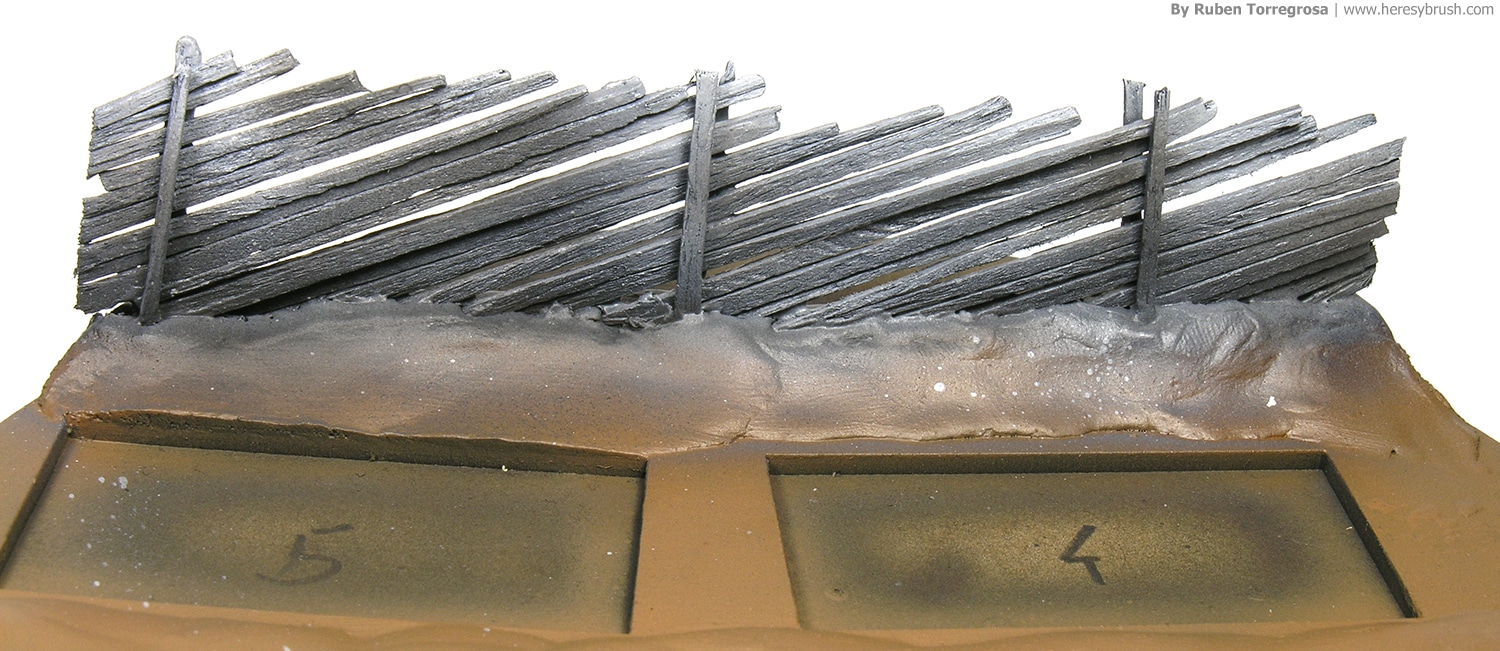
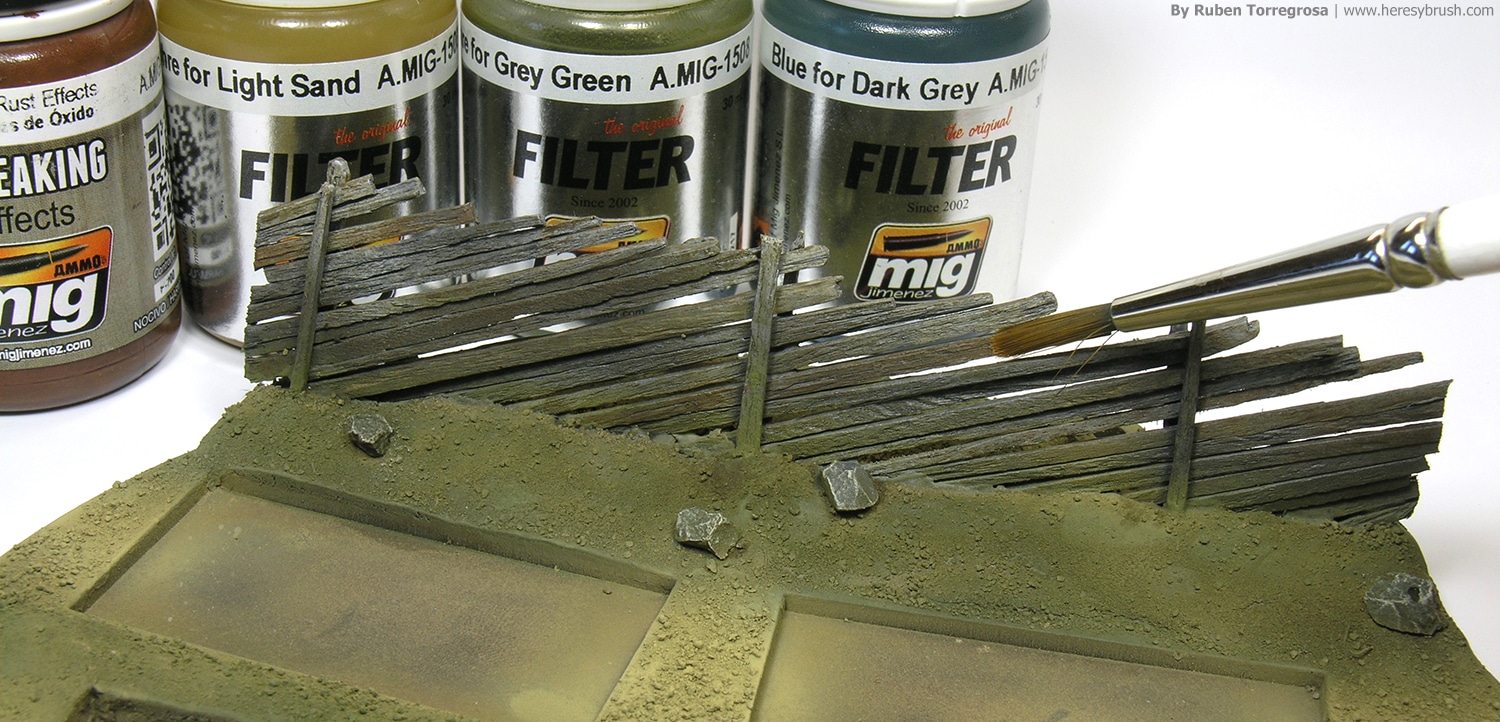
I immediately started to paint the terrain. I used a medium brown to paint the whole base. It does not really matter the color, as we only need to replace the black colour. On the other hand, I painted the wooden fence using different grey tones. I took advantage of the AMMO set for Dunkelgrau that I had on my shelf and I used Dunkelgrau (A.MIG-008), Dunkelgrau light base (A.MIG-909) and Dunkelgrau high light (A.MIG-910); although you can always start with a dark grey and then add white. Furthermore, I applied a very thinned brown color on some random areas to get some contrast.
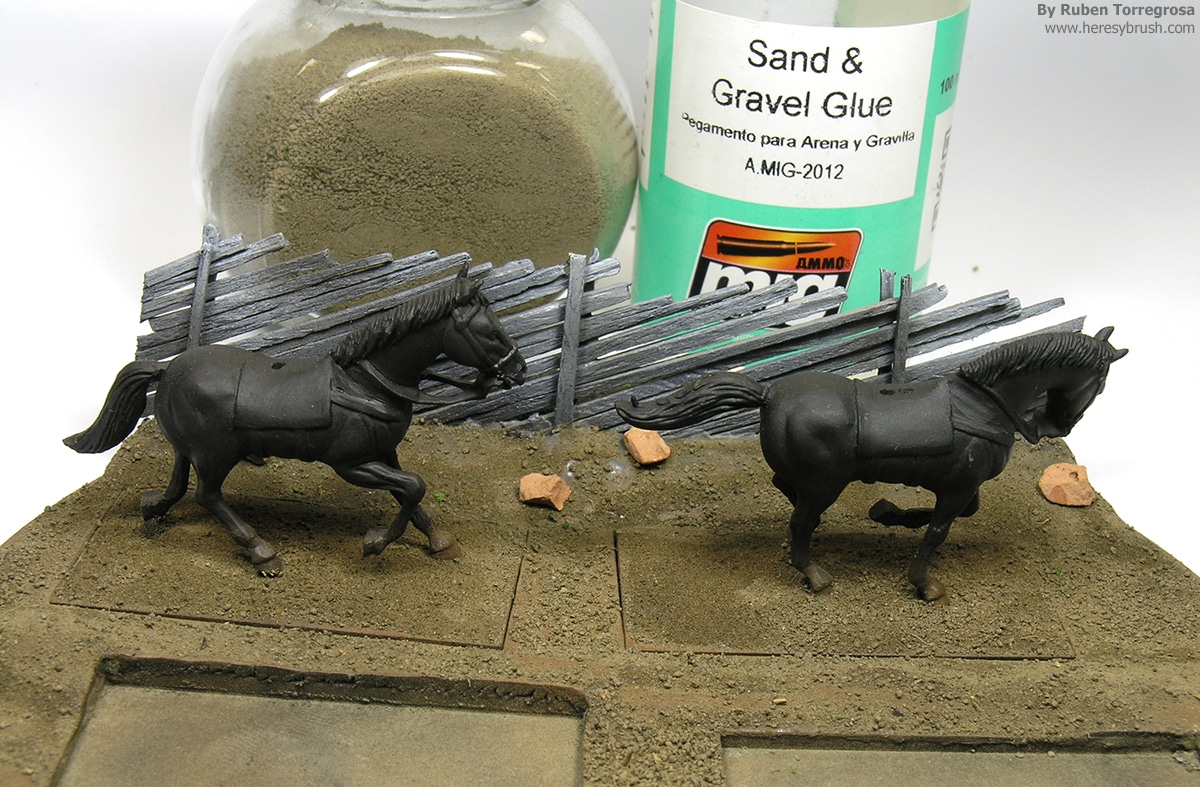
Instead of using modelling sand or beach sand –the most common source of wargamers– I directly used real sand. Note that the first ones are actually gravel, whereas the stuff that I used is close to dust. I already explained how I obtained and prepared this substrate here. It is very cool because although it is like dust, there is always small stones or clumps that confer a very nice and irregular texture. I firstly applied a coat of white blue diluted with water and then started to sprinkle the sand directly from the jar. However, this was not enough to properly fix the sand. Once the white glue was totally dry I applied some drops of Sand & Gravel Glue from AMMO with a brush. I dropped drops of this liquid and I waited to see how it spread around. Do not touch the surface! First, because you can remove or alter the texture. And second, you can smudge the brush with the sand. I let it dry overnight. In addition, I glued some big stones to add more variety to the ground.
Next day, I added some extra colour to the ground using the airbrush. I did not totally cover the original sand color, but I used thinned paint (three drops of thinner per 1 drop of paint). I applied a yellowish color, such as Dark Yellow (Tamiya XF-60) over the road; and a greenish, such as Olive Green (Tamiya XF-58), on the rest of the base. I tried to avoid painting the fence! I also painted the big stones with a brush and a thinned grey color, and subconsequently I applied a white drybrush over it.
Wood does not always have the same color, sometimes even when you obtain several slats from the same tree. But above all, because of the weathering. Therefore, we had to add some color variation. And one of the easiest ways to do it is by applying different filters. I have already explained a number of times what a filter is in the blog; but just in case, a filter is a very thinned paint (1 part of paint and 9 of thiner) which means that it barely covers the surface, and therefore, it slightly changes the color. Check this post for more info. AMMO have a big number of ready-to-use filters. I used four of these: reddish, yellowish, greenish and blueish colors; and I used a brush to paint different sticks with different colours. Remember to remove the most part of the paint from the brush prior applying the filter (it is not a wash!).
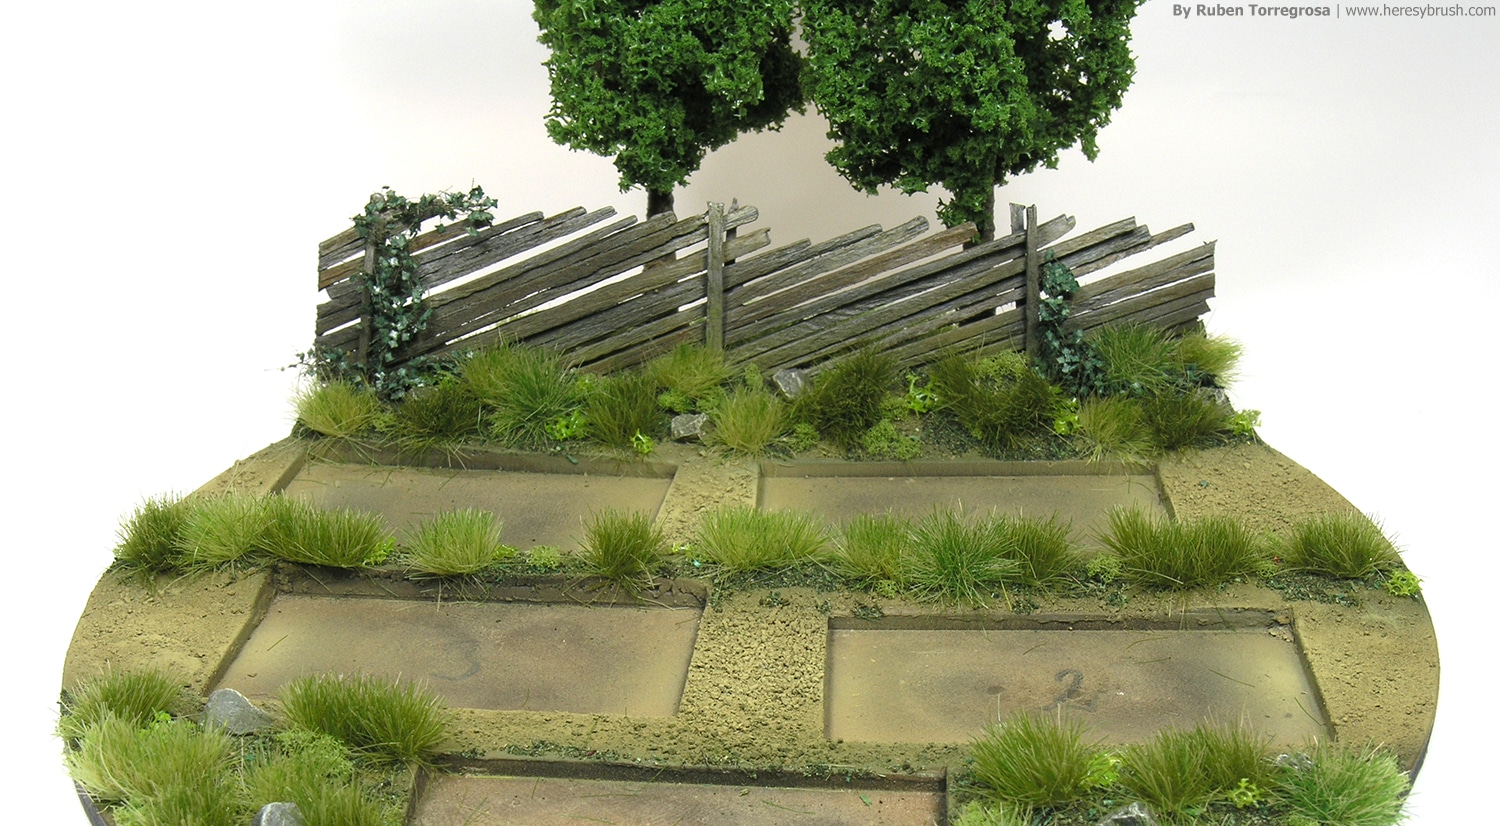
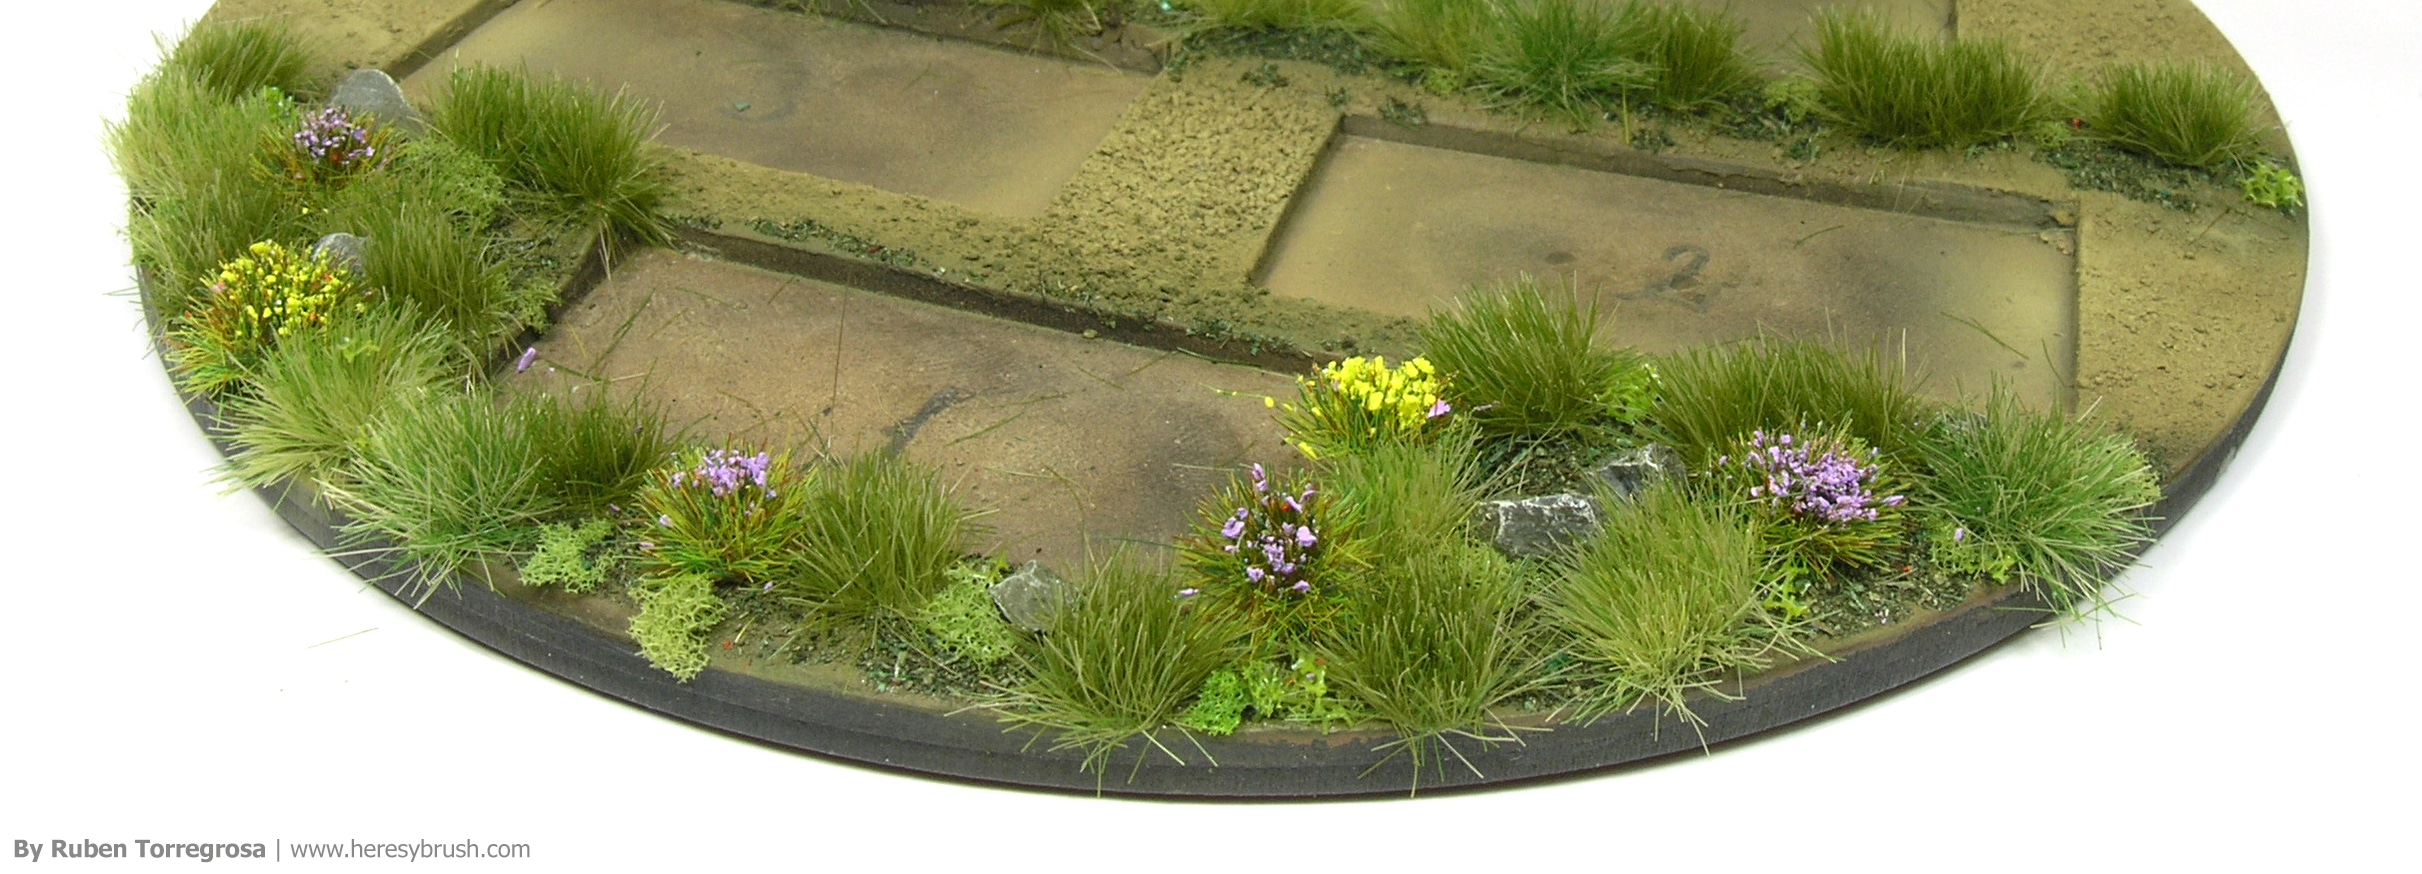
Finally, I work on the plants. Besides the two big trees placed on the rear, I wanted to create a really spring atmosphere (Perhaps it is because I am still waiting for it here in Finland…and we are almost on May!). Therefore, I used very different product to create very different contrasts and textures. First, I randomly applied some green sawdust with white glue. When I say “randomly” I mean that I didn’t totally cover the ground, but I keep some opened spots. This creates very interesting contrasts. On top of this, I started adding grass tufts of different shapes and colors. The variety is very important to obtain a realistic effect! Do not use always the same size and / or color of grass tuft. Combine them to obtain nicer results. I used mainly references from Tajima1. Next, I used another two foliage products to create more textures. The first one is green sponge, one of the most common elements used in train modelling. The other one is some kind of plastic lichen, also from train modelling. Once again, I got these stuff from my father’s storage room…and I do not know their references, but definitely you can buy them from Bosch and similar brands (actually, it is the same stuff that 4Ground uses for its trees). Furthermore, I love the poison ivy from Army Painter, and I put some pieces over the fence. I love the effect!
If you want to know more about this vignette, and how the kinghts and horses were painted, I recommend you to take a look at WS&S 84 issue, where you can actually find several amazing wargaming articles!