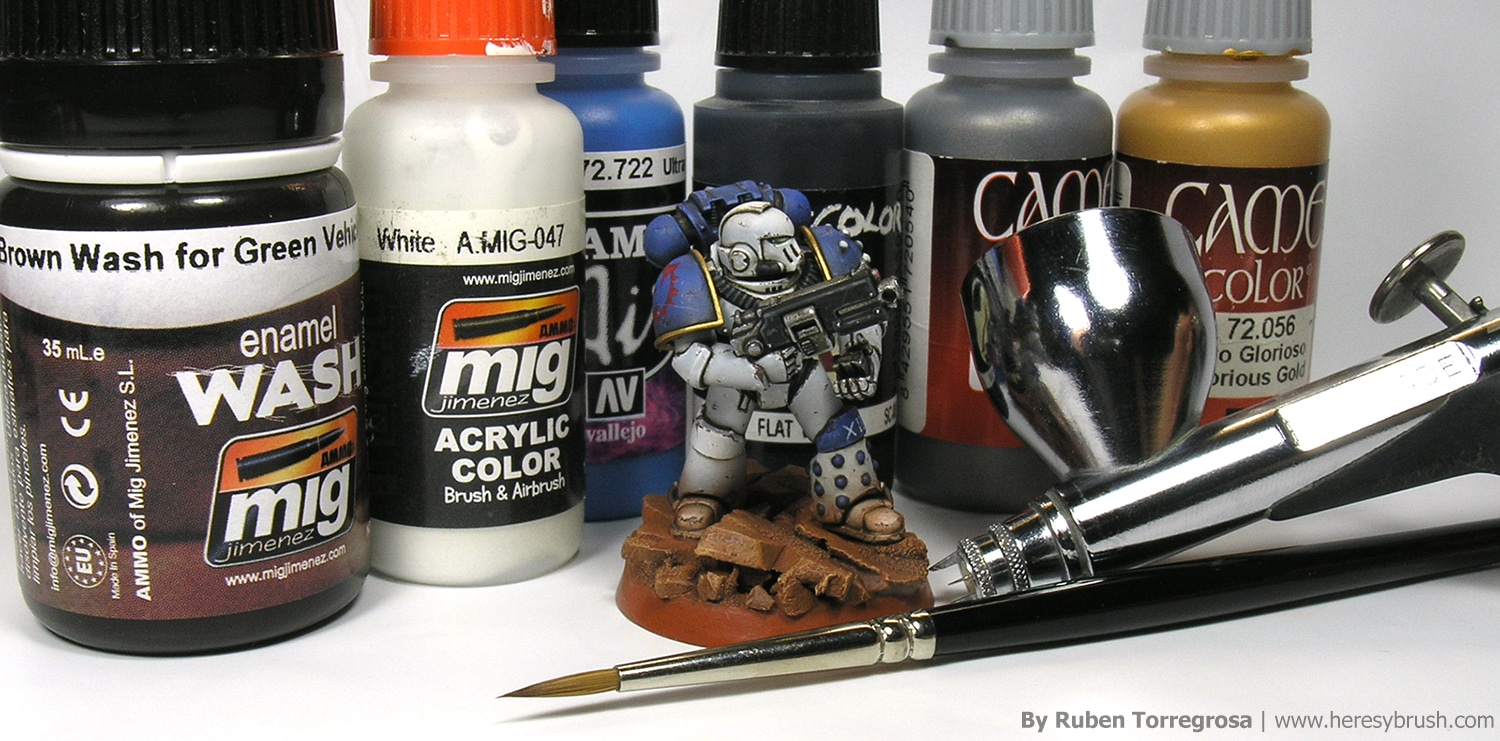
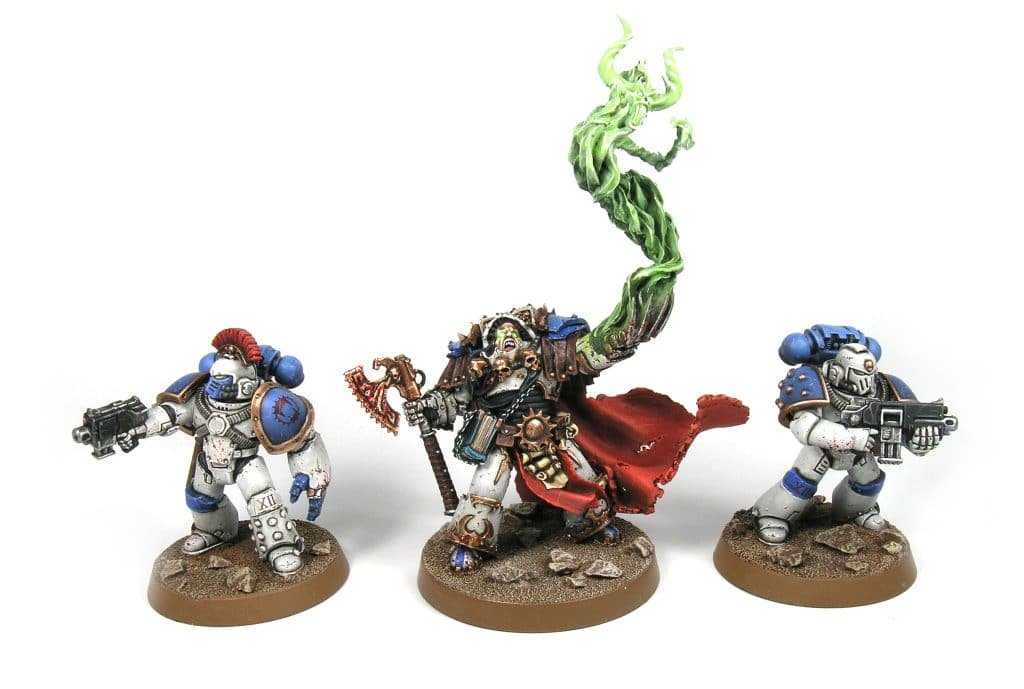
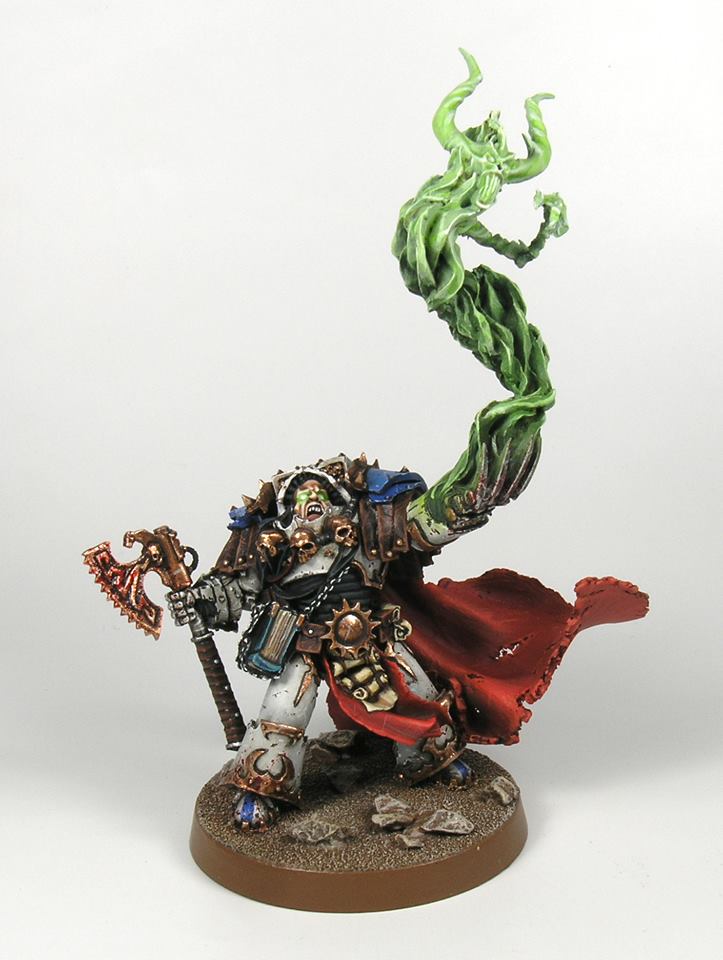
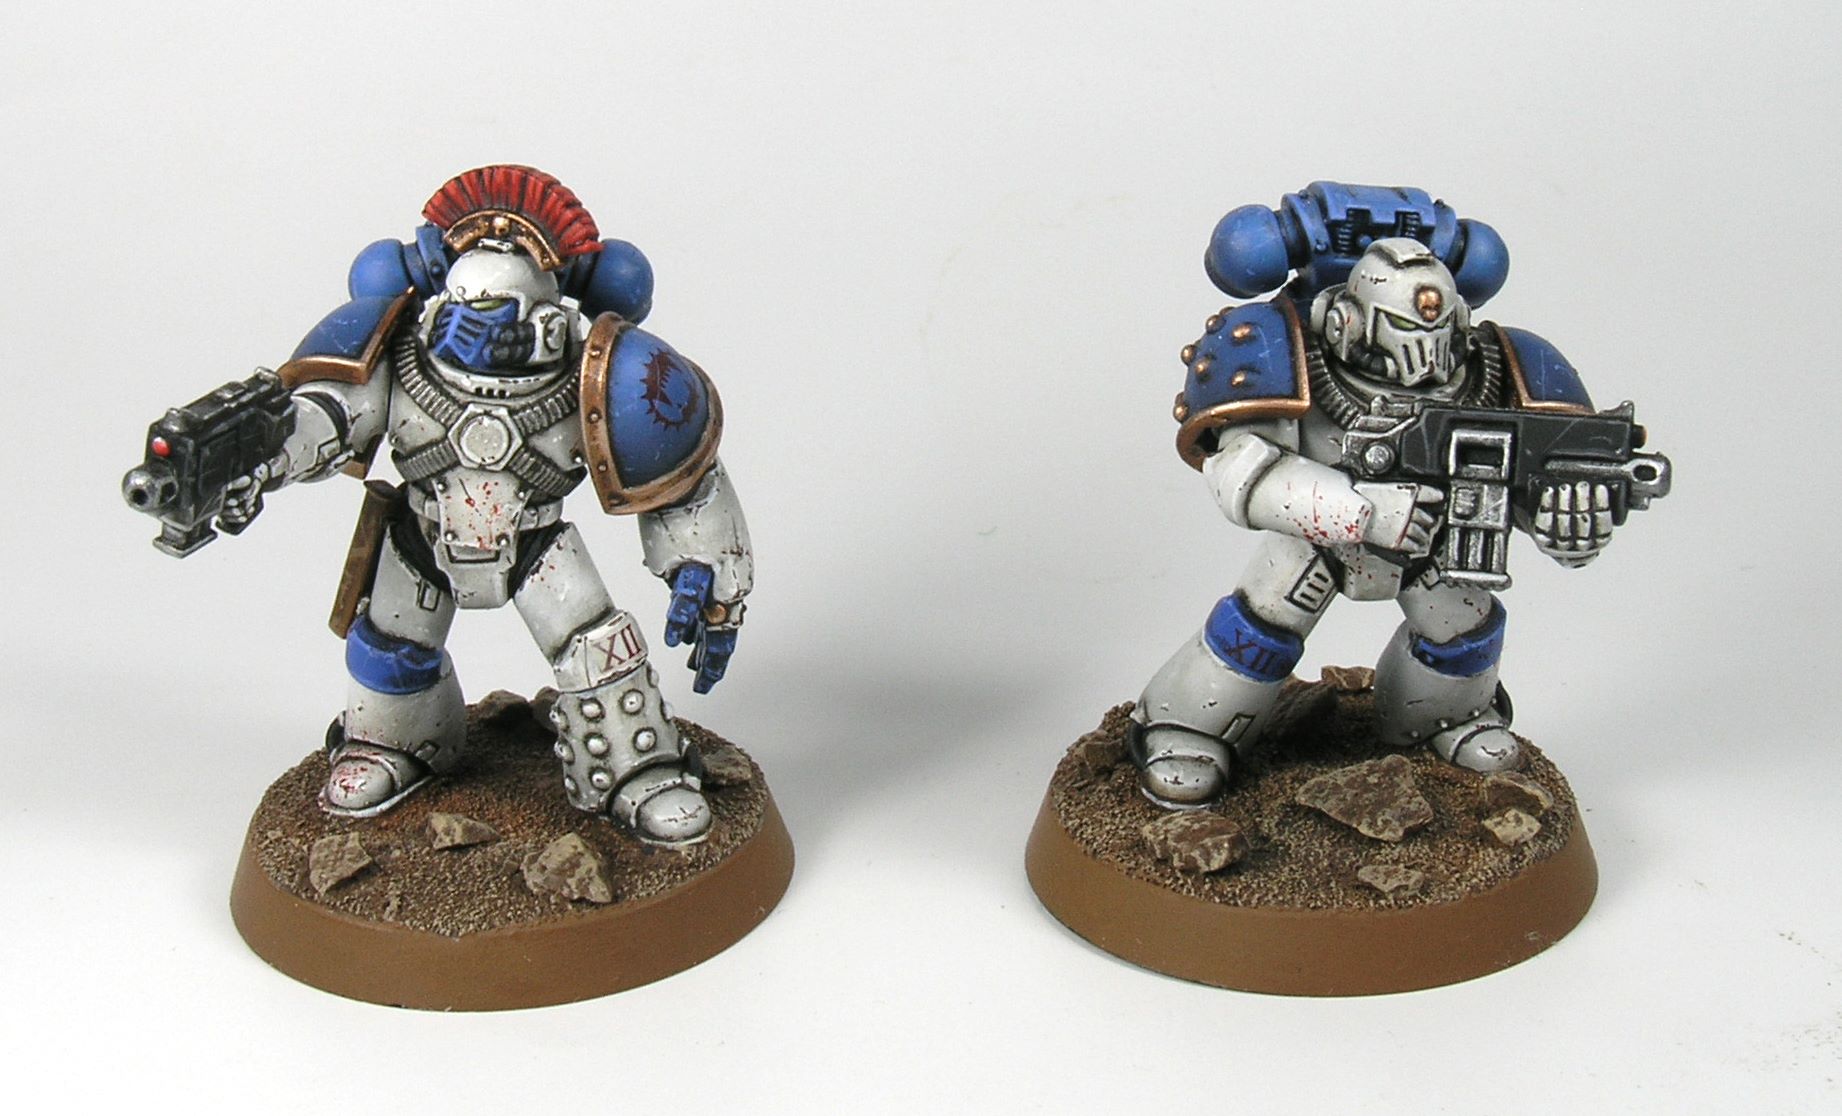
My brother wanted me to prepare an easy painting guide to quickly paint his new Warhammer 40K force, the Space Marines (SM) from the chapter World Eaters. My brother specifically wants to use the airbrush to save time, but banned me from doing color modulation because he considers this technique as very complicated and time demanding. Thus, you will find here a simple painting guide for SM. When I paint one of my Ultramarine warriors, I will prepare another more advance painting guide using color modulation and other techniques learnt from painting vehicles.
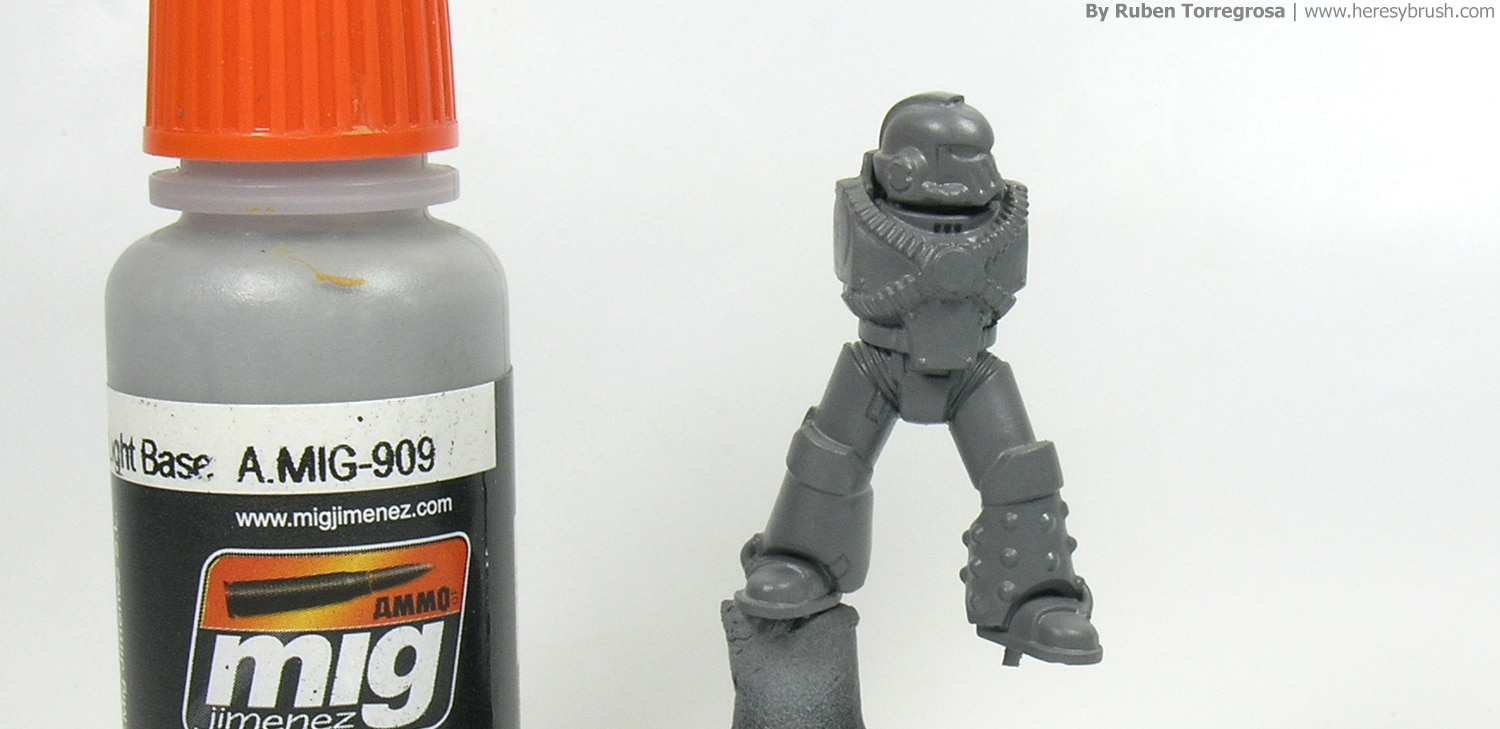
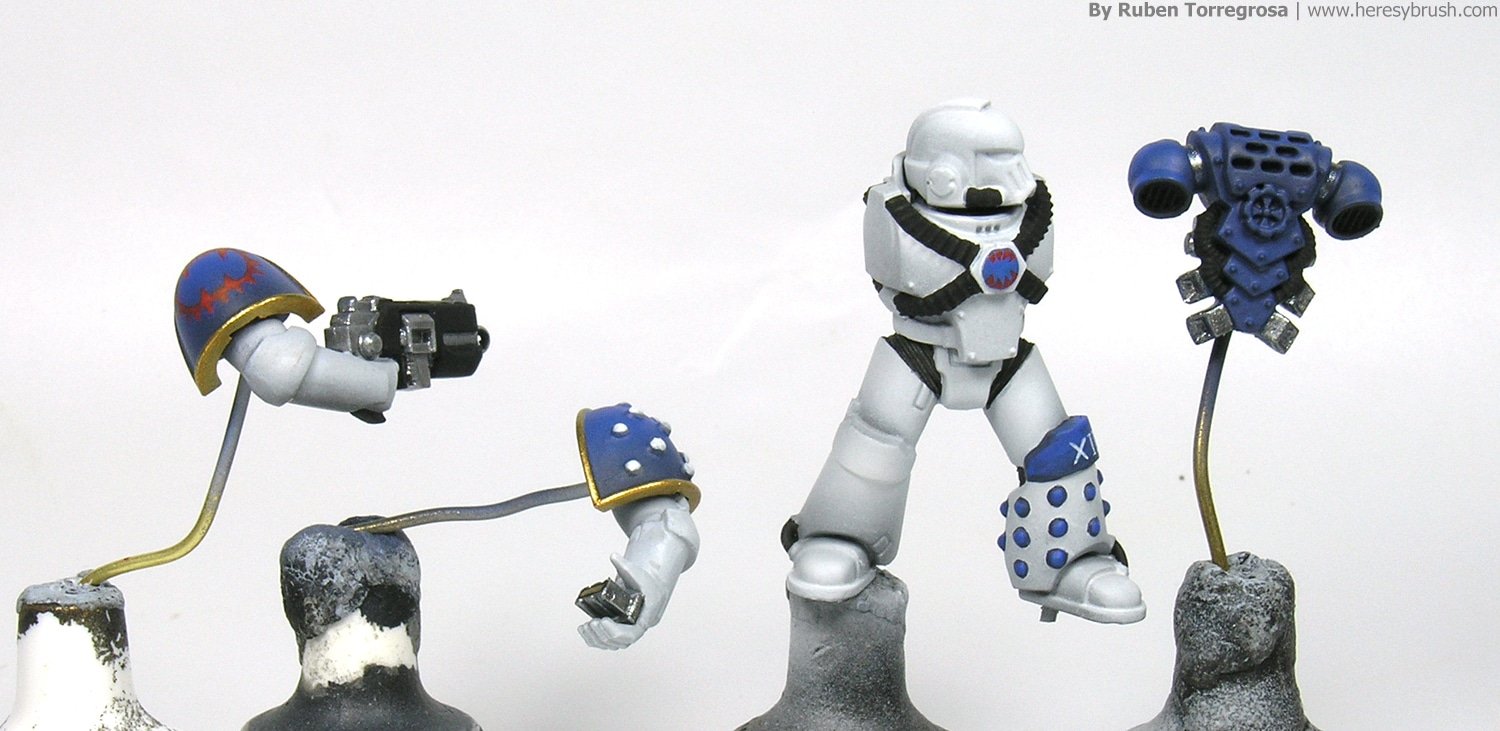
After removing the flashes with a modelling knife and a file, we may put together some pieces but not all of them. Because we are going to use the airbrush, it is better to have more space to work. For instance, we can independently paint four elements: arms and shoulder pads (left and right), the back generator and the legs + body + head. This is in my opinion the minimum distribution to facilitate the airbrushing, although I would rather to paint the shoulders also separately; especially because the World Eaters wear white armor but their shoulder pads are blue. In addition, we can fix the different elements with a brass rod in order to make easier the painting. Once ready, we generously apply a layer of grey primer with the airbrush and wait overnight before continuing.

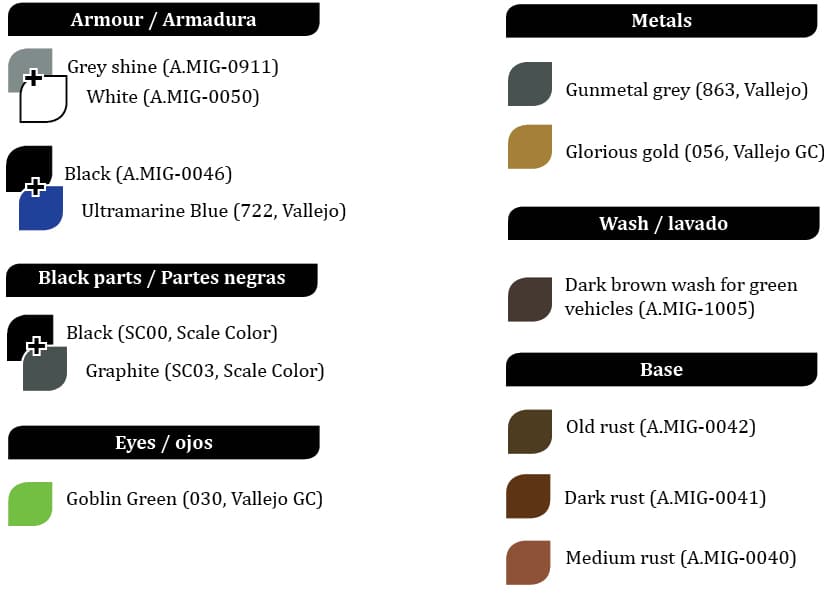
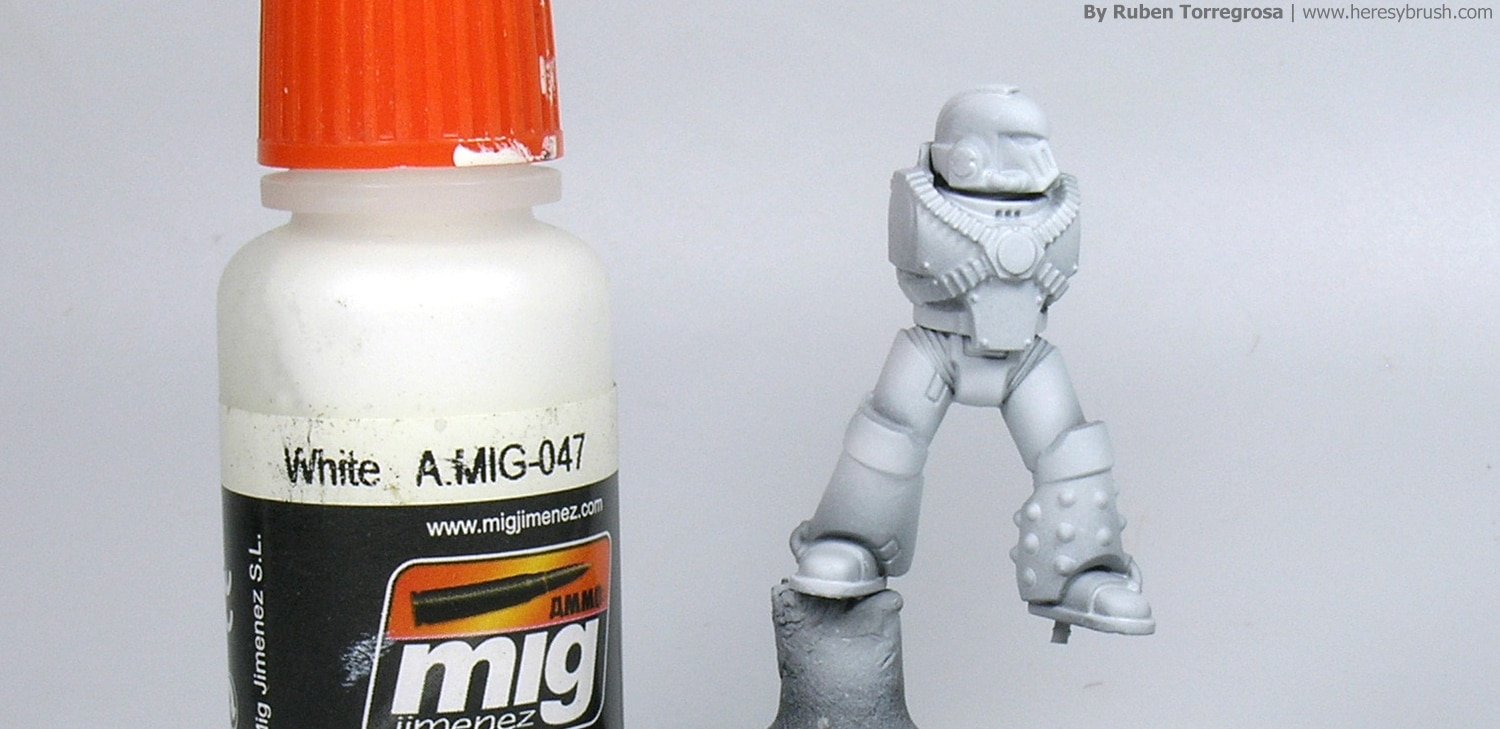
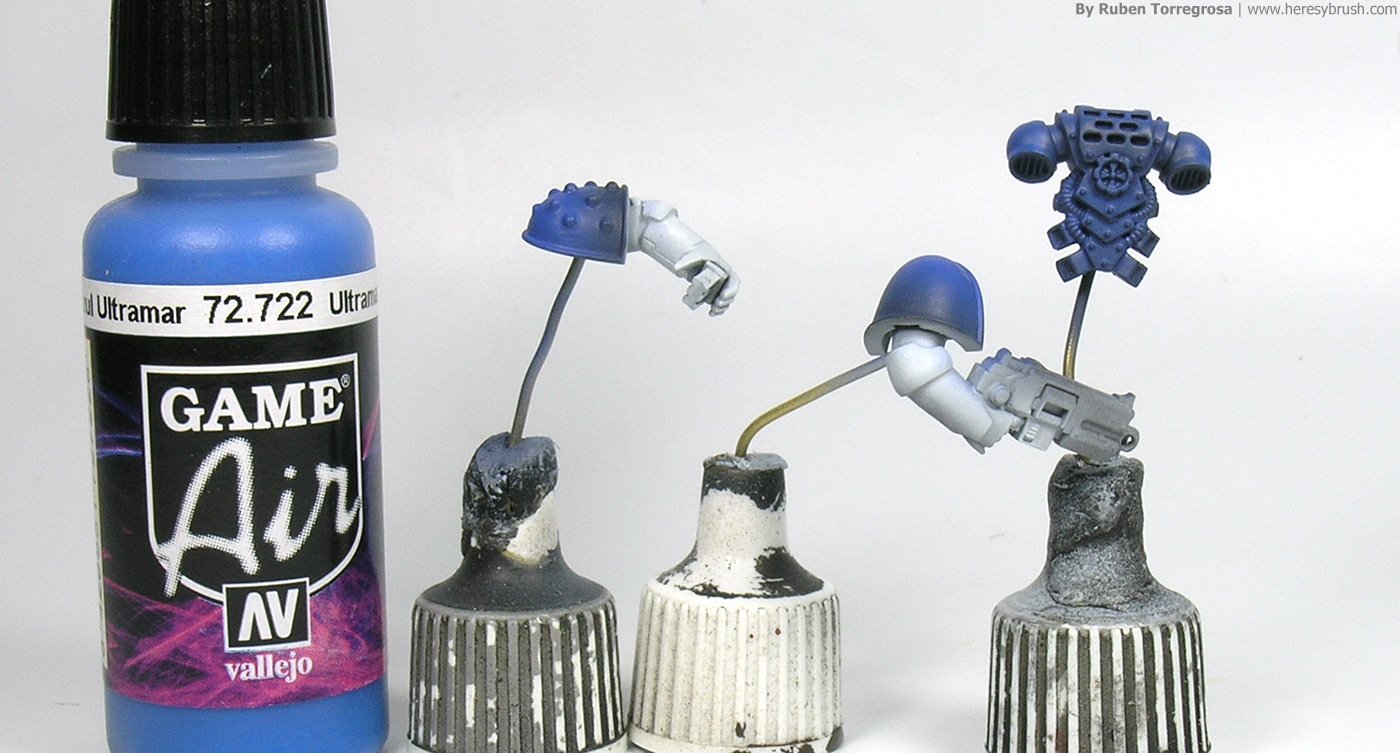
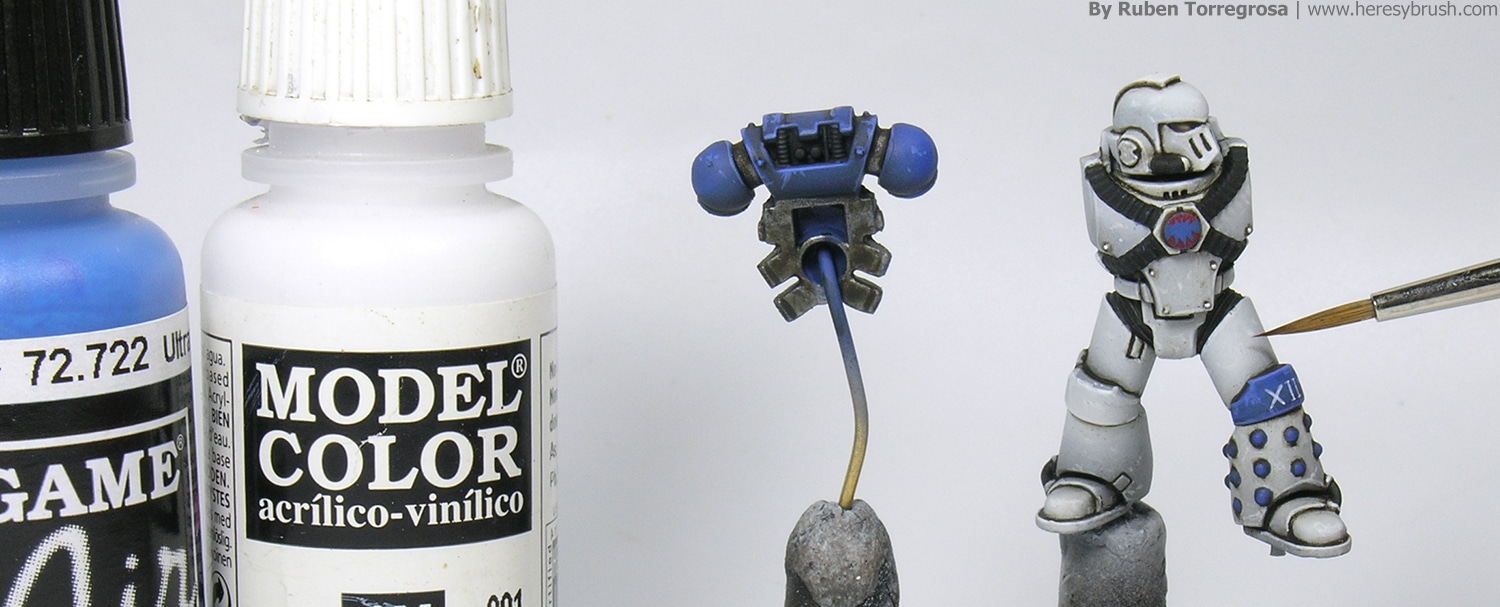
The color scheme of pre-heresy World Eaters is white and blue. White. White is one of the more difficult colors to paint, but we will see an interesting and easy approach here to deal with it. In both cases we start applying the shadows with a darker color: Grey shine (A.MIG-0911) on the white parts of the armor, and a 1:1 mix of black and Ultramarine blue (722, Vallejo Game Air) on the back generator and shoulder pads. We may mask the arms with some masking tape or a piece of paper to don´t splash out these areas when painting the blue. On the other hand, we can airbrush these paints straight from the bottle, although I always prefer to thin them a bit with an acrylic thinner because the airbrush works smoother.
Next, we work on the lights –or real colors, actually. If we previously thinned the paint, now this is even more important. To apply lights we must use a thinned paint because it creates semi-transparent layers that will help us to create smooth transitions. The thinned paint does not cover very intensely the surface so that we can apply several layers one on top of the other to increase the opacity and intensity of the color. Therefore, we will increase the amount of layers on the area that we want to be more highlighted, while the dark area will be cover much less. Note, although we should thin the paint, we shouldn’t thin it very very much or we can get a “flooded” effect. Check first how the dilution works on a piece of paper. You need to have absolute control on the paint, which means that you can airbrush only the area you want in a very homogeneous way.
According to this, we directly use Ultramarine blue to highlight the blue parts by applying the lights on the upper part of the shoulder pads and backpack. If you want and have the time, you can always apply an extra light with Ultramarine blue mixed with just a bit of white. And for the white areas I directly used White (A.MIG-0050) and I tried to create some contrast by leaving dark areas at the bottom of the different elements of the armor. It is not very important whether or not these contrasts are real, because we only want to have a nice overall result. And we don´t need to reach the purest white color when applying these highlights, because we can use the pure white afterwards to create very nice eye-looking contrasts with the chipping effects, as you will see below. That is, the final color here would be indeed a very very light grey. By airbrushing thinned paints and using this “layer-by-layer system” we can obtain a very homogeneous and clean white. Definitely, I don´t recommend to use a regular brush instead of the airbrush, 1) because it would take much more time and 2) the result is not usually as clean.
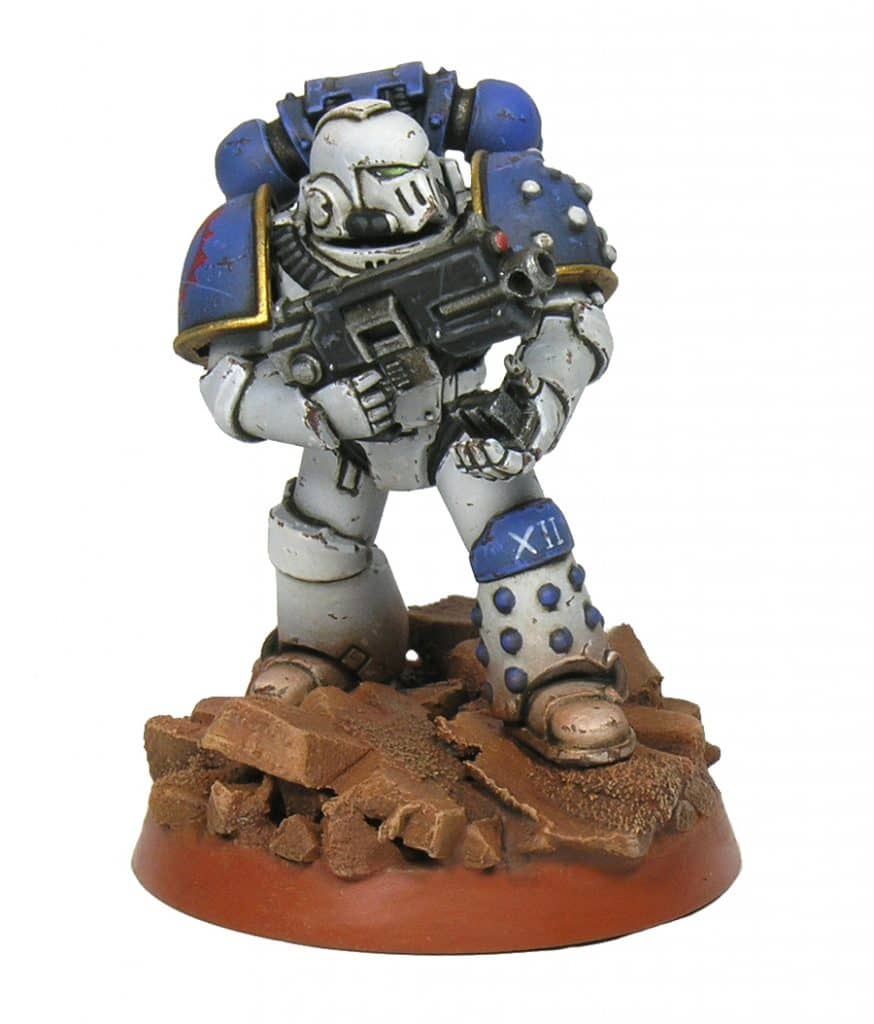
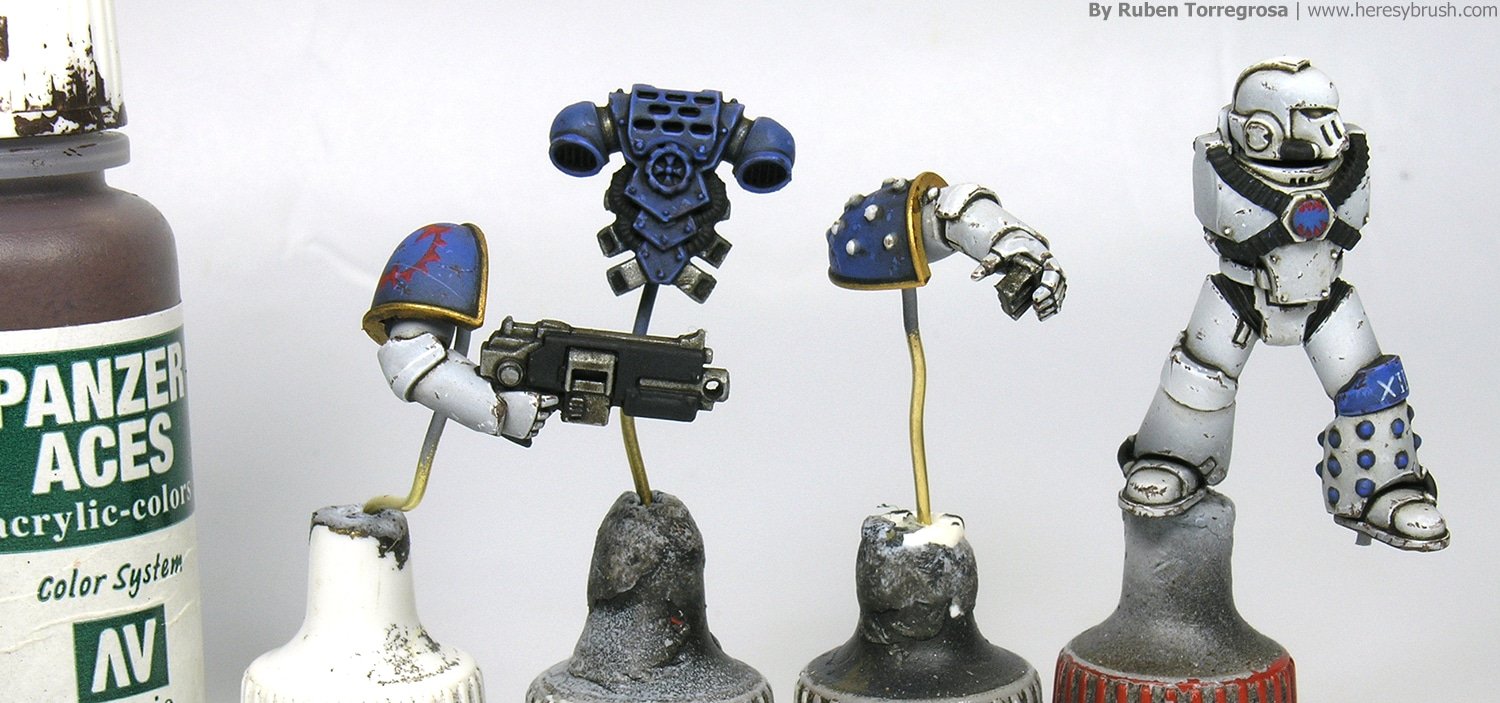
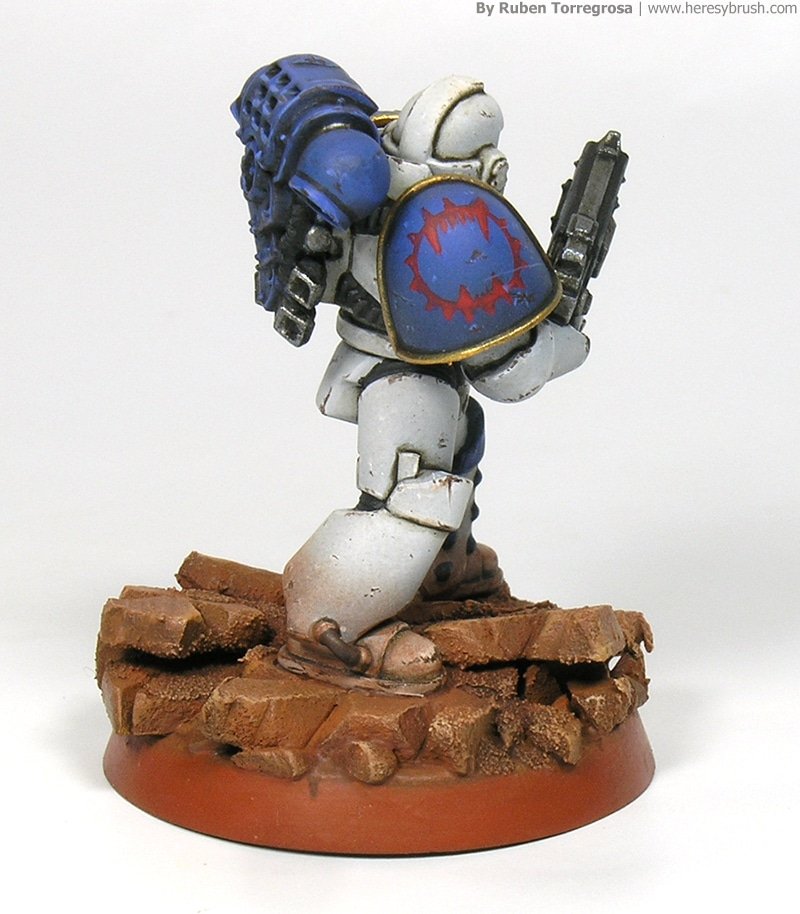
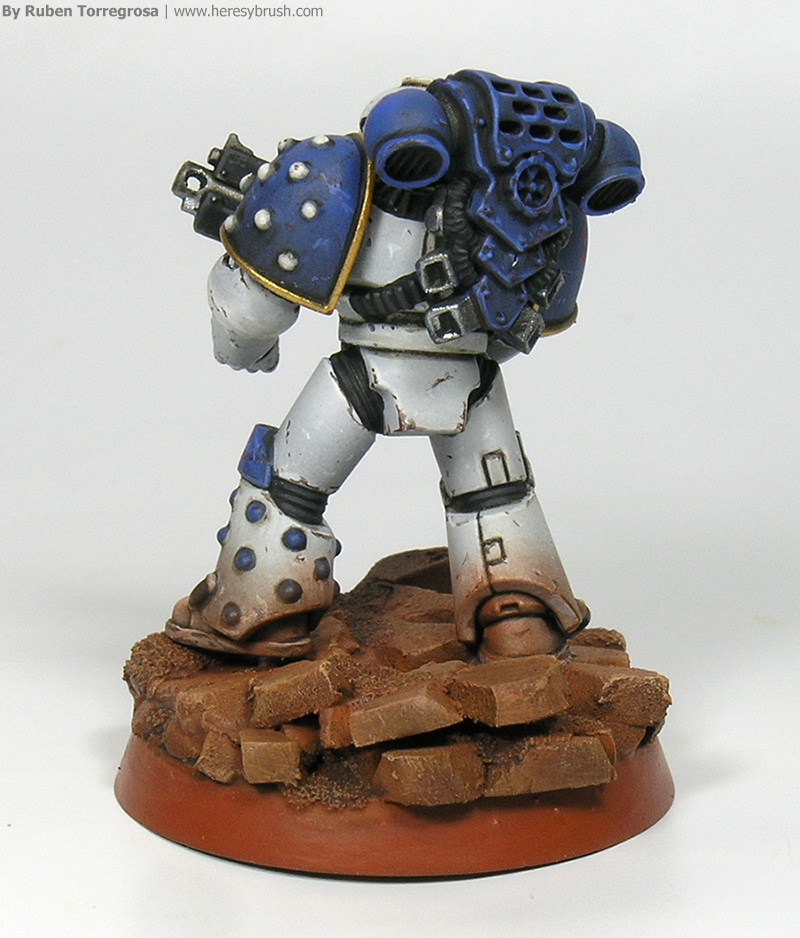
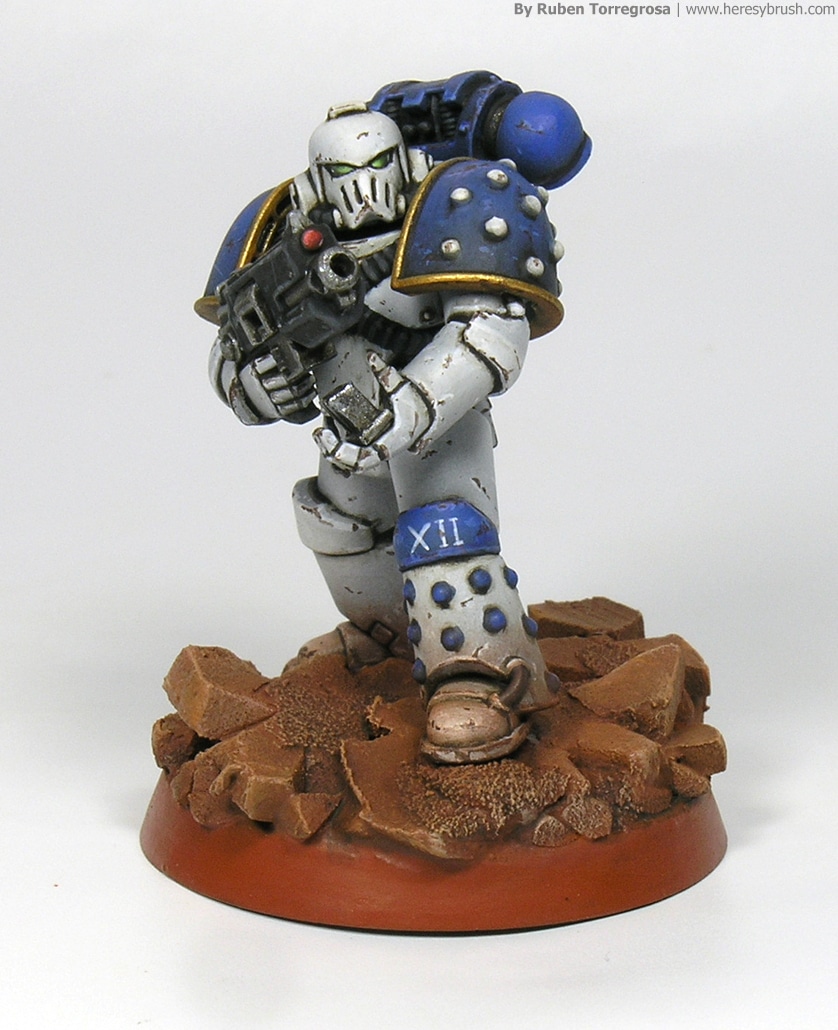
Now we can use different colors to paint the remaining details of the SM. For example, I decided to provide more contrast by painting the rivets on the left leg and shoulder pad with the opposite color (blue-white). We paint the metal parts of the bolter and back generator with Gunmetal grey (863, Vallejo) and the edges of the shoulder pads with Glorious gold (056, Vallejo Game Color). Furthermore, with black we paint the coating areas of the bolter and cables and joints of the armor. At this point we should put decals if we want and/or hand paint the insignias.
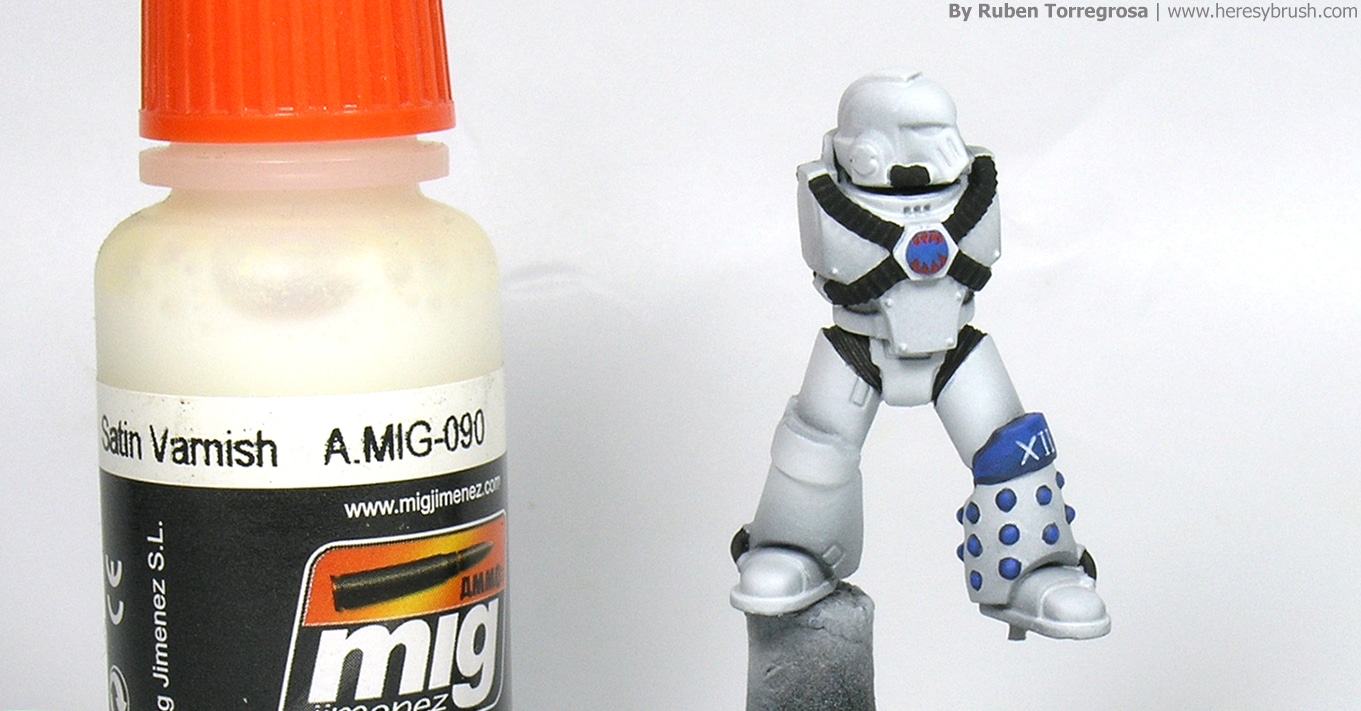
To bring the SM to life, a black profiling to separate the different parts of the miniature is needed. To do the black profiling classically acrylic inks or washes (from Citadel) are used. The problem of acrylic paints is that they dry in seconds and once the paint is dry, we cannot touch it. That is why I prefer much more to use enamels. They need hours to dry and we can always remove the parts or excess that we don´t like. But before using enamels we should apply a gloss or satin varnish over the whole miniature. The varnish will protect the acrylic paint from enamel solvent but it will also facilitate the application of the wash. Think about the satin or glossy effect. The glossy effect means that the surface reflect the light, which in turn is cause by a flat and polished surface. This implies that the paint will easily slide on this polished surface; and therefore, it would be easier to work with.
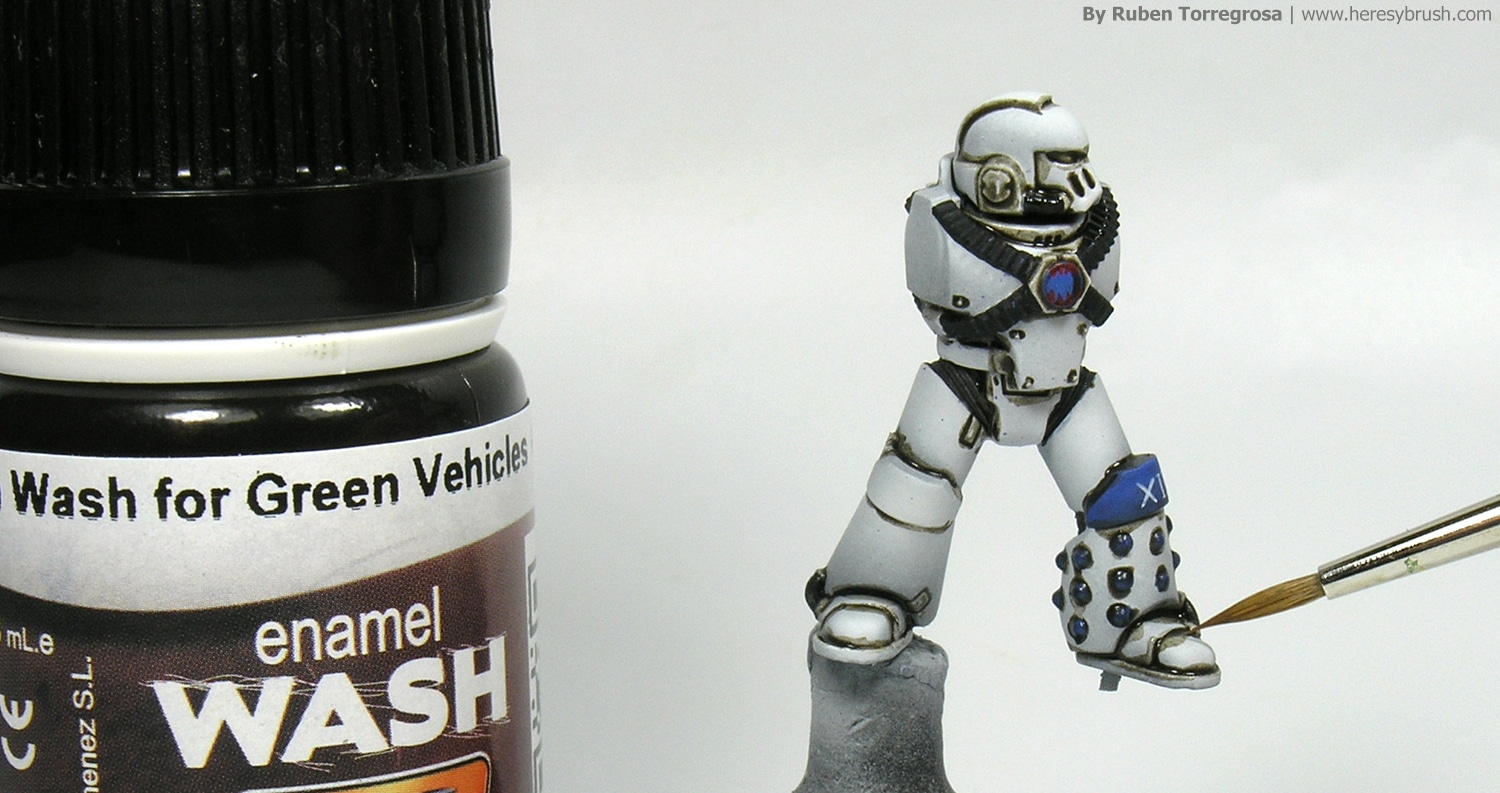
Once the varnish is dry, we can apply the enamel wash. Instead of a black wash, that it might be very dirty in general, I would rather to use a dark brown wash like Dark brown wash for green vehicles (A.MIG-1005). A dark brown is dark enough for the black profiling but it also confers some worn effect as it can reflect dust and weathering. We should NOT cover the whole miniature with the wash. No. By doing this we will obtain a very dirty and dark miniature. Instead, we should use a fine brush and carefully apply the wash only on the recesses, trying to don´t get dirty the surrounding areas. This is known as “pin wash”. We also apply the pin wash on the bolter and other metal parts.
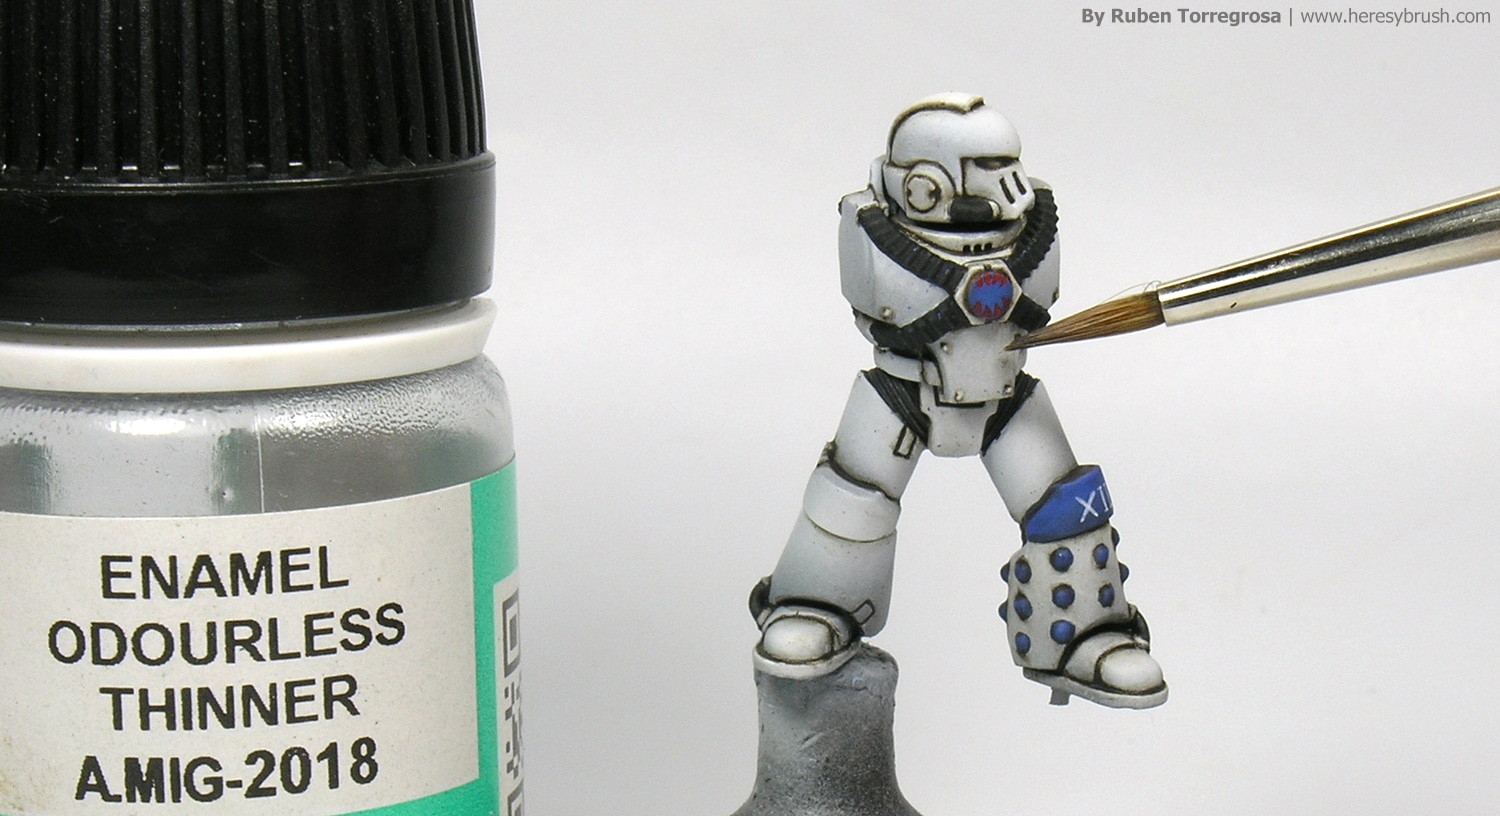
After one hour or so we can start removing the excess of the wash with a moistened brush with thinner (White Spirit or odorless turpentine that is different from the acrylic thinner). The idea is to retain the wash in the recesses and remove the rest. Try to keep the brush very clean (wash it very often with the thinner) to do not spread the traces of the wash. Sometimes we can accidentally remove the wash from the recesses. In this situations we can apply again the wash and wait subsequently, or we can use an acrylic paint and do the black profiling with a fine brush instead (once the enamel thinner is evaporated after some minutes). For this purpose I usually use Dark oxide (302, Vallejo Panzer Aces).
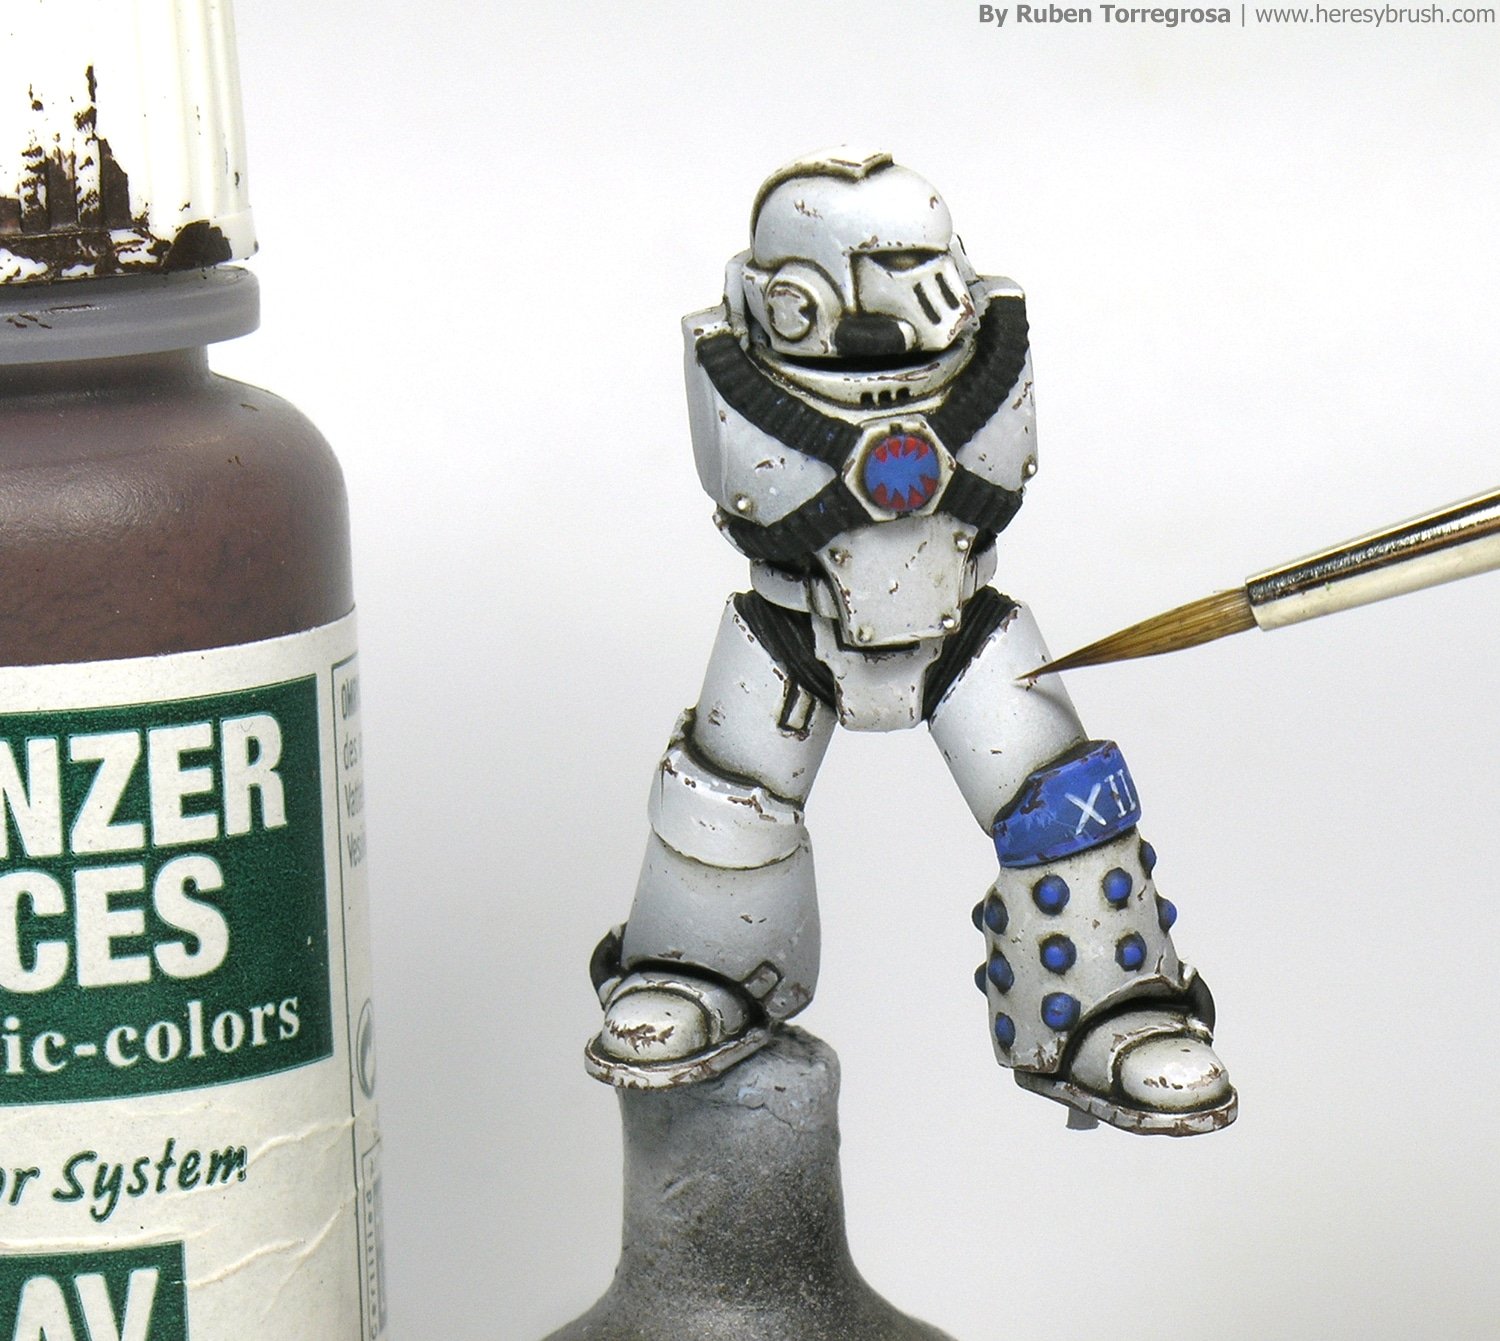
Empezamos con el color claro que representa arañazos superficiales sobre la armadura y donde el metal no ha quedado al descubierto. Para las zonas azules mezclamos Ultramarine blue con un poco de blanco; mientras que utilizamos blanco puro para las zonas blancas. Recordar que mencionamos que la armadura en realidad acabaría con un color gris super clarito. Pues bien, ahora los desconchones claros destacarán incluso sobre las partes “blancas”. La idea es utilizar la punta del pincel para marcar de forma aleatoria la armadura teniendo en cuenta dos factores: aleatoriedad y reducido tamaño de los desconchones. Los desconchones nunca deberían tener la misma forma ni ser ubicamos de forma simétrica entre sí. Además, usar la lógica. Los desconchones estarán concentrados en las zonas más expuestas y de mayor uso, como pueden ser las rodilleras, pies o coderas. Igualmente, es muy importante no sobrecargar la armadura con desconchones. Pintar algunos desconchones aquí y allá. ¡Pero no cubráis toda la armadura¡ Estos desconchones representan pequeños impactos y no reflejan el atropello de un tren de mercancías. Los errores más comunes que siempre veo son: desconchones demasiado grandes y concentrados en zonas ilógicas normalmente en forma de “nube” (como mencionamos antes, debido a la esponja). Intentar no caer en estos errores. A modo de conclusión: pequeños puntitos (o líneas) colocados de forma aleatoria y sobre todo en lugares lógicos. Por otro lado, con estos colores claros podemos hacer algo más: perfilar los bordes de la armadura. Esto equivale a una luz máxima que añade más contraste y que además podemos usar para los desconchones oscuros posteriormente.
We start with the light color that represent light scratches on the armor and the metal is not visible yet. For blue areas we mix Ultramarine blue and a bit of white; while I use pure white on the white areas. Remember that we mentioned that we should not reach the pure white when we applied the lights on the armor. So, we can obtain a very nice contrast now. The idea is to use the tip of the brush to randomly mark the armor following two key features: randomness and small size of chipping effects. Chippings never should have the same shape nor be placed symmetrically. And use the logic. Scratches will be concentrated on those areas that are more exposed and are used very often, as knees, feet or elbows. It is also very important to do not saturate the armor with chippings. Paint some scratches here and there. But don´t cover the whole armor! On the other hand, try to paint SMALL scratches and chippings. They simulate small hits but not a run over by a train. The most common errors that painters usually commit are: so big chipping effects and very concentrated chippings in illogic areas that usually resemble a “cloud of chippings” (this is mainly cause when we use the sponge). Try to do not fall into these errors. In conclusion, small dots (or lines) randomly placed mostly in logic places. On the other hand, these light colors can be used to do something else: a profiling over the edges of the armor. This is like a final highlight that confer more contrast and we can also use it as a base for the dark chippings afterwards.
And now we can apply the dark color. I usually use Dark oxide (302, Vallejo Panzer Aces) to represent exposed metal or heavier hits. We can follow the same idea that we have previously seen, but now the dark color should be placed always “inside” the light scratches or chippings. The idea of combining both colors is to provide a deeper and therefore real effect to the chippings. So, using a fine brush we paint small dots (o combination of dots = dotted effect) on top of the light chippings, but we DO NOT cover all of the light chippings. The point here is to combine both kind of worn effects in the same area: light chippings on one side and deep chipping on the other.
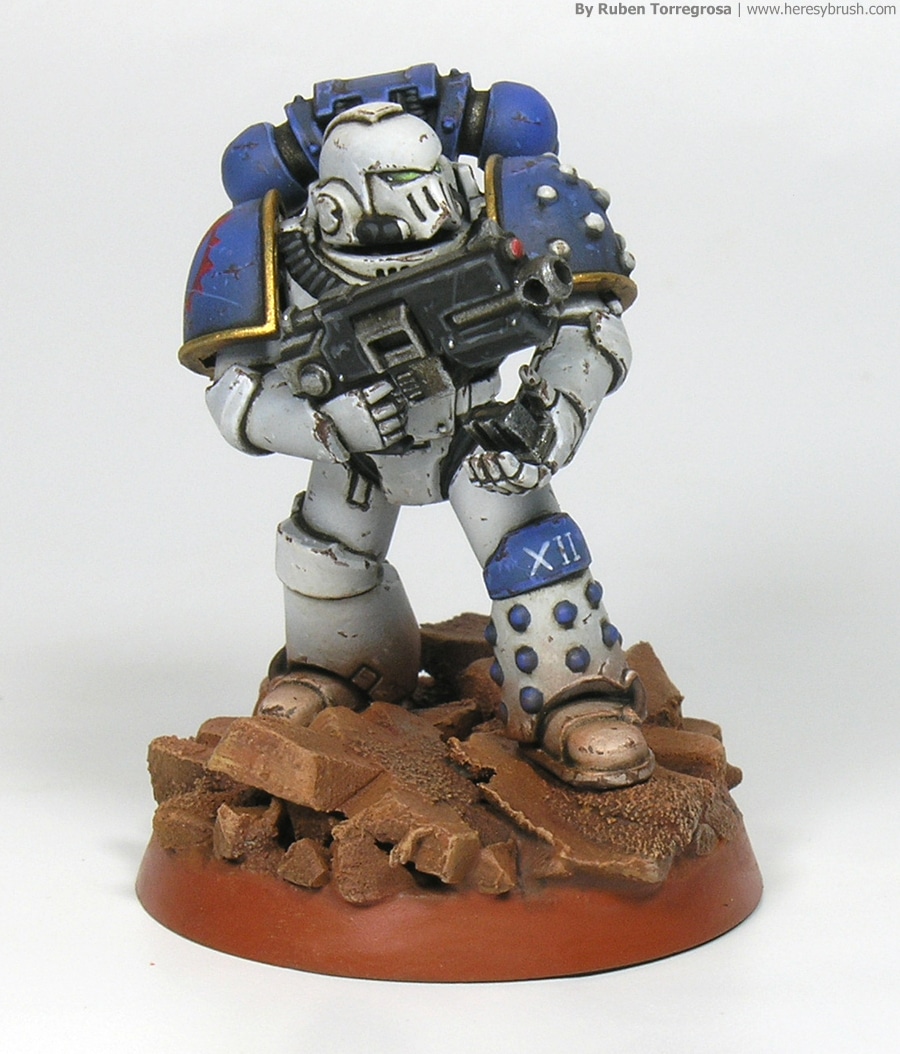
To highlight the black areas we can use any grey color, such as Graphite (SC03, Scale Color). We can applied a couple of lights. The first one was a 1:1 mix of black and Graphite, while the second one was pure Graphite. The idea here is to mark the edges of the bolter and junctions of the armor with the tip of the brush. We may also add some scratches on the bolter, although the dark colors is not needed. On the other hand, we can highlight with Gunmetal Grey the metal parts that were darkened when we applied the dark wash. Finally, I painted the green eyes with Goblin green (030, Vallejo Game Color) following the classical Citadel style for painting gems.
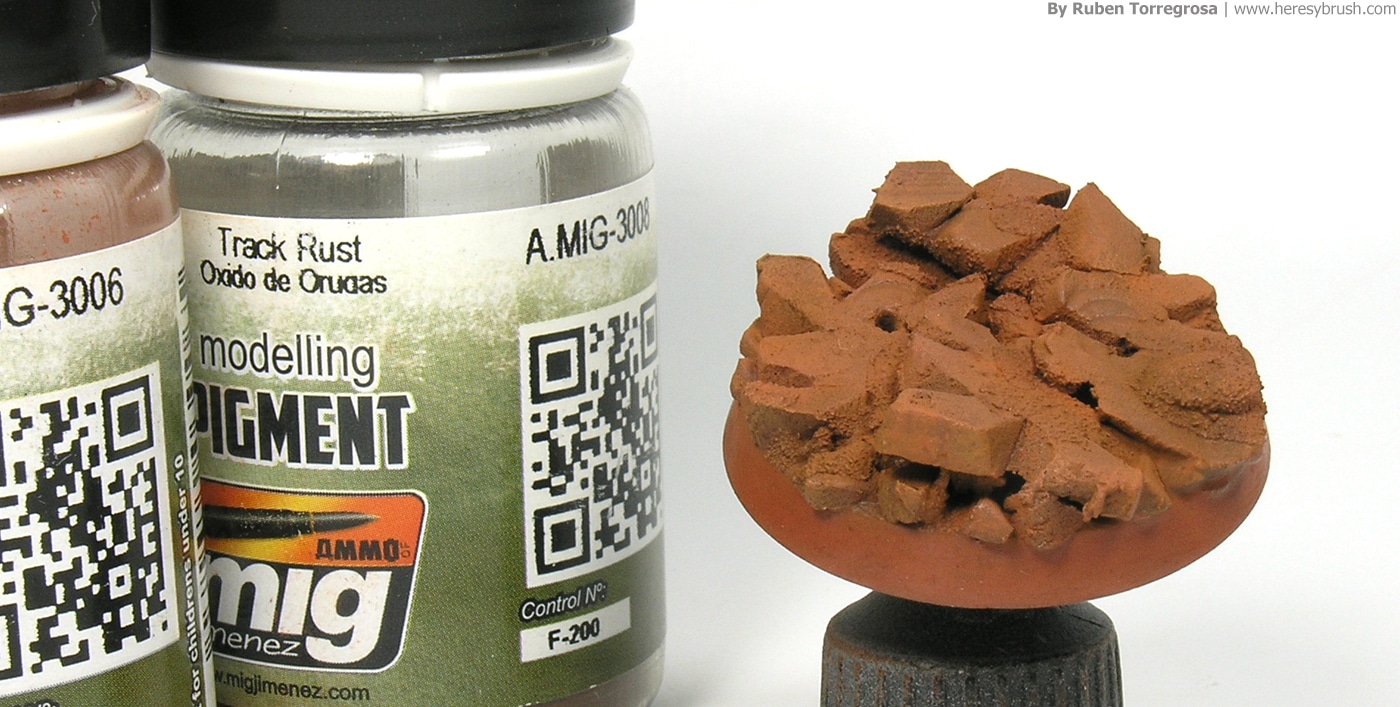
The miniature is now fully painted, although we can add some extra weathering effect to integrate the miniature and the base. According to this, I applied a couple of rusty pigments (A.MIG-3006 and A.MIG-3008) on the legs to simulate a dusty red planet. First I mixed a bit of each pigment and then I used an old brush to dust the legs. Note that we are working on top of a white surface; and therefore, we do not need too much pigment to create the effect. Do not apply so much!
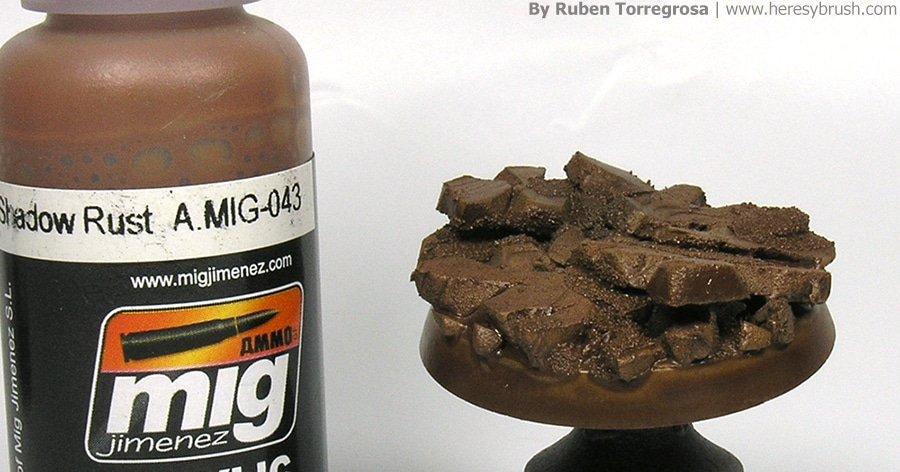
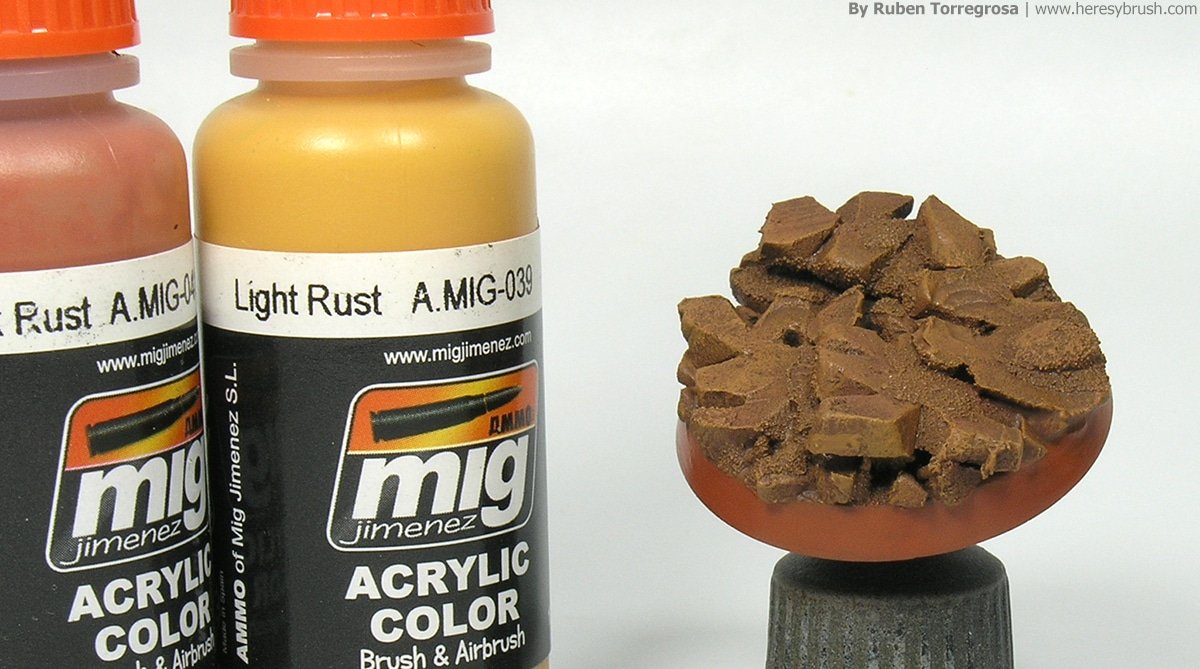
I would like to explain also how I created the base. Basically I used foam and followed this guide to build the rocky base. To simulate the reddish or rusty colors I started airbrushing Old rust (A.MIG-0042), followed by a couple of dry-brushing layers with Dark rust (A.MIG-0041) and Medium rust (A.MIG-0040). Furthermore, I wanted to get a dusty effect; and therefore, I applied over the rocks the same combination of pigments that we previously used. Finally, I used a sand color such as Iraqi sand (819, Vallejo) and a dark brown enamel wash (the same that we used) to add some extra lights and shadows in random areas. Now, we only need to glue our SM onto the base!



One thought on “Painting Warhammer 30.000 Space Marines”