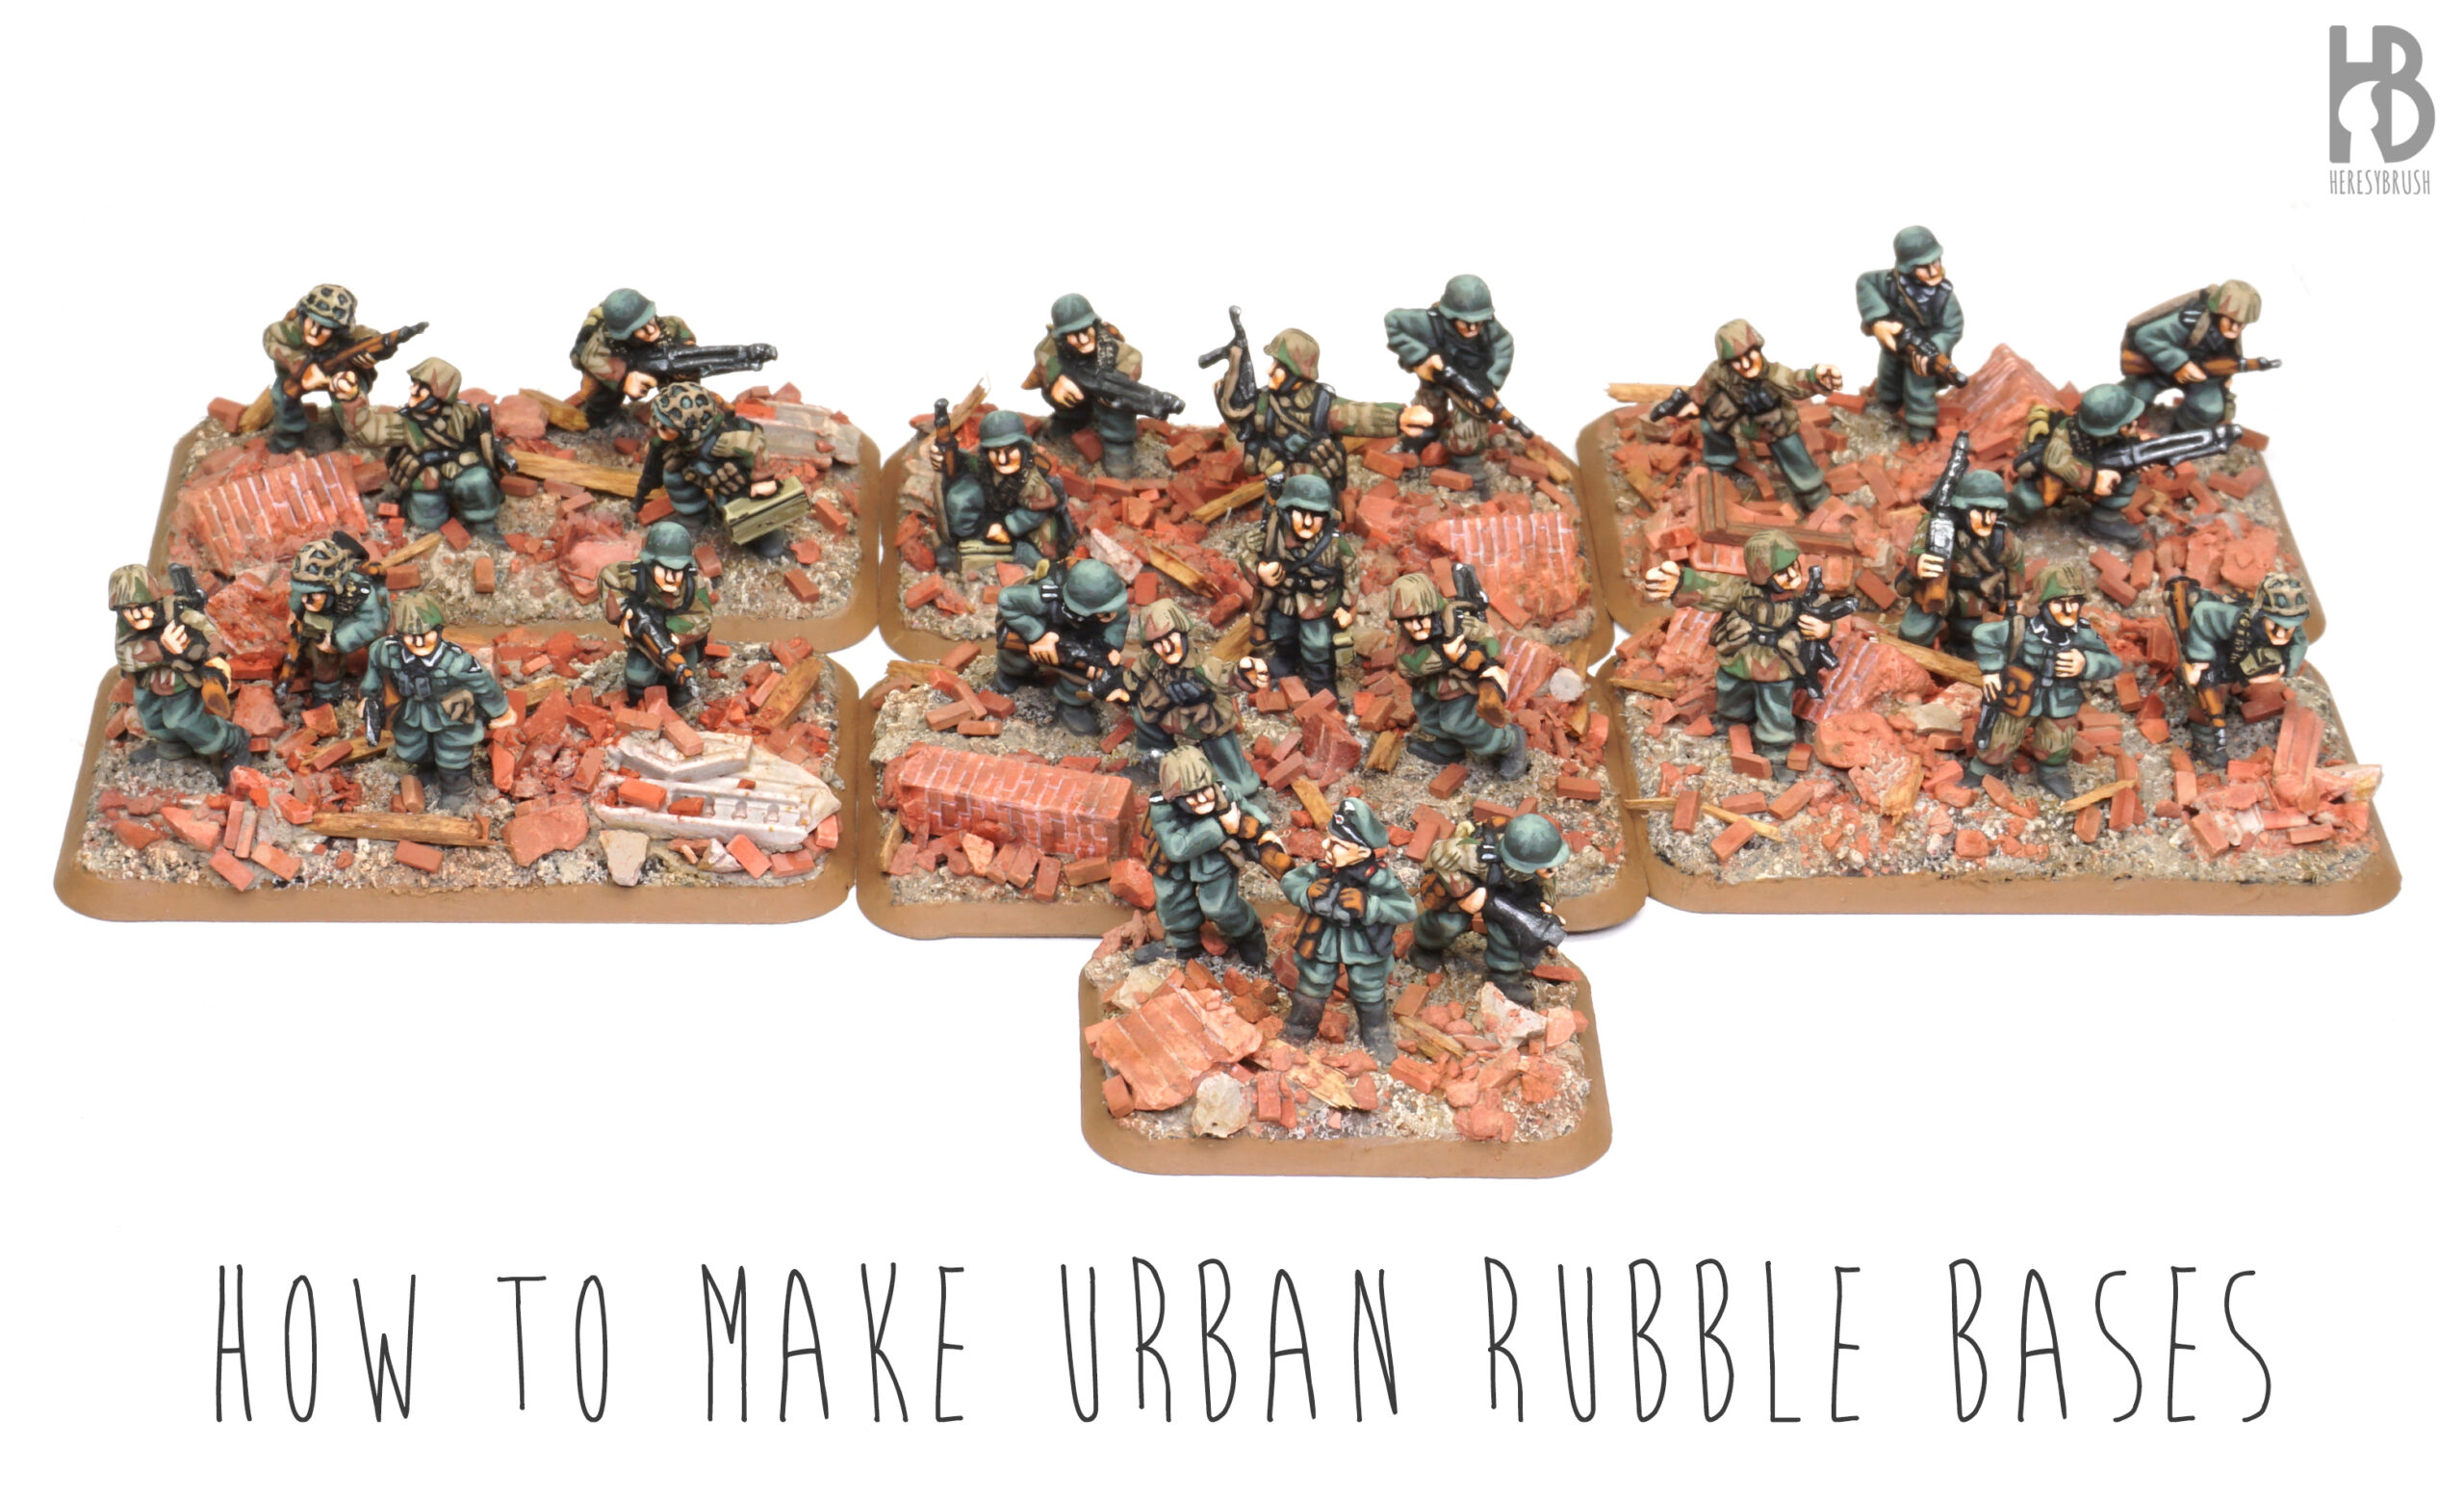
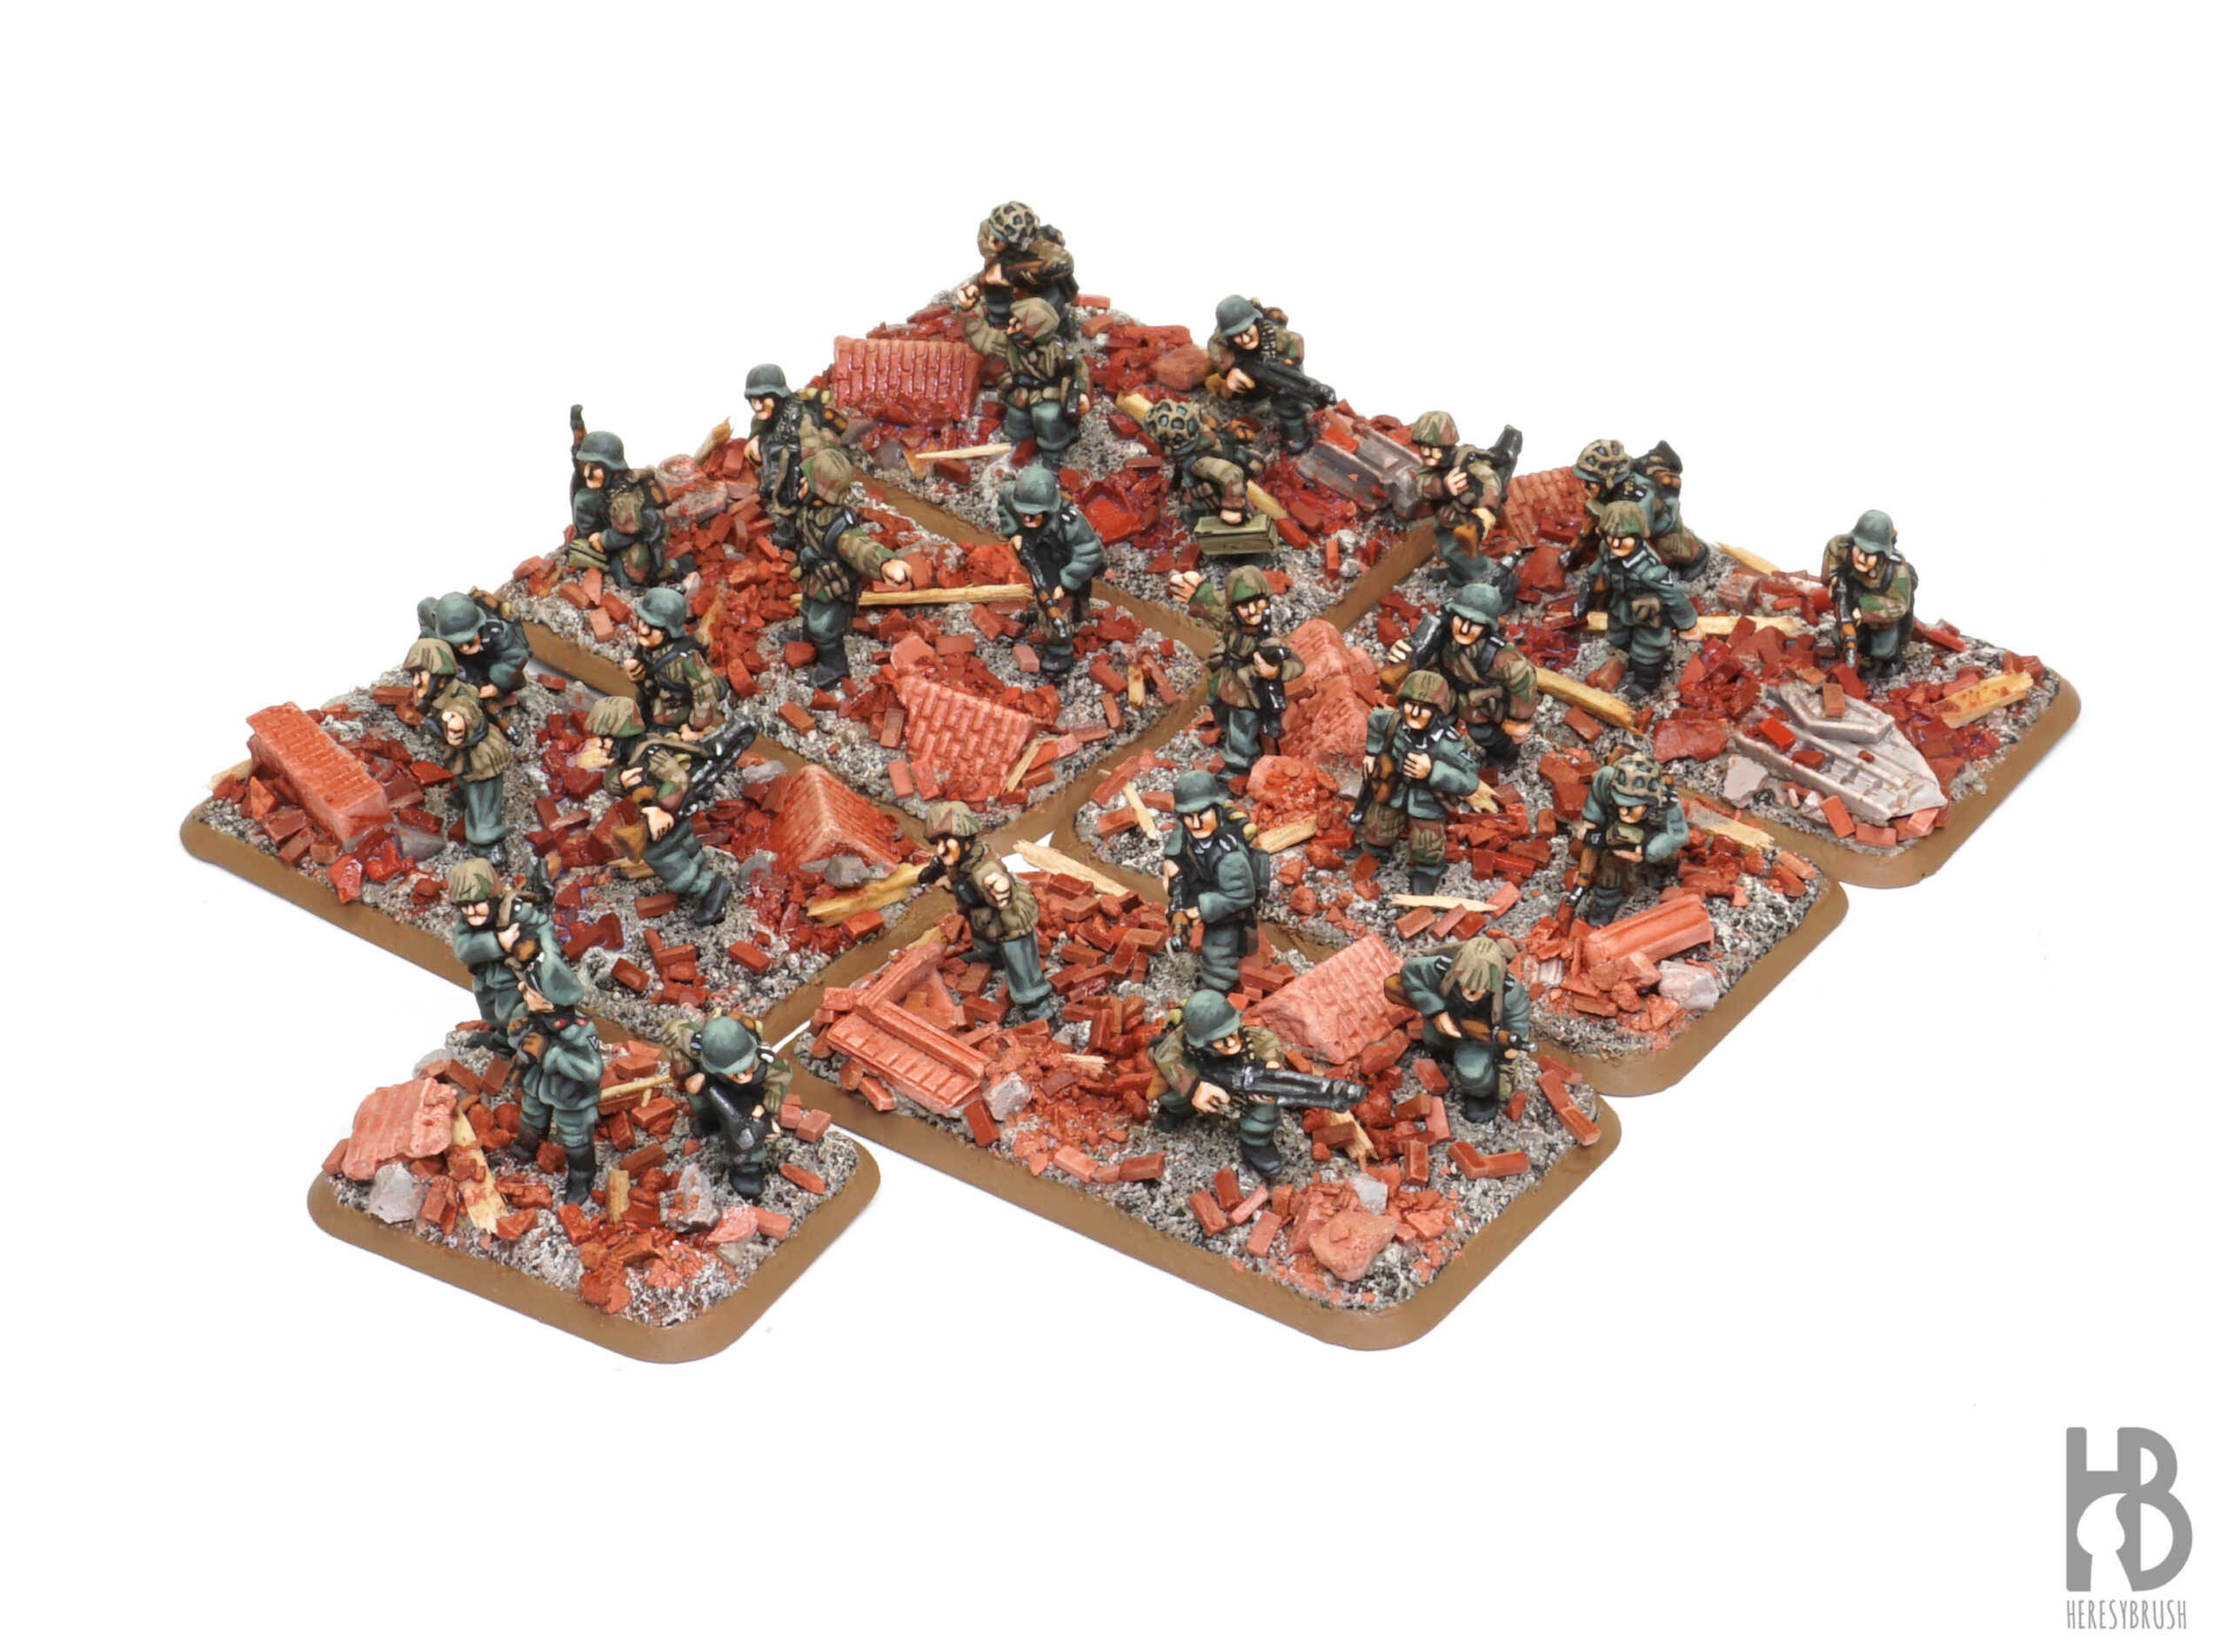
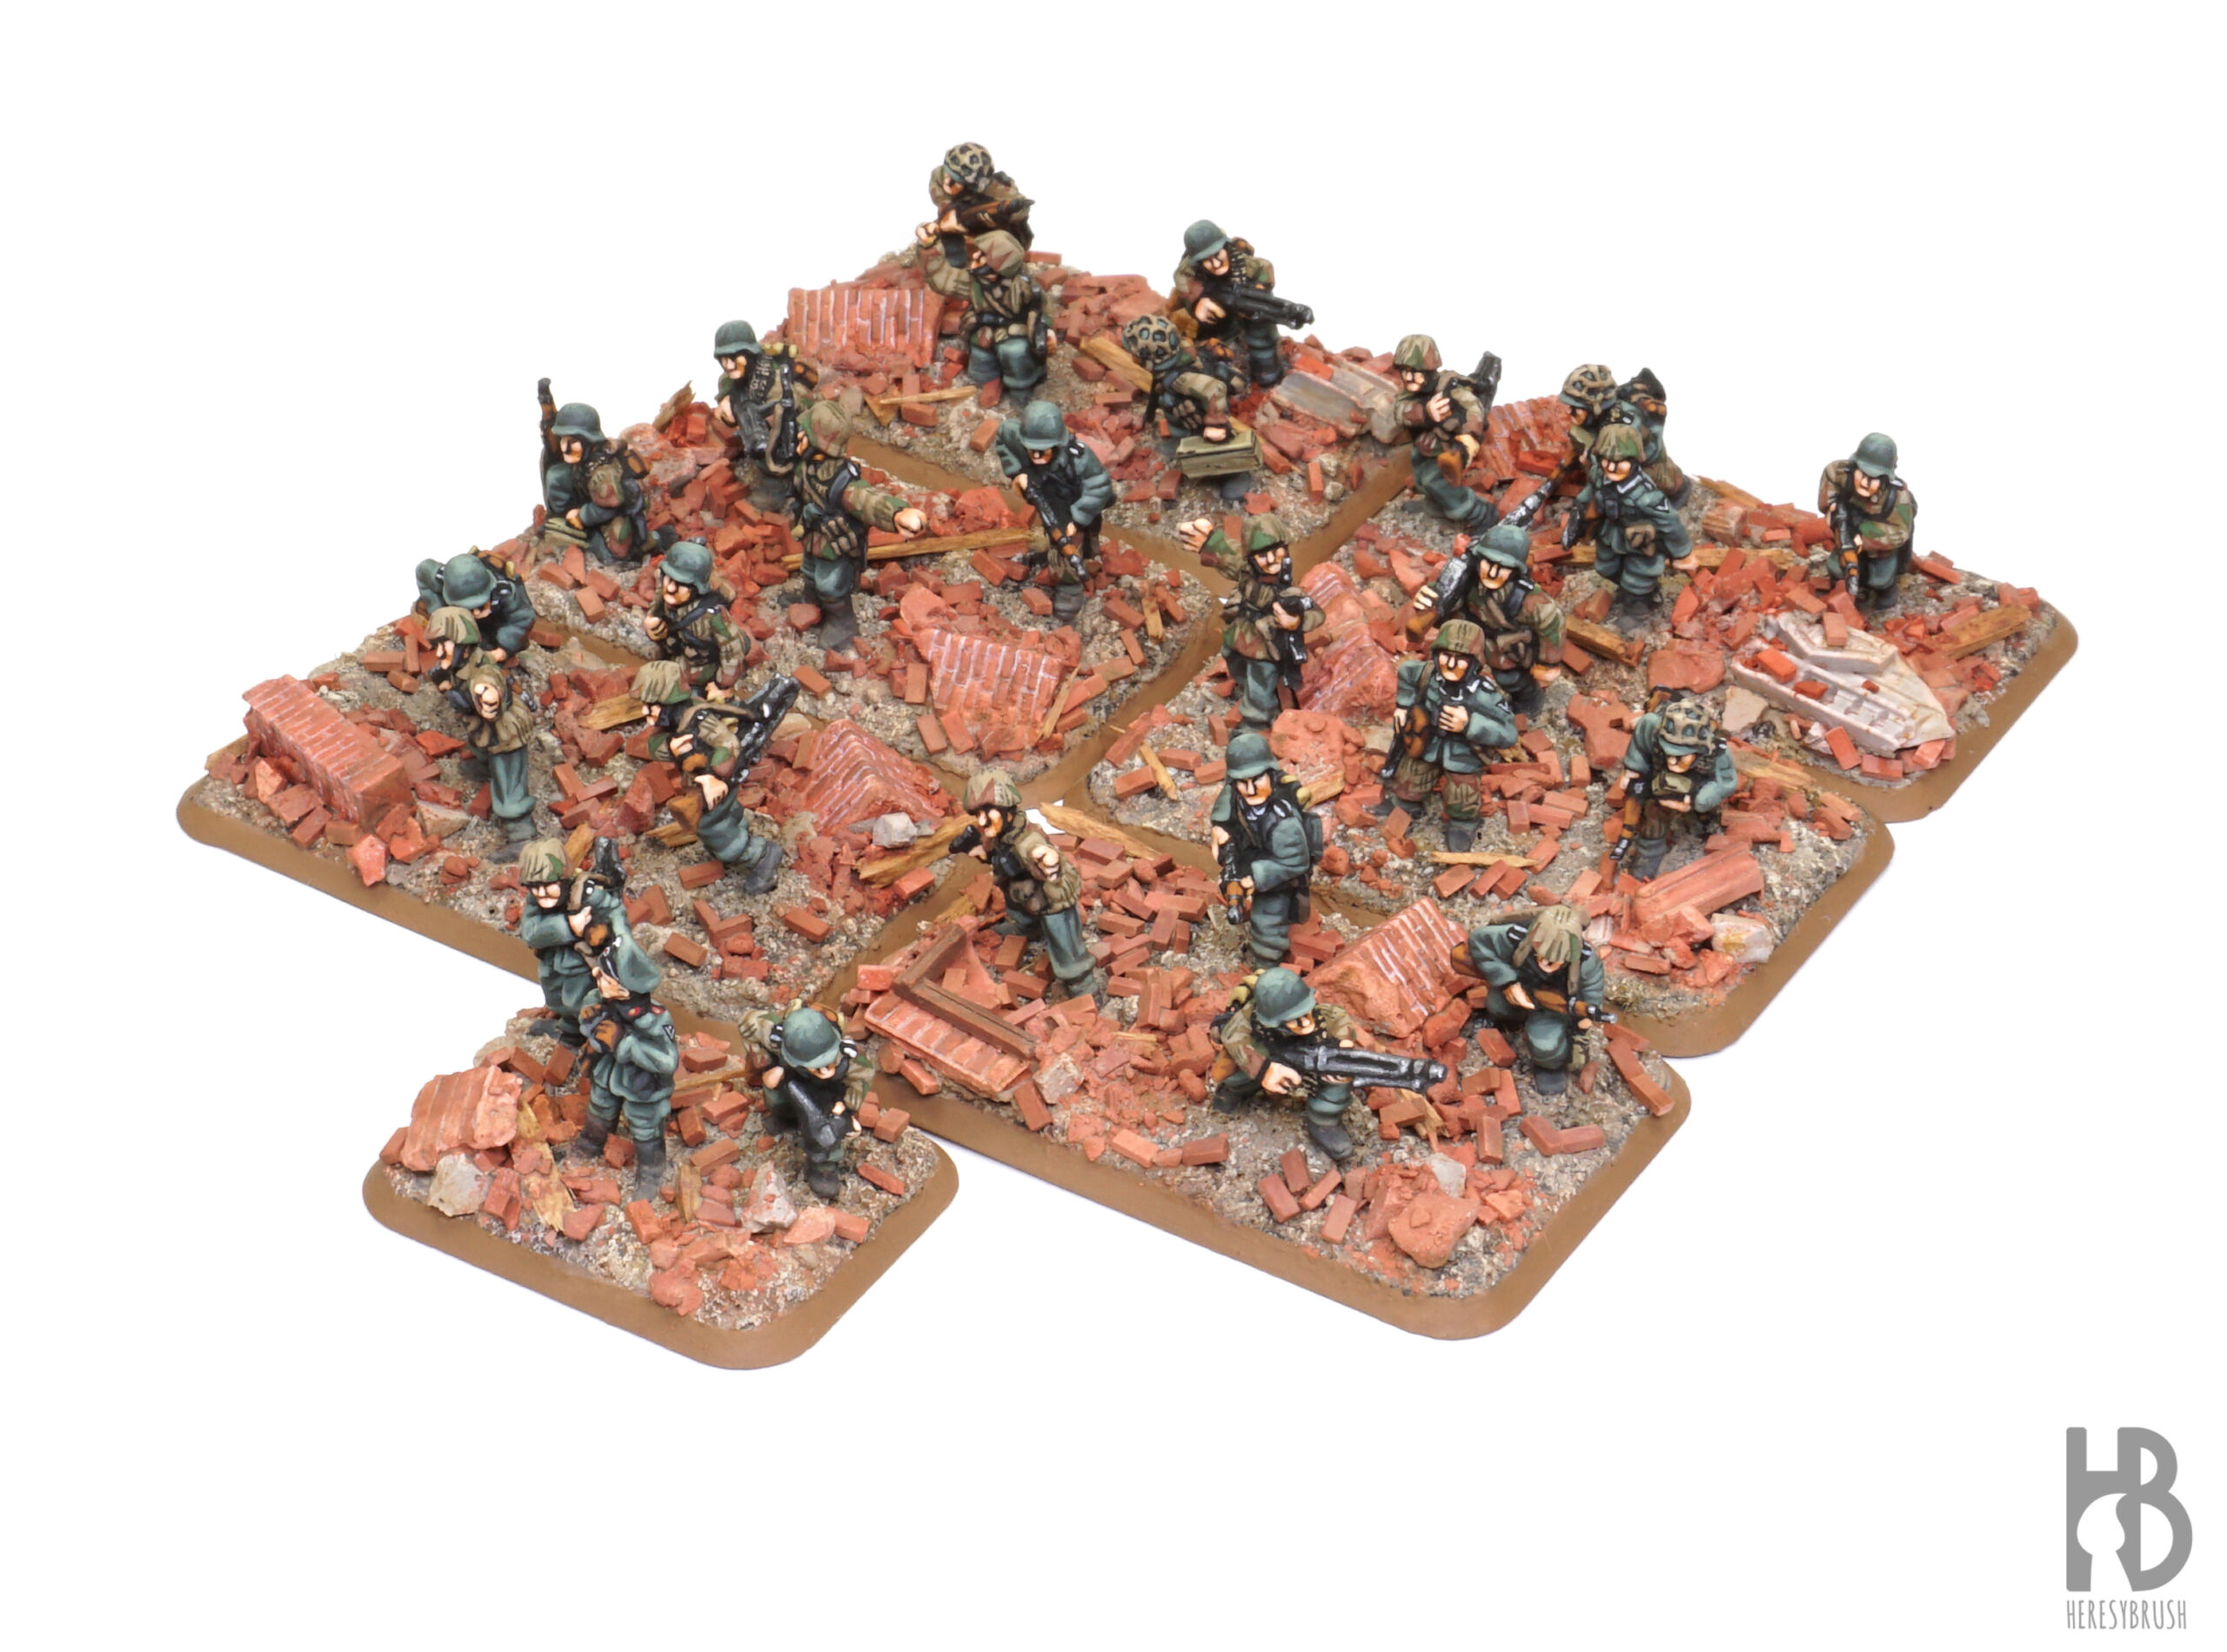
In a couple of weeks, I will be attending the Flames of War National tournament in Finland (Talvisota 2024), for which I have spent the last few months assembling a new German army. Given that the theme of the army is Berlin, 1945, I wanted to craft something unique for the bases of the infantry and Flak 88 guns. In this tutorial, I will demonstrate how to create urban bases with debris in a straightforward, efficient, and effective manner.
While this tutorial primarily targets 15mm miniatures (Battlefront), its principles are adaptable to other scales or projects with the simple adjustment of maintaining proportional elements.
List of materials needed:
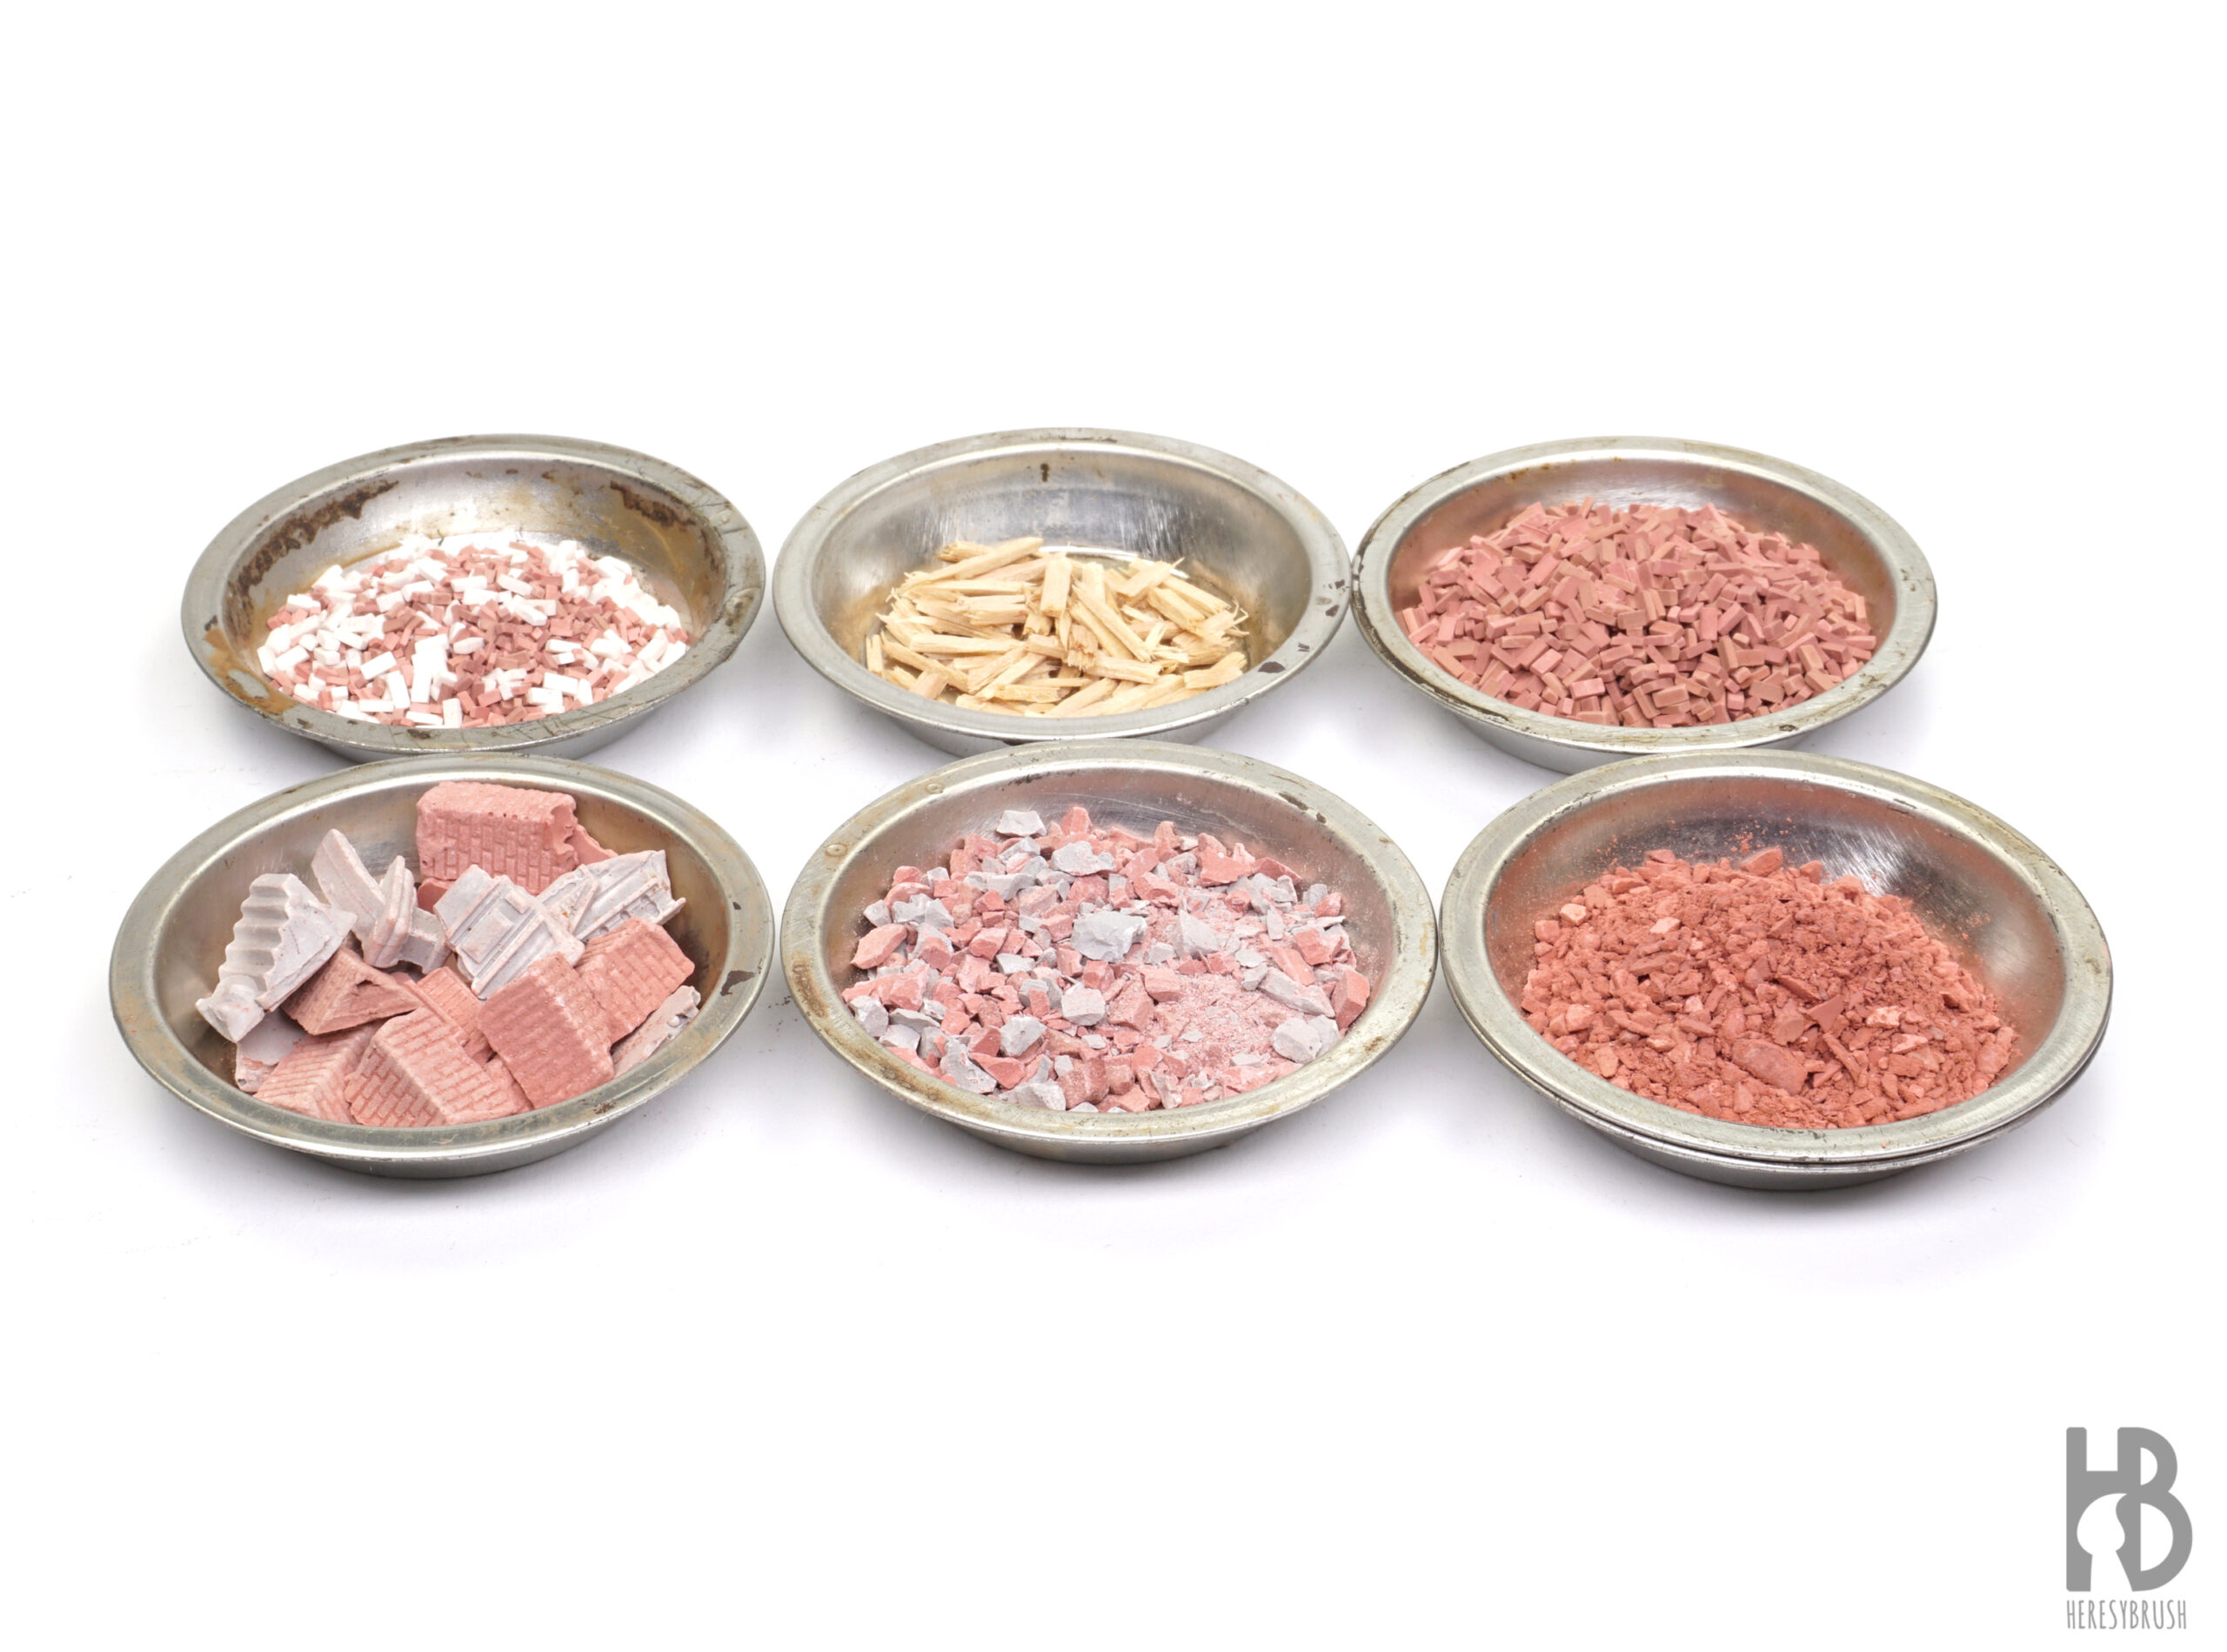
- Bricks and debris in HO scale (Juweela): including bricks of different red shades (JUW-28022, JUW-2817, JUW-2827) and debris (JUW-28127).
- Acrylic texture Light Earth Ground A.MIG-2152 and materials for creating highlights and shadows, such as Dio Drybrush Light Sand A.MIG-0616 and acrylic wash Dark Wash A.MIG-0708.
- Liquid glue for fixing the debris and other elements, such as Dio Glue A.MIG-8833.
- Oils for creating dust effects, such as Oilbrusher Earth A.MIG-3514, Rust A.MIG-3510, and Dust A.MIG-3516.
Given the time constraints of this extensive project, I opted to repurpose an old infantry platoon that my brother and I painted approximately 15 years ago. Since the miniatures are already painted, enhancing this “basic” paint job would not require too much time.
Step 0 – Clean the base
The initial step involved removing all vegetation using a modeling knife and cutter. Perfection wasn’t necessary at this stage, as I planned to cover it later with an acrylic texture.
Step 1 – Create a new texture
The quickest method to create a new texture is to apply a colored acrylic texture, such as Light Earth Ground A.MIG-2152. The light brown color would perfectly complement a debris scenario. Ideally, after painting the miniatures individually and fixing them onto the base, the first step for creating the base would involve applying this texture. We spread the acrylic texture over the base using a brush, taking care not to spoil the painted miniatures. We cover everything, also the area around the feet.
Step 2 – Add contrast to the base texture
To create a more interesting foundation for the debris, we can stand out the recesses by applying a dark wash such as Dark Wash A.MIG-0708, followed by a drybrush with a very light color such as Dio Drybrush Light Sand A.MIG-0616 once the wash is dry. I also painted the ribbon using a beige brown, similarly to the rest of my army.
Bonus step – Improve painting job
As I mentioned, I repurposed a very old painted infantry platoon. Consequently, I decided to make slight improvements to the painting to ensure it harmonized with the rest of the army painted in my current style. I recommend you to read this another article about this topic. In short, the main change involved using a more greenish and accurate color for the uniform, as well as adding more pronounced highlights to create greater contrast.
Step 3 – Prepare basing materials
To save time and achieve more uniform results, we can utilize pre-made modeling products to replicate bricks and debris. Upon the recommendation of some friends, I opted to use Juweela products in HO scale (1:87, slightly larger than 1:100 or 15 mm). I acquired several sets of bricks and one set of debris containing larger chunks or fragments of buildings. Additionally, I crushed some of these pieces using a ceramic mortar to create smaller debris, including some almost resembling dust. I also added small pieces of balsa wood to the collection of materials.
Step 4 – First layer of debris
We begin by creating the first layer of debris, starting with the addition of the larger pieces. To do this, we apply a small amount of the same acrylic texture used previously, then gently press down on top of it one large debris element, along with other smaller ones, bricks, and wood. The acrylic texture not only provides a similar color to the rest of the base but also acts as a glue, effectively integrating everything together. For this porpoise I used tweezers rather than the hands.
Step 5 – Second layer of debris
Once the first layer of debris has completely dried, we proceed to add bricks, thinner debris (almost like powder) and more wood, focusing especially around the larger elements added previously. These can be applied using fingers or tweezers in a random manner. To secure them in place, we apply drops of liquid glue, such as Dio Glue A.MIG-8833, using a pipette, being careful not to touch the debris directly. Once dry, the ceramic material of the debris will darken (with the red becoming more intense) as it absorbs the moisture from the glue and is sealed. This glue not only serves to fix the material in place but also helps cover its porosity, resulting in a more cohesive and realistic appearance. Since the glue leaves a glossy or satin finish, we need to apply a layer of flat varnish using the airbrush to eliminate it. We also seal at the same time the paint job on the miniatures.
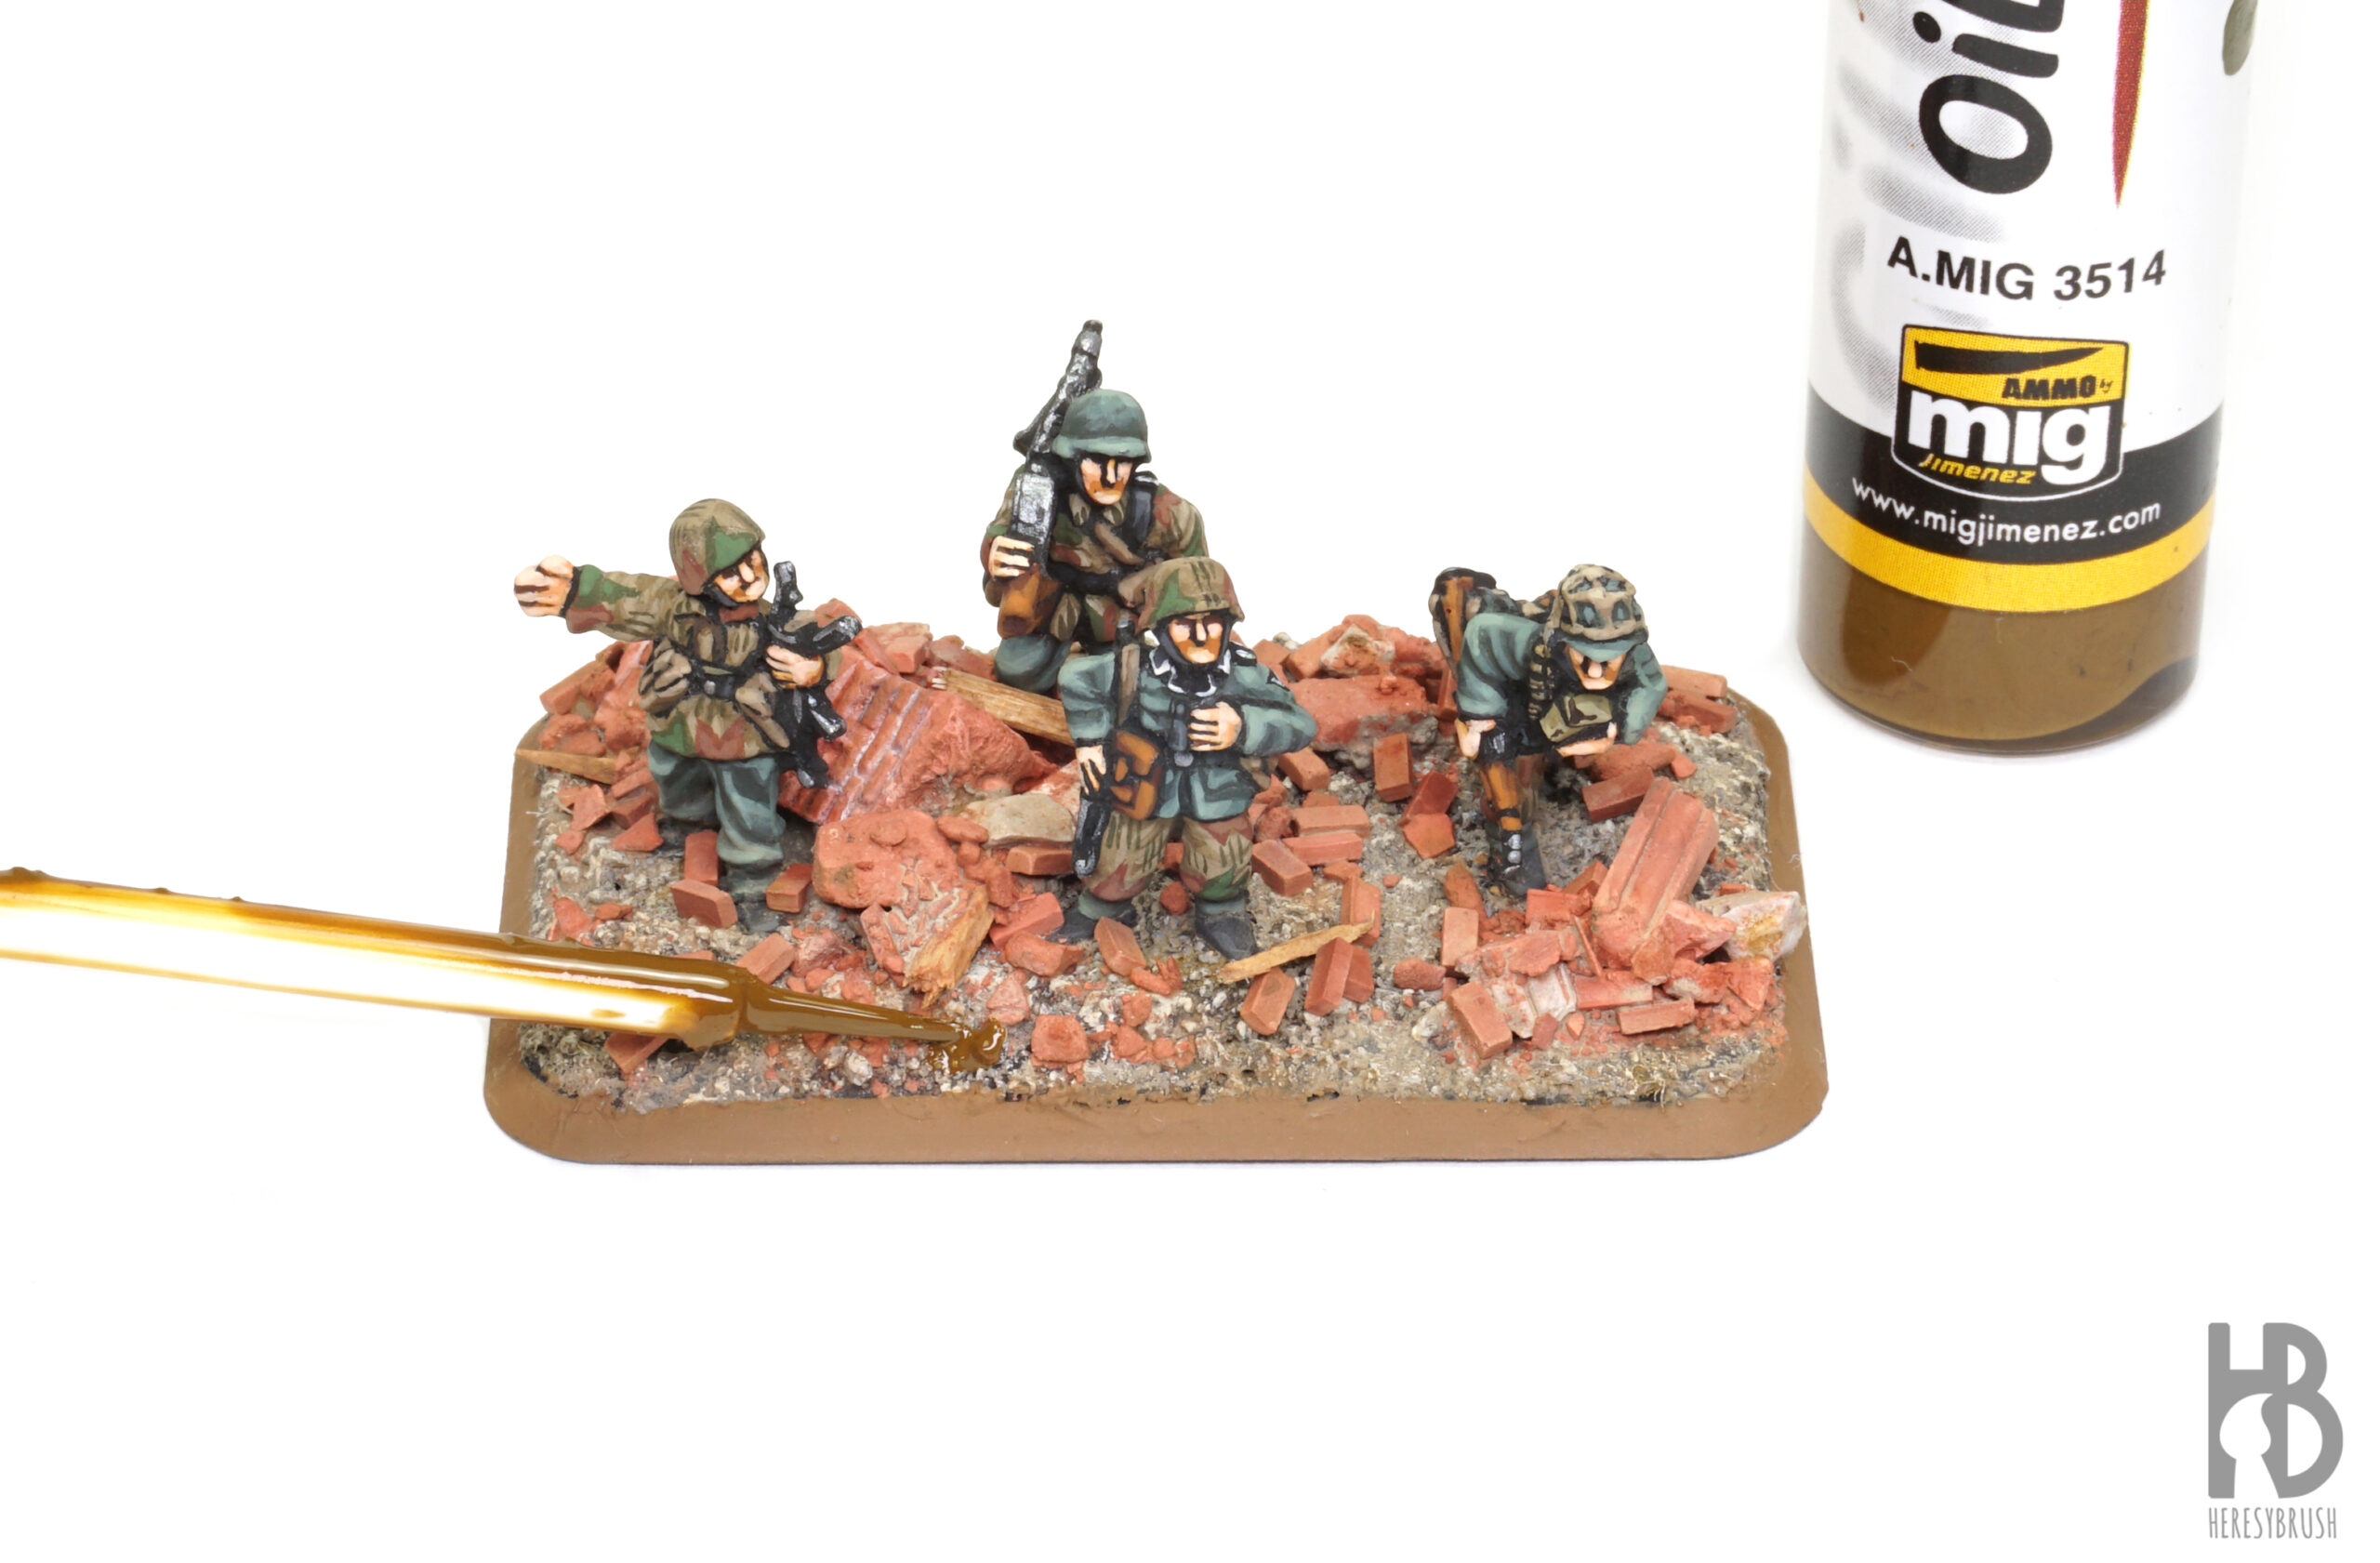
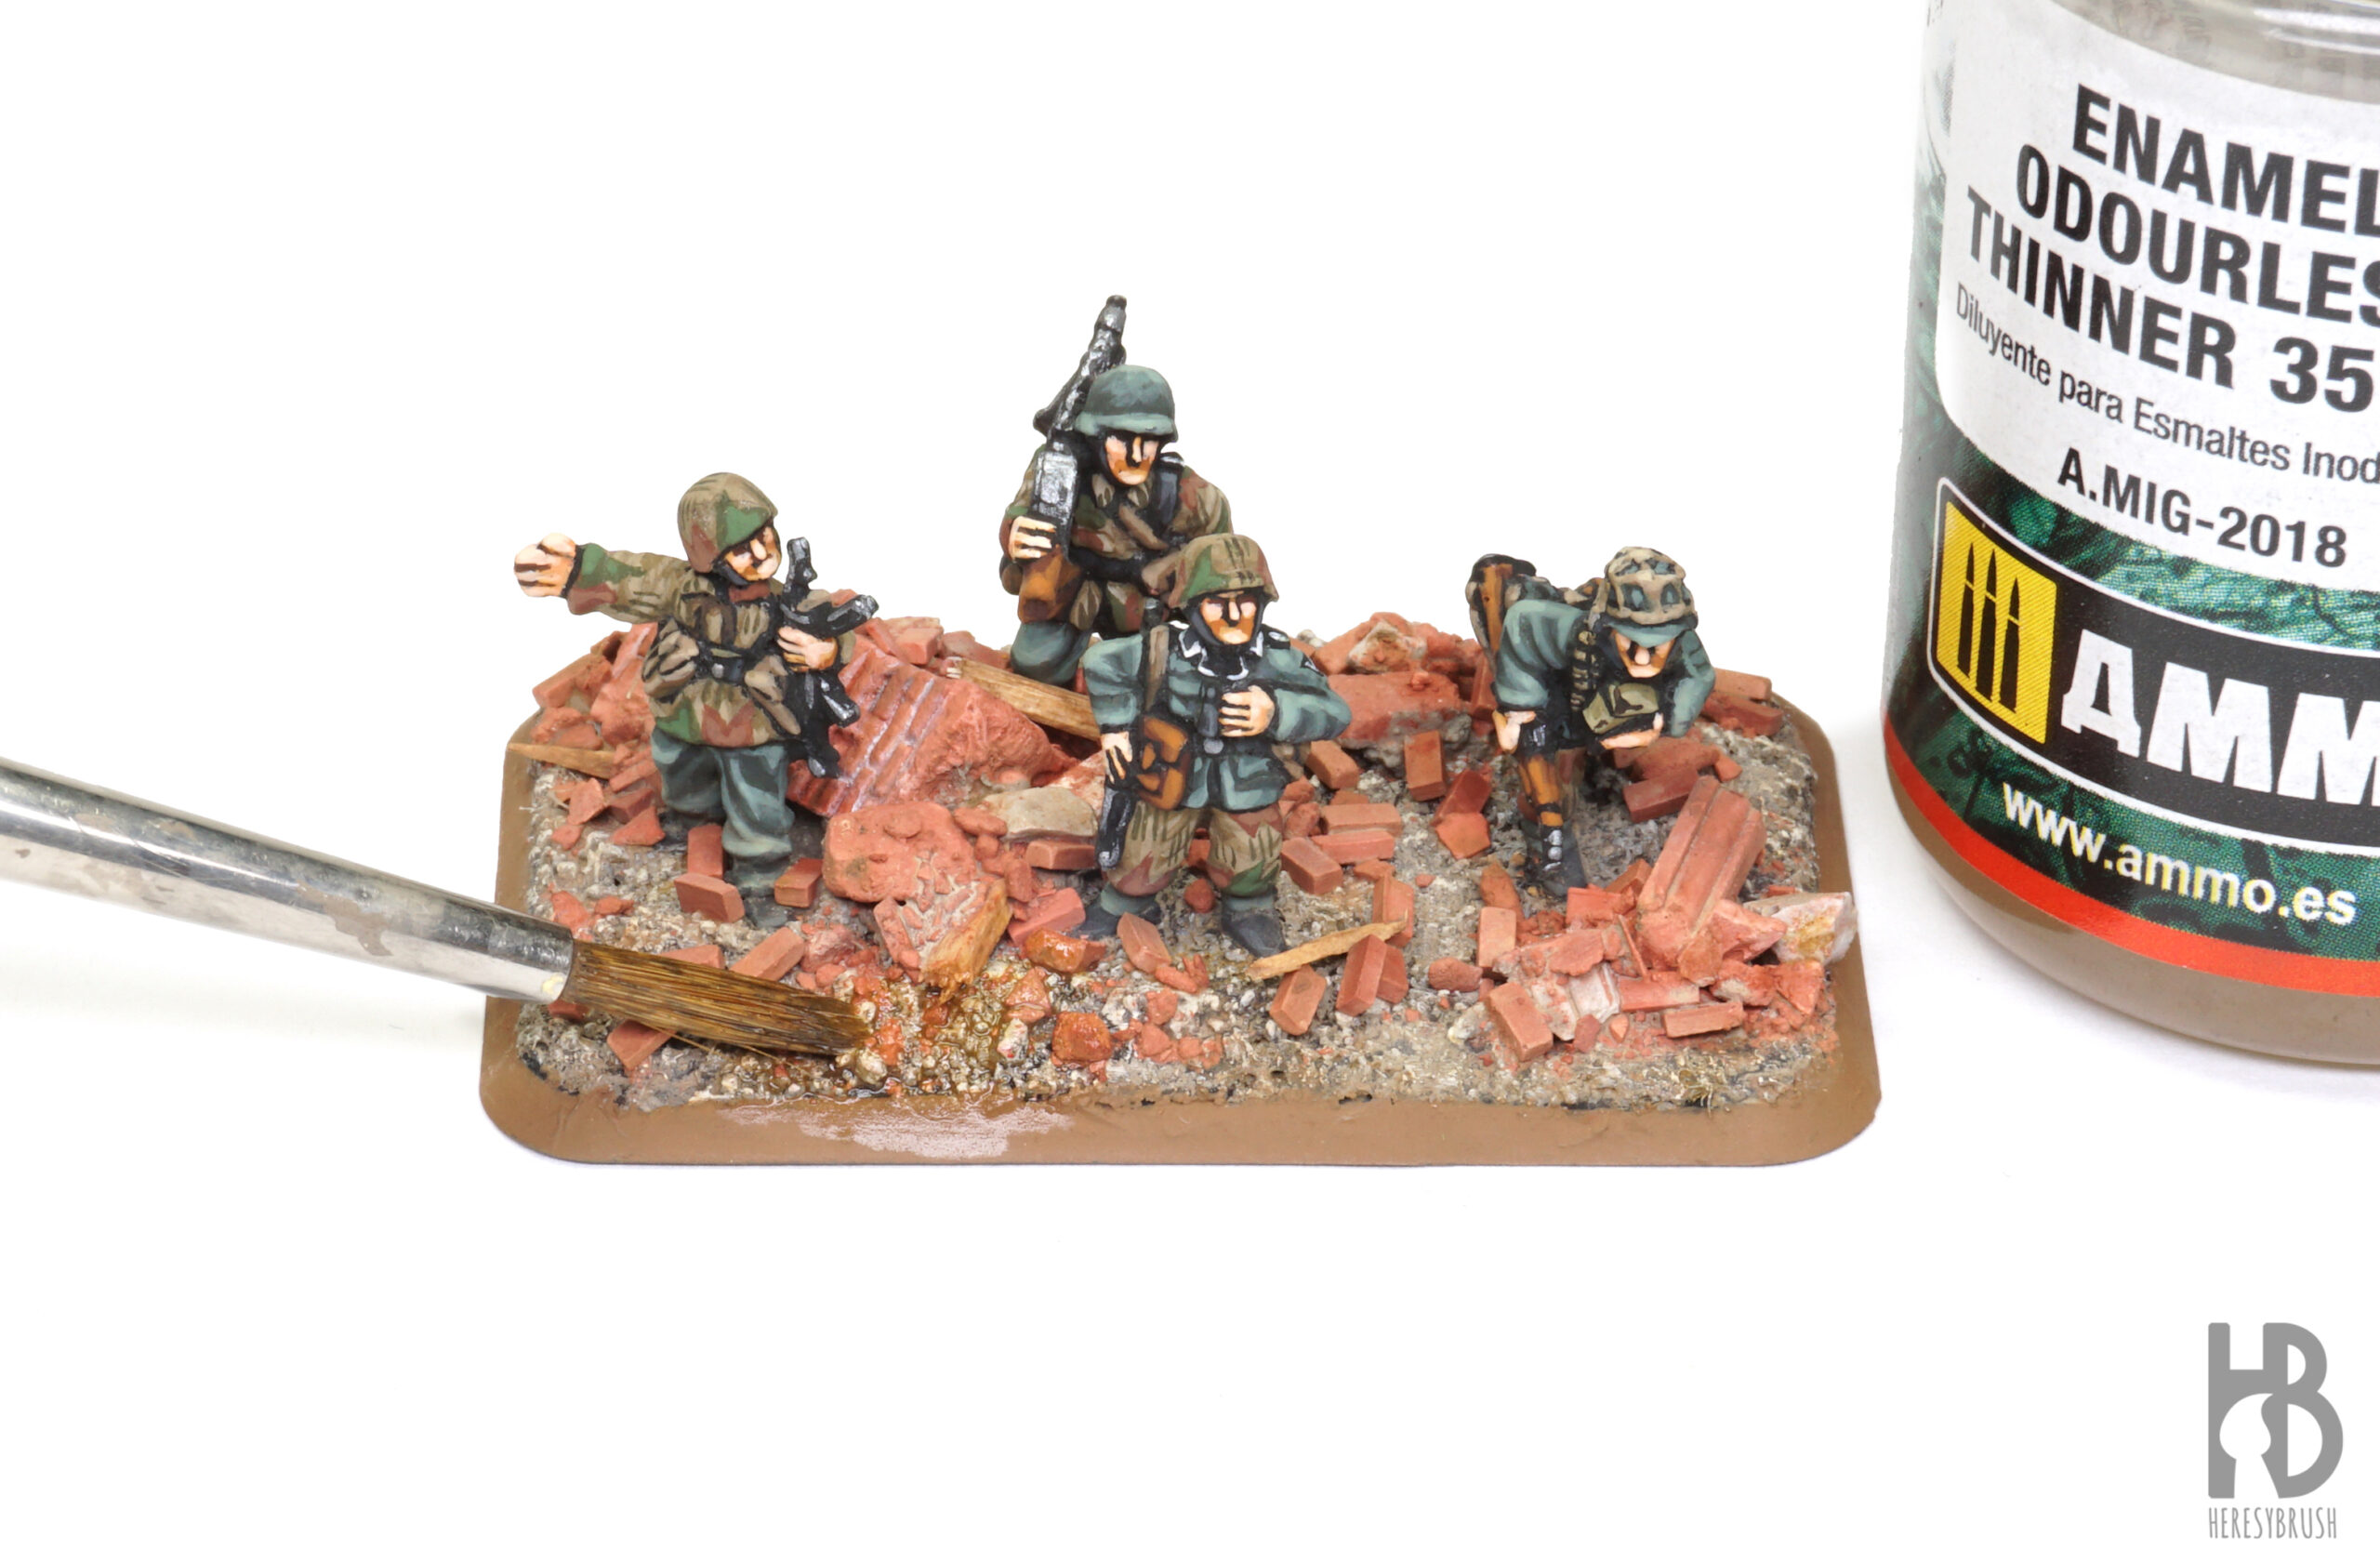
Step 6 – Dust effects with oils
Finally, we use oils (Oilbrusher Earth A.MIG-3514, Rust A.MIG-3510, and Dust A.MIG-3516) to create dust effect and integrate everything together (see below). We can also use white to paint the whitish line between bricks on the fragments of walls.
First, we apply a bit of each oil here and there using the same brush incorporated in the tube of the Oilbrusher.
And then, we blend the oils using a brush moistened with Enamel Odourless Thinner A.MIG-2018.
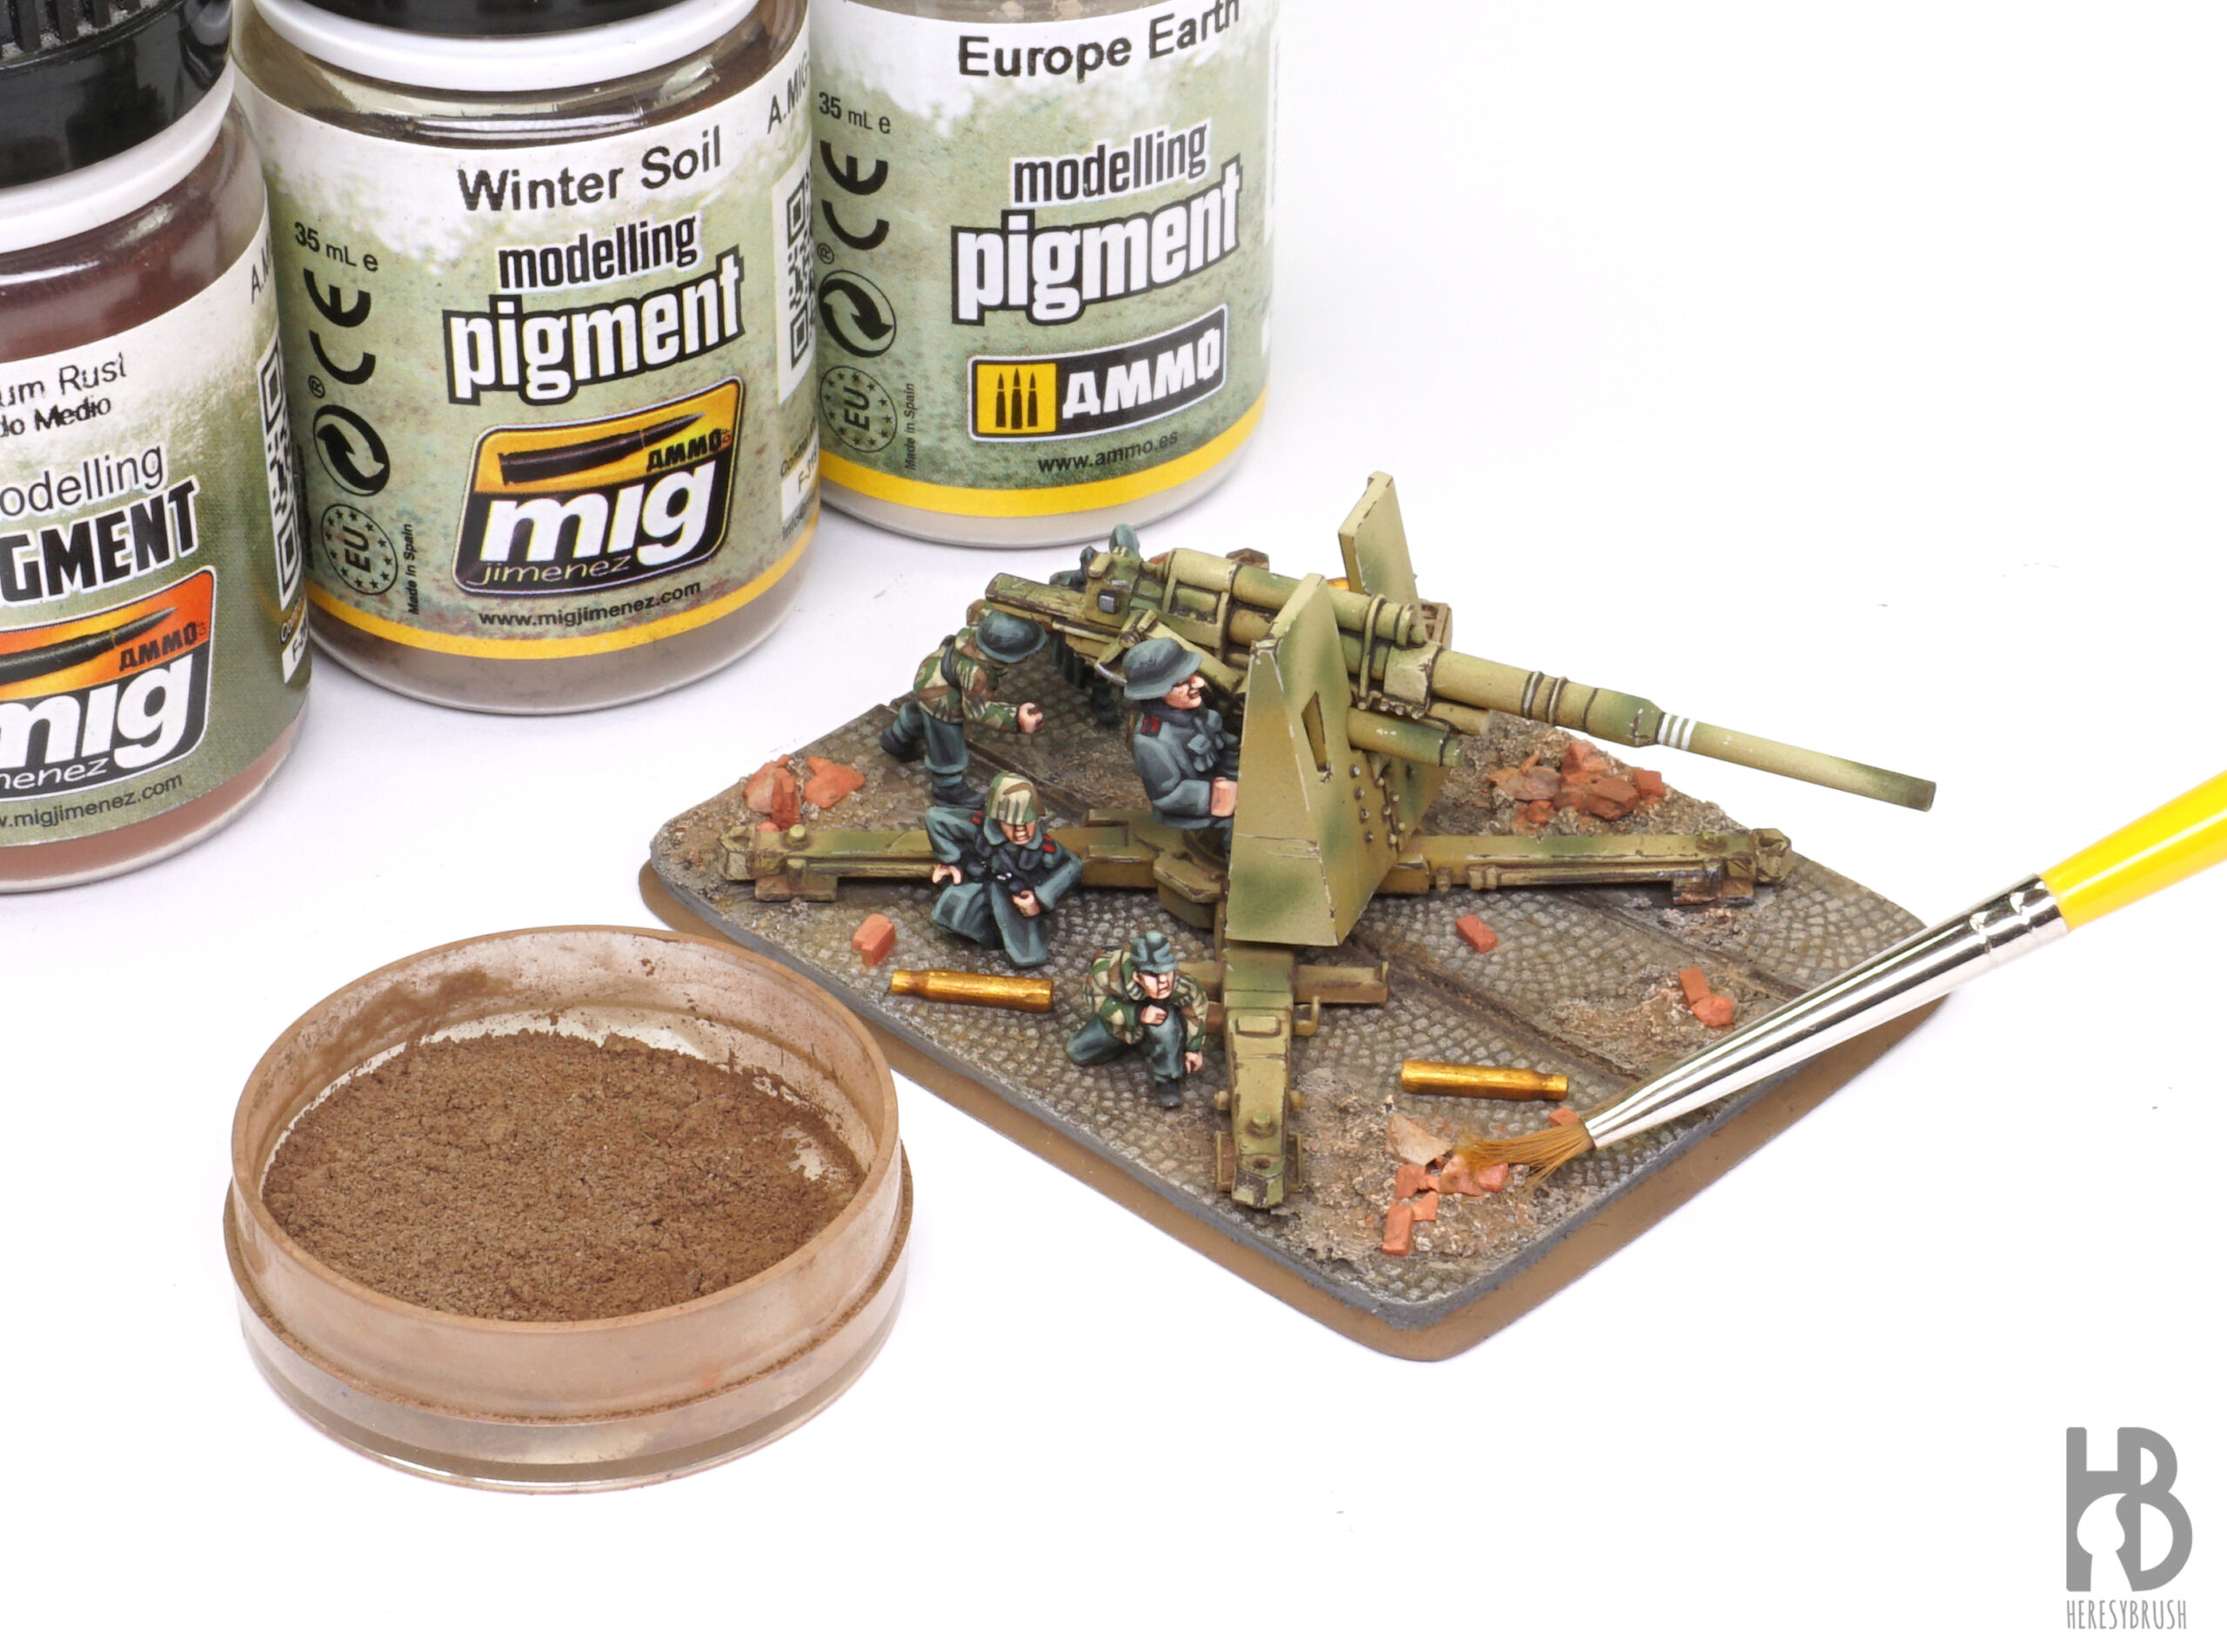
Step 7 – Dust effects with pigments
We can also enhance the realism by creating dust effects using pigments, which are a more suitable modeling product. These are essentially colored powders or dust. I chose not to add them to the infantry bases since they already have a proper dust effect. Pigments could further mute the colors of the base, potentially reducing the contrast that is crucial for enhancing 15 mm miniatures.
However, for the bases of the Flak 88 guns, some pigments will help integrate the small accumulation of debris on the grey cobblestone bases. To achieve this, we apply the pigments dry, directly from the jar without mixing them with water or White Spirit. After selecting a few suitable pigment colors to enrich the result, we gently spread them using an old brush. Although not compulsory, we can permanently fix the pigments by applying them by capillarity – without touching the surface – using some drops of Pigment Fixer A.MIG-3000.
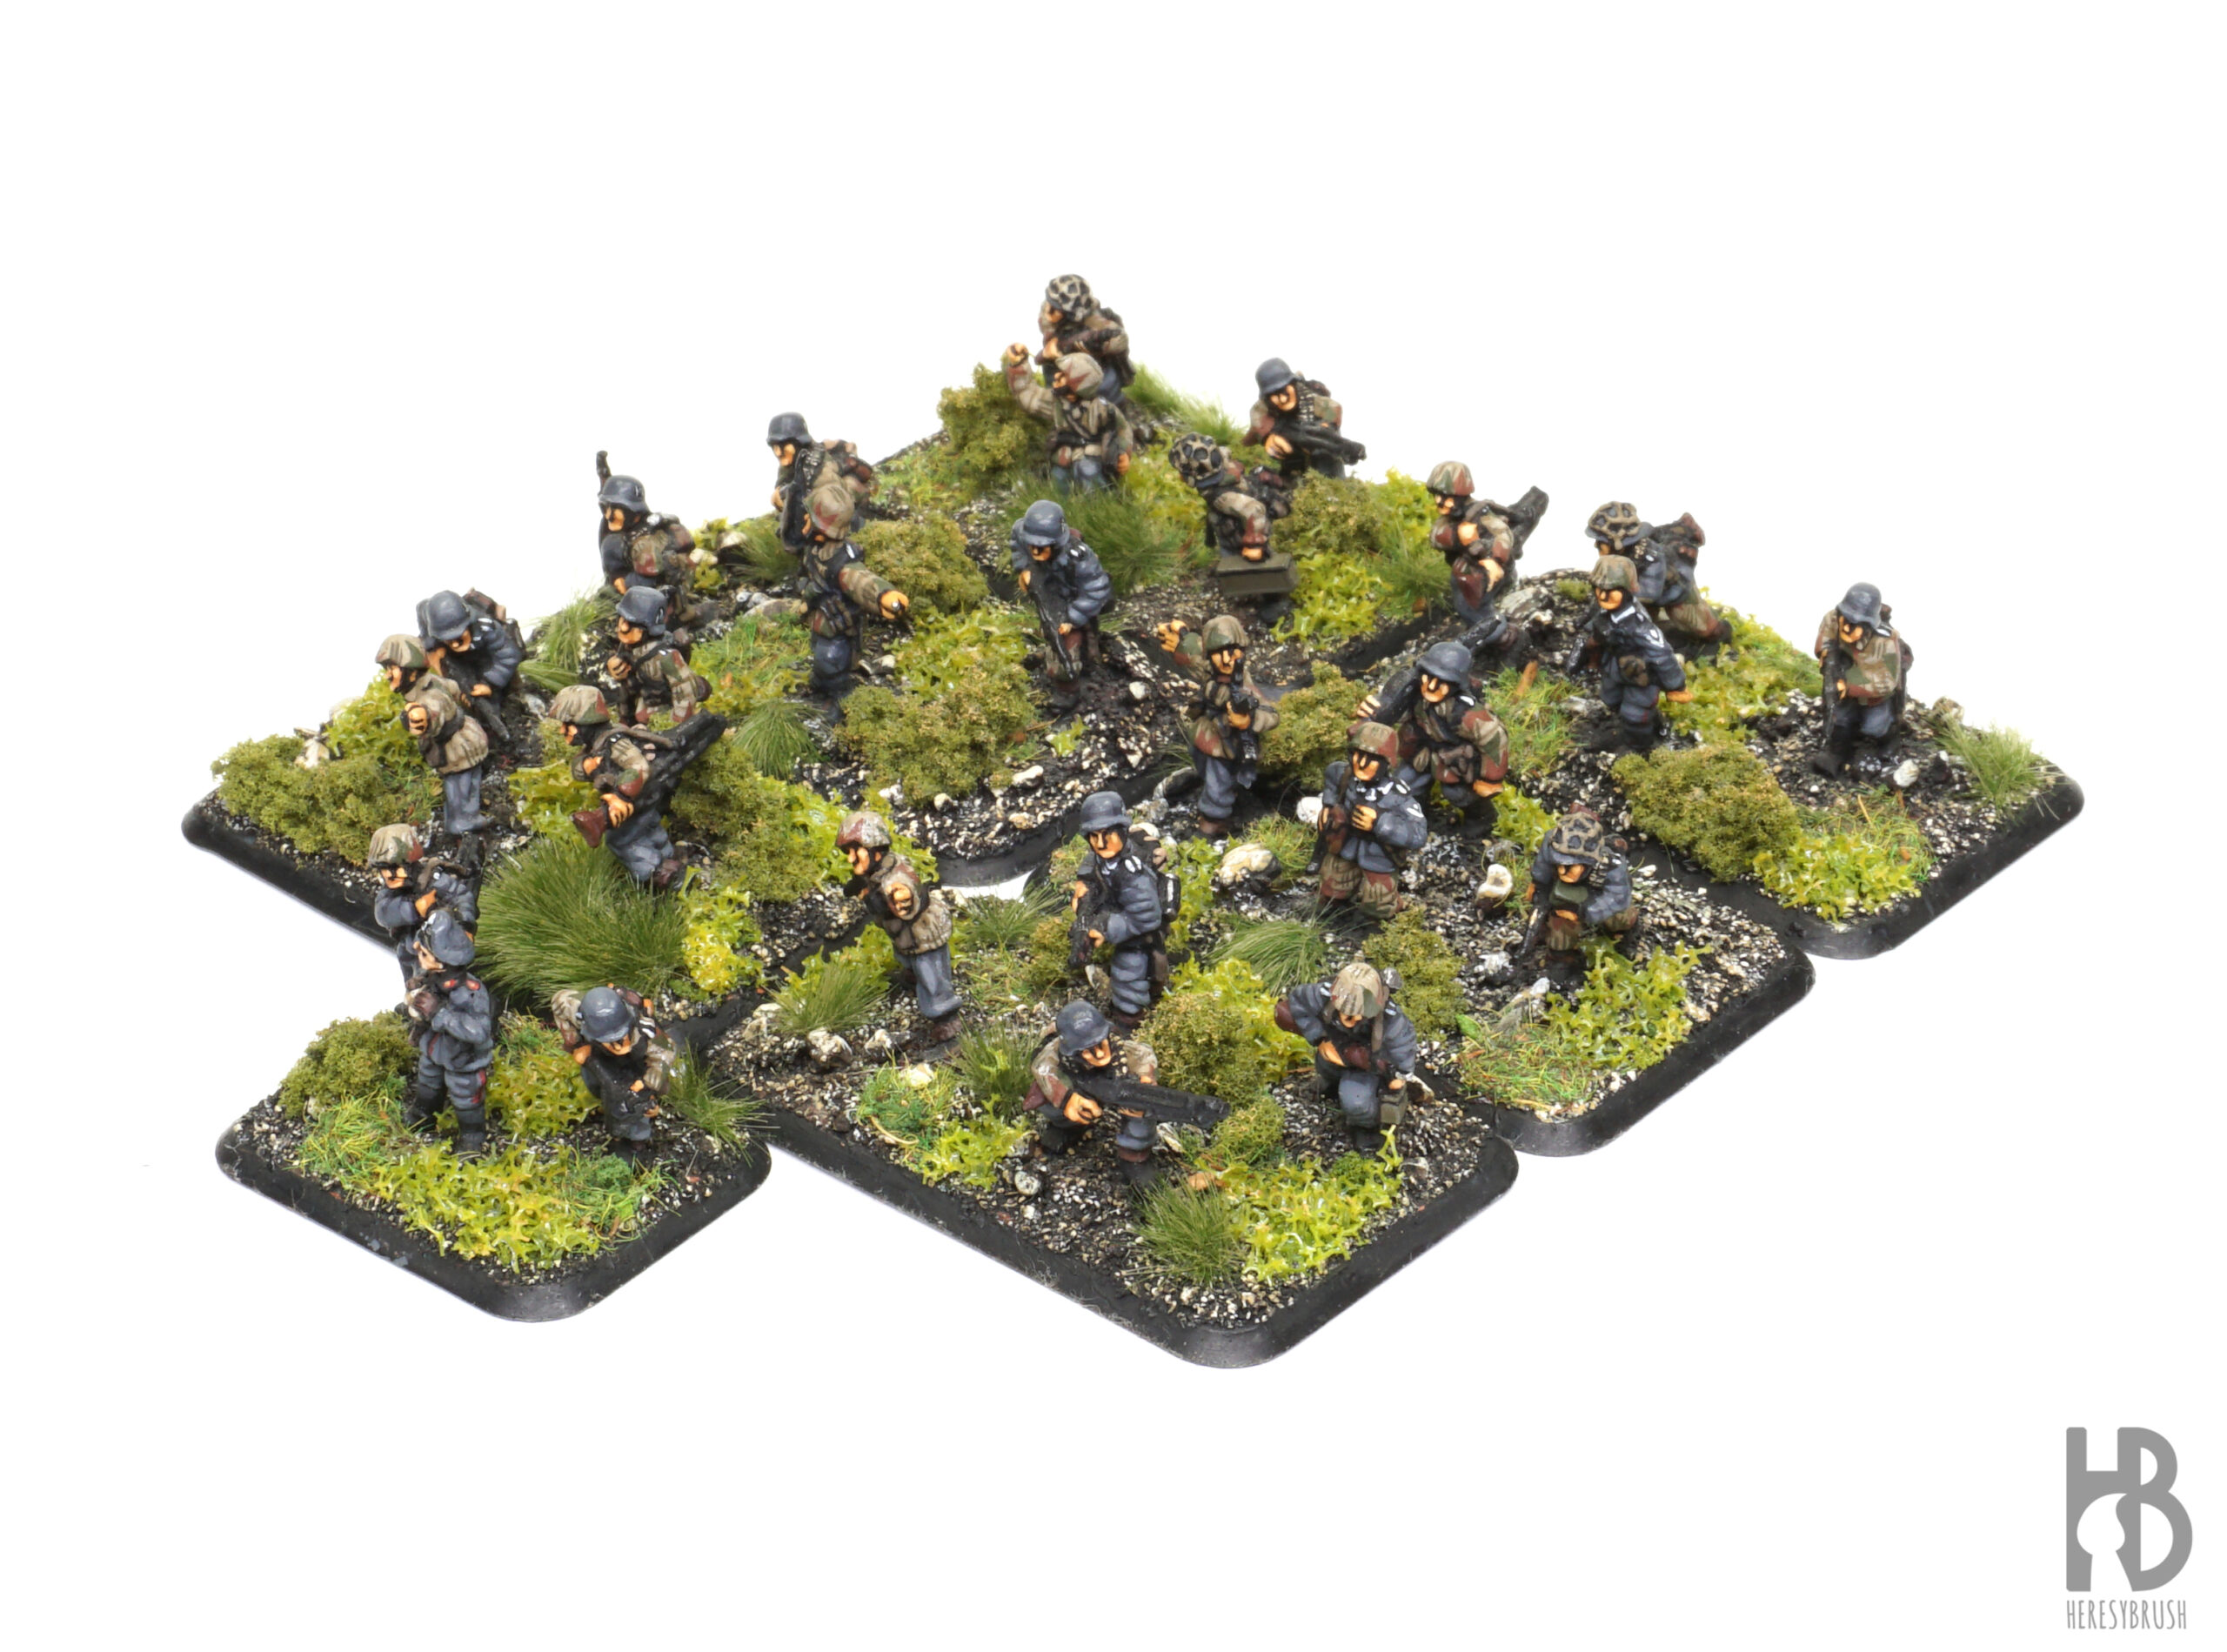
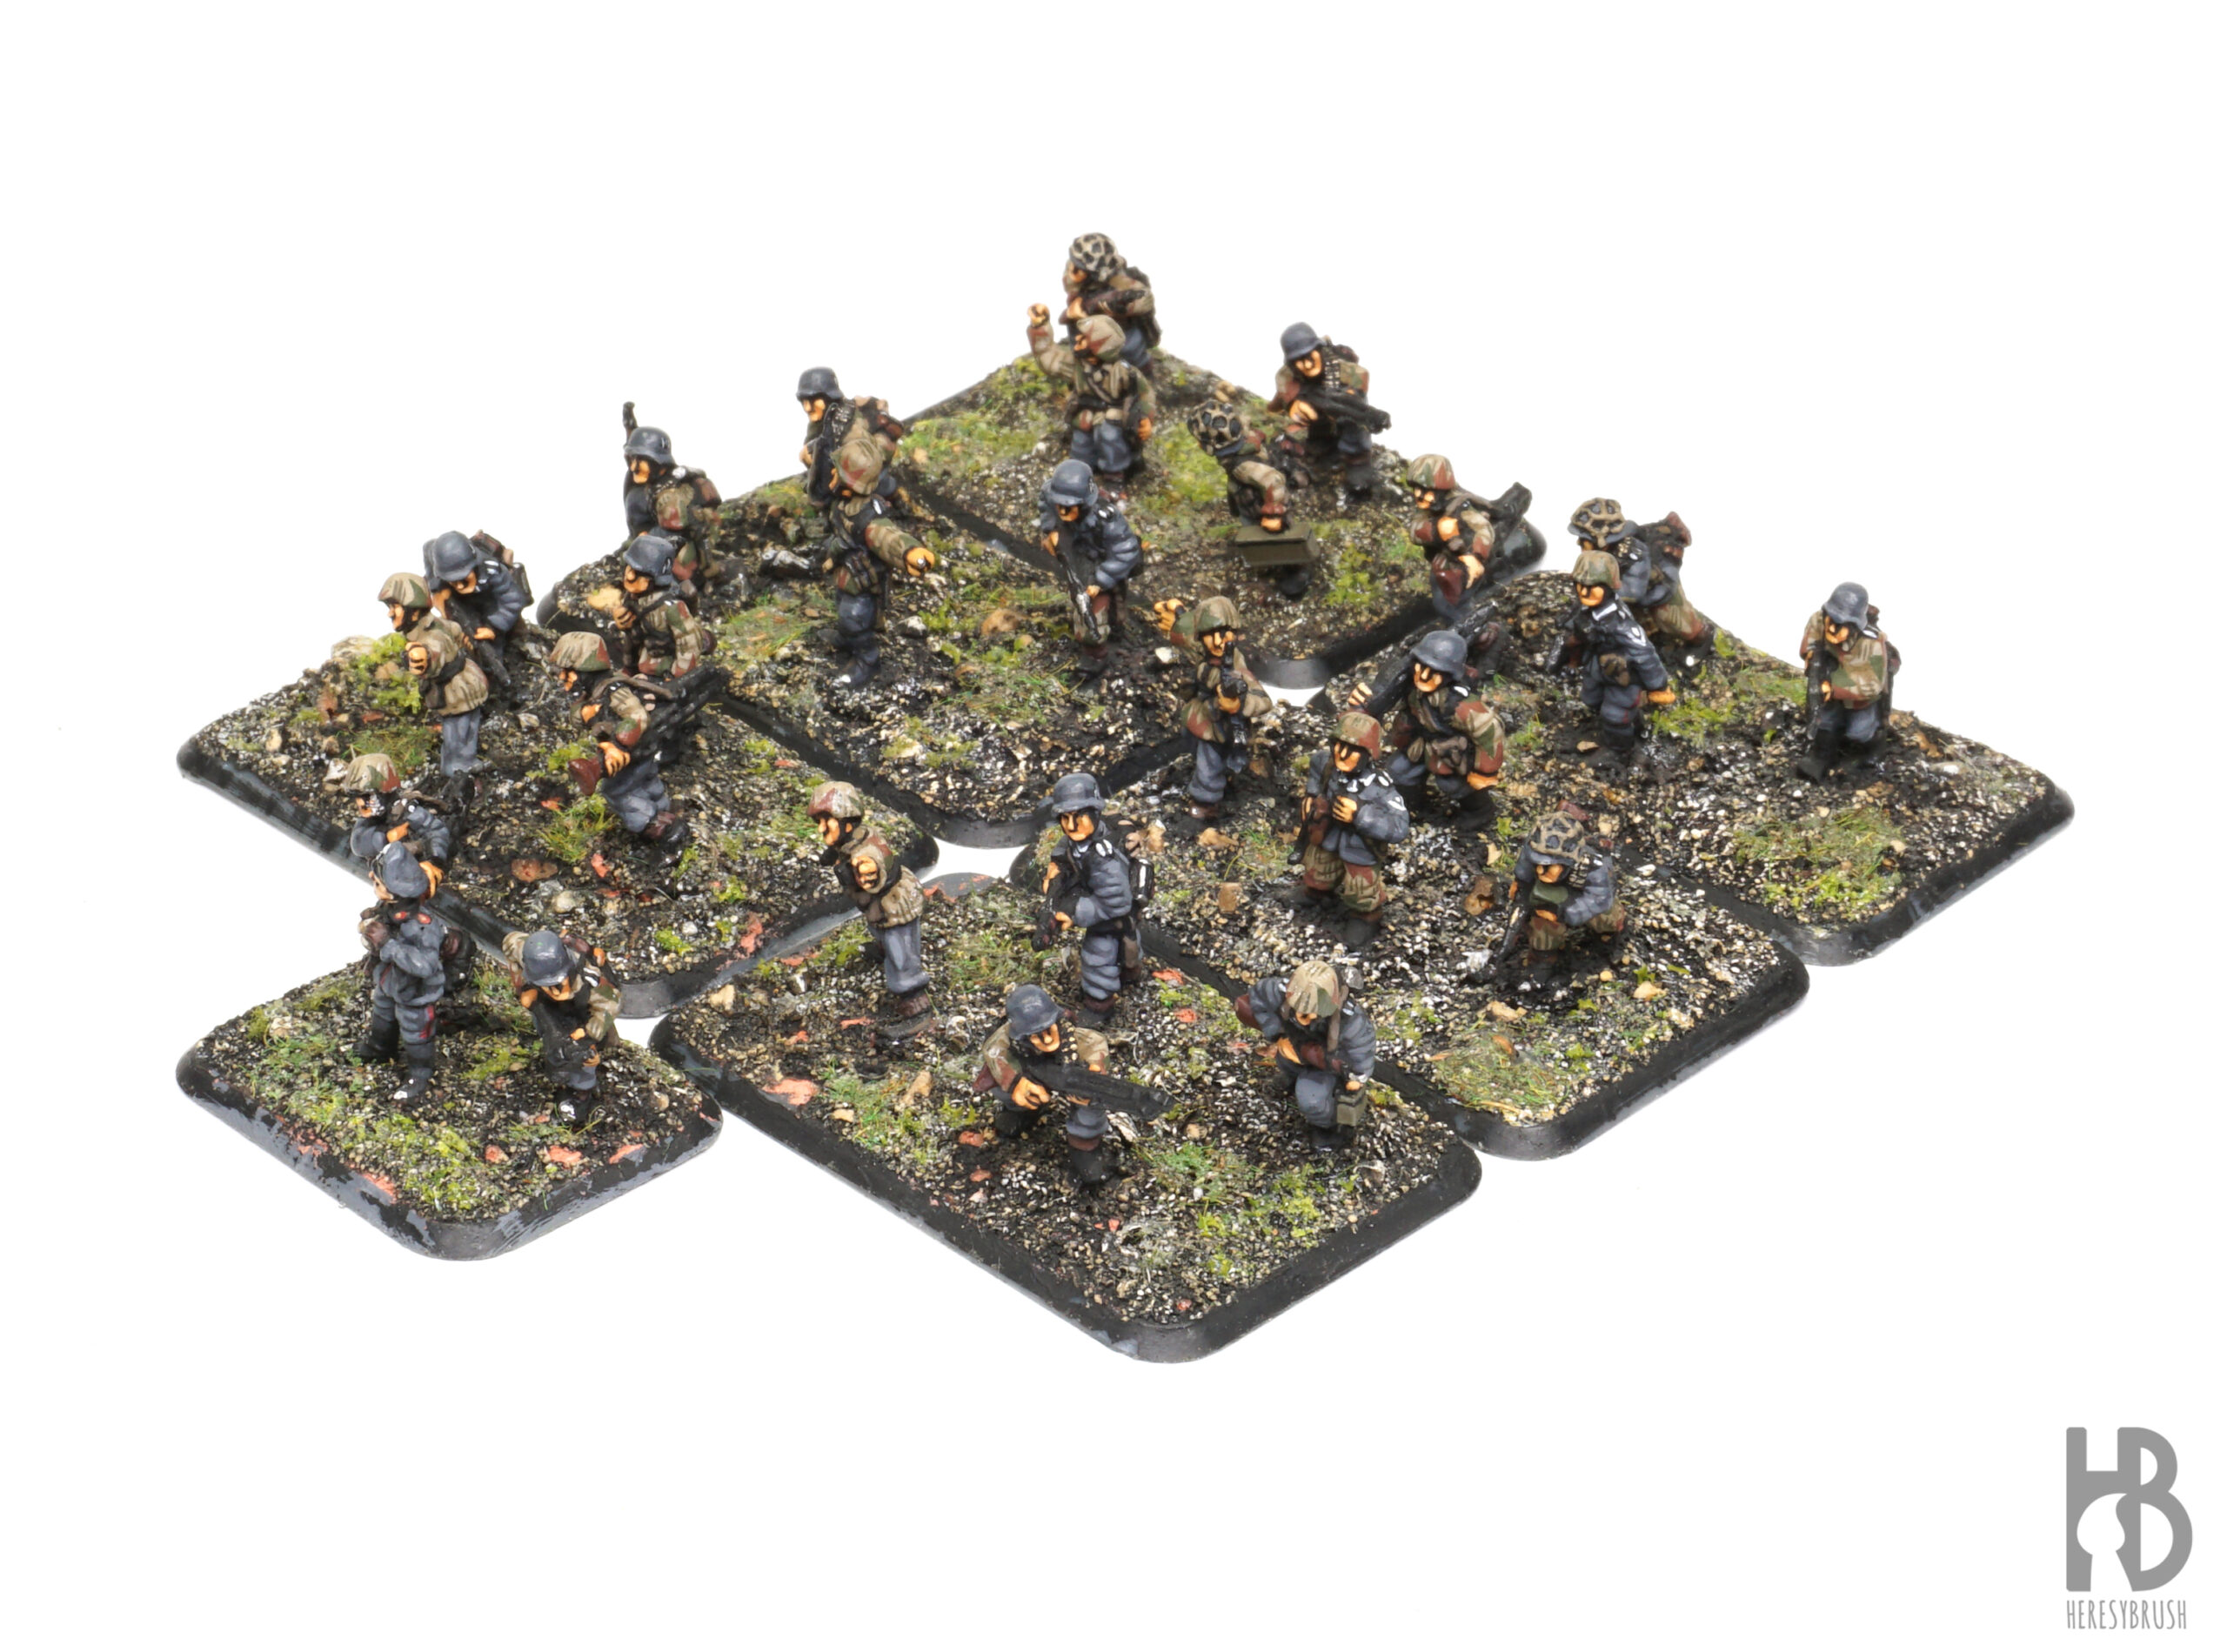
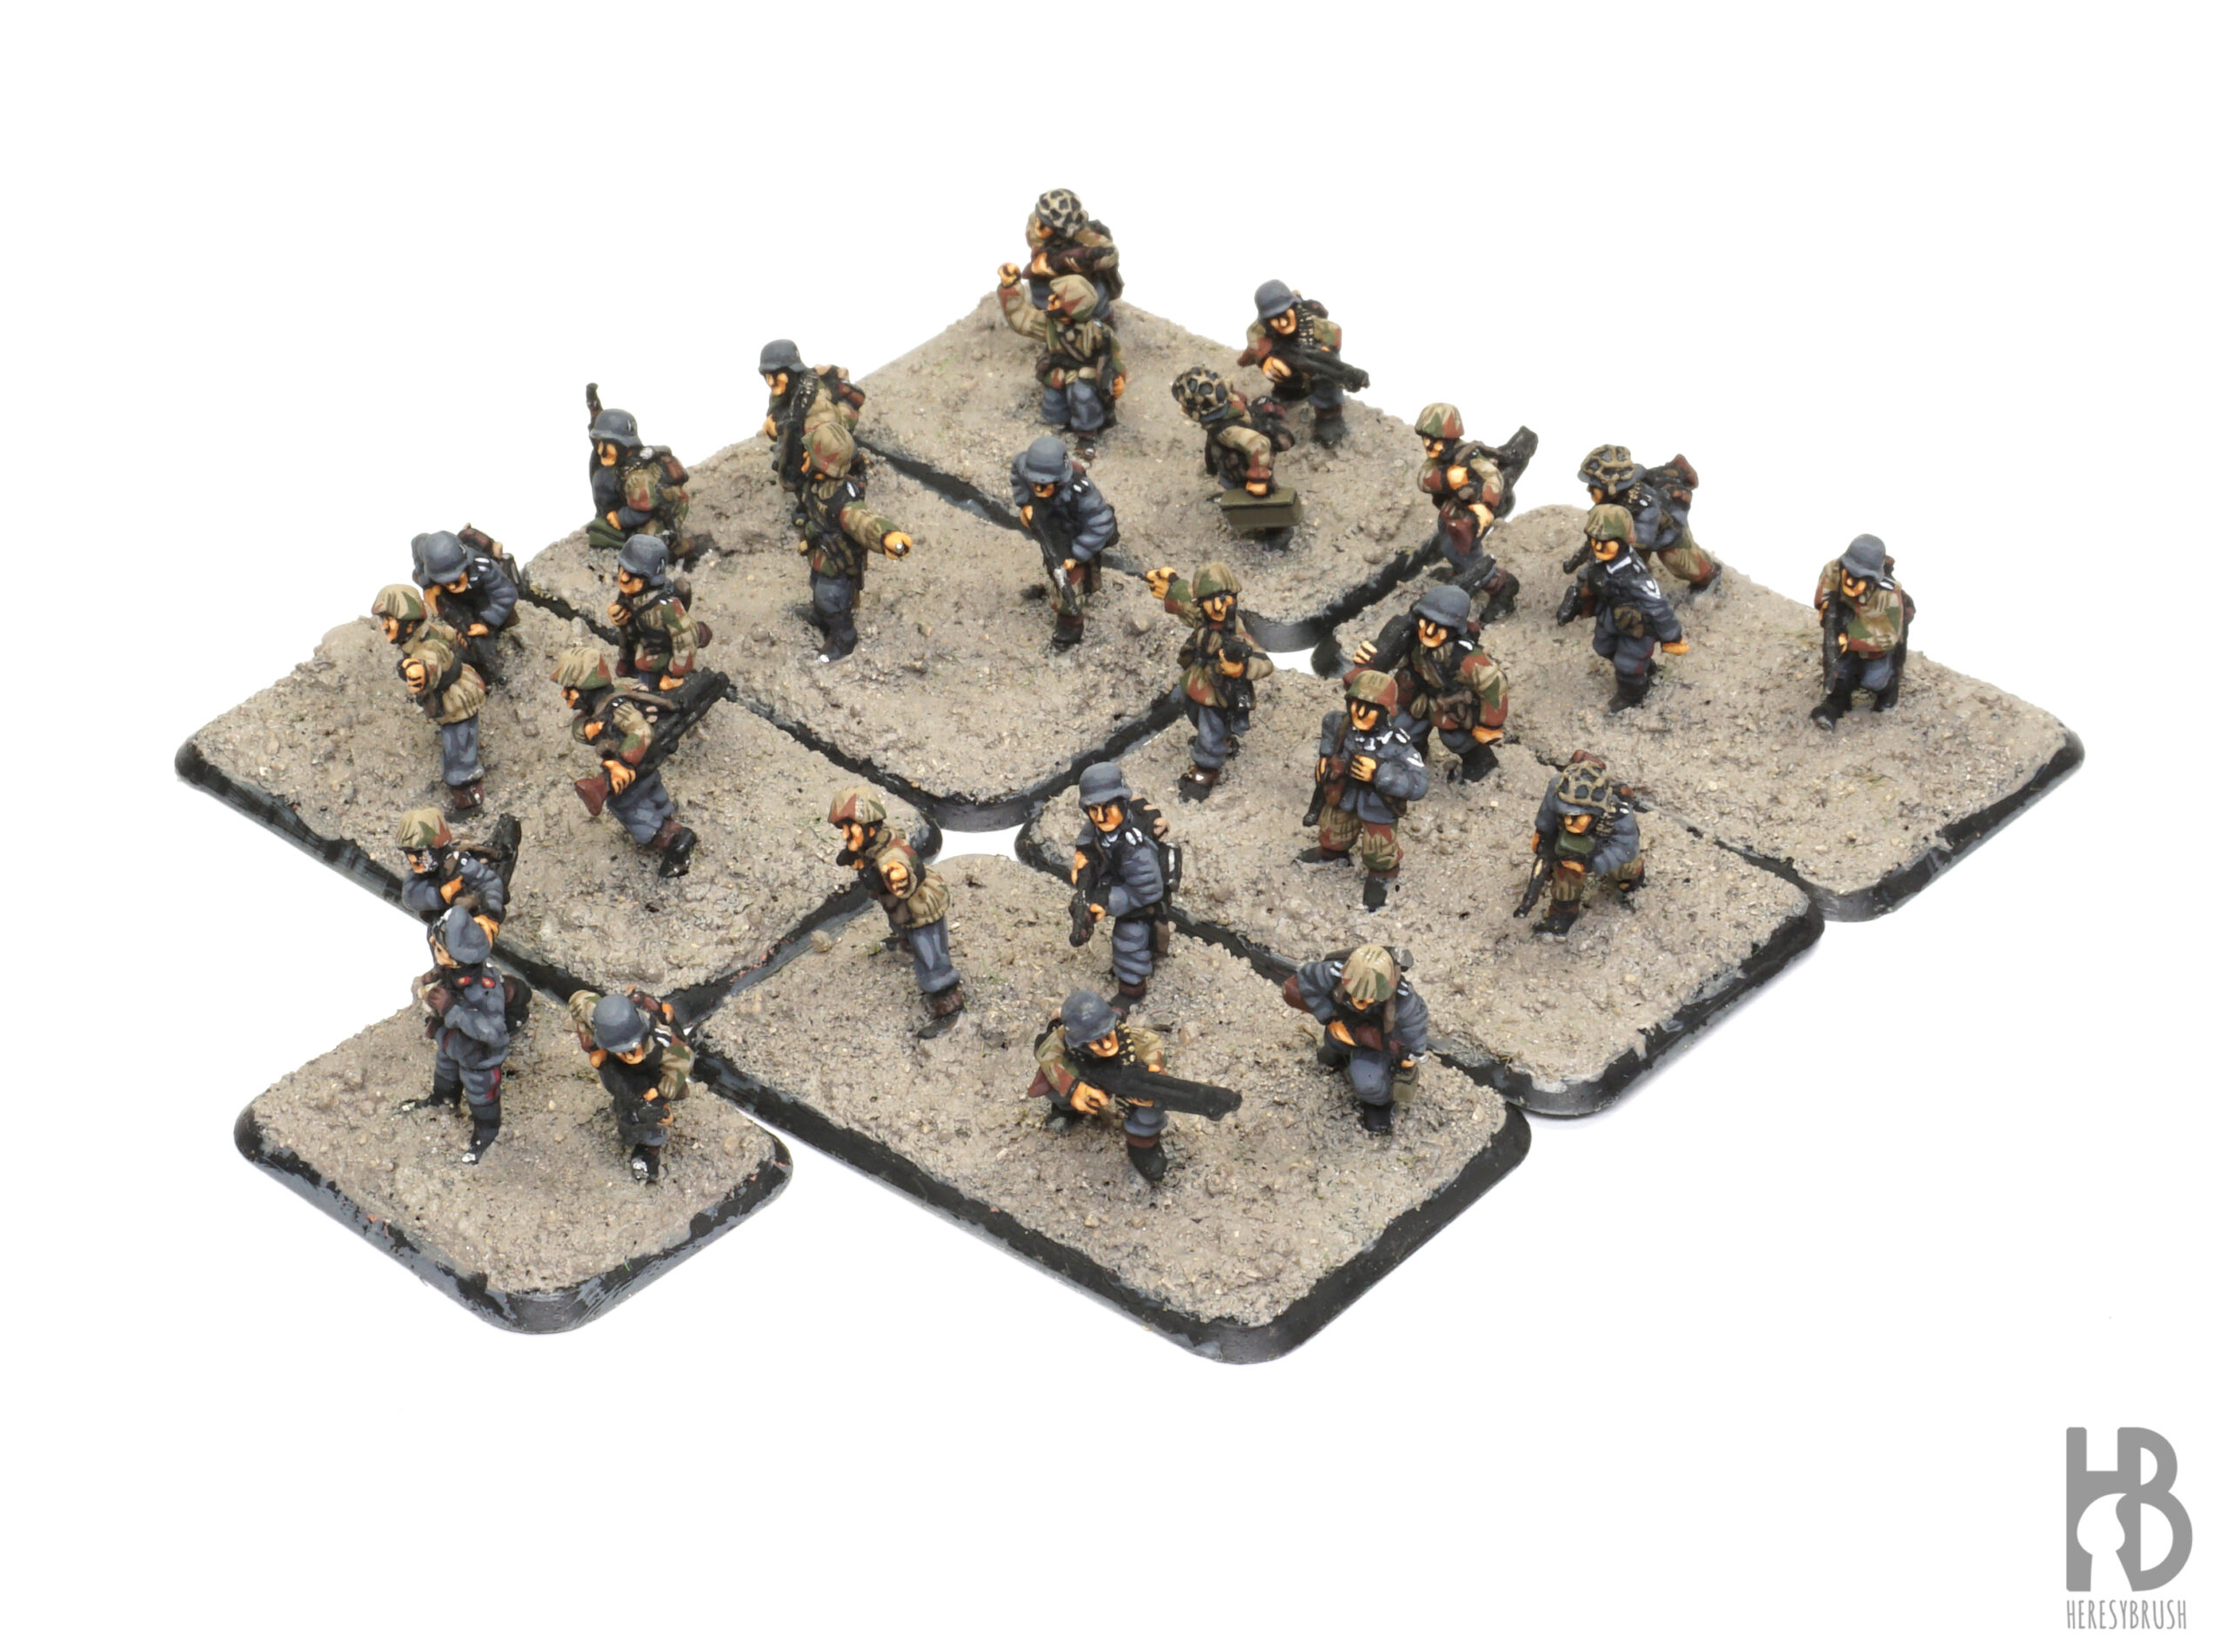
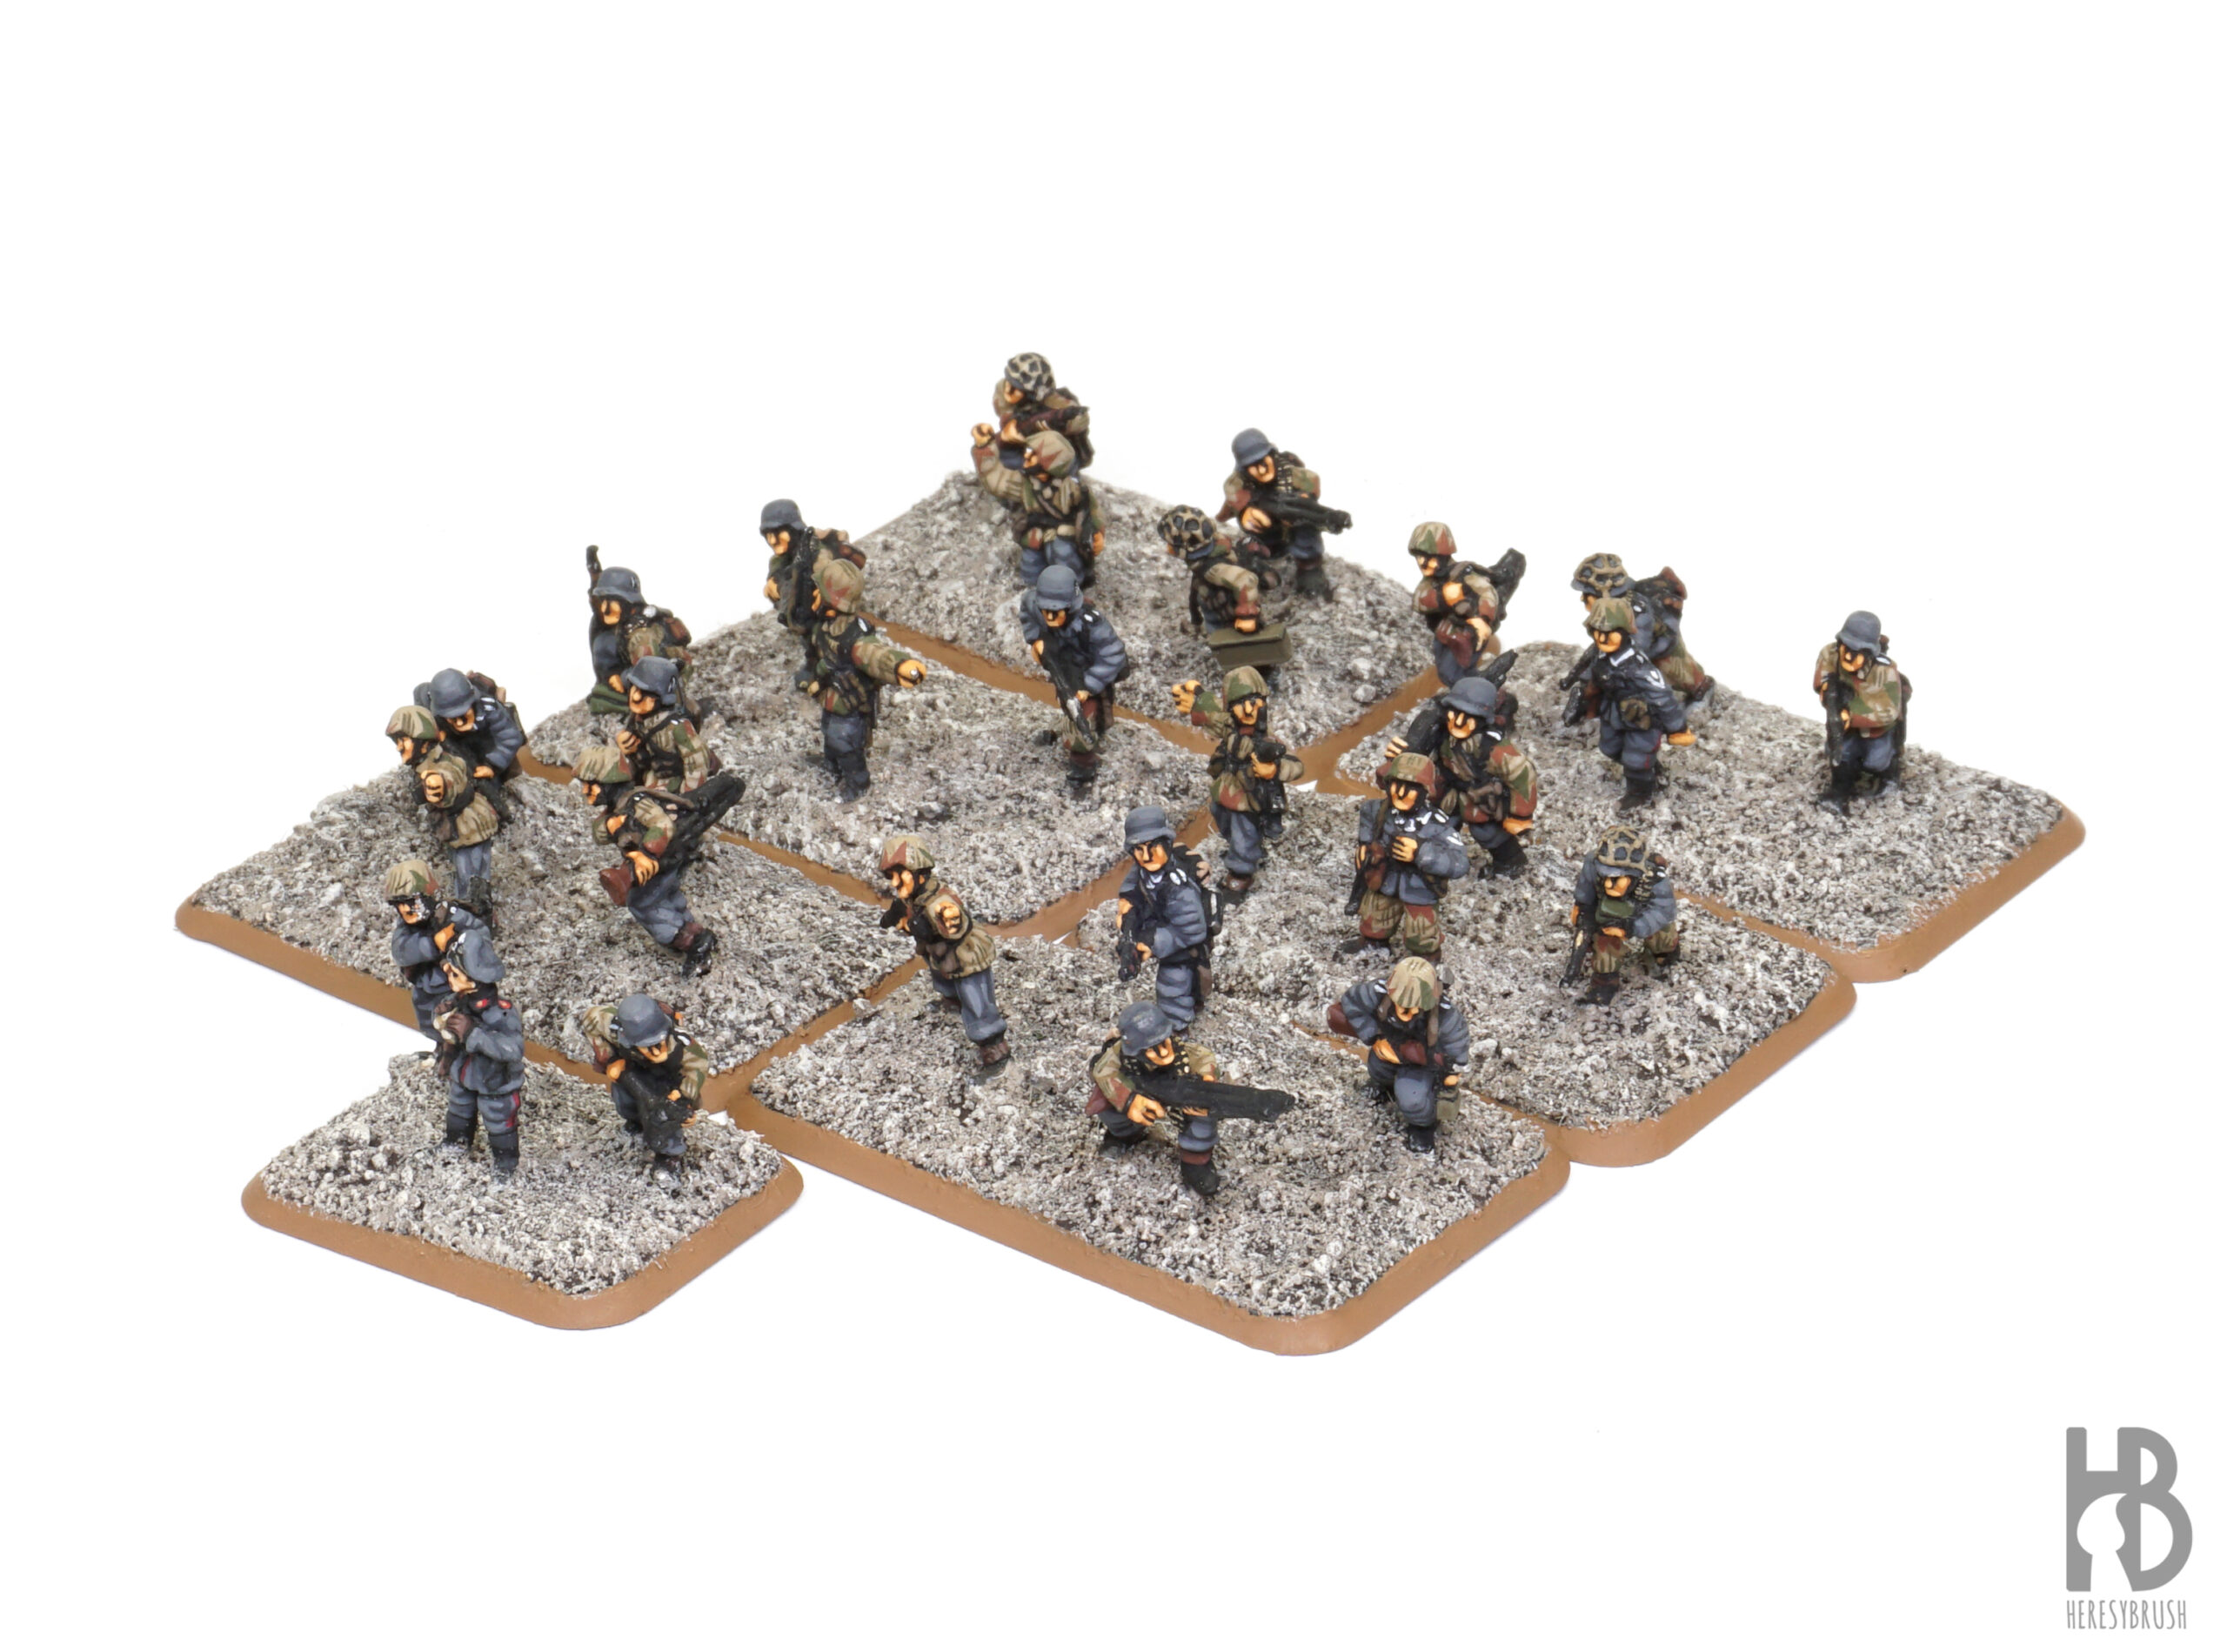
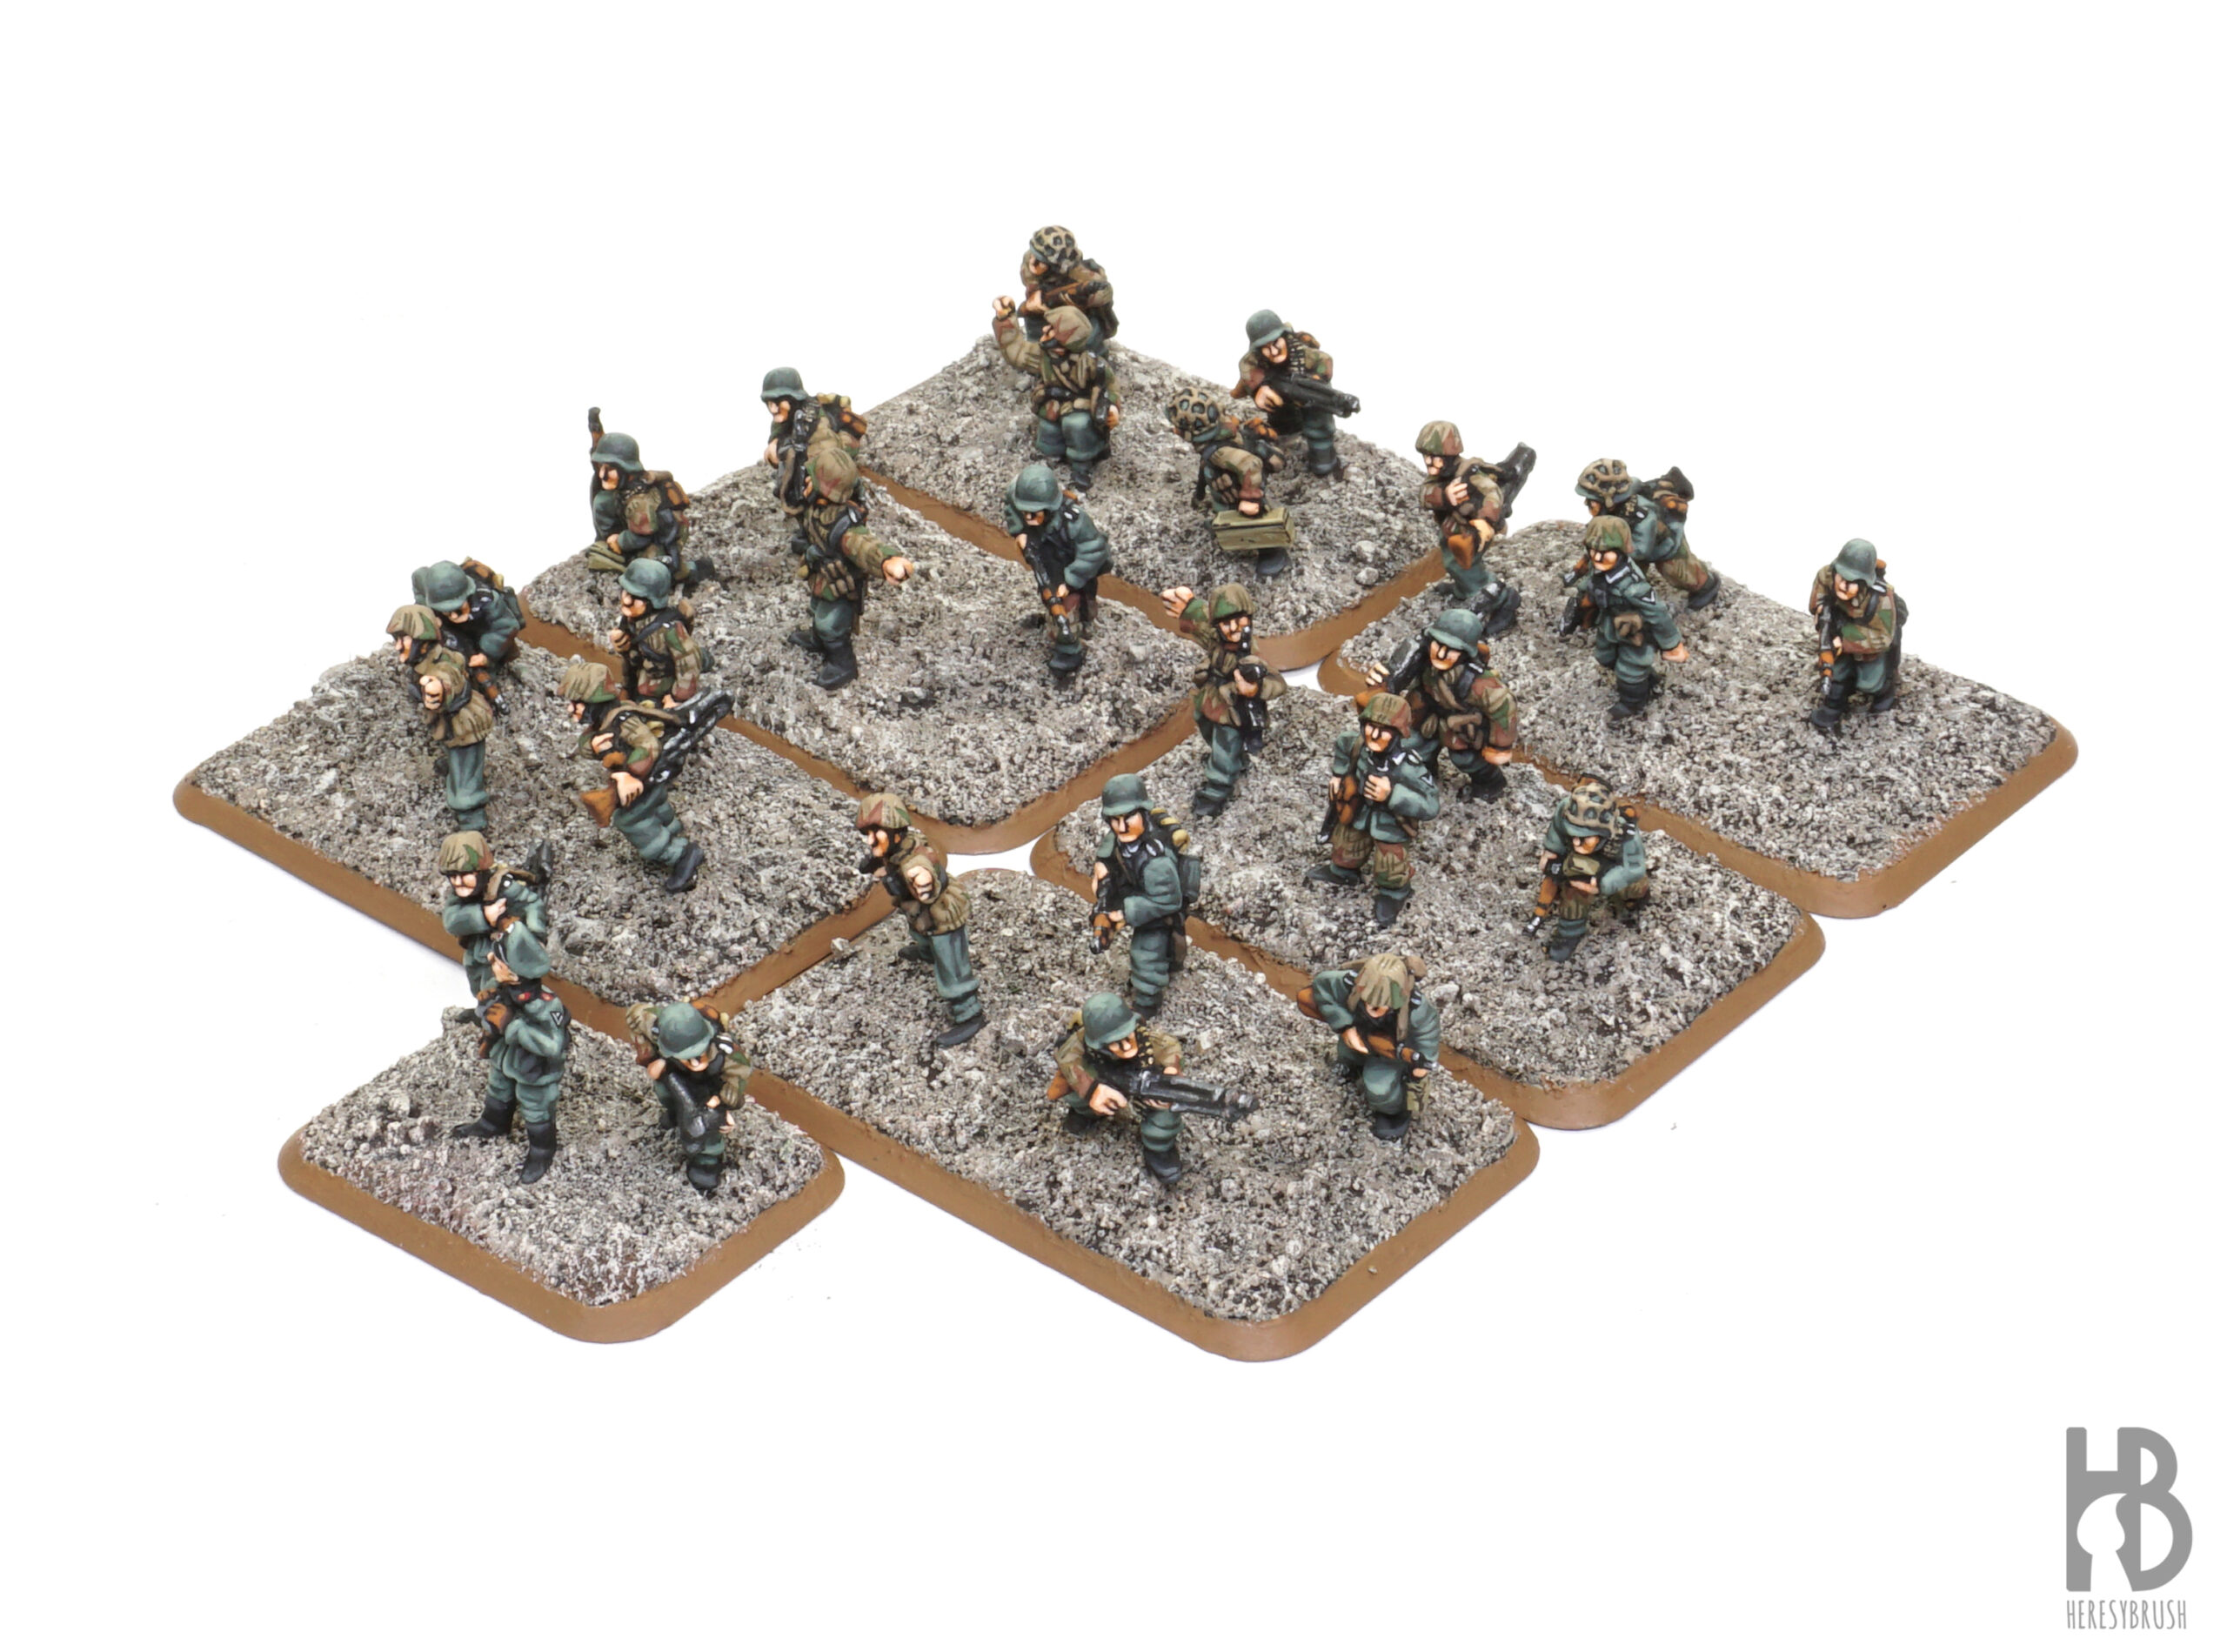
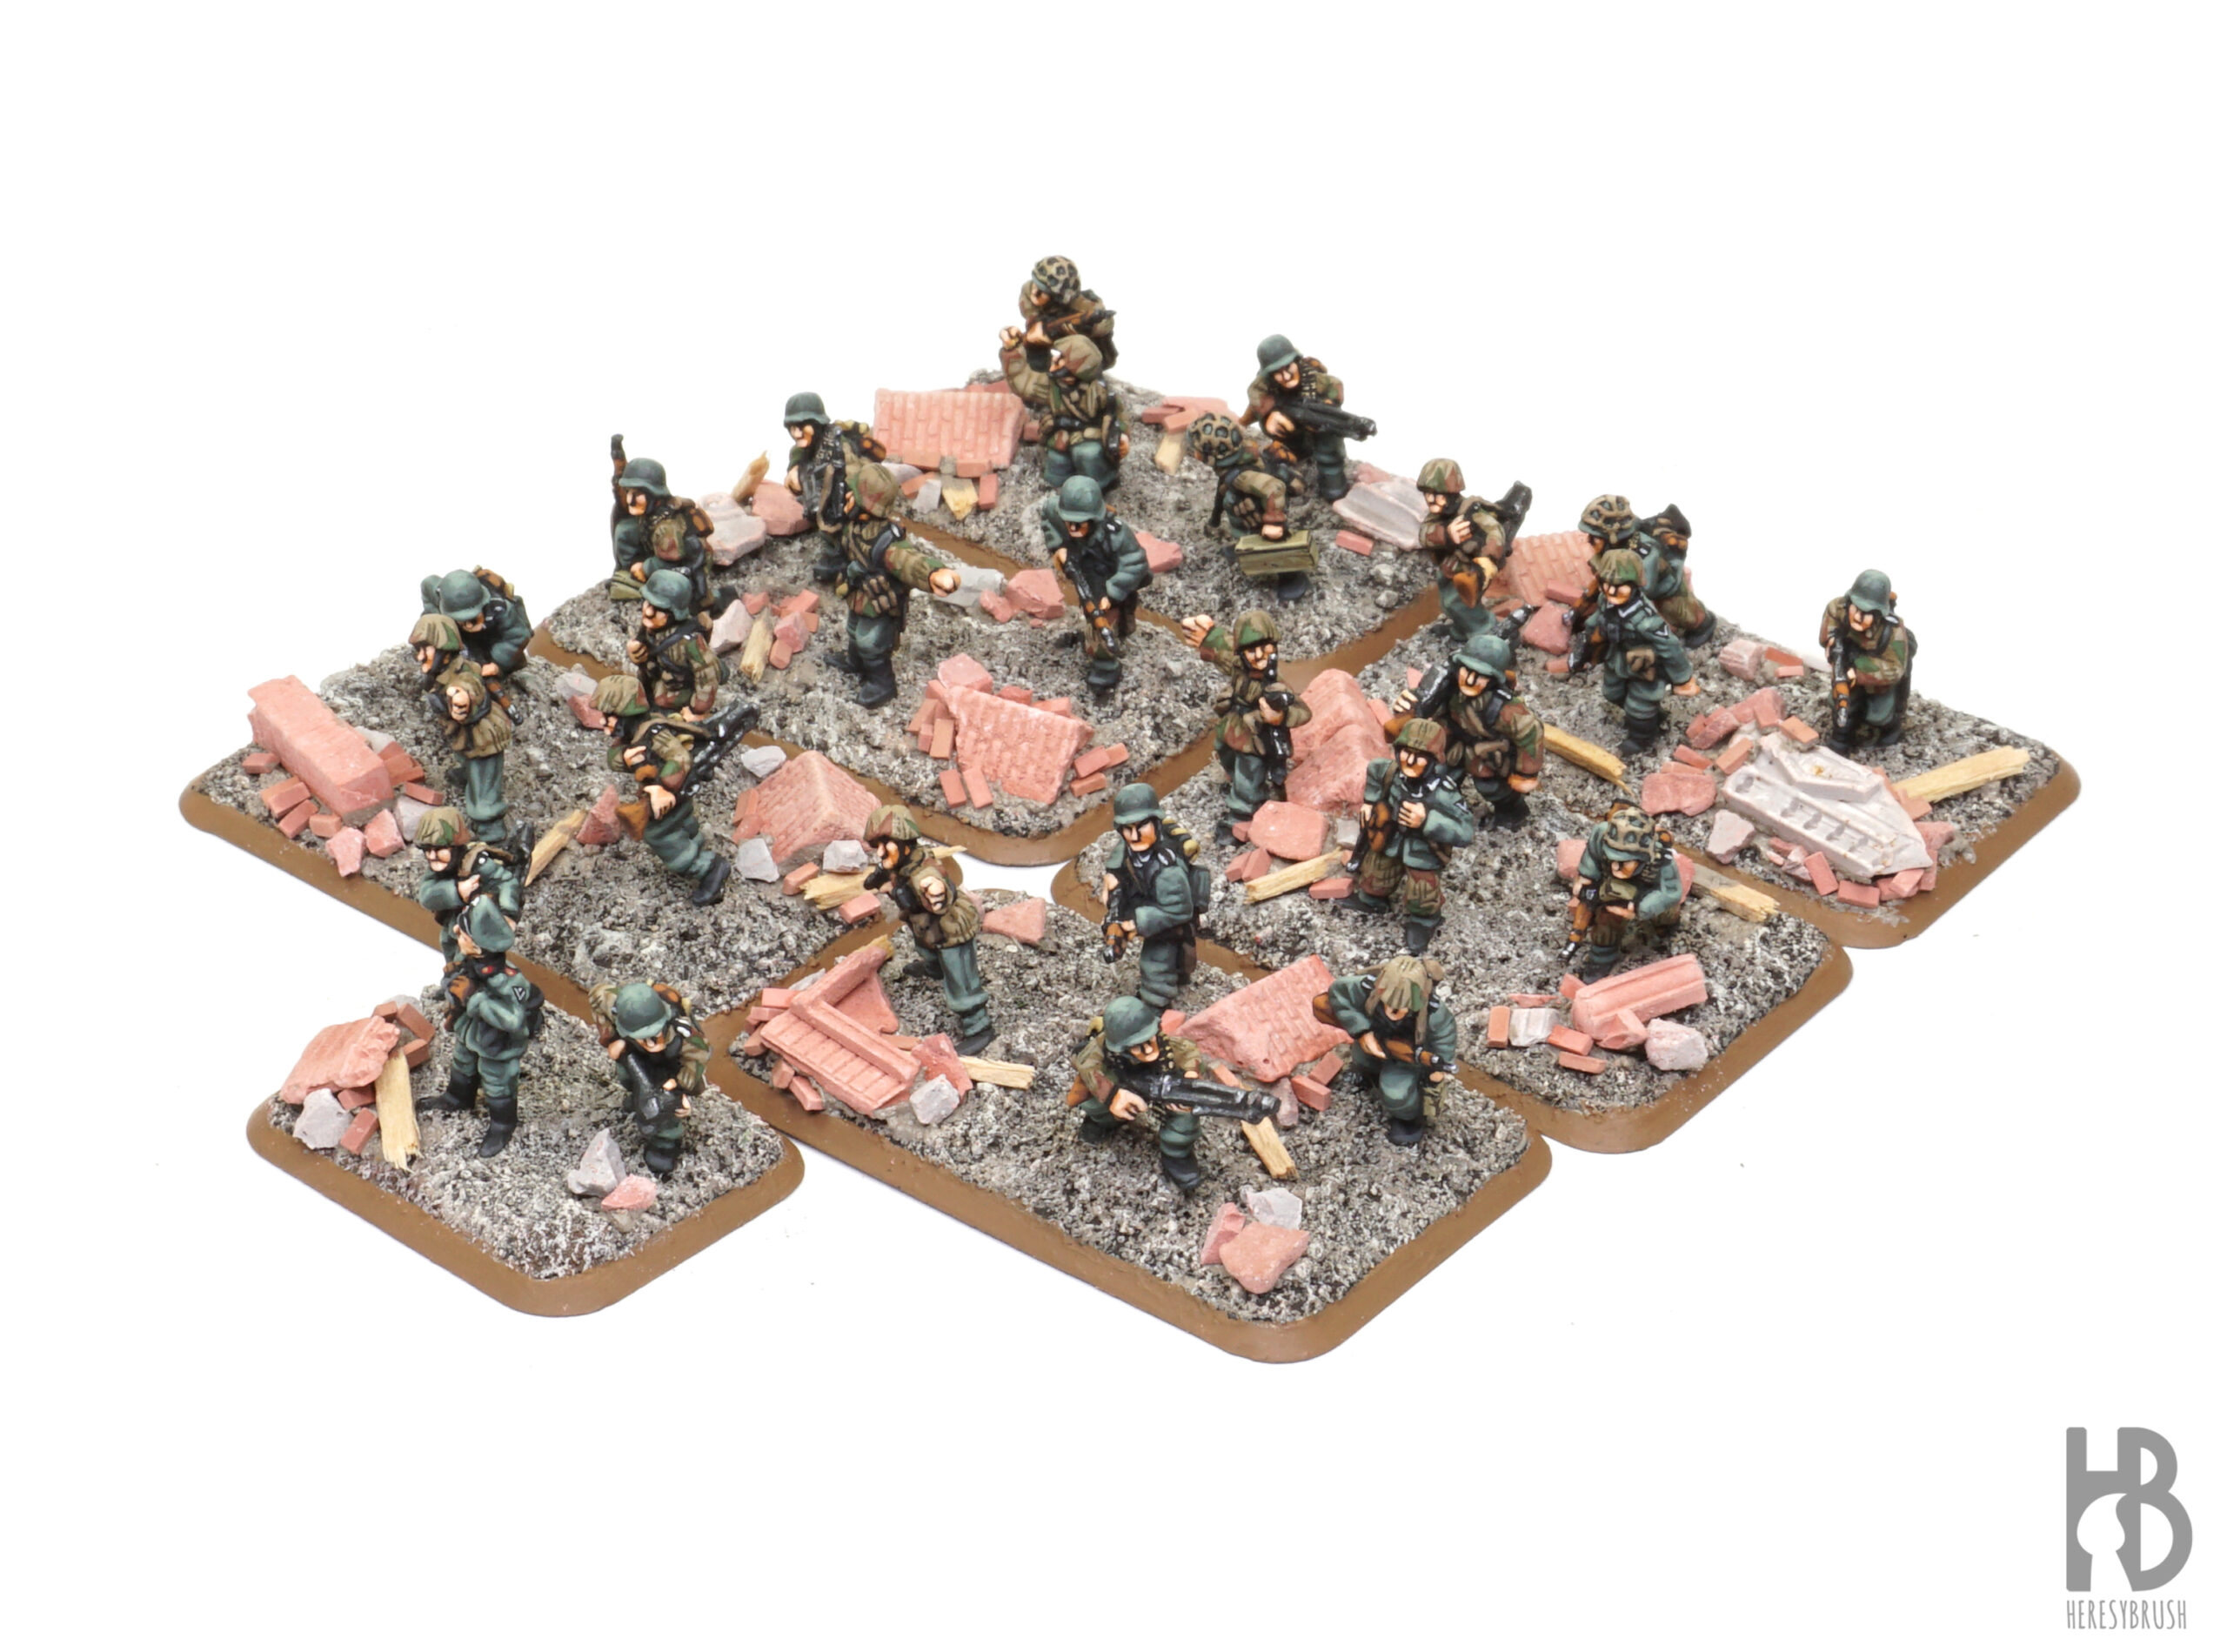
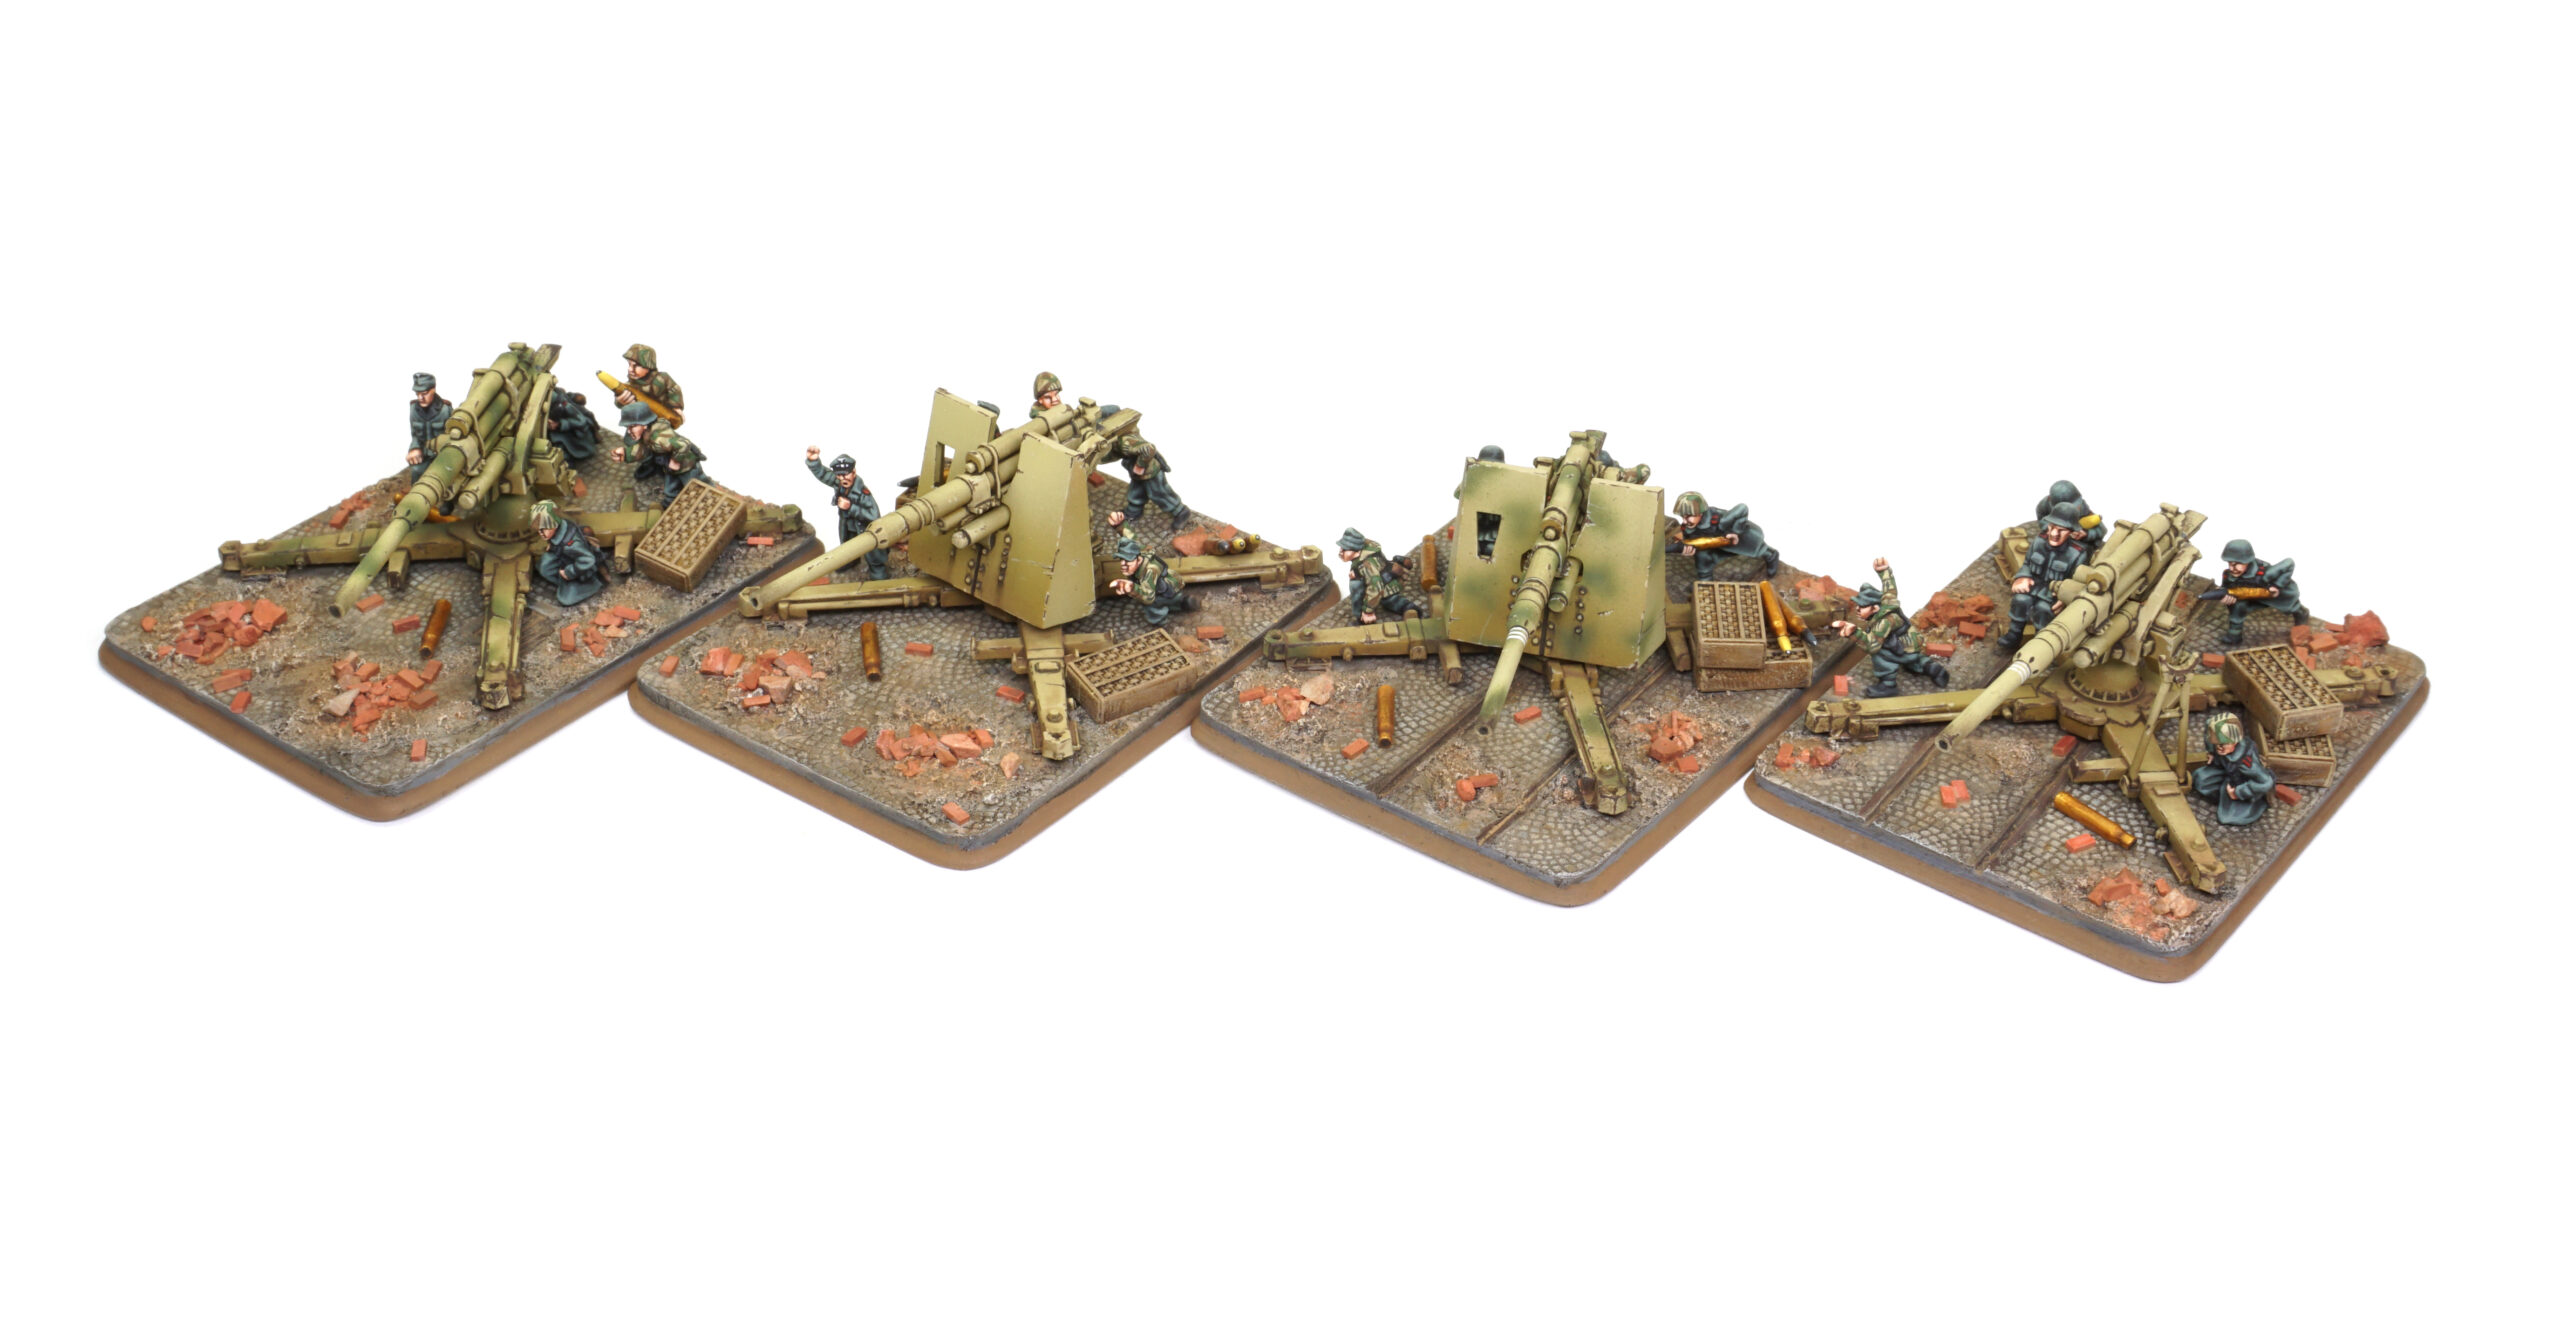
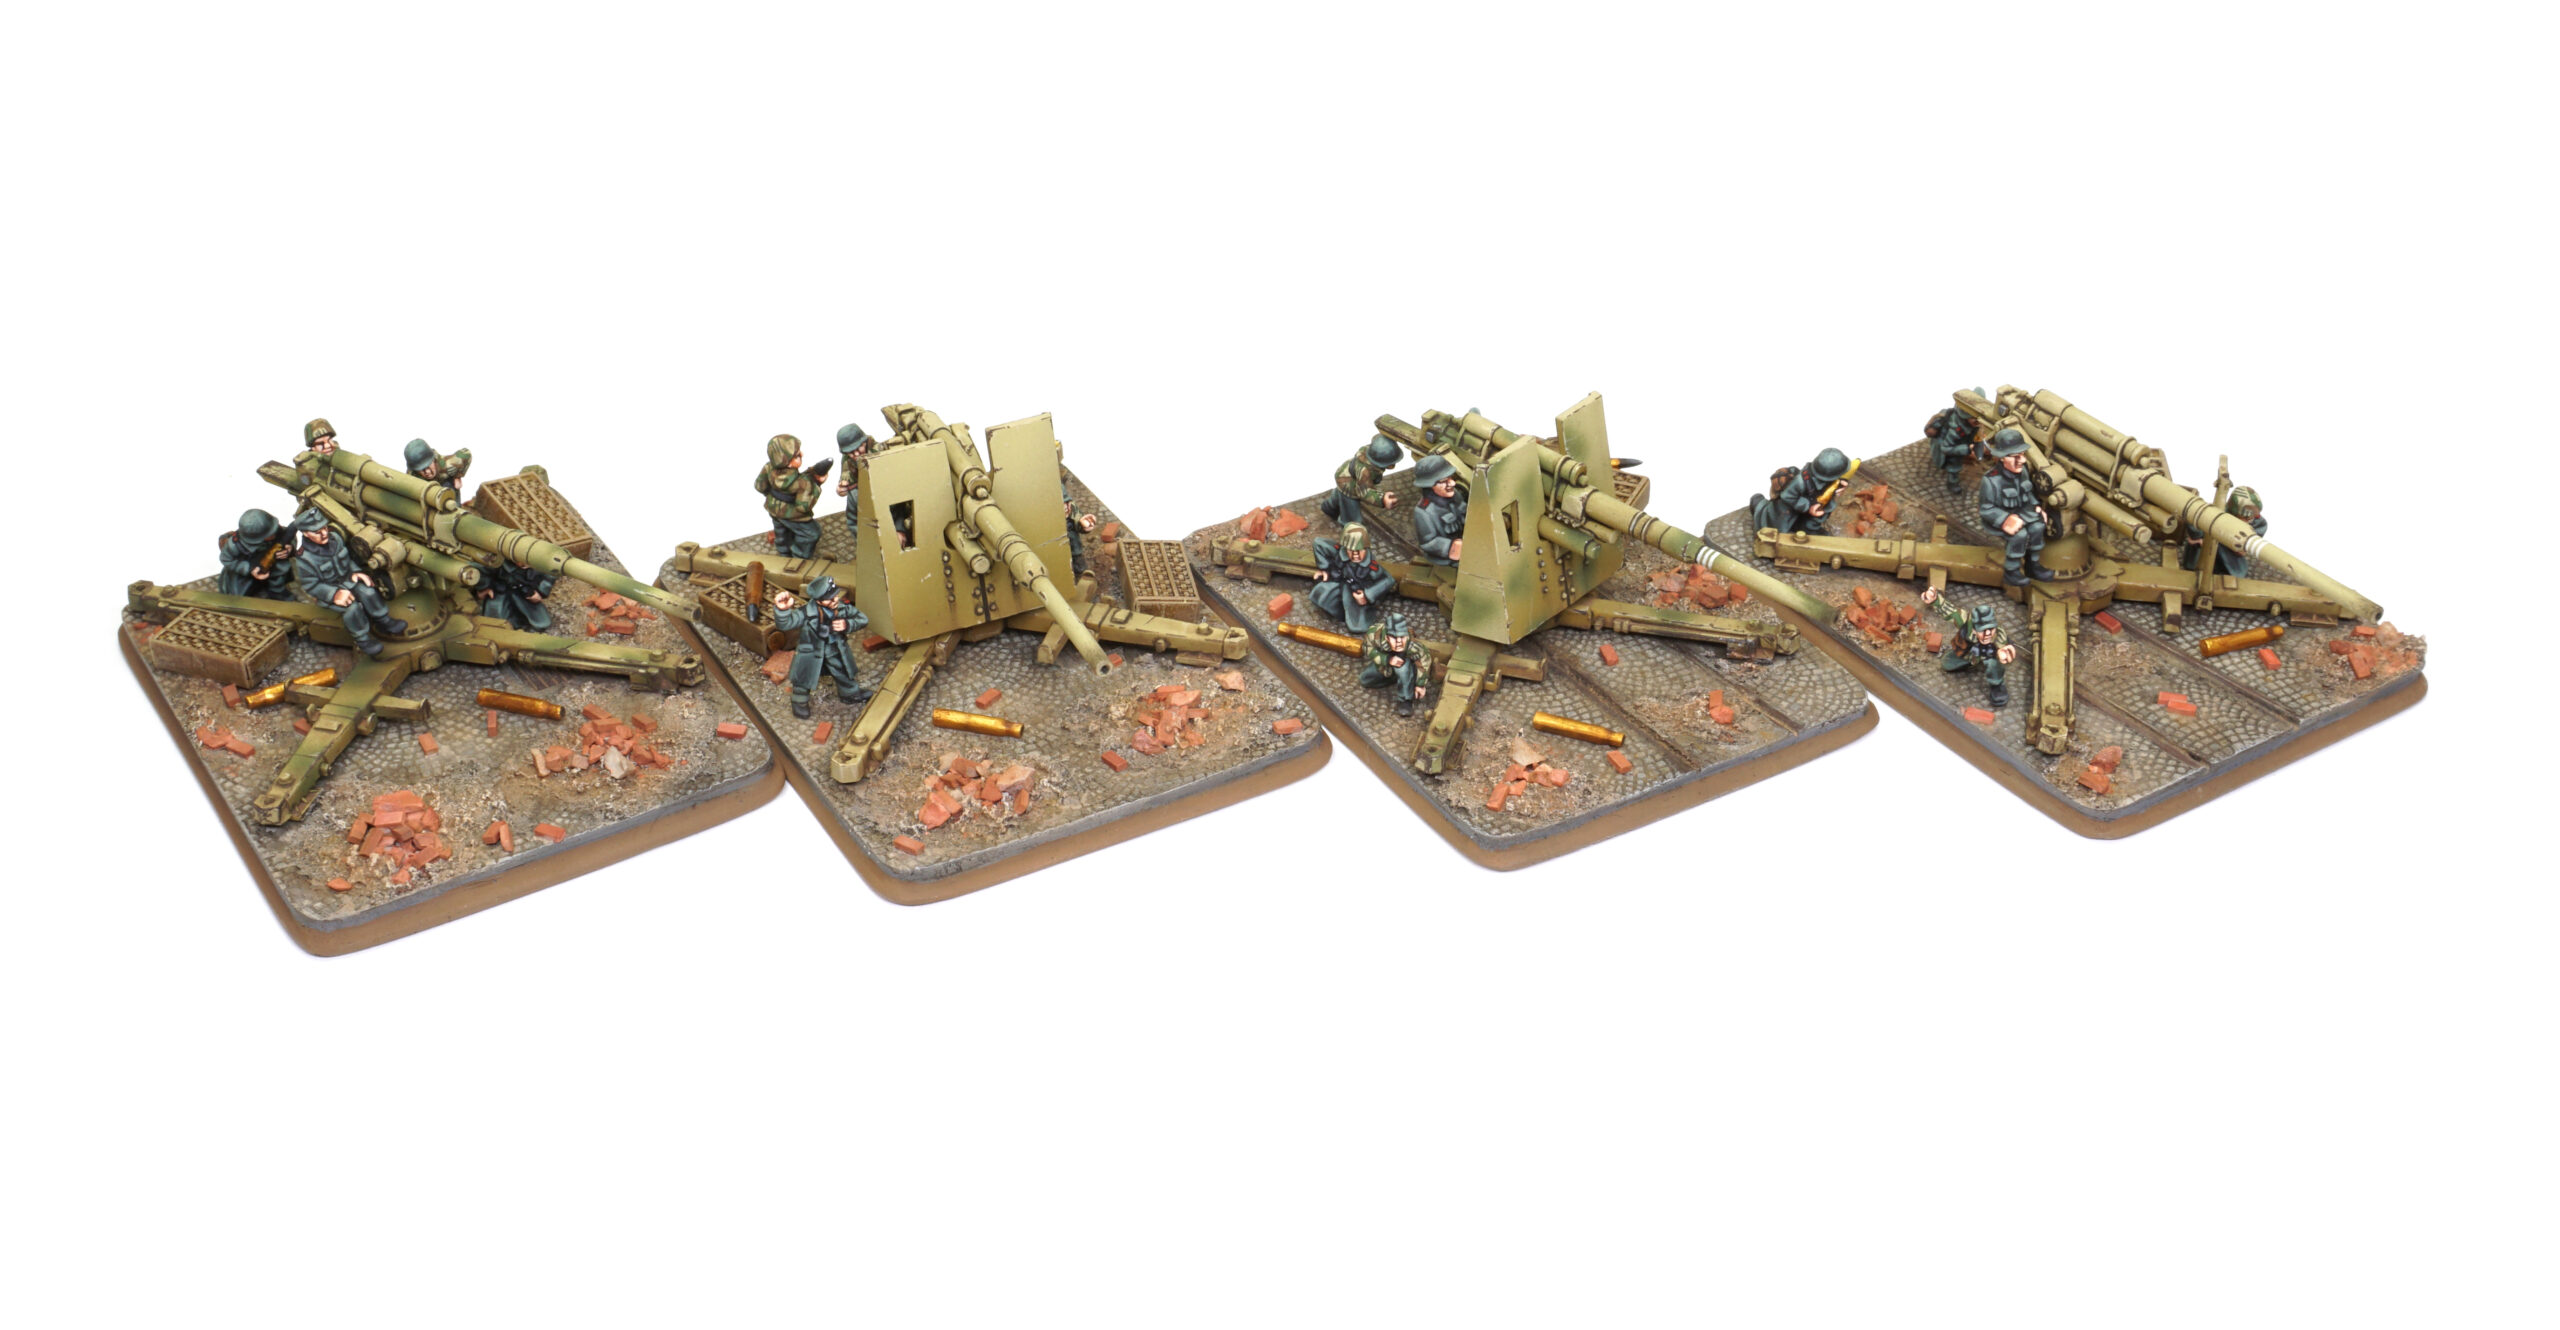
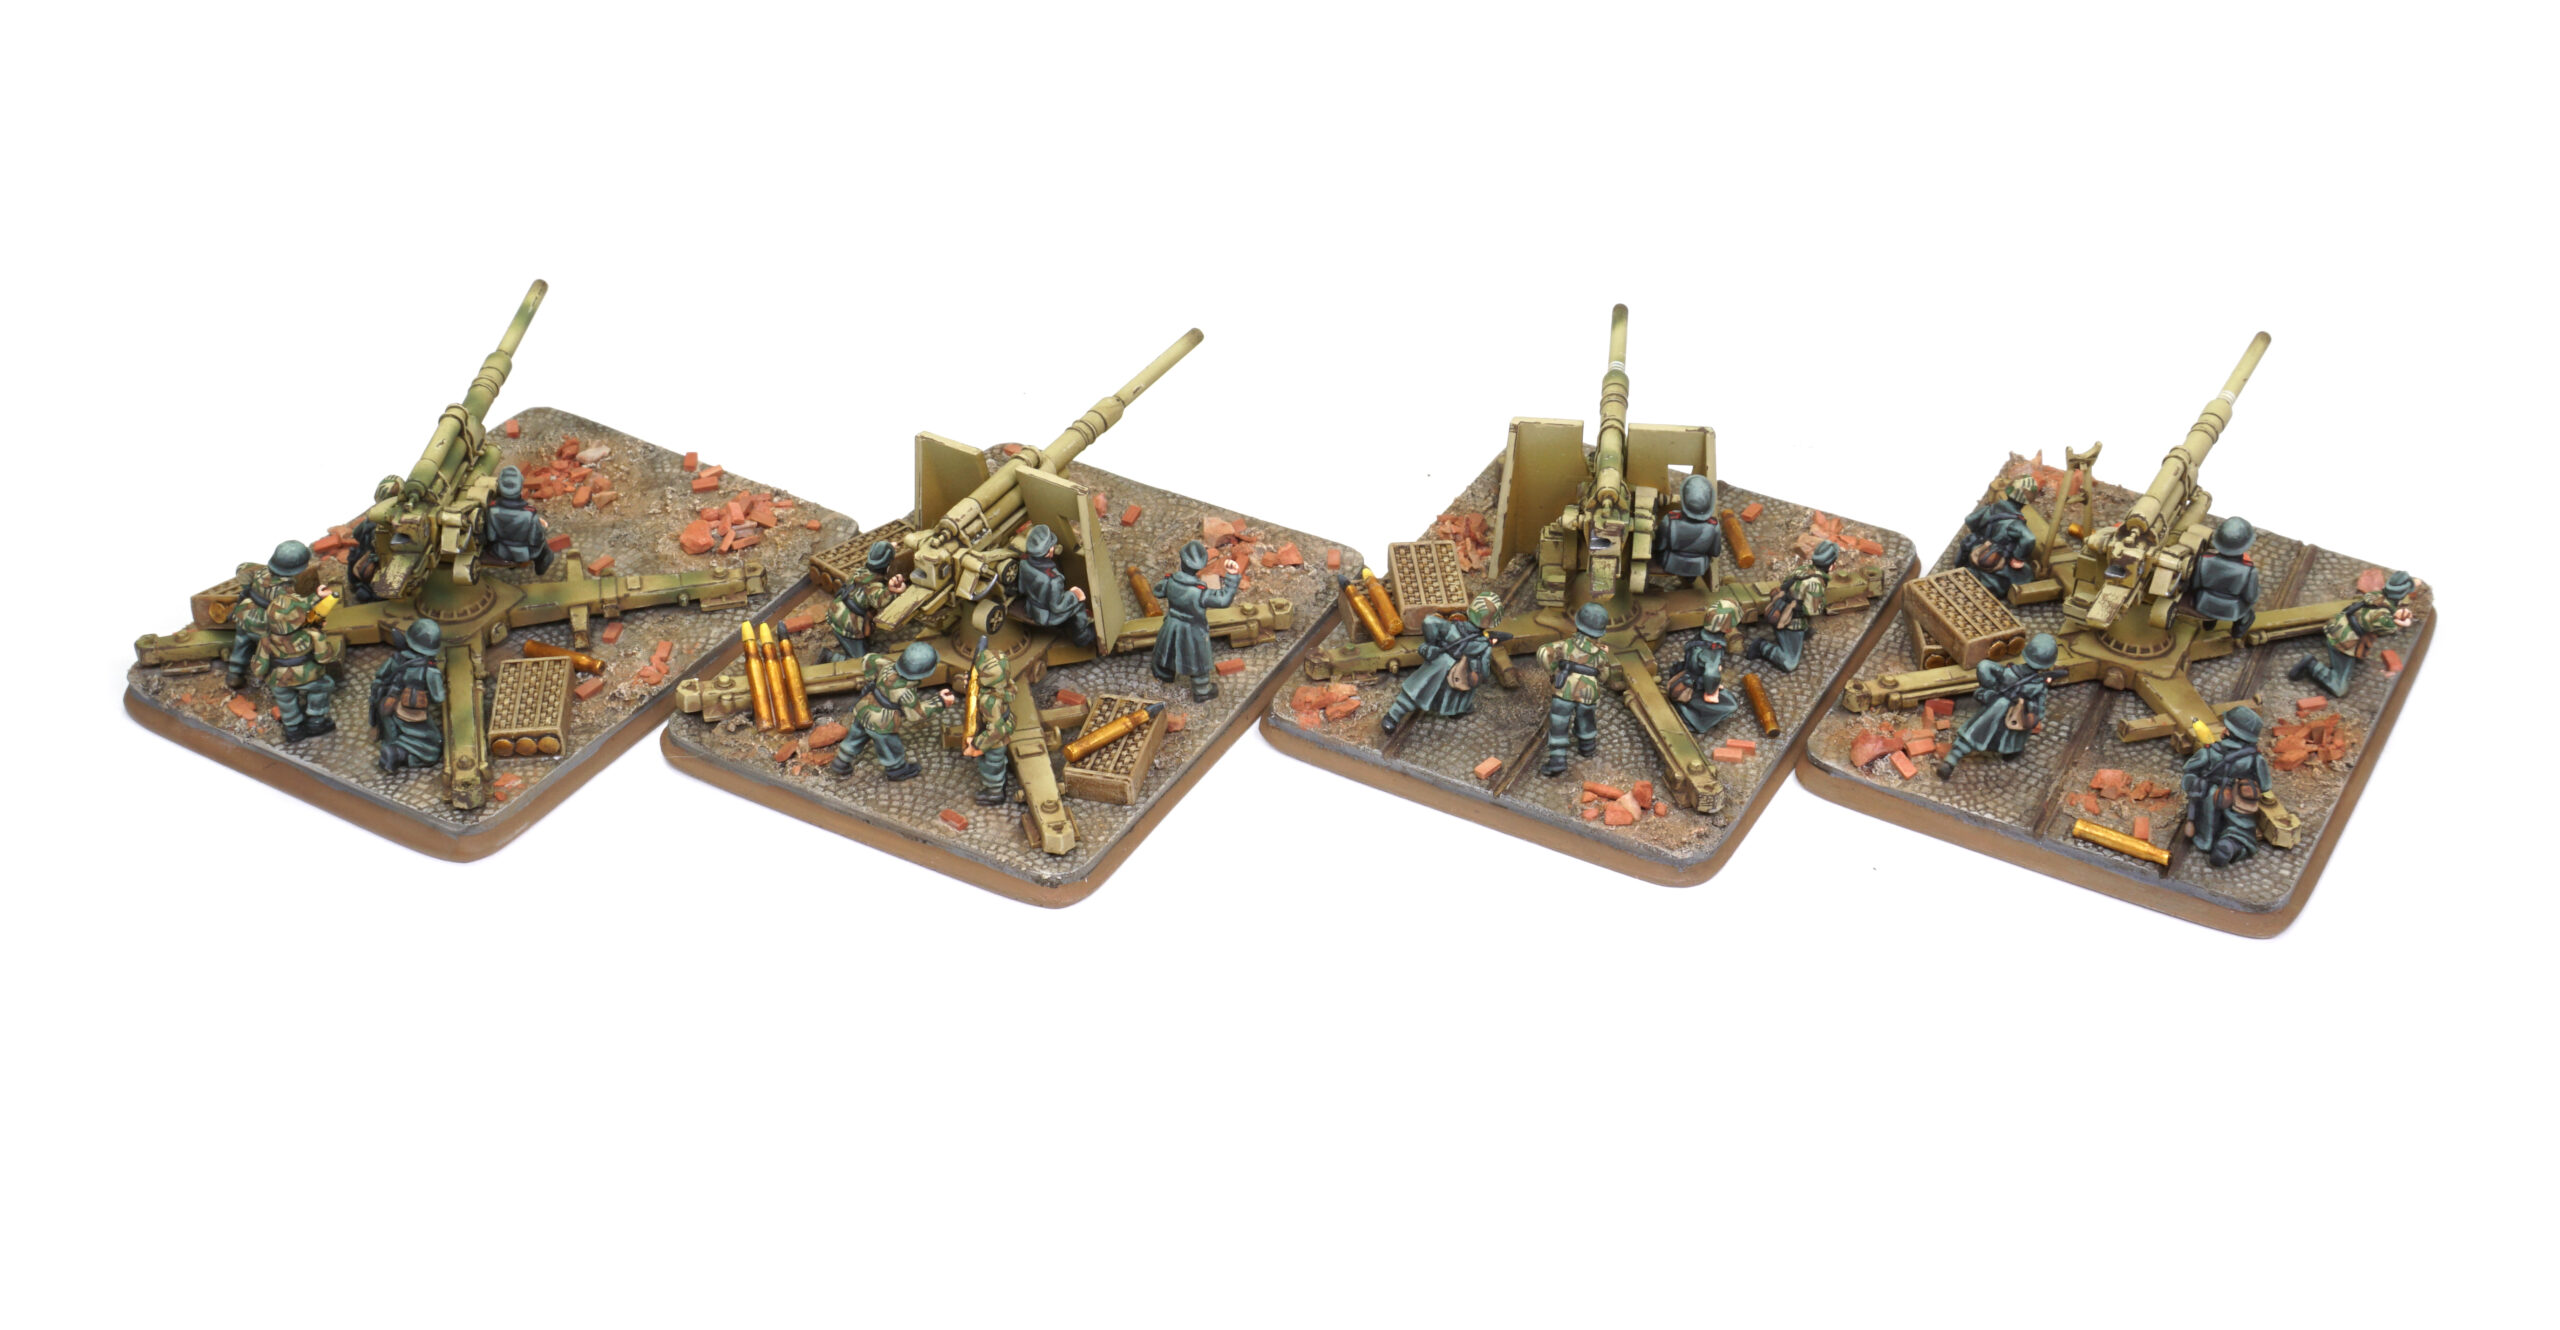
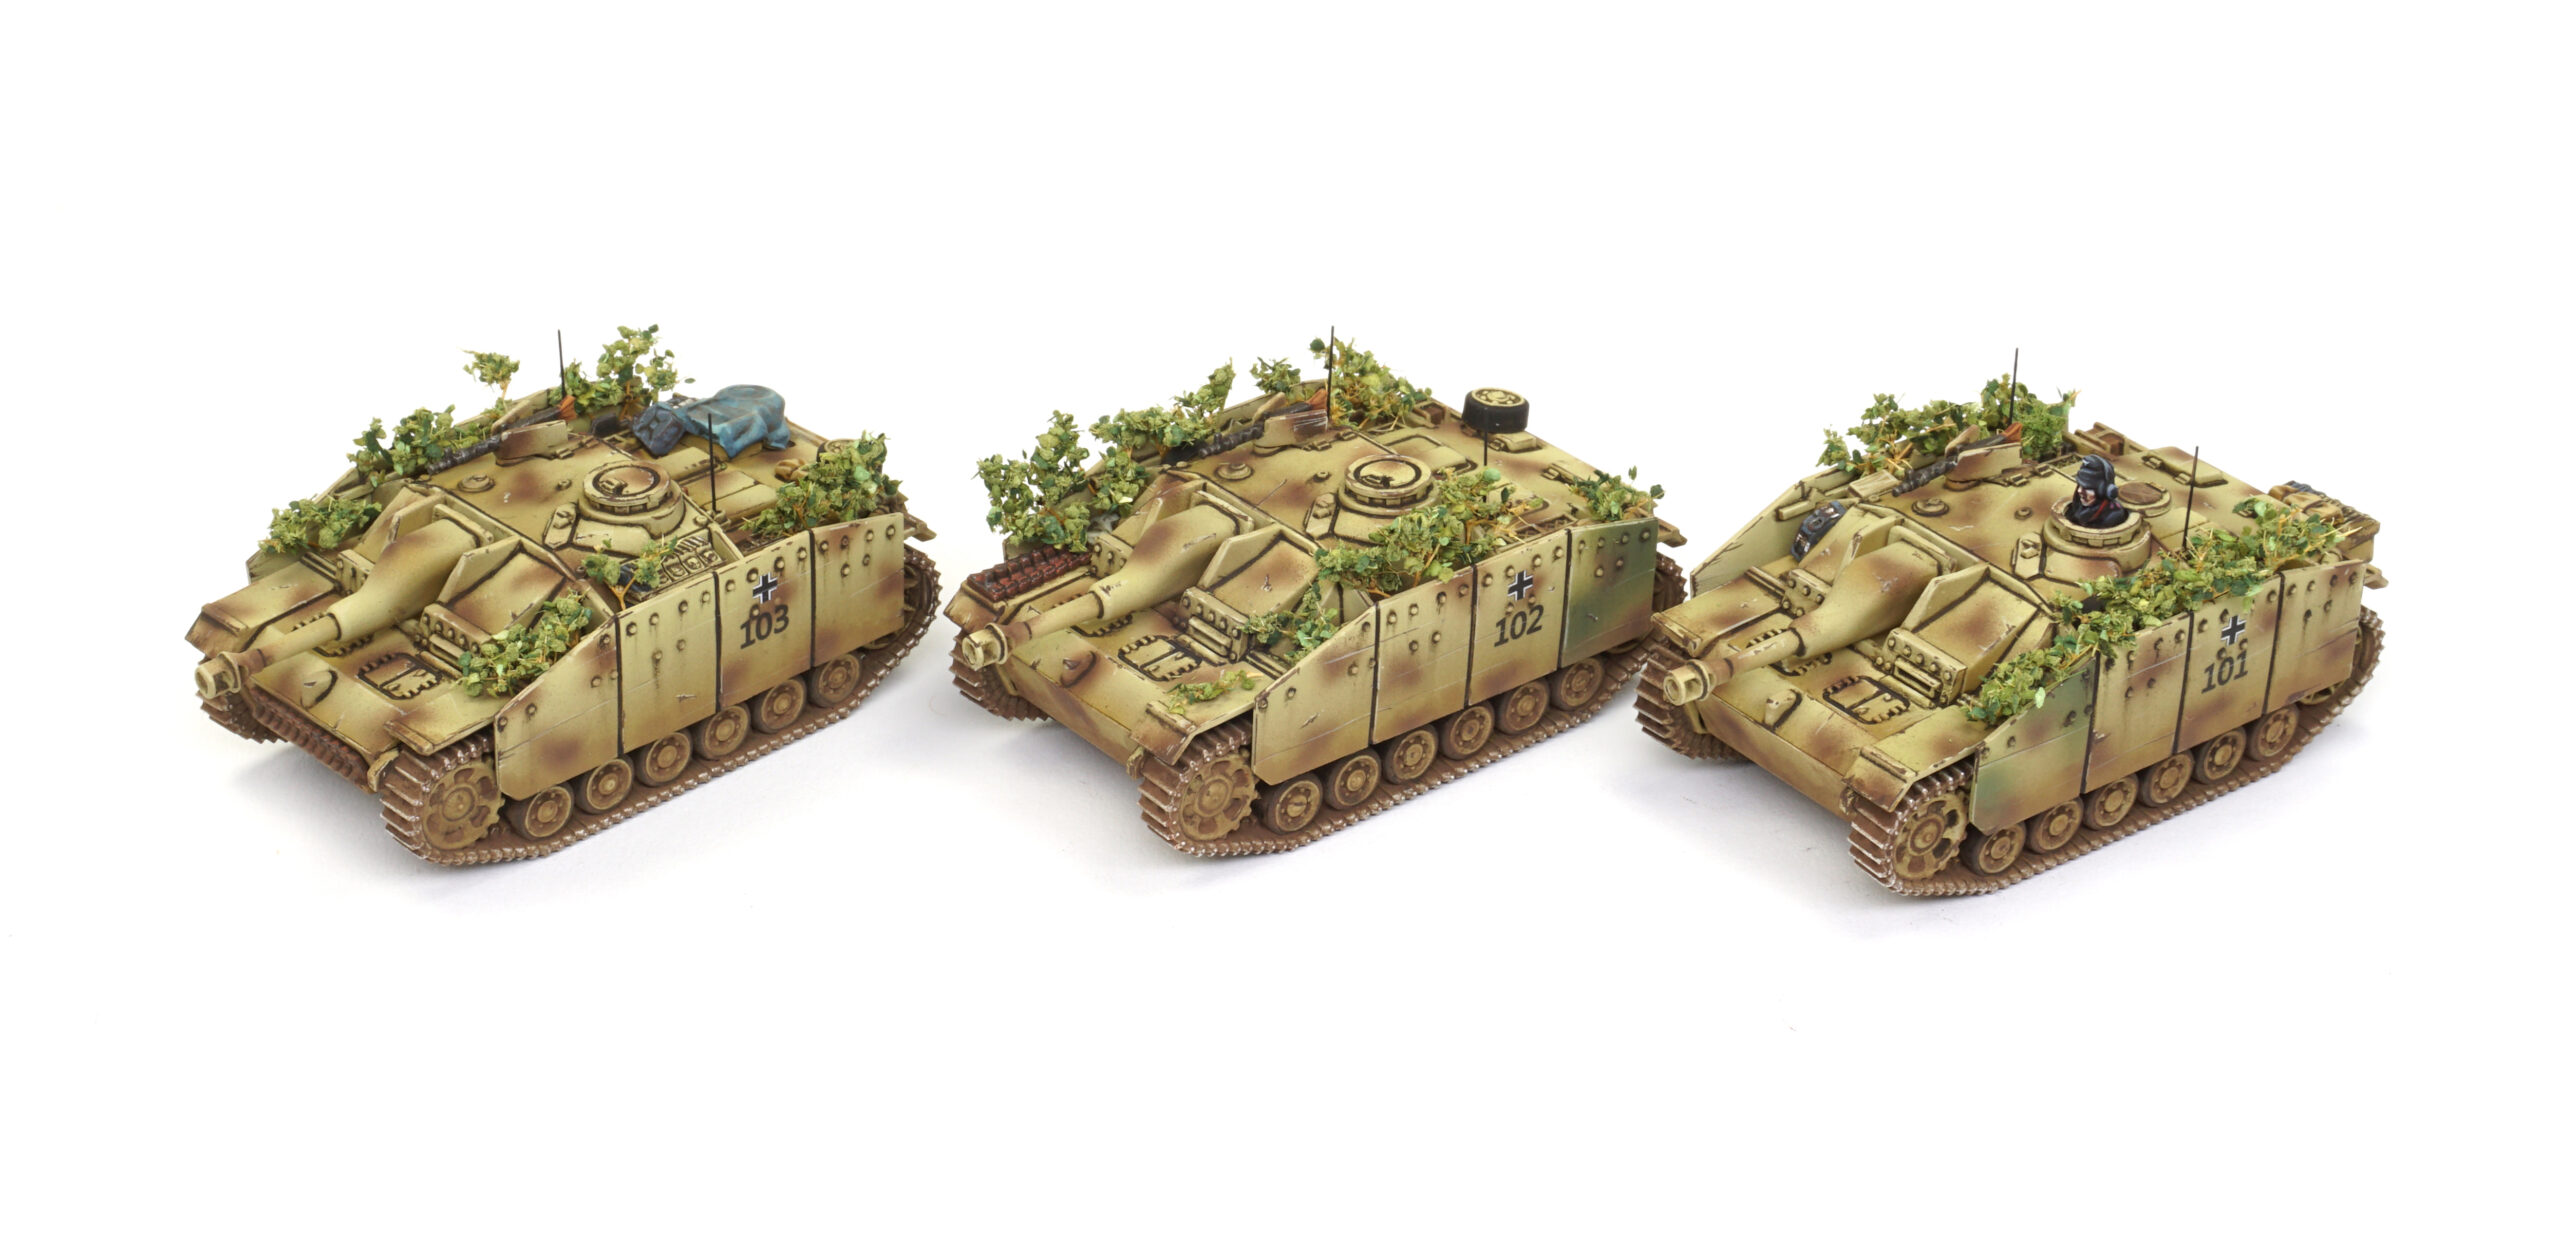
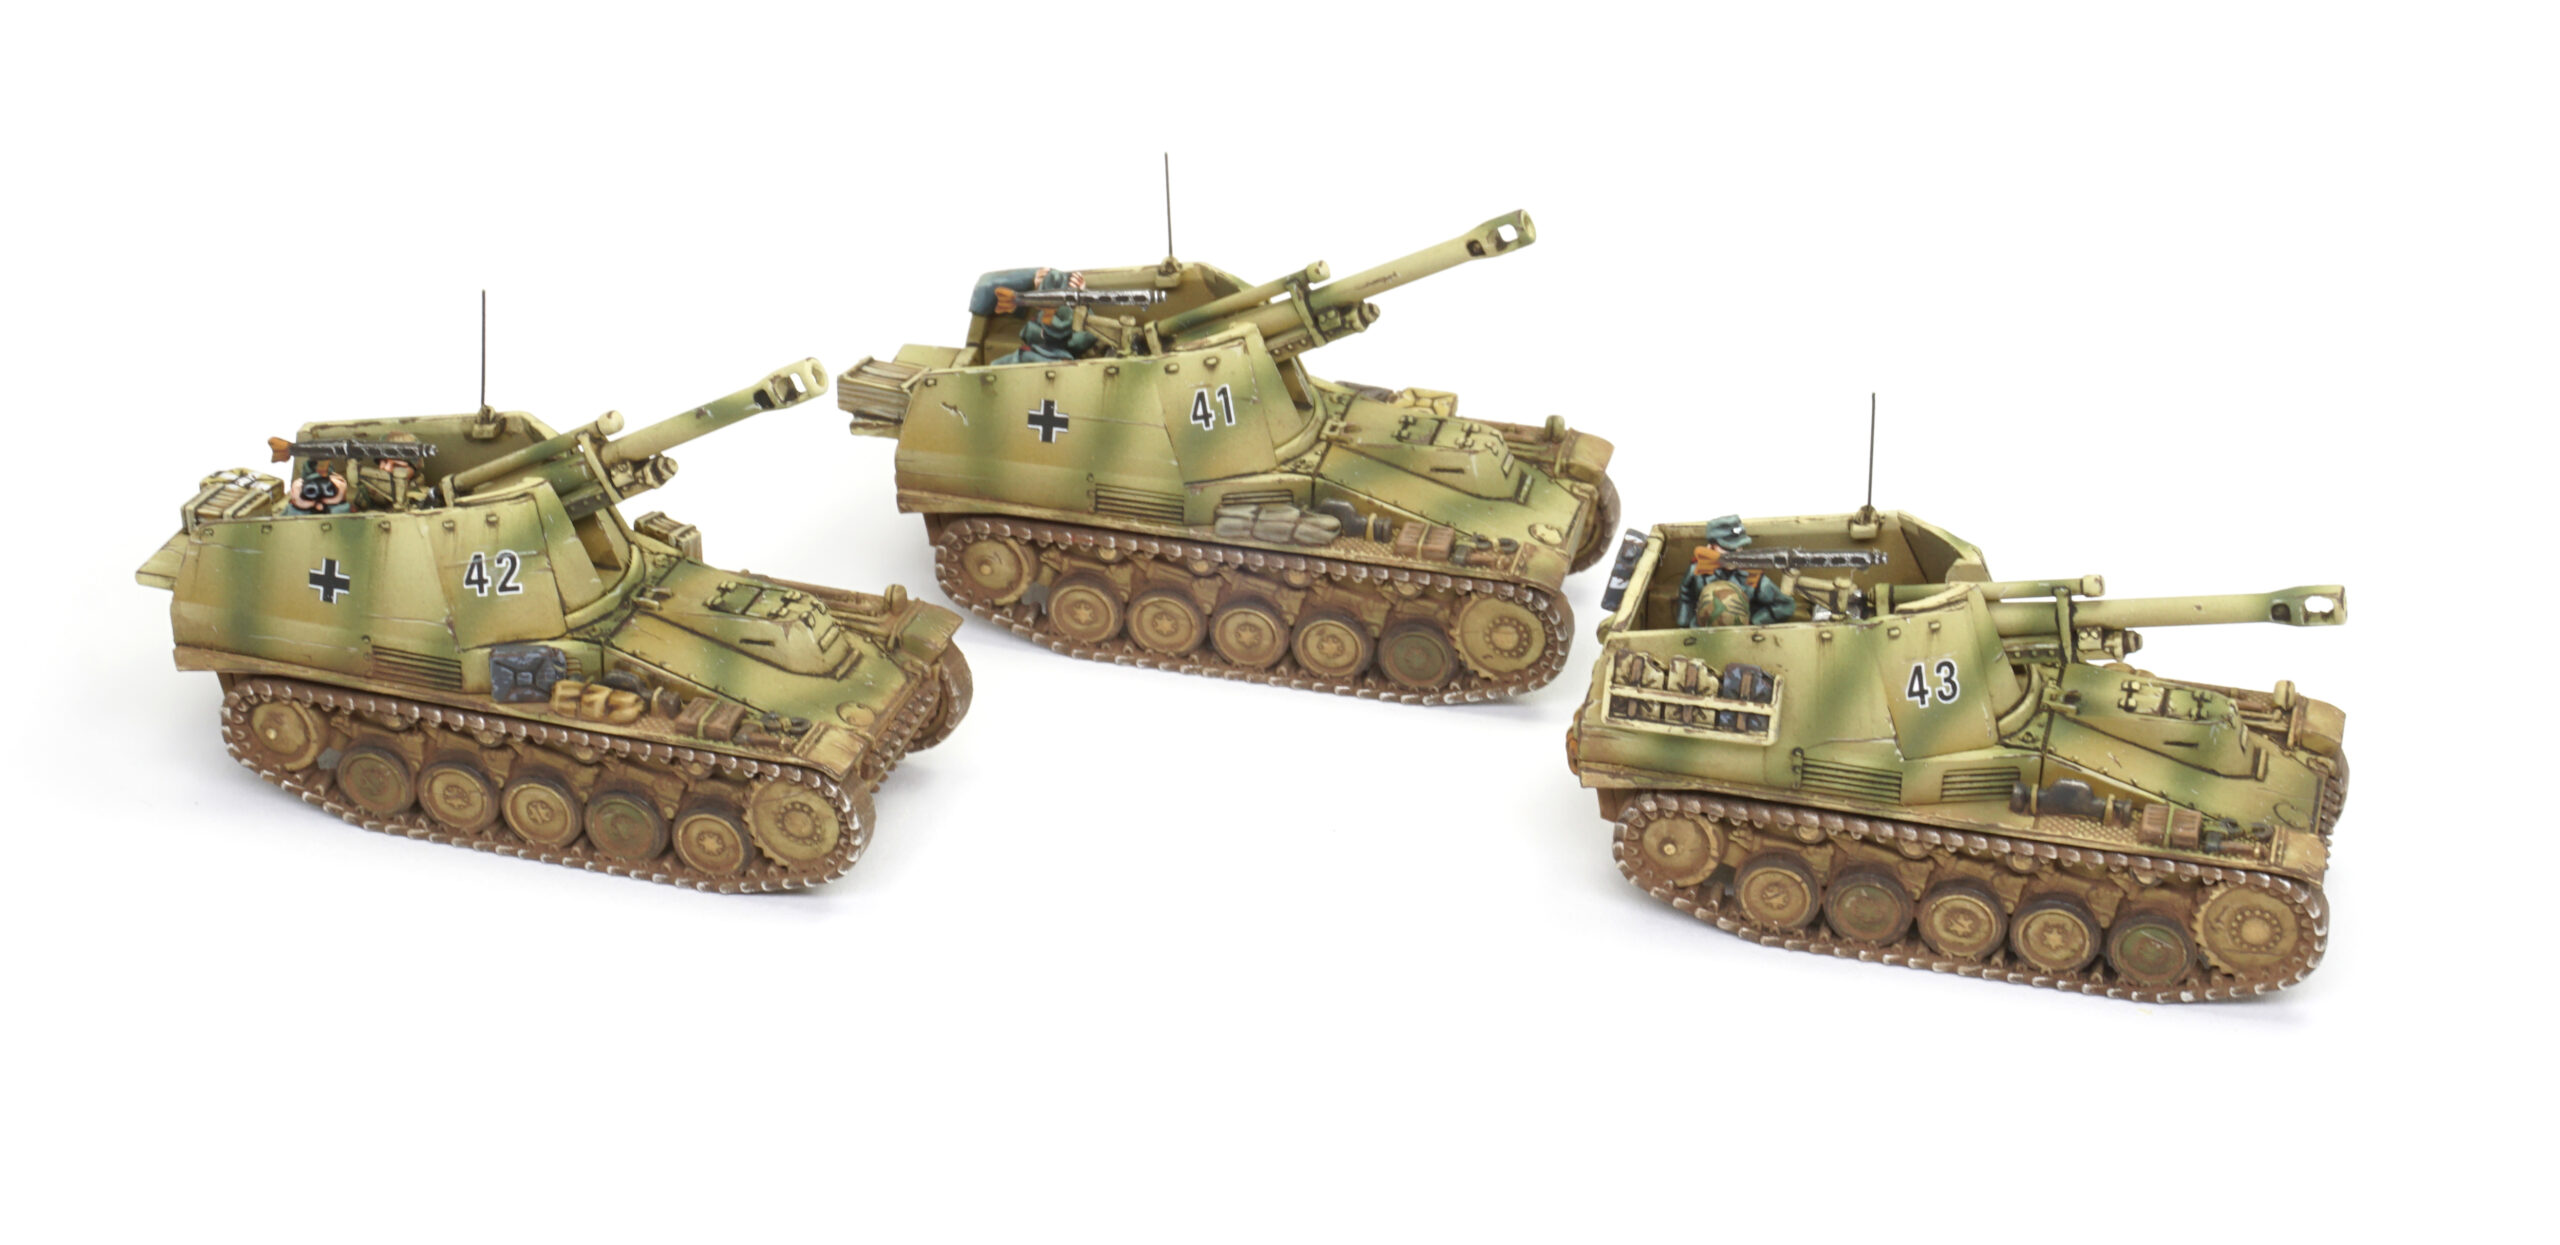
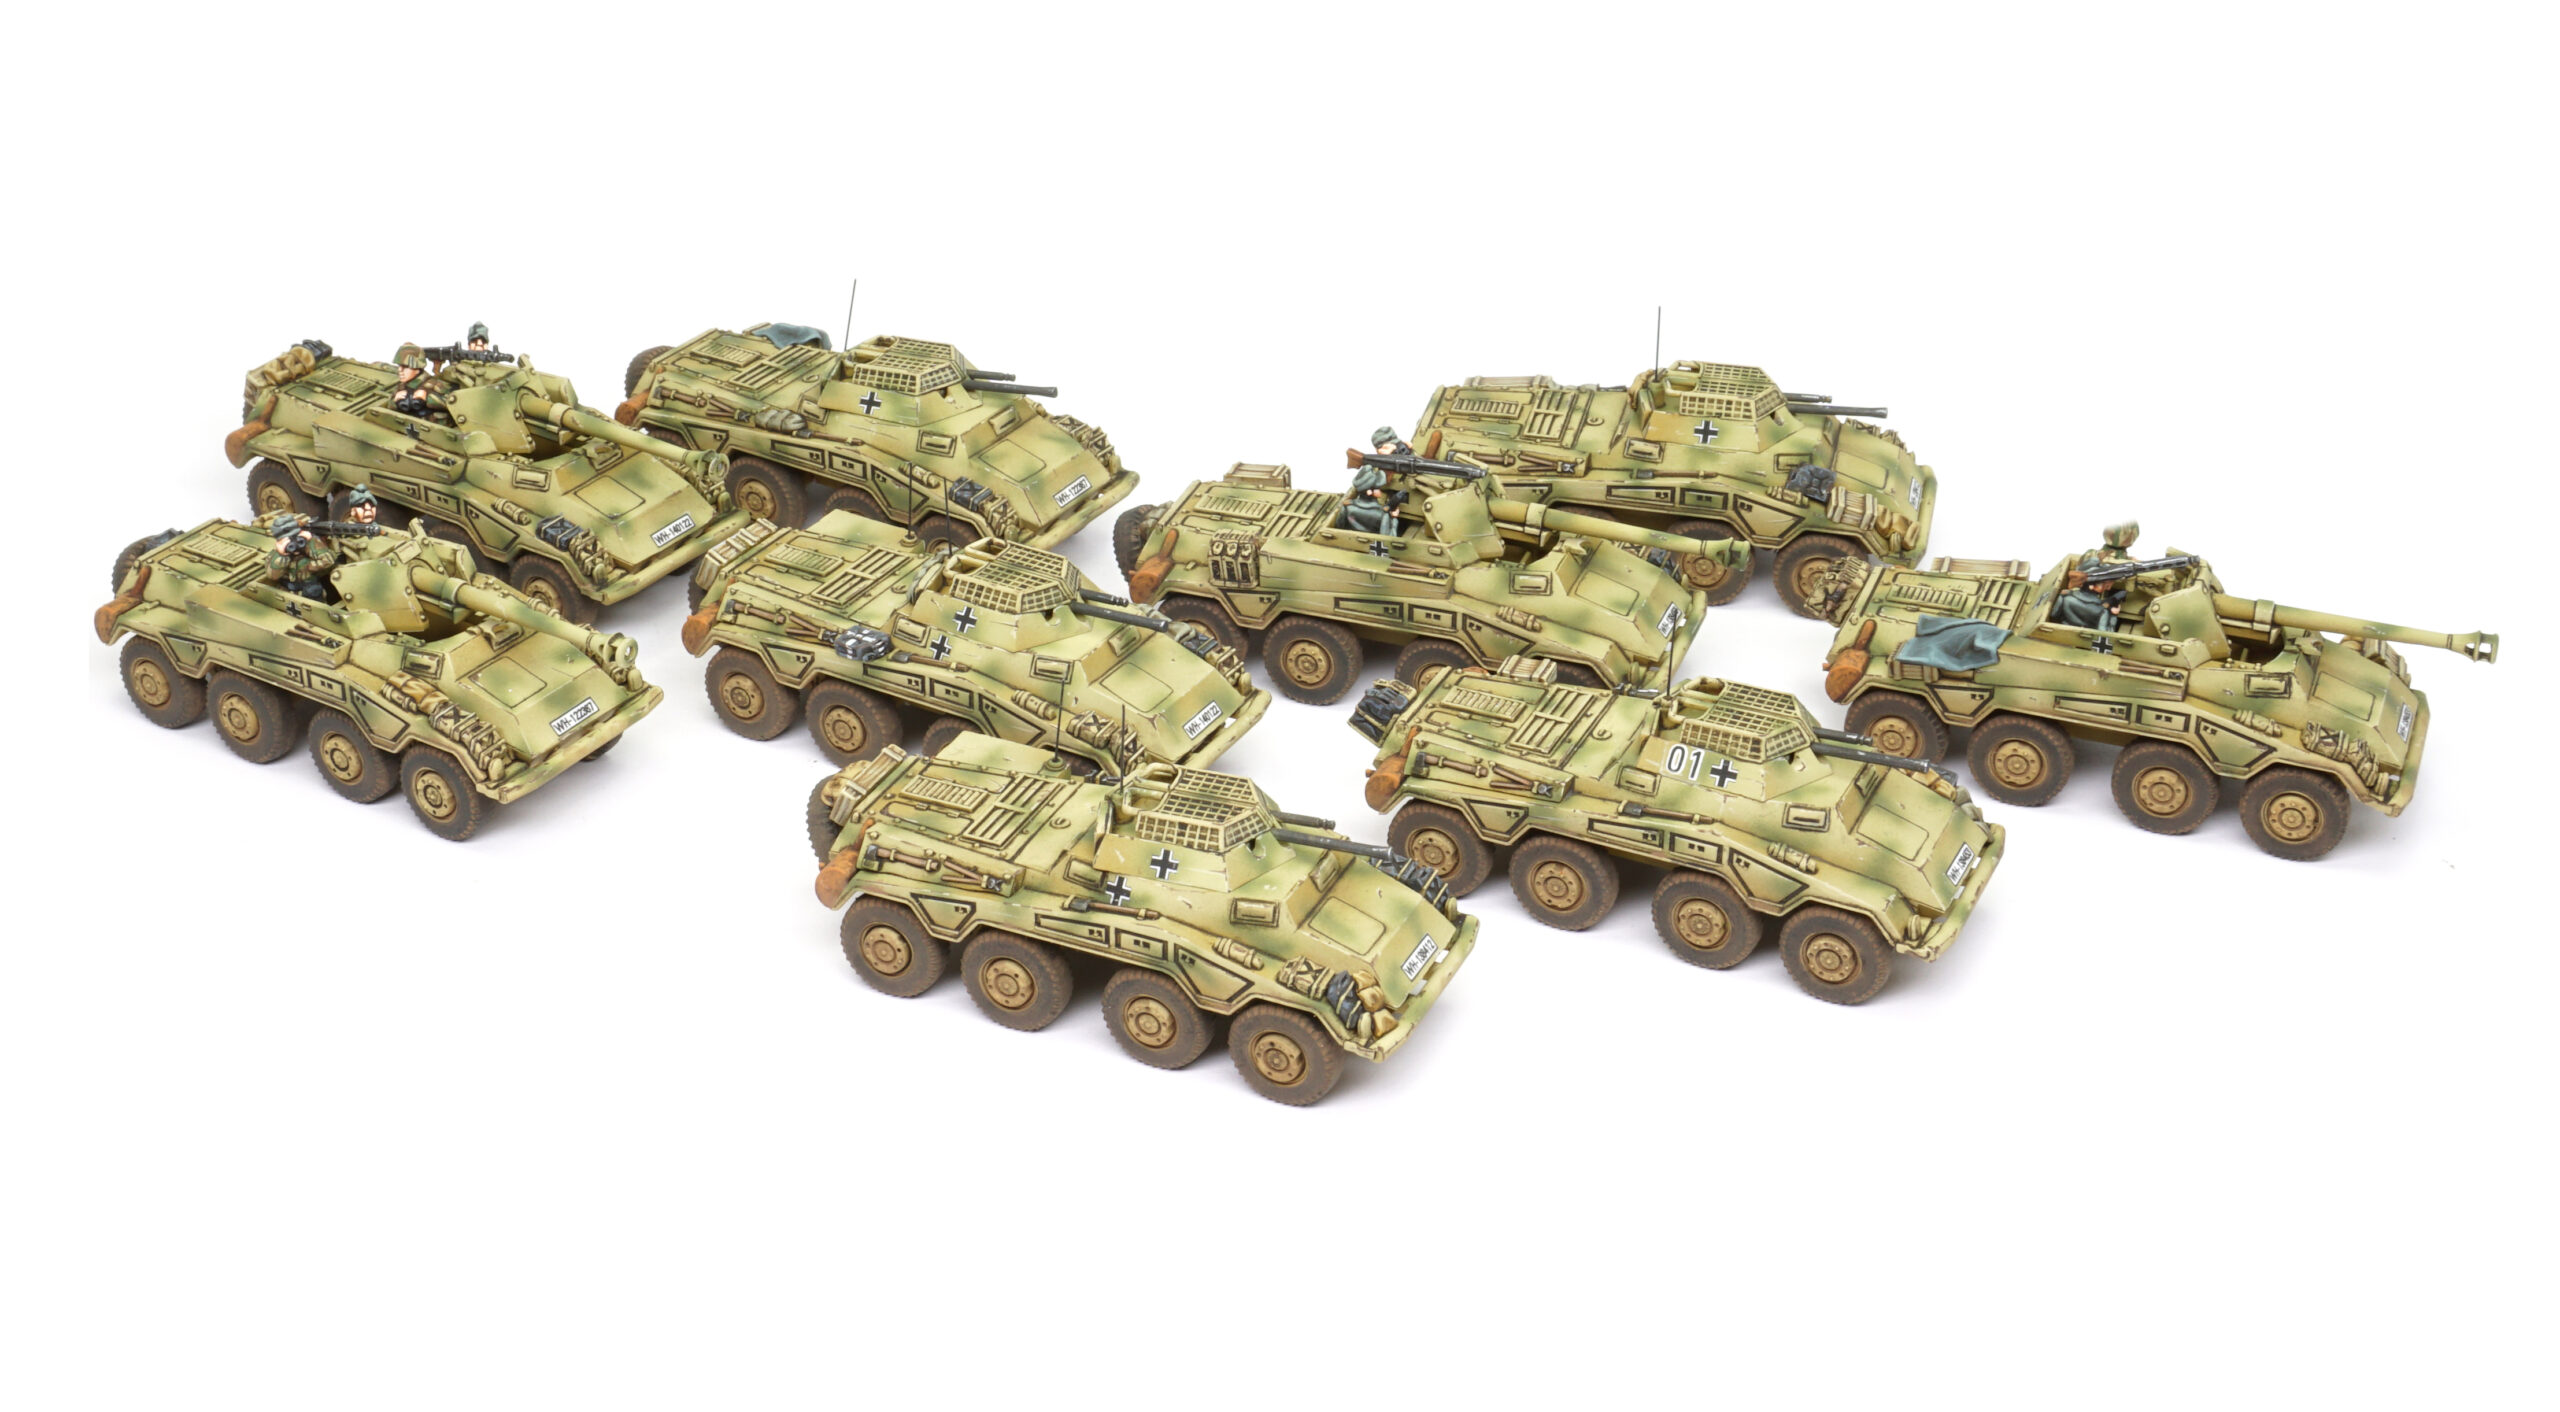
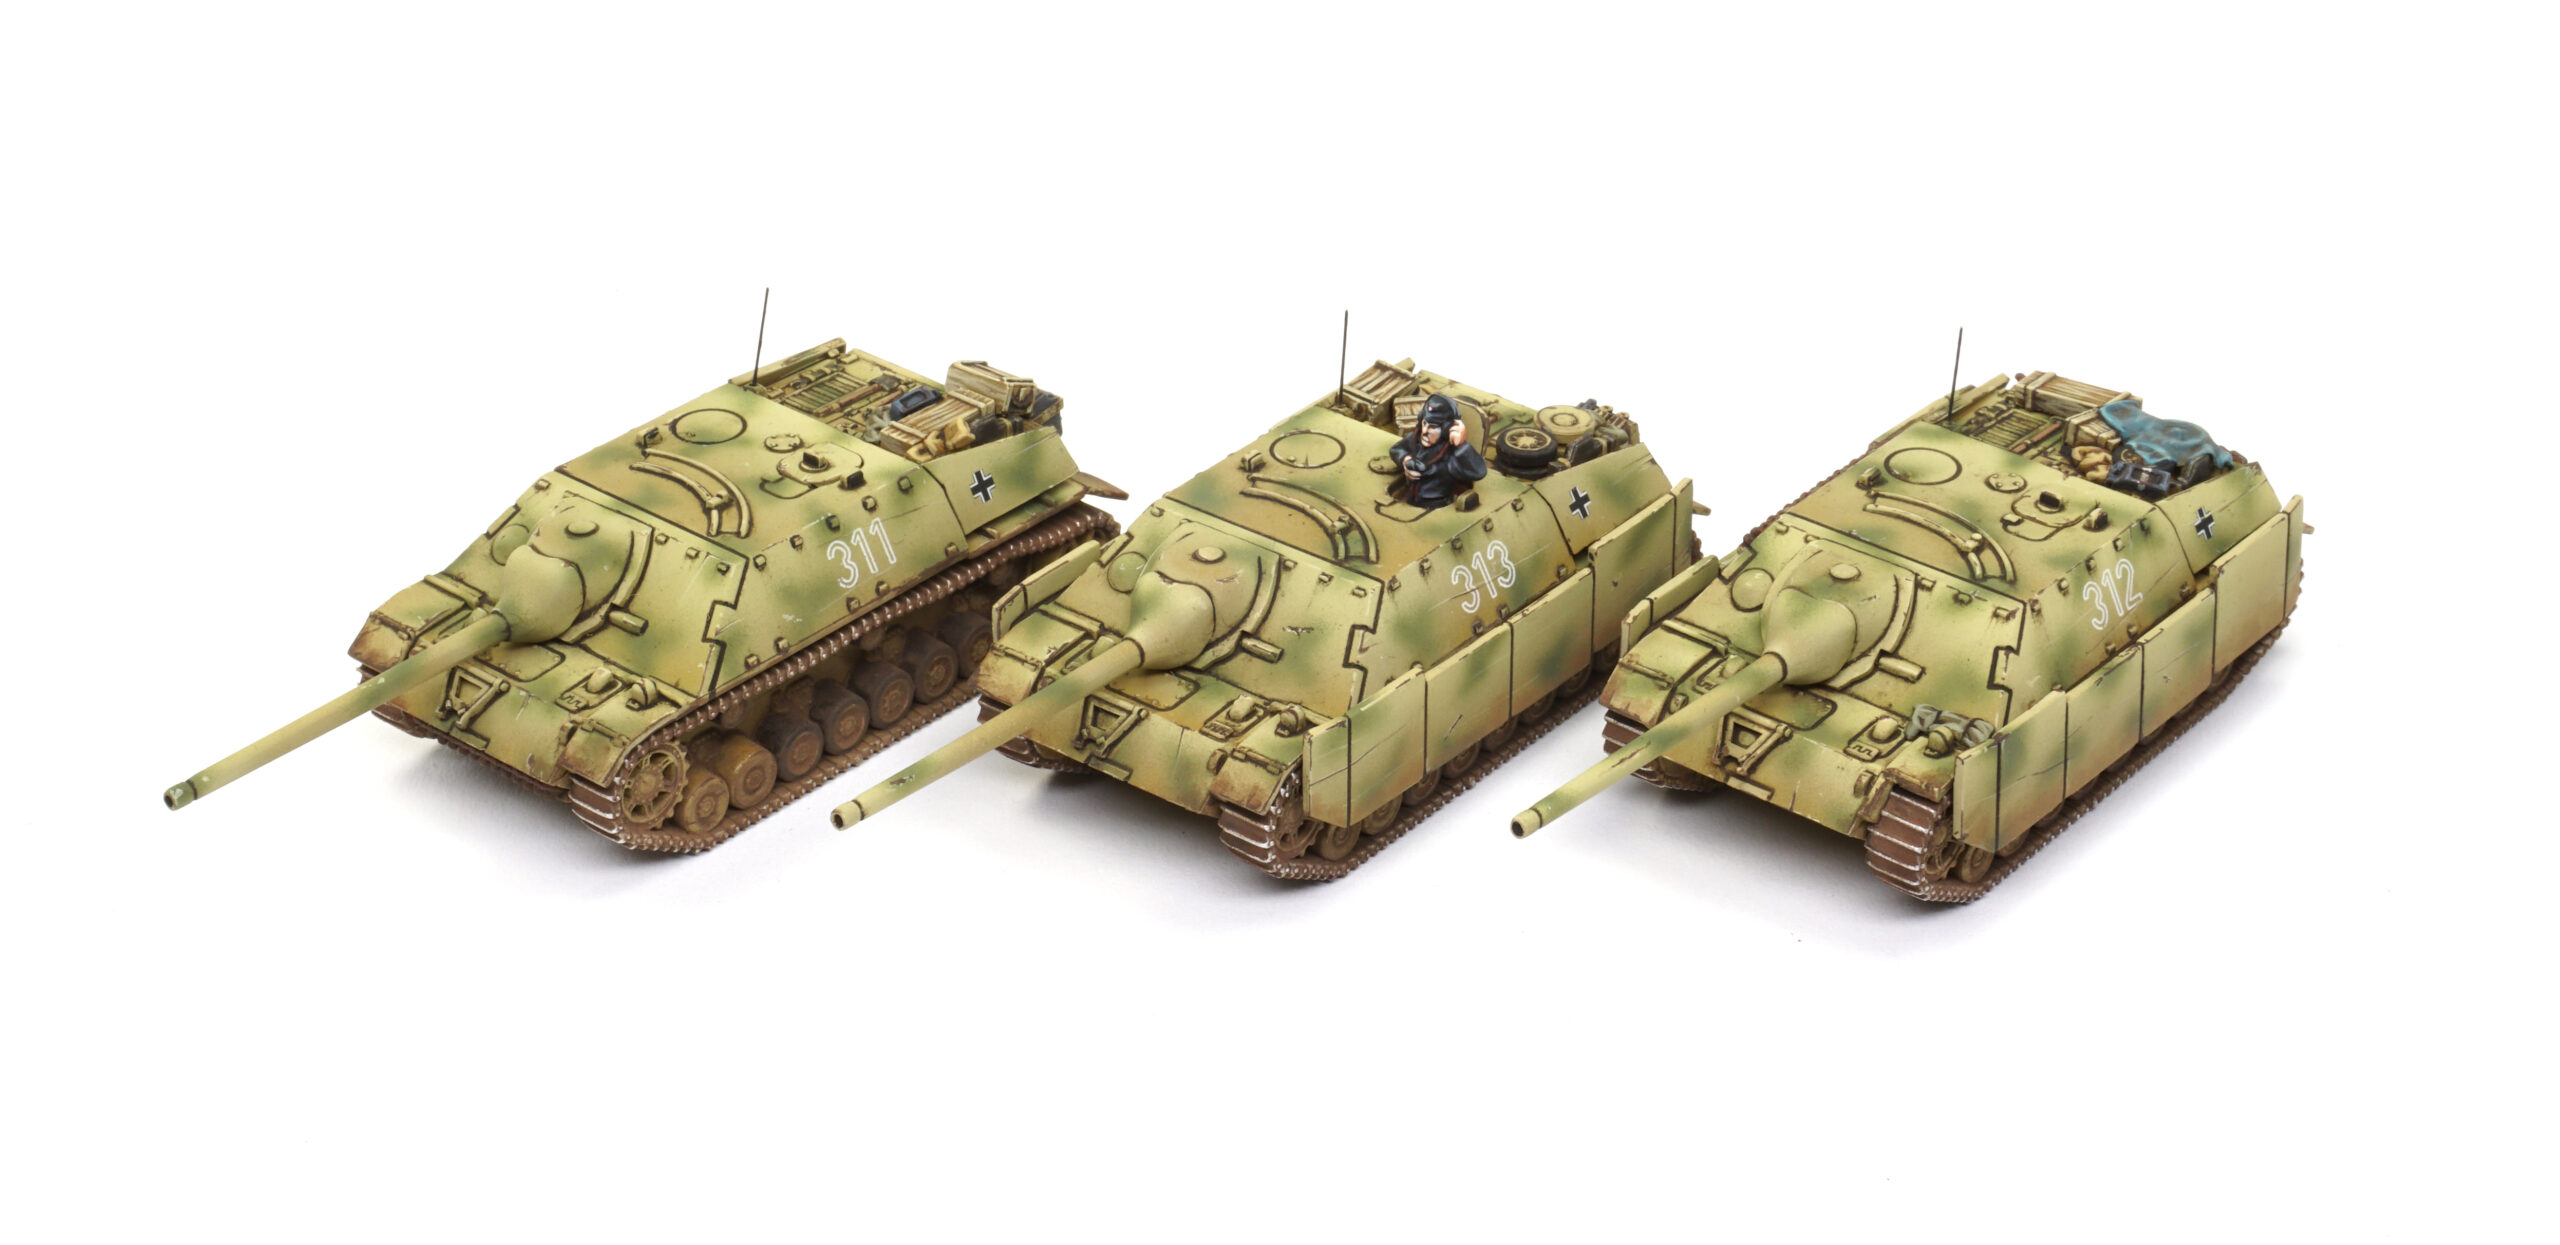
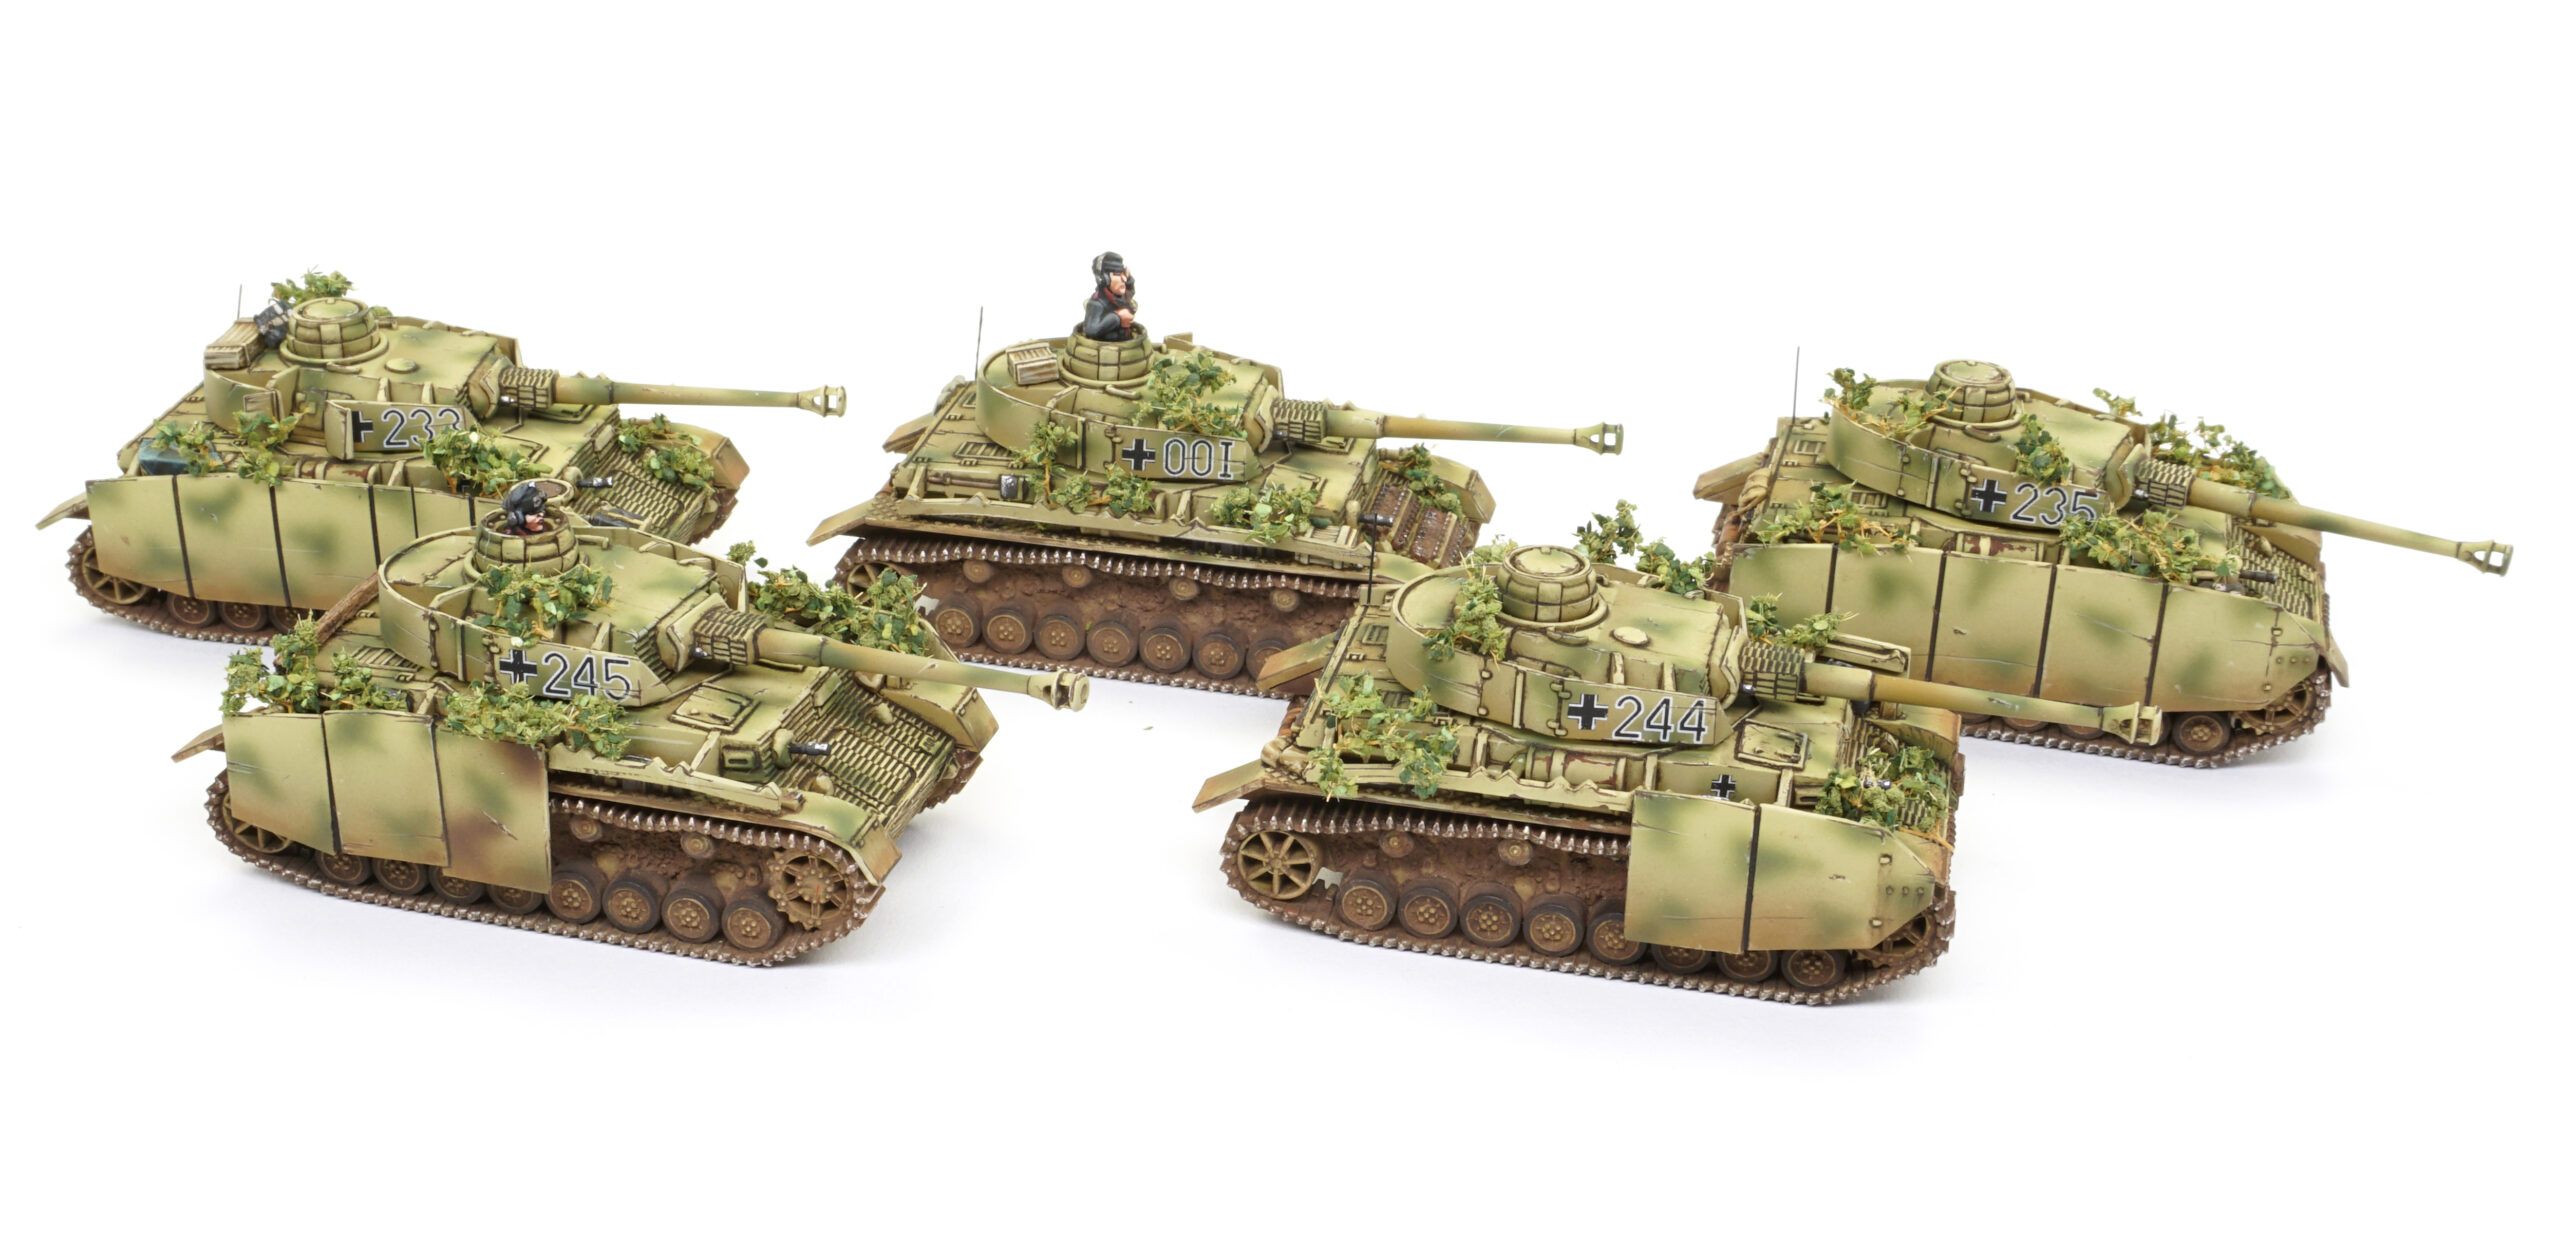
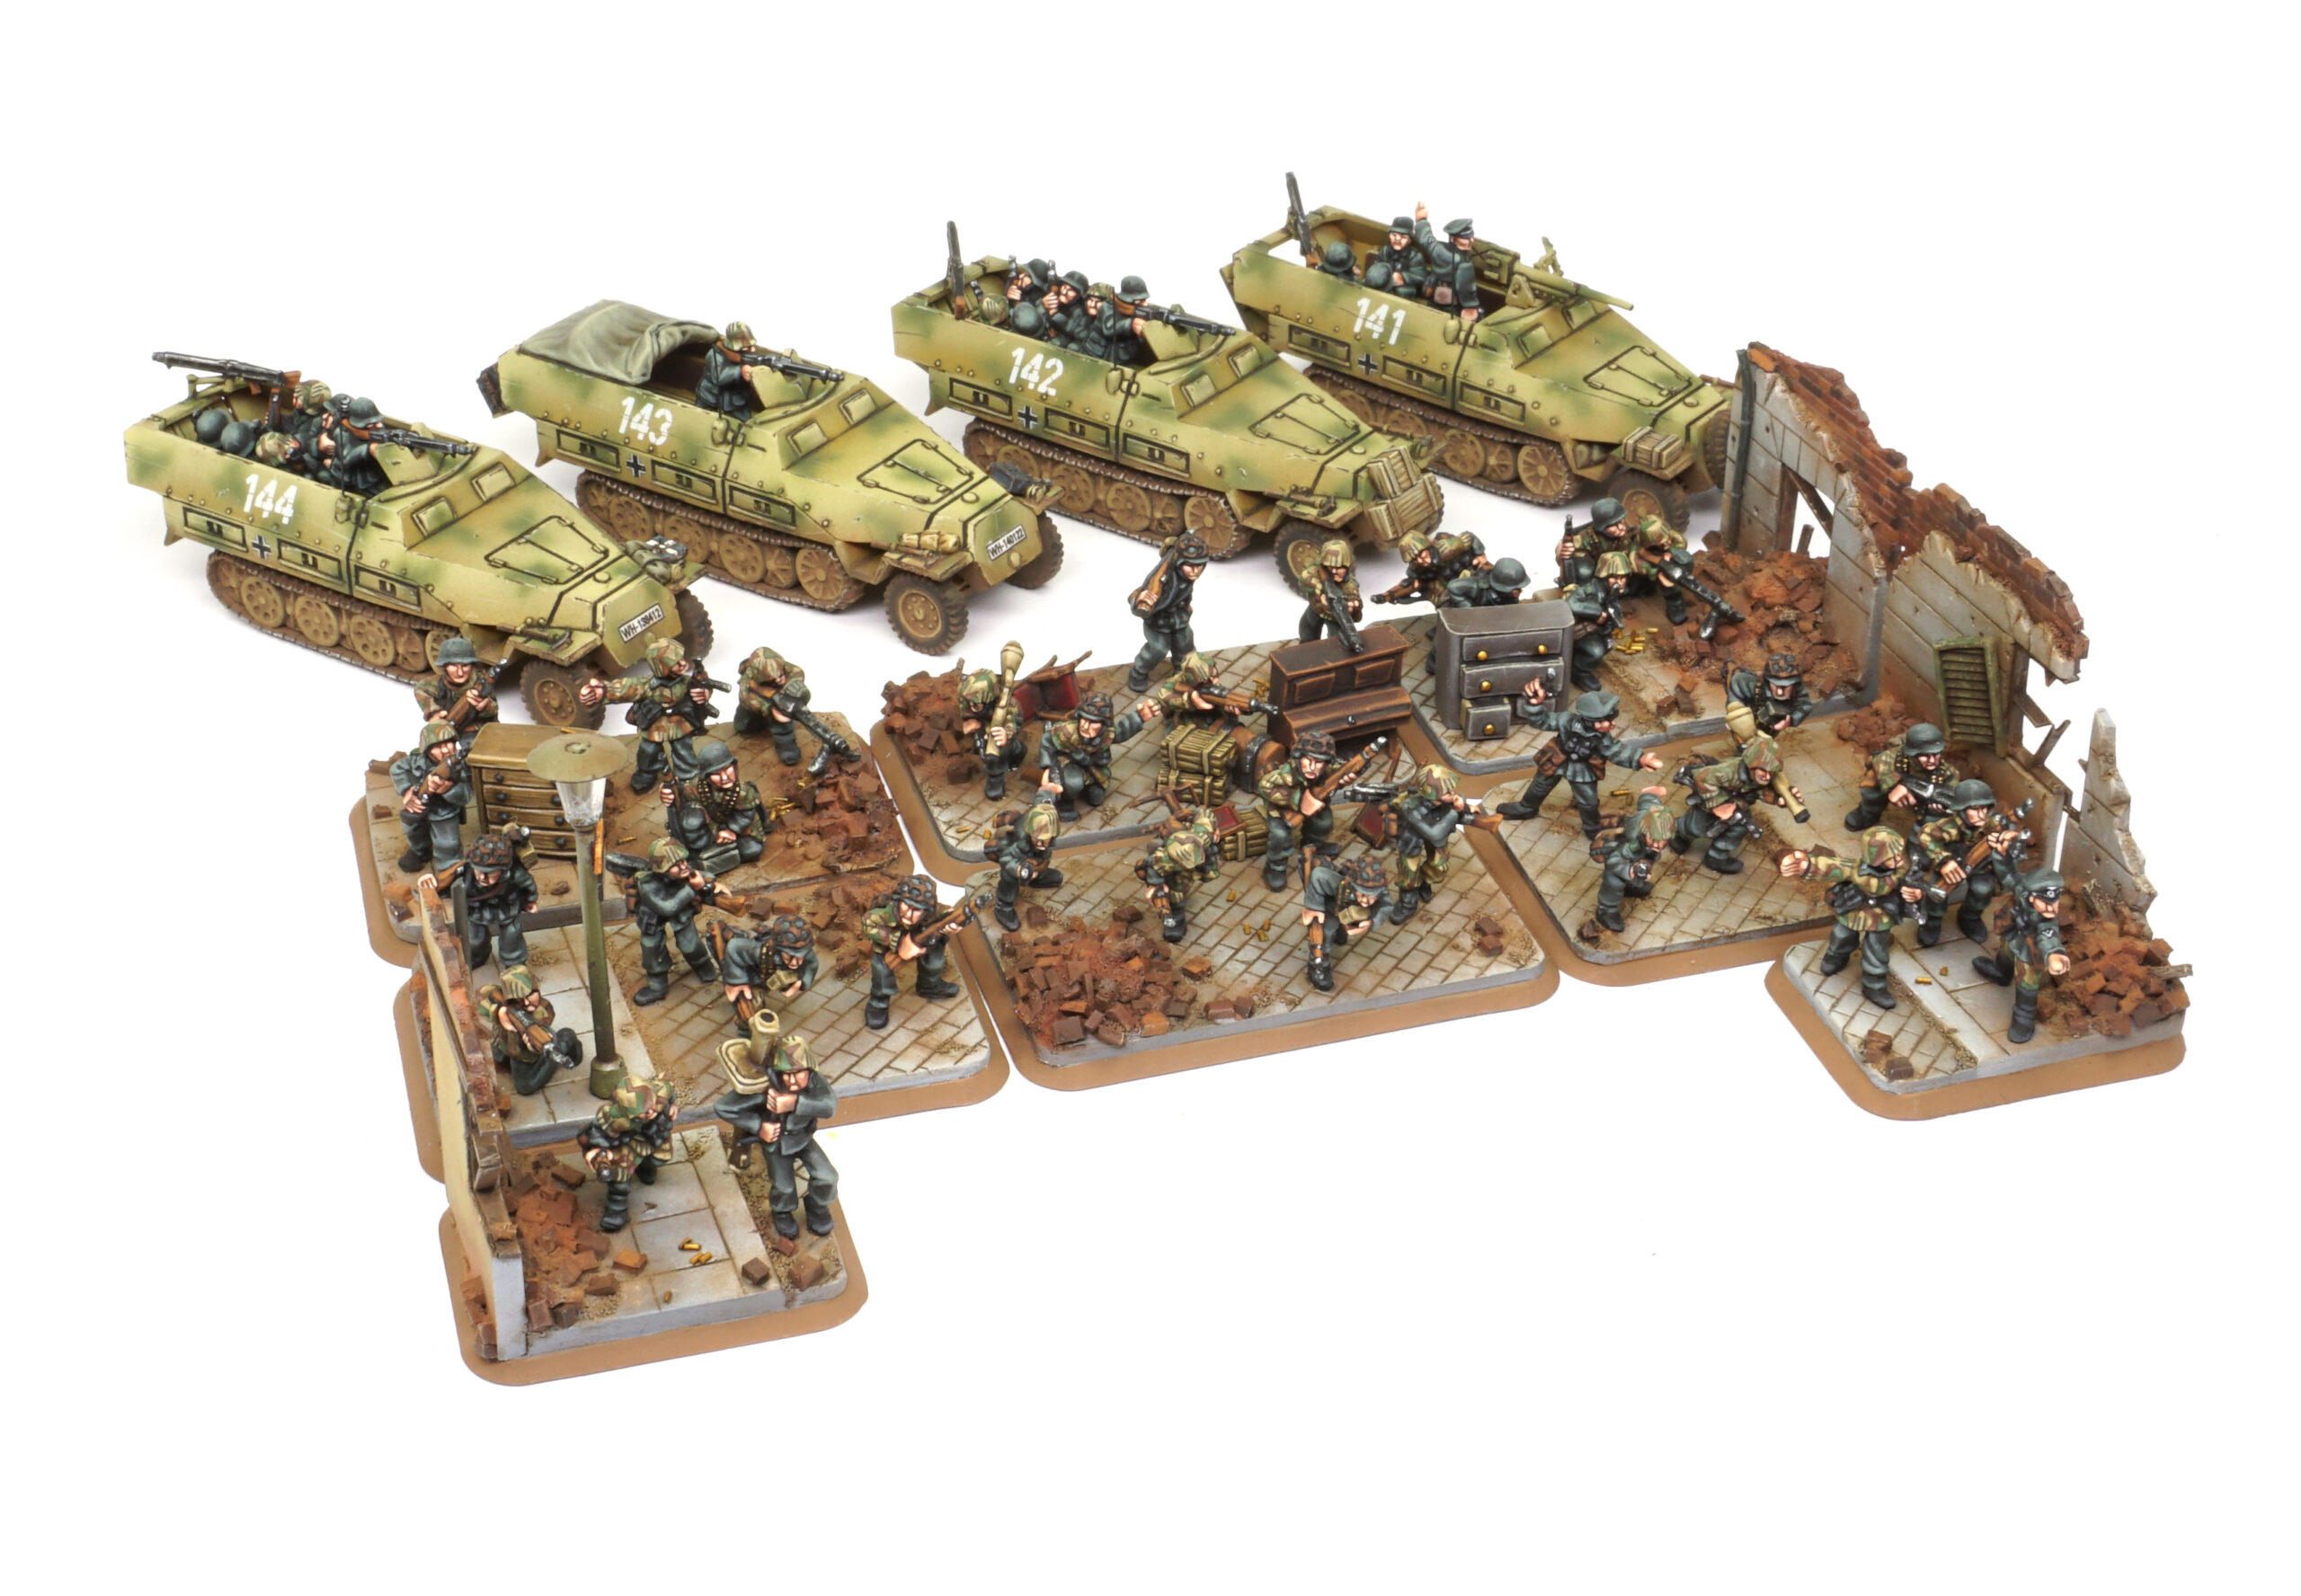
Pictures of the different units of the army:
Outstanding! Simply outstanding! Please continue to show us these projects in the future!
You are very kind, Carl! Thank you.