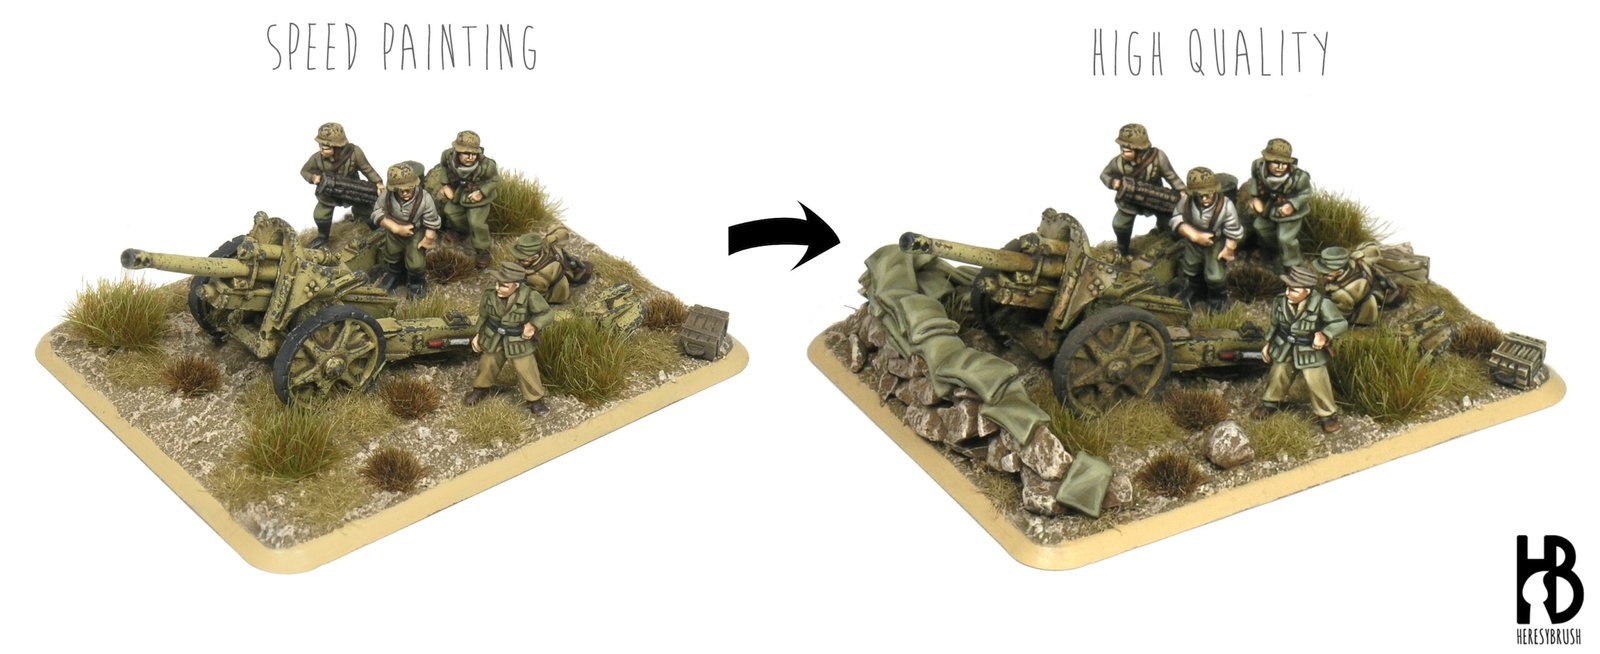
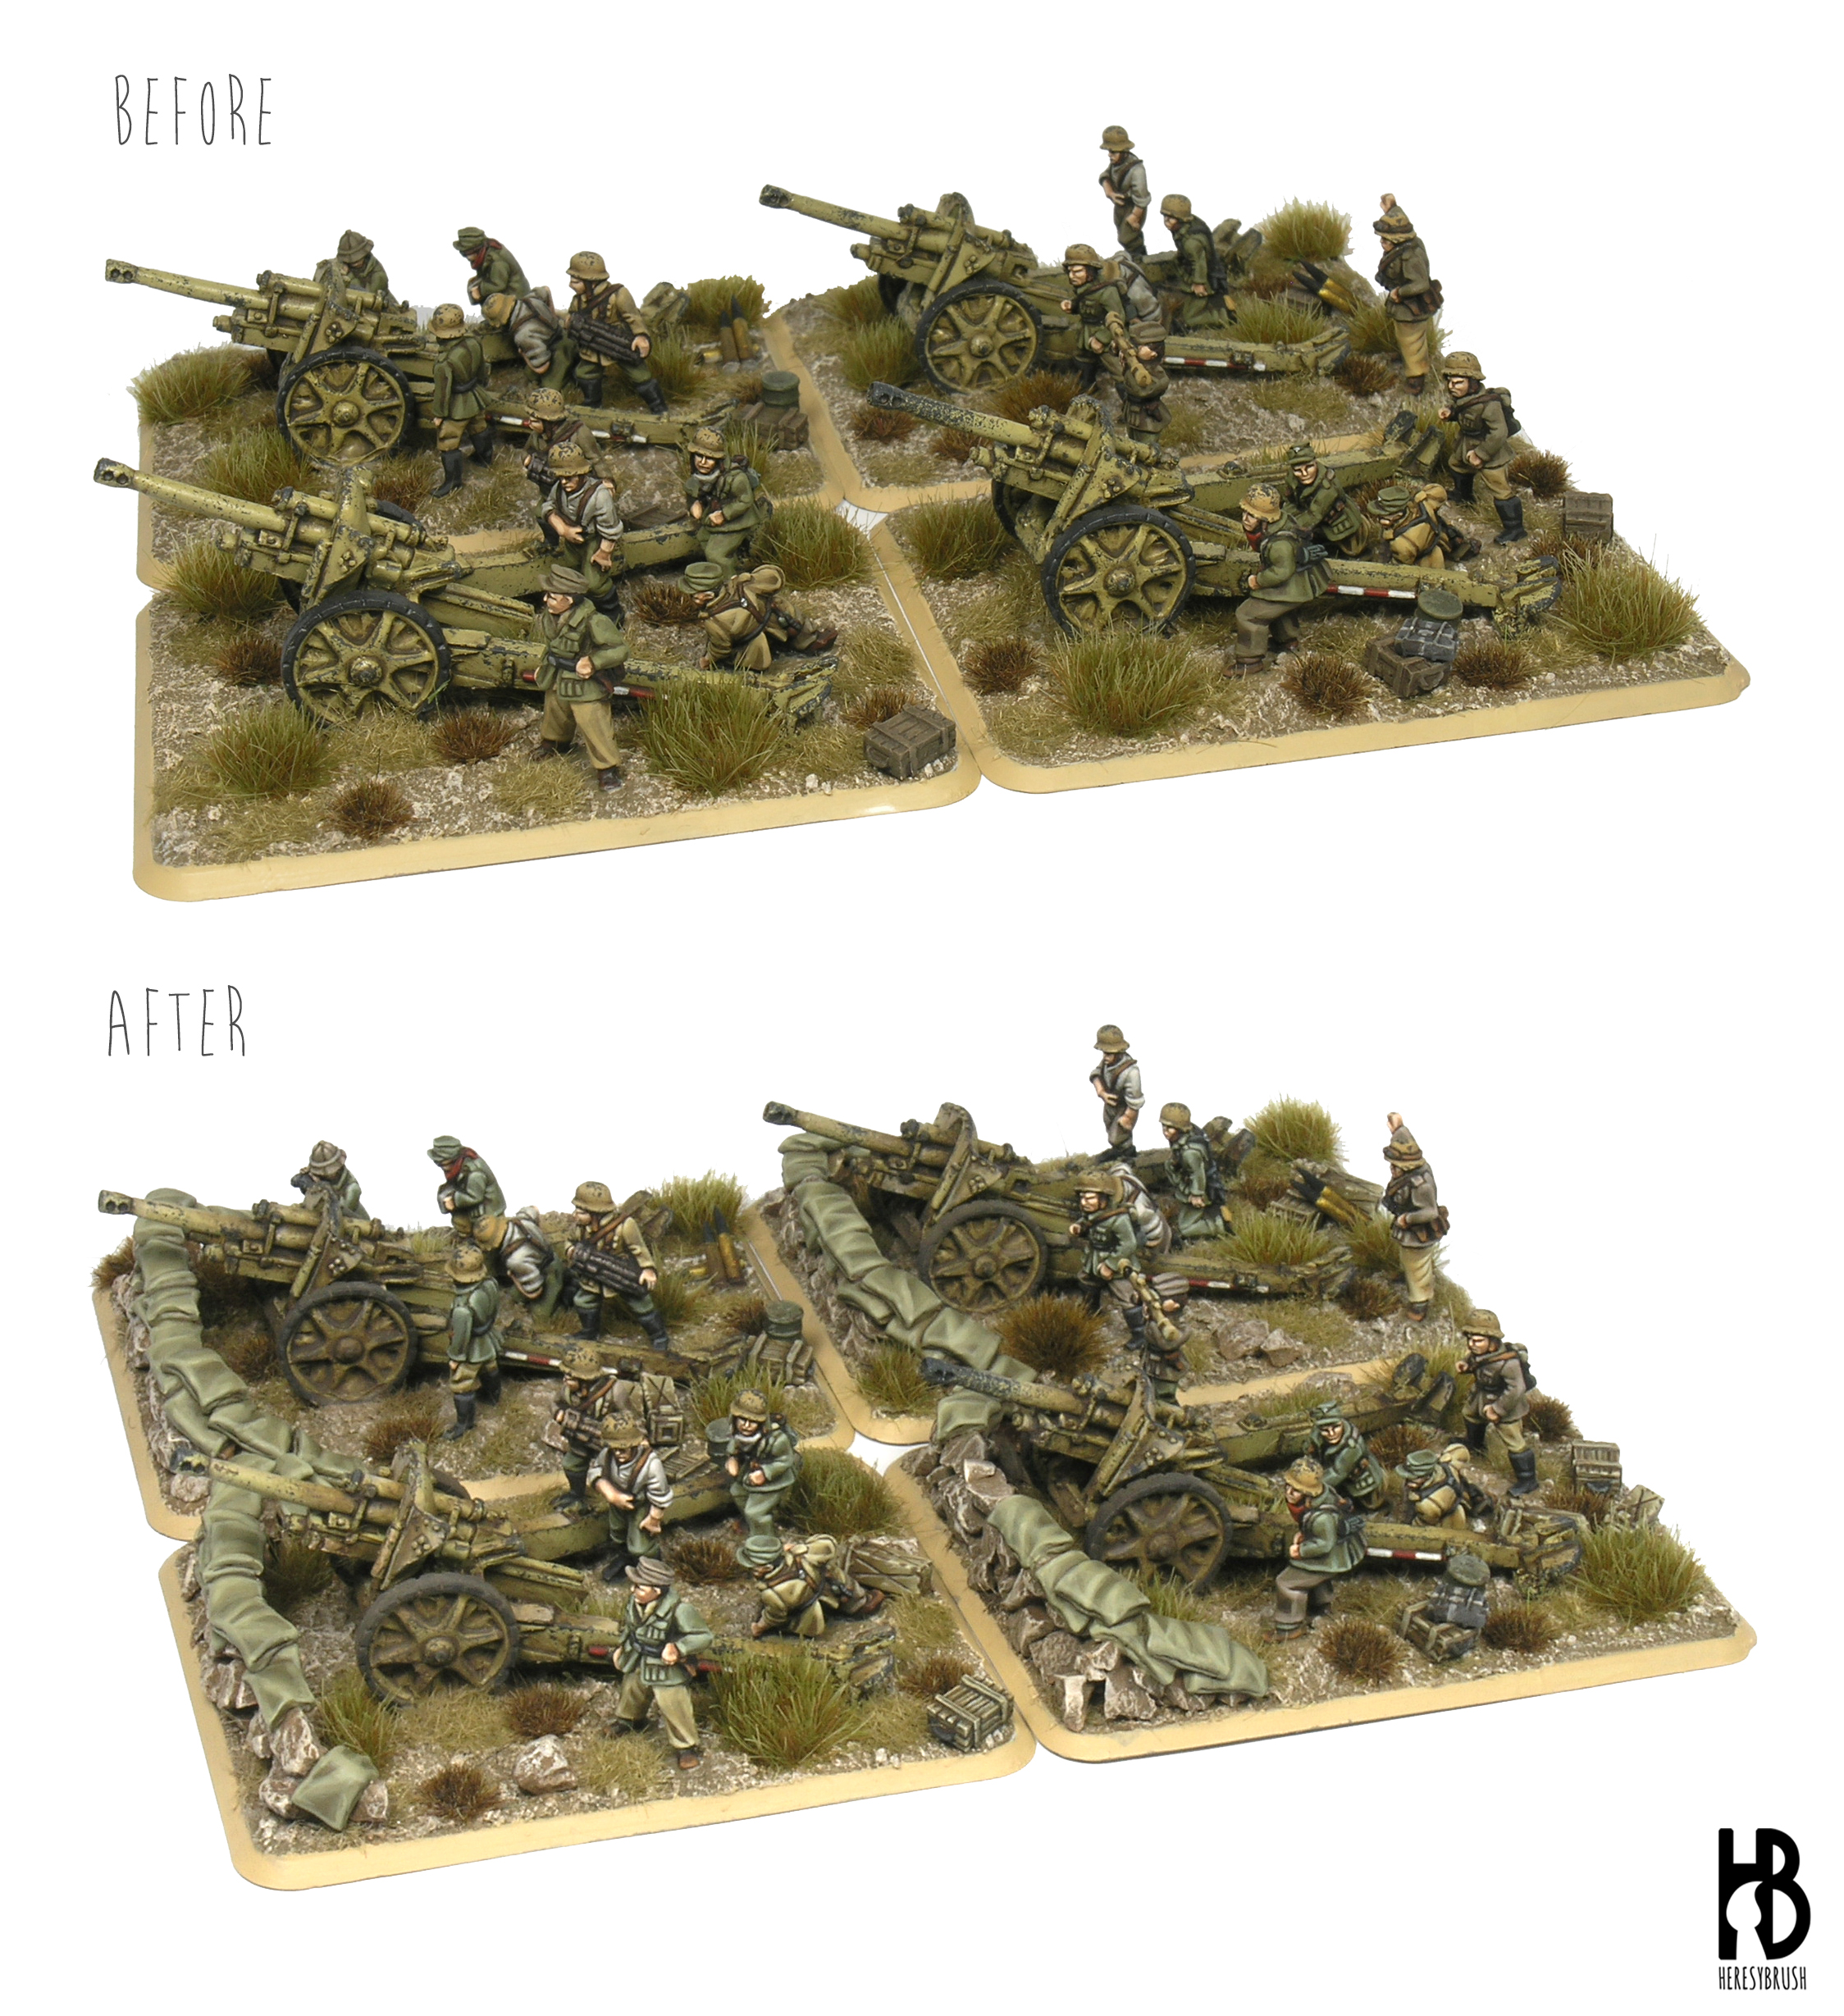
Most popular painting techniques for wargames fall in the category of fast painting methods that aim for the so-called “tabletop quality”. The idea is to have ready a unit or an army as soon as possible, with each miniature painted with the right colors and a bit of contrast between shades and highlights. These quick methods are perfect for wargamers since they do not require much time, allowing the players to spend more time in the battlefield. But, sometimes we have some extra time that we can use to push forward the quality of our miniatures for wargames. I would like to explain in this post how we can upgrade a “speed painting” into a “high quality” paint job. The advantage of this option is that we can take any army that we have already painted, and improve it little by little. We are not in a rush to finish it because the army is literally already painted and can be used at any moment. The miniatures featured in this article are produced by Forged in Battle.
The recently book published by AMMO, “How to paint miniatures for Wargames” (more about this here), contains a masterclass describing how to paint a German artillery platoon in 15mm following a fast painting method (base, wash and highlight). This approach is super fast and the results are very convincing. But the miniatures are a bit flat. This is even more pronounced in 15 mm miniatures due to their very small size. How can we improve this? We need more contrast. We need a more aggressive difference between shades and highlights (something described in another masterclass from the book, featuring a Spanish Tercio in 15 mm). In addition, more elaborated bases with more details will help.
In the following lines we will see how to improve in three steps an artillery gun platoon painted previously using fast painting techniques:
- Improve the bases by adding more details
- Apply more highlights on the crew
- Apply more highlights and shades on the guns

1. Improving the bases
Sand and grass is the most common option among wargamers to decorate the bases. It is easy and fast. But again, it is a bit boring. We can definitely add grass tufts of different size and color to create more points of interest. But if we want to tell a story, we must add something else. Something that stands out in the middle of the base, but does not drag much attention. The main elements of the base should be the miniatures, not this additional stuff.
In my case, the bases already had wooden boxes, water canisters and shells. But when I think about artillery teams, the first thing that comes to my mind is a fortified position. Following the same aesthetics used in the rest of my army, and taken advantage of the big size of the bases, I fortified each gun with a stonewall reinforced with sandbags after removing all the grass tufts from the frontal part of the base.
To create the stonewall I used small stones to decorate aquariums and I piled them with a little bit of instant glue. Then I sculpted the sandbags using green stuff: prepare a thin roll of putty, smashed it and finally cut it in small rectangles. I applied and adapted each rectangle (sandbag) individually on top of the stonewall with a sculpting tool, and then created the sewing lines by pressing on the shades of the sandbag with the sharp edge of a modelling knife.
I painted the fortified walls in the same way I painted the base using two dry brush steps using light brown colors over a dark brown base coat. And then I painted each sandbag individually in a pale olive green tone (a mix of Dark Olive Green AMMO-F503 and Ochre Brown AMMO-F543 in the same proportion). For the highlights I mixed this color with light yellow and applied them on the more exposed areas and edges of each sandbag. Finally, using Dark Brown AMMO-F533 and a thin brush I outlined each sandbag and marked if needed the sewing lines.
2. Improving the crew
As aforementioned, the results of fast painting methods are effective but flat. To create more contrast we can apply additional highlights by mixing the corresponding base colors with a lighter one. I rarely use white for this, but instead ivory or light yellow. Both colors contain yellow and the resulting highlights will be more vivid and interesting (specially when using light yellow). In the case of red leather, we can use brown orange. Keeping this in mind, I applied at least two additional highlights in the most exposed areas of the uniform and edges of each piece of equipment. Note that it is very important to reduce the painted area with each new highlight, so that all the different layers are visible at end. This will create a color gradient. Similarly, we repaint the accessories such as the wooden boxes and canisters. I added a few additional ammo crates.
In addition, we can outline the different parts of the miniature with a thin brush and a dark brown or even black paint. This will enhance the definition of the miniature -and increase the contrast-, which is specially important when painting 15 mm.
If the miniatures are already glued on the base, we will not be able to reach some parts of them with the brush. This is fine, because these parts are likely hidden and are not that visible anyways. We will focus on the most exposed parts of each miniature.
3. Improving the guns
The guns were painted very quickly and with very subtle highlights. Again, although the results are good enough to play, they are a bit boring. As we did with the crew, we can add more highlights but also shades. And we will do this with oils or enamels. Why oils / enamels instead of acrylic paints? Because they dry slowly and it is easier to blend them with a little bit of thinner (such as White Spirit) to create color gradients. Acrylic paints dry in seconds and cannot be blended with water in the same way. The relatively large surfaces of the guns are perfect to follow this approach using oils.
I usually apply the “color modulation” technique (more about this here) when highlighting tanks and guns. To create the striking contrast between shades and highlights typical of this technique, we can apply a bit of Oilbrush Dark Brown A.MIG-3512 in areas we want to darken and Oilbrush Basic Flesh A.MIG-3520 (a light brown / yellow) in the ones we want to become lighter. And then we blend the oil paint with a brush moistened with thinner, leaving more paint in those areas we want darker or lighter. For example, we can enhance the highlights in the upper part of the gun shield and force the shades in the lowest. Or we can highlight the tip of the gun and darken the body. We can repeat this process several times until we get the desired effect. Similarly, we can also add a faint orange tint in the dark and intermediates areas with Oilbrush Rust A.MIG-3510. If needed, we can repaint a little bit the chipping effects afterwards using acrylic paints.
Finally, we can create a dust effect on the wheels by applying pigments with an old brush. We apply them “dry”, directly from the jar and without any thinner.

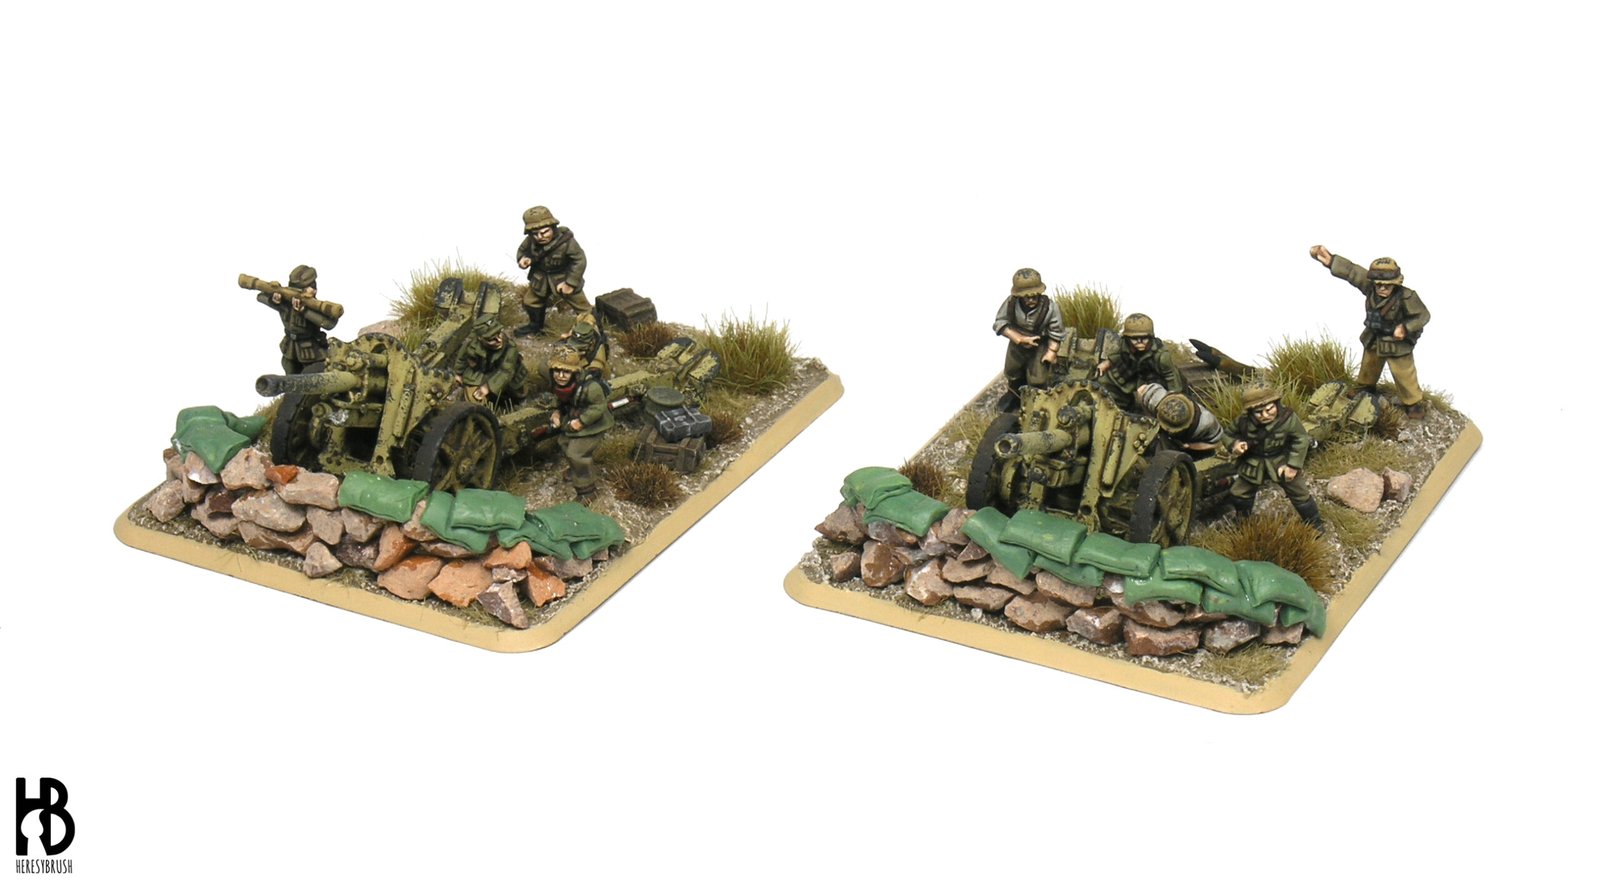
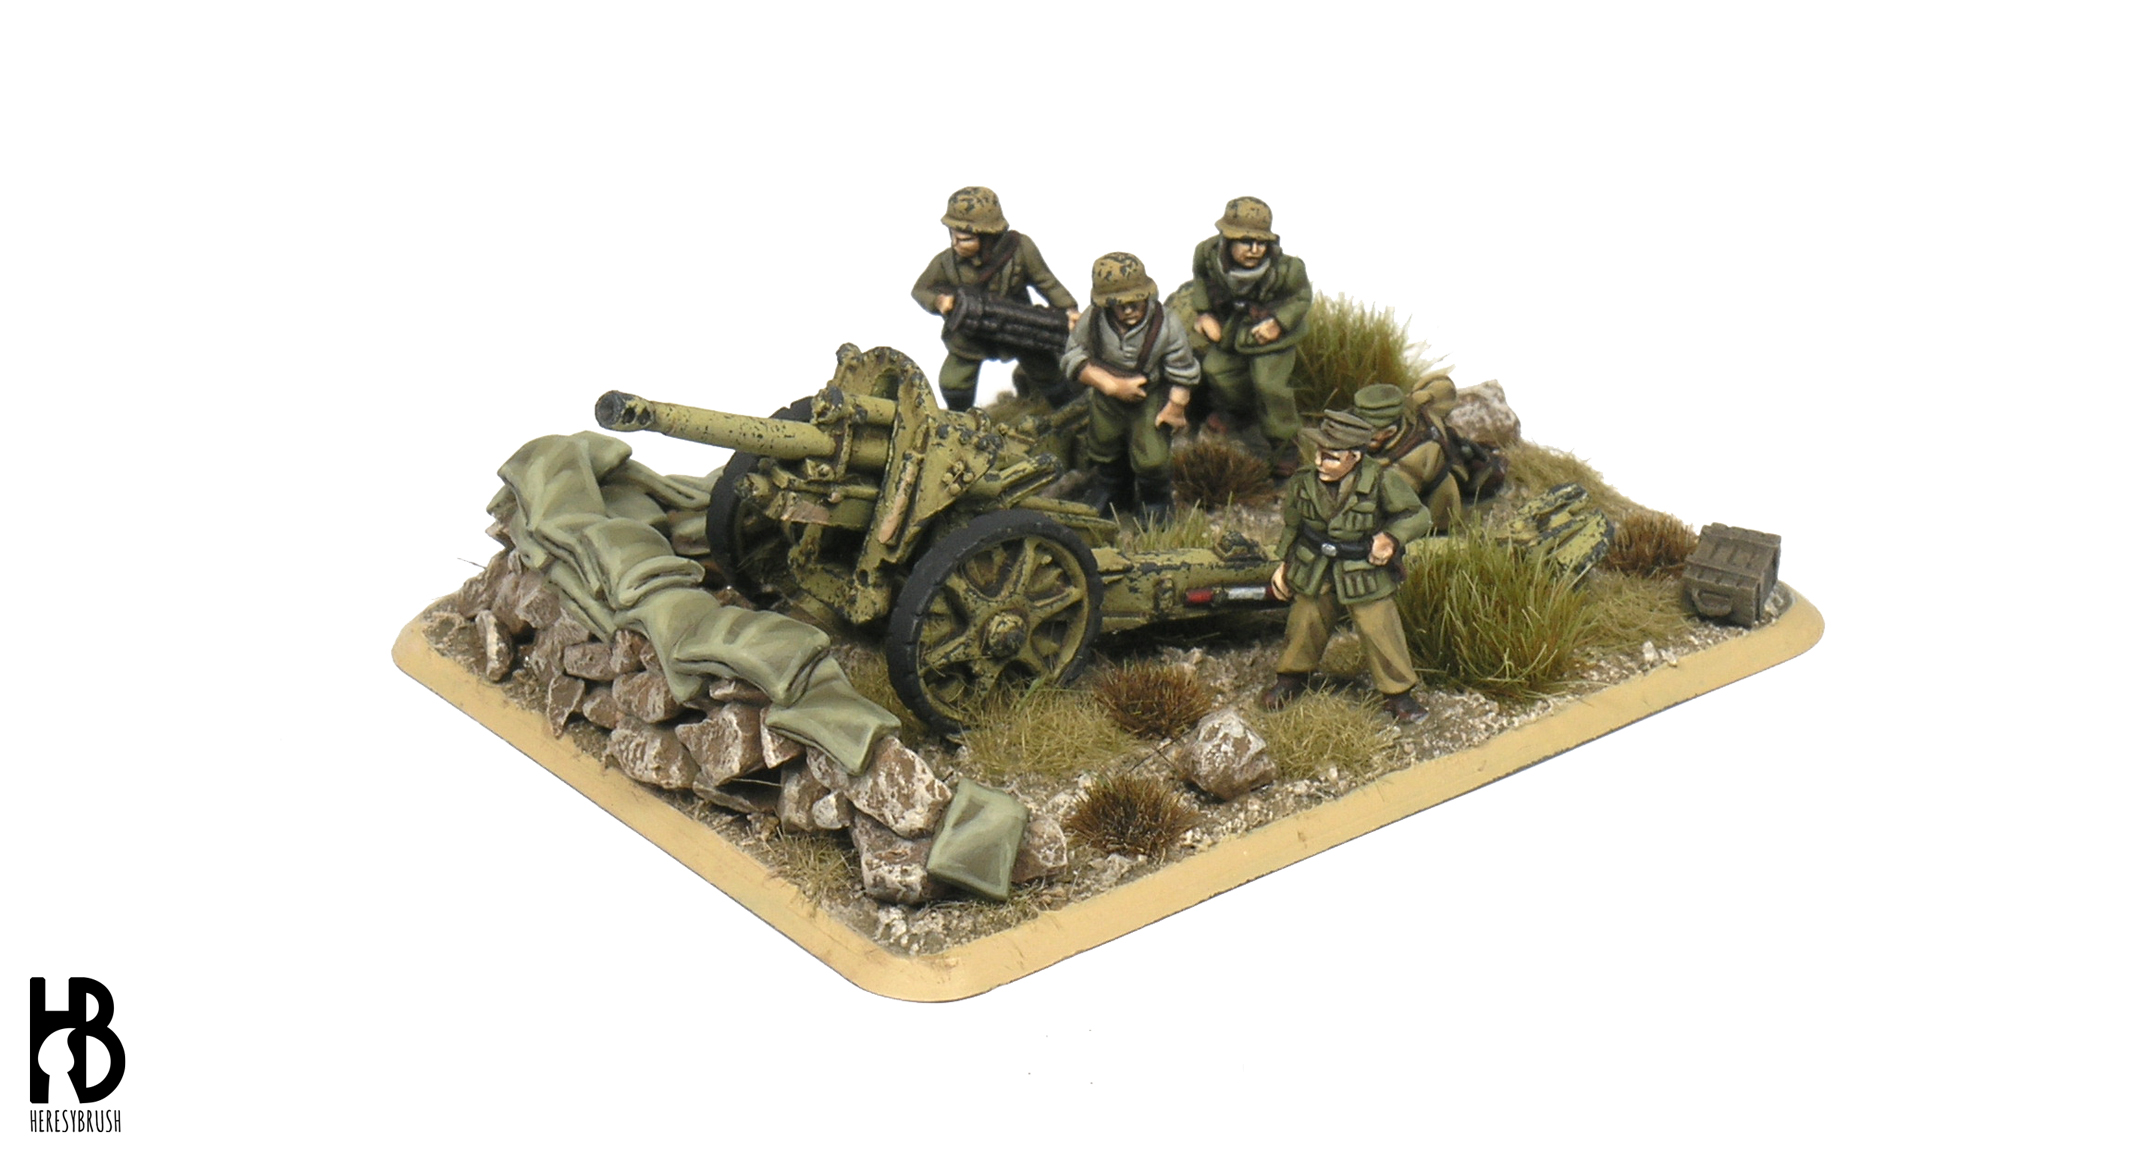
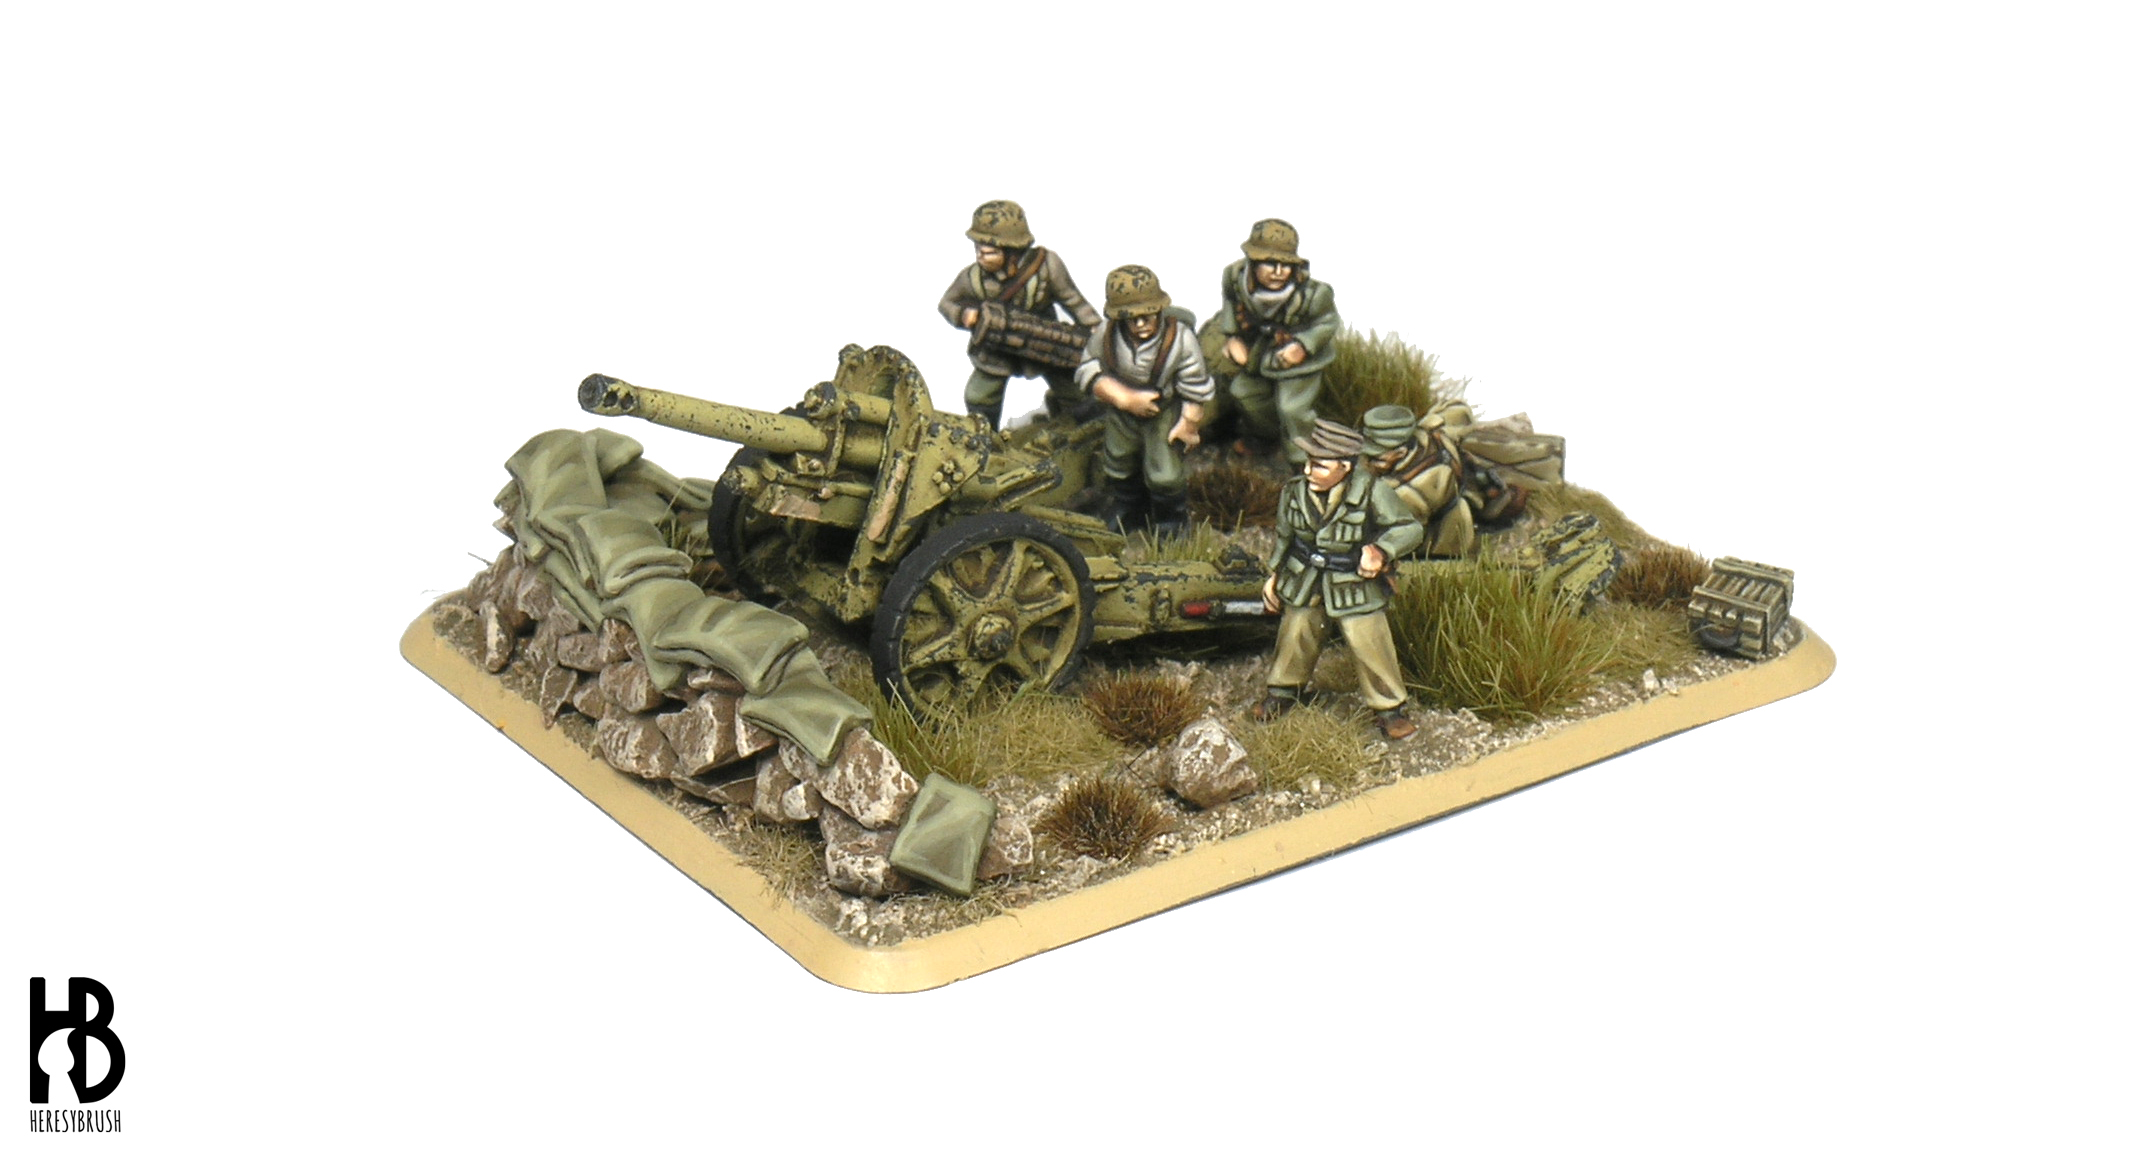
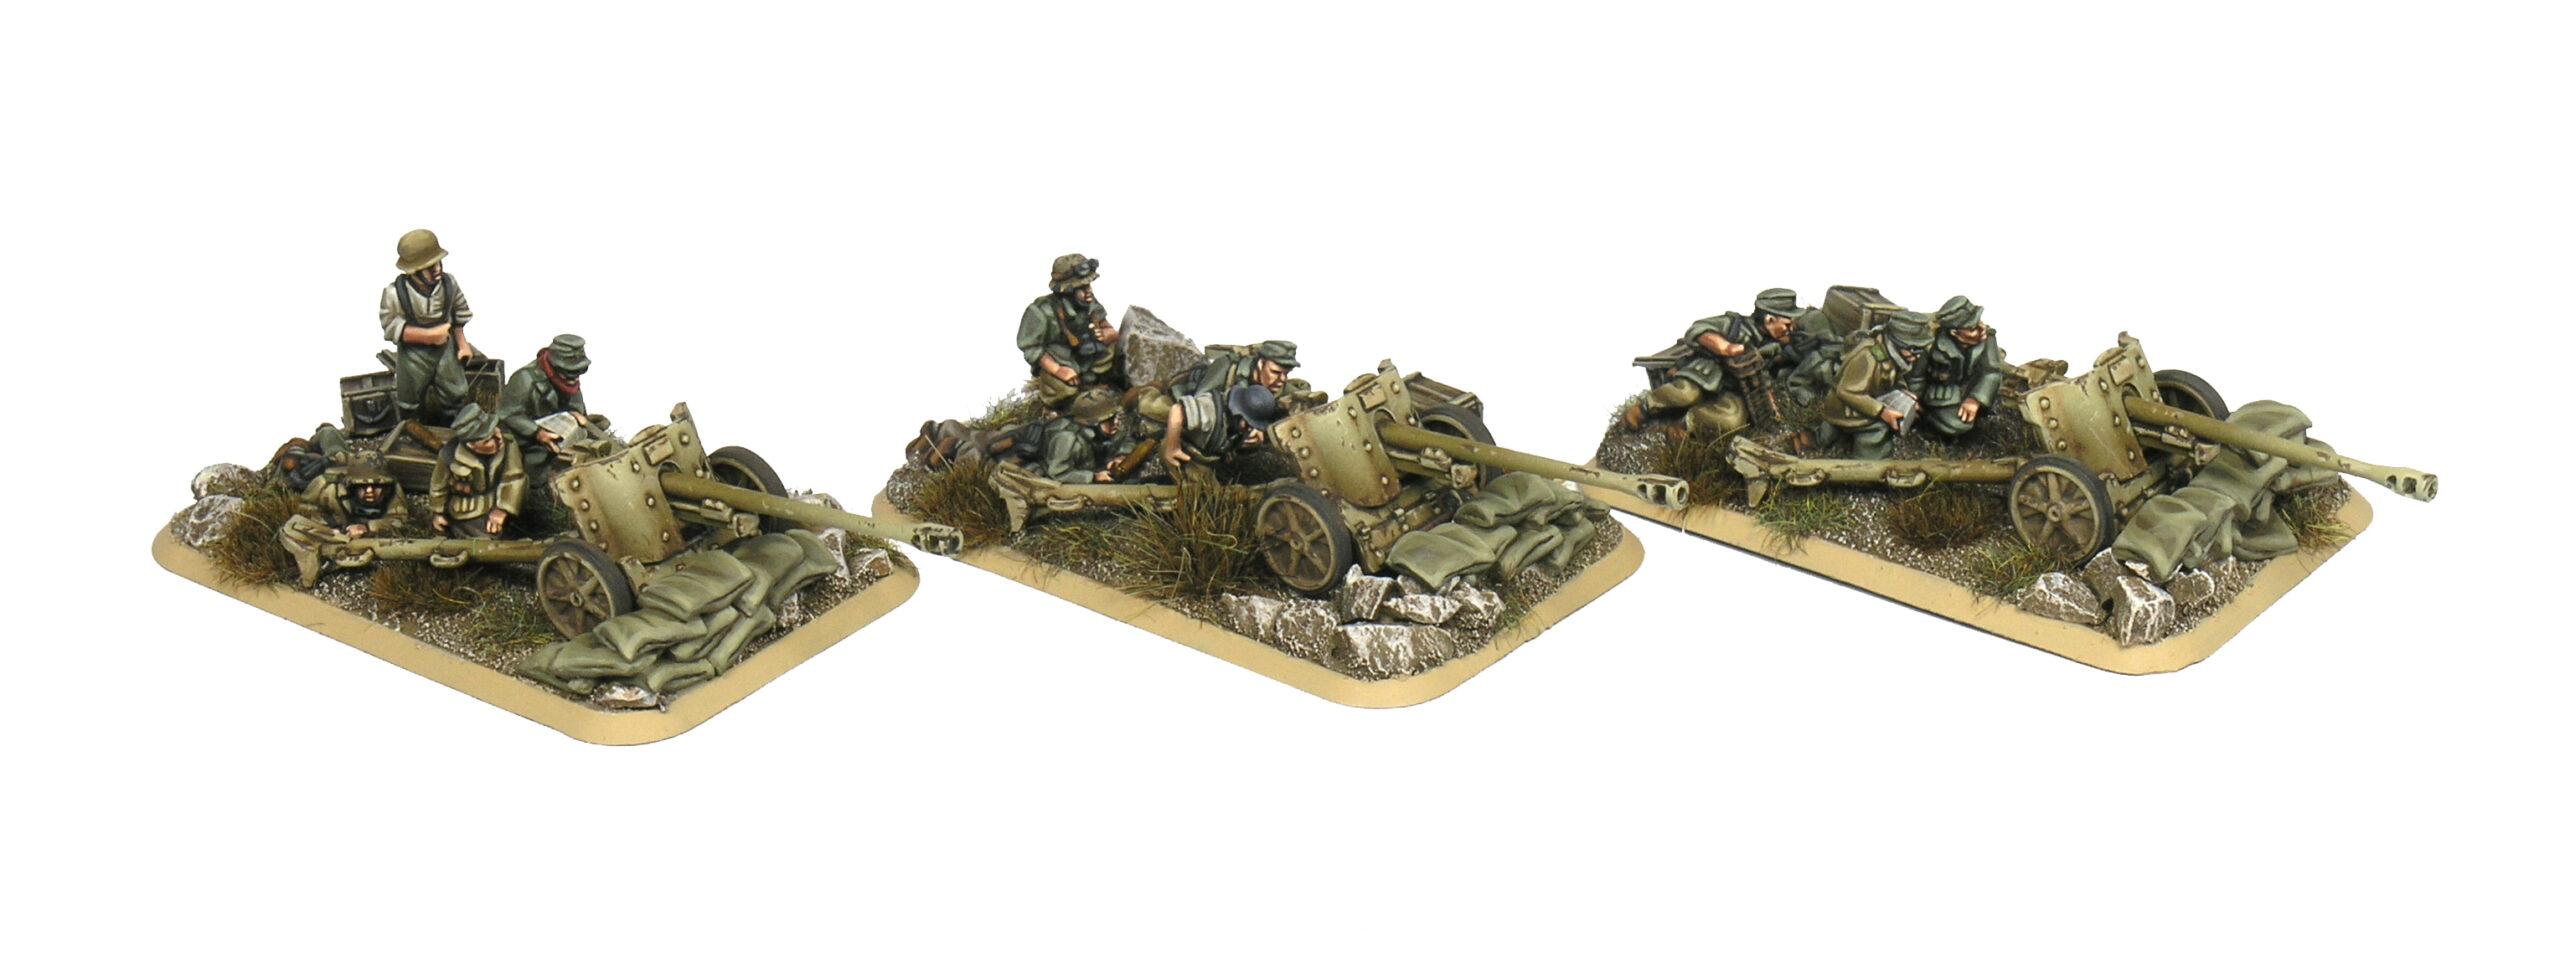
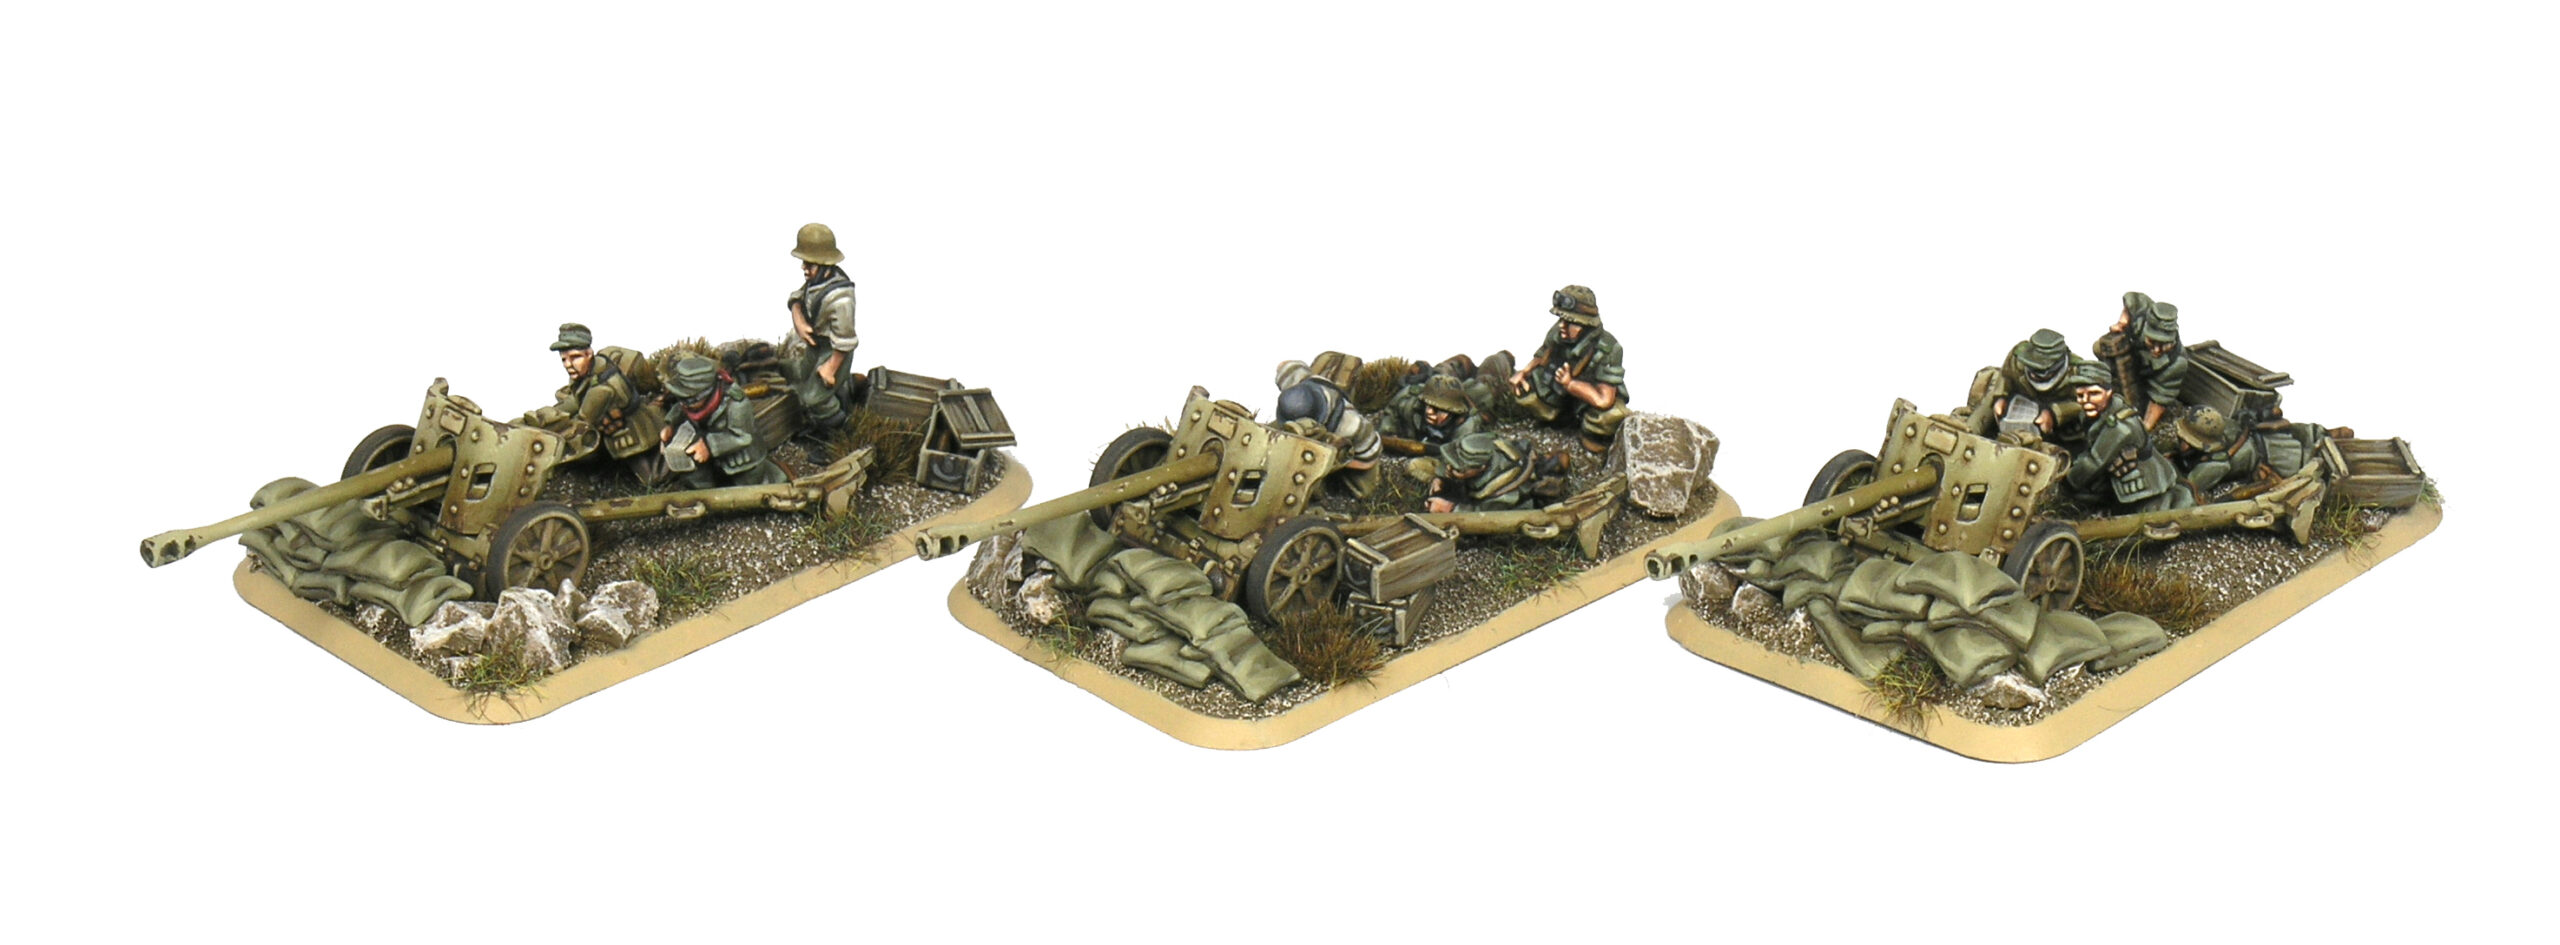
Pictures of the whole platoon:

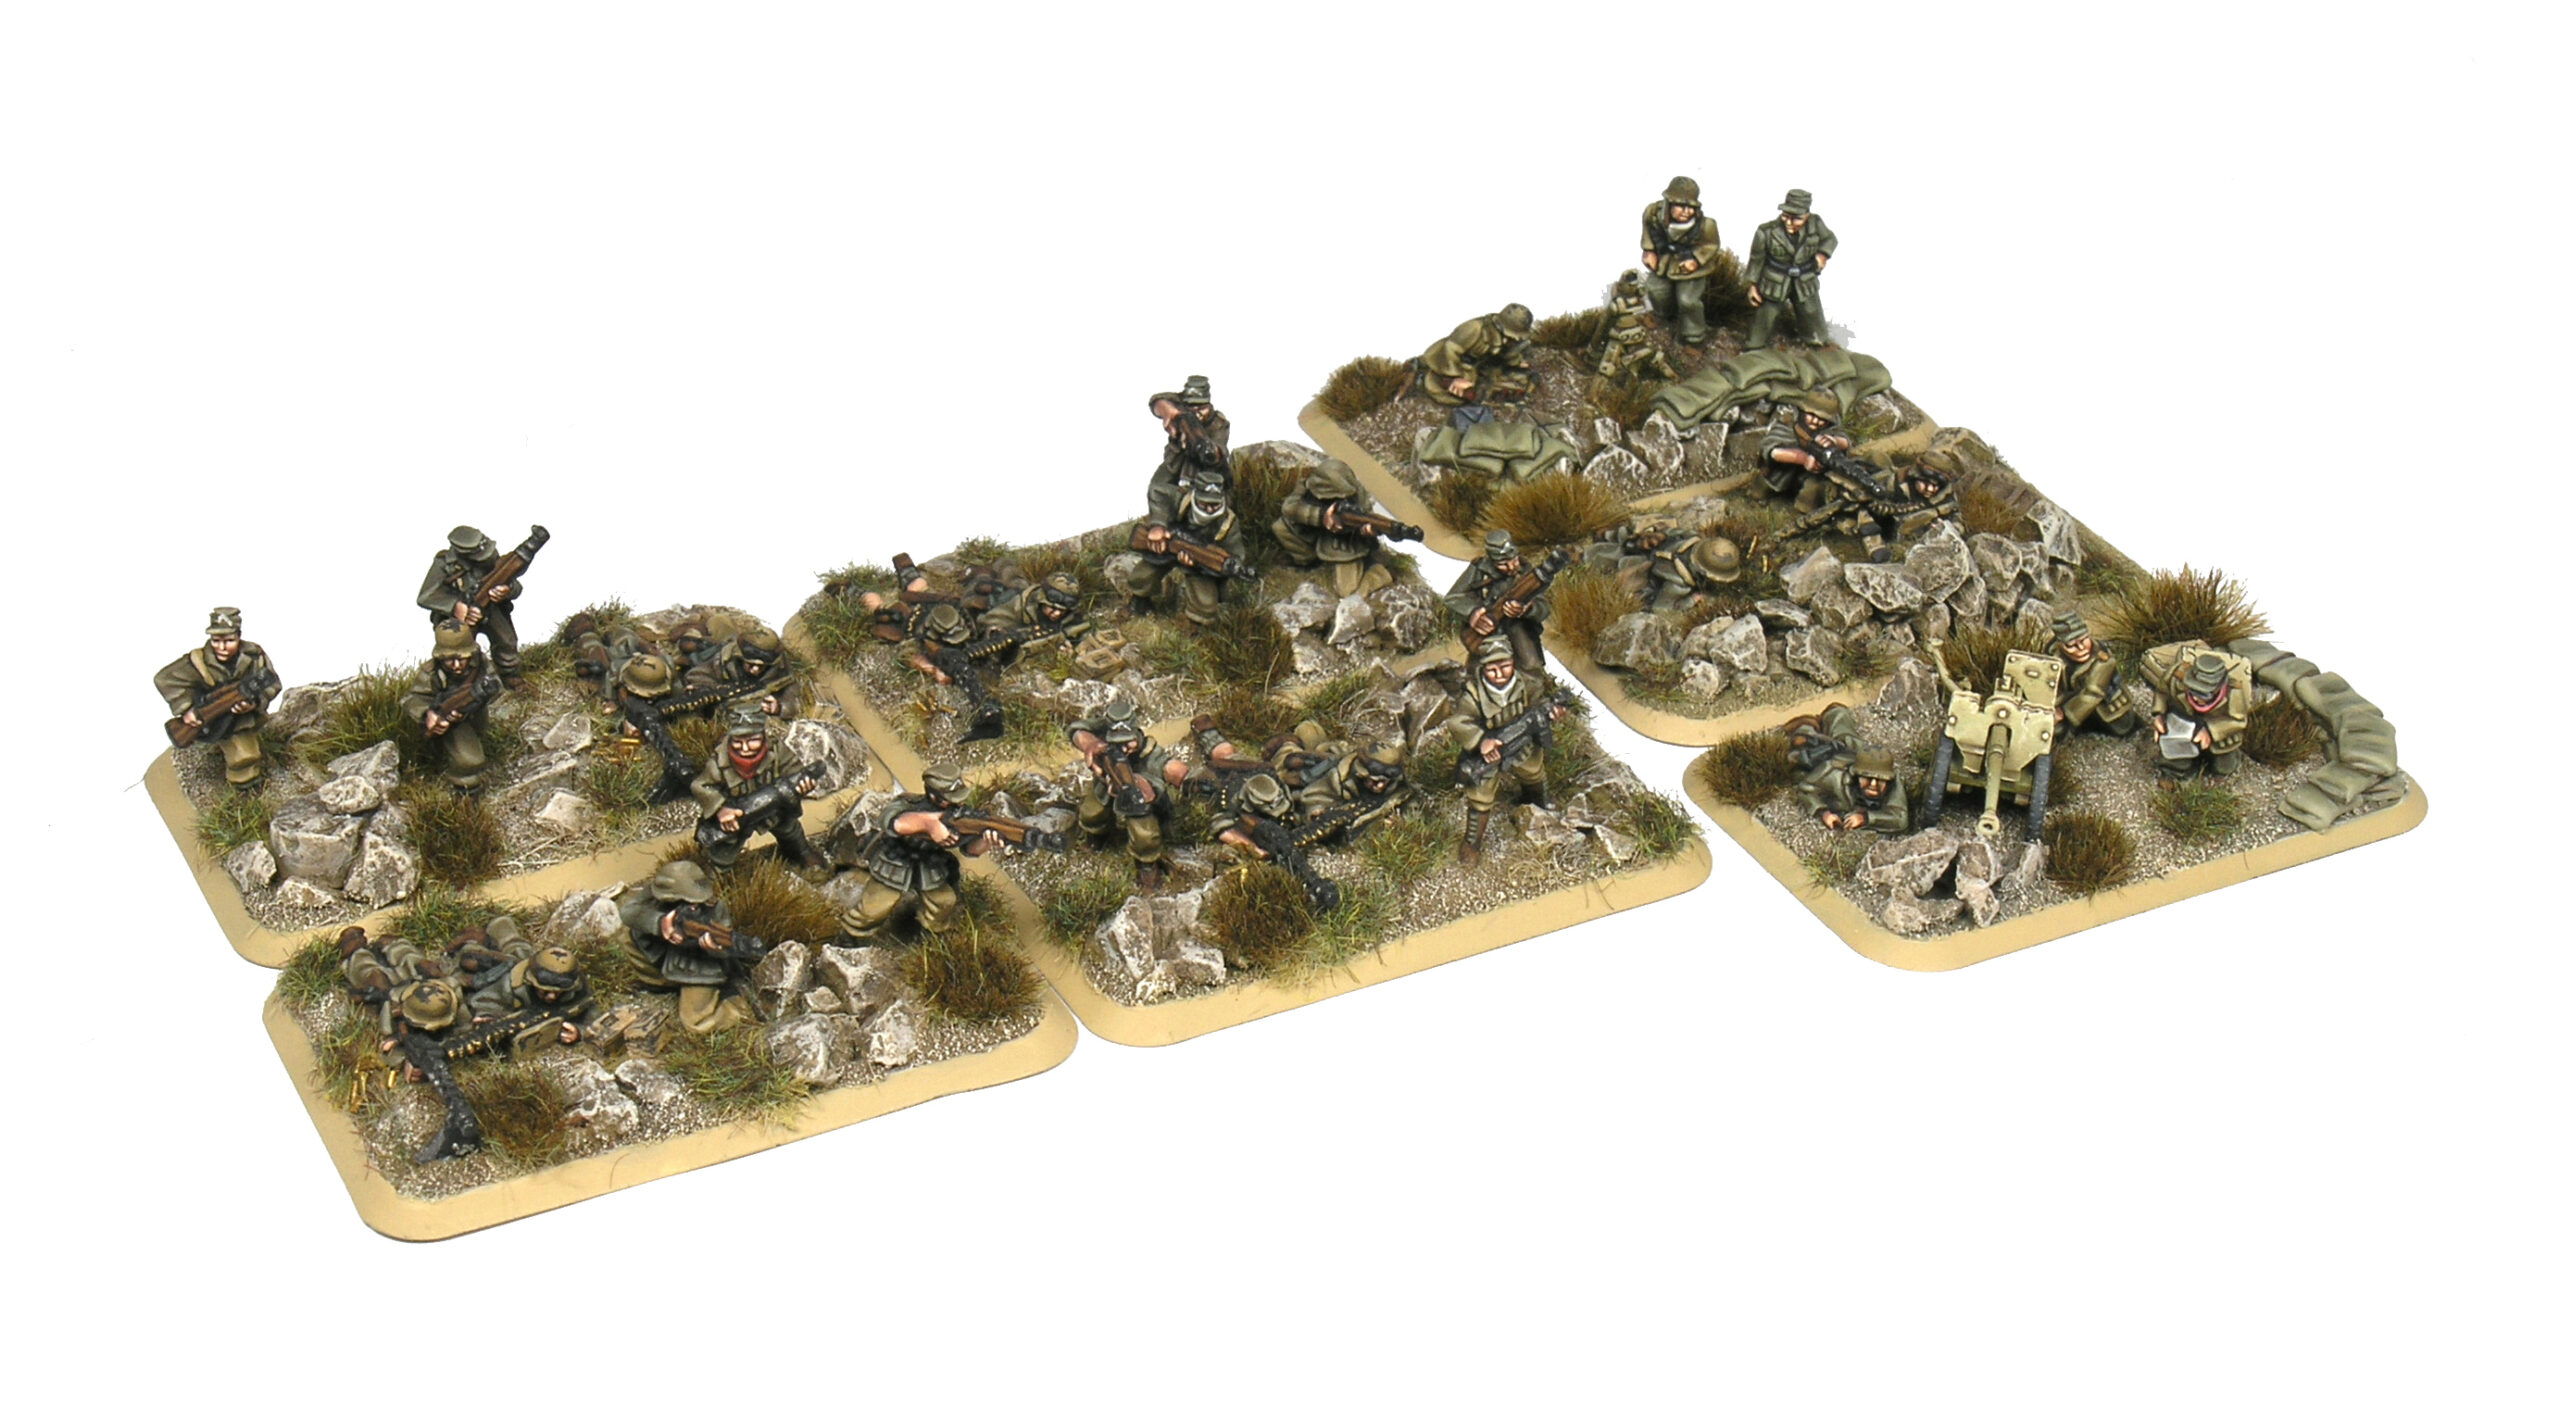
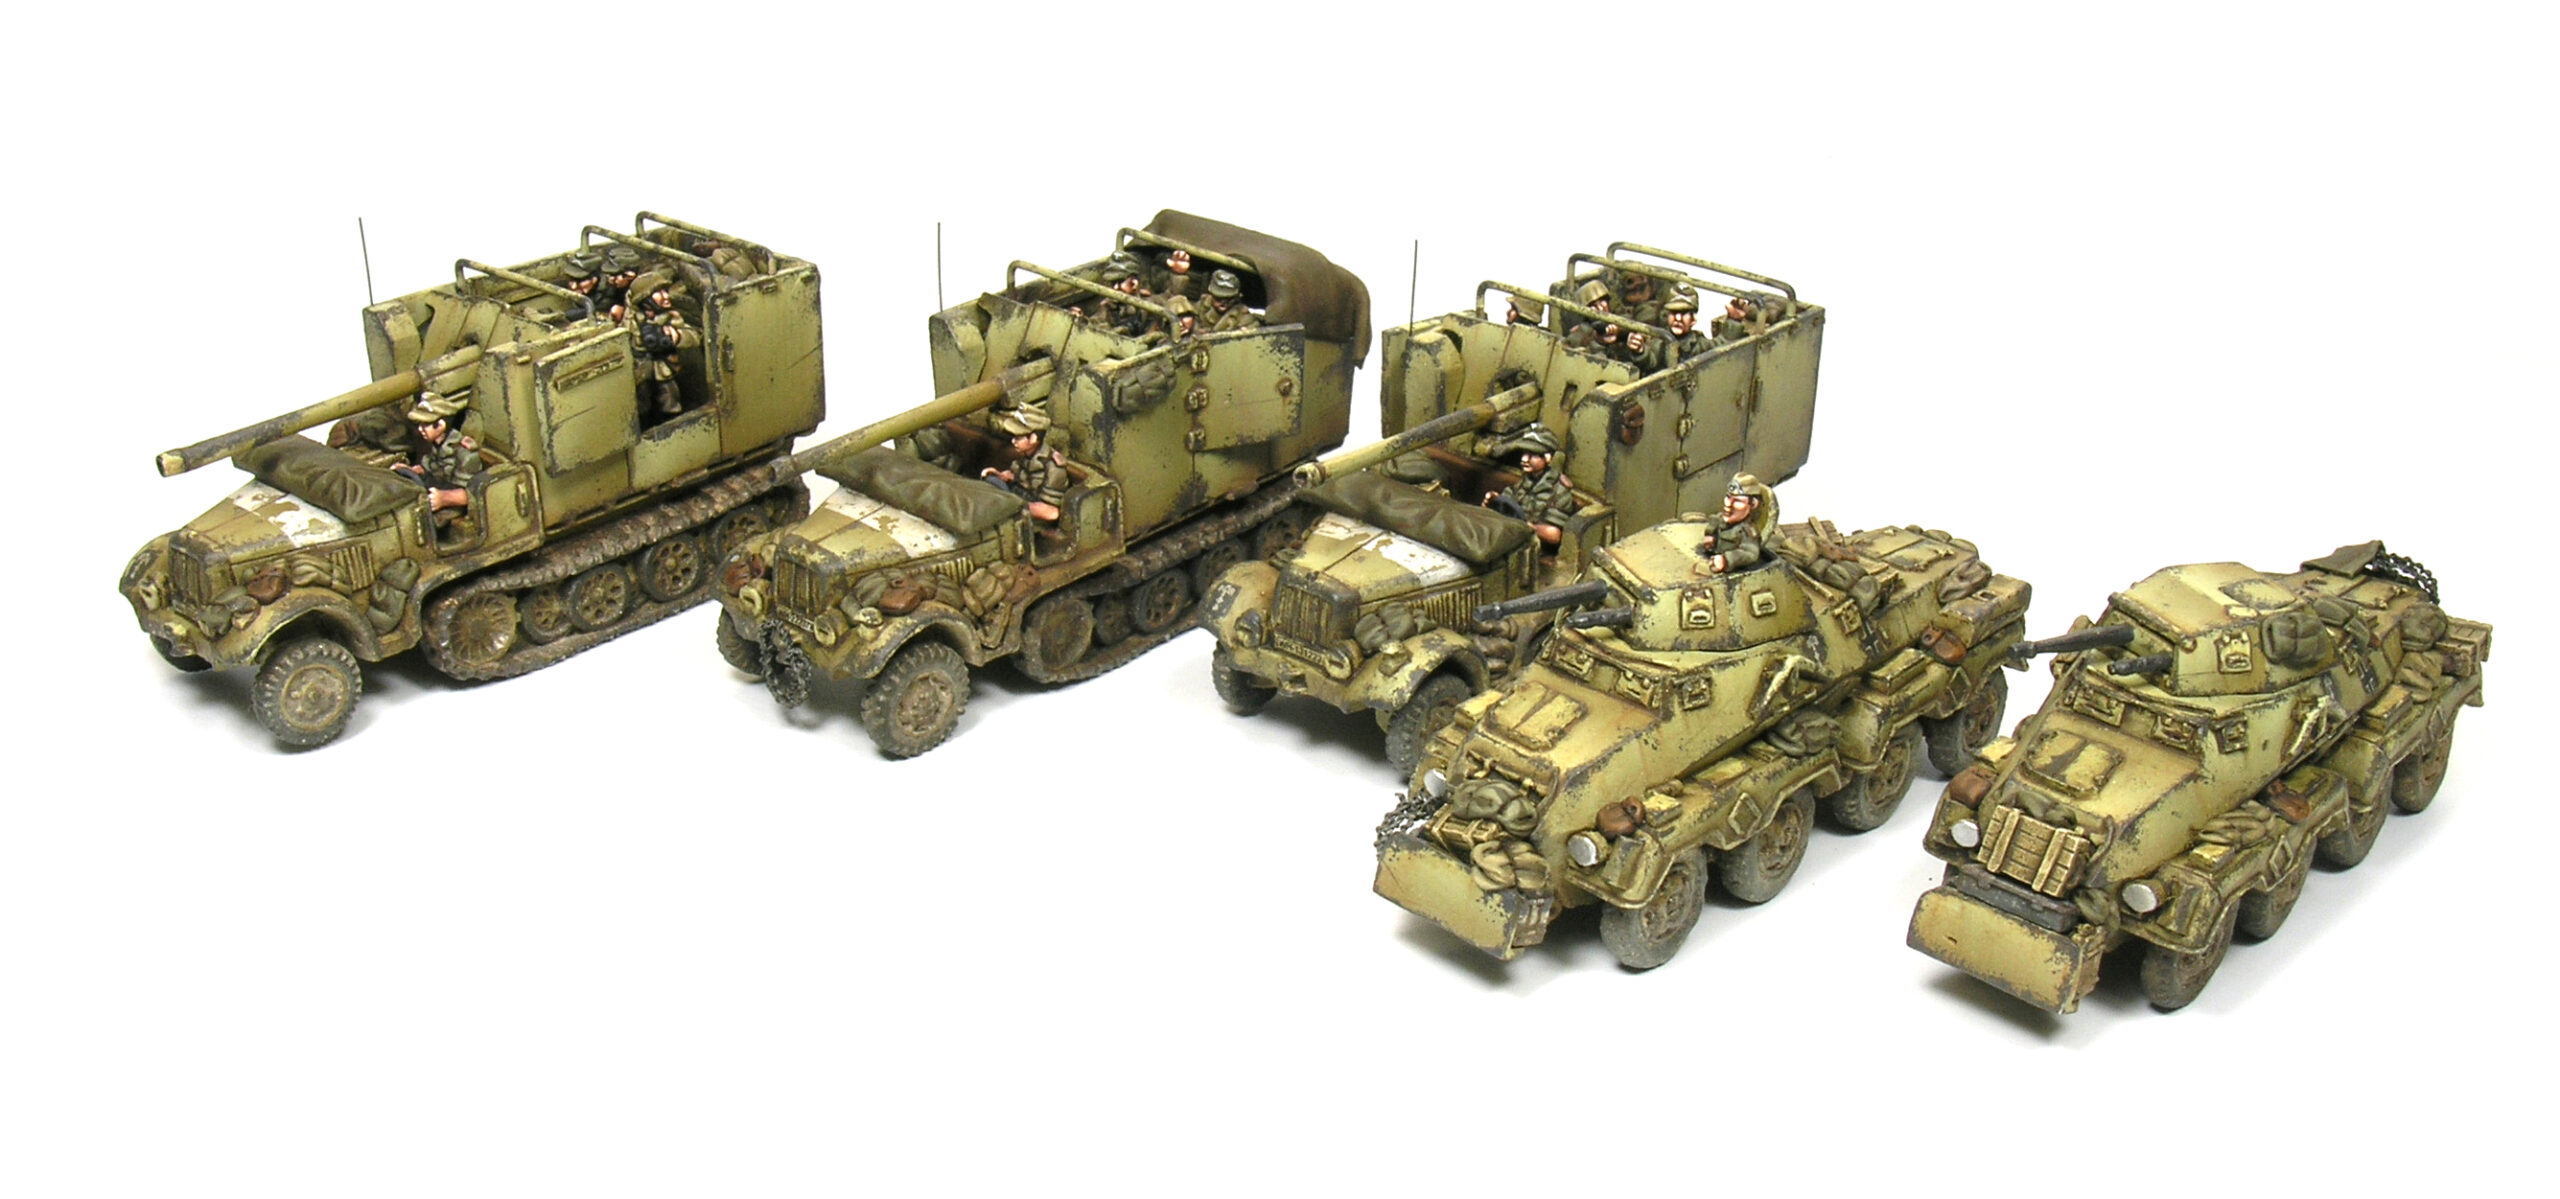
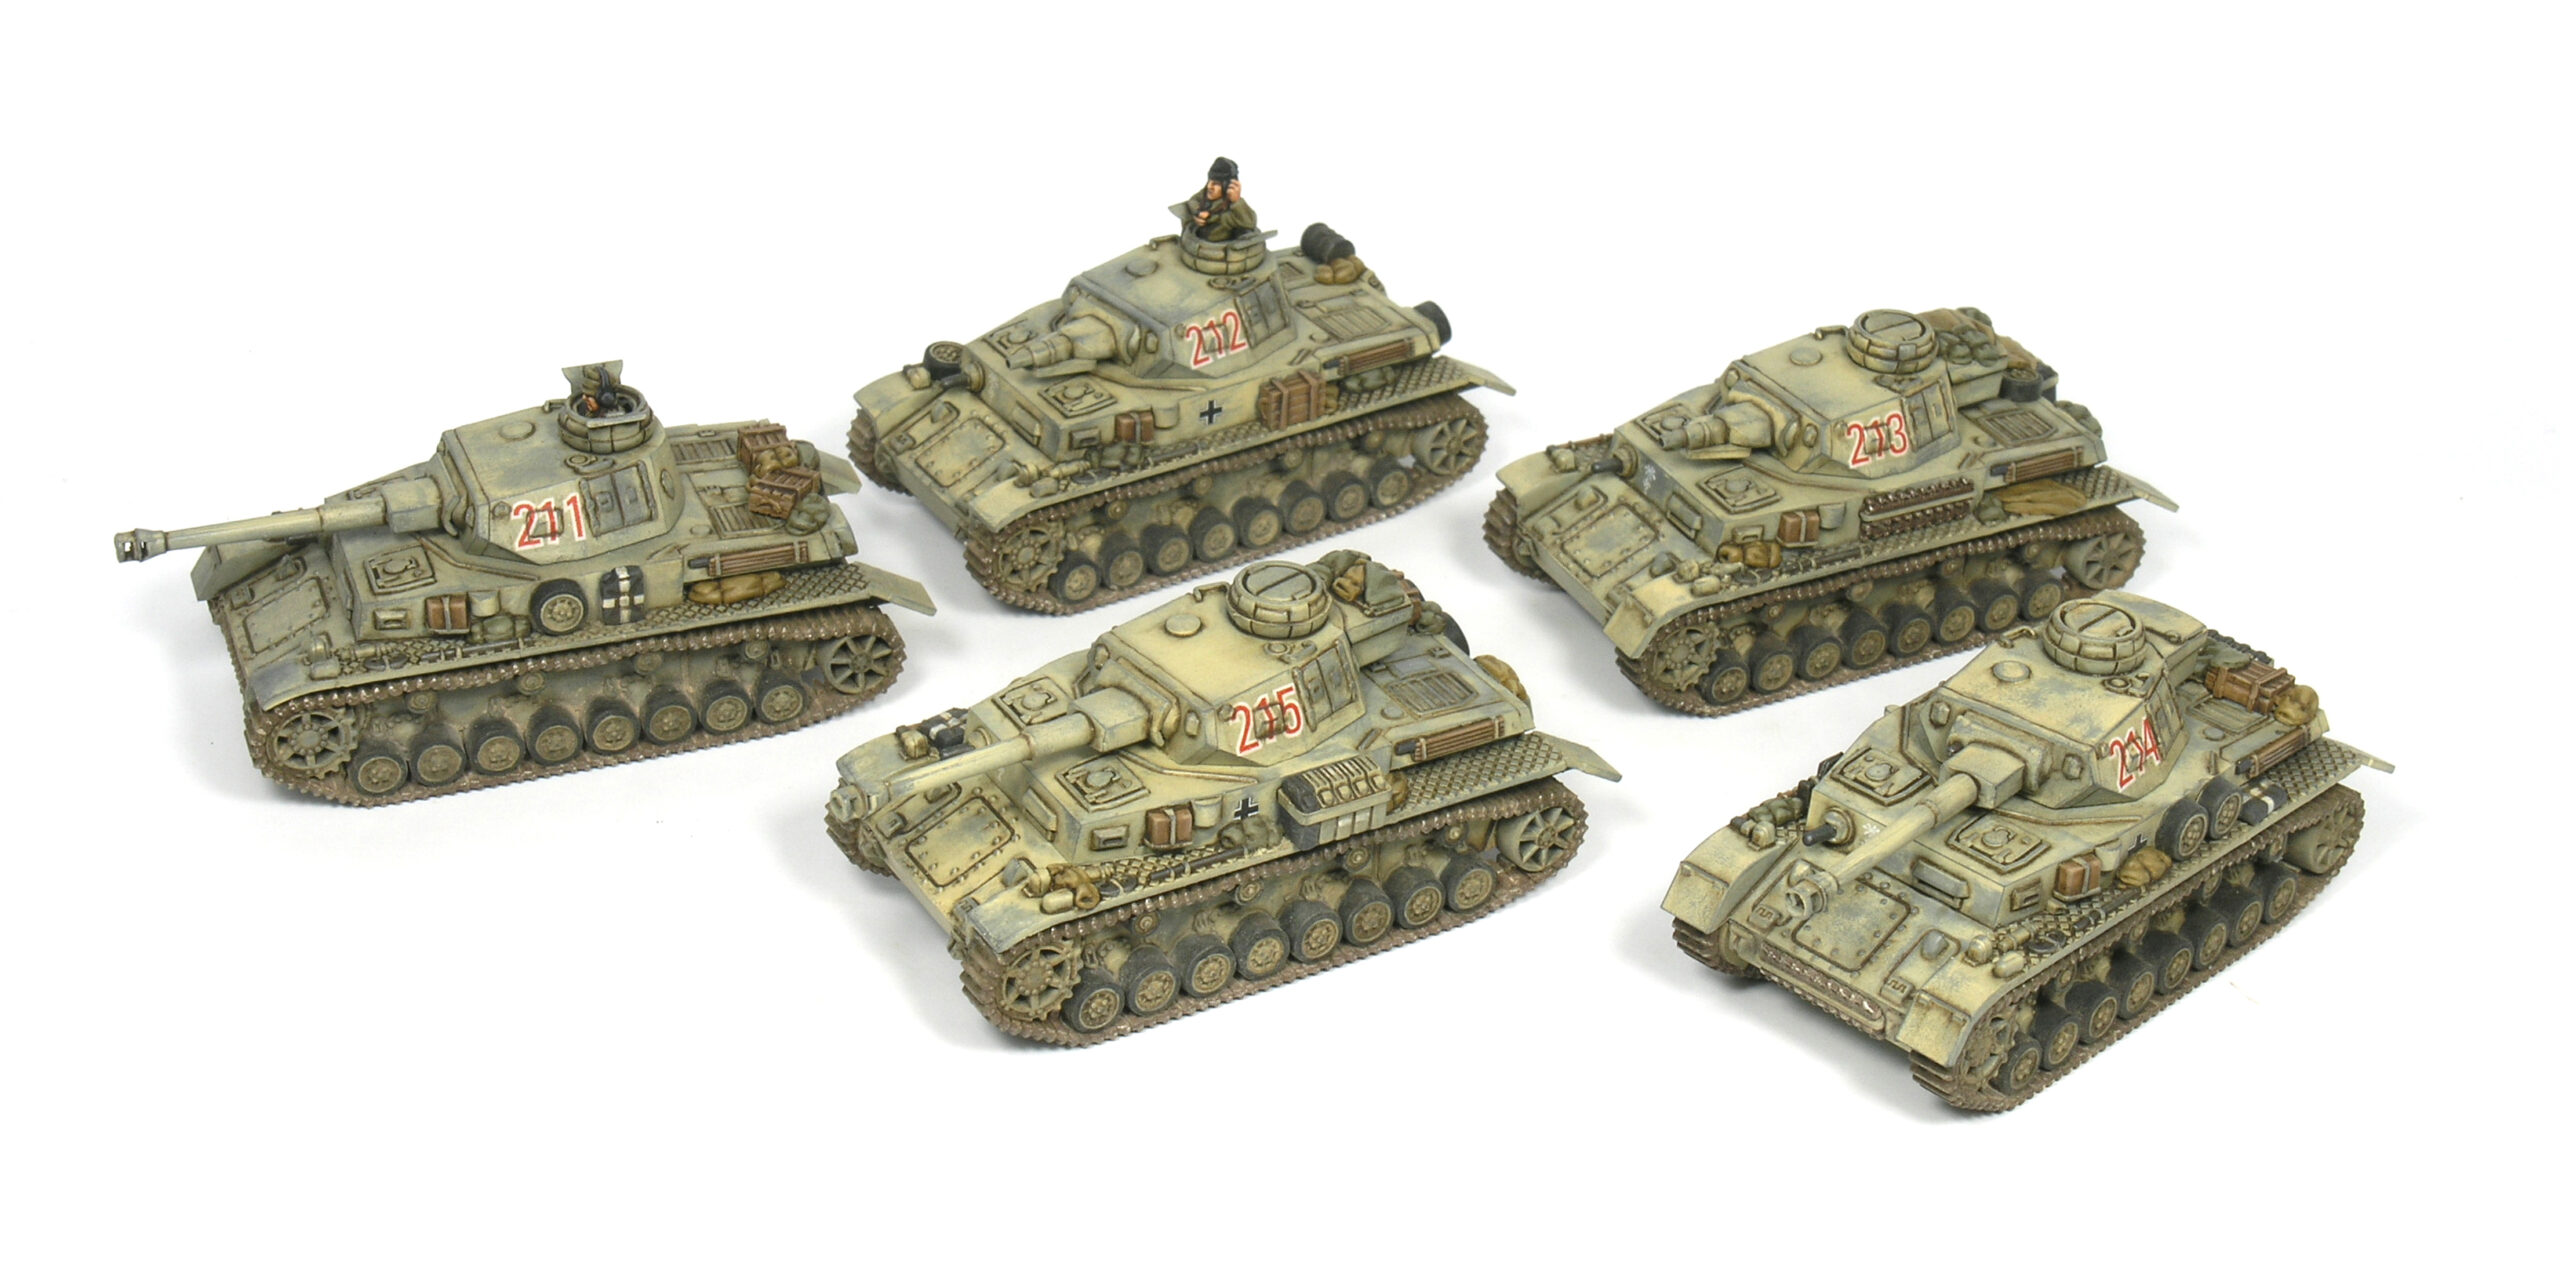
Other elements of the same army:
A great article.
Thank you very much!