Almost two years ago I received a number of lovely 15mm WWI tanks from Battlefront Miniatures, and I started immediately working on a video-tutorial to explain how to paint a British Mark IV tank. I completed the first part of the tutorial regarding how to paint the base color and published the video (see below). Nevertheless, the poor quality of the video discouraged me from recording a second part. Instead, I put the tank into a box with the idea of buying a new video camera in the future. Unfortunately, I haven’t had the chance (nor the money) to buy a new camera. Thus, why did I decide to finish it? The motivation has raised after playing the beta of the incoming Battlefield 1, where I had the opportunity of driving one of these beasts. Motivation! How important is the motivation! Isn’t it? A book, a movie, a video game…we do not need anything else to be impulse to paint and shape our imagination in a way that we can extend the experience we had. After destroying several buildings under the tracks of my virtual Mark IV, I recalled that I had this poor guy buried in oblivion. I do not have a new camera so that I have not recorded a new video, but I have prepared a step by step tutorial with plenty of photos to cover the second part of the tutorial: extreme weathering after surfing on a muddy battlefield of the Great War.
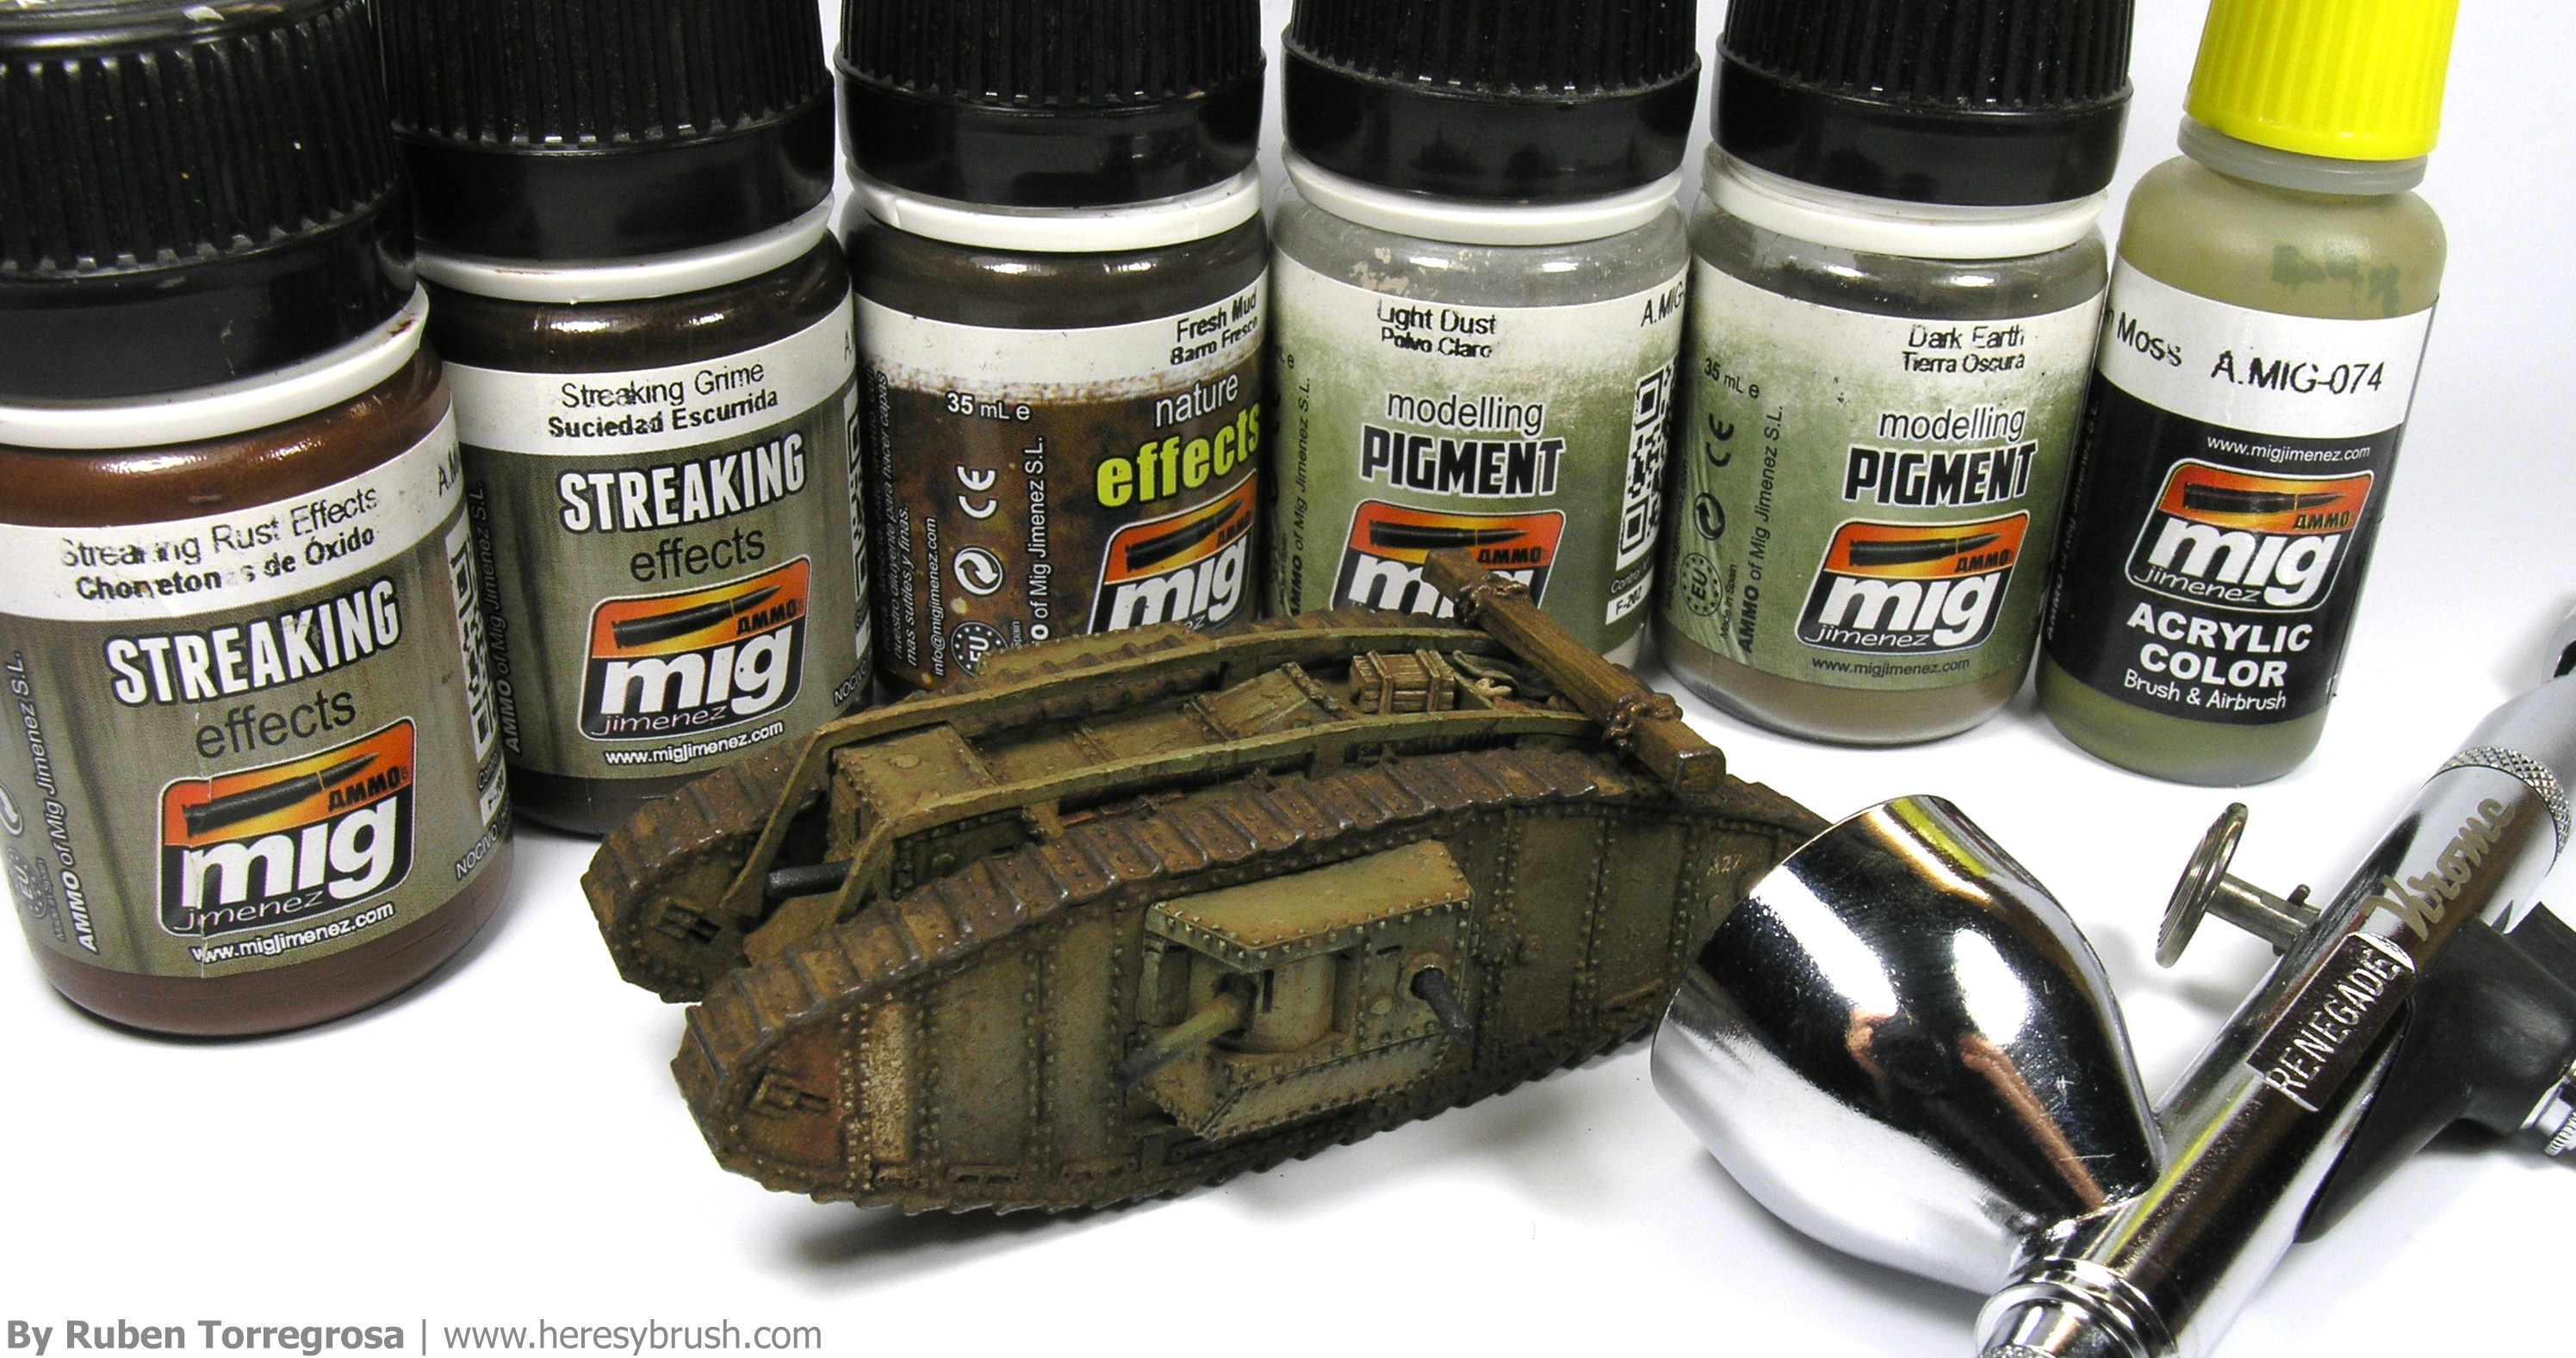
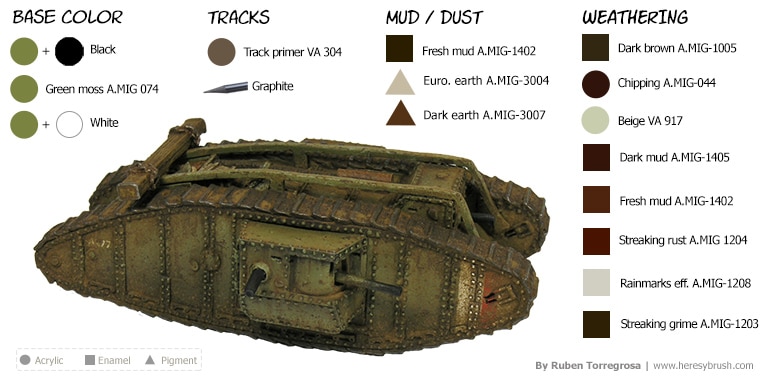
In the following picture you can see which colors and paints we would need:
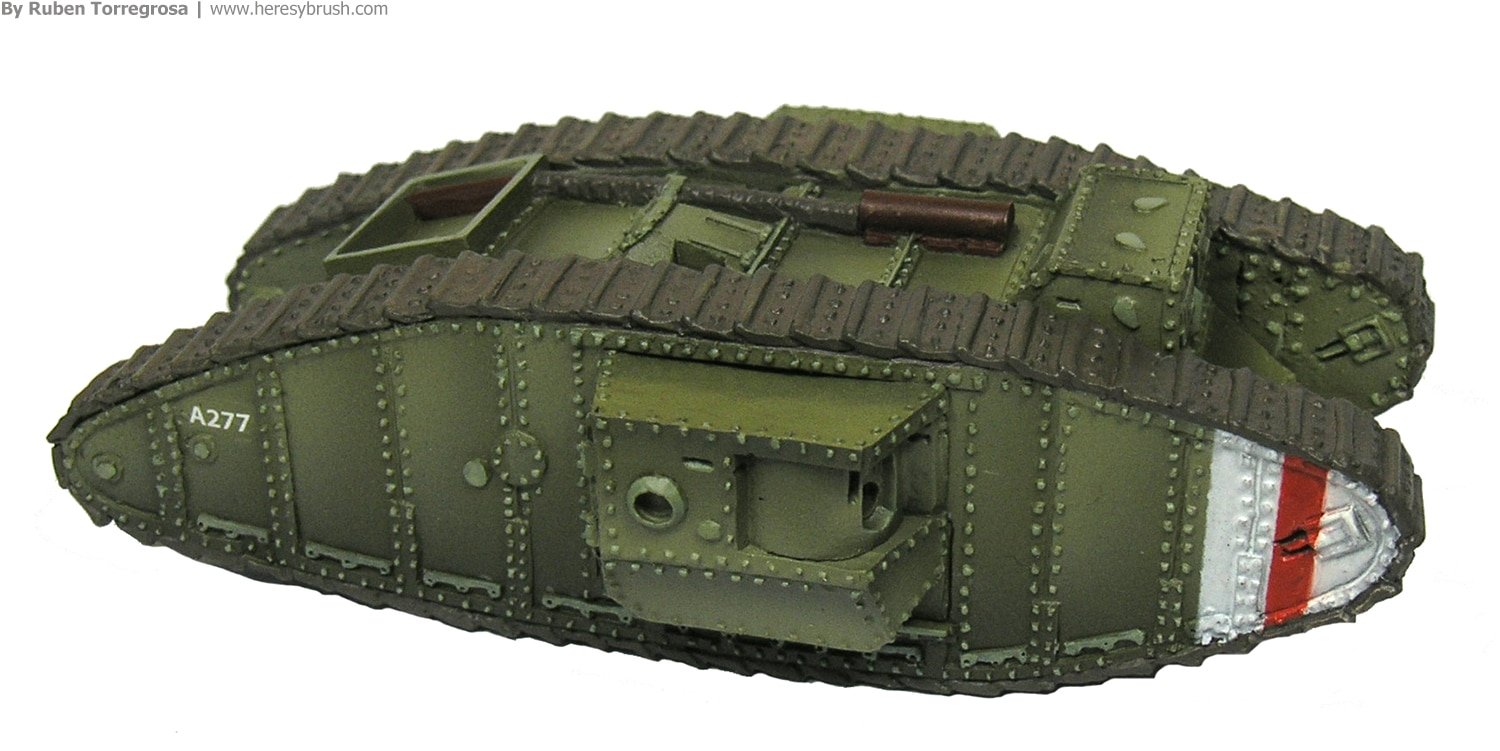
Part I – Basic colors
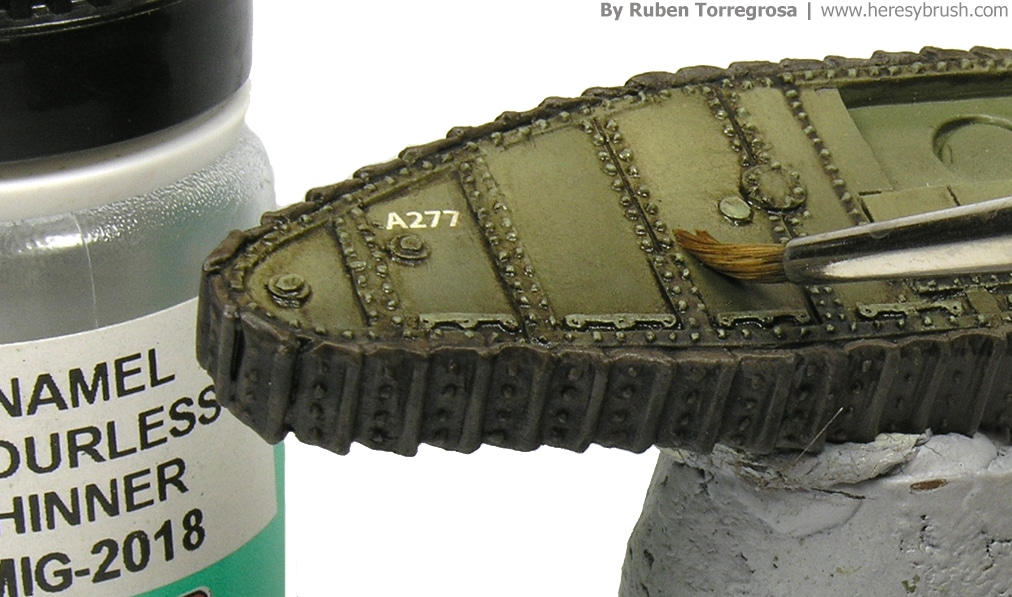
I do not want to go into details here because the video is self-explanatory enough (although I can see that the English can be easily improved…). But I would like to comment something about the different types of varnish according to its base: water-based or enamel-based (another topic to be commented is the differences among mat, satin and gloss varnish, but we have already discussed this in the blog). –Remember, water-based or acrylic paints are thinned with water; whereas enamels are thinned with White Spirit or other similar organic solvent. And in principle both types of paints cannot be mixed- Many of you probably already know that we must always apply a varnish before applying any enamel paint. Otherwise, you know it now. It is needed to protect the previous work from the aggressive techniques that the use of enamels implies. This indicates that we should use a varnish of the opposite type; that is, an acrylic or water-based varnish that is resistant to the solvent in which enamels are thinned. Whether we use an enamel-based varnish, we would easily remove it once we start using enamels for the weathering techniques. Enamels are thinned in solvent (such as White Spirit) and this thinner might dissolve other enamels previously applied on the surface (even if we think that they are dry!). This is actually the reason by which we should always wait at least overnight before applying a new weathering effect on top of other. This could be the case when applying the varnish, of course; but it is better to do not risk. It is much safer to use a water-based varnish before applying any enamel.
This is how our newly-assembled tank looks. I have airbrushed a thin layer of satin varnish and now it is ready to receive the weathering effects.
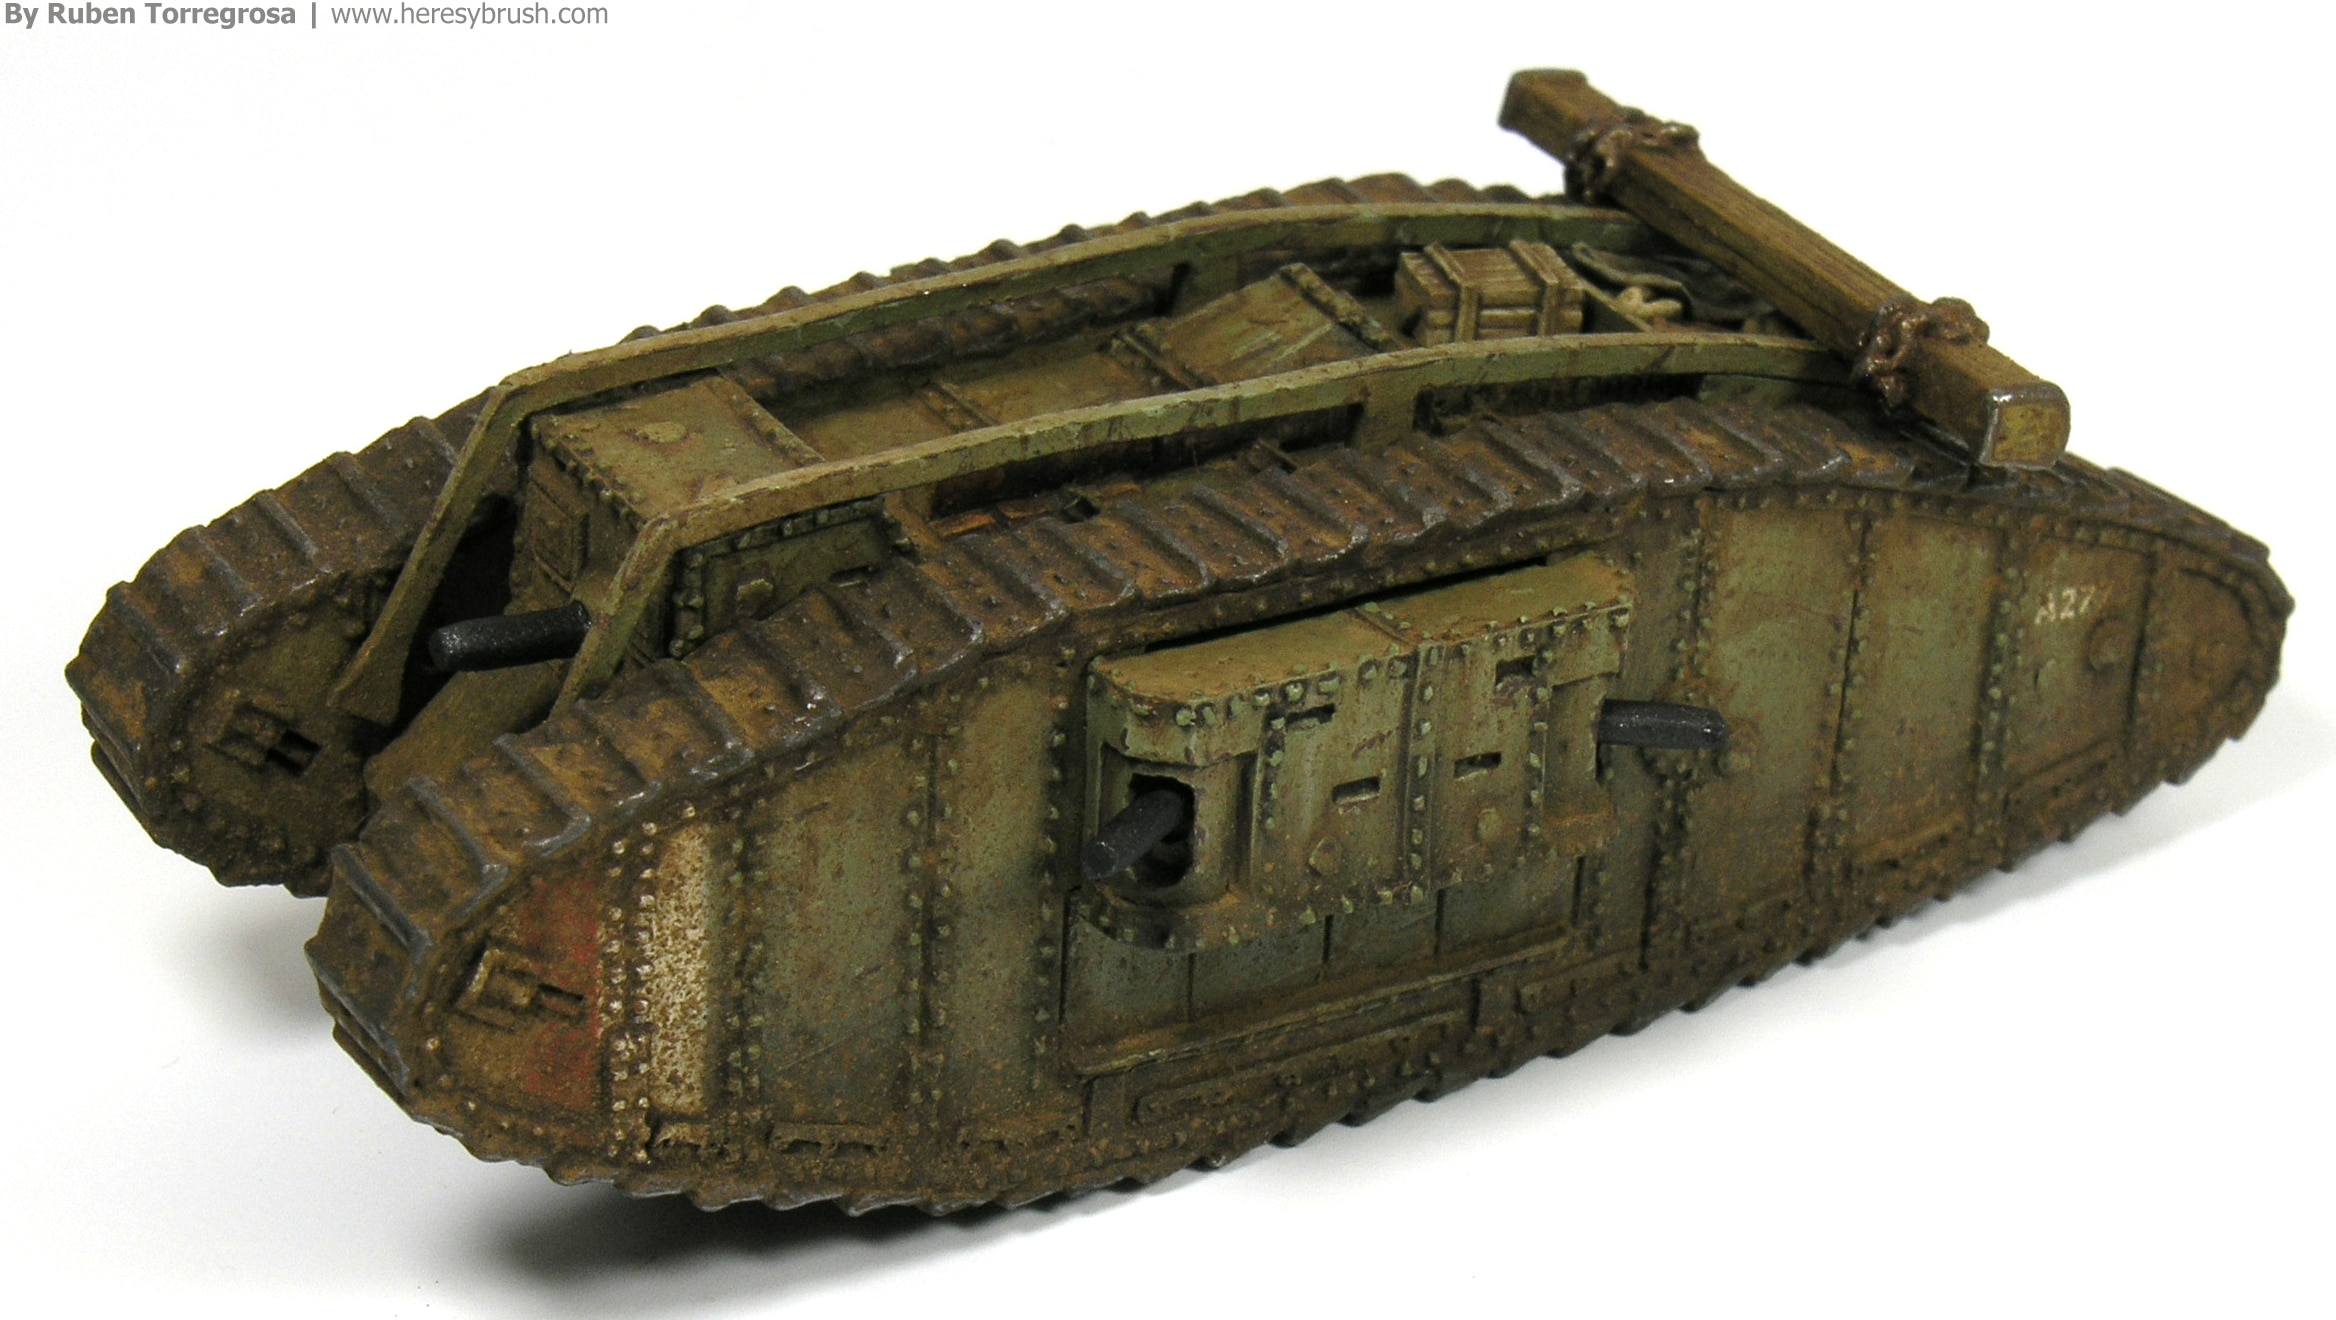
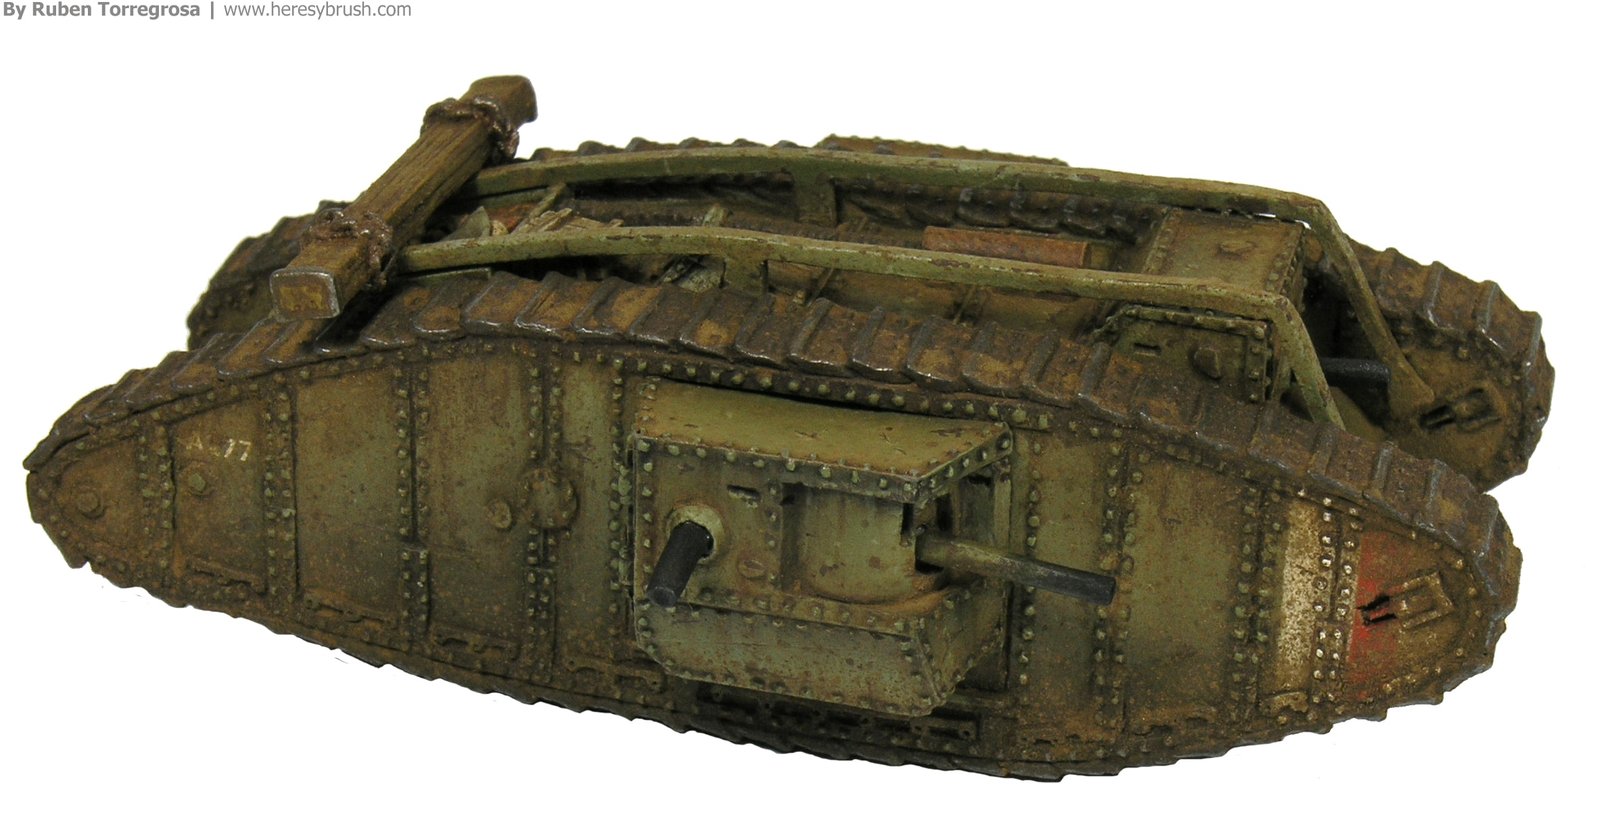
Part II – Extreme weathering
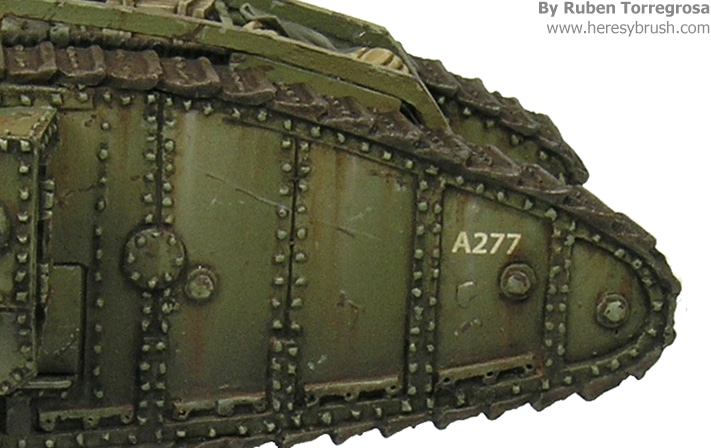
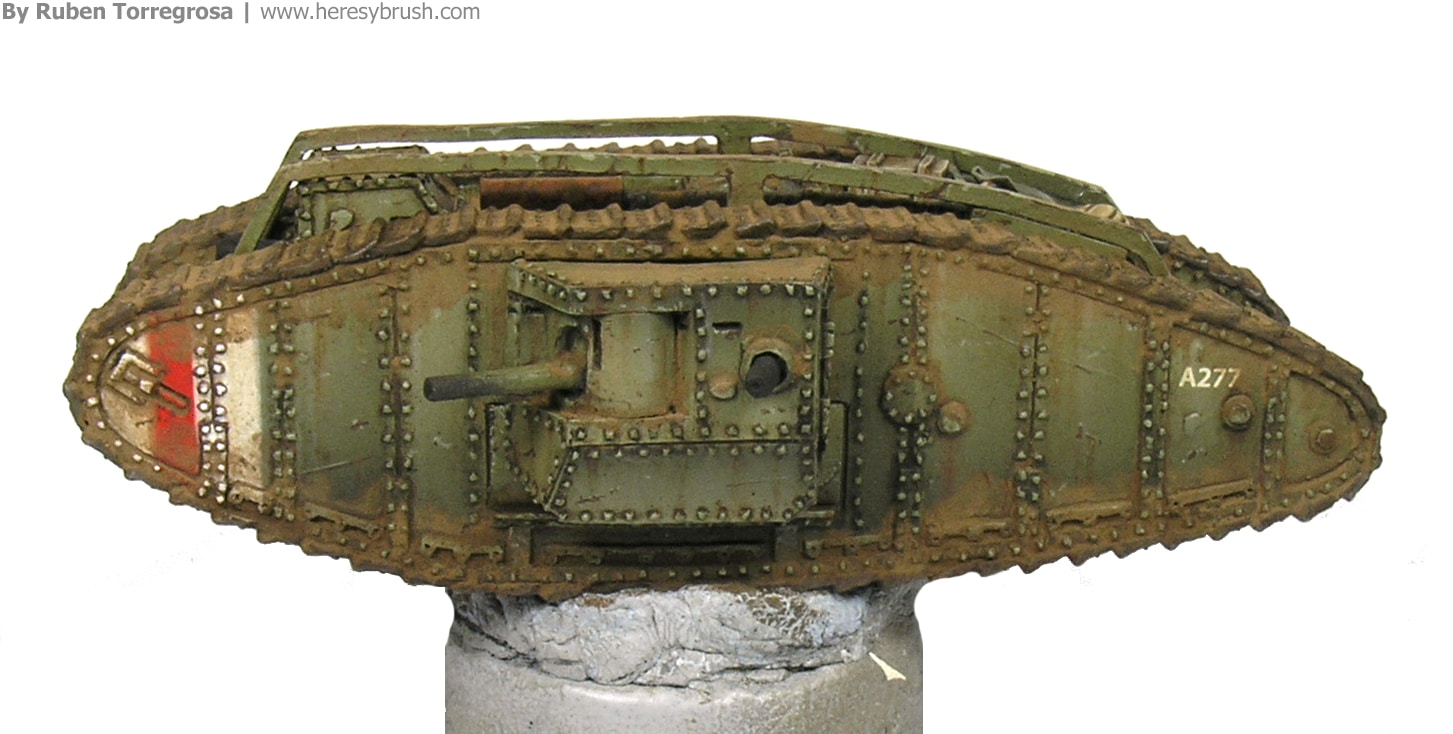
We start adding some contrast to the different panels by applying an enamel wash only in the recesses (pin wash). Do not apply a general wash! If so, you will darker so much the miniature. I have used a dark brown wash specific for green vehicles, A.MIG-1005. Be sure that all of the rivets are covered by the wash. For instance, we can apply the wash vertically along each vertical stripe of rivets. Don’t be worry about the excess of wash.
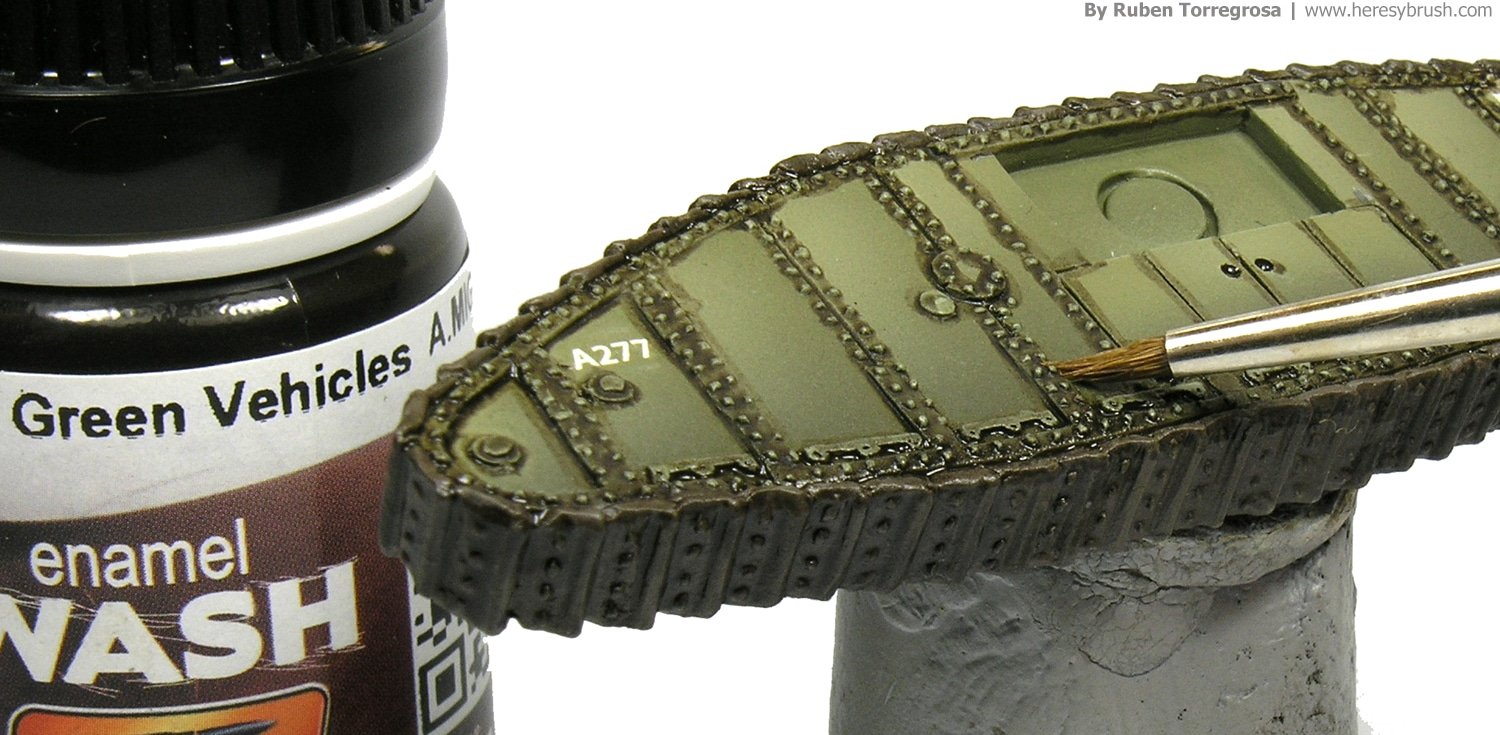
After waiting for an hour or so, we remove the excess of wash with a brush moistened in odorless turpentine or White Spirit. I really recommend to use a thinner produced for modelling. You can buy a cheaper one anywhere, but it can be very strong and destroy the previous work. I usually use a flat brush when I remove the wash, but I preferred to use a rounded one here to have more control when removing the excess of wash around rivets. On the other hand, try to move the brush always up and down on vertical surfaces, in order to create at the same time some streaking effects. However, do not focus on this effect yet. And be sure of no leaving so much wash around the rivets. If you remove too much wash, do not be worry about it.
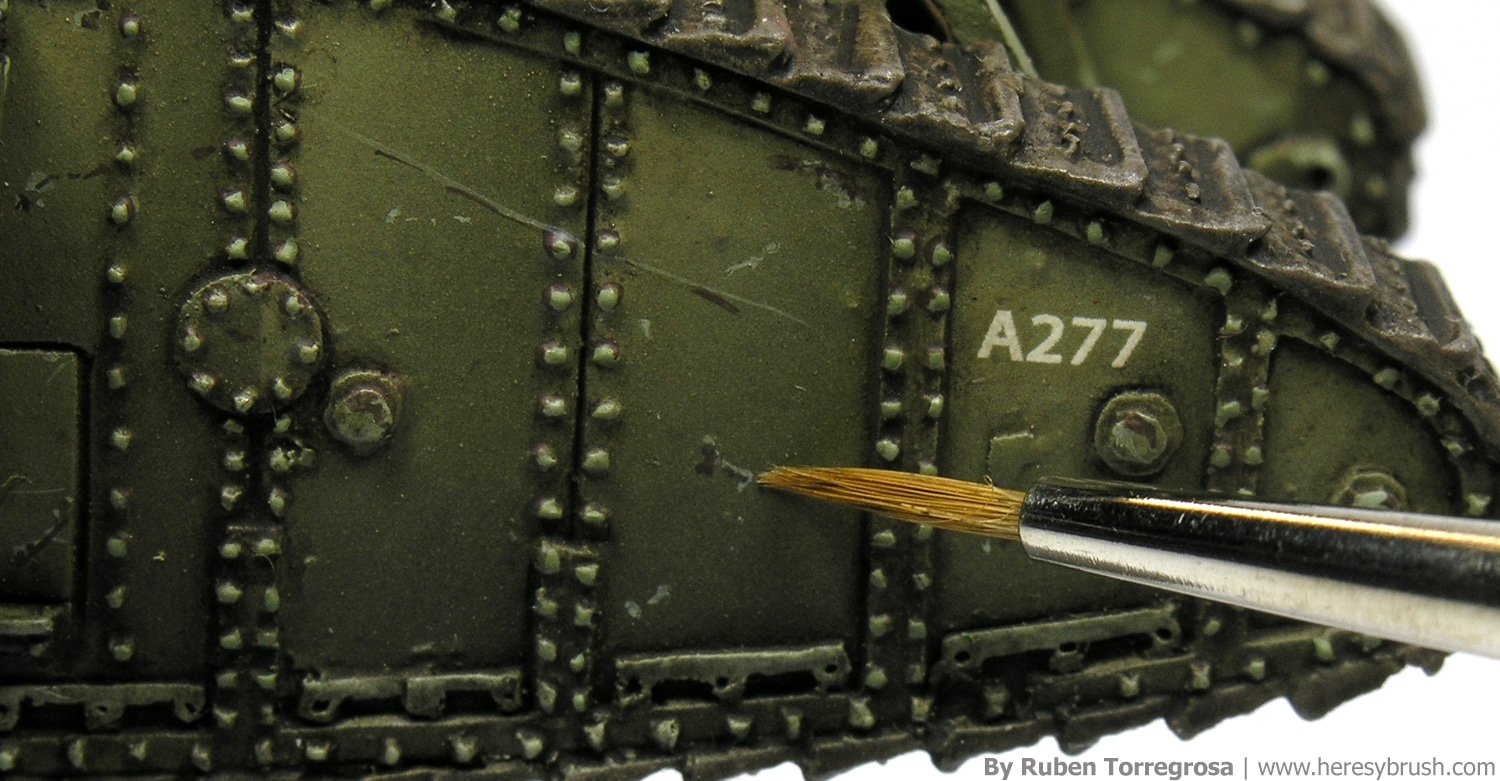
Once the enamel thinner is evaporated (that is, the surface is not shine anymore), we can continue. I usually use a dark brown color (water-based), such as Dark oxide 302 (Vallejo) to reinforce some of the recesses where the wash was removed in excess. Indeed, this is very important in this case, because the wash might be very weak around some rivets (or even totally absent). With a thin brush we paint a line around these rivets. Continuing with water-based colors, now it is time for the chipping effects. I have used only the brush to paint the chips because I have an absolute control with it. The sponge technique is very useful, but it is very random as well. That is why I prefer the brush. Either way, I have followed the two-color method for the chippings: I have used first a light color such as the green basic color of the tank mixed with white (or just a beige color such as the 917 from Vallejo); and then a dark color such as the Dark oxide 302 (Vallejo). I have largely talked about chipping effects before, so you can find more information here and here. Nevertheless, remember: sometimes less-is-better.
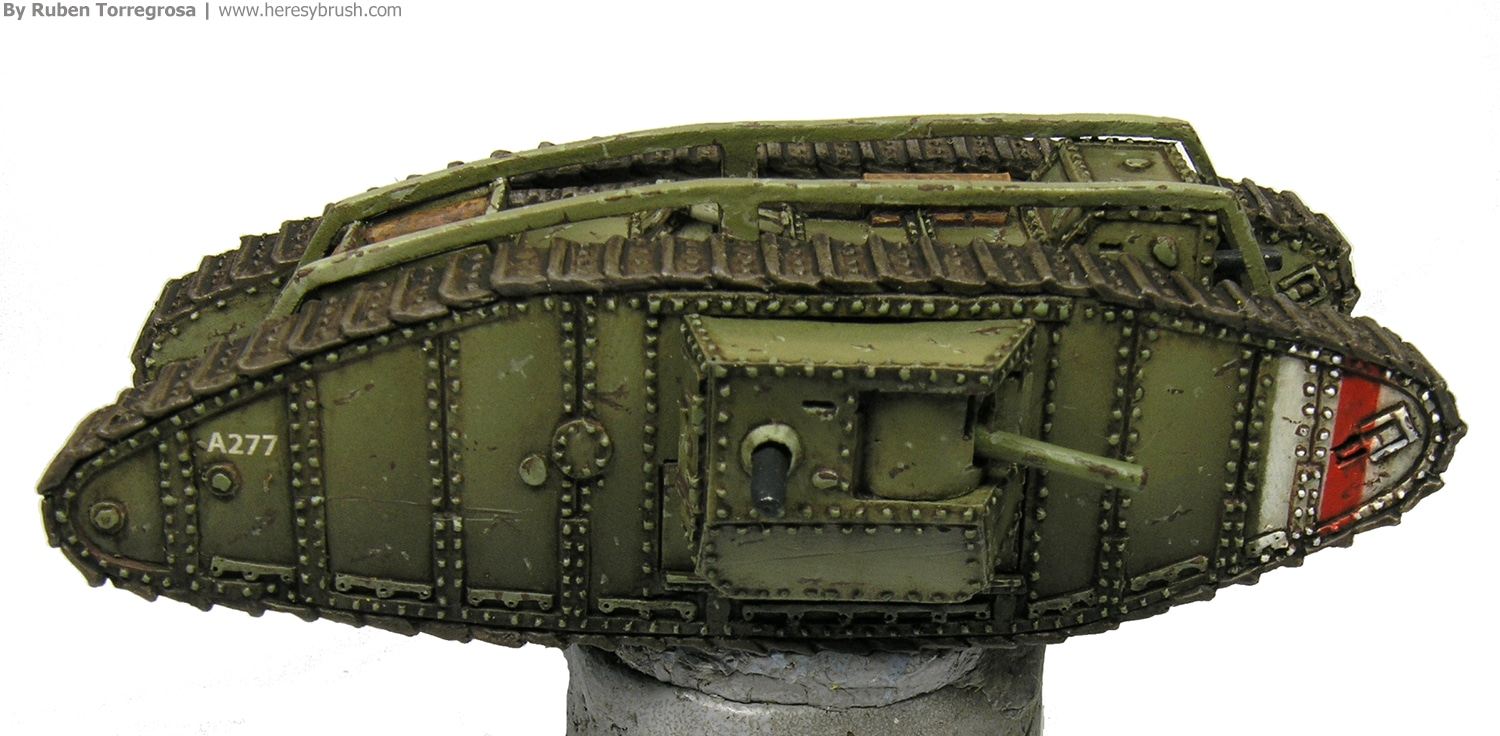
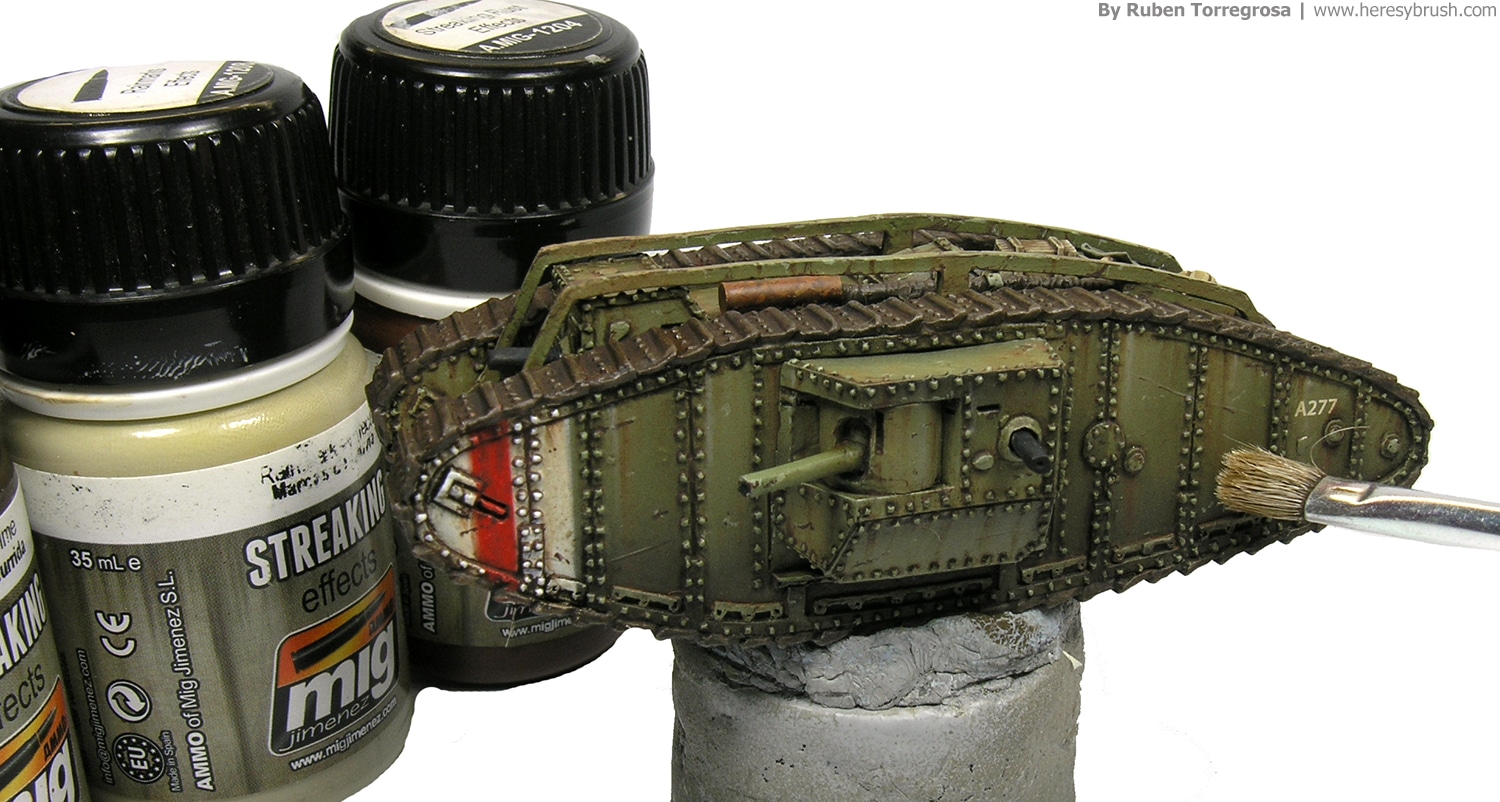
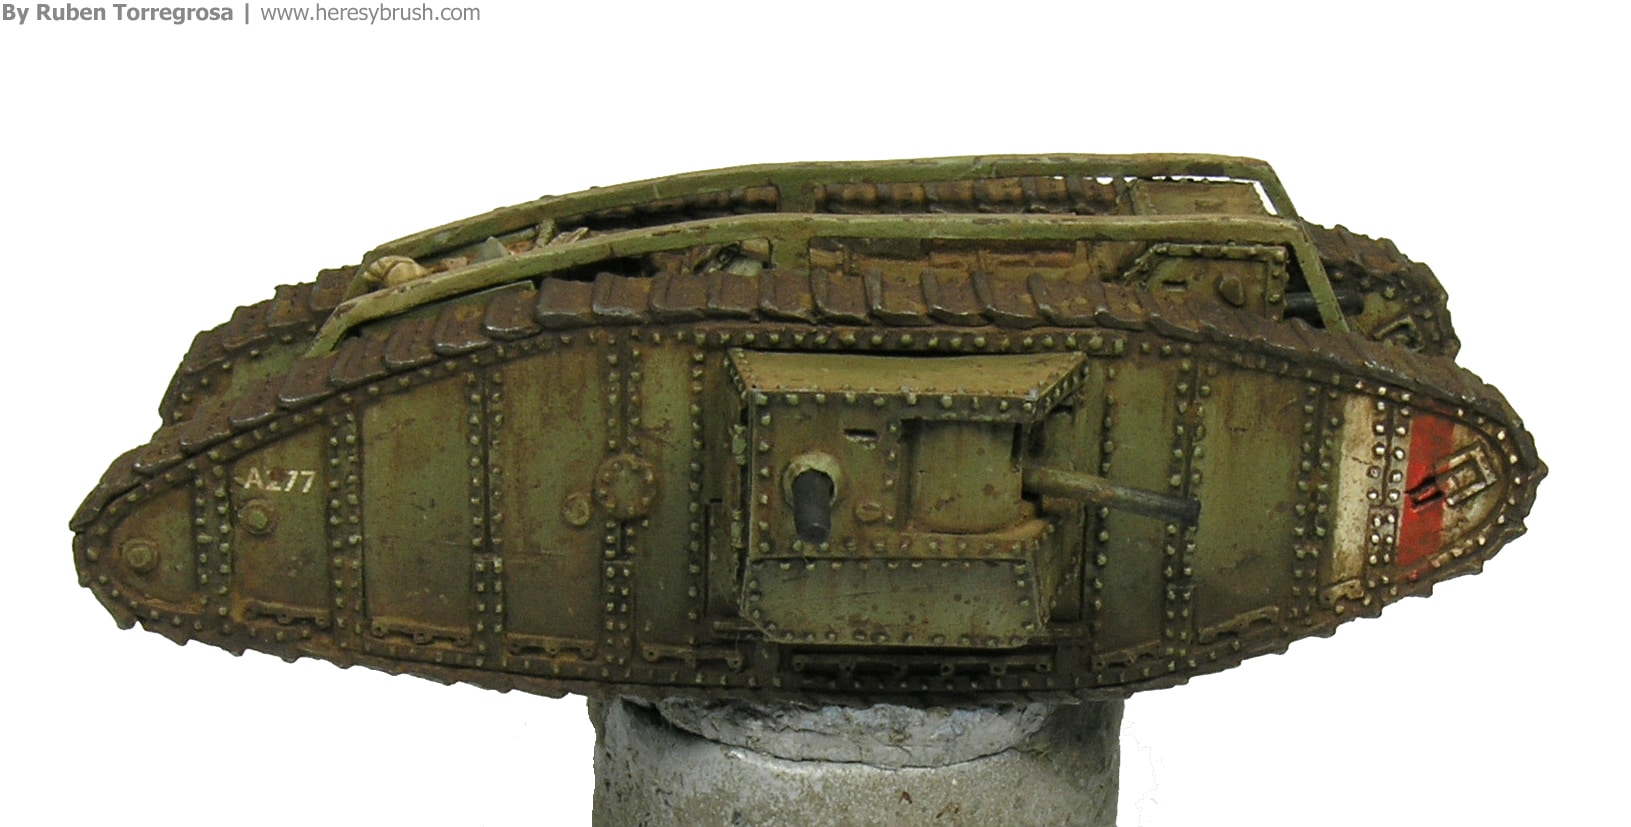
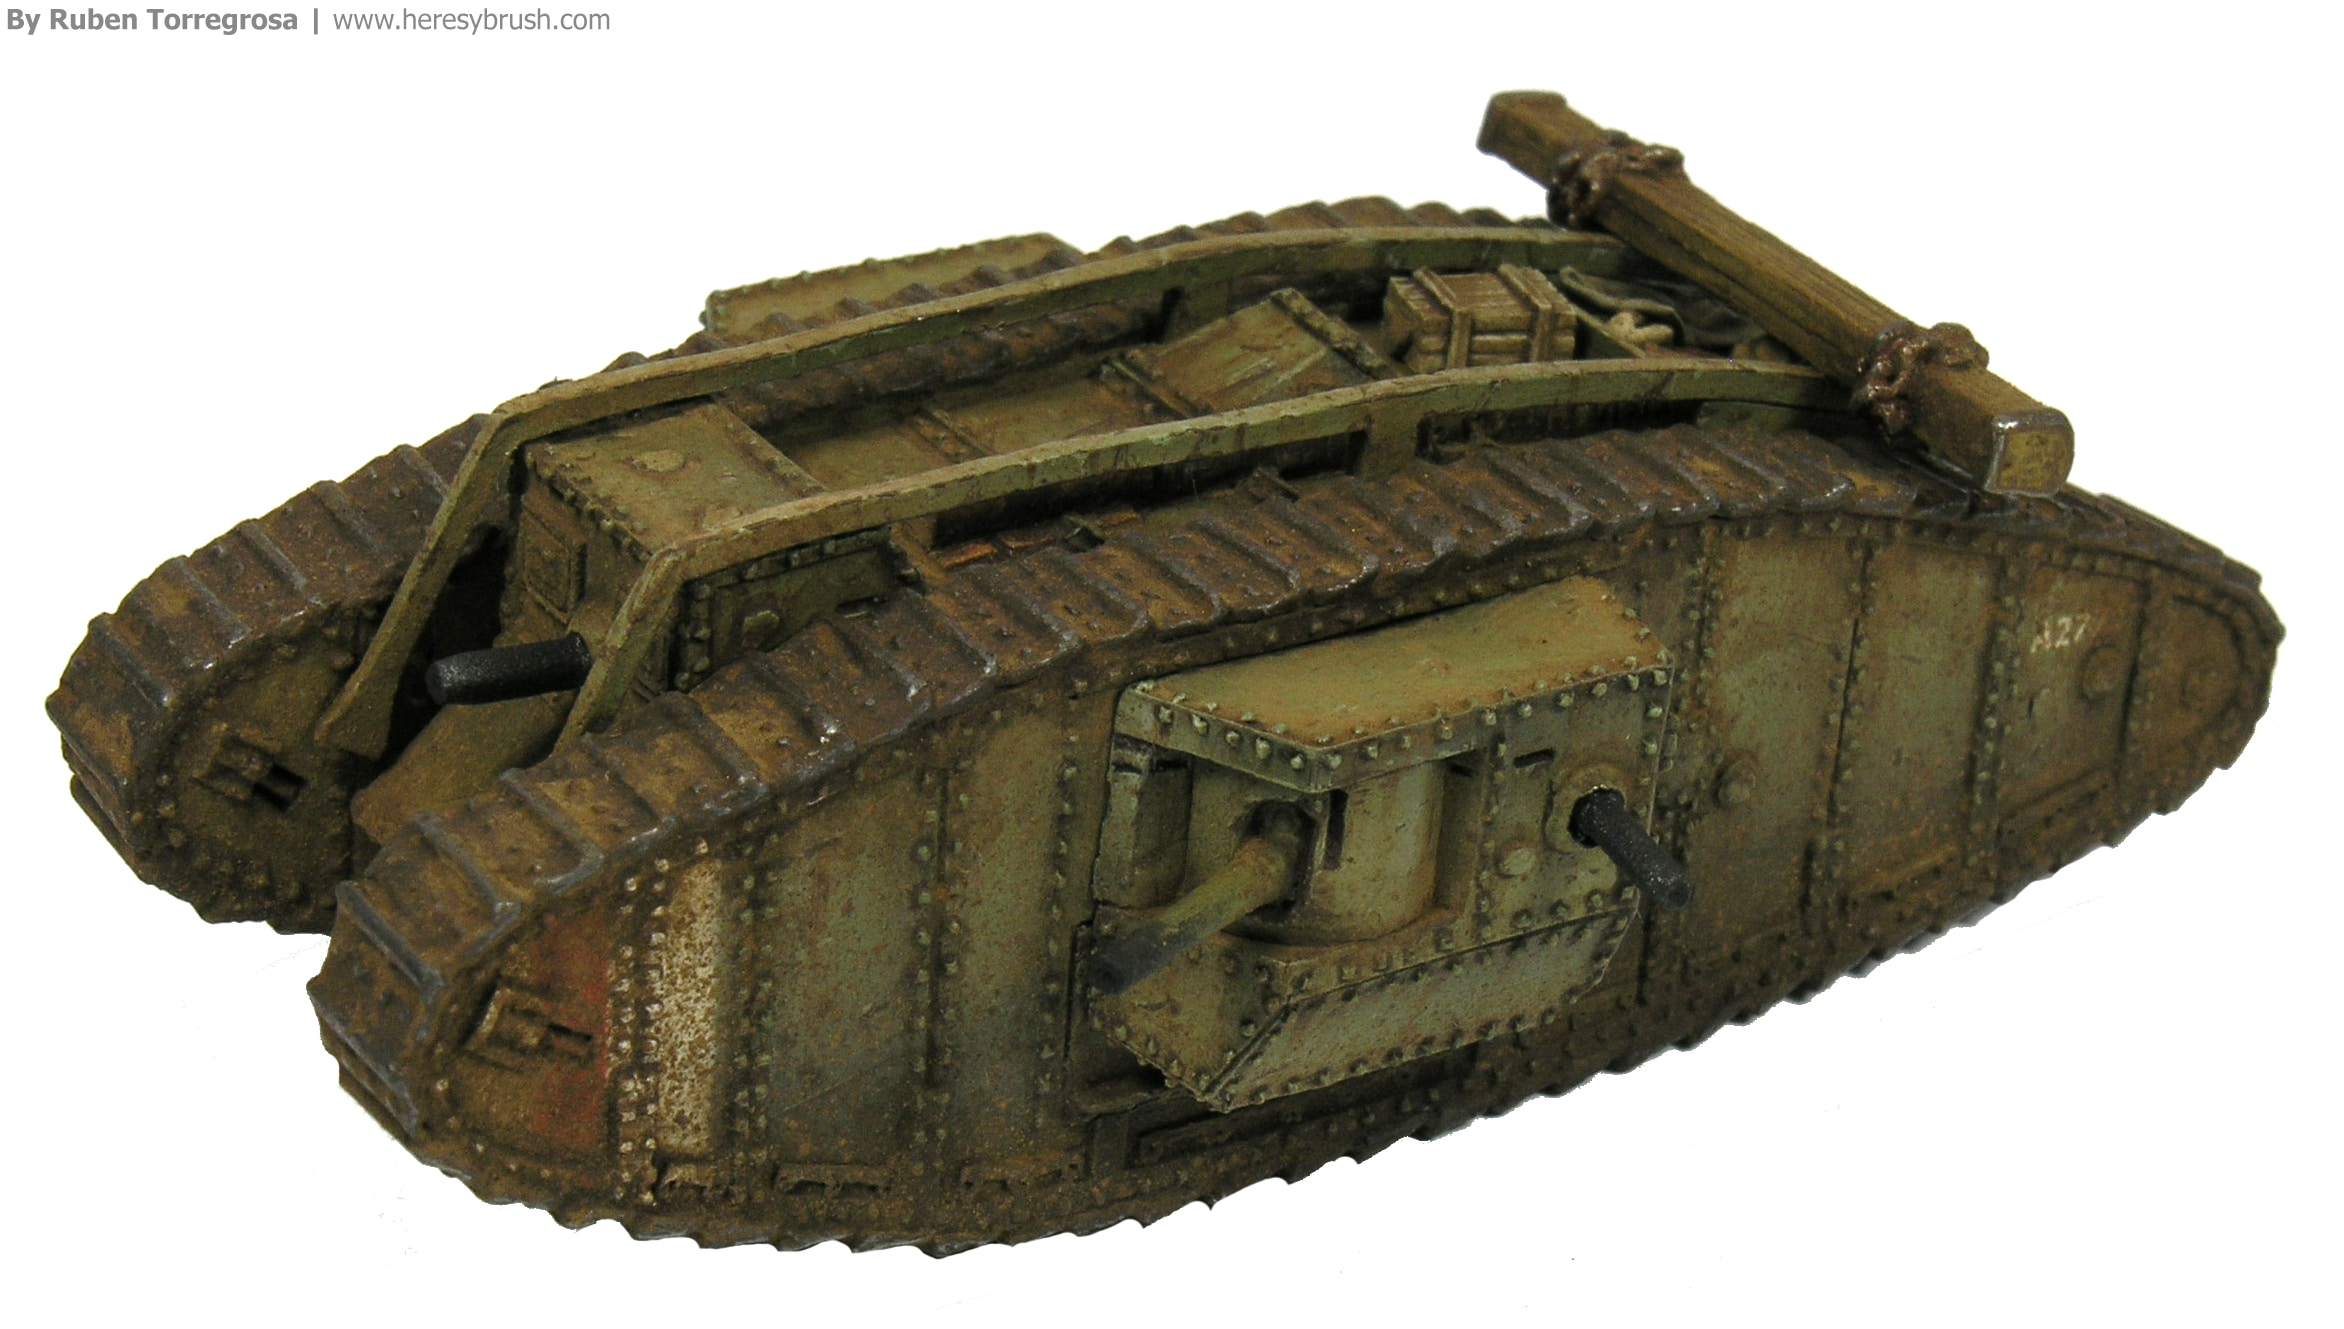
The next weathering effects is the streaking effects. In the previous links you can find more information about how to apply this effect, so that I will not explain it here. In this case, I have used three different ready-to-use enamels from AMMO: streaking rust A.MIG 1204, streaking grime A.MIG-1203 and rainmarks effect A.MIG-1208. If you want you can add more, but I consider these three as the minimum. We have a reddish color (for rust and dirty effects), a brownish-greenish color (for general dirty) and a very light one that can simulate dust. Therefore, we cover the more general environmental effects that our vehicle might have suffered; and more importantly, it does not matter the basic color of the surface, by using these three different tones we will always obtain some contrast. On the other hand, one of the most common errors that we commit when applying this effect is painting very striking or intense streaking effects everywhere. We can do it locally; that is, only one or two in the whole surface to simulate punctual effects. But the streaking effects should be weak in general. Do not over exaggerate the effect! We can use the same enamels to simulate some effects on horizontal surfaces, like it is explained here.
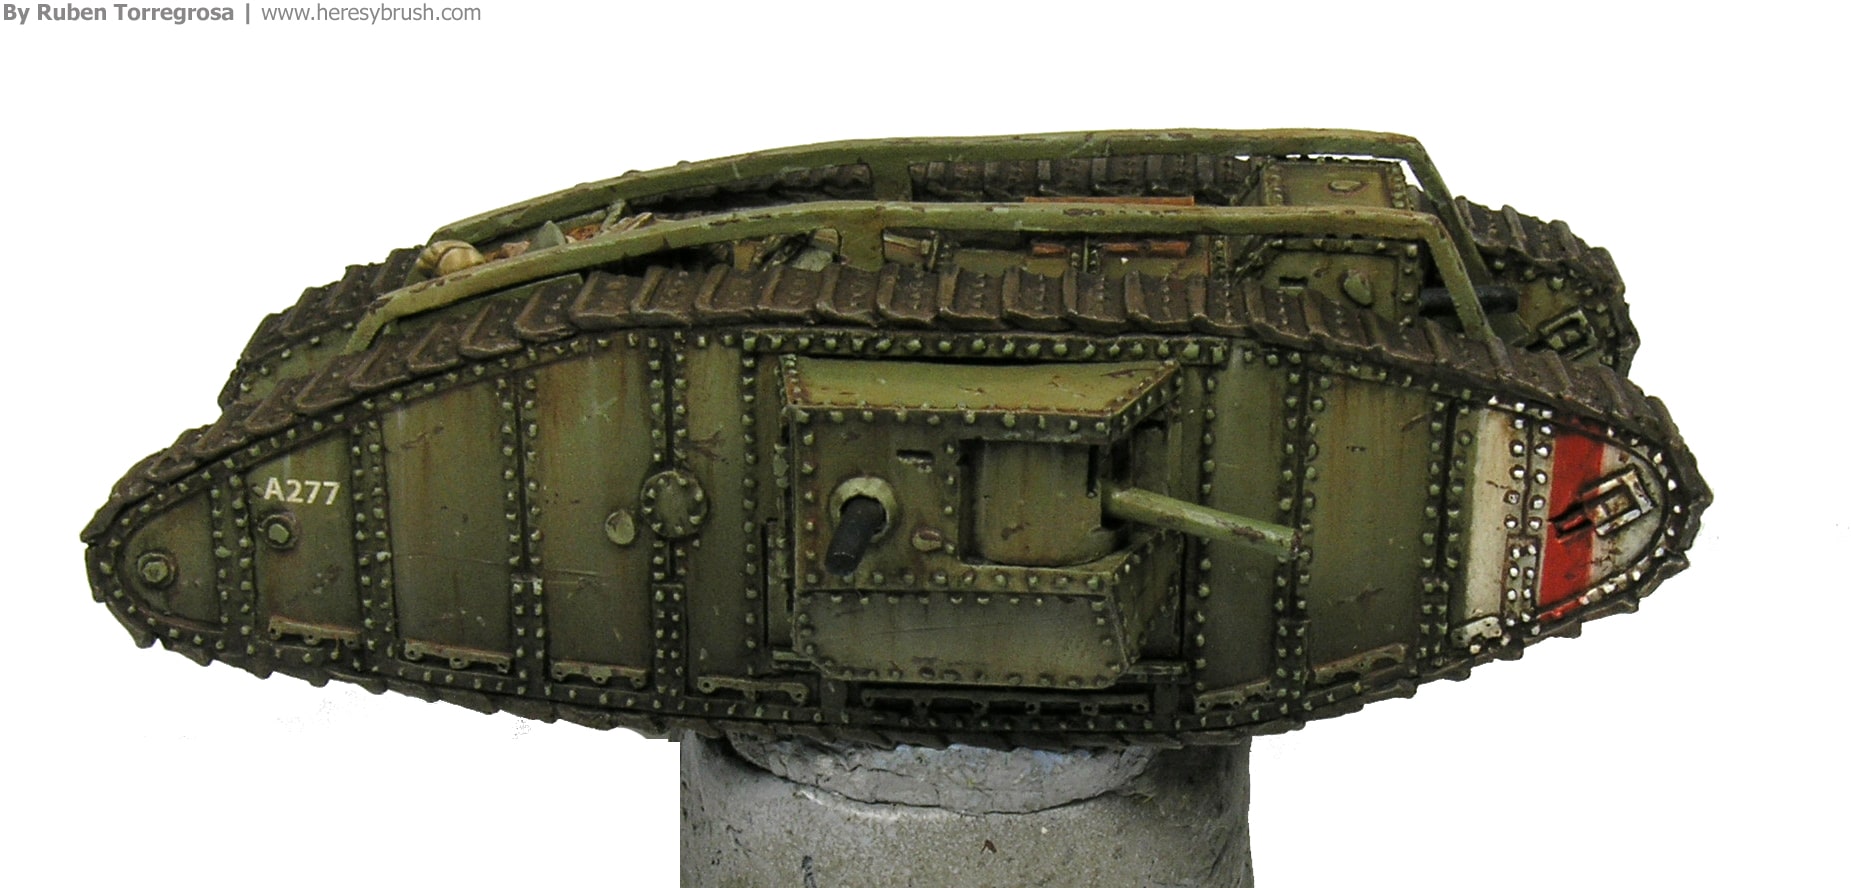
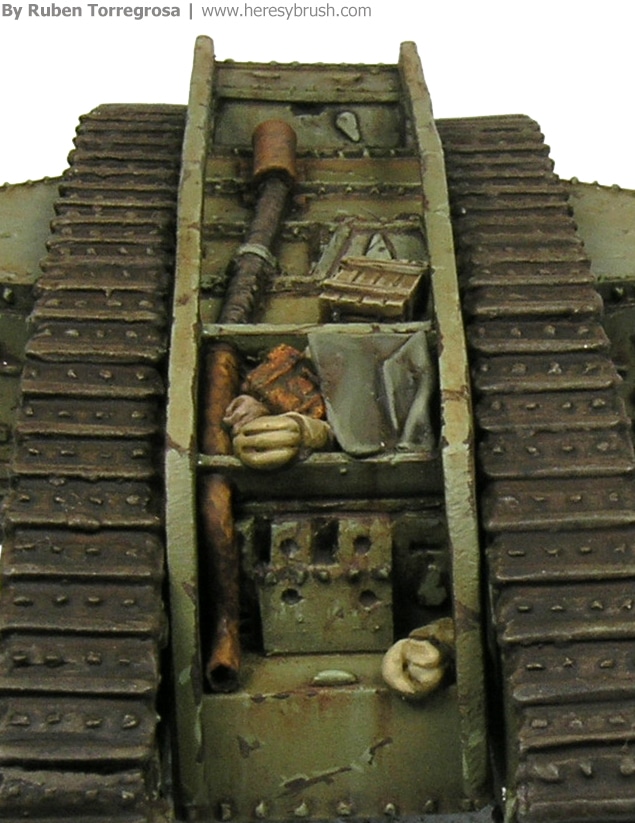
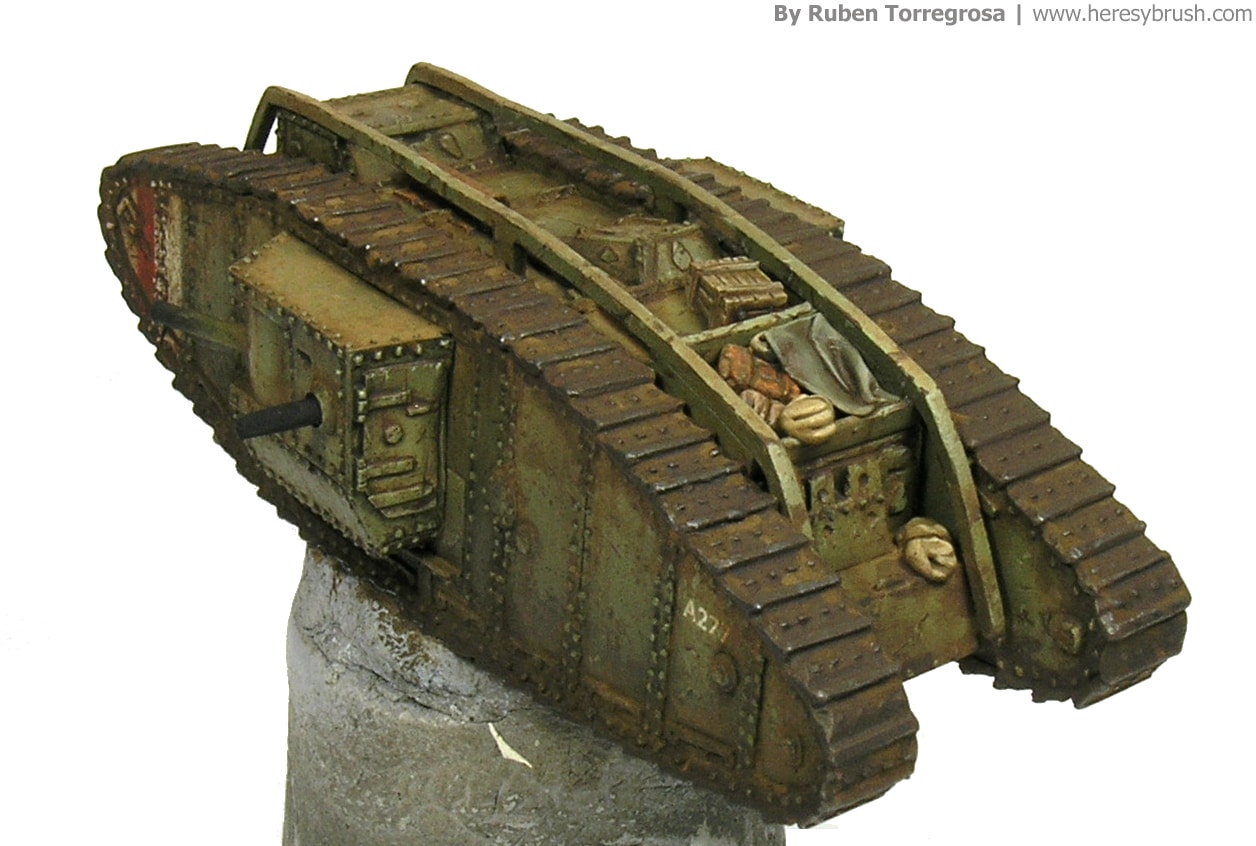
If the vehicle is carrying some stowage, now is the moment to paint it (or add it). We can use acrylic paints to paint the different accessories. It is important to take advantage of these accessories and try to get more contrast by choosing the right colors. For instance, look at the exhaust pipes and the gasoil can. The rust is obtained by using several brown and orange colors and it results very striking over a green surface. The yellow color of the blankets and crates is very useful in the same way. On the other hand, a big greenish blanket covering part of the stowage homogenize the final result.
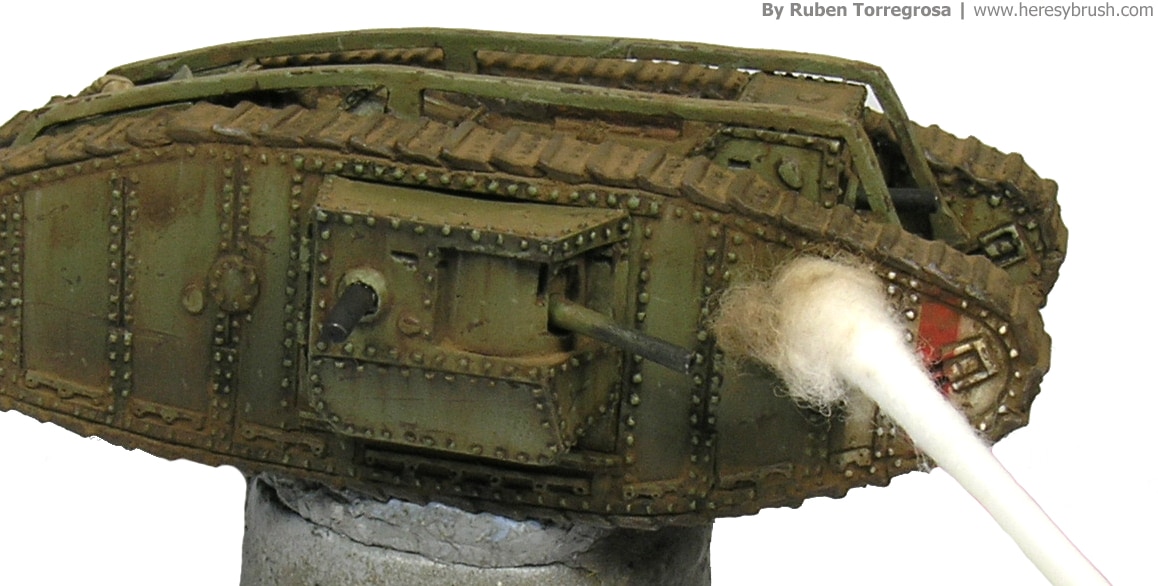
We wanted to simulate a heavy mud effect. However, we should proceed little by little and work layer by layer. The mud is not painted, it is created. The first step is to apply a good layer of dust that will simulate dry mud and dust per se. To do it we firstly prepare a mixture of two pigments. I have chosen Dark earth A.MIG-3007 (dark) and Europe earth A.MIG-3004 (light) to obtain a final medium color, good enough to represent the French fields. We can prepare the mix in any small container and keep it for future uses. Now, in a separated container we dissolve the pigment mix with White Spirit or odorless turpentine. Add the thinner until you obtain a texture similar to the coffee you drink every morning. Then, with a brush we apply the mix over the tracks, around them and over any area that we think that should be dusty. It would take a while until the thinner is evaporated; and we cannot continue before it is done. Therefore, relax for a while and watch a movie or play Battlefield. It can easily take 1-2 hours. You can see below the “before” and “after” results, where the former is the wet mix and the latter the dry one. Note, if you do not obtain the same intensity of pigment that I get when is dry, it means that you did not put enough pigment into the mix. Add more, and apply it again.
Once the pigment is absolute dry, we can remove the excess and soften the edges of the accumulation with a cotton swab. Do not use so much pressure. Be sure that the pigment is absolutely dry or you might ruin the effect.
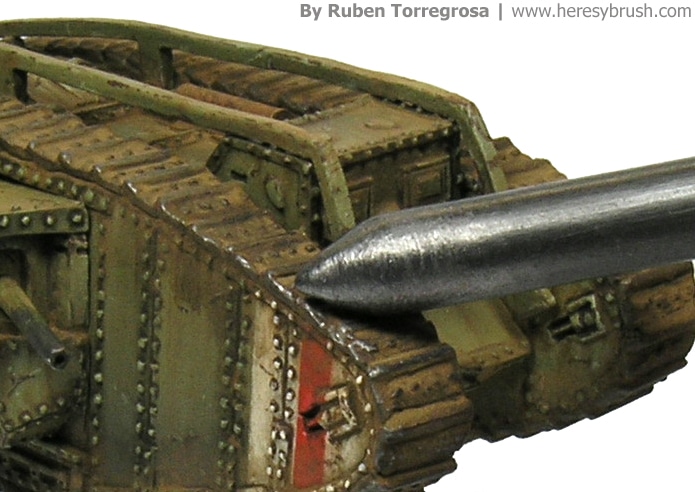
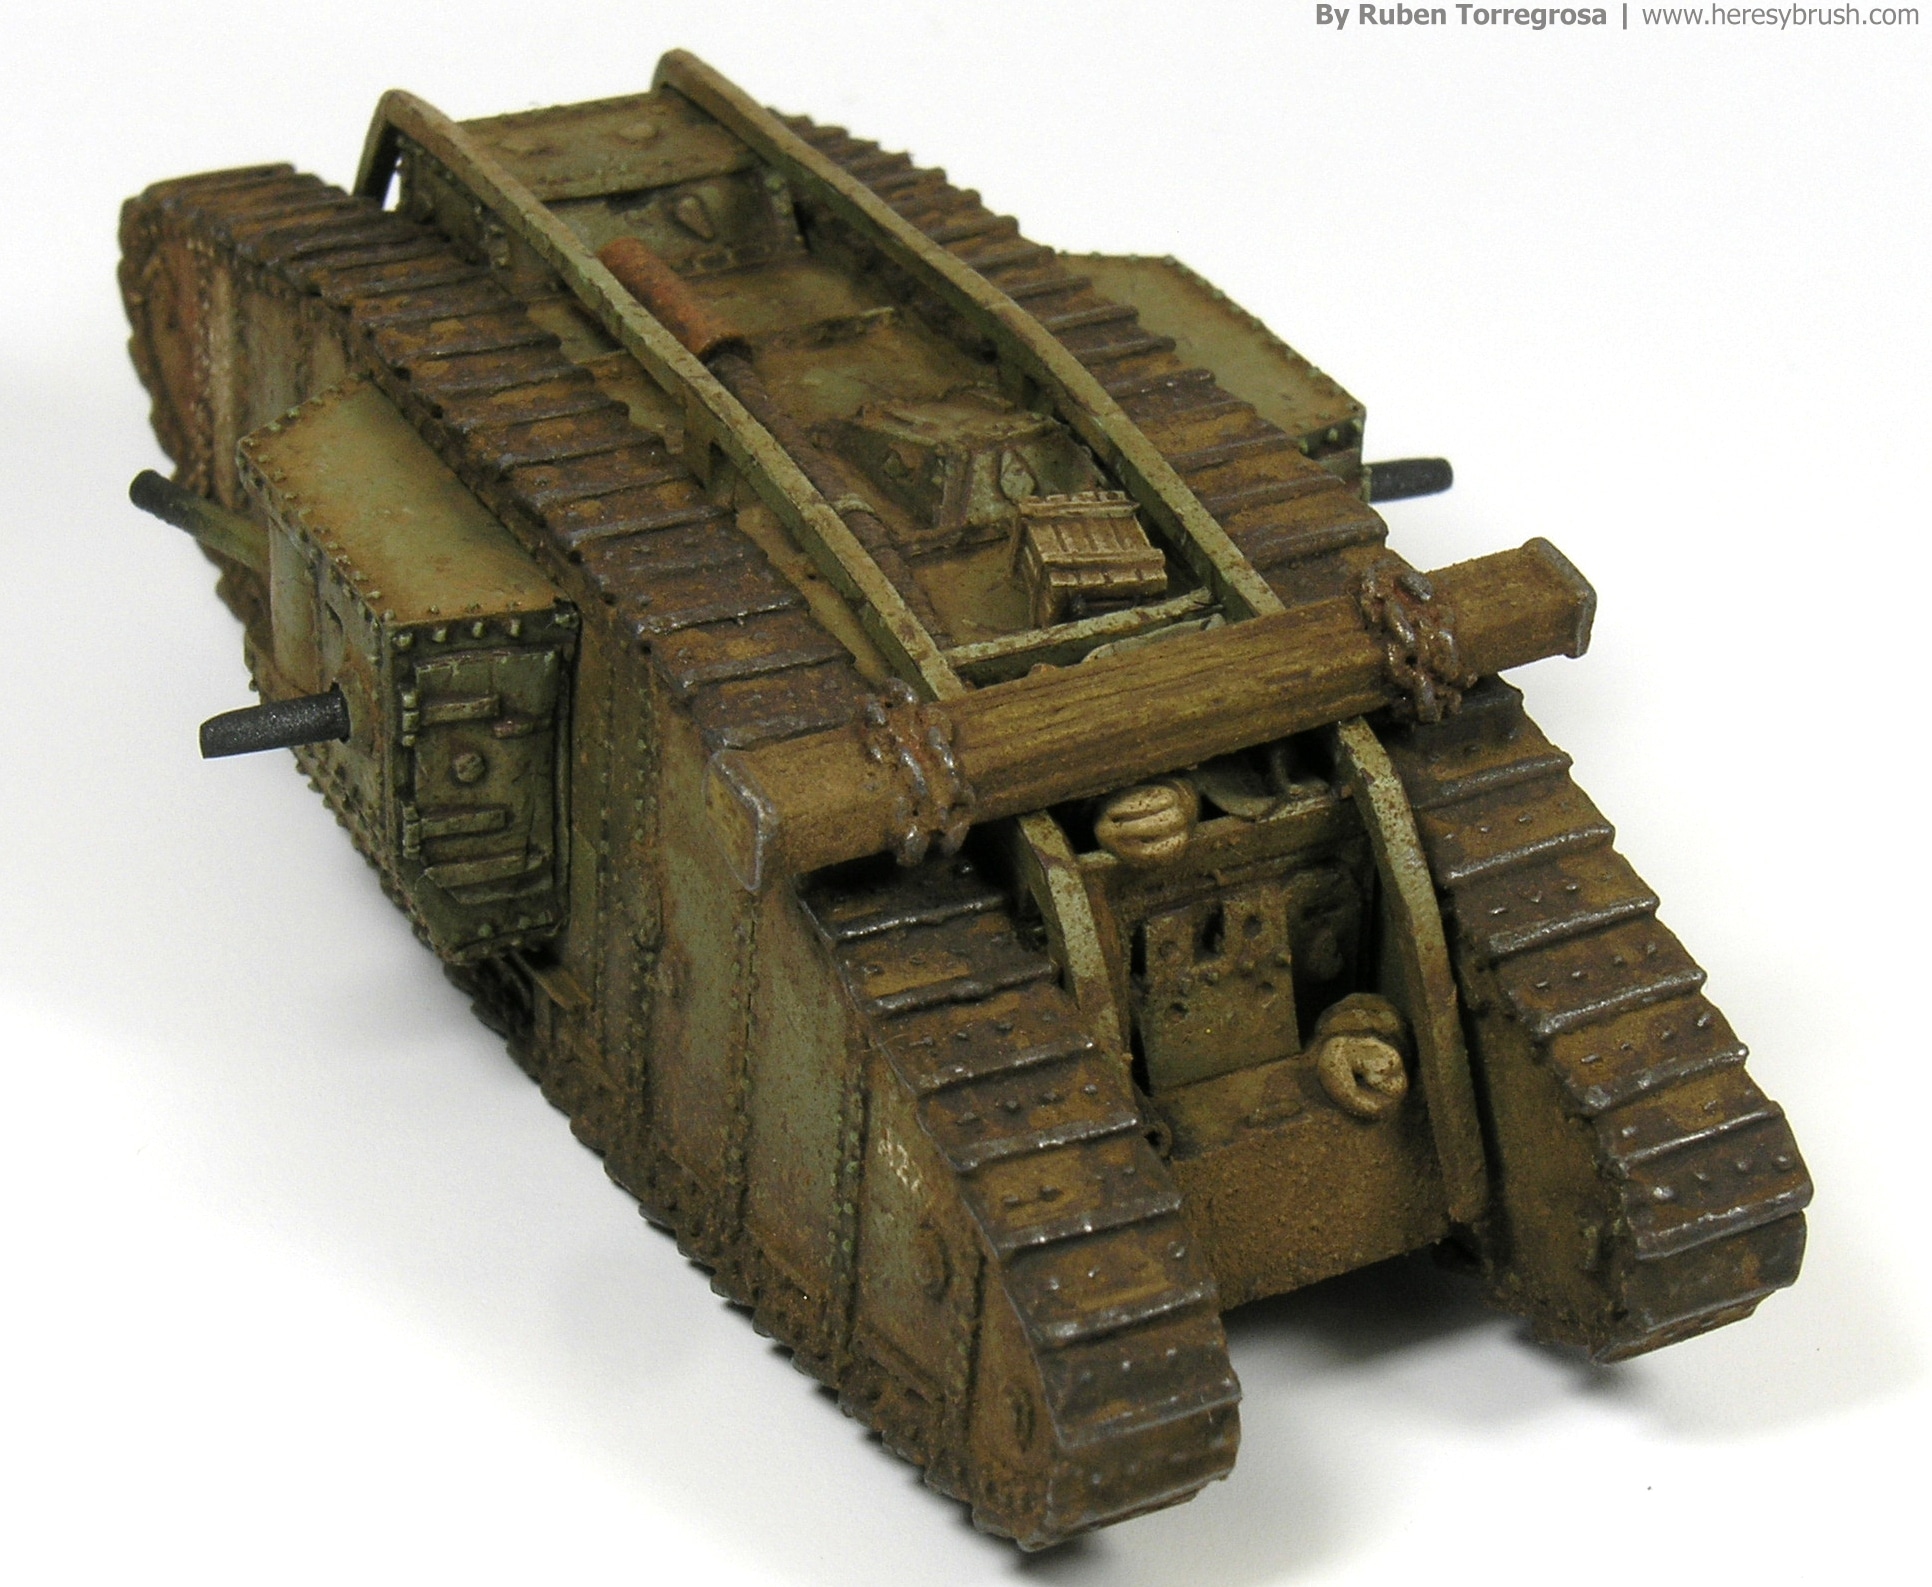
To simulate the steel of the tracks we use a graphite pen. We use it horizontally to leave some traces of graphite ONLY on the reliefs of the tracks.
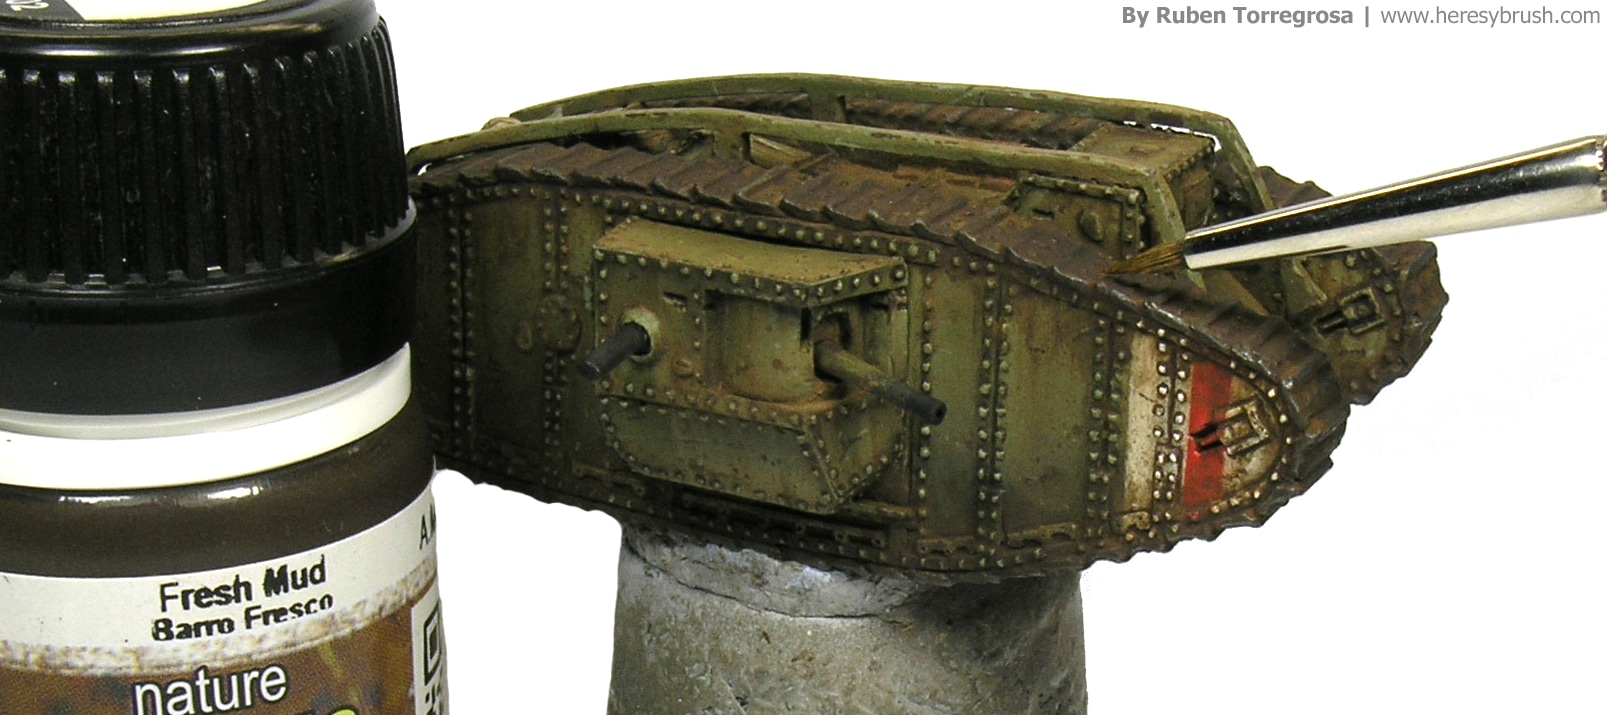
This dust effect is OK if we want to simulate just dust. But we want mud! The mud can be easily simulated by using a dark color that represent wet soil. But we do not want to lose the dust effect that we have just added. The idea is to combine both effects: dry and wet (or light and dark) to obtain a very striking and real effect: some areas are already dry, whereas other have been recently splattered. One way to proceed is by using a dark brown enamel, such as Fresh mud A.MIG-1402, to apply splatter effects with a stippling brush (check this tutorial to see how to do it). Remember, the idea is not to cover the whole surface! But add some contrast here and there. The dry pigment will absorb very quickly the enamel, so be sure that you do not apply so much or the whole pigmented area will be darken (we are looking for contrast!). Additionally, you can thin a bit the enamel with White Spirit to reduce its opacity. Finally, although we apply the splatter effects over the whole vehicle including the tracks, we can use a regular brush to add more Fresh mud specifically on the tracks. This area is expected to be wet as it is constantly in contact with the ground!
If you want, you can stop here. Now our tank looks very dirty and muddy. However, if you want a heavier muddy effect, we need to add some textured mud. We can achieve this last effect by repeating the splatter effects, but using pigments this time. First, we dissolve a bunch of the pigment mix that we prepared previously with White Spirit. This new mixture should be very dense, something like butter: you can easily handle it, but it remains solid. Then, we use the stippling brush to apply the dense pigment mix over the tank, focusing on the areas close to the tracks and the tracks. This splatter effect represent dry mud. Therefore, now we should prepare a new mix of pigments dissolved with the enamel Fresh mud A.MIG-1402 instead of White Spirit, resulting in a darker color. And we repeat the same process with the stippling brush, but reducing the area of the new splashes, as we want to combine the dry and wet effects. We can repeat this process as many times as we want, until we obtain the effect we are looking for. However, note that this effect is very fragile and the pigment can be easily removed by touching the miniature. If you are planning to use the miniature very often, you should dissolve the pigments with Pigment fixer, instead of using White Spirit. Furthermore, you can always apply a final varnish layer. However, you might ruin the dust effect, because the pigment will absorb the water from the varnish before the varnish is dry. Perhaps an enamel-based varnish is the solution to this problem…but I have never check it out!

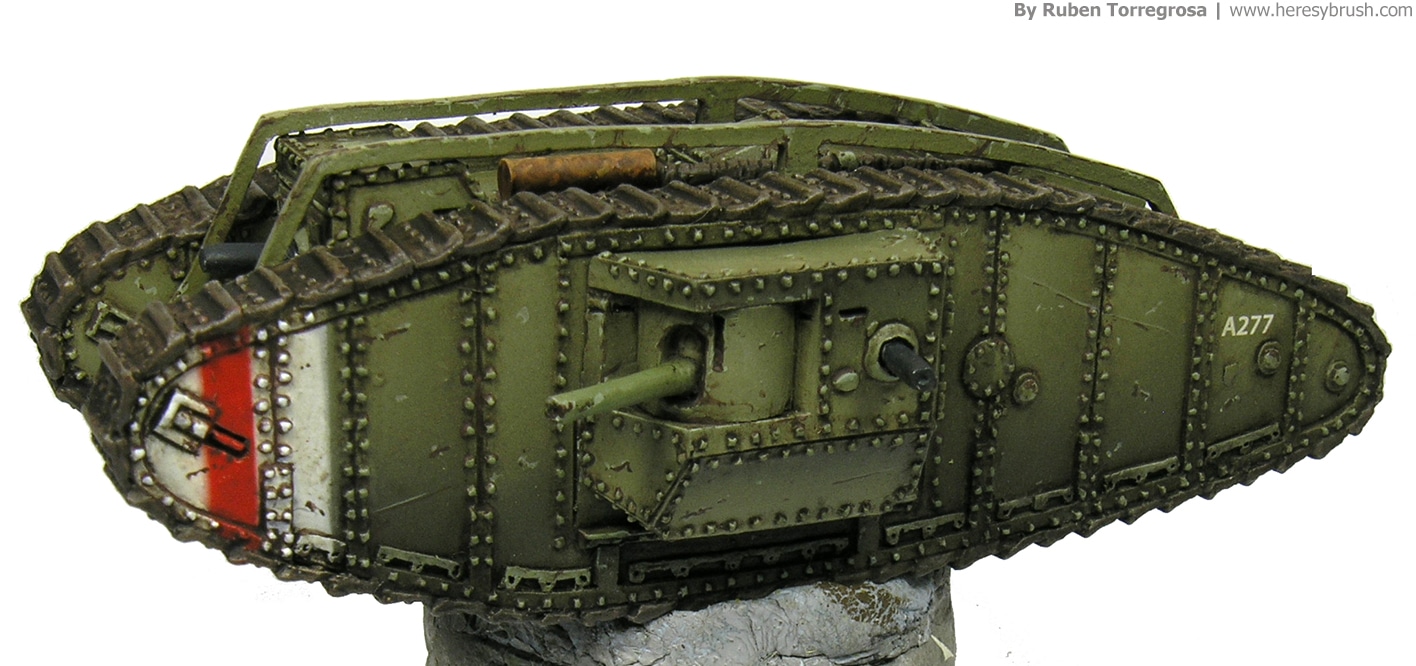
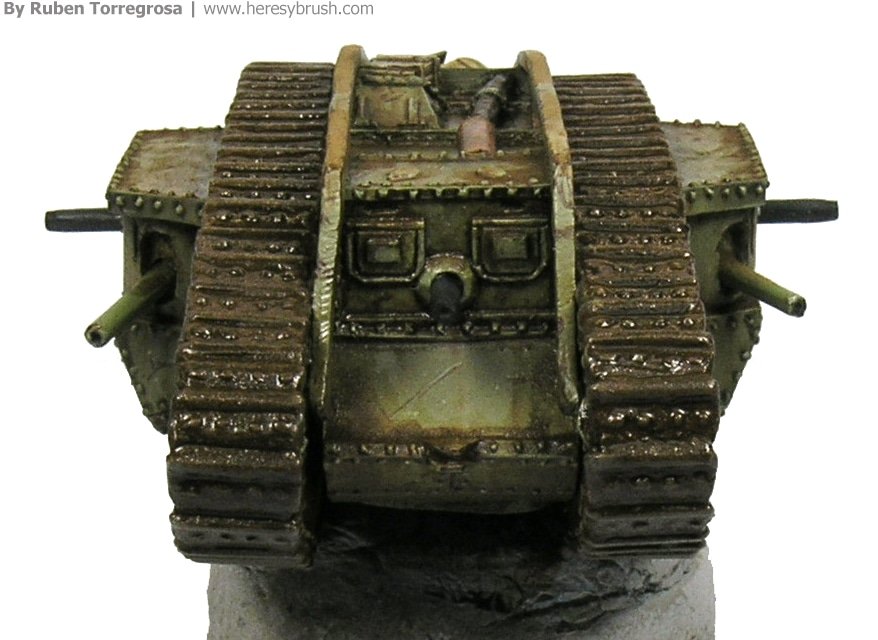
The male version:
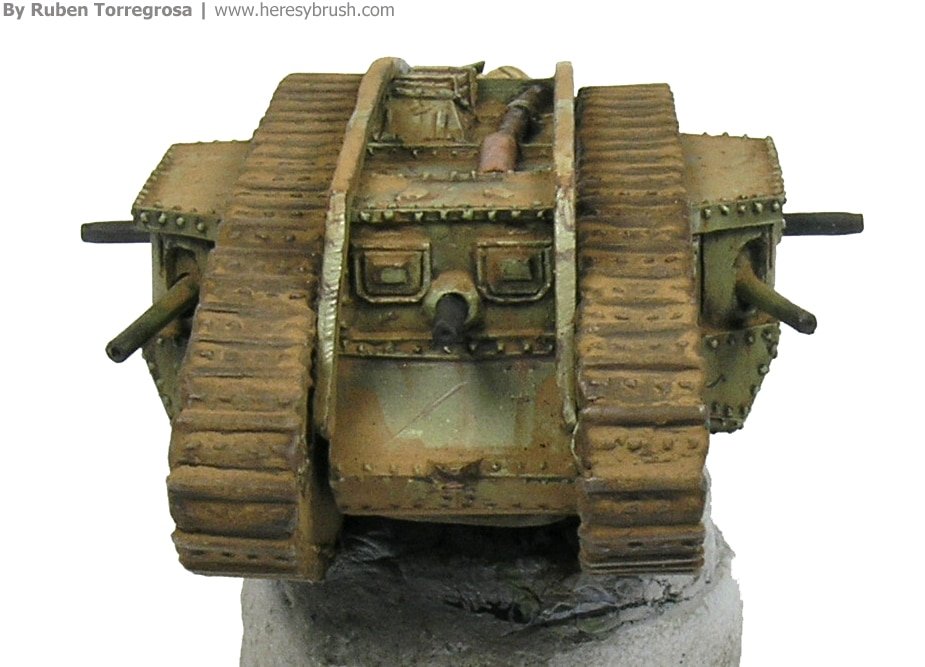
The female version: