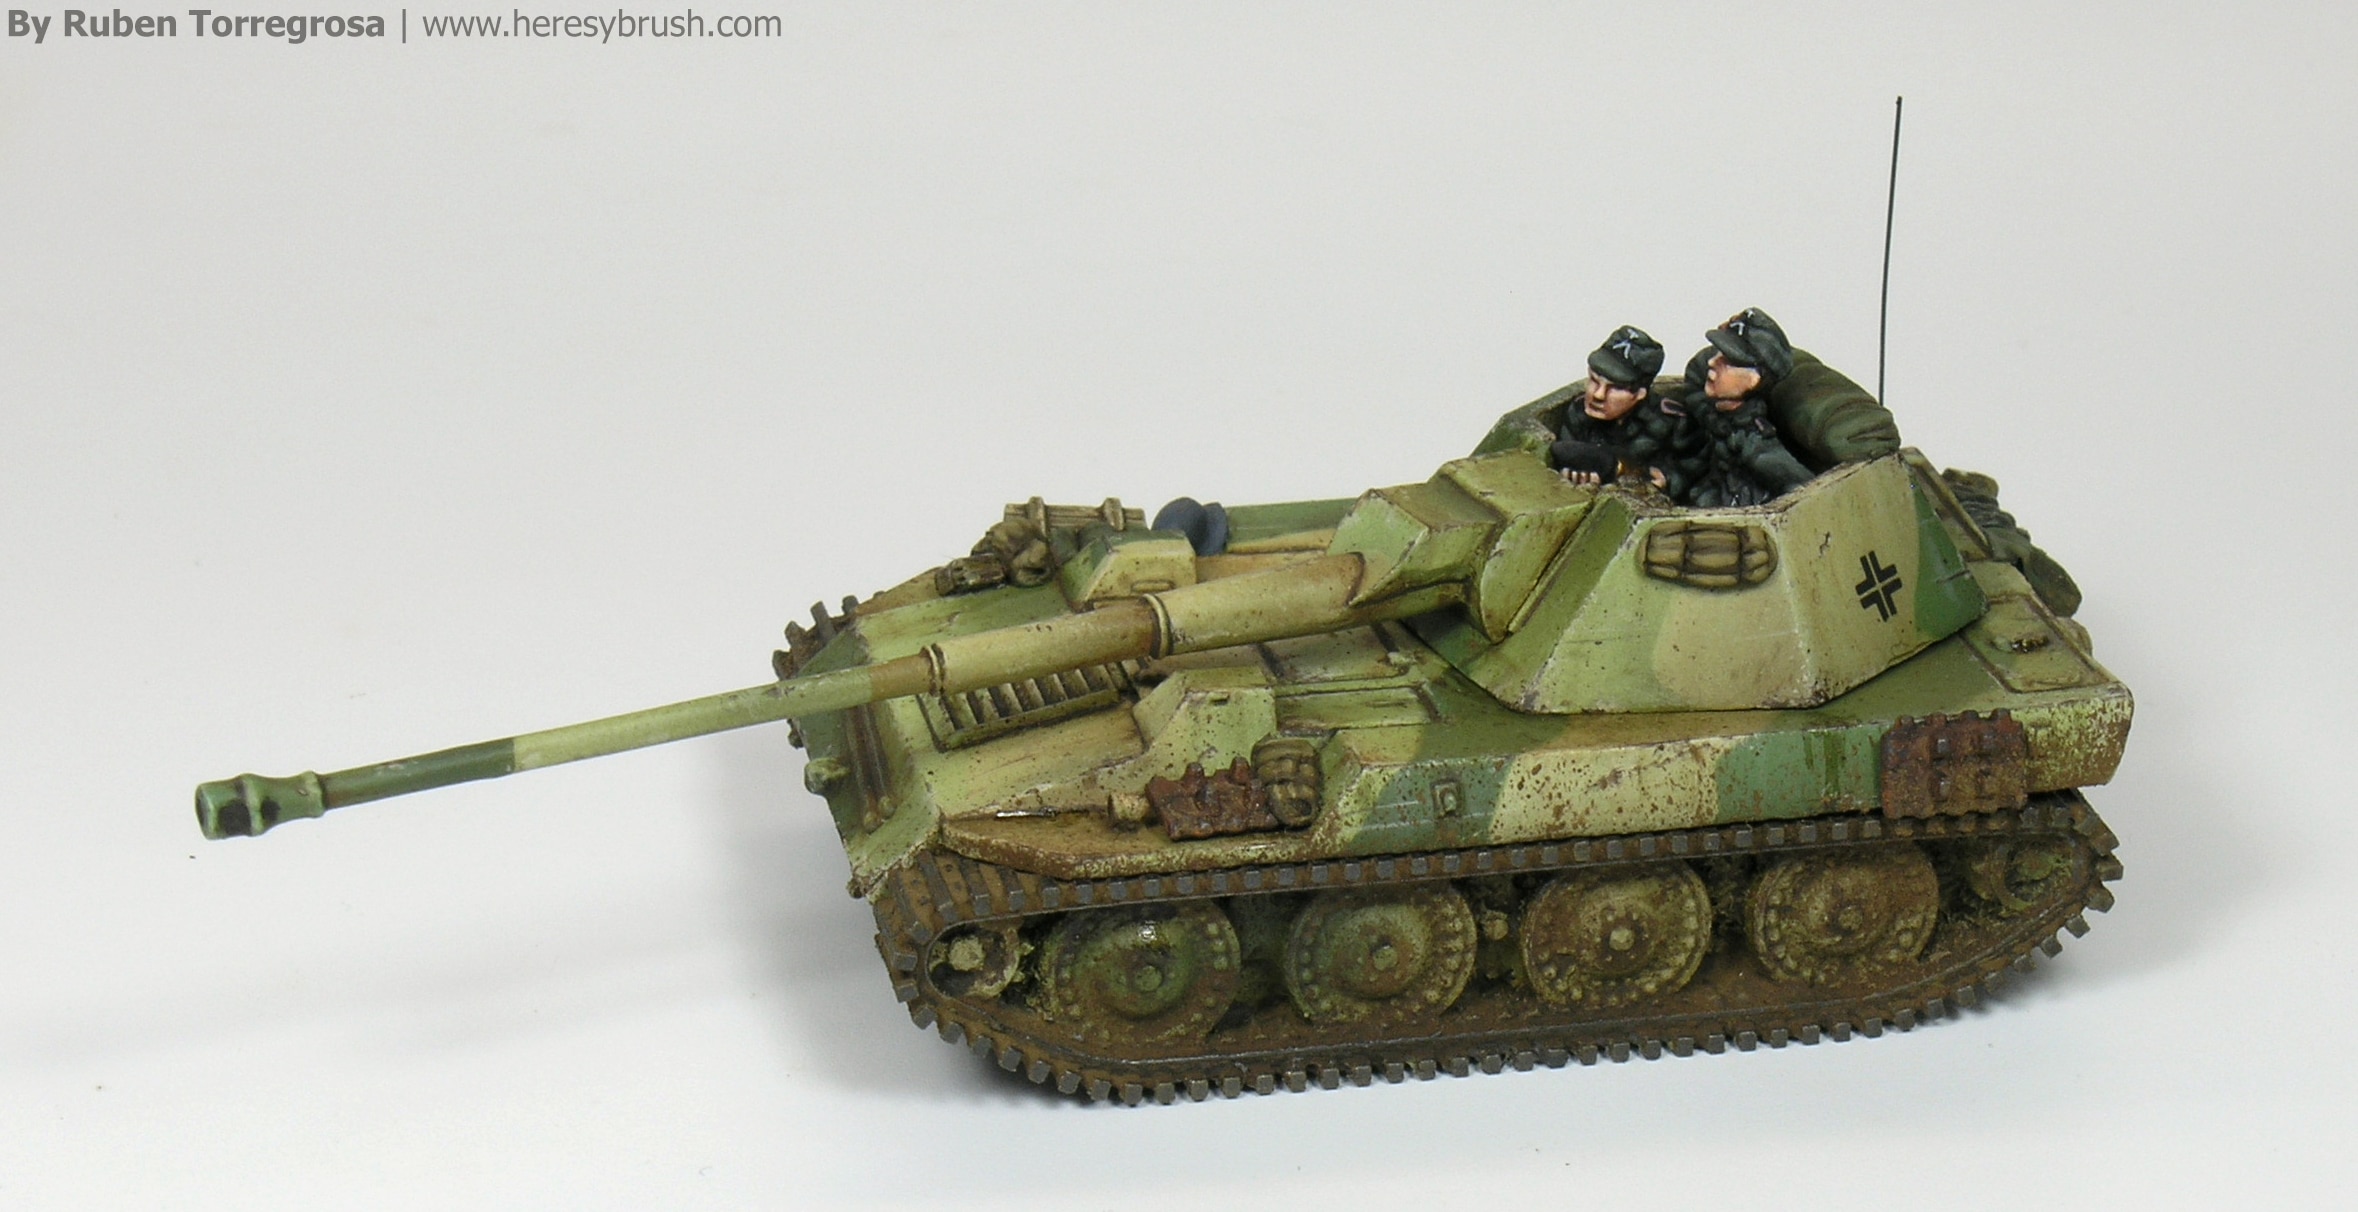
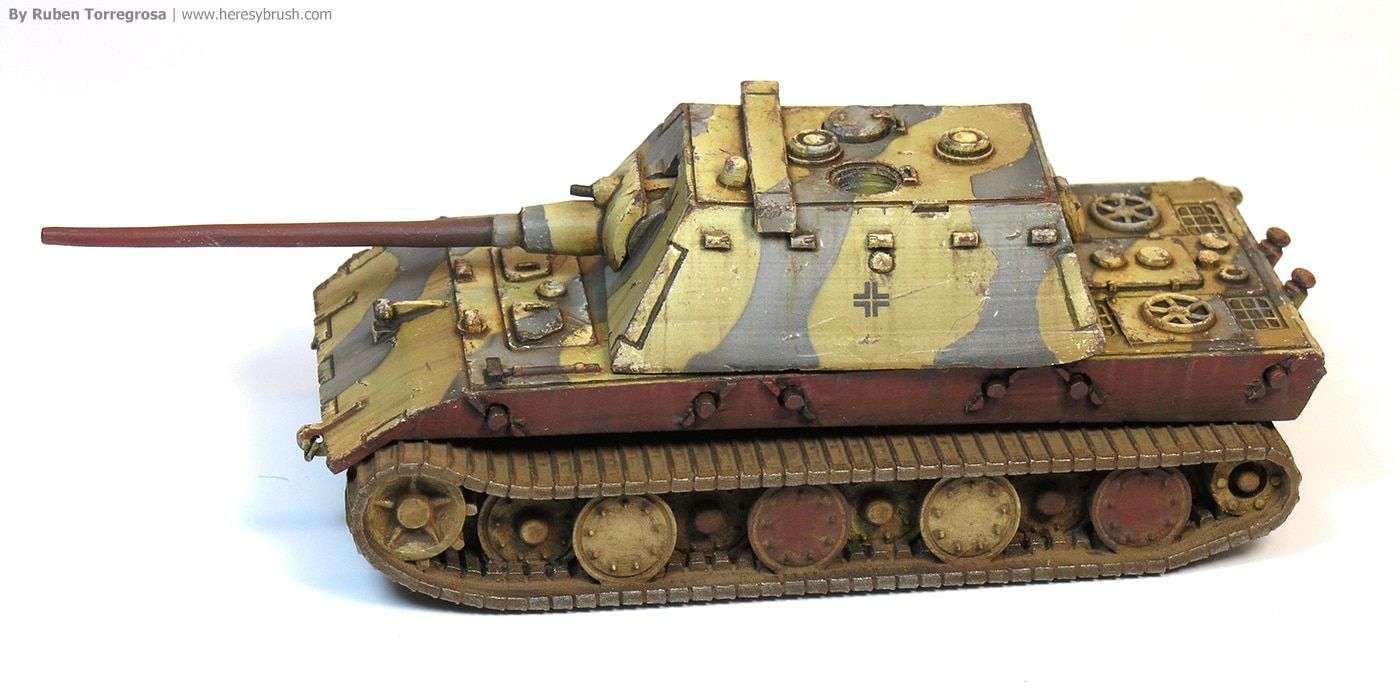
While I am working on different projects, such as the new PaintingWar book focused on the Spanish Civil War, I have no time to prepare any tutorial for my blog. It is a pity. Nonetheless, you can follow my work in www.ModelBrush.com, a blog which I run with some friends. Strikingly, I have found an abandoned painting guide in my computer (that is, unpublished) and I would like to exploit it, starting by this “mud splatter effects in 15mm” tutorial. A very simple but very effective weathering effect. I have already commented this effect several time in my blog, but I would like to deeply talk about it. The vehicle mostly used to explain this technique is a Waffenträger Krupp-Steyr 8,8cm Pak 43 (15mm, 1:100) from Heer46
First and foremost I would like to force you to make some questions about weathering. What do you want to simulate? What story do you want to tell? Where historically is placed the model you are painting? Nowadays you can find hundreds of tutorials about how to do weathering effects on our tiny models. However, the purpose of the weathering is not to apply the whole spectrum of techniques you know, but is to tell a story. I mean, we will learn here how to do splashes. However, you do not expect to find splashes in a vehicle running on the dunes of Africa, do not you? Summarizing, we need to consider what we want to represent, and then decide which techniques from our repertory we want to use.
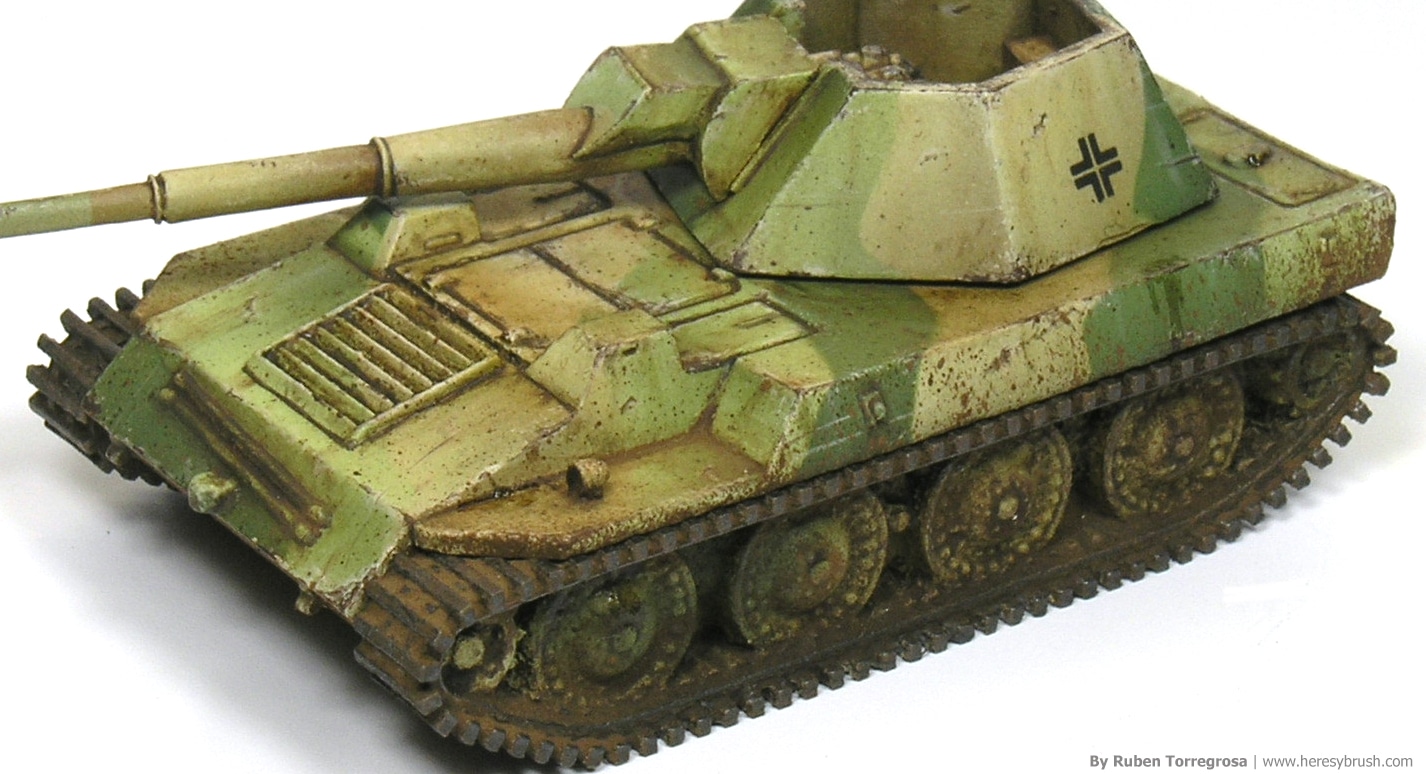
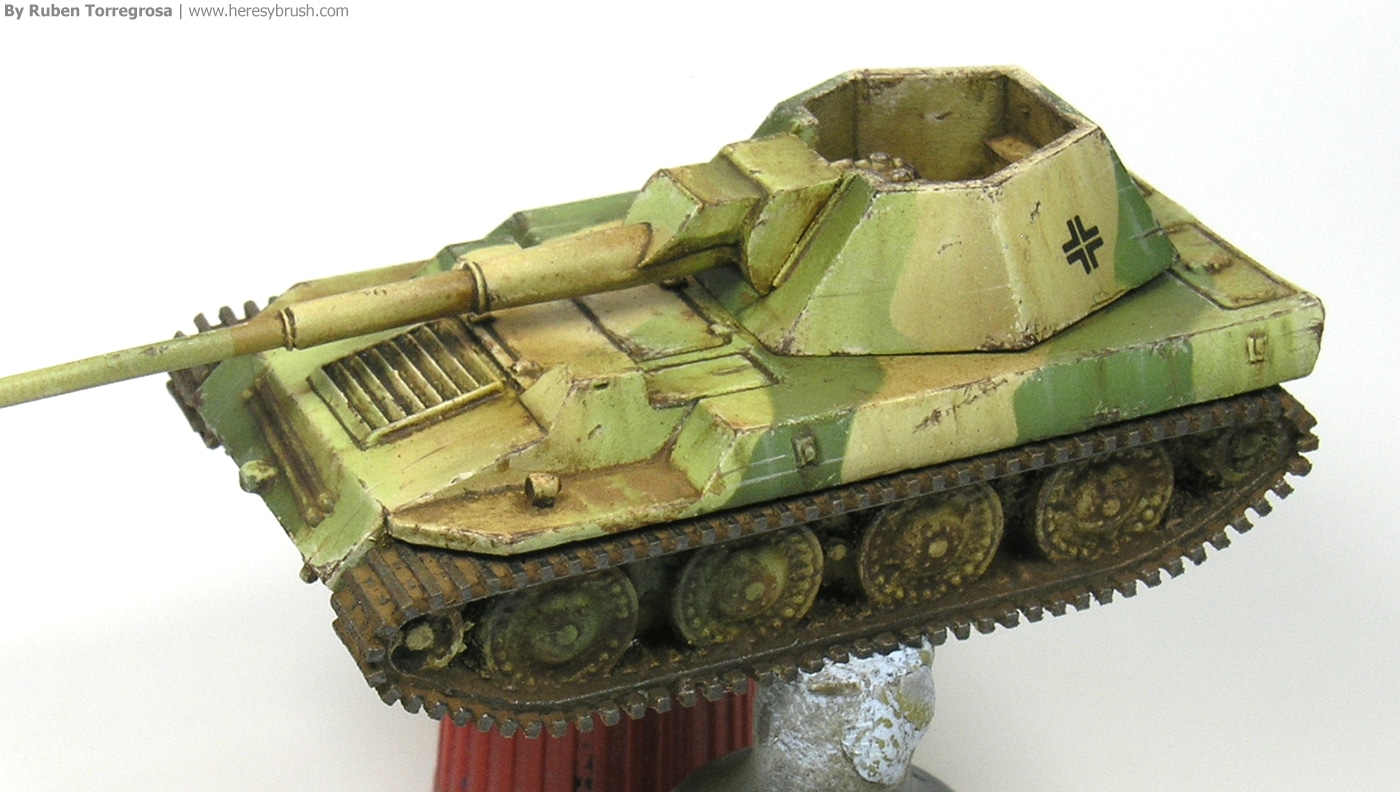
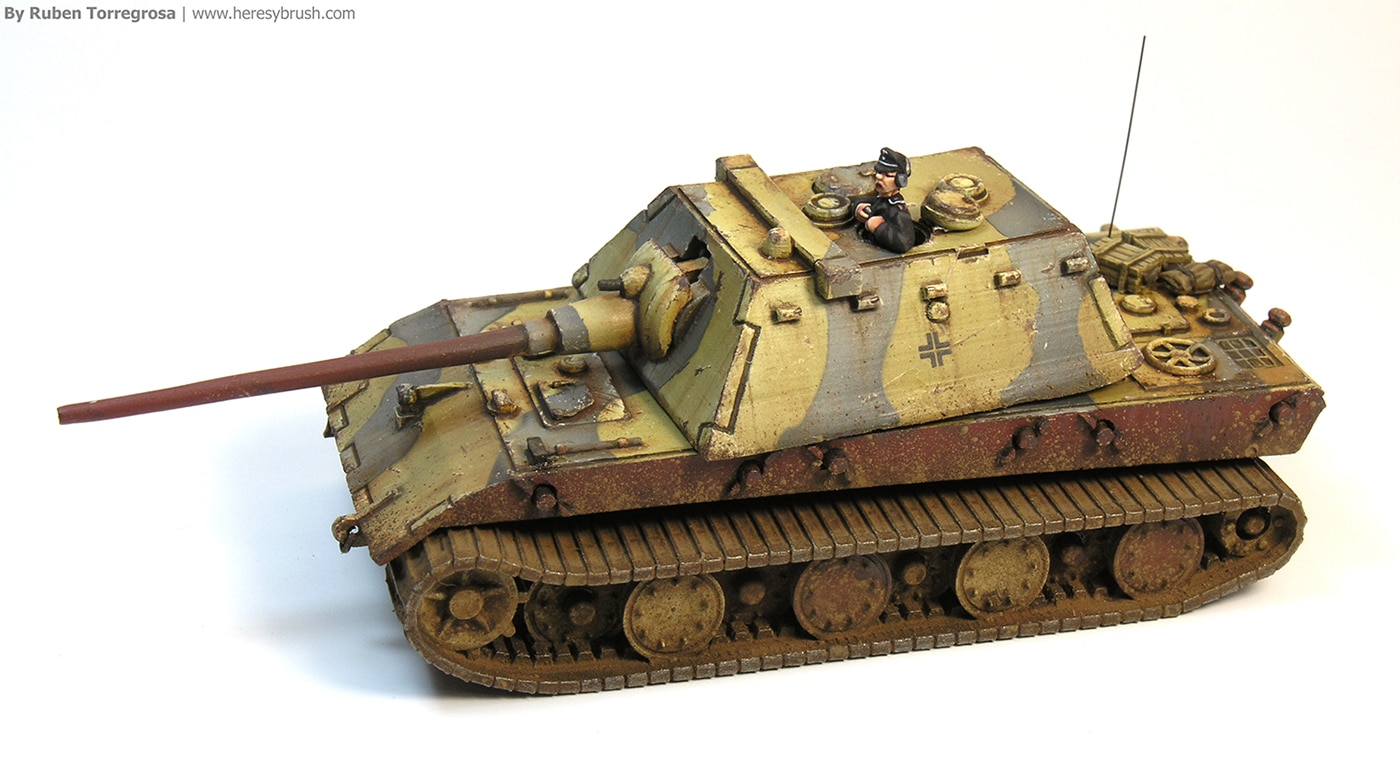
Firstable we need to almost finish painting the vehicle, including the weathering effects and even the tracks. The splashes effect is one of the last techniques we will apply on our model. For example, in the following tank I have painted the camouflage and then applied chipping effects, slight streaking effects and some pigments on the horizontal surfaces. Now it is ready for the mud splatter effects.
To do splashes effects we are going to use a very basic and “old” method, based on flicking a brush charged with pigment or paint. Therefore, we would need the following stuff:
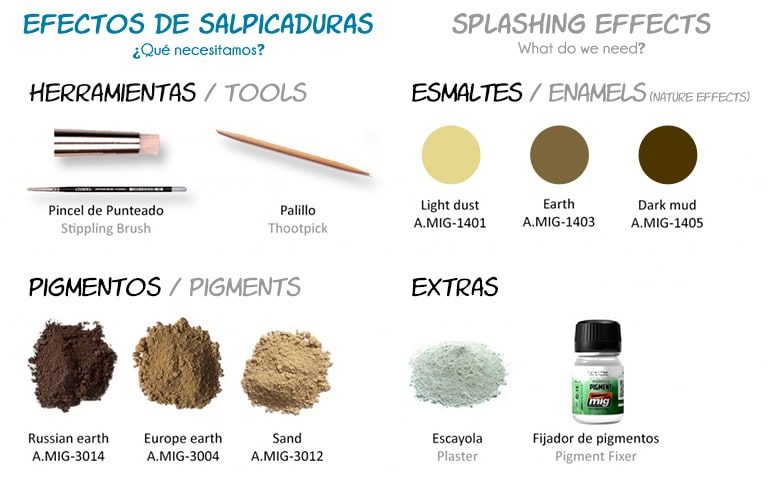
As you can see above, we would need pigments and enamels. We will use these two reagents to prepare our splashes. I usually mix two or three different pigments to increase the chromatic variety, but you can use only one if you want. In principle we have to dissolve the pigments with White Spirit to create something with a texture similar to melted cheese. However, we can also use brownish enamels instead of WS as thinner and to get a more colorful result. For example, we can mix two pigments (Russian earth A.MIG-3014 and Sand A.MIG-3012) and then dissolve them with Dark mud (A.MIG-1405) nature effect. Now we have to consider three very important points:
1. Dilution/concentration of the mixture: the dilution (“how liquid is the mixture”) is inversely proportional to the lump size. What I mean by this? The more liquid the mixture is, more flat the lumps are. If we want to get bulky lumps, then we need to work with a denser mixture (just, add more pigment). We can take advantage of this feature depending on the effect we want to simulate. For example, if we want to simulate slight splashes cause by fording a river we can use a more diluted mixture. On the other hand, if we want to represent mud from a muddy road, then we can use a denser mixture.
2. Plaster: we can use plaster to easily get bulky lumps. I am not a chemist, but it seems that the aggregation properties of plaster is higher than regular pigments. This means that we would get bigger and more voluminous lumps. We just need to add a bit of plaster to our mixture of pigments and enamels. HOWEVER, plaster is white; and therefore it will lighten the final color. Take into account this and increase the amount on brownish enamel or dark pigment.
3. Pigment fixer vs White Spirit: pigment fixer is much stronger on putting together pigments than White Spirit. Therefore, you should add it to the mixture in order to increase the durability of the splashes effects. This is especially important when you are planning to play with your models. Remember that when you apply a varnish layer on top of a pigment, the pigment gets wet and therefore it becomes darker. Thus, we should not use varnish to protect the pigment effects.
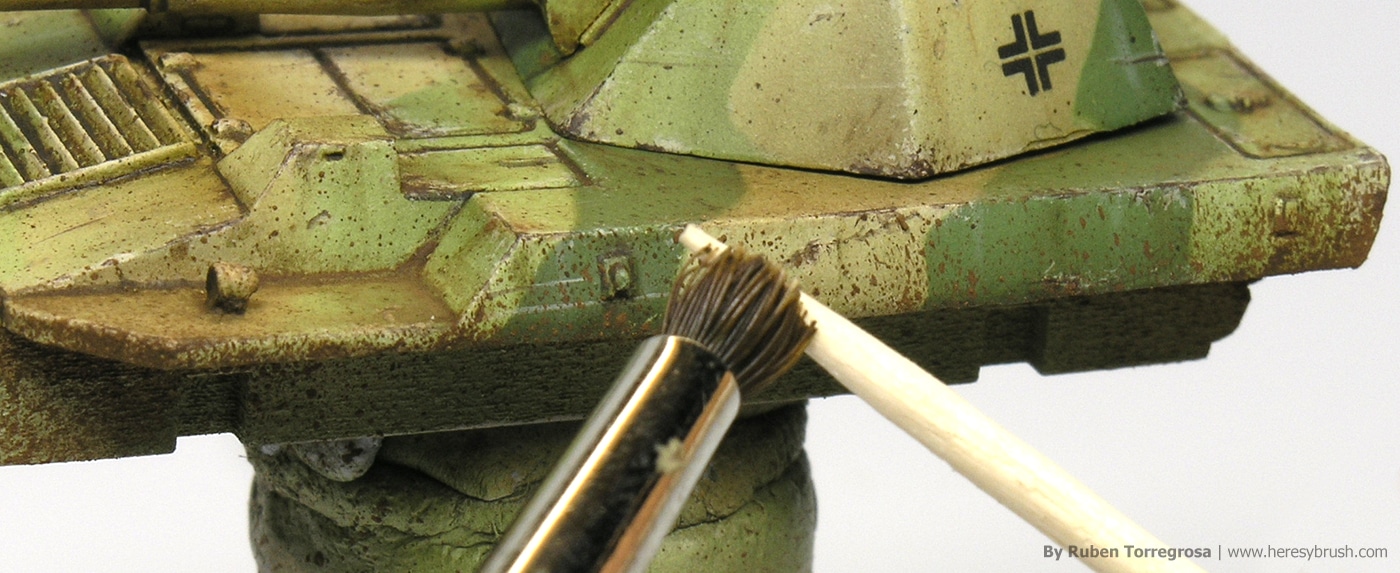
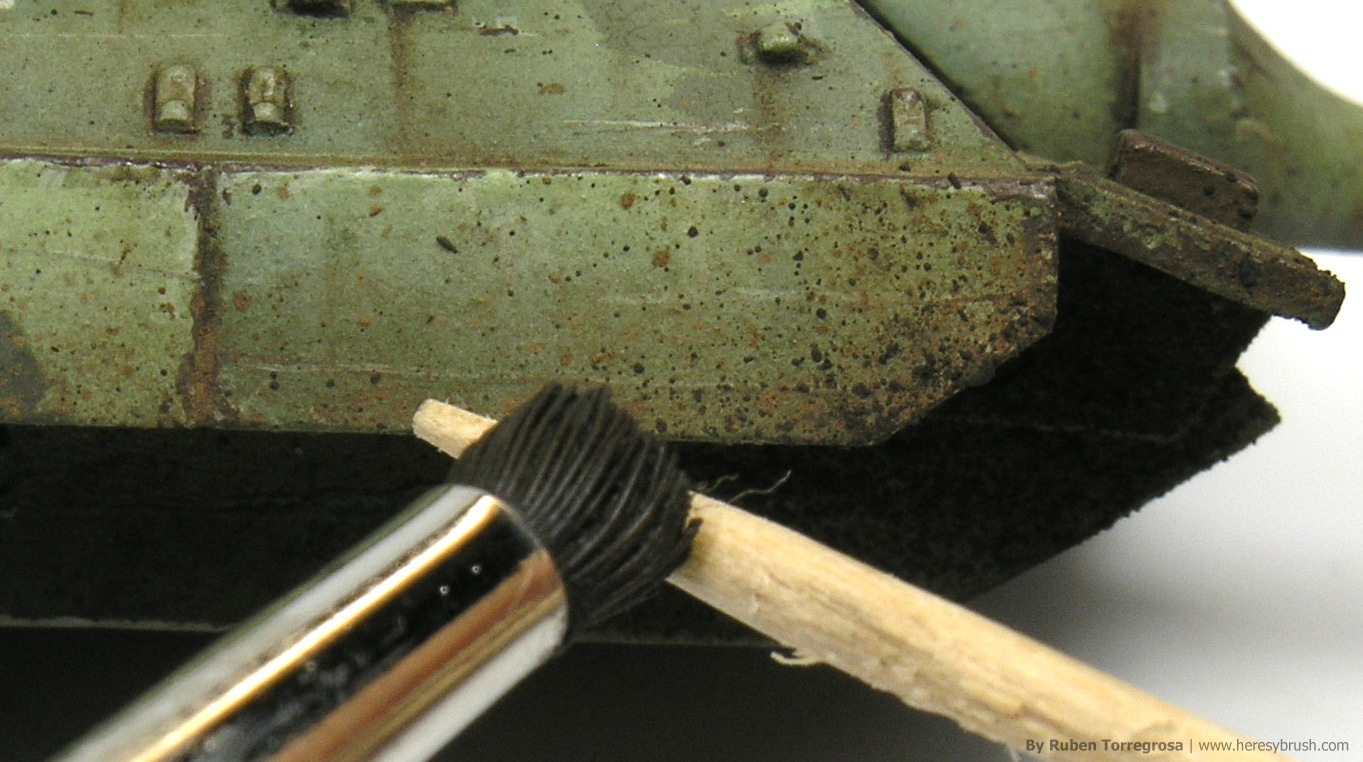
After this consideration, we can start applying the effect. We need a brush with very hard bristles, such as an old brush or a plastic-bristles brush. I love the stippling brush from Citadel because it has very short and hard bristles, which increases my accuracy when I apply splashes. We just need to charge the brush with the mixture, and then to flick it with a toothpick. I like to do it close to the model to have more control and to avoid splashing everything. Note, these splashes are based on enamels, which allows has to remove them just with a brush moistened with White Spirit. Therefore, we can remove the lumps we do not like or are in wrong places.
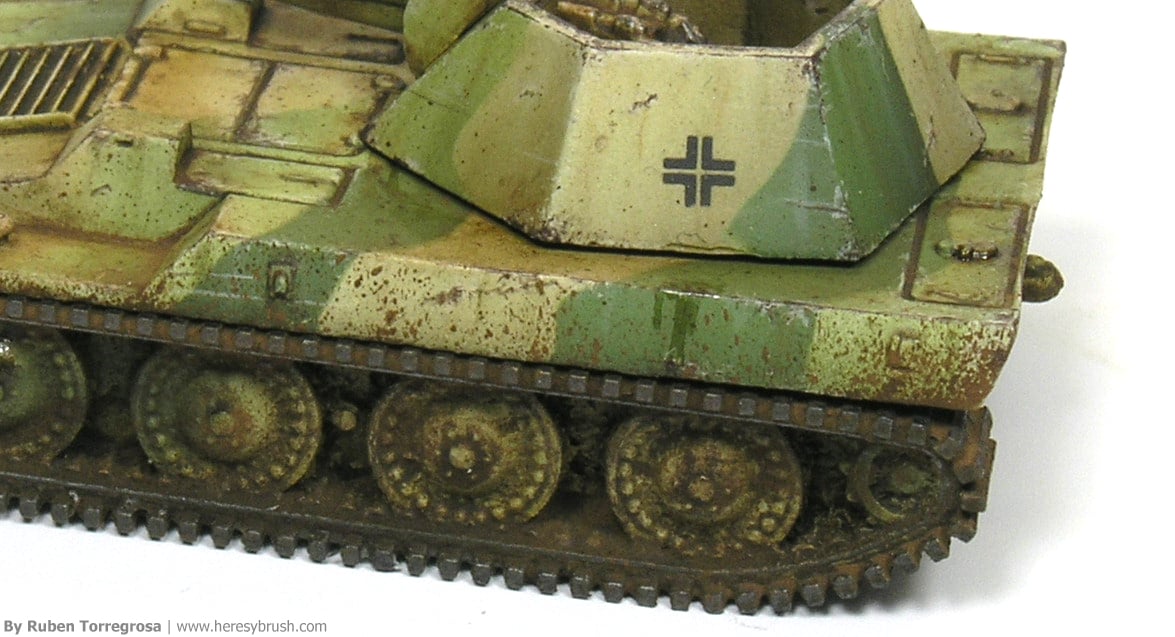
It is also important to take into account WHERE we apply the splashes. The obvious areas are the ones close to the tracks, and of course, the wheels on the tracks (the tracks will not have many splashes, as they are constantly in movement). We should also pay more attention to the mudguards (I think the proper word is an invitation). Take a look at the following example. It is important to consider that the turret is very close to the tracks, and therefore, it will be probably dotted. Actually, this depends a lot on the vehicle.

 Now we can focus on some extra effects: oil/grease stains, different color of splashes (fresh and dry splashes) or some gear. We will see one by one.
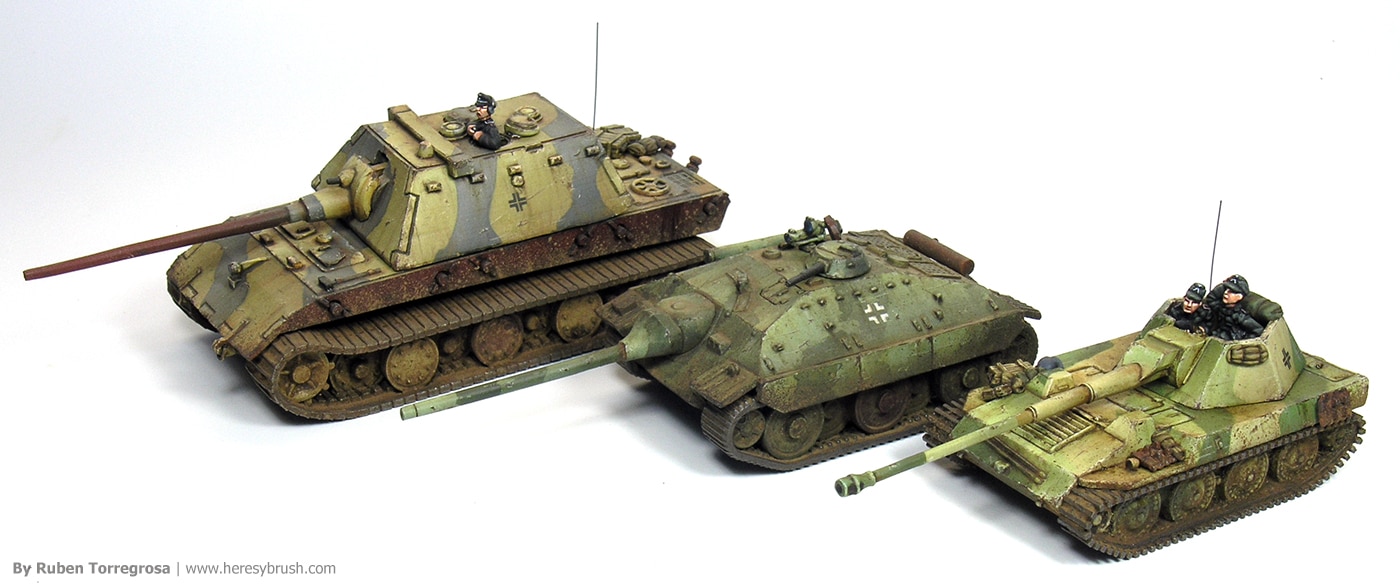
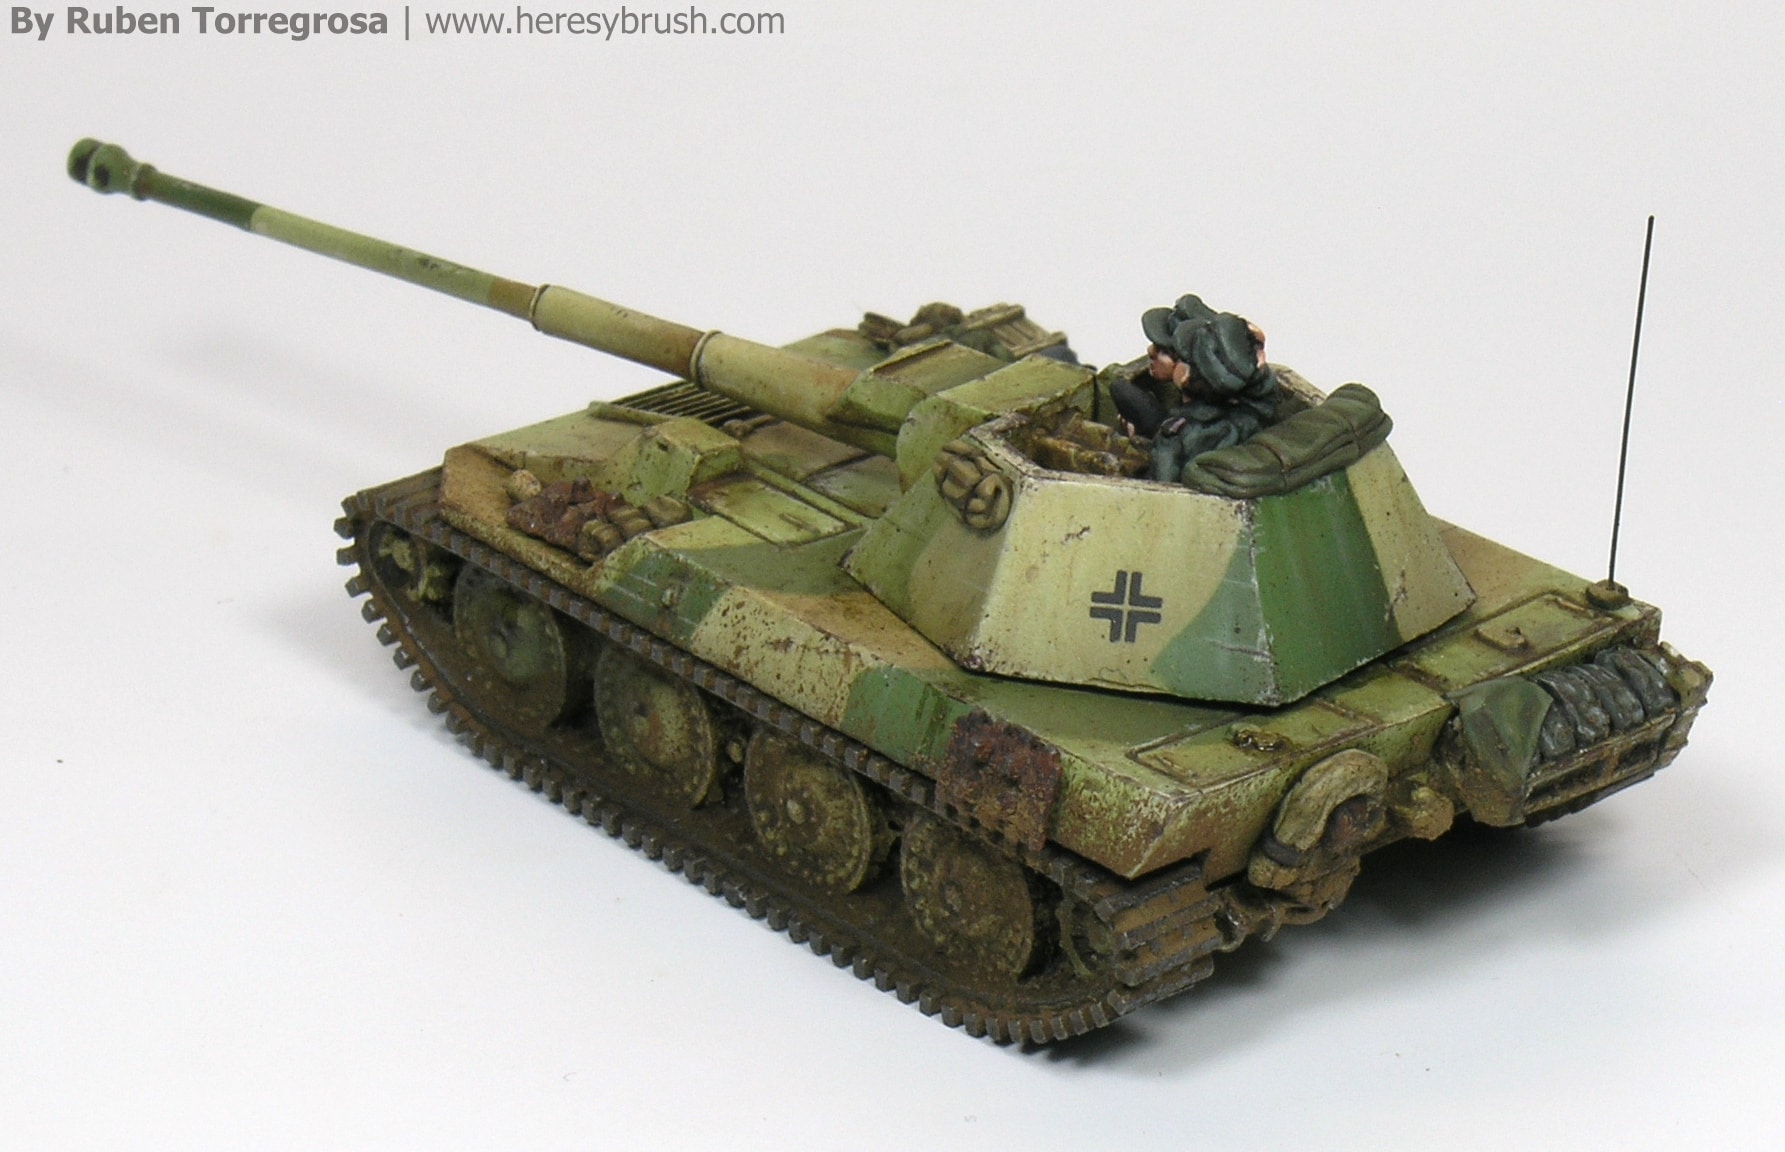
Once more, depending on the effect we chase we can use two different mixtures to represent wet splashes (dark color) and dry ones (light color). It is very simple. First we use light colors (pigments and enamels) to create dry splashes, which are older and therefore are behind the fresher ones. And now we use dark colors to create the wet ones, which are new (=fresh) and therefore on top of the previous one. Basically we repeat twice the splashes effect but using two different mixture colors. To represent the fresh ones we can use abuse of Dark mud (A.MIG-1405) or even Fresh mud (A.AMMO-1402) which has a satin finish for the appearance of wet. You can see an example below.
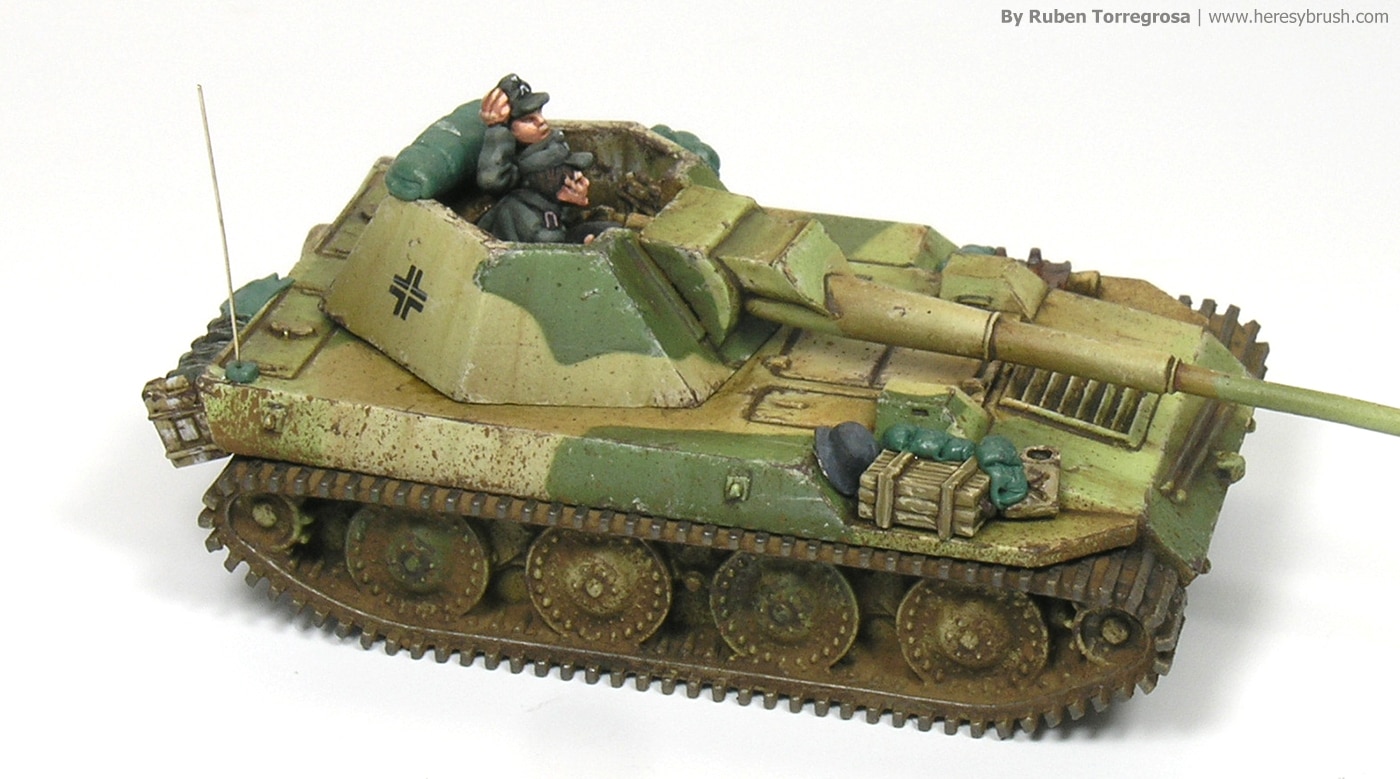
In my very personal style I like to paint separately the gear, such as boxes, bags, cans, etc and then glue them at the end. This is because I prefer to don’t have anything that limits the work with the airbrush and weathering effects at this very tiny scale. If you paint 1:48 or 1:35 vehicles you do not have this problem. However, my own way to do this is not the correct one. I can see now that it would be more profitable to glue all these accessories BEFORE applying the splashes effect; otherwise, I have to work on them twice. As you can see, we can always learn something new every day. Anyways, in my case I have added all these elements and after painting them I needed to INTEGRATE them with the rest of the vehicle. That’s, I have to repeat the same weathering effects I have already done, especially the splashes. This provides coherence.

The last weathering effect I usually apply is the oil or grease stains. I would like to prepare for my blog a specific tutorial about this effect, so I will not deeply describe it now. Basically, I have used Fresh engine oil (A.MIG-1408) to create different streaking effects on vertical surfaces or accumulations on horizontal areas. I would like to mention two things: (1) we do not have to abuse of this effect (especially in 15mm) and (2) we can dilute this product with White Spirit to get stains of different intensities and brightness. And that is all! I hope you found this article interesting.