K.O. Wrecked vehicles. They have something special, aren’t they?. When we see an intact tank, we can usually know his history. If it is discolored and covered by dust, we can imagine it has been fighting in the desert of North Africa. If the mud blocks the tracks, the tank has been probably rolling on some Russian road. But what about an abandoned tank?. Which was his problem? Why the crews decided to give up their steel friend?. Any possibility is right. The K.O. and wrecked vehicles are much more open to our imagination!. And because that, in my opinion they are special.
But why do we want to build a wrecked vehicle?. In Flames of War it doesn’t have sense, excepting for the objectives (for some strange reason, instead a valuable resource, objectives in Flames of War are mostly represented by destroyed vehicles). But we can also represent damaged but operative vehicles (in war all equipment is too appreciated!). Nonetheless, wrecked / KO / damaged vehicles are a challenge. That’s is my reason. It’s more complicated try to simulate a damaged area than an intact one. For instance, how can we effectively represent a burned effect? Painting a camouflage is a straightforward method, but these irregular effect are more complicated. Perhaps this is a second reason because this kind of vehicles is special for me.

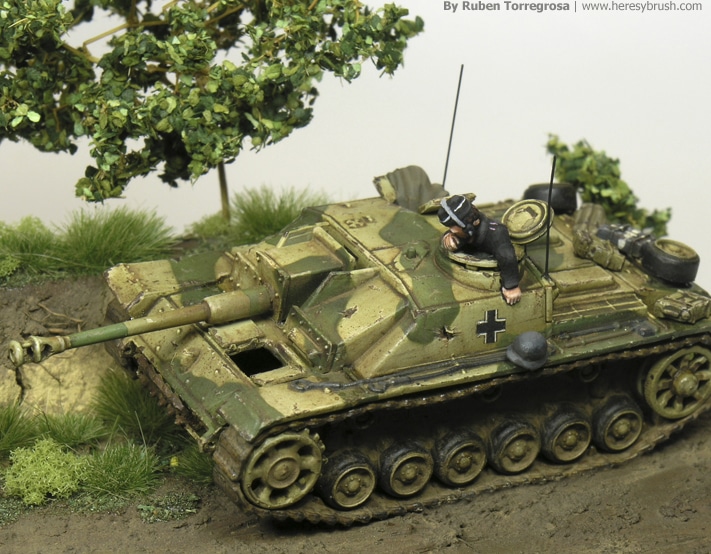
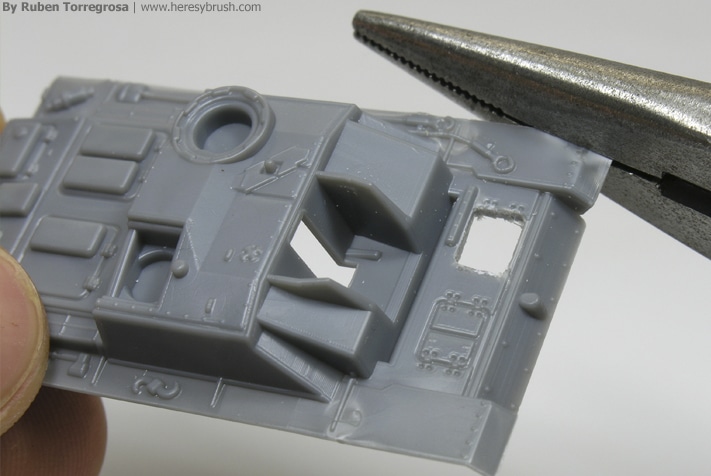
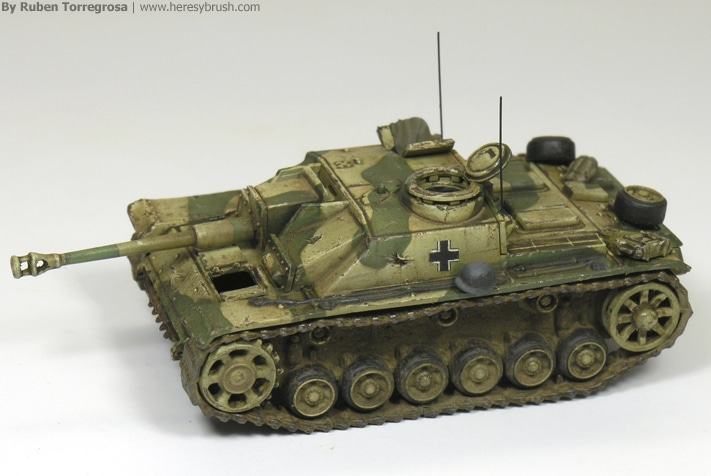
In this post I want to show some simple methods to simulate damages on our vehicles. First and foremost, we have to considerate that the plastic is the easiest material to work. We can easily perforate it, fold it and so forth. With resin we can still do some effects, but we are more limited. In my case, I’m portraying a Stug G which has been abandoned by its crews. Basically, I will make some hits and open several hatches to confer it an abandoned looking.
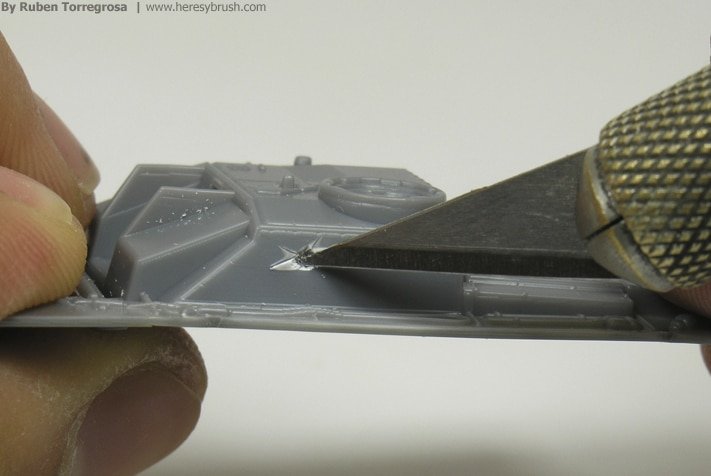
To create impacts on the steel we can easily use a modelling knife. We cannot only do the hole, but we can also create some chipping effects or splinters. We can also use a hand drill, but then we only can do the hole. Anyway, we DON’T want to totally perforate the armour, just create a small hole. The process is very simple. Sink the knife on the surface and twist it to create the hole. Then, mark some lines emerging from the hole, and give them depth. Remember, we SHOULDN’T fill the whole vehicle with this marks. One, two or maximum three are OK, but more is a bit unreal. Of course, it depends on what do you want to represent (The frontal armour of a Tiger tank can hold too many impacts!), but we shouldn’t abuse. We can also play with the depth of the different hits.
The fenders were easily damaged because impacts with other vehicles and other stuff. We can simulate this effect with pliers and smoothly folding the fenders. Notice we should avoid the “teeth” of the pliers. We can fold up or fold down the fenders. The idea is to deform the original shape. Once more, we shouldn’t abuse of this method. Try to include variety in your model: once side more damage than the other, for example.
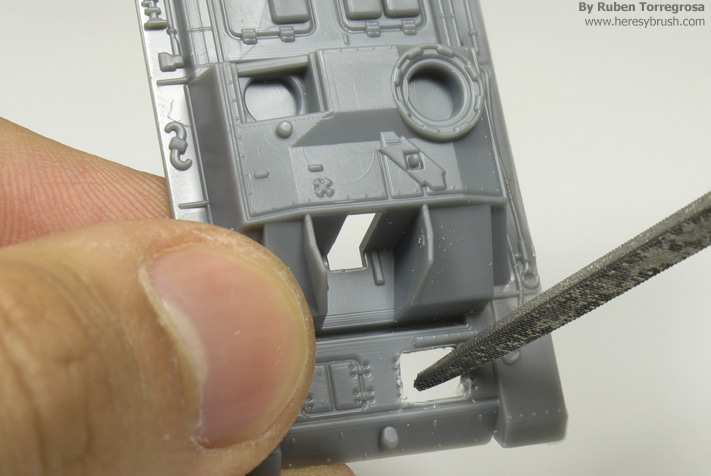
Some hatches are already opened, but others no. If we want to represent that the crews have run out of the tank we can open some extra hatches. For example, I have opened the driver hatch. In plastic kits this work is very easy. Before putting together the chassis pieces, we remove the whole hatch with a knife, and refine the borders with an abrasive file. Then we prepare a couple of small plastic pieces to rebuild the opened hatch (next picture). Depending on the hatch, we have to rebuild it in one way or another. Indeed, it’s very important to check on internet or books how the opened hatches look. Sometimes is not intuitive!
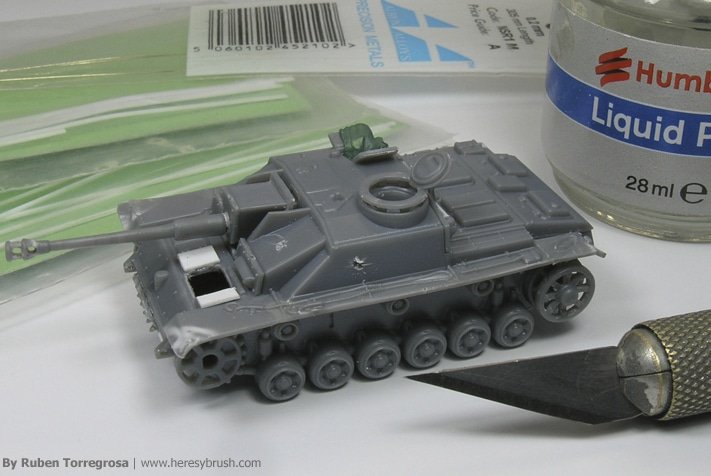
Finally we can use modelling putty and plastic card to add some details. As we saw before, we can use the plastic card to rebuild the removed hatches, but we can also use to add other (i.e. tools and other stuff which is not included in the kit). And we can use the modelling putty not only to add blanket rolls or bags, but also to represent some symbolic effect. For example, in my case I have put one blanket in one hatch to describe the rush of the crews, who forgot it on the run. Even we can add a crew who couldn’t scape.
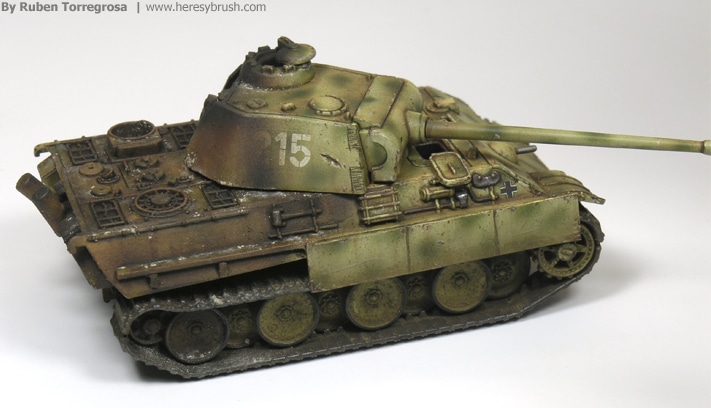
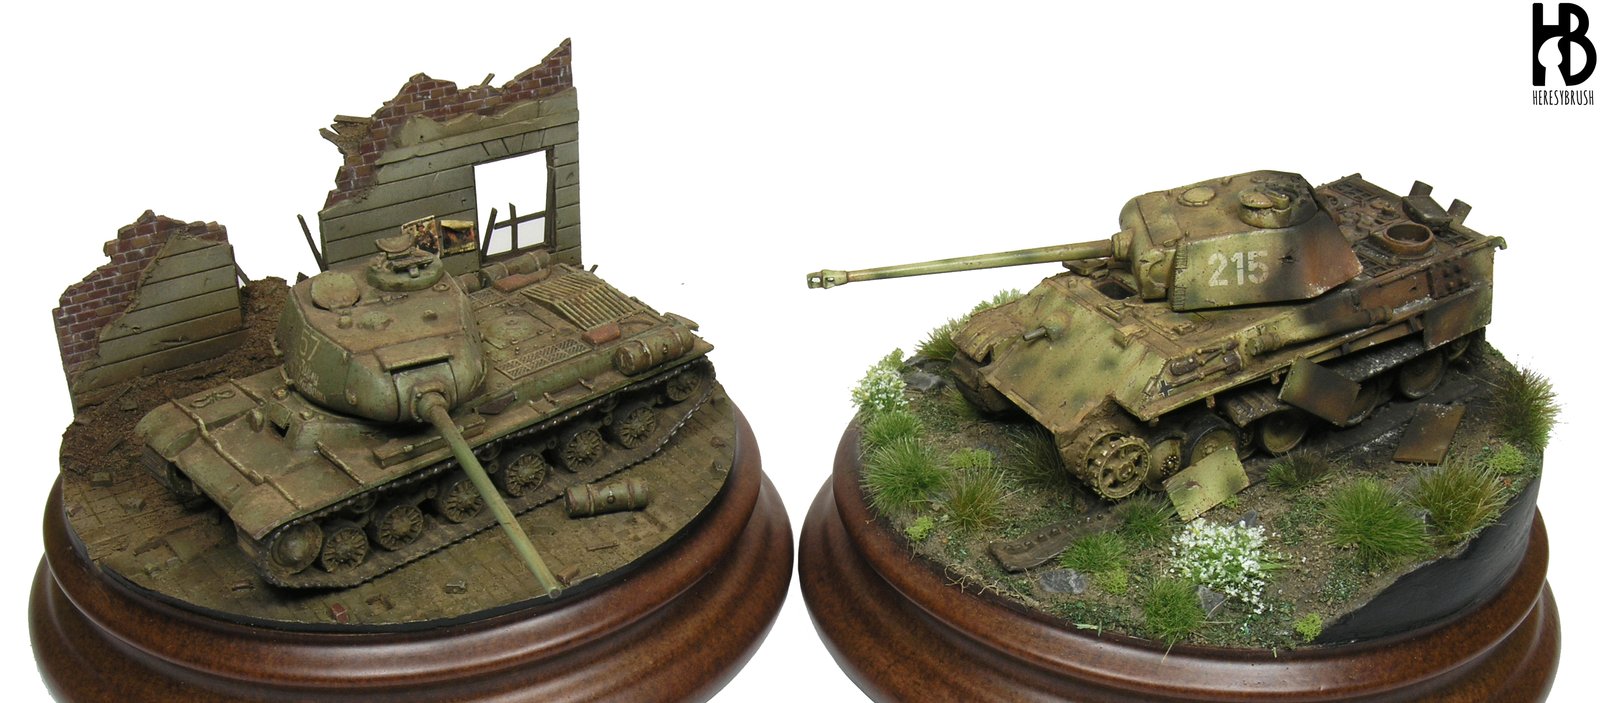
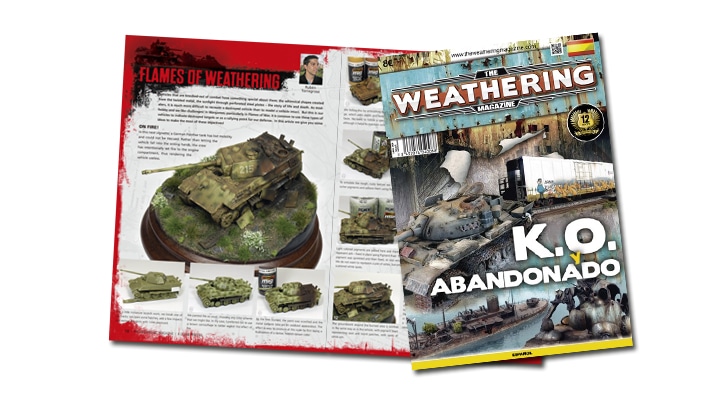
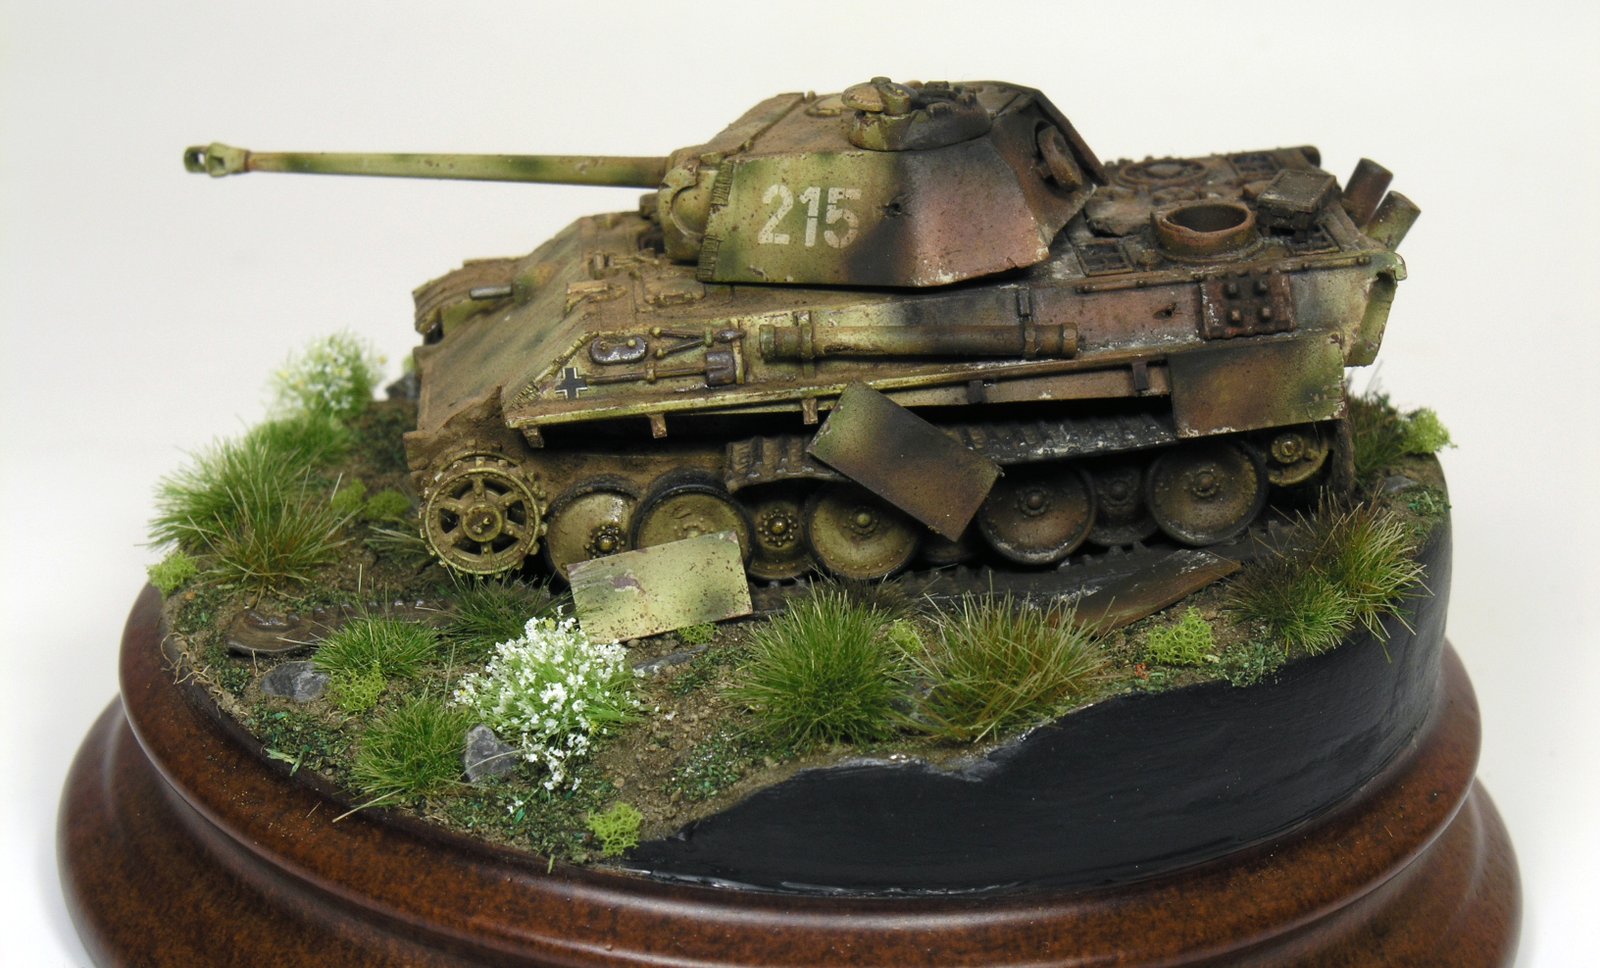
If you are interested in wrecked and K.O. I recommend you the last issue of The Weathering Magazine, dedicated to this topic. Inside you can find very different ways to represent “wrecked effects” in very distinct ambient and vehicles (from tanks to wooden boats). And in the last pages I try to explain how to simulate a burned effect on a 15mm Panther tank (the one which illustrate the title of this post).
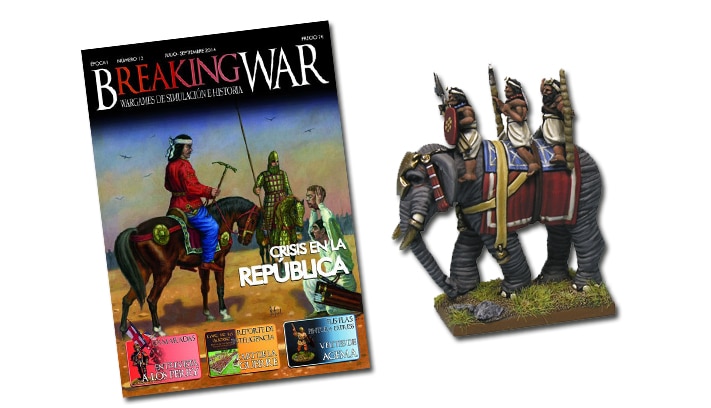
On the other hand, in BreakingWar you can find another of my painting guides featuring an Indian war elephant in 15mm from Forged in Battle.