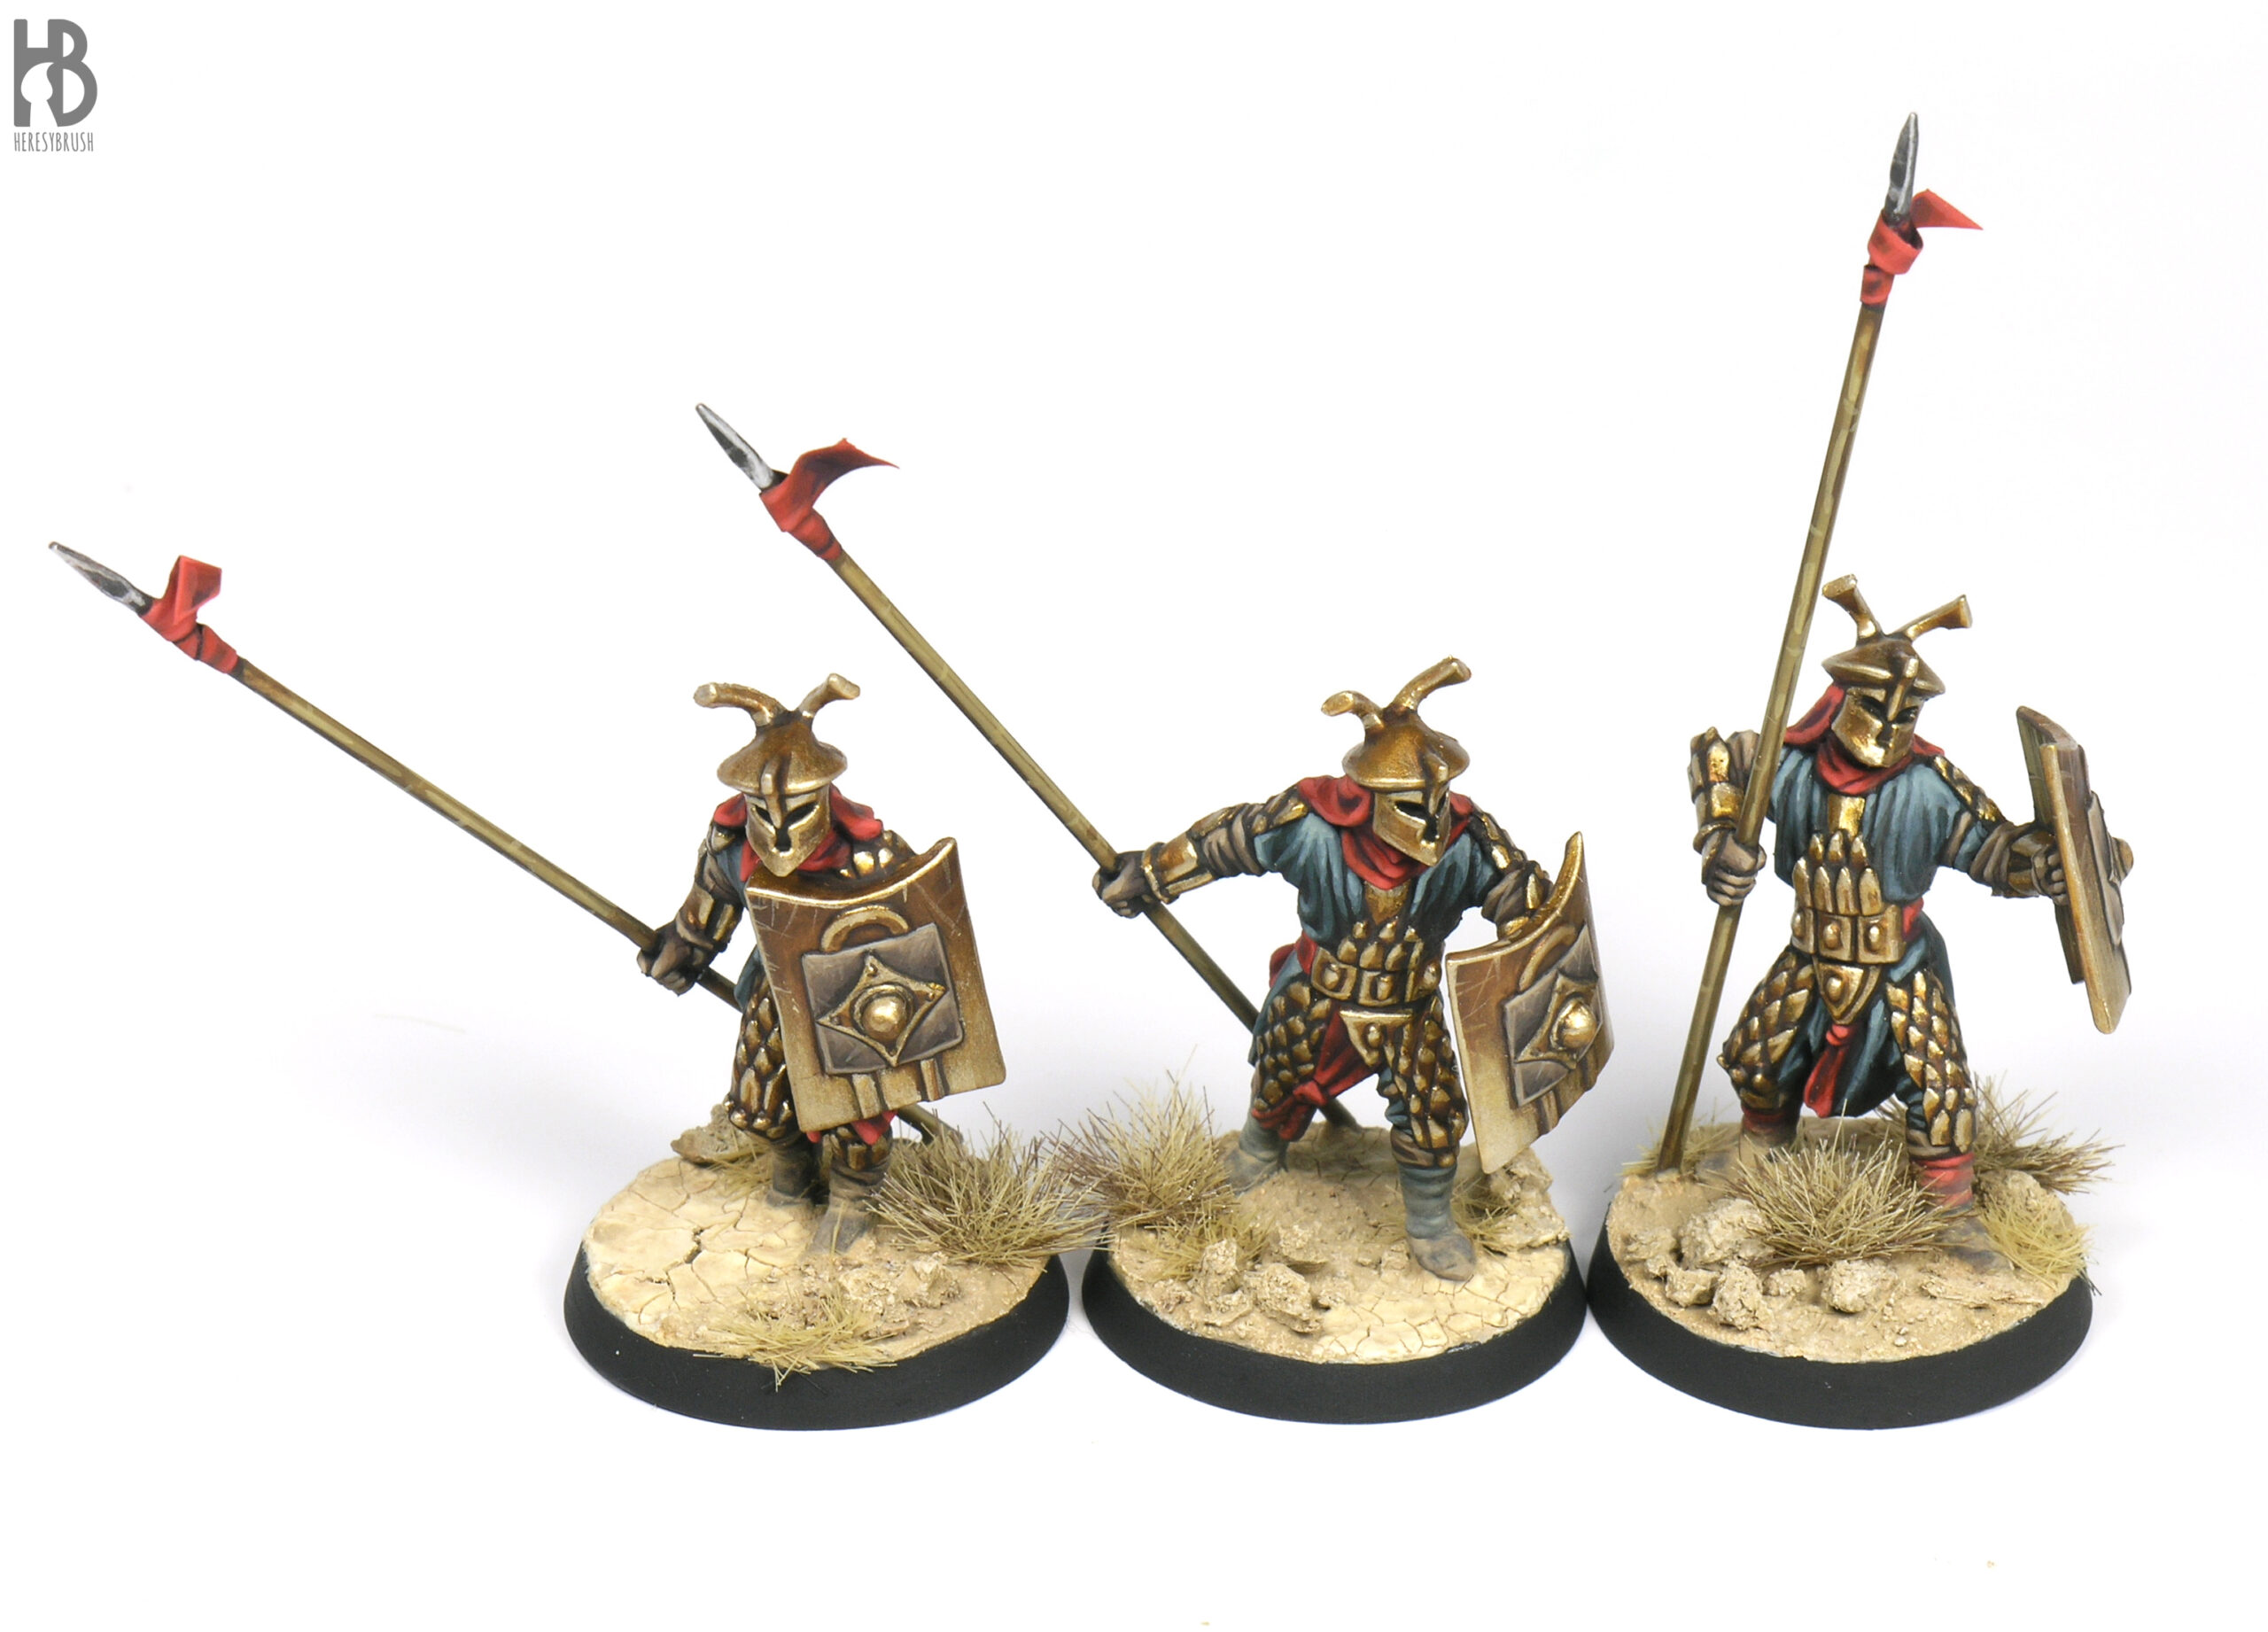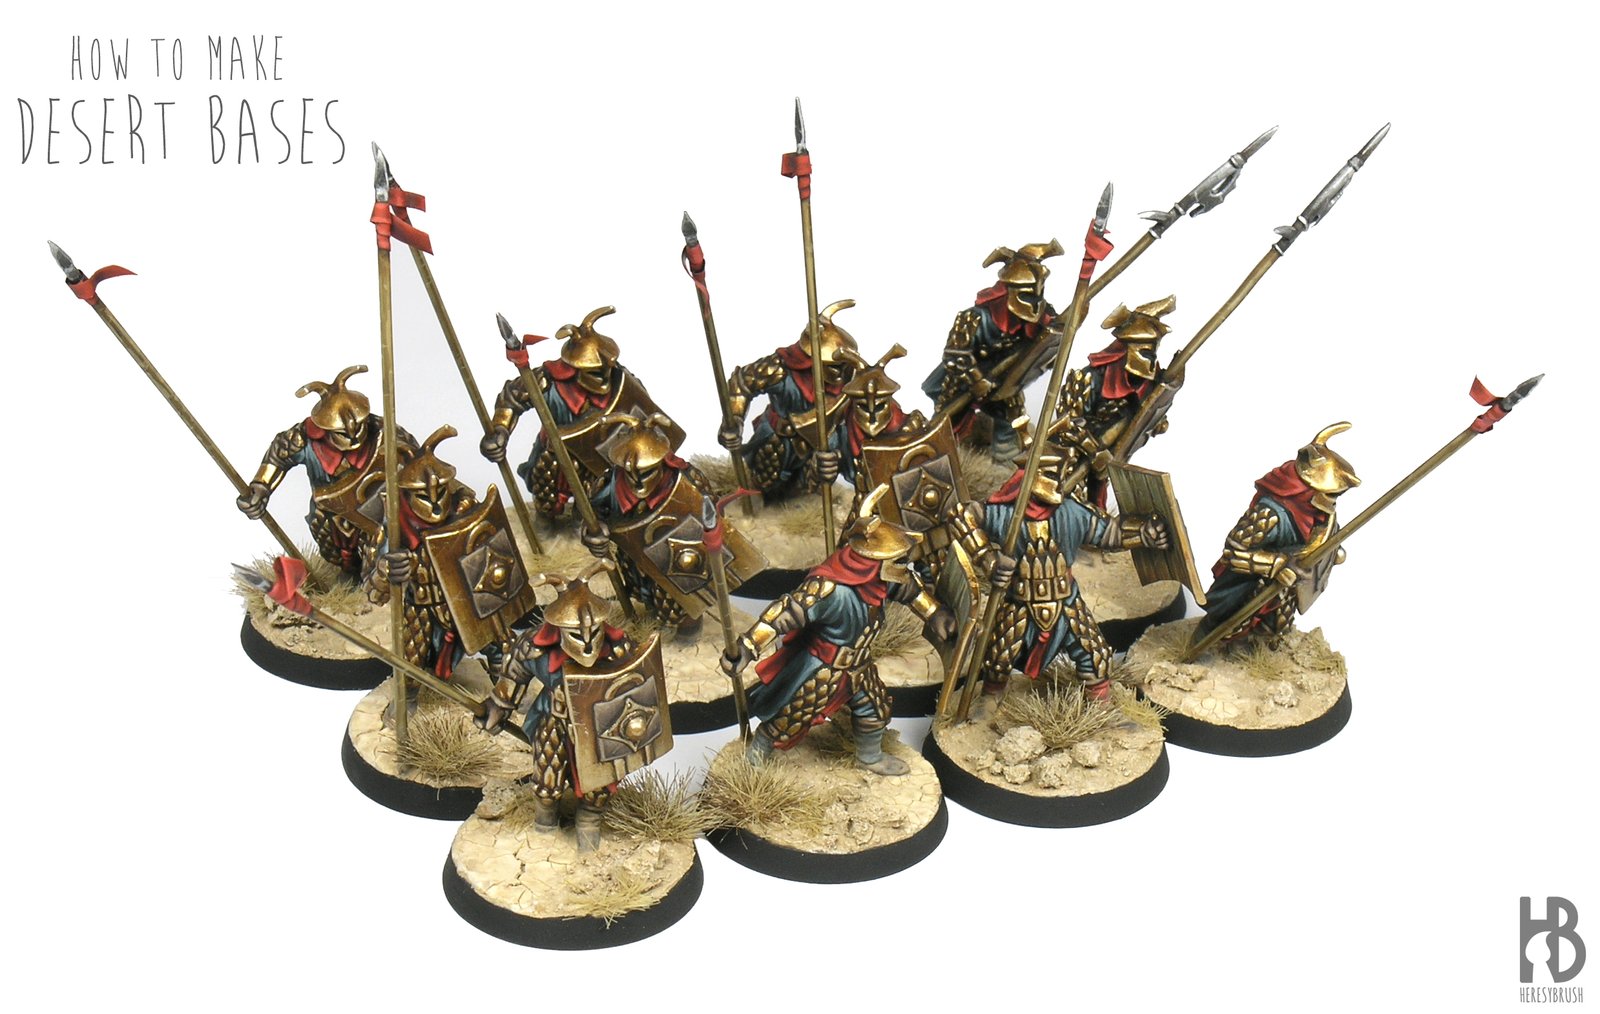
In the previous post we discussed one way to paint true metallic metal gold using as an example model a unit of LOTR Easterling (28mm, Games-Workshop). Now, we will see how to finish these miniatures by making desert bases.
According to my experience, one of the most difficult aspects of this hobby for newcomers (and also for veterans!) is how to make the bases. Probably one reason for this is that bases are not painted, but created. That is, we need to generate a texture and add 3D elements such as rocks, plants, debris, etc. Luckily, the market is full of options to decorate the bases of our miniatures for wargames. But in fact, this is often a problem rather than a solution: there are way too many products and options that people can easily get lost.
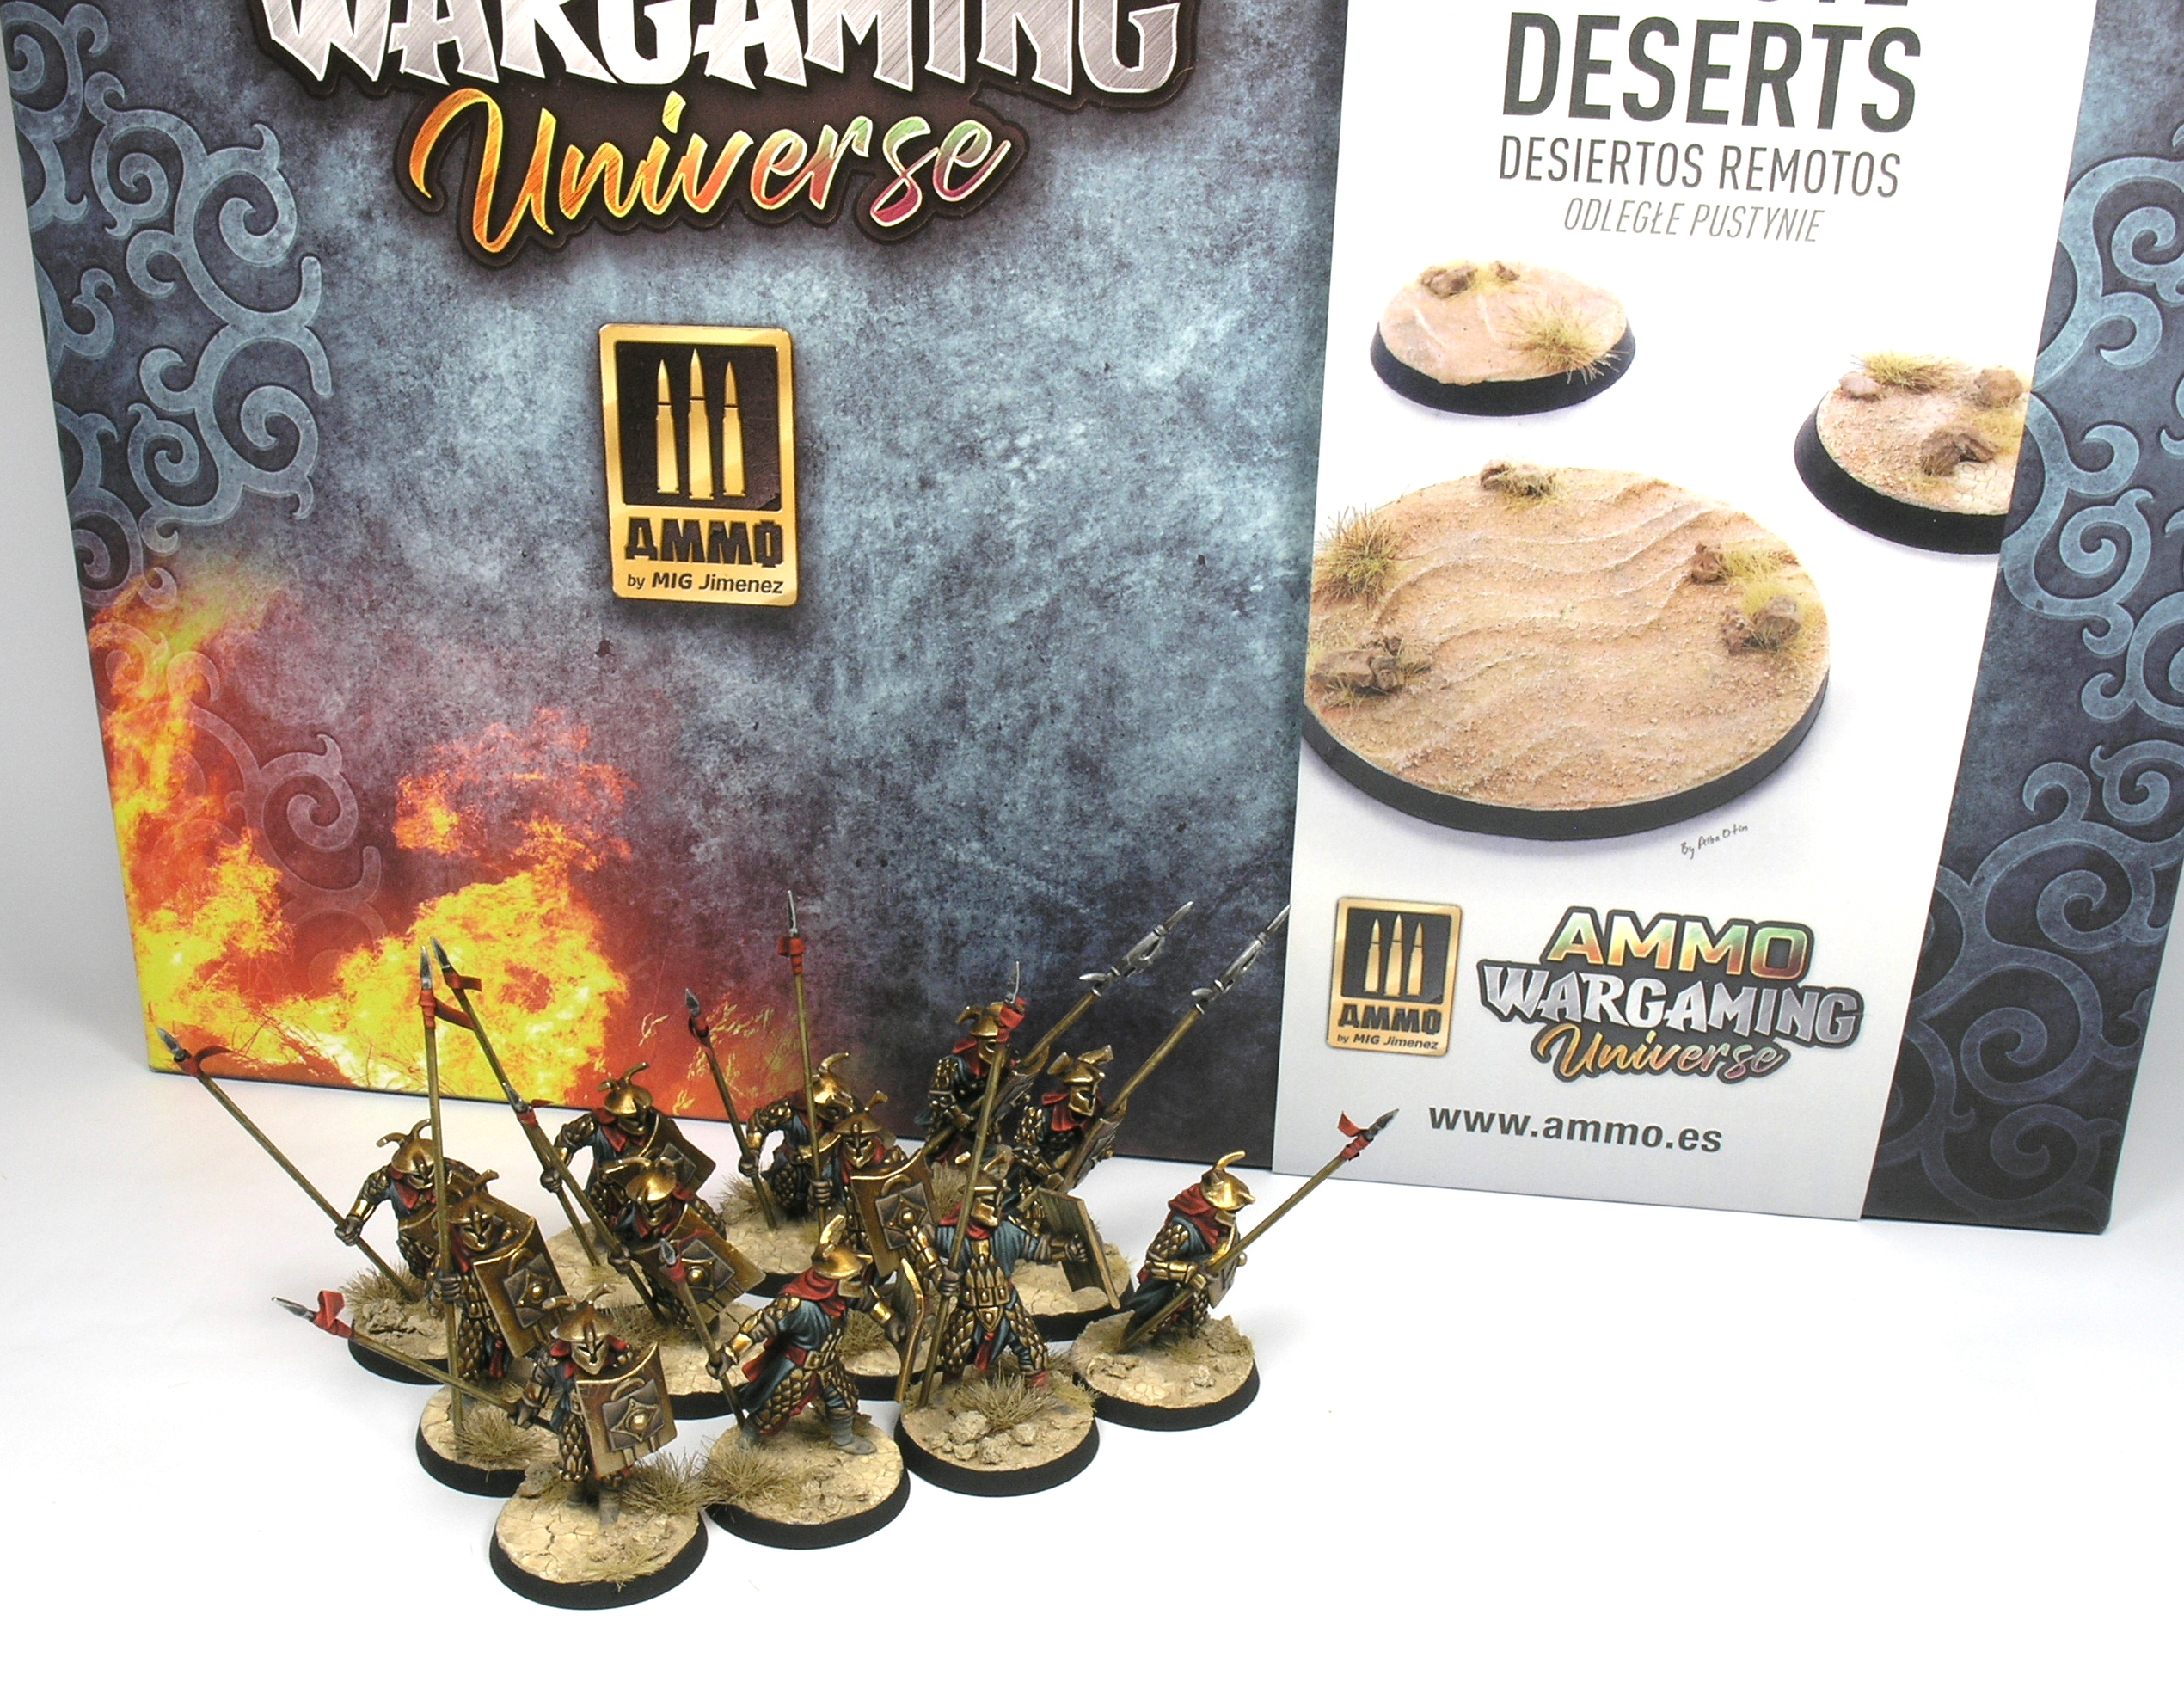
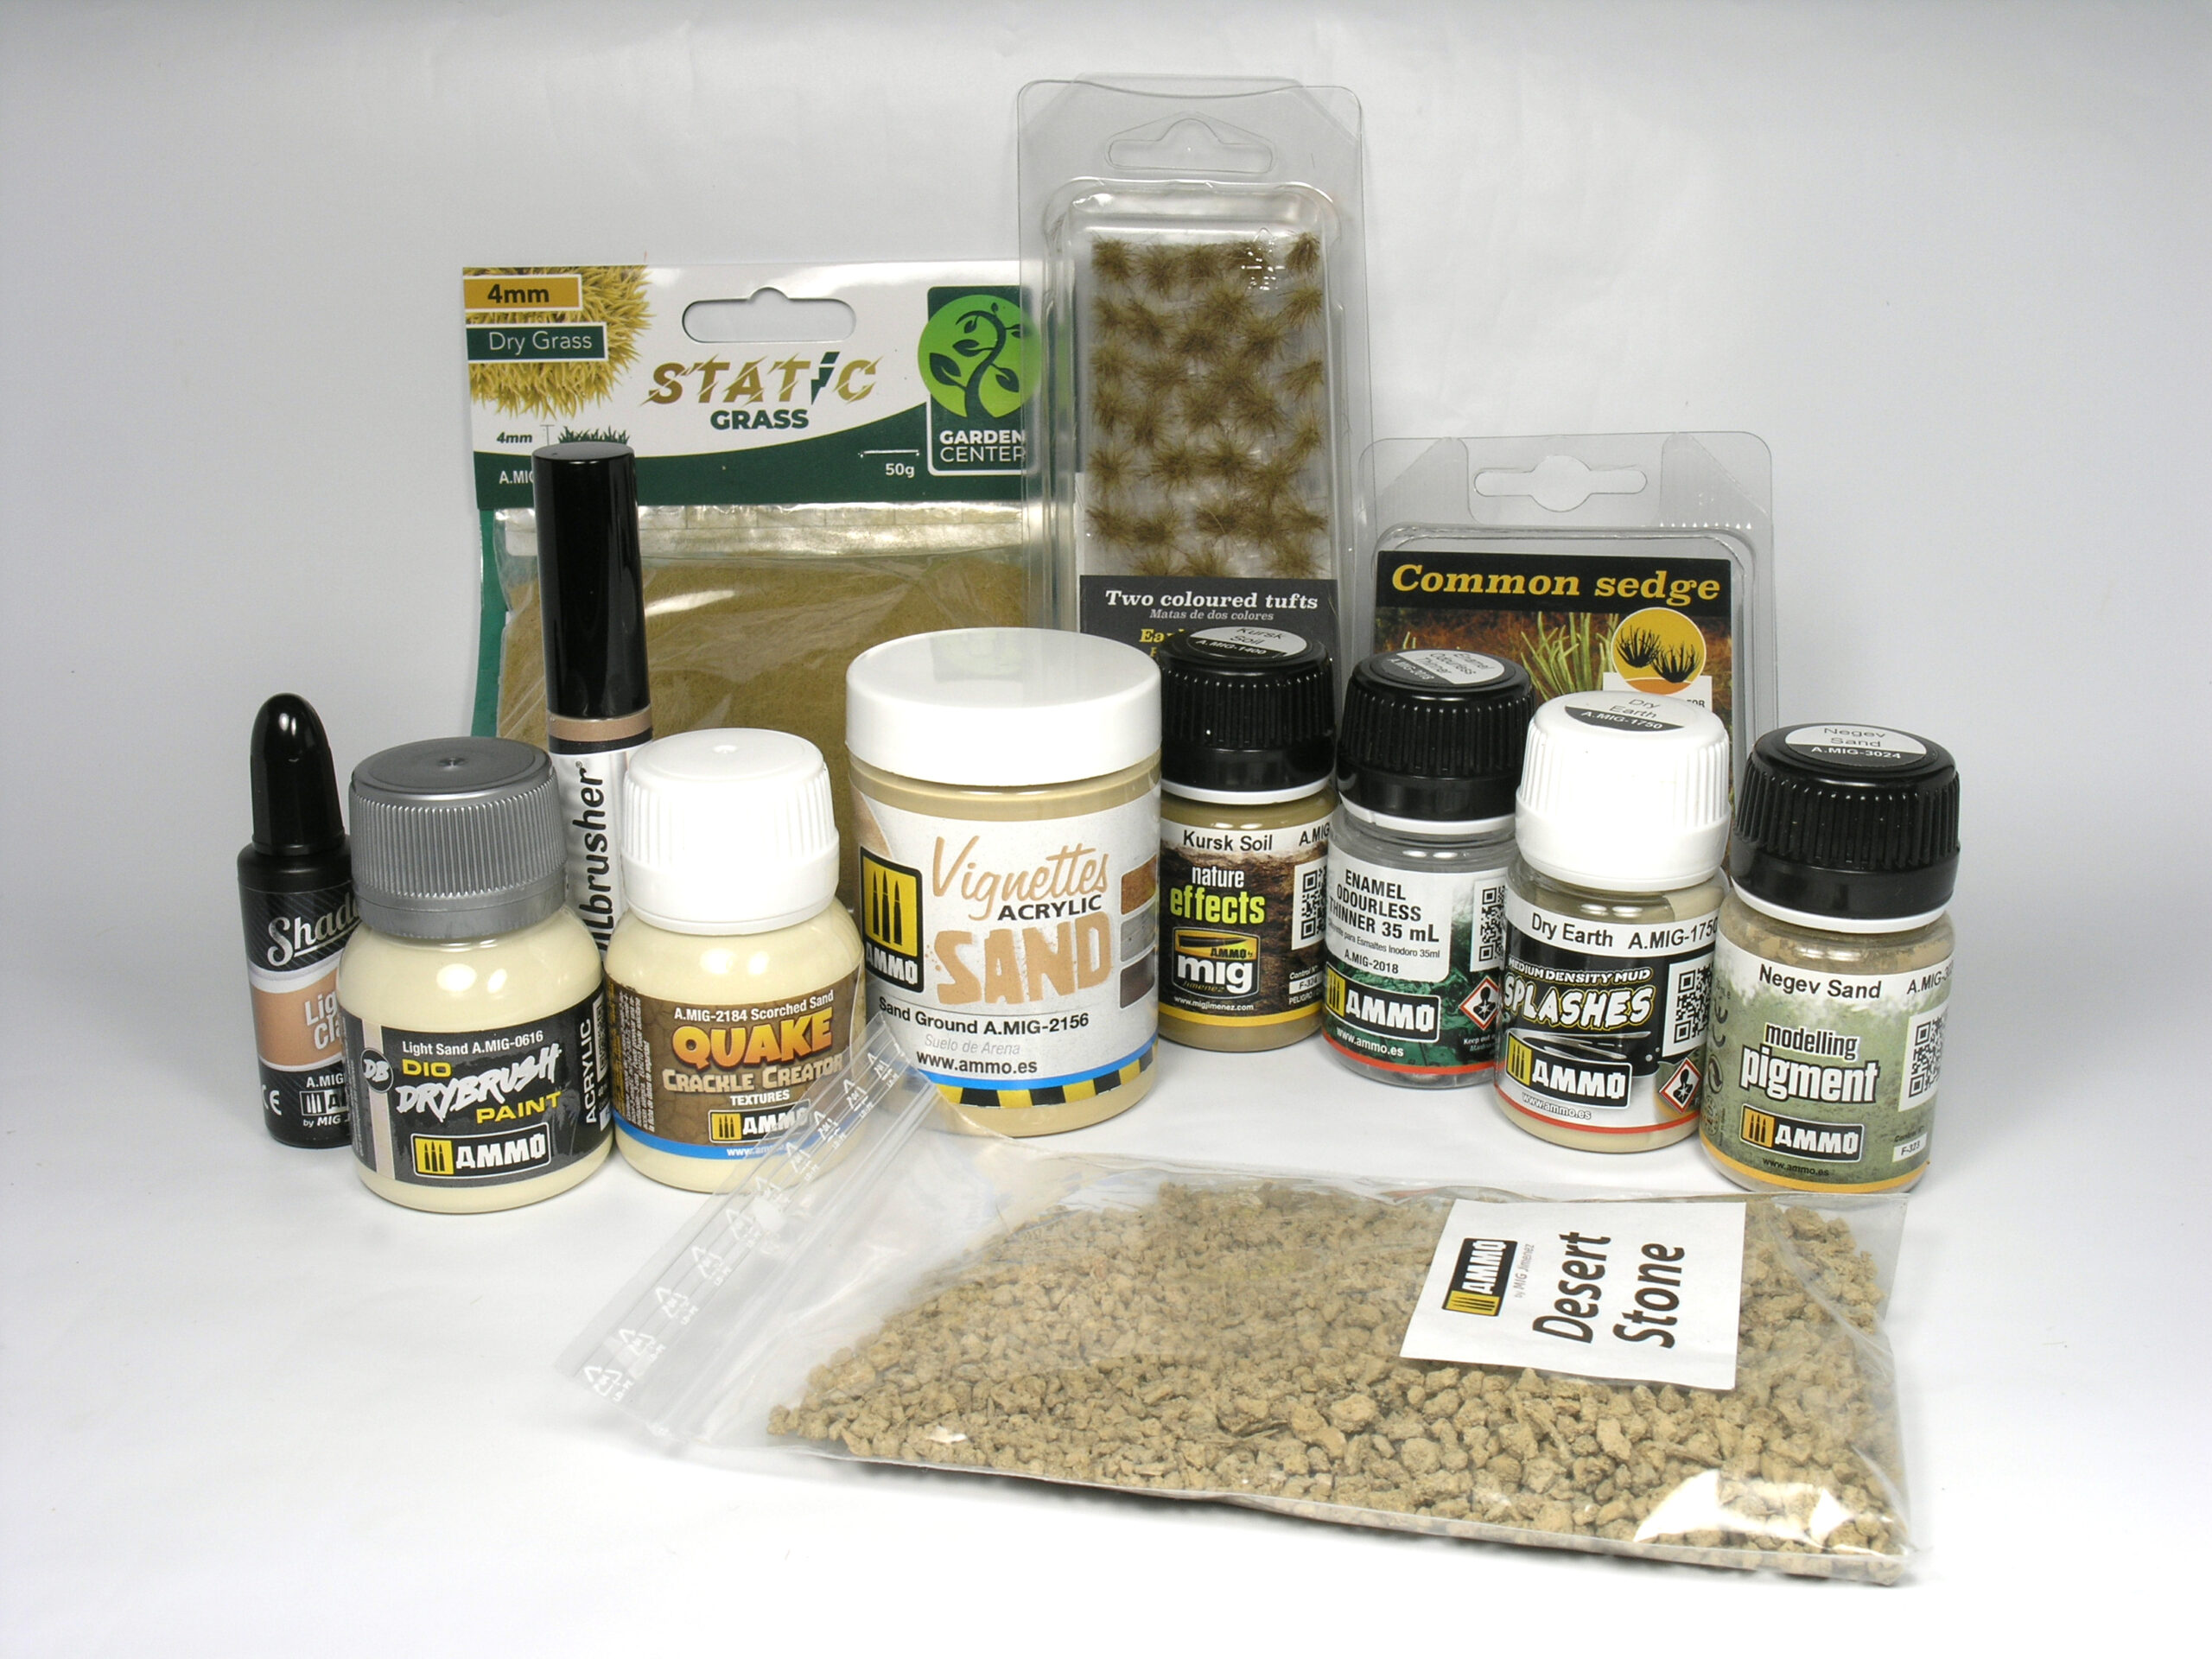
To solve this problem, AMMO of Mig Jimenez is about to launch several thematic boxes within the frame of their new branch AMMO Wargaming Universe. Some of these boxes are meant to make specific types of bases or landscapes, including in a single box all the products we might need for it: acrylic textures, acrylic paints, enamels, oils, pigments, rocks, grass fibers, grass tufts and paper plants, for example. Furthermore, the box also contains a booklet explaining how to use the products included in the box. After a description of each product, we can find a couple of step by step tutorials explaining how to combine them to obtain different results. The box is quiet versatile, as we have many options to use all or some of the products depending on our needs.
To sum up, these boxes are a great solution to simplify our life and at the same time obtain very interesting and realistic results. If you are not sure about how to decorate the bases of your army, one of this boxes is the remedy. And with one box we have enough material to make the bases of several armies!
I was lucky enough to get in advance one of these boxes to make desert bases (thanks AMMO!) and I have prepared this step by step tutorial with it. I followed more or less the guide included in the booklet, but I added a few modifications or change the order of some steps. I used all the products included in the box except the paper plant (common sledge) as I wanted a very arid looking bases.
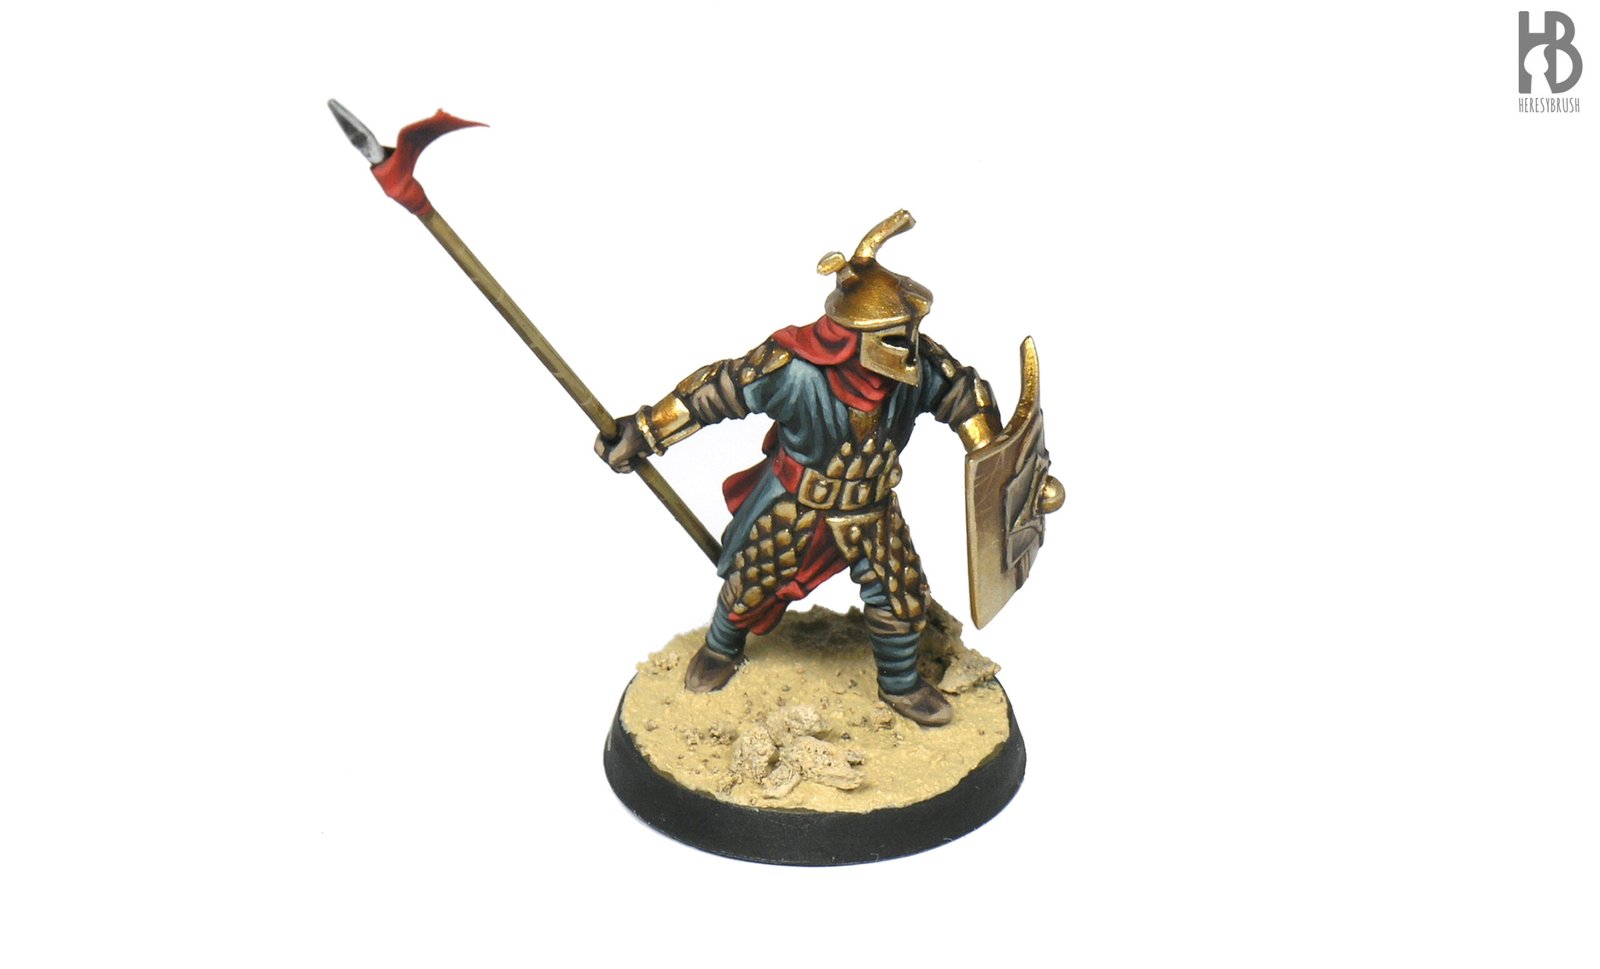
Step 1
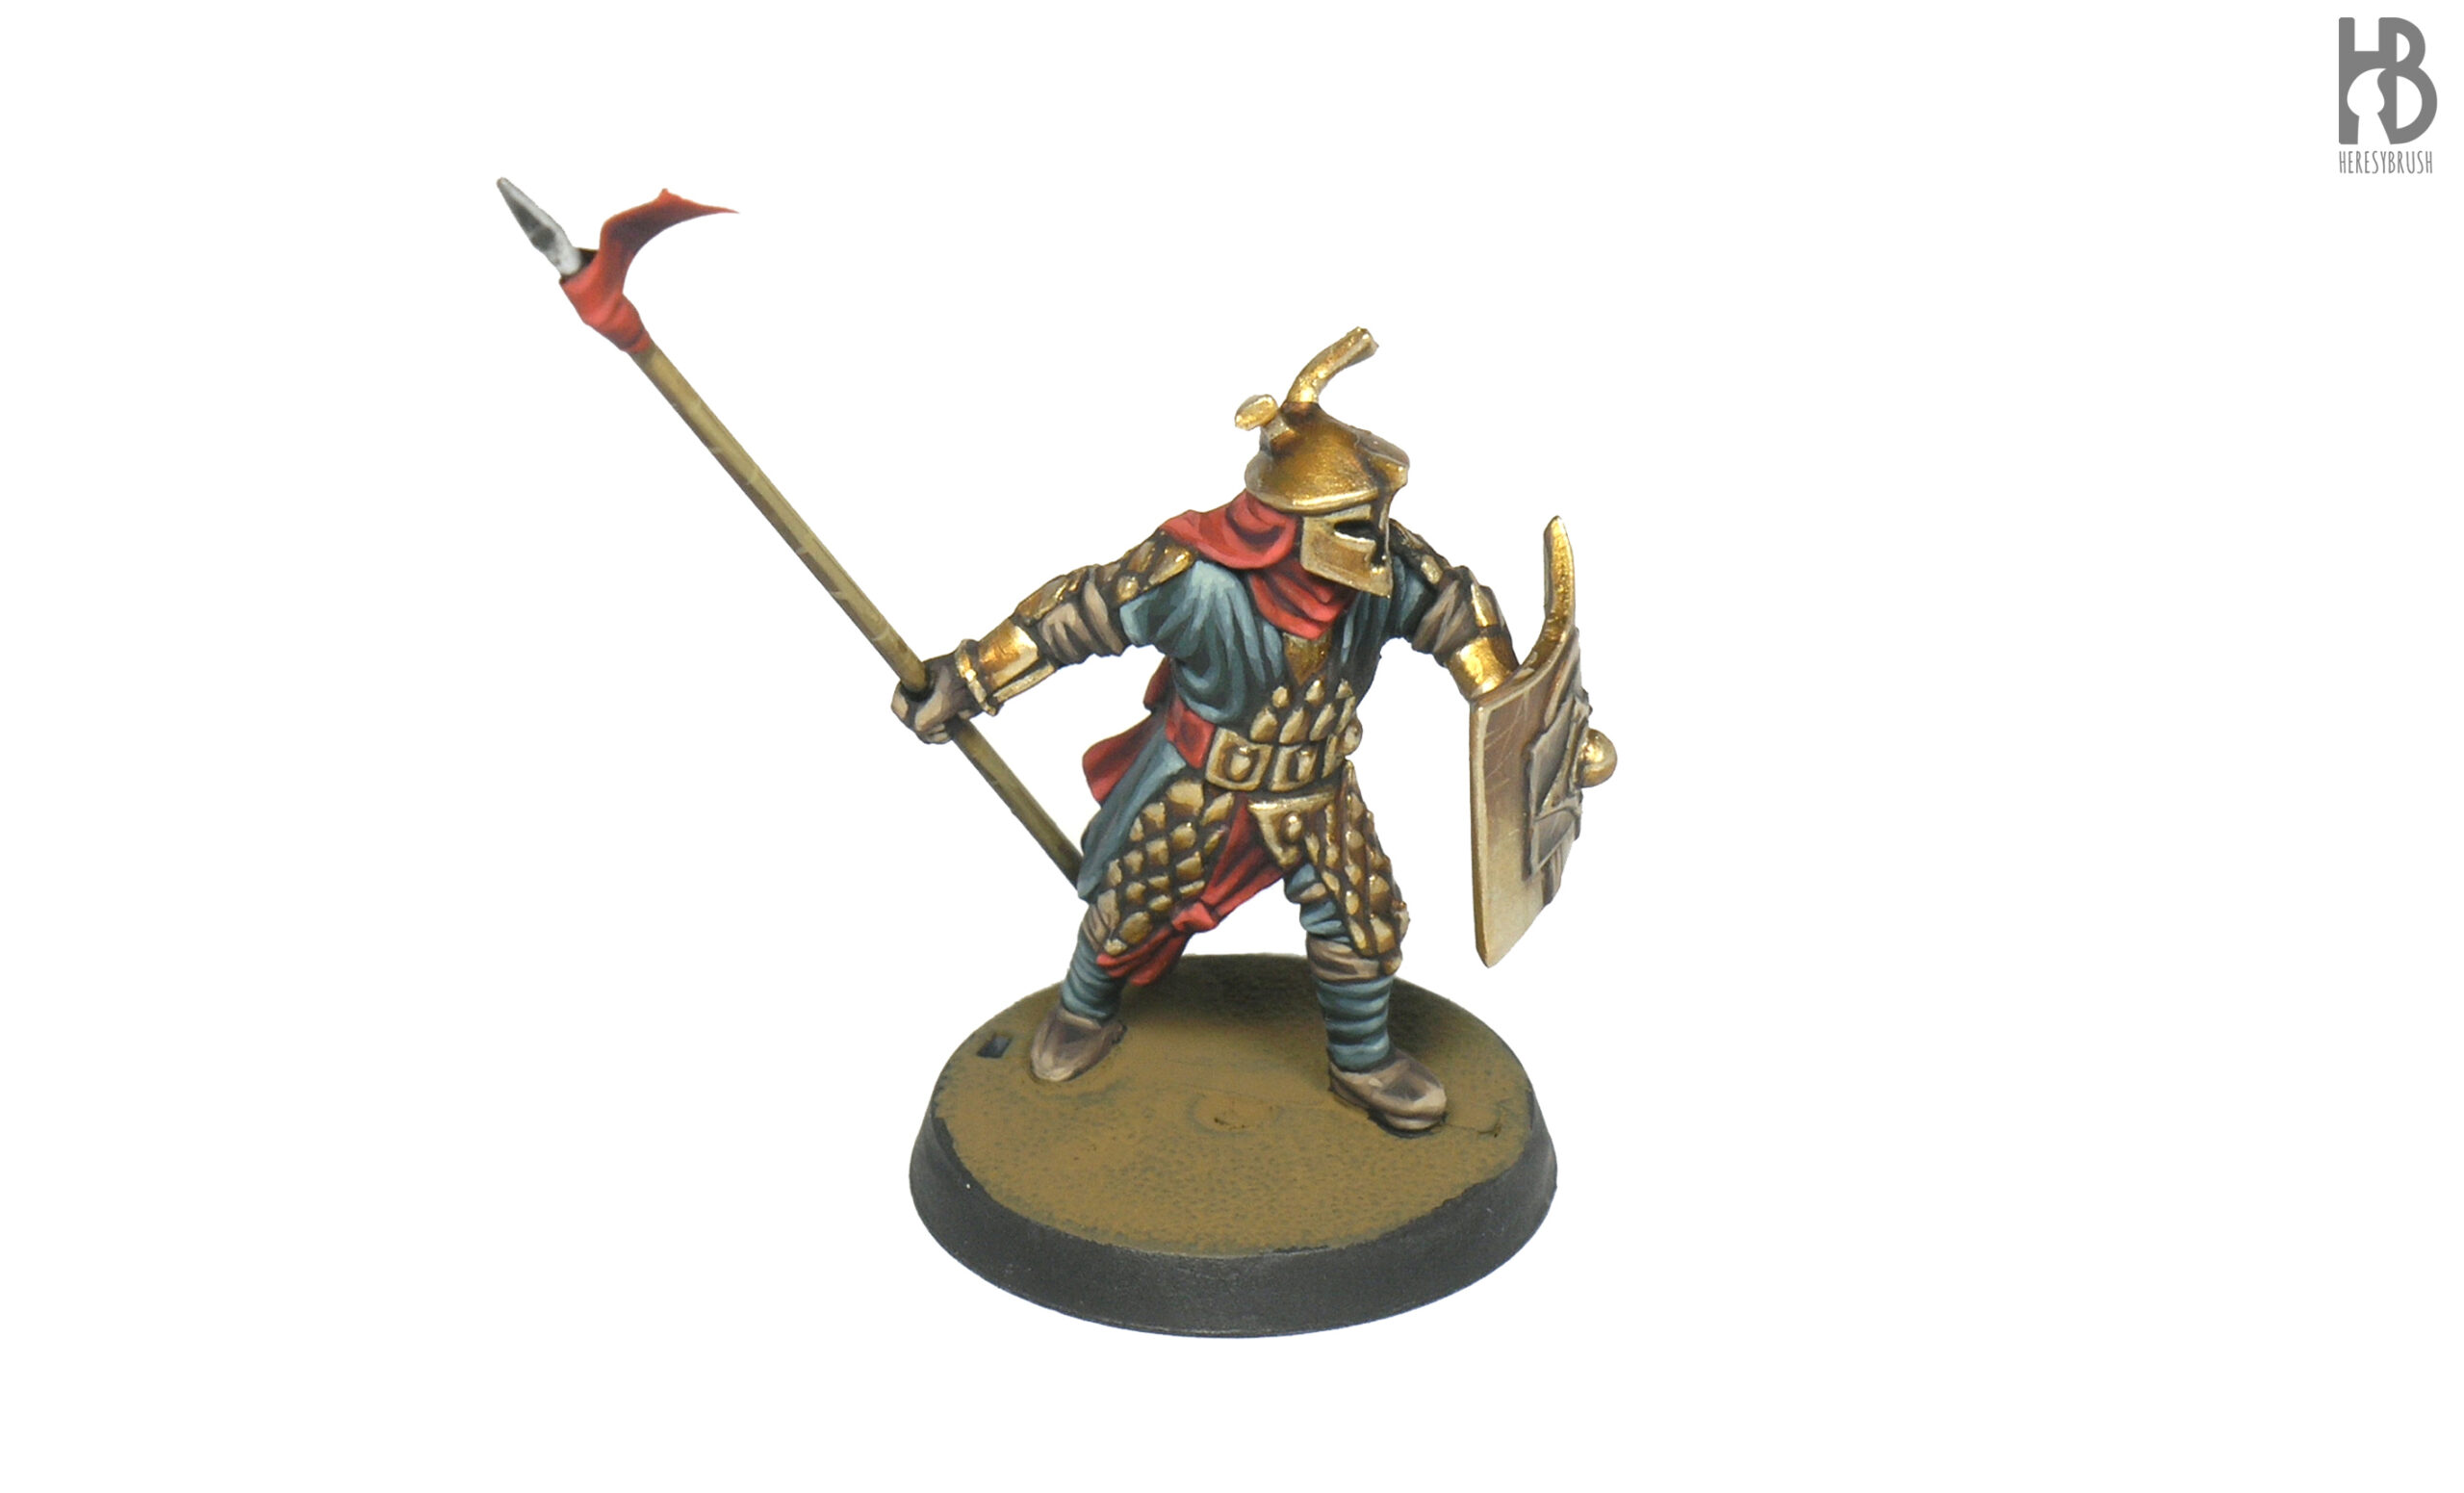
We must paint first the miniature following our favorite painting method. We do not need to paint the base, but it is important that it is at least covered by a layer of primer. This will help the following steps by facilitating the adherence of the acrylic texture or the crackle creator product. I personally like to paint the base in brown just in case later some parts are still visible.
 Step 2
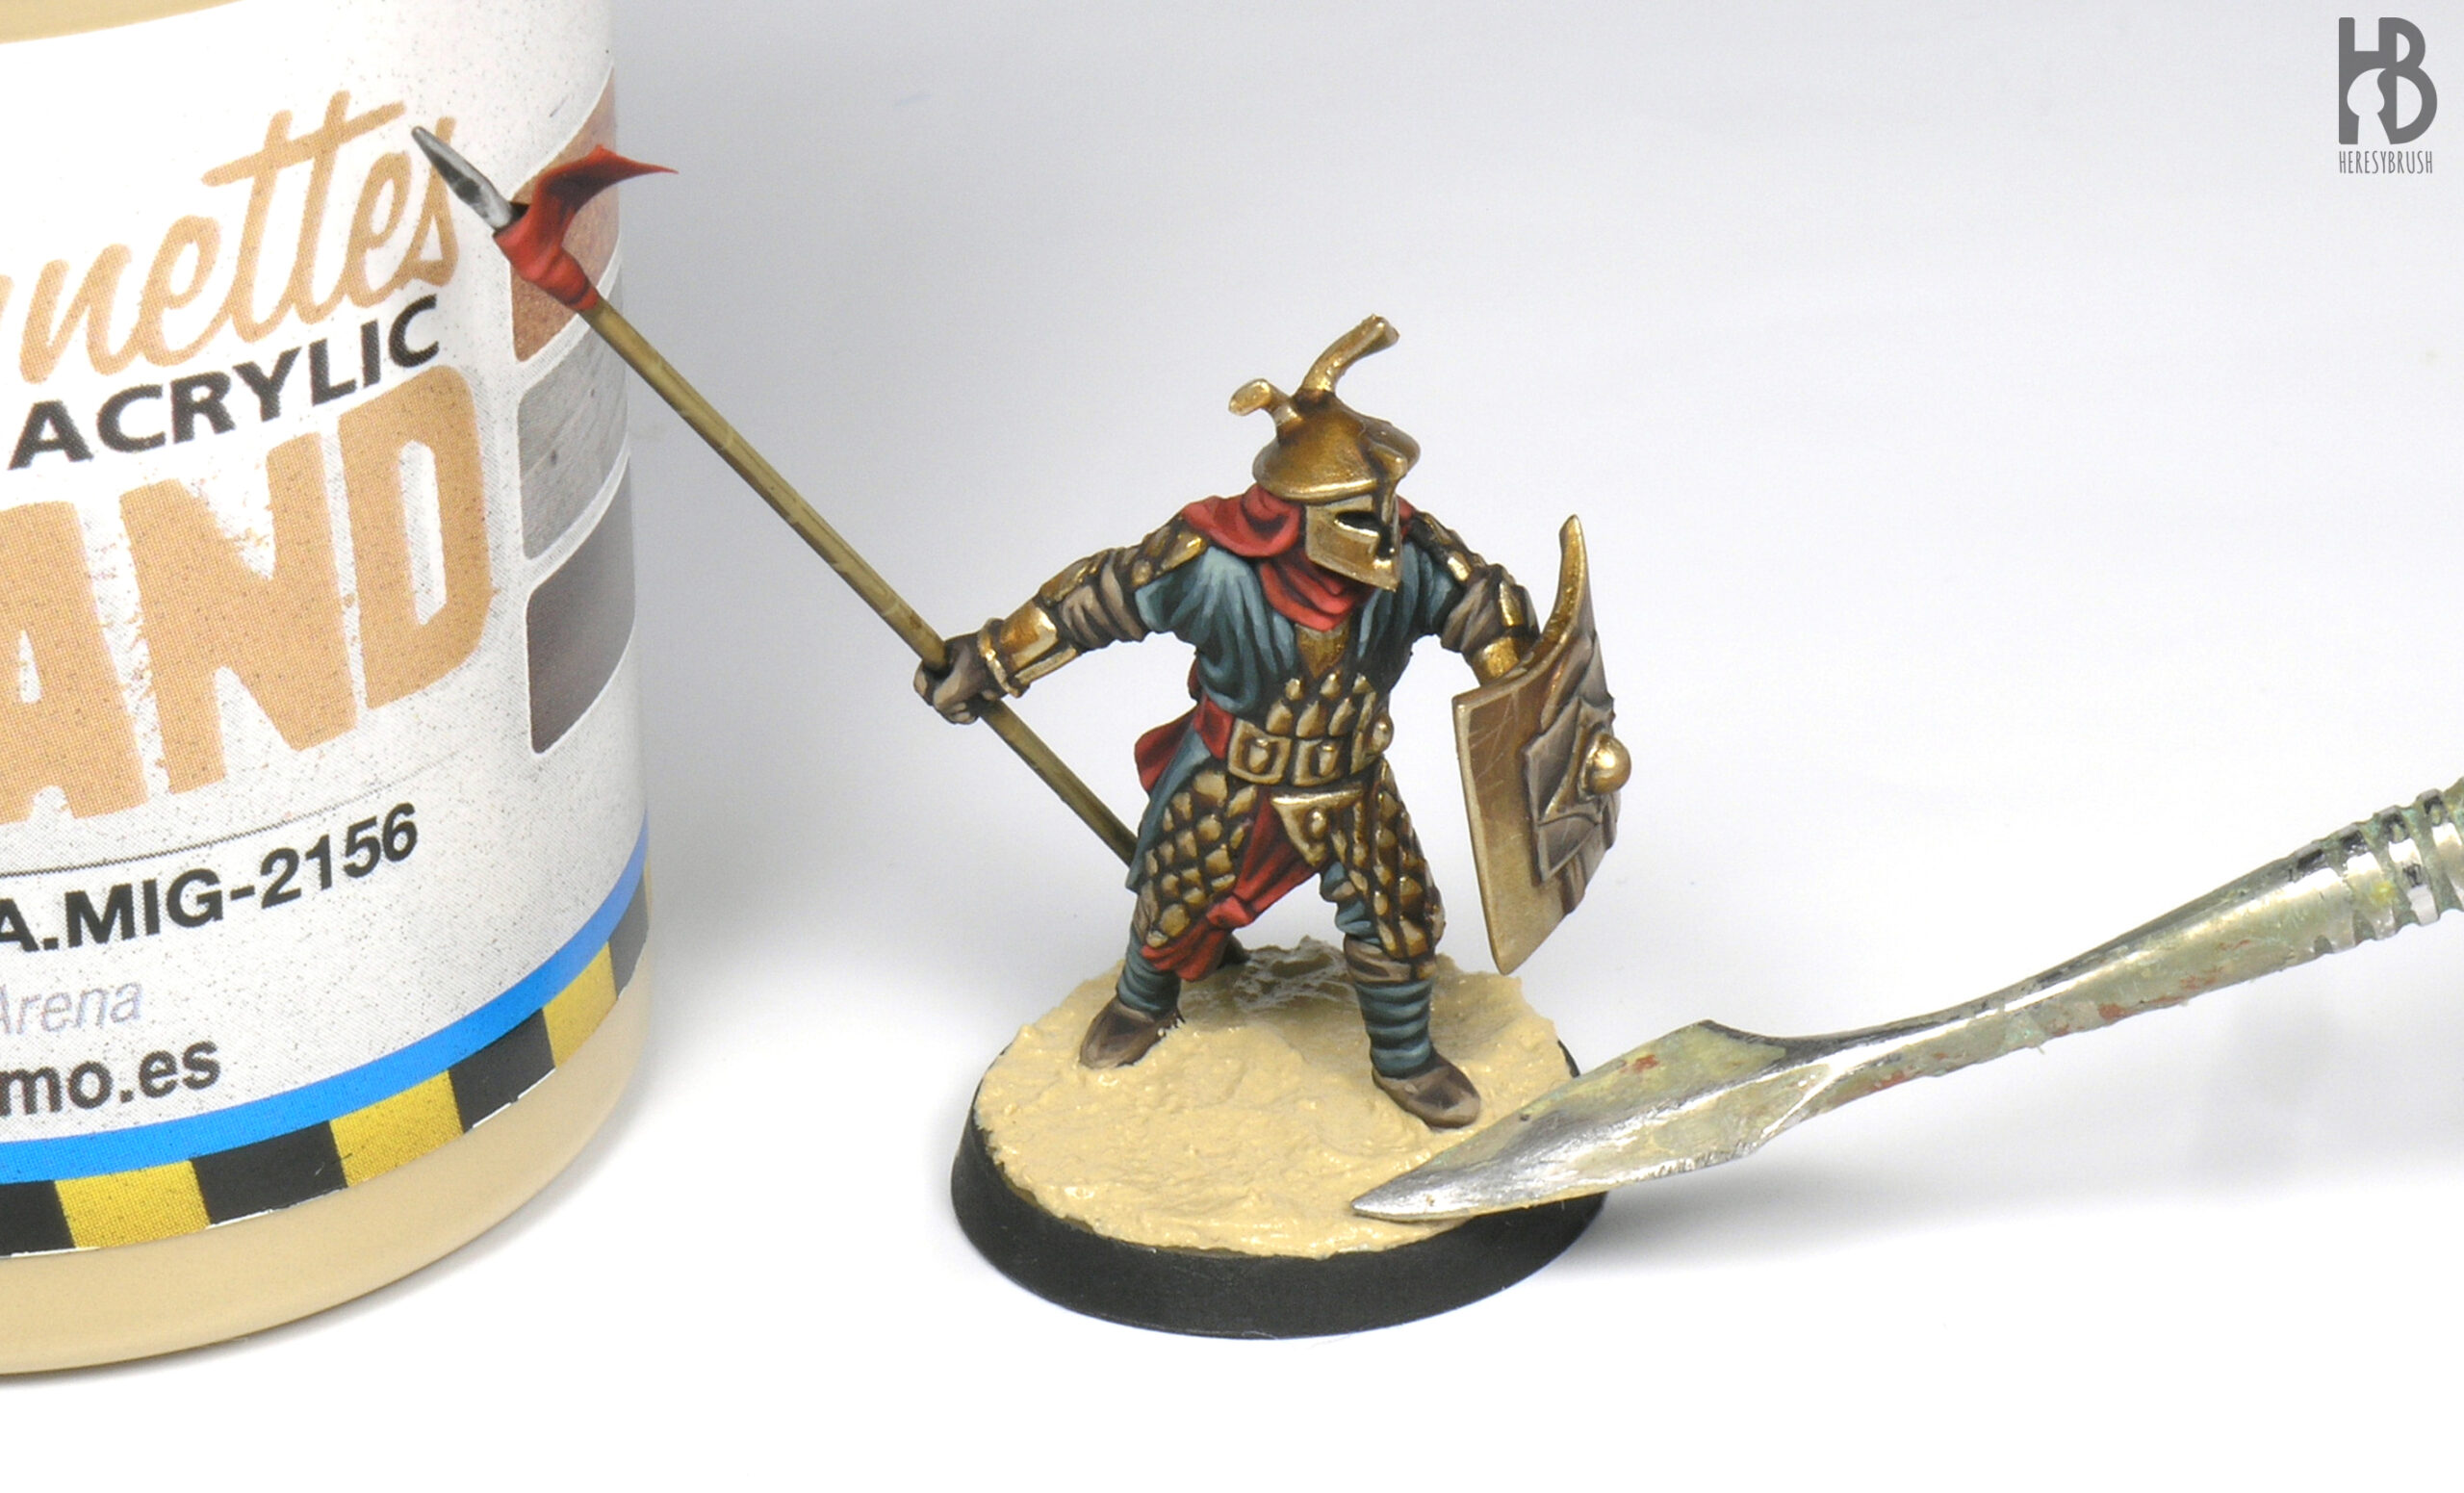
We extend the acrylic texture Sand Ground A.MIG-2156 over the base using a small spatula. We do it carefully not to spoil the painted miniature. This type of modelling product combines a texture and a color, which will save us time.
Step 3
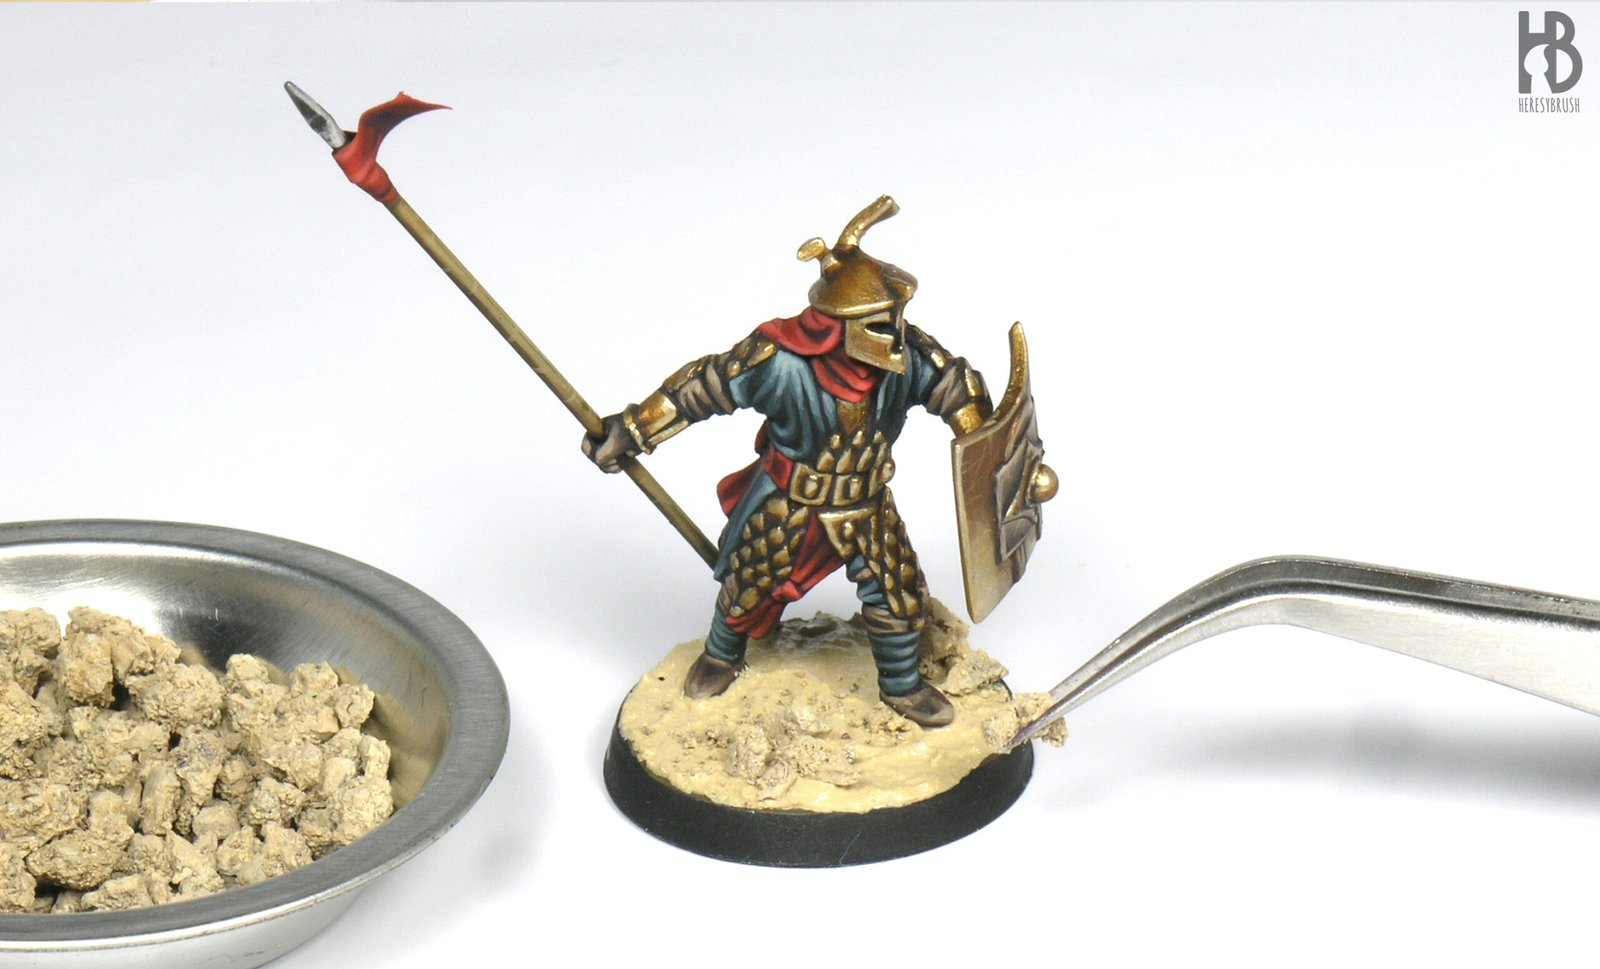
While the acrylic texture is still fresh we add Desert Stones using tweezers. We press them a bit to integrate them into the ground. We can place them in small groups but will avoid symmetries to get more realistic results. We can chop the rocks with our fingers to get small fragments.
Step 4
Once it is dry, we have a very convincing base with the right texture and color. We could even stop here! It is advisable to apply a mix of PVA glue and water (50/50) around the rocks to fix them properly.
Step 5
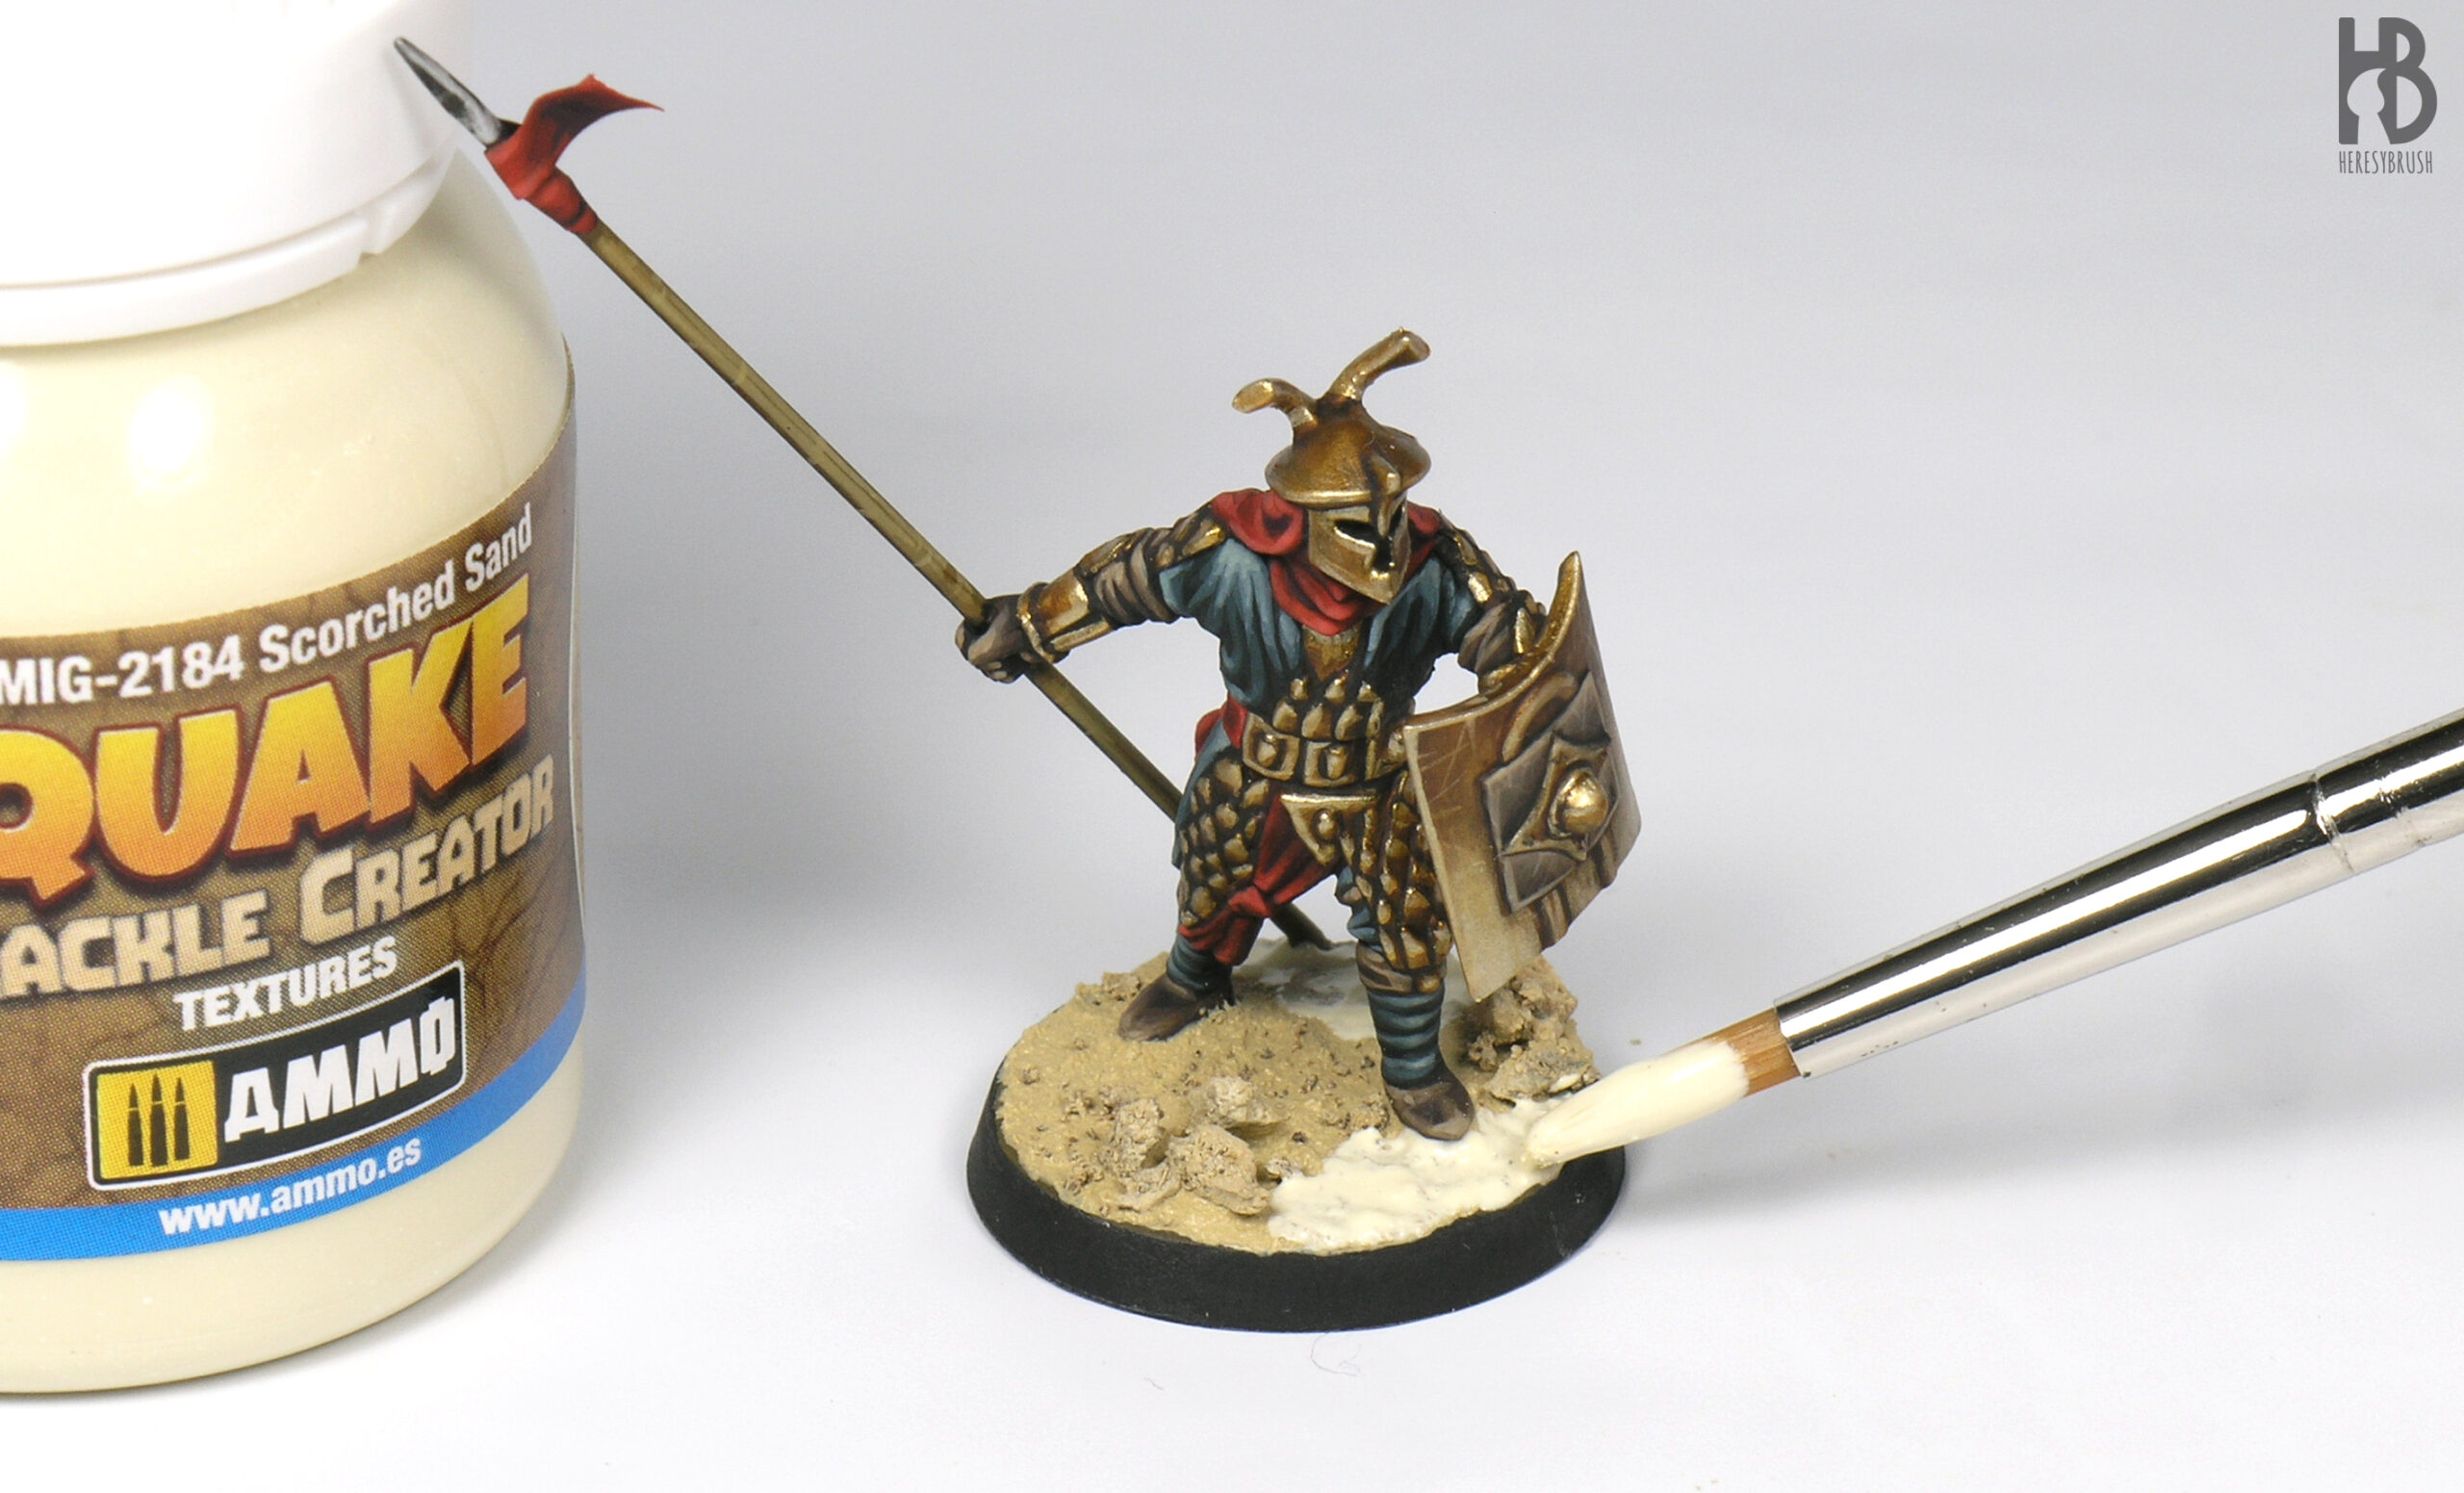
Optionally, we can create a crackled texture -such as a dry river bed- using a new range of products of AMMO, the Quake Crackle Creator. For a desert base we use Scorched Sand A.MIG-2184 that it is extended with a brush in some parts of the base. This is an acrylic paint that when dry creates cracks. The thicker the layer of paint, the bigger the cracked parts. For 28mm miniatures I applied a layer of around 1 mm. If you have never used this type of product before, it is recommendable to do some tests first.
Step 6
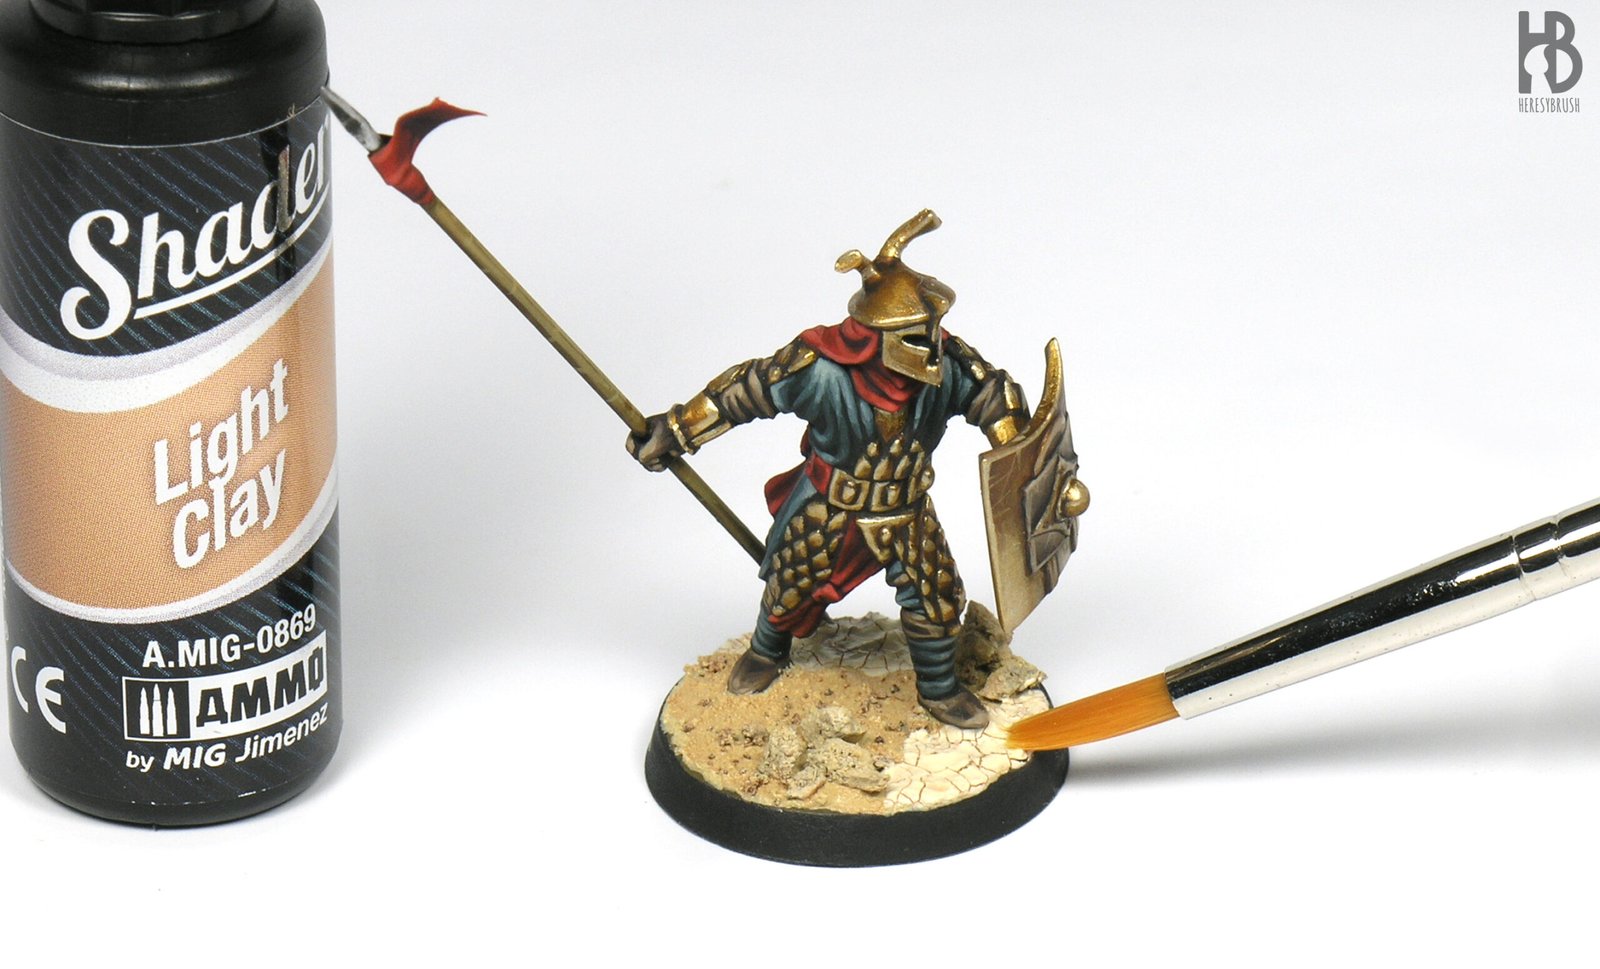
Although the textures are quite interesting as such, we can create a bit more of contrast by applying a brown filter-wash. This step will also help to start integrating both types of texture (the rocky and crackled parts). For this, we apply the Shader Light Clay A.MIG-0869 thinned with a bit of water and using a brush over the whole base except the big rocks. The orange hue of this product will also create a warmer base.
Step 7
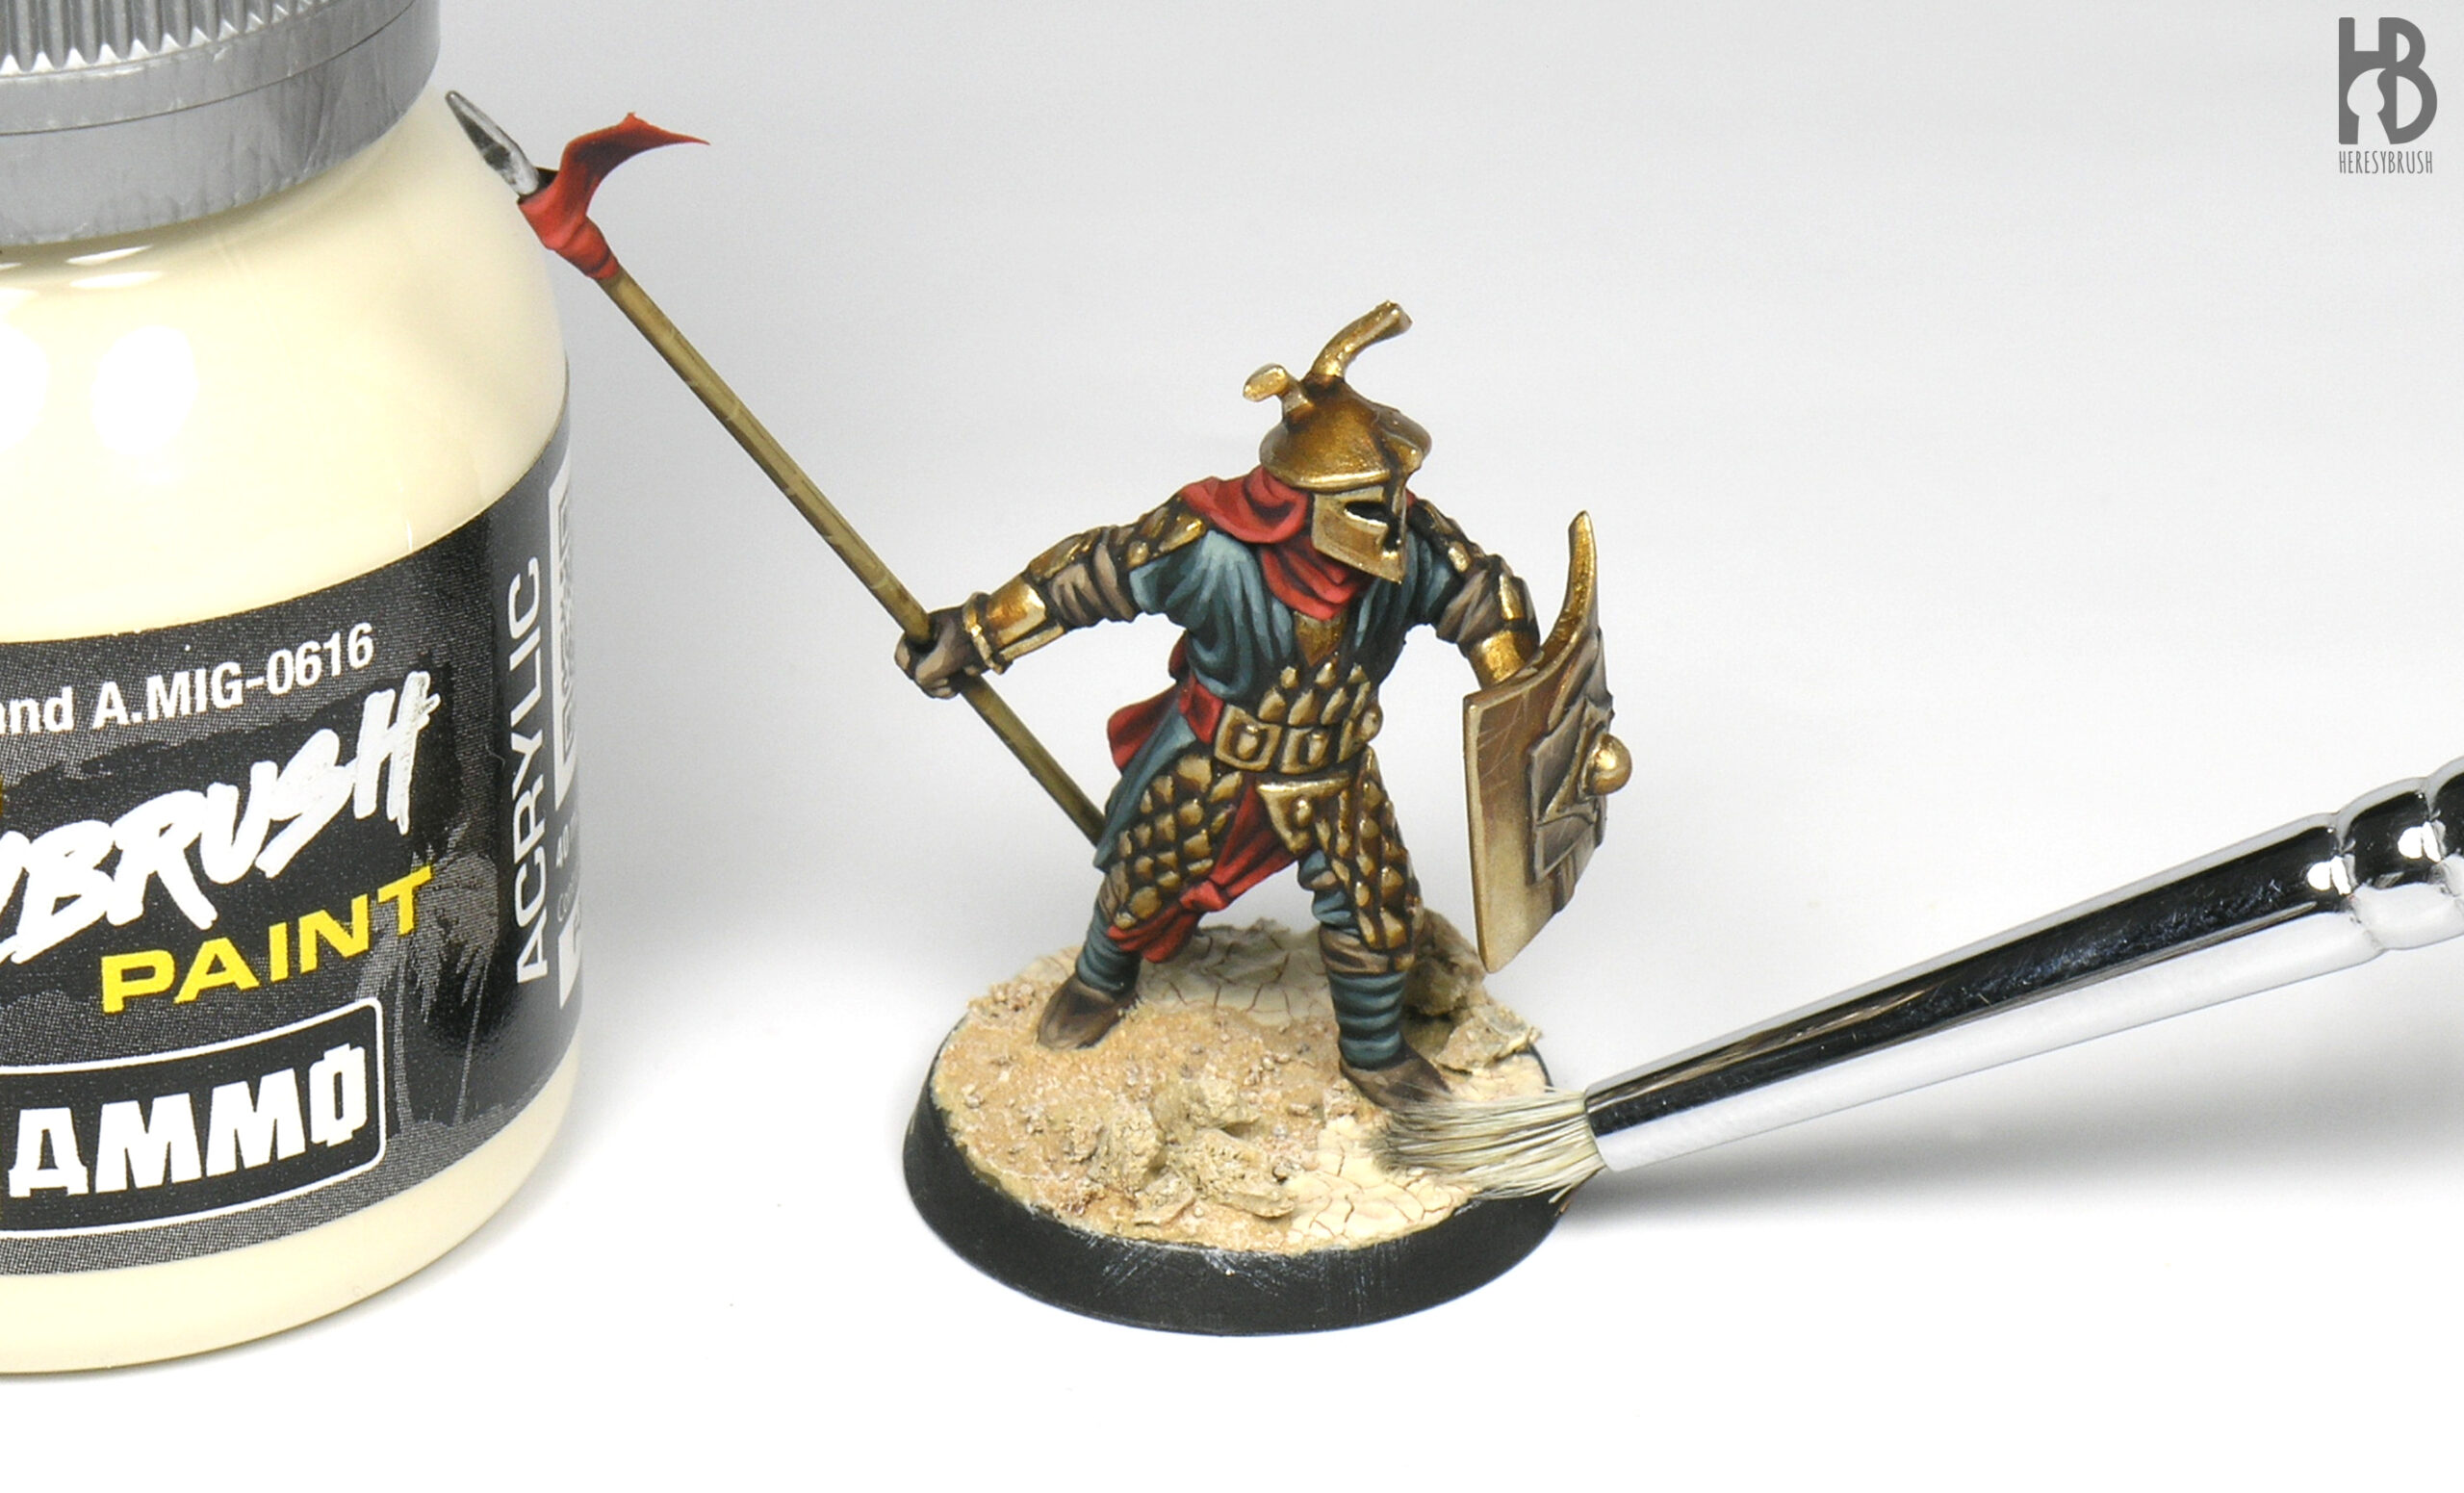
Another step to create contrast and integrate all the elements of the base is done by applying a drybrush using a light color such as Light Sand A.MIG-0616. To apply this technique we first brush off most of the paint on a piece of paper or cloth, and then with an almost dry brush we gently paint the raised parts of the base. We do it carefully again to avoid spoiling the painted miniature.
 Step 8
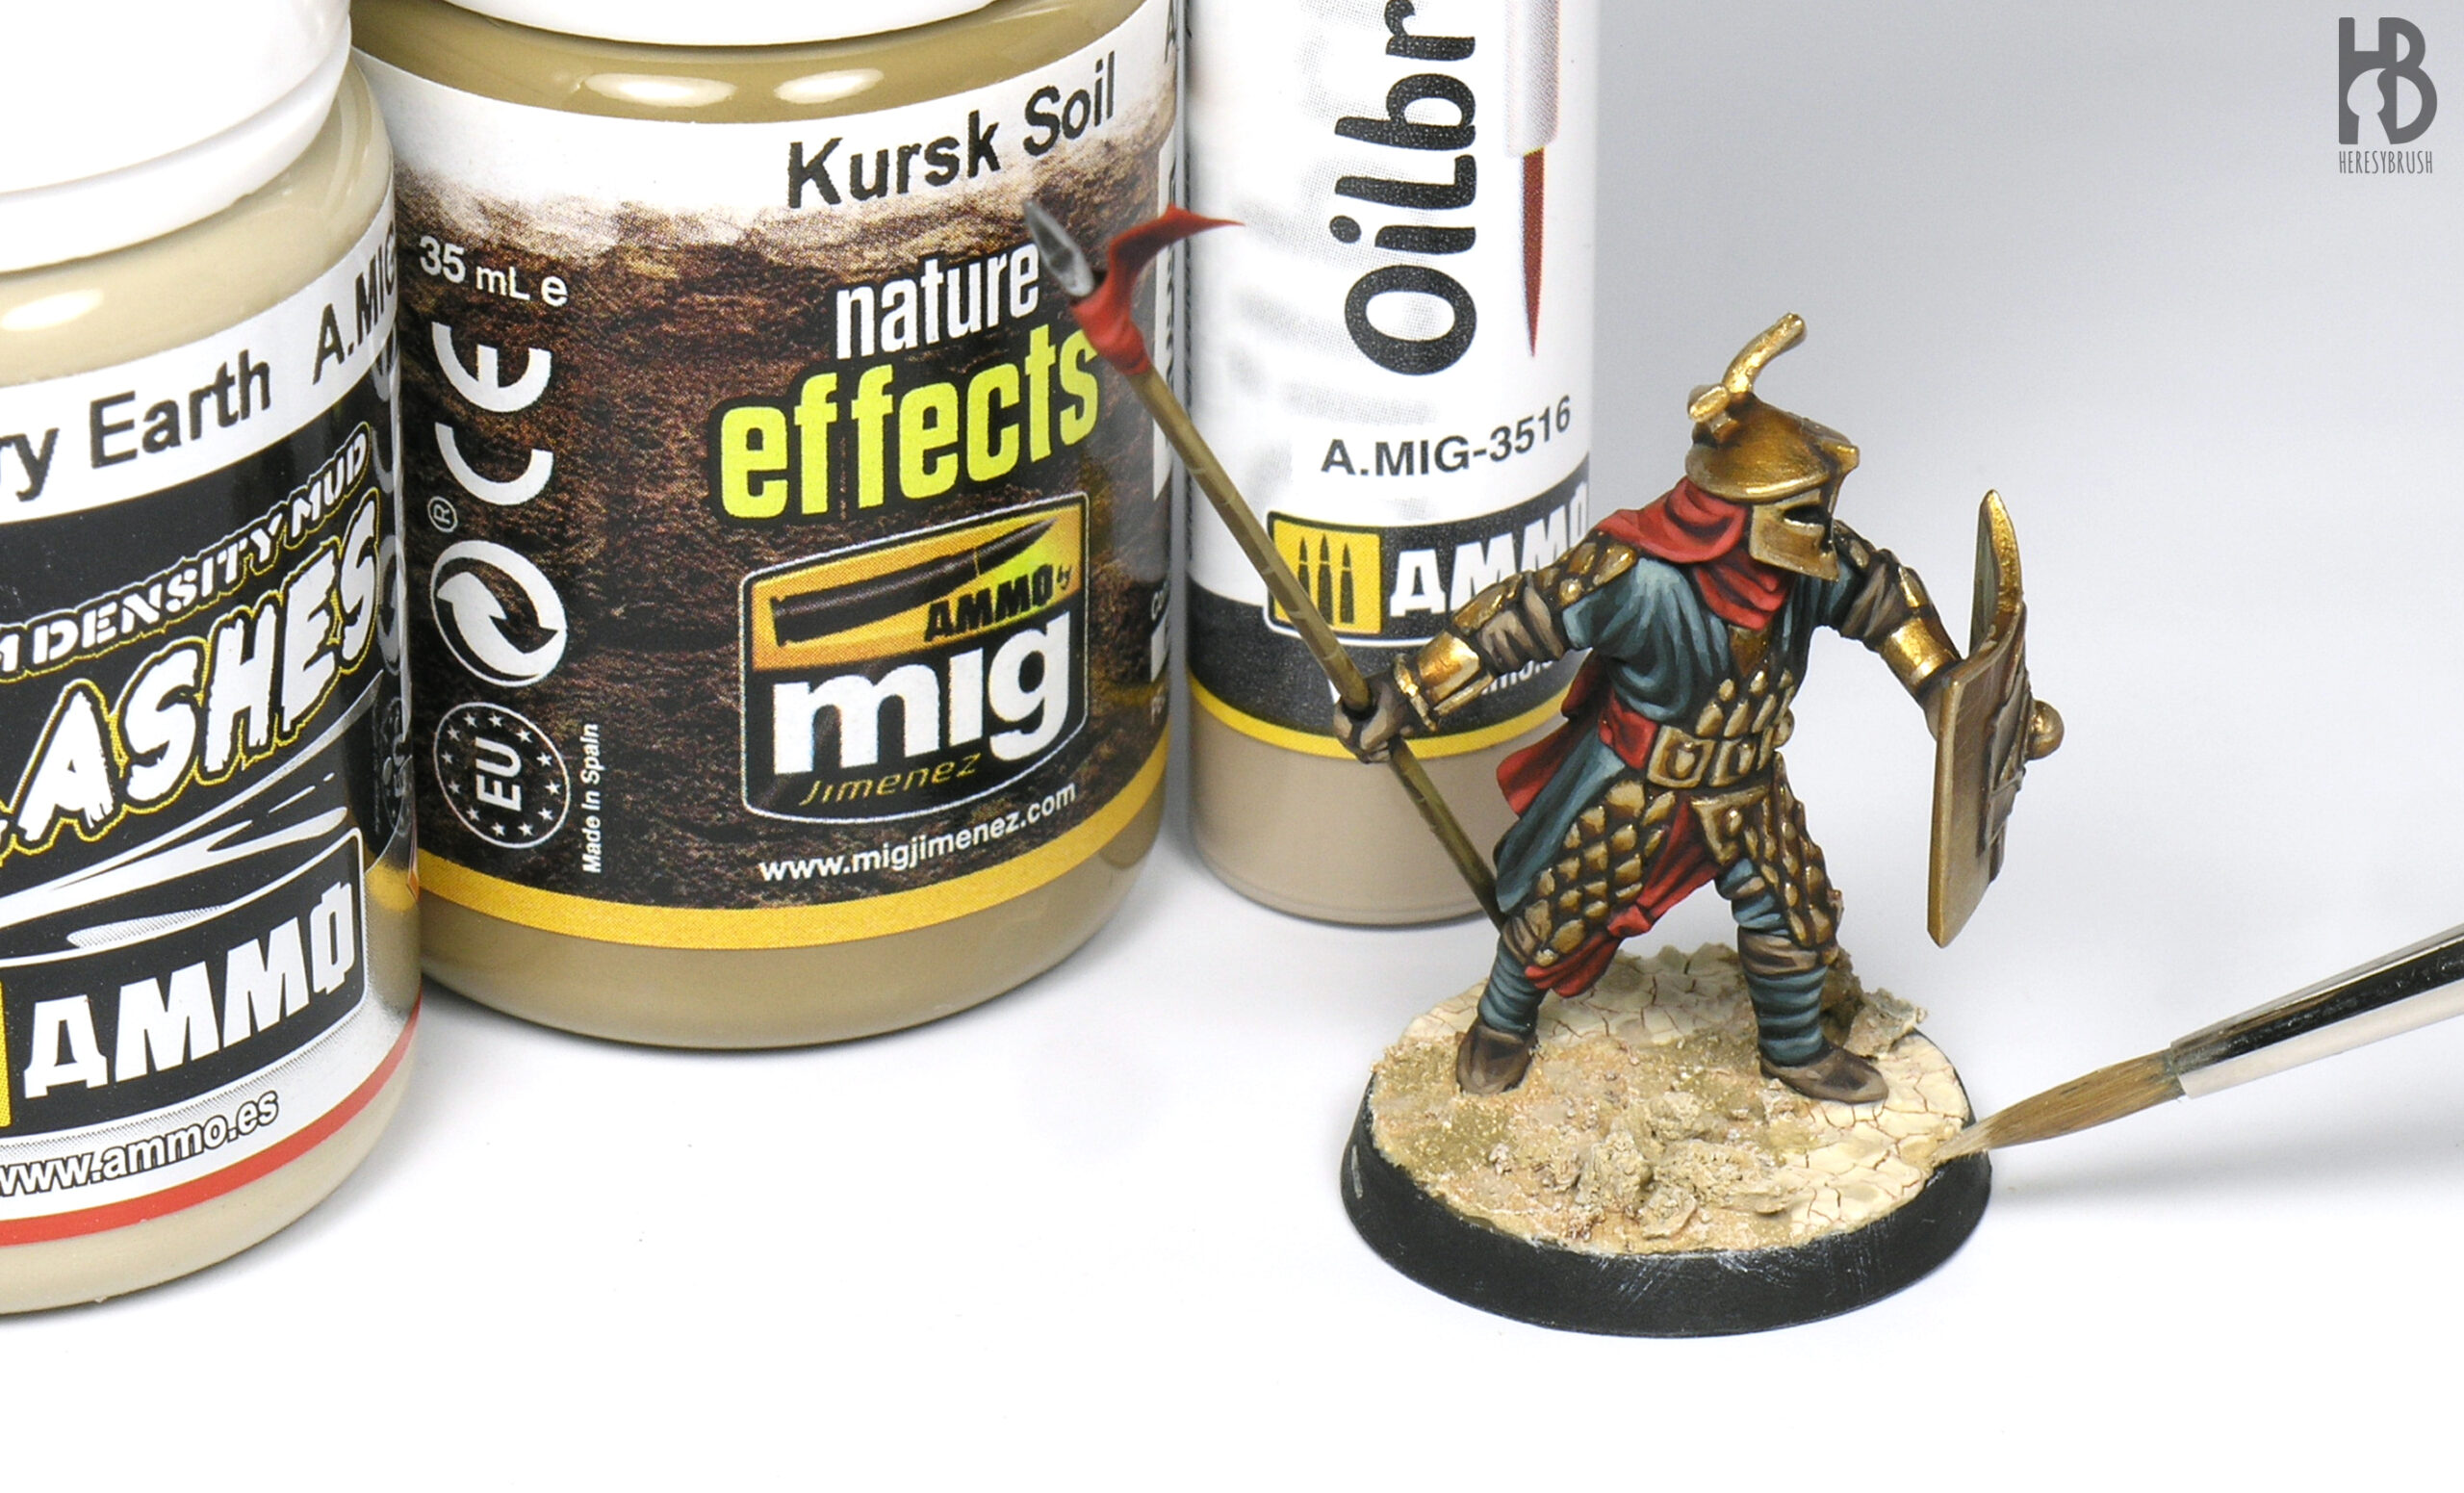
So far we have used acrylic paints, which are probably familiar to all of you. But if you have a look at what Scale Modelers use, you will discover that they also use other types of paints, such as oils and enamels. These oil-based paints are not acrylic. They are thinned with an organic solvent (such as White Spirit) and dry after several hours. More importantly, enamels and oils are extremely easy to blend compared to acrylics. And this feature makes them a great tool to create weathering effects, such as dust in our case.
The box contains three different products: Oilbrusher – Dust, Nature Effect – Kursk Soil and Splashes Effects – Dry Earth; plus the corresponding Enamel Odourless Thinner. The first is an oil paint, and the two other are enamels. For our purposes, we will use them similarly. Note that the oil and splashes effect are specially designed to create dust effects, meaning that once dry they will look very dusty (perfect for us!). The nature effect Kursk Soil will be very useful to add a bit of more color to the base.
After shaking vigorously each jar, we apply a bit of each here and there using a brush. Note that this is not intended as a wash!
 Step 9
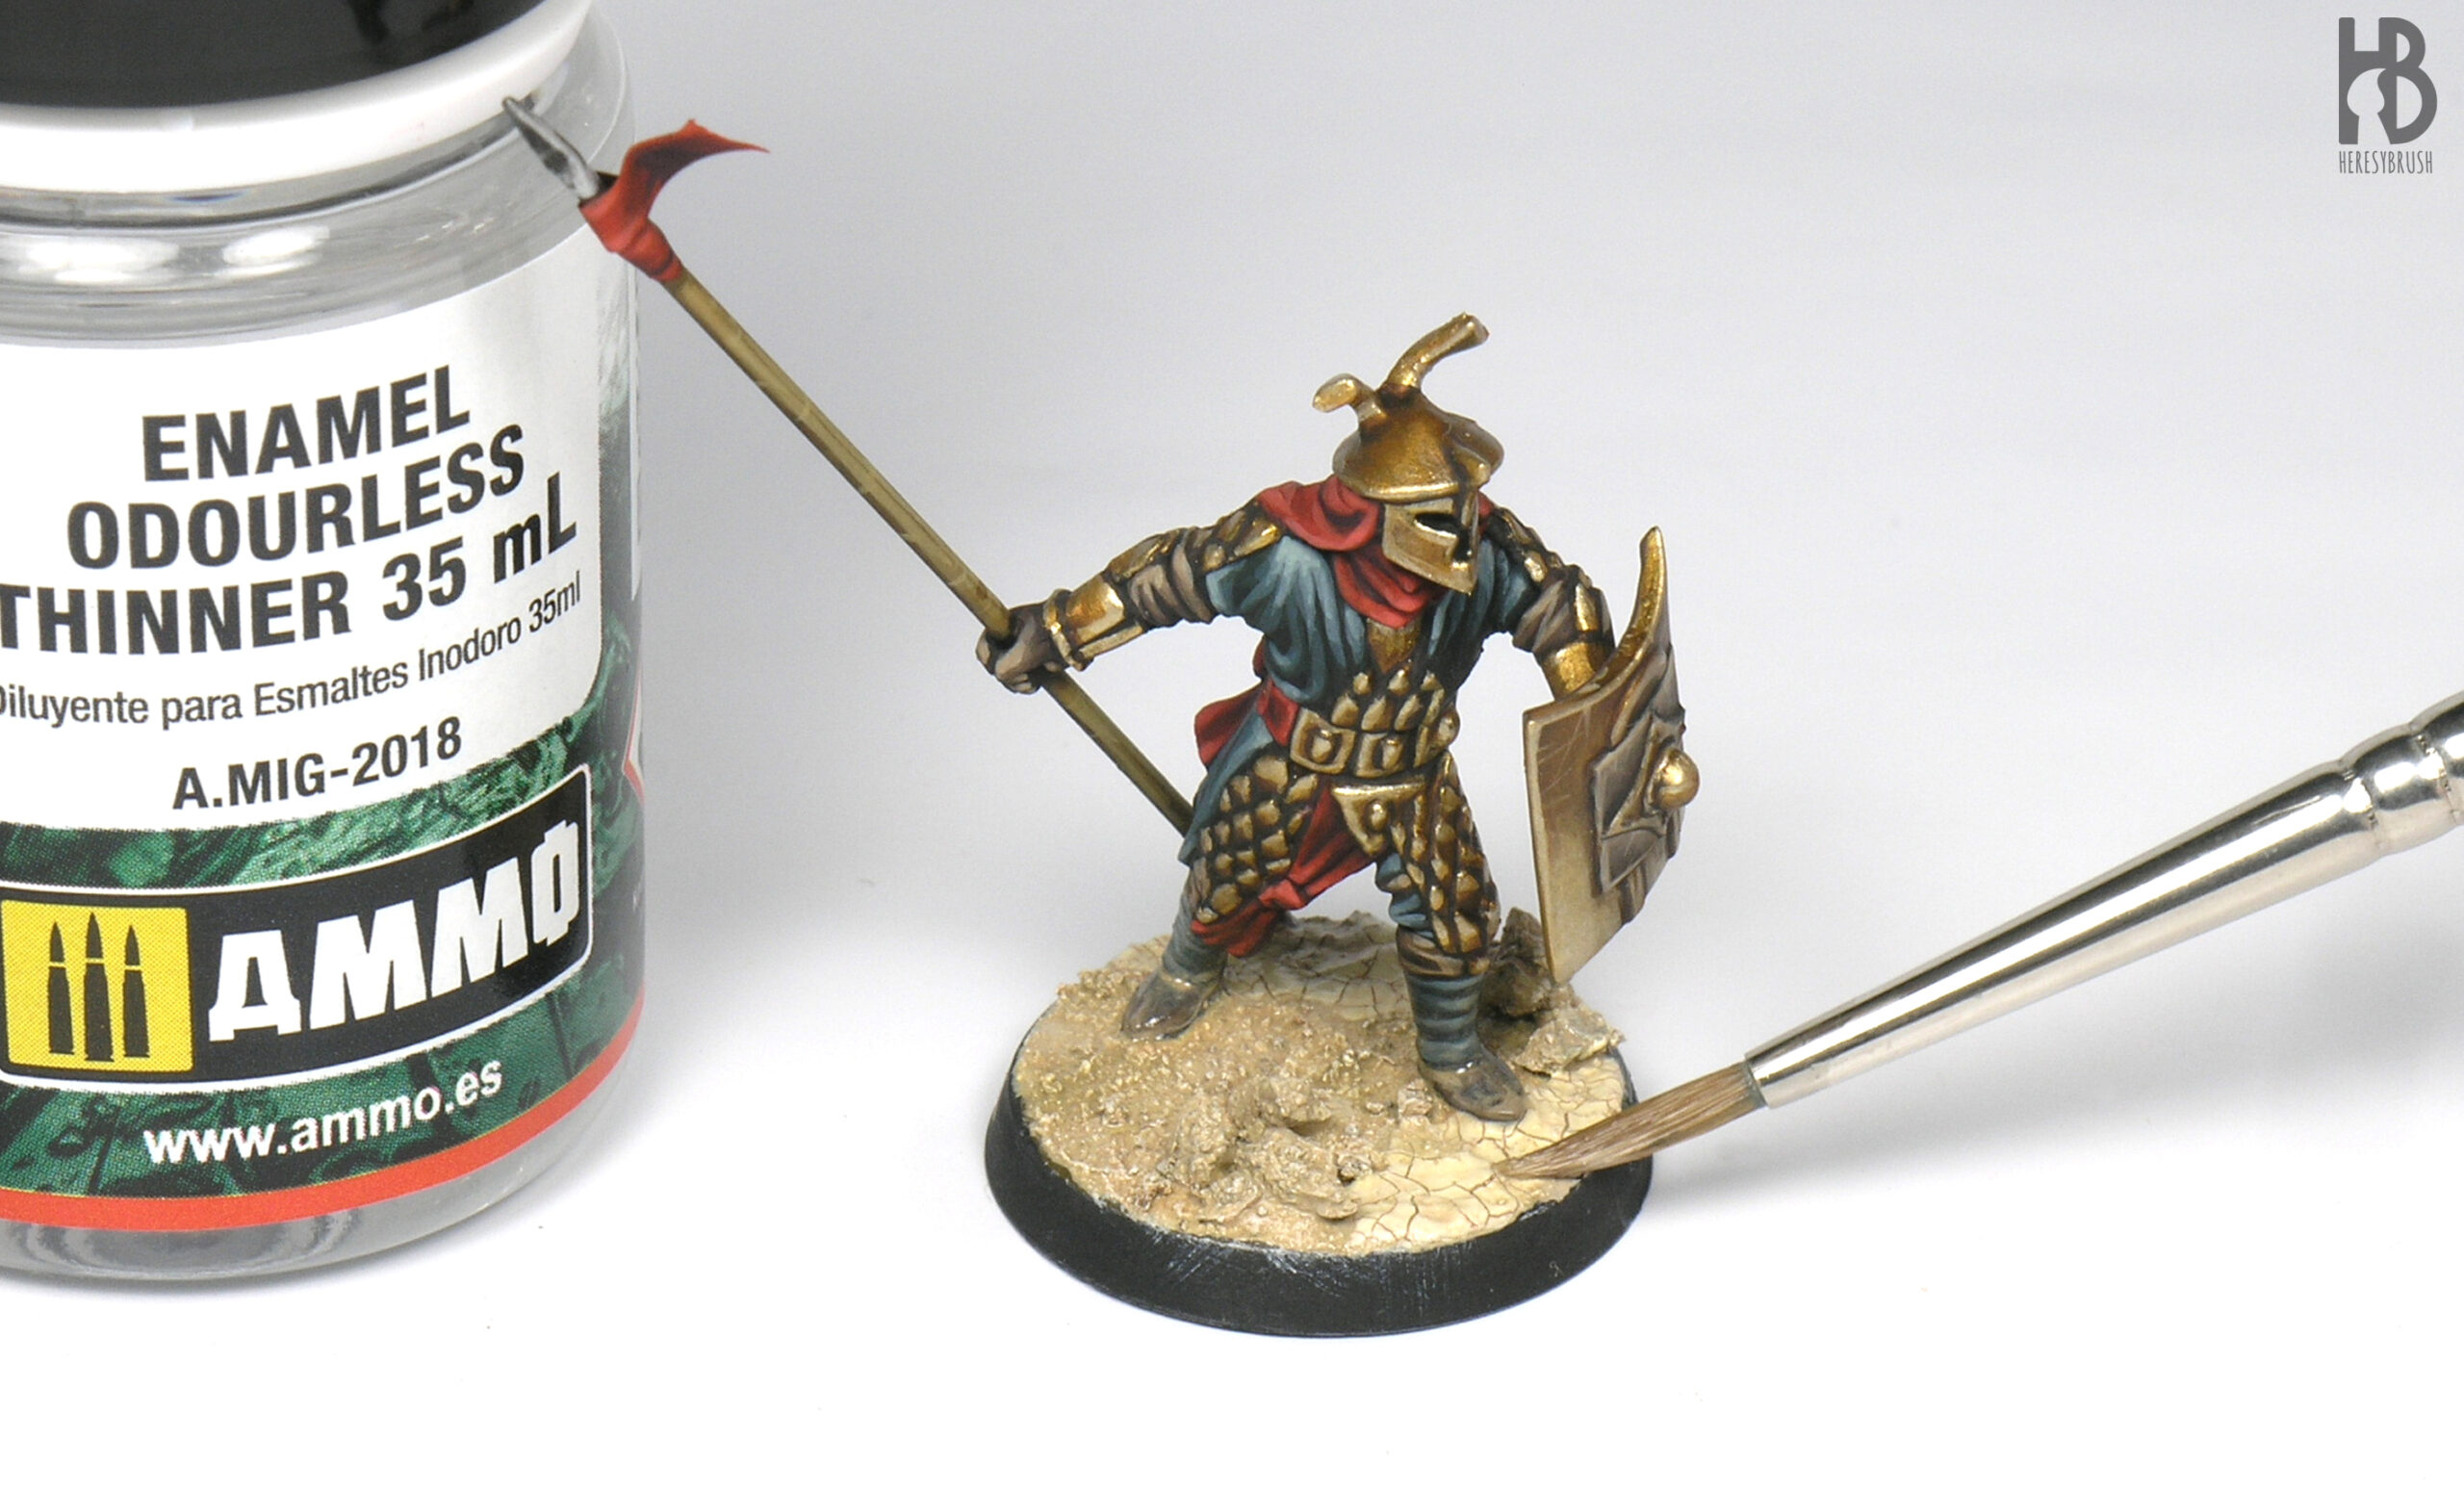
Now we blend the enamels/oil together using a brush moistened in Odourless Enamel Thinner. We also extended them to the shoes and lower part of the legs of the miniature to fully integrate it into the landscape.
 Step 10
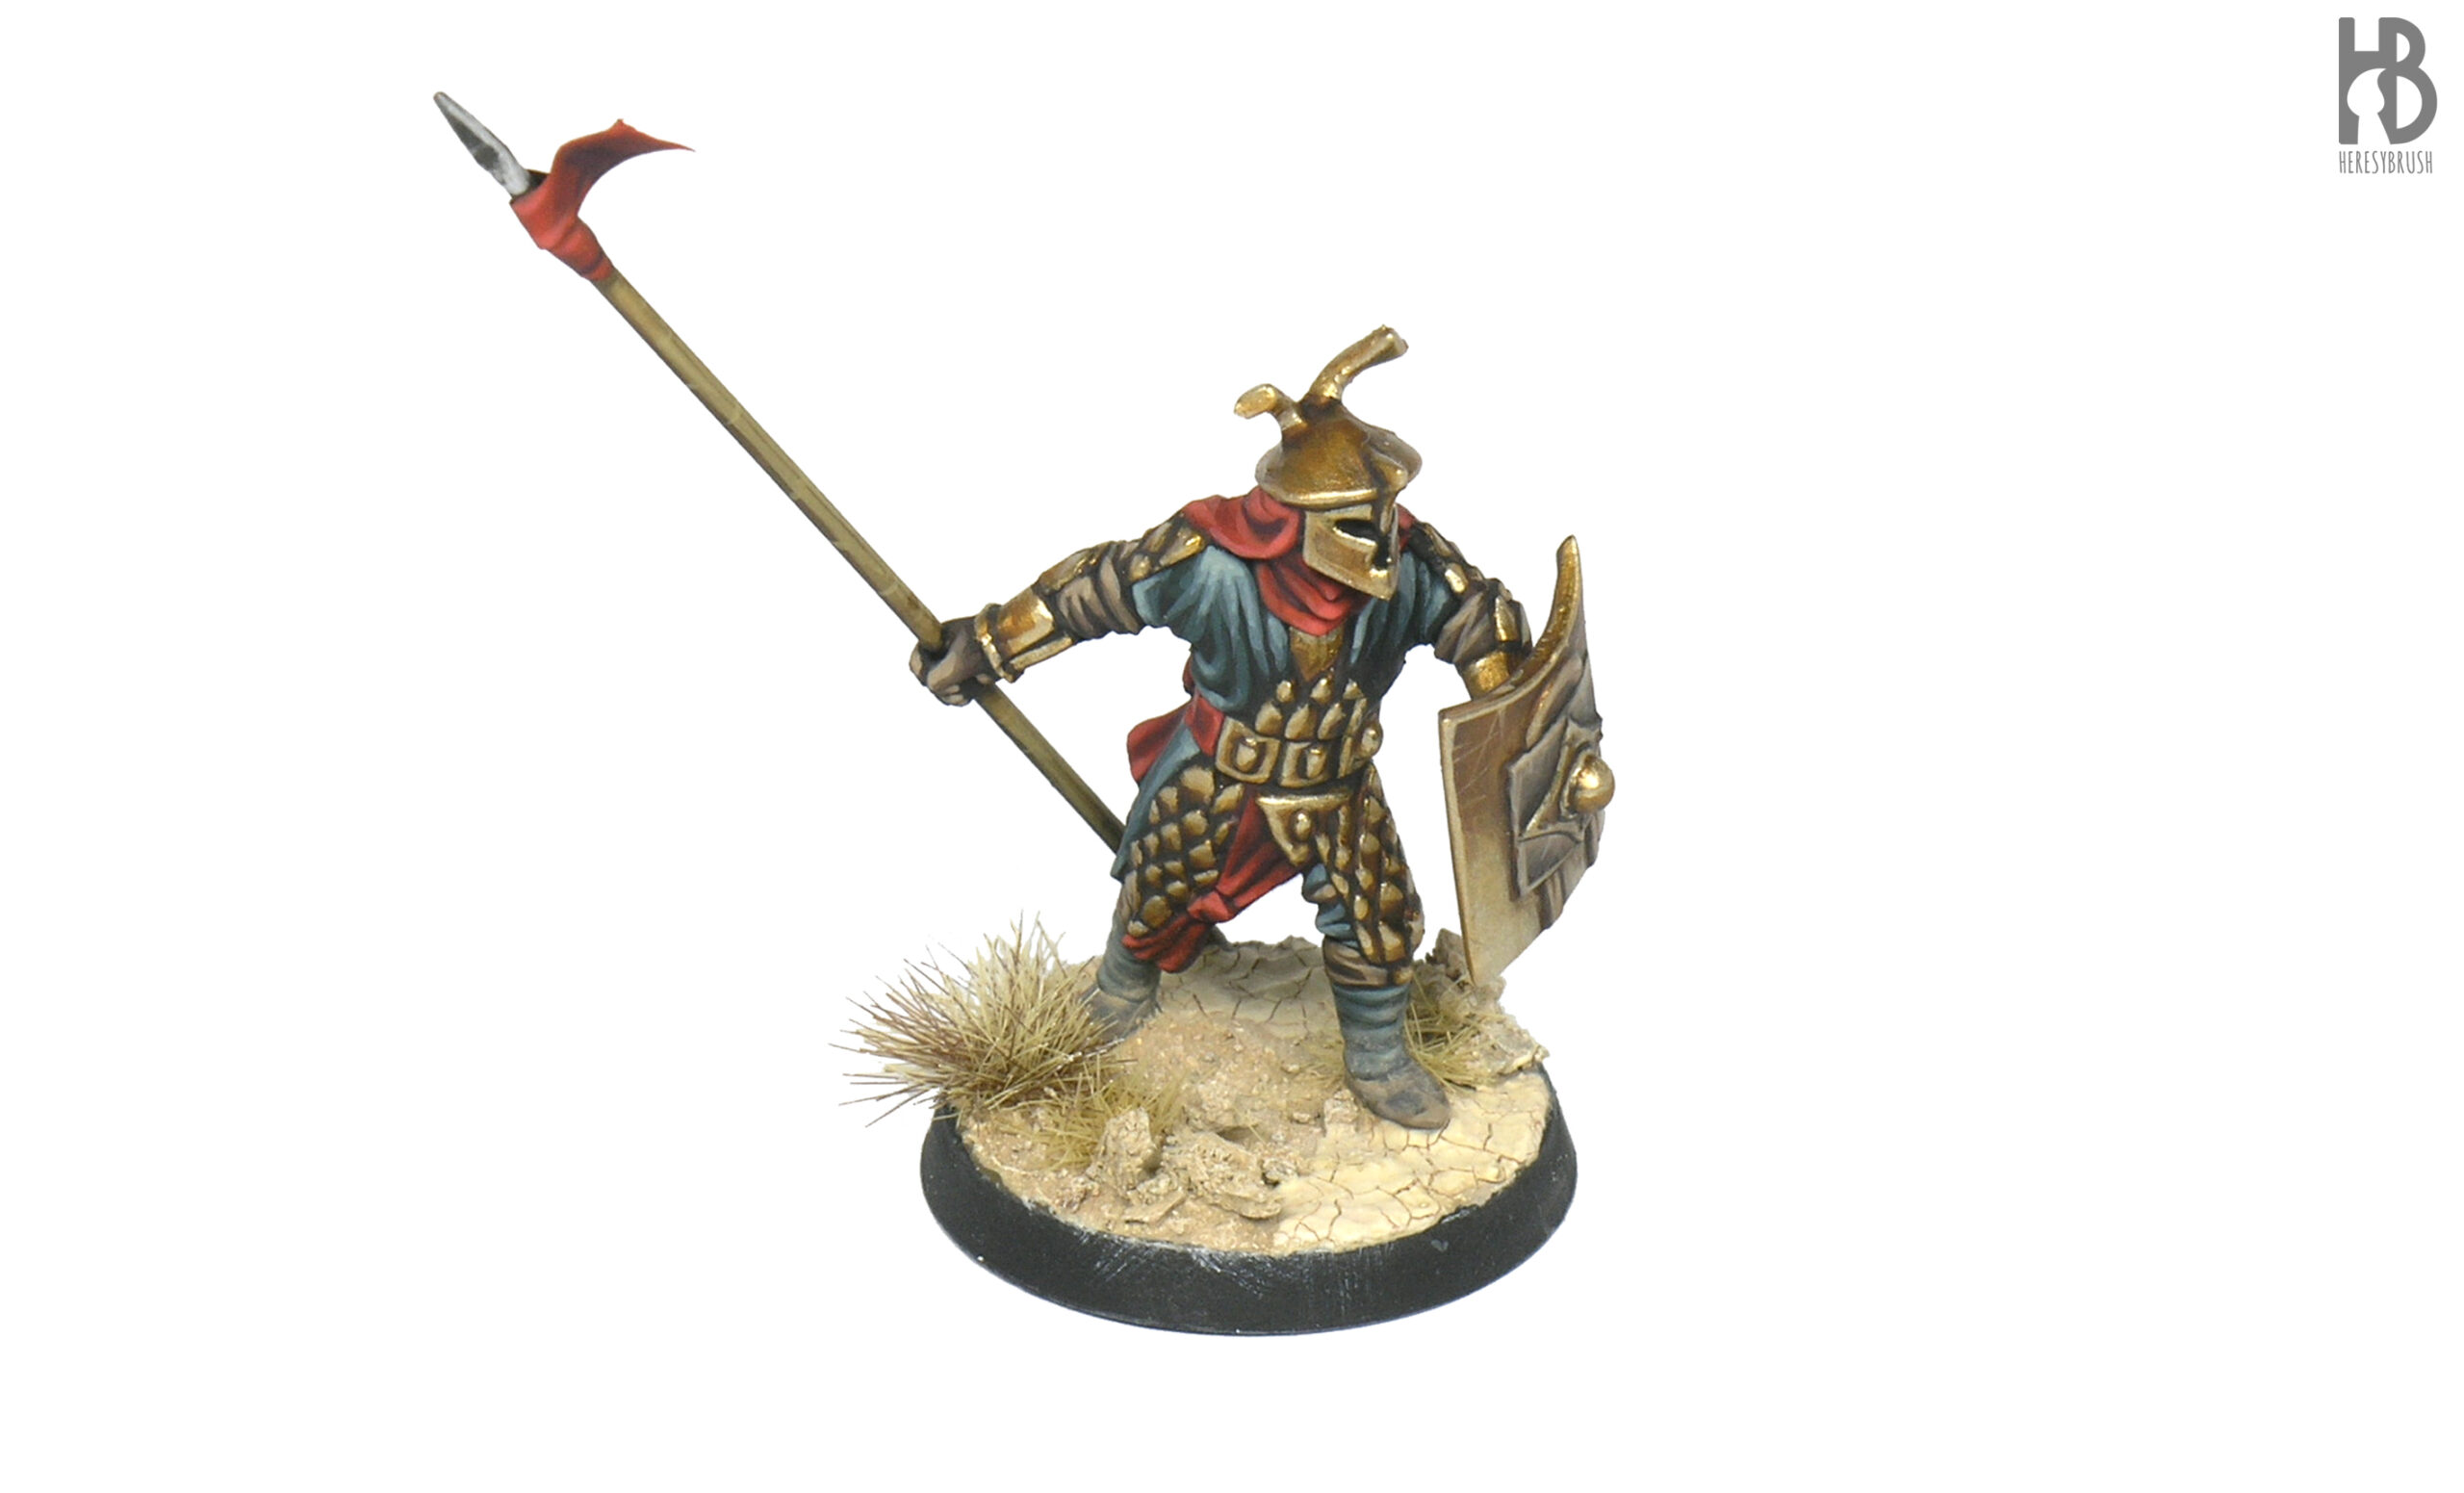
Once dry, the results are very realistic! Now it is the moment to add the vegetation layer. Using PVA glue we add a bit of Dry Grass A-MIG-8807 and Early Autumn A.MIG-8415 grass tufts. Optionally we can apply a drybrush (check step 7) on the upper part of the grass tufts to gain more contrast and integrate them better into the base.
 Step 11
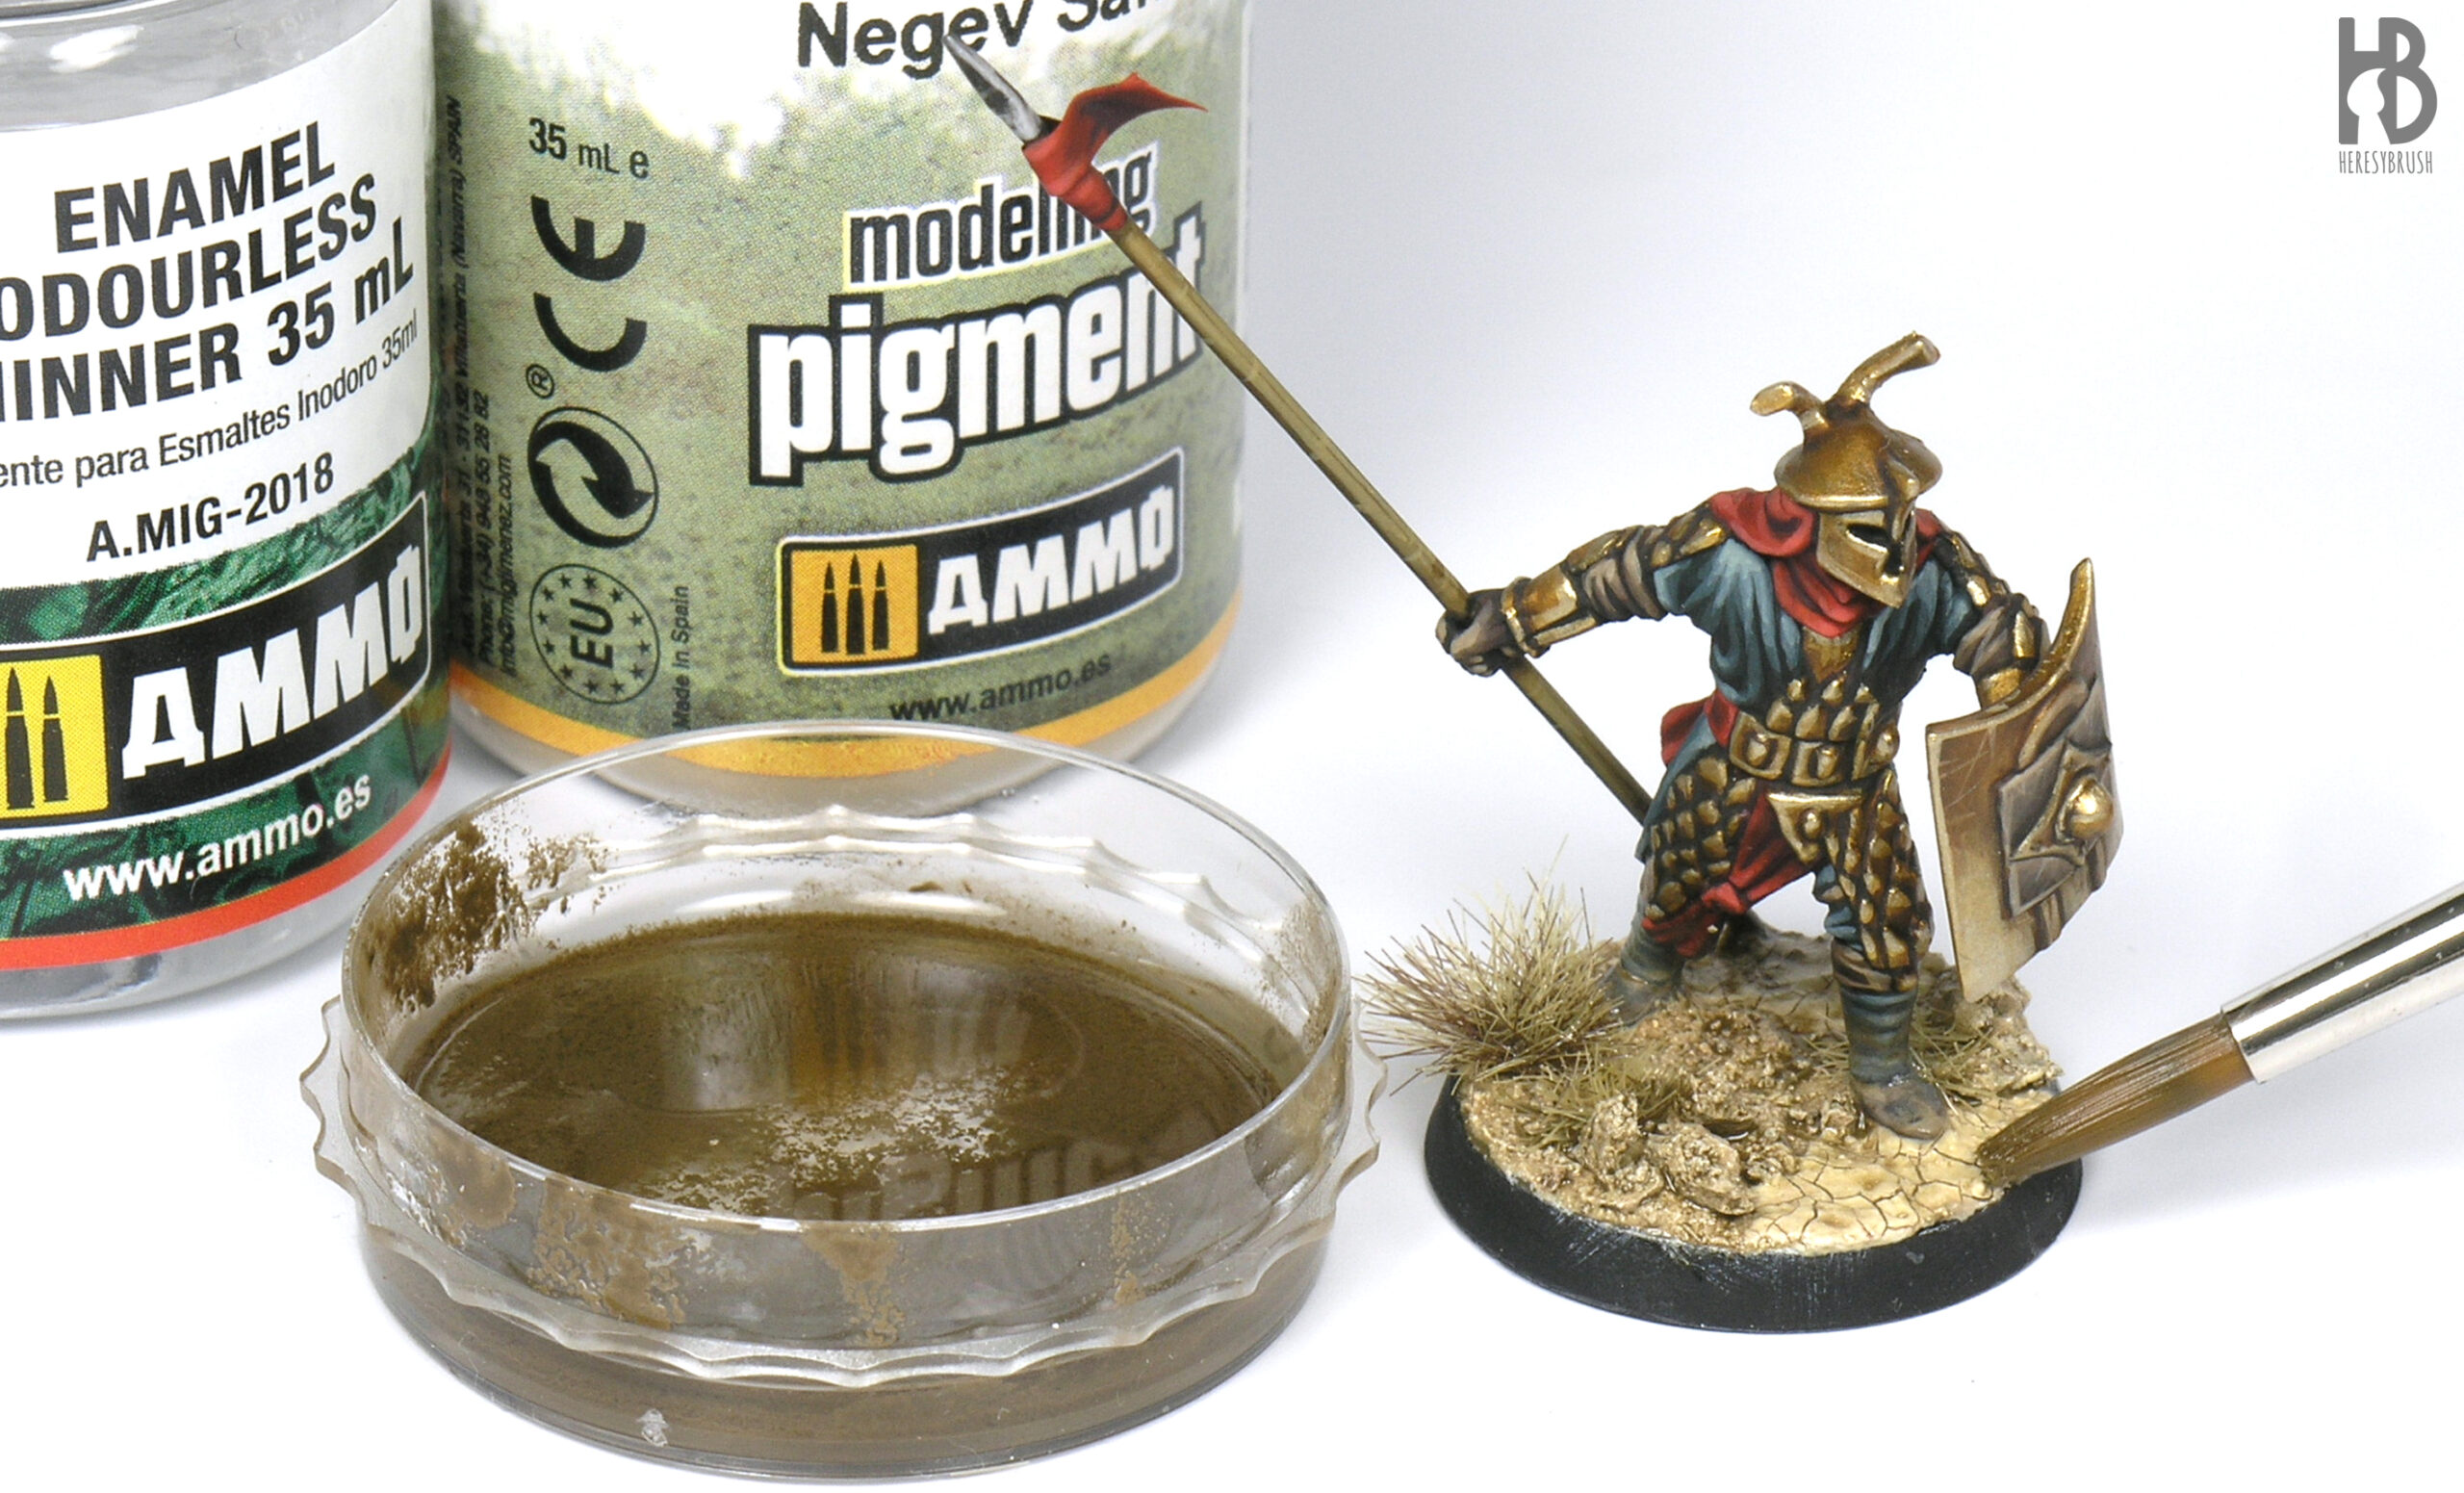
There is still something else we could do to get even more interesting results: add pigments. Pigments are ultra matt colored powders, making them the ultimate tool to simulate dust. Here we will use a light color such as Negev Sand A.MIG-3024.
We have different options to apply pigments: dry directly from the jar, or wet after mixing it with a solvent such as Enamel Odourless Thinner. I used the latter to create a short of a wash (50% pigment and 50% solvent) that was extended over the whole base and lower part of the miniature. This approach will help to accumulate more pigment on the recesses. We also apply it on top of the grass fibers and center of the grass tuft to integrate better integrate these elements into the base.
 Step 12
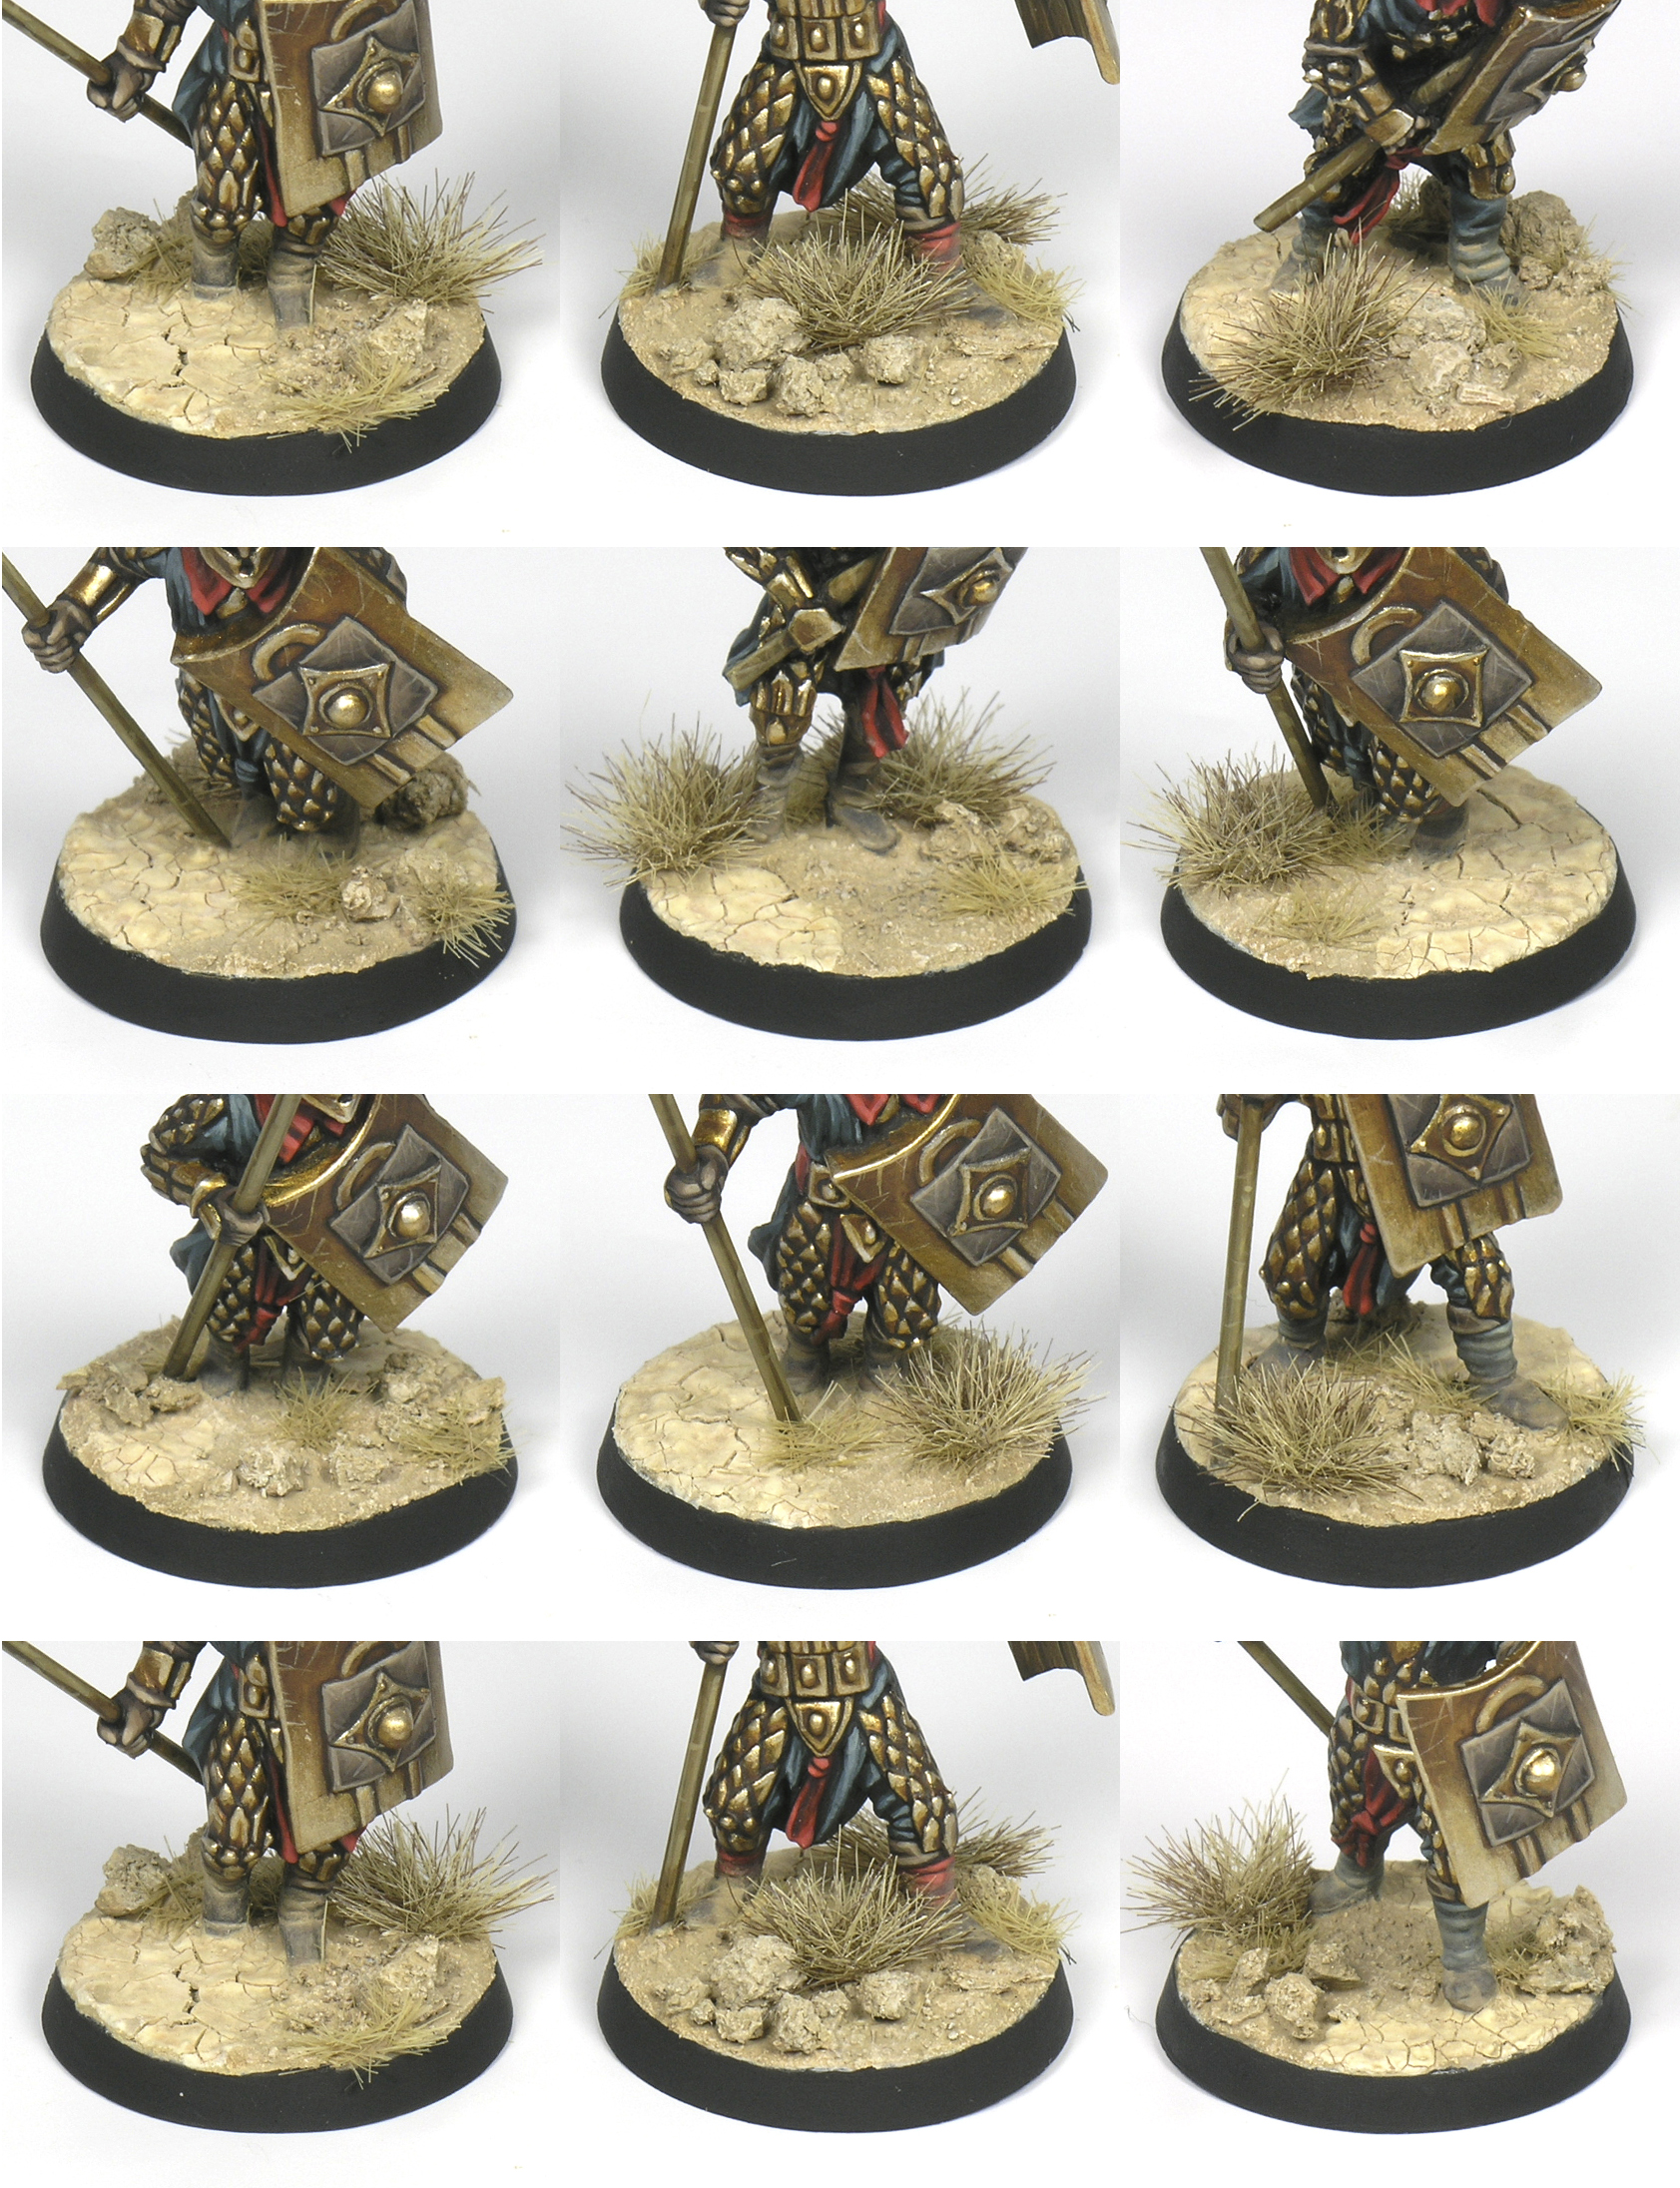
Once the solvent is completely evaporated -it can take a few hours- we obtain a super dusty result. We can use a brush to remove the excess of pigment from the lower part of the miniature, to create a more subtle effect. Finally, I painted the base ribbon in black.
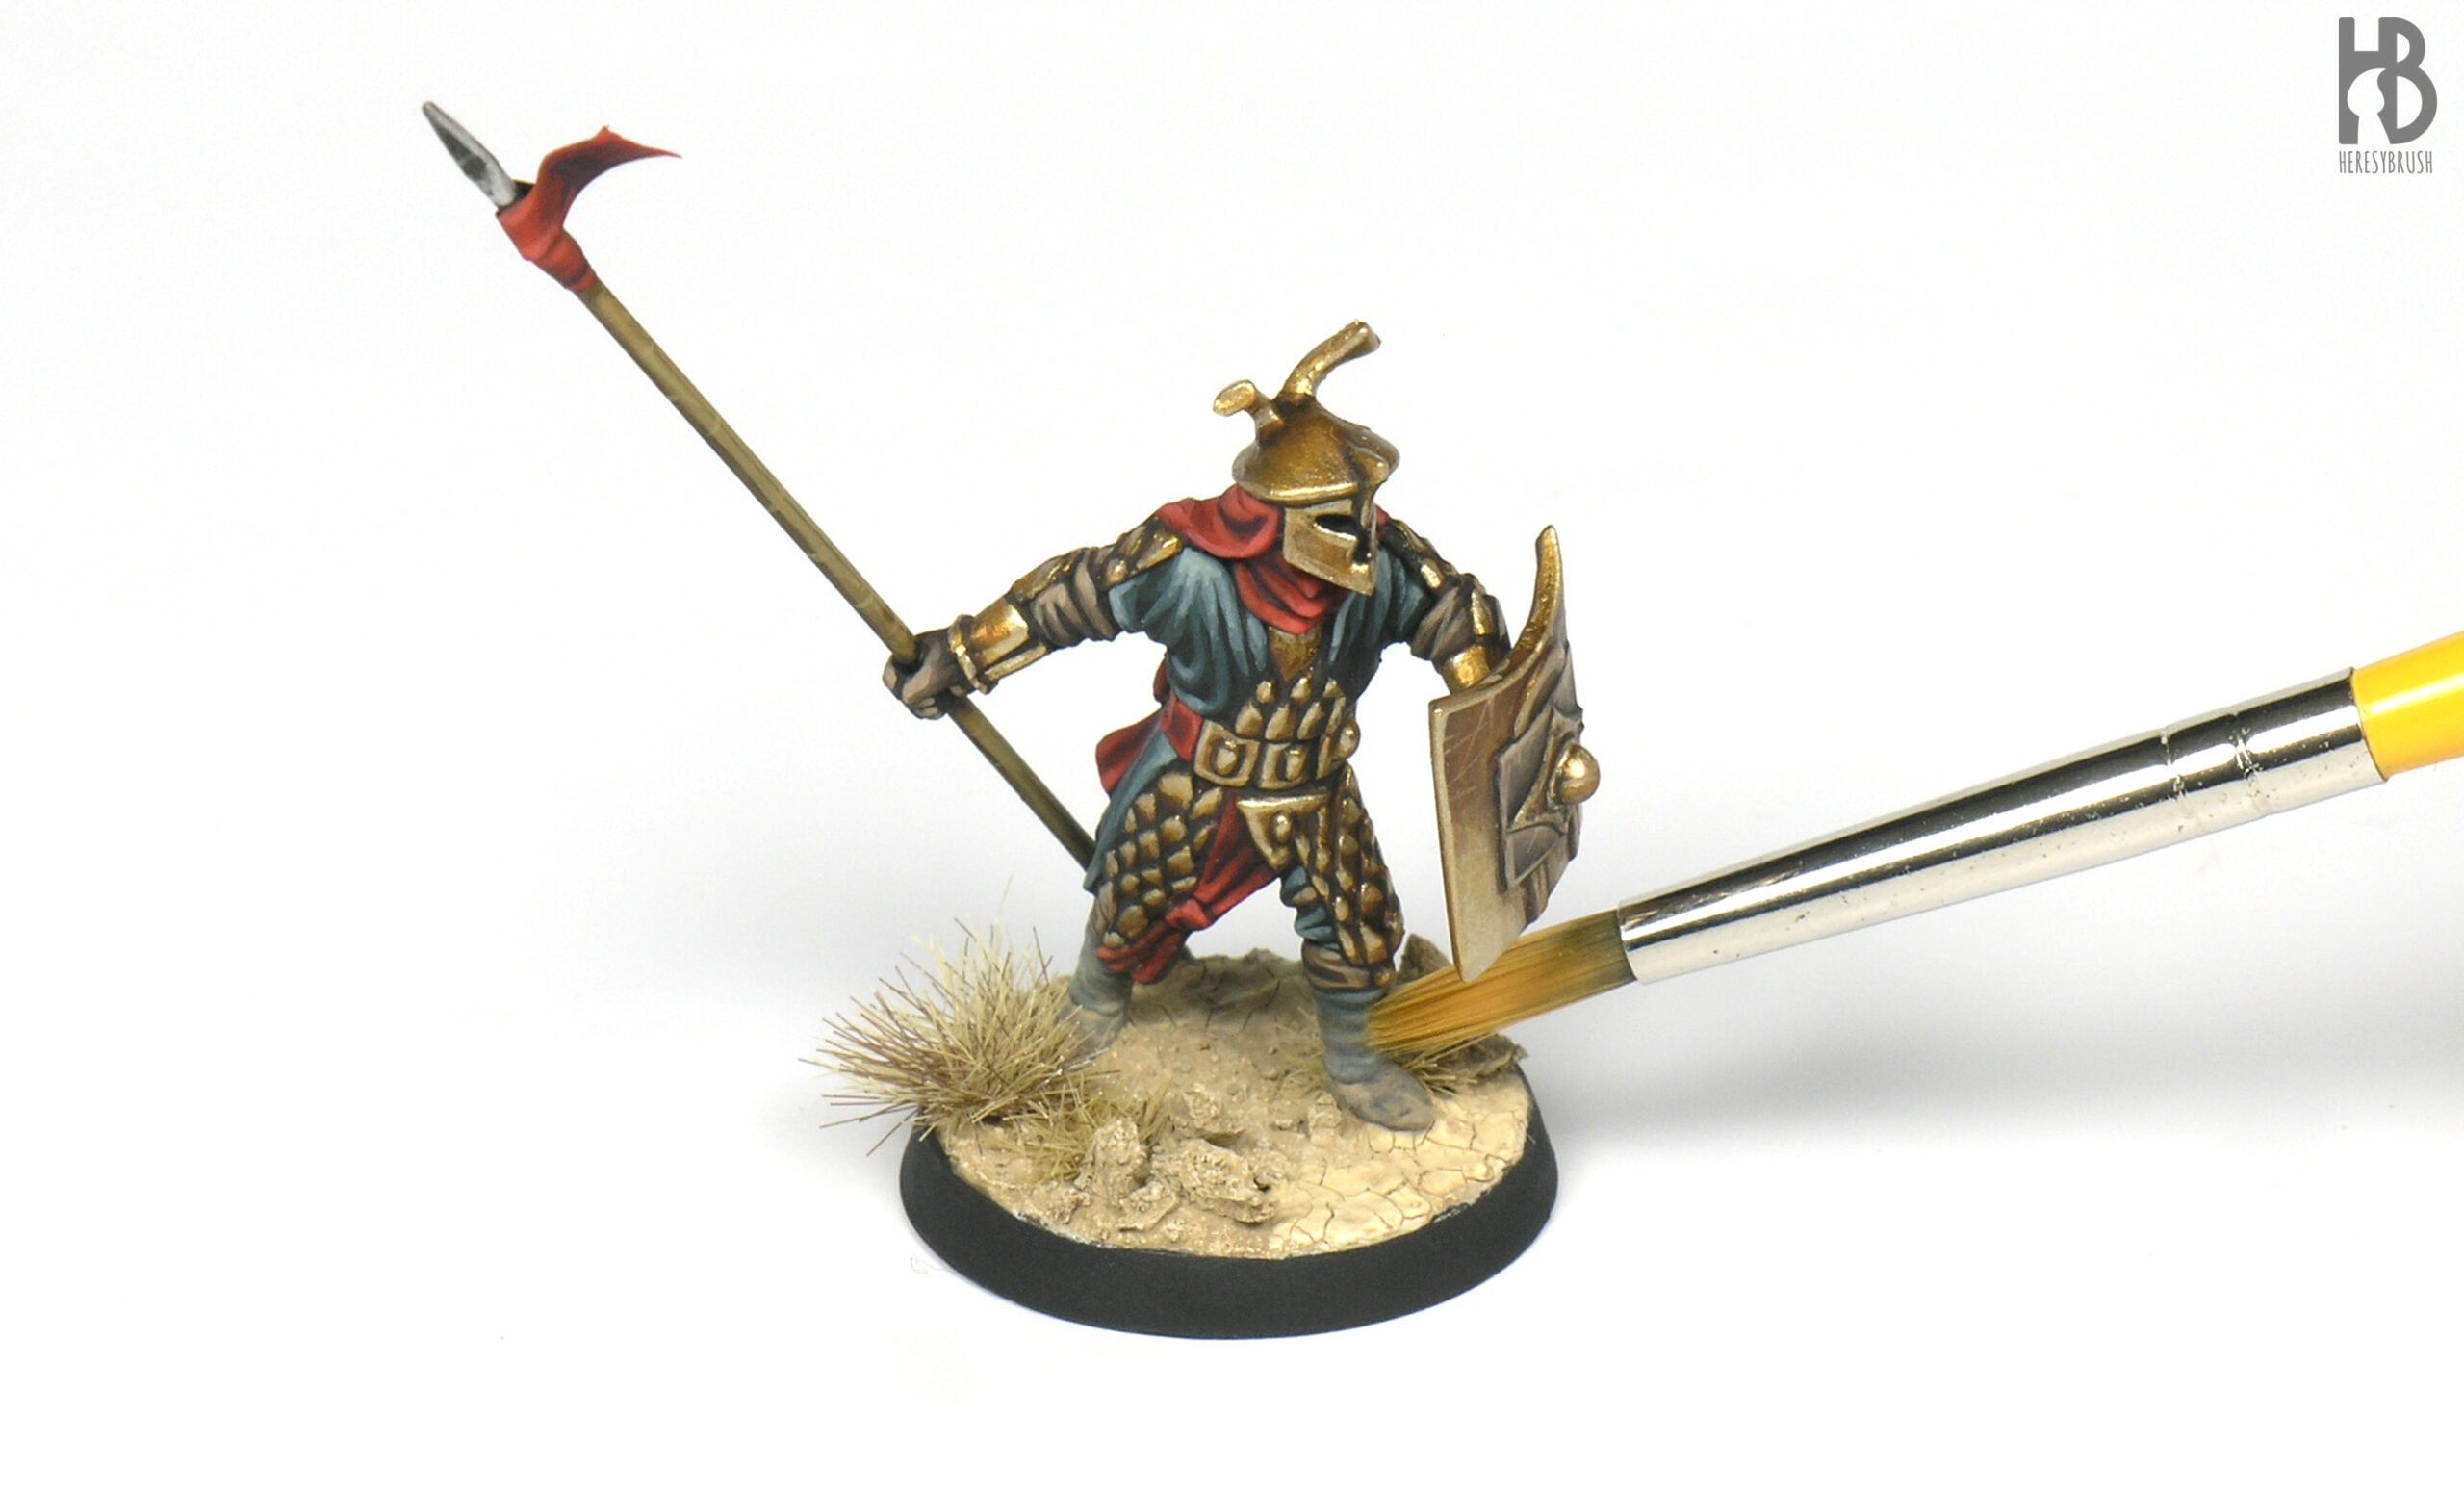
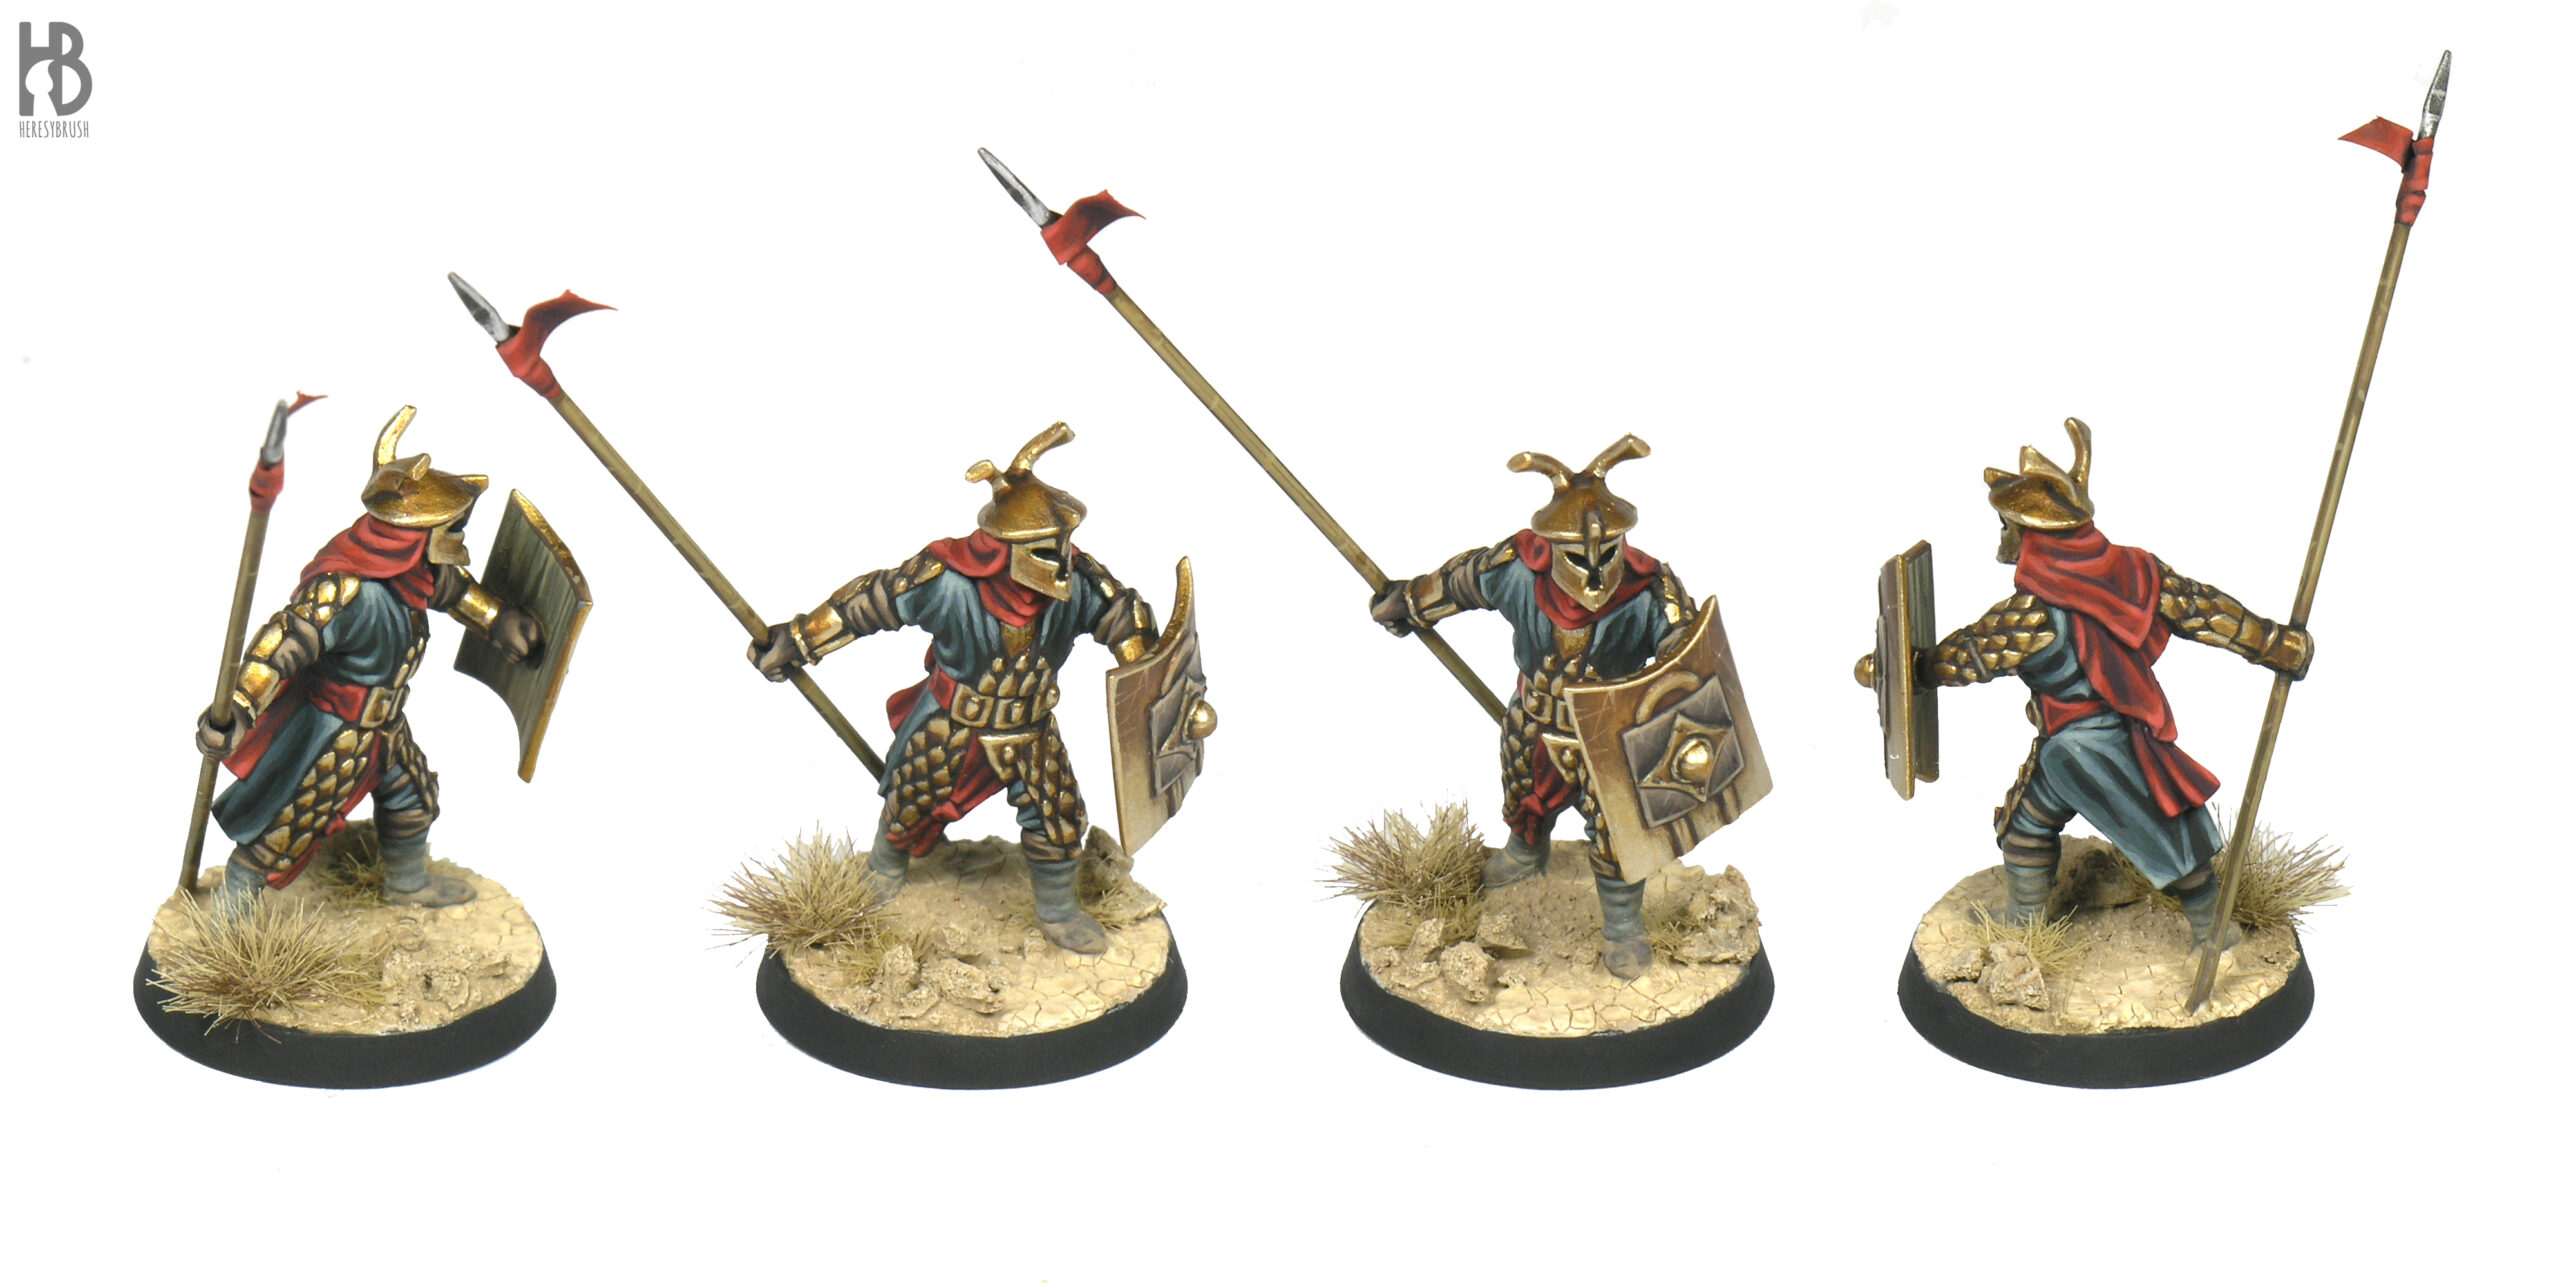 I followed the “batch painting” approach to make the bases, meaning that to save time I made the 12 bases at the same time. It is important to add variation on each base. We will avoid symmetries and repeating the same patterns in different bases. And we do not need to add rocks and grass tufts in all the bases.