This article was published original on 4th of September of 2012. Updated on 4 of April of 2022.
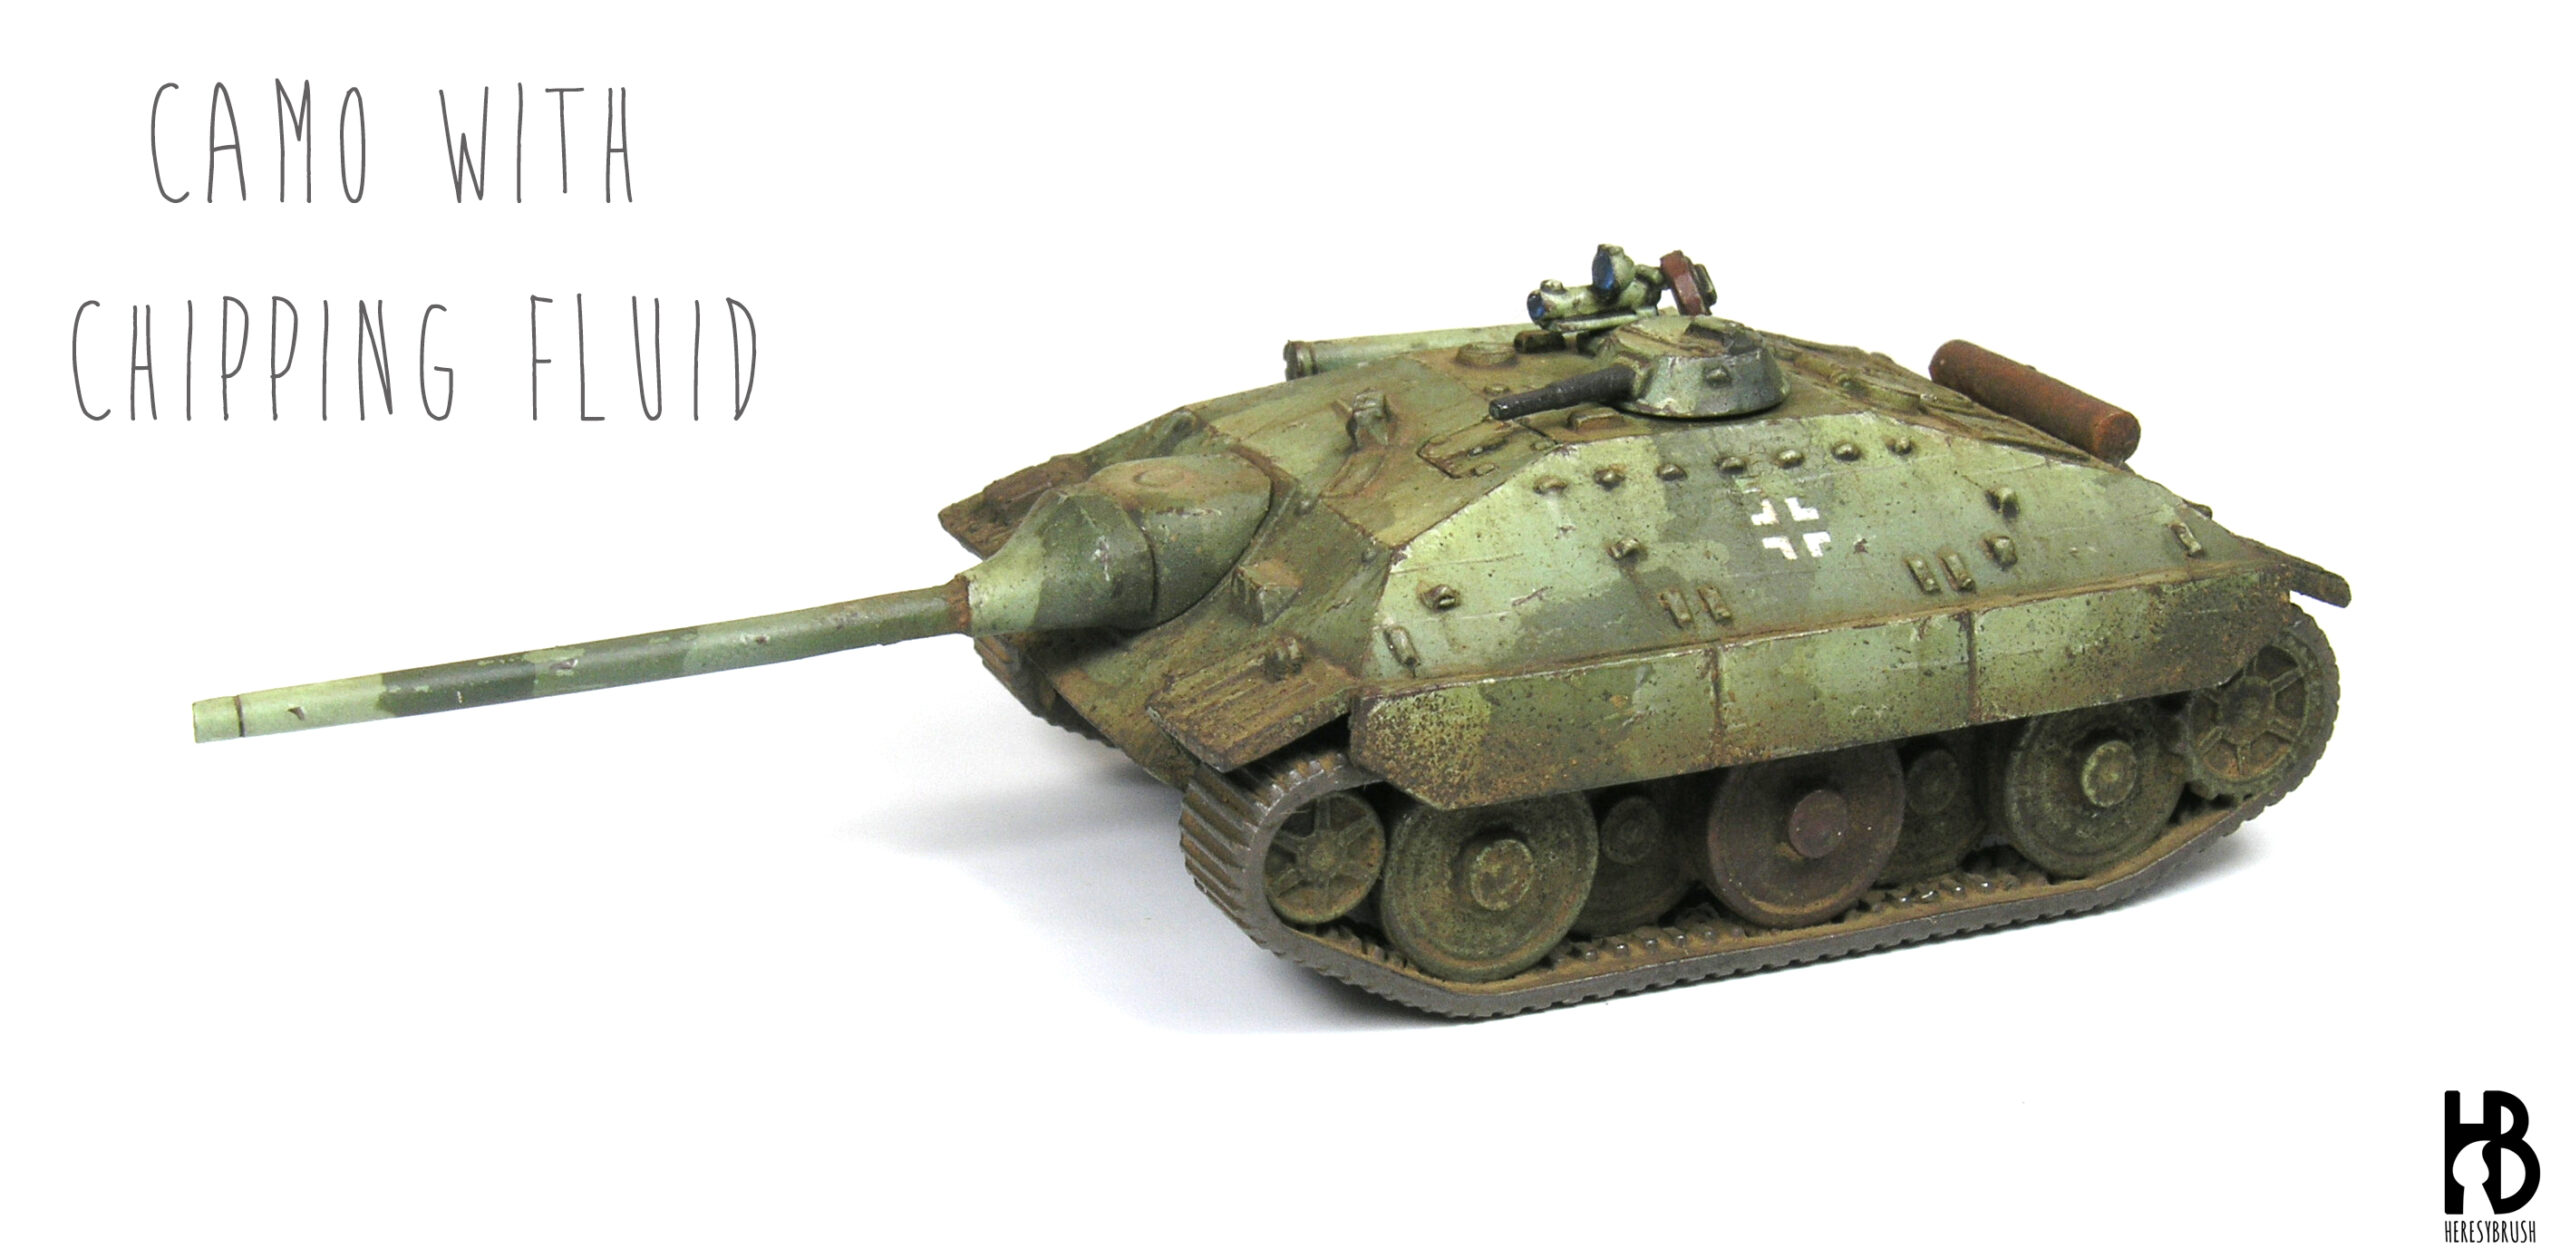
In this post we are going to see how to use a Chipping Effects fluid to create worn camouflages where the original base color is exposed. Basically, after painting the base color of the tank, the idea is to apply a thin layer of chipping fluid and on top of this the camouflage. After activating the chipping fluid with water, we will be able to remove small pieces of the camouflage paint applied on top. These Chipping Effects fluids replaces what classically is known as the “hairspray technique”, where literally we use hairspray. But these specific products offer more control and reproducible results compared with the classic hairspray. The tank used in this tutorial is a German E-25 tank in 15mm from Khurasan Miniatures.
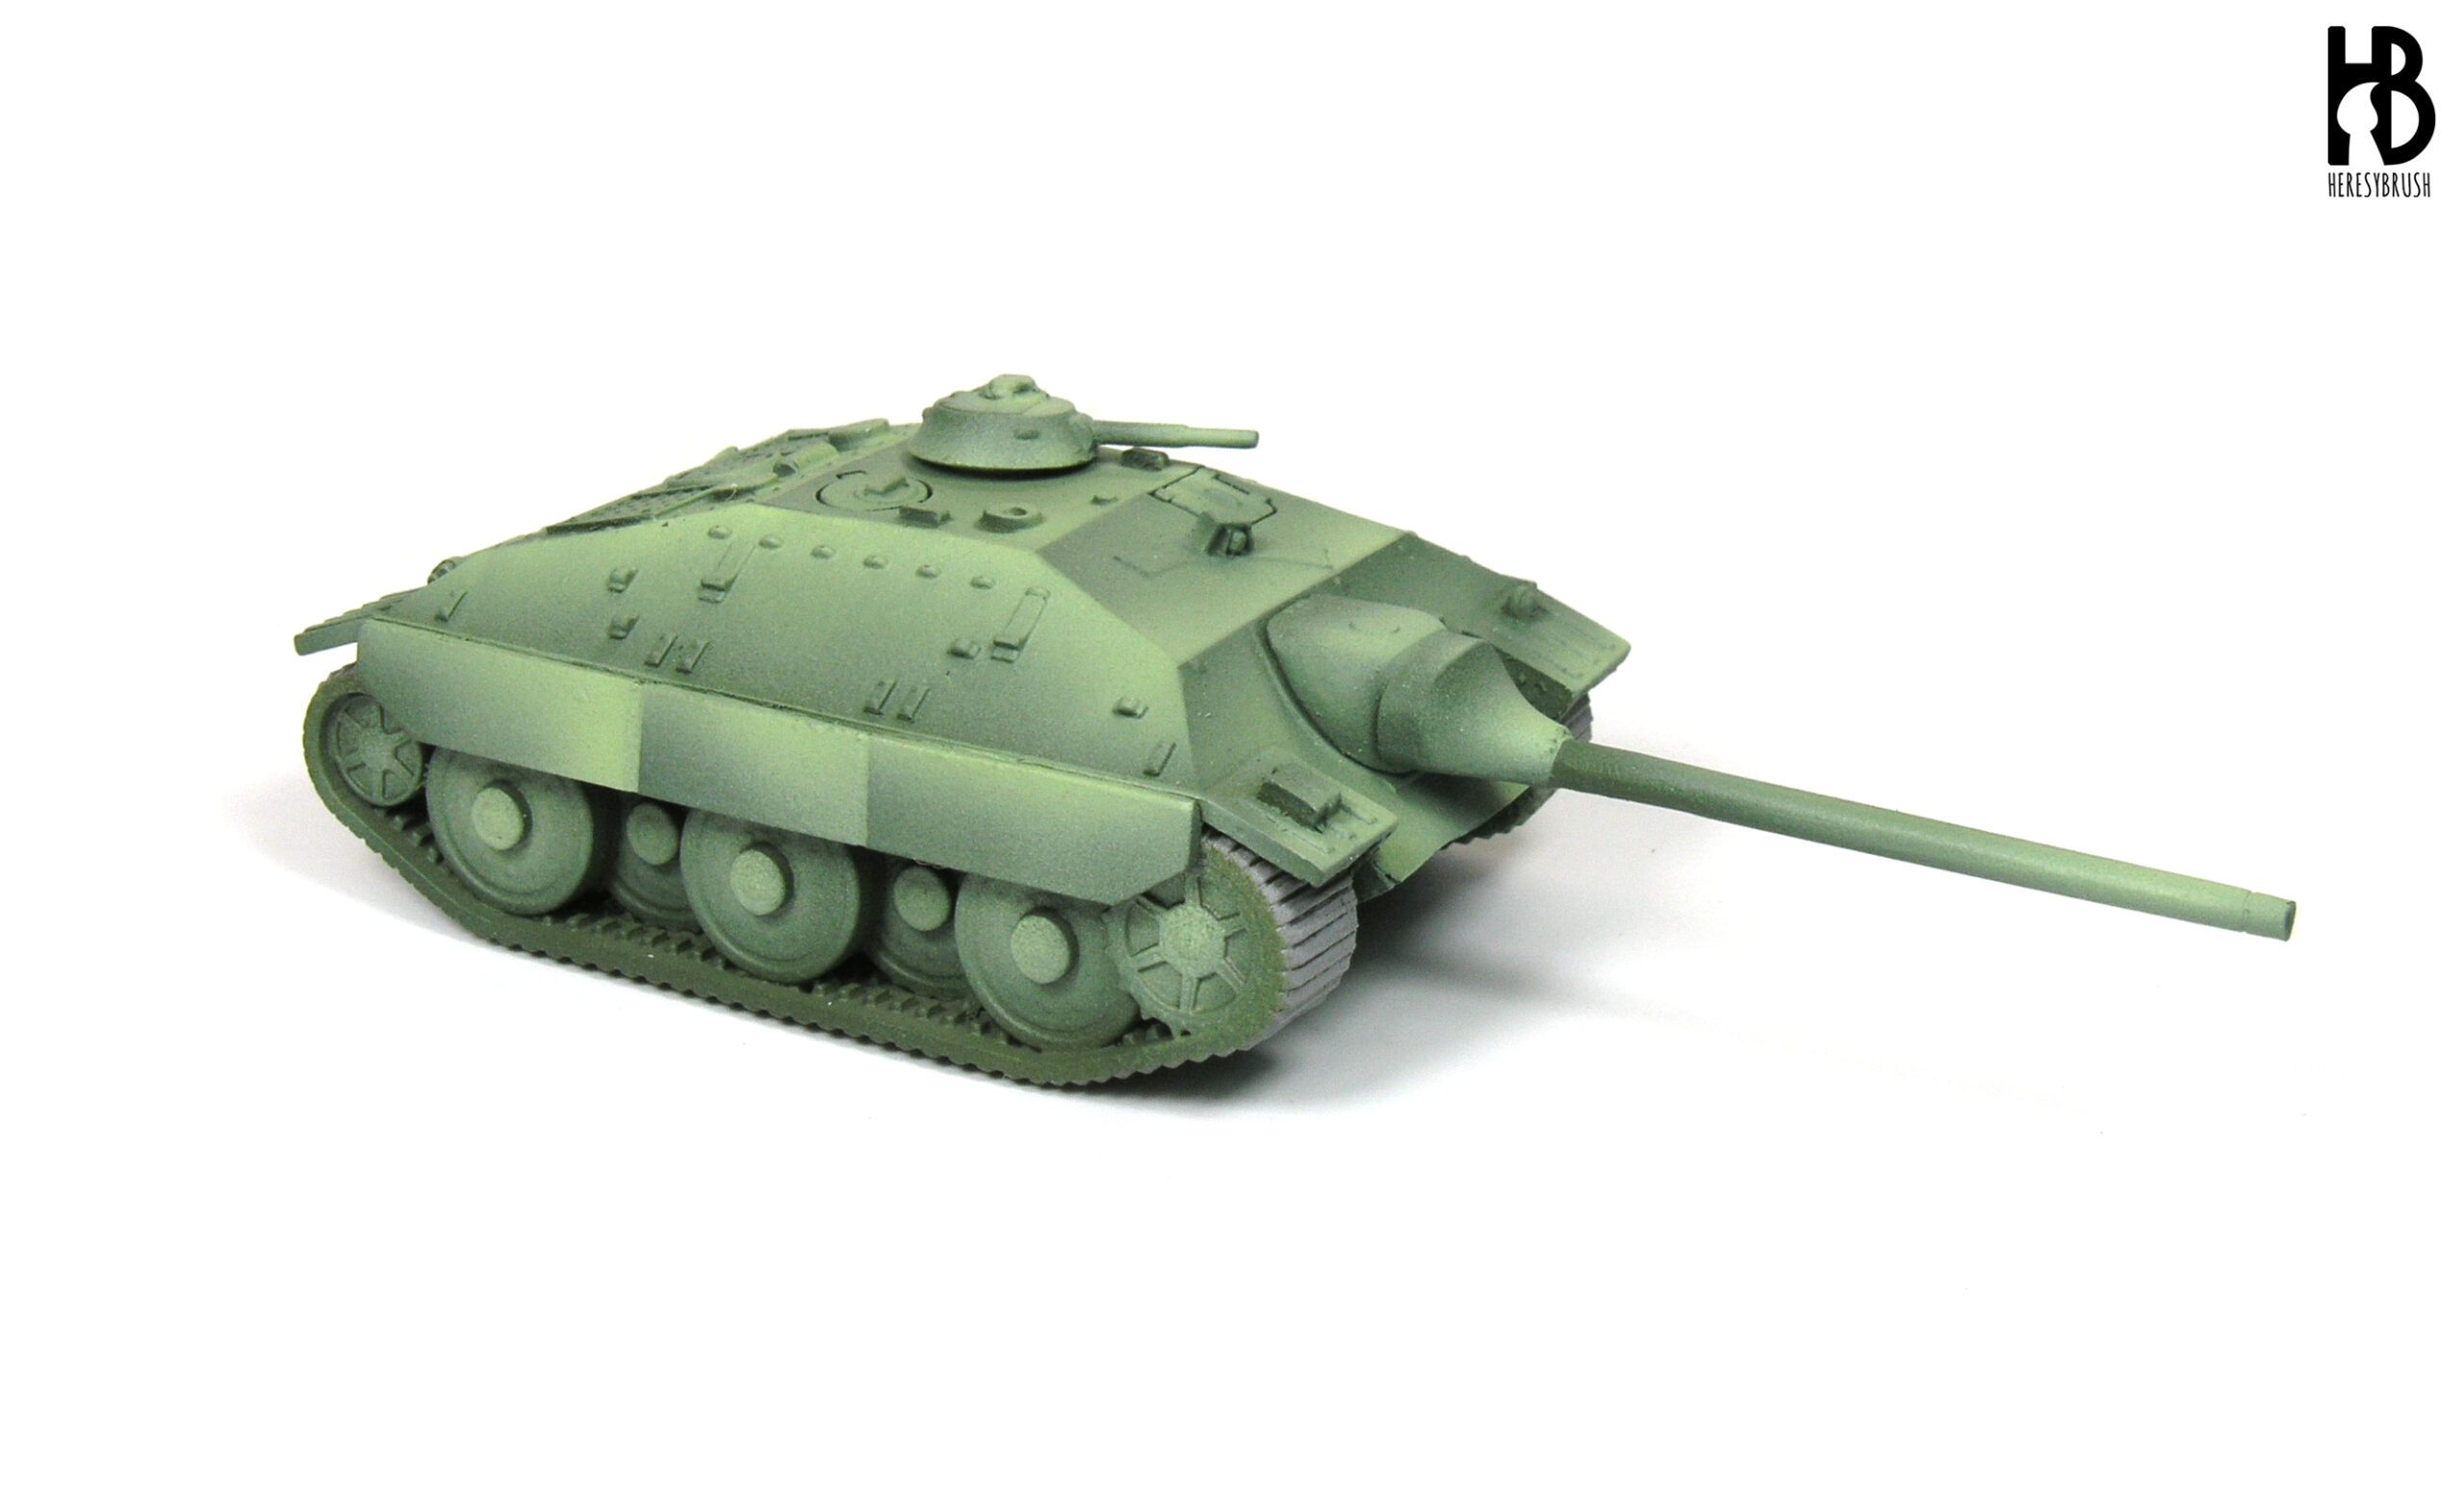
In first place, we paint the base color of the tank. This color will be visible through the wholes that we will create in the worn camouflage. For this prototype (the E-25 never saw the battlefield) I decided to follow an anachronistic -but beautiful- camouflage consisting in three shades of green. You can find the paint references along with a complete step by step painting guide of the tank here. To gain more contrast in such a small tank we can force the shades and highlights applying a color modulation.
Before applying the chipping fluid is very important to apply a thin layer of satin varnish to protect the previous work. The chipping fluid will not affect the acrylic paint, but the following work with the toothpick (scratch the surface), can ruin it.
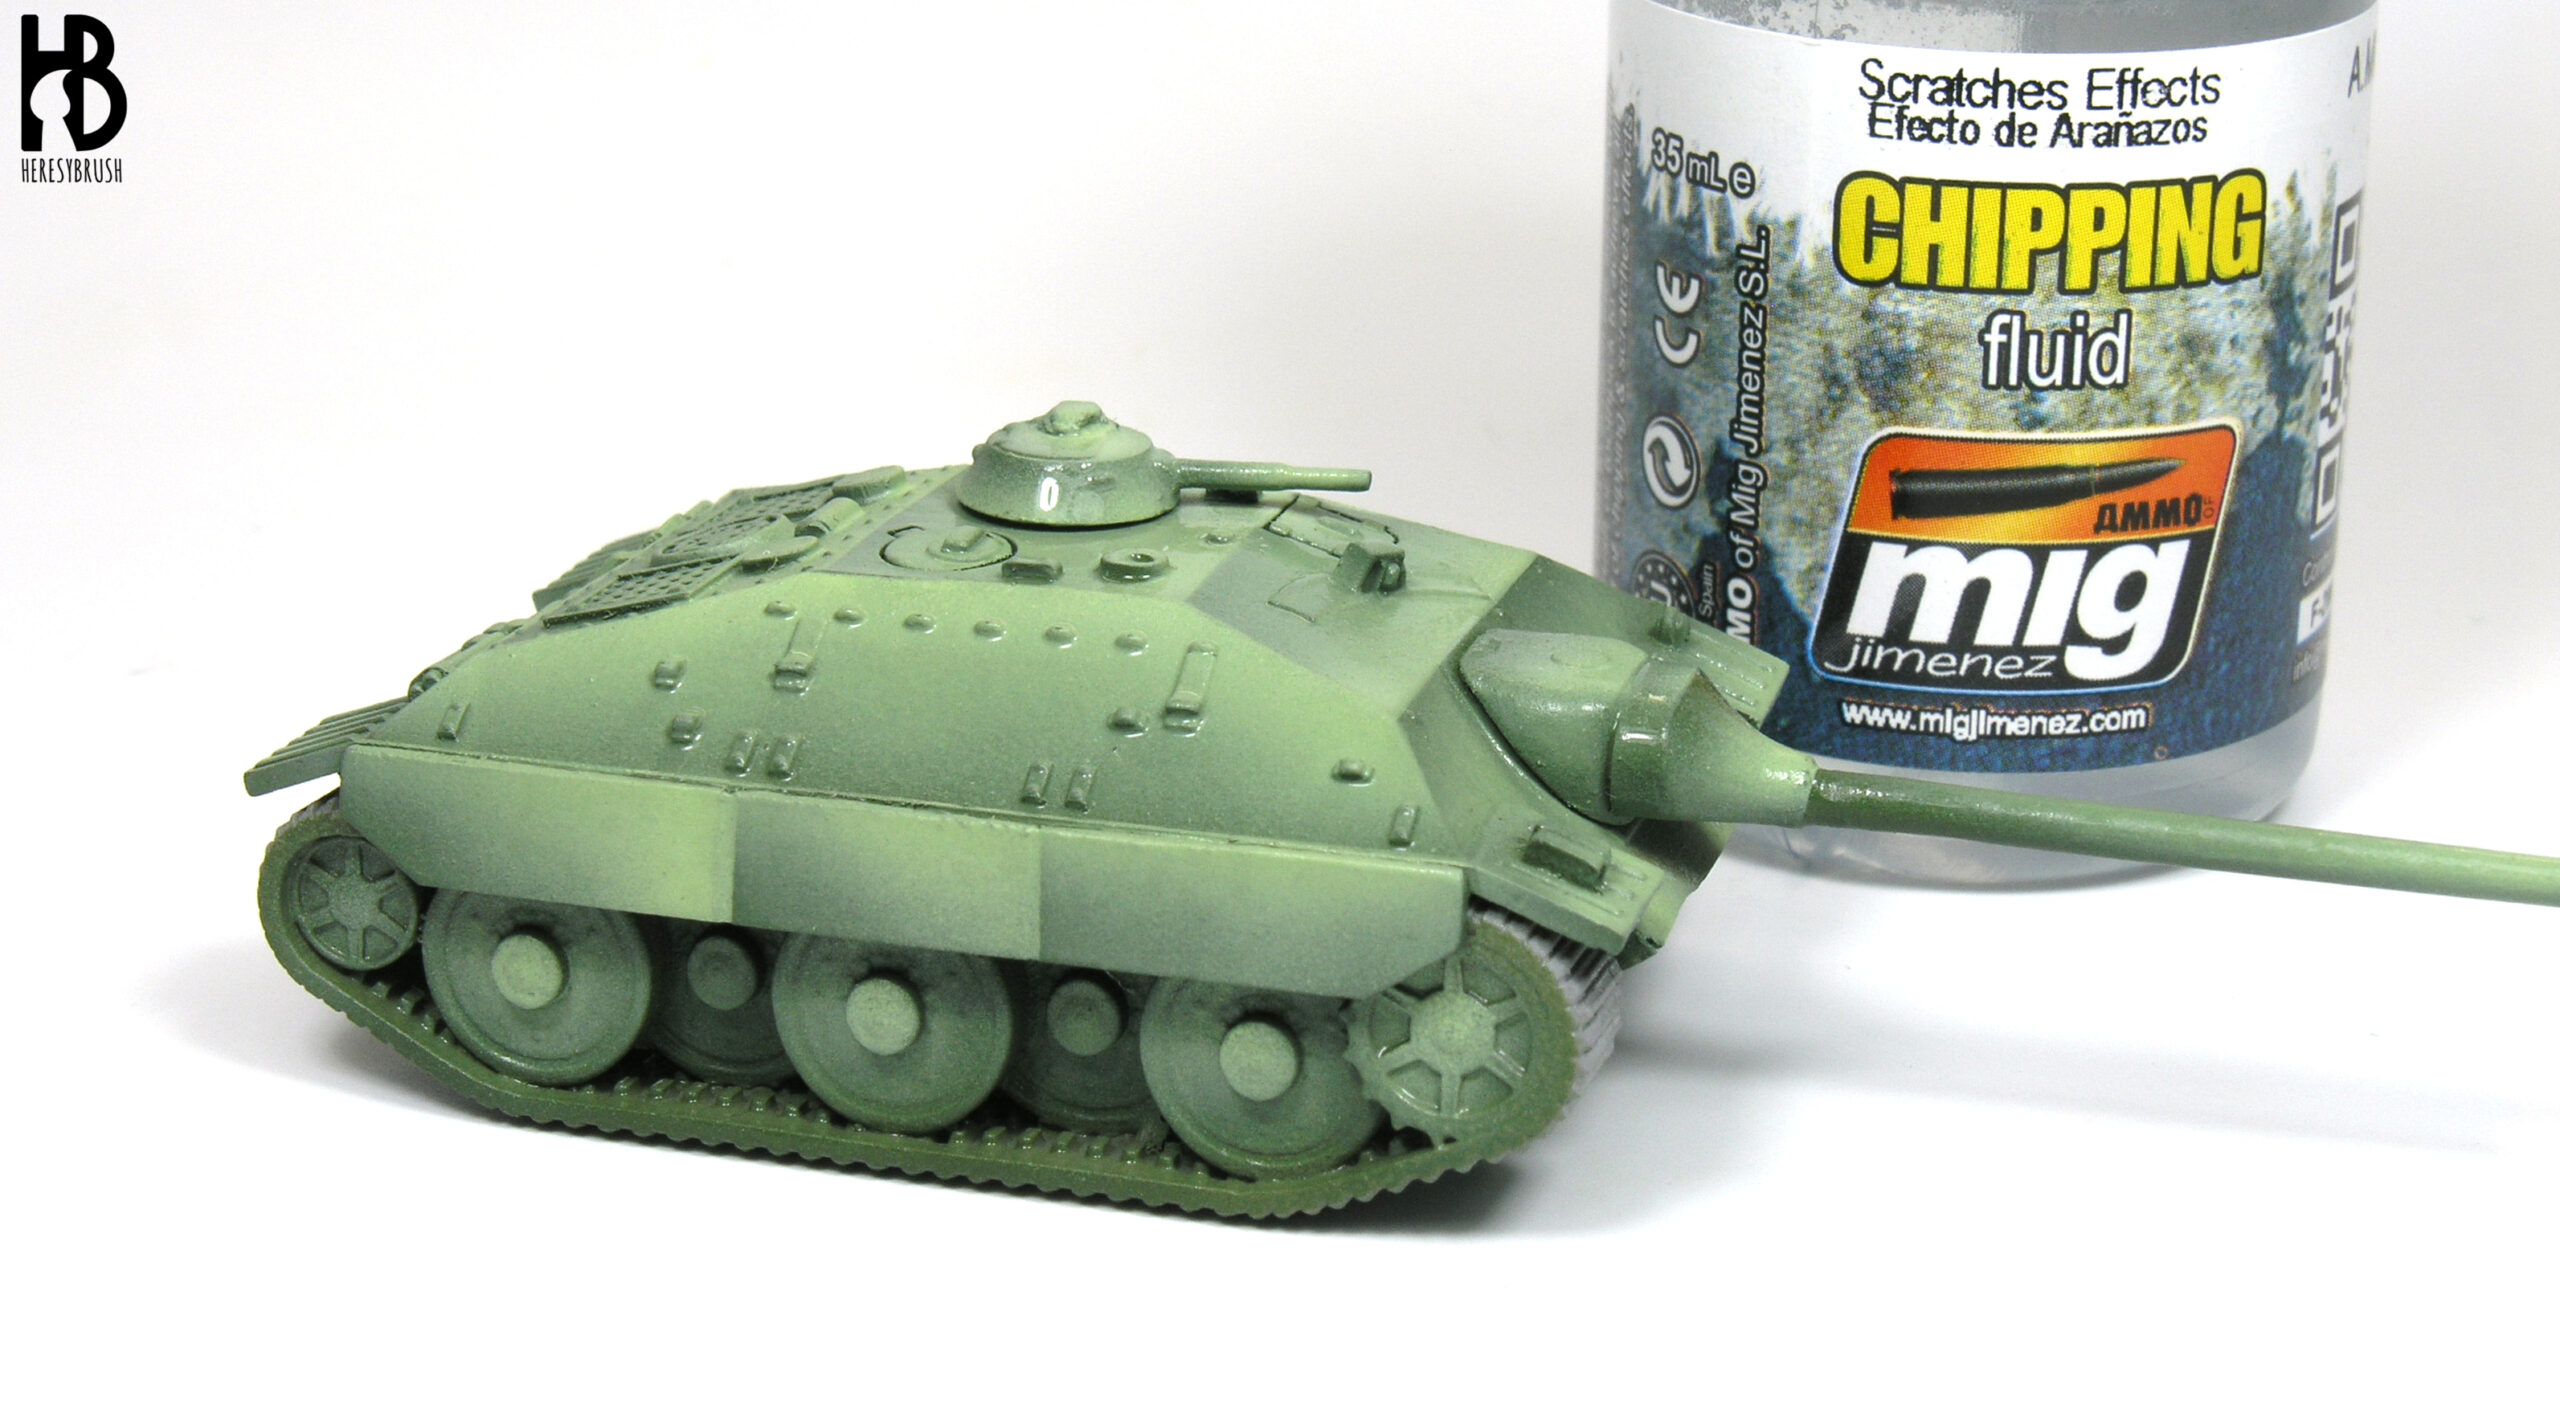
Once the base color is ready, and before applying the camouflage, we apply two thin layers of chipping fluid using the airbrush. We let the first layer to dry before applying the next. These layers should be very thin and it is very important to avoid flooding the recesses. Otherwise, big chunks of paint will come off later. And we do not want this. We aim to create small chipping effects, more suitable with this small scale model.
AMMO provides two different types of chipping fluid: Scratches Effects A.MIG-2010 y Heavy Chipping A.MIG-2011. The former serves to remove small bits of paint and creates more subtle chipping effects, whereas the latter generates bigger chipping effects. In this example I have used the first one to keep the chipping effects small. We use the chipping fluid product directly from the bottle.
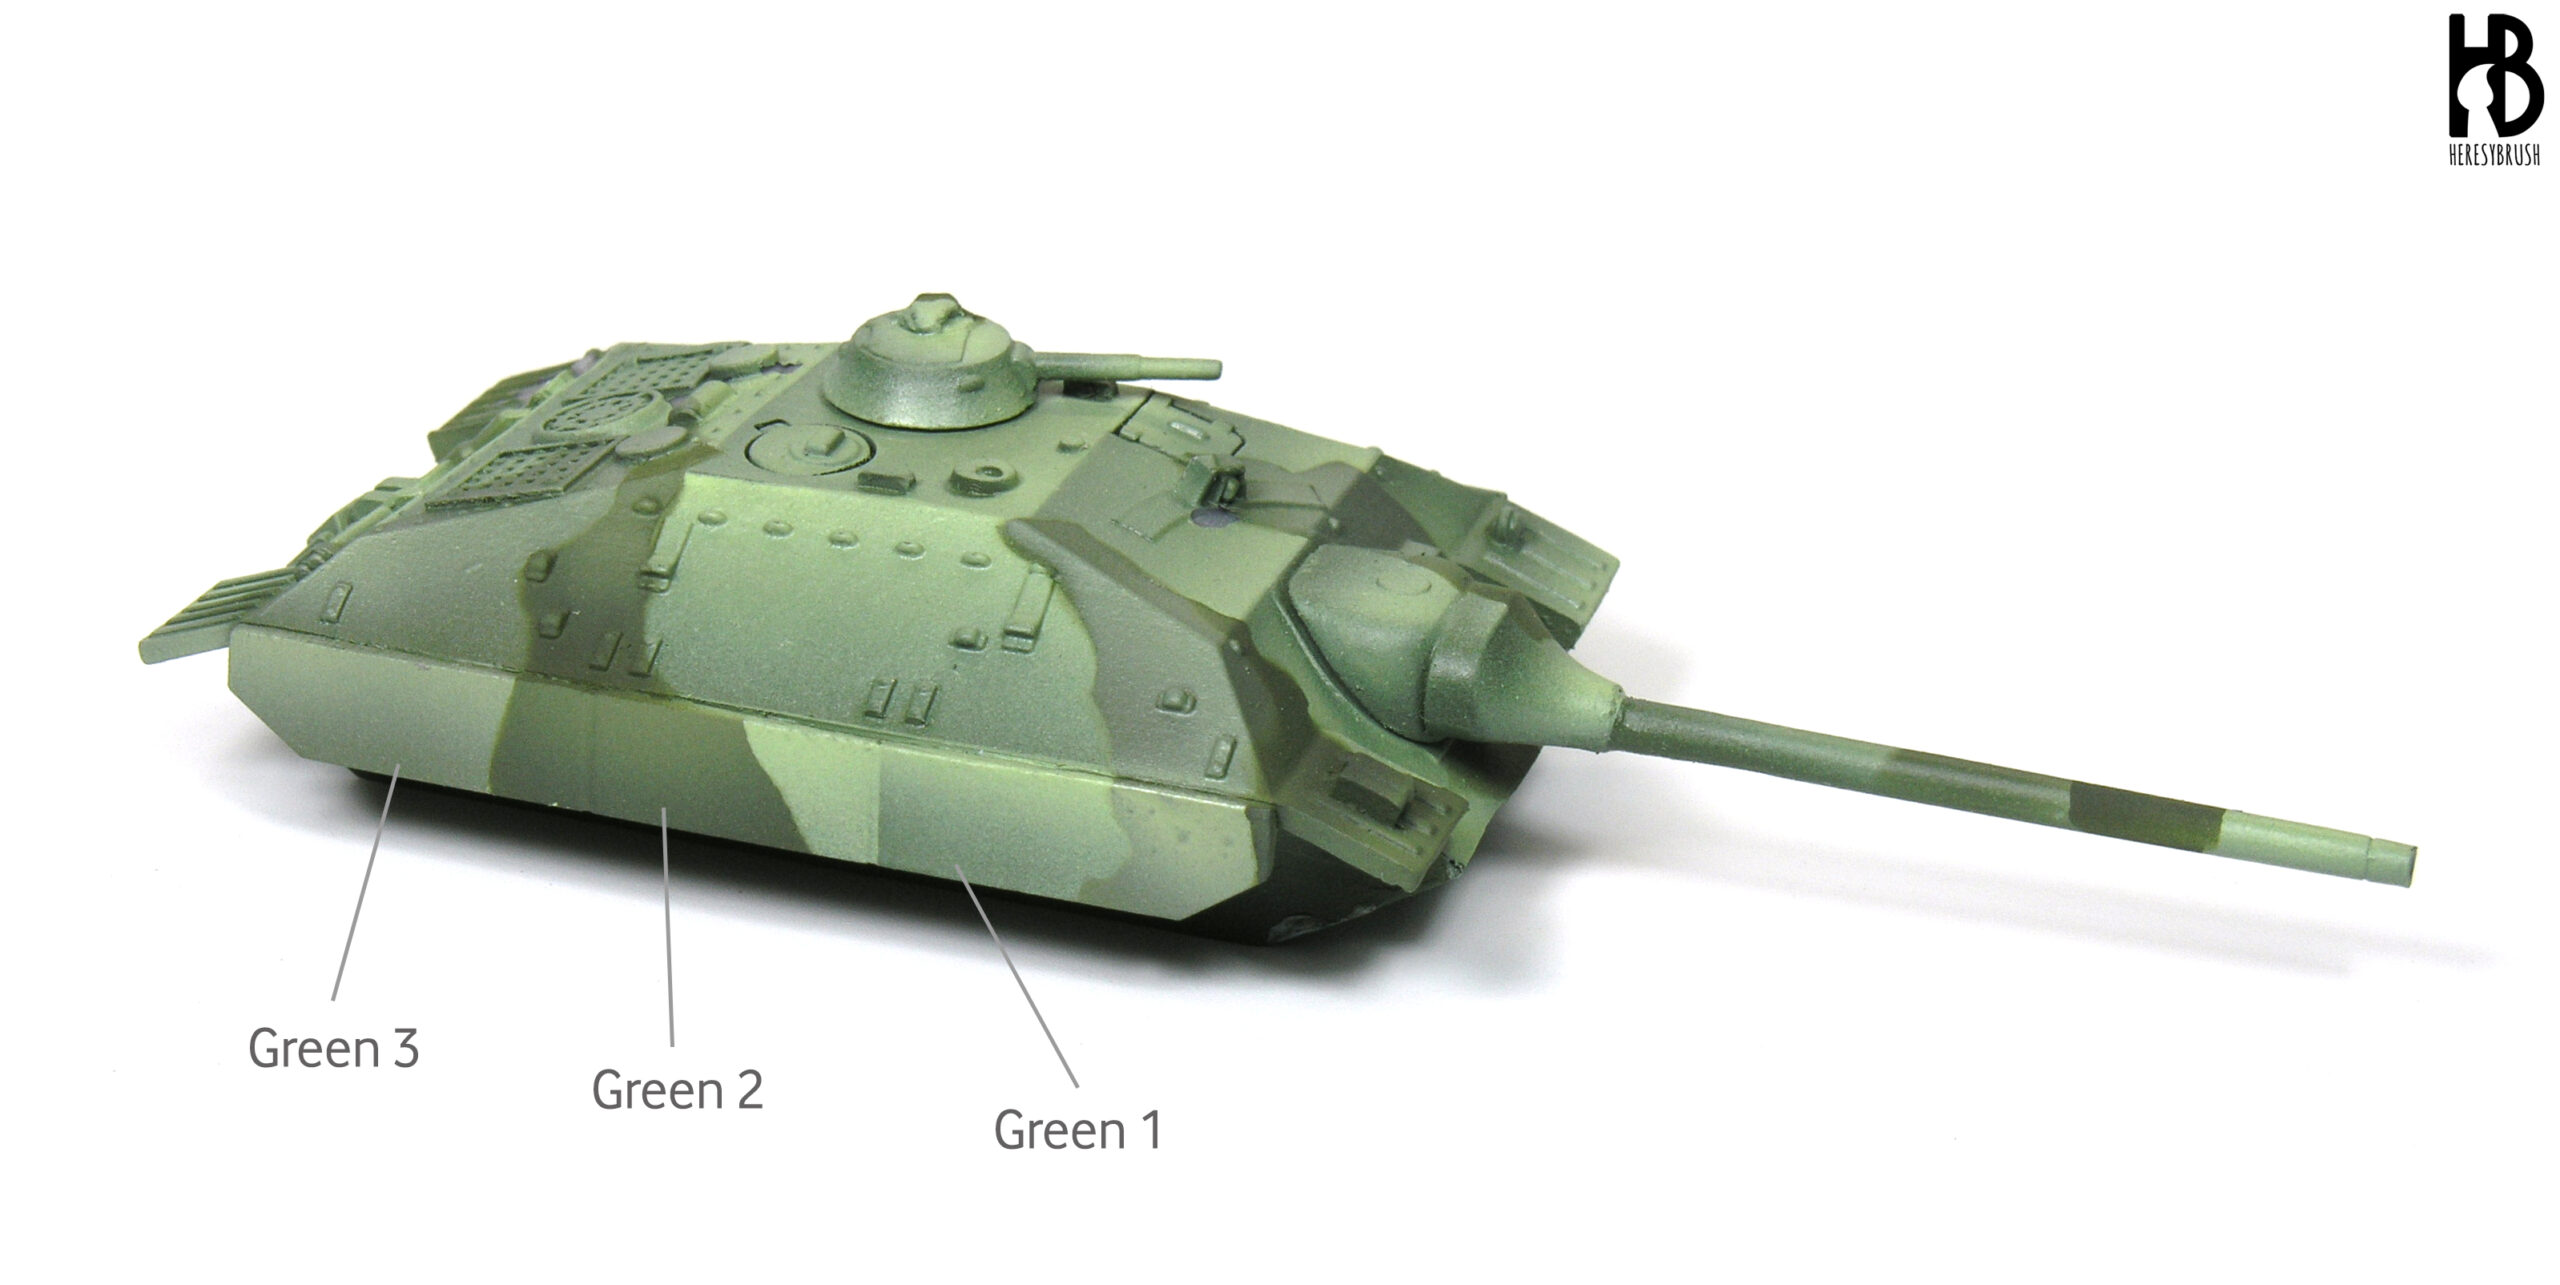
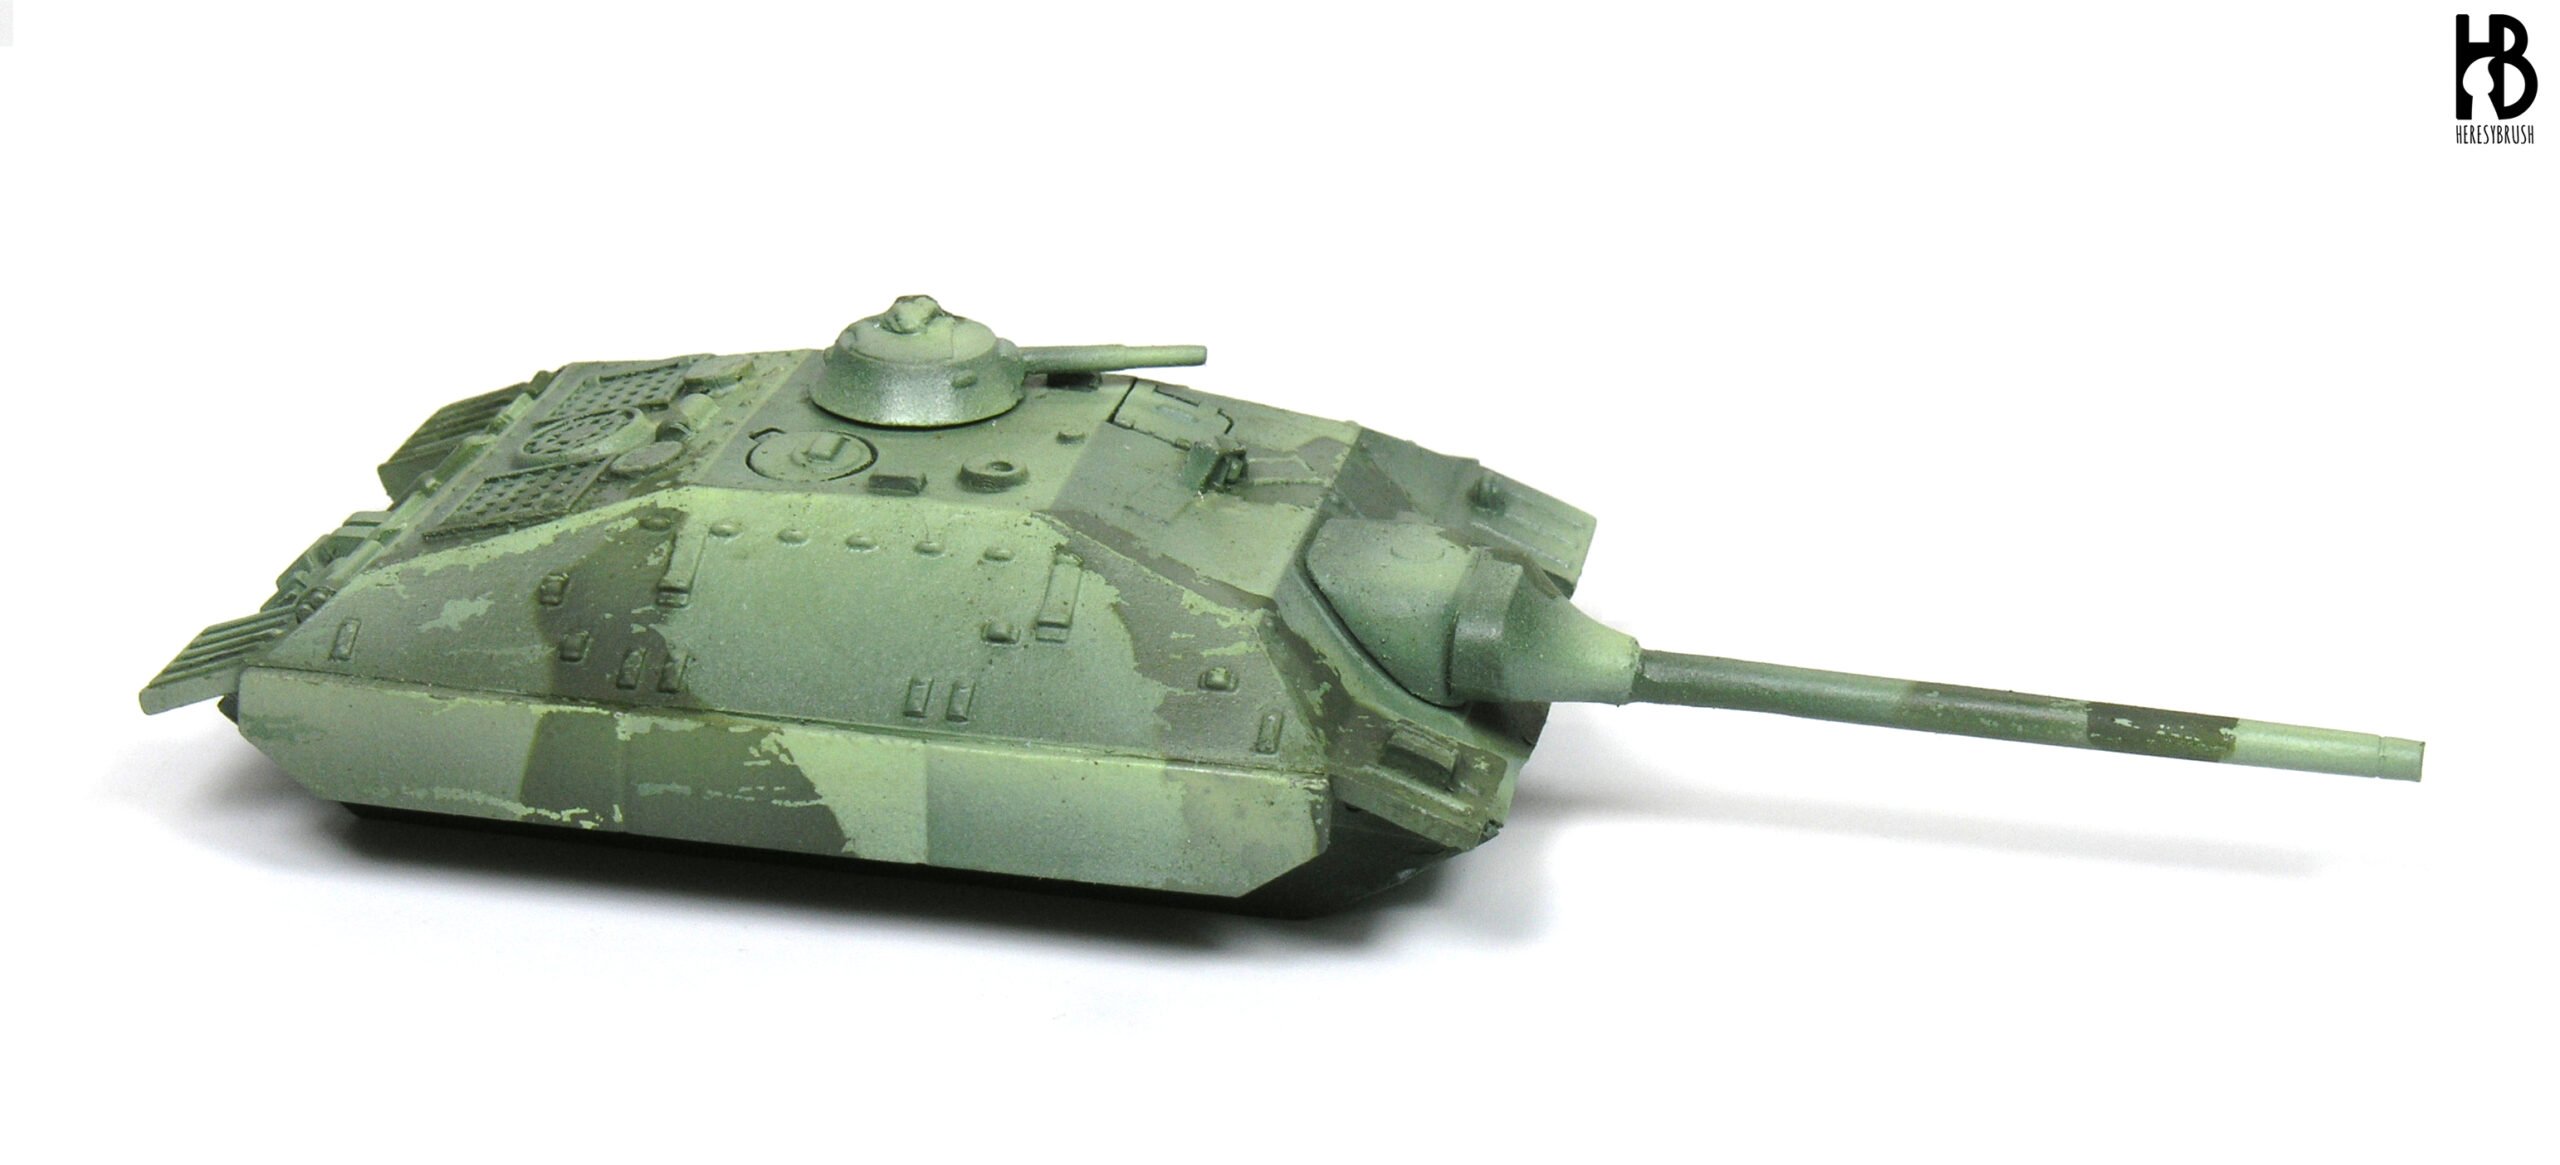
We paint the camouflage immediately once the chipping fluid is dry. If we wait too long, it might be more difficult to activate it in the later steps. Although we can work in peace, we should not waste time. I have applied two additional shades of green to create a tritonal camouflage with hard-edge spots using masking putty, in two consecutive steps. This type of edges is very important when creating chipping effects on the camouflage, as the chippings will be more difficult to see on a soft-edge camo in such a tiny scale (15mm or 1:100).
Thanks to the masks we can create shades and highlights following the color modulation technique as we did on the base color. The problem is that when applying the highlights we are adding more paint over the chipping fluid. If the layer of paint is to thick, it will limit the chipping fluid effectivity. Therefore, it is advisable to apply a single and thin highlight (note that I normally apply three highlights, and here with only one highlight I try to create a similar color gradient. This can be done by playing with the airbrush).
In the previous step we commented that the chipping fluid layers should be very thin to ensure that the resulting chipping effects are small enough. Now, we have seen another two important variables when using the chipping fluid: the available time before we start activating the chipping fluid and the thickness of the layer of paint we apply on top of the chipping fluid.
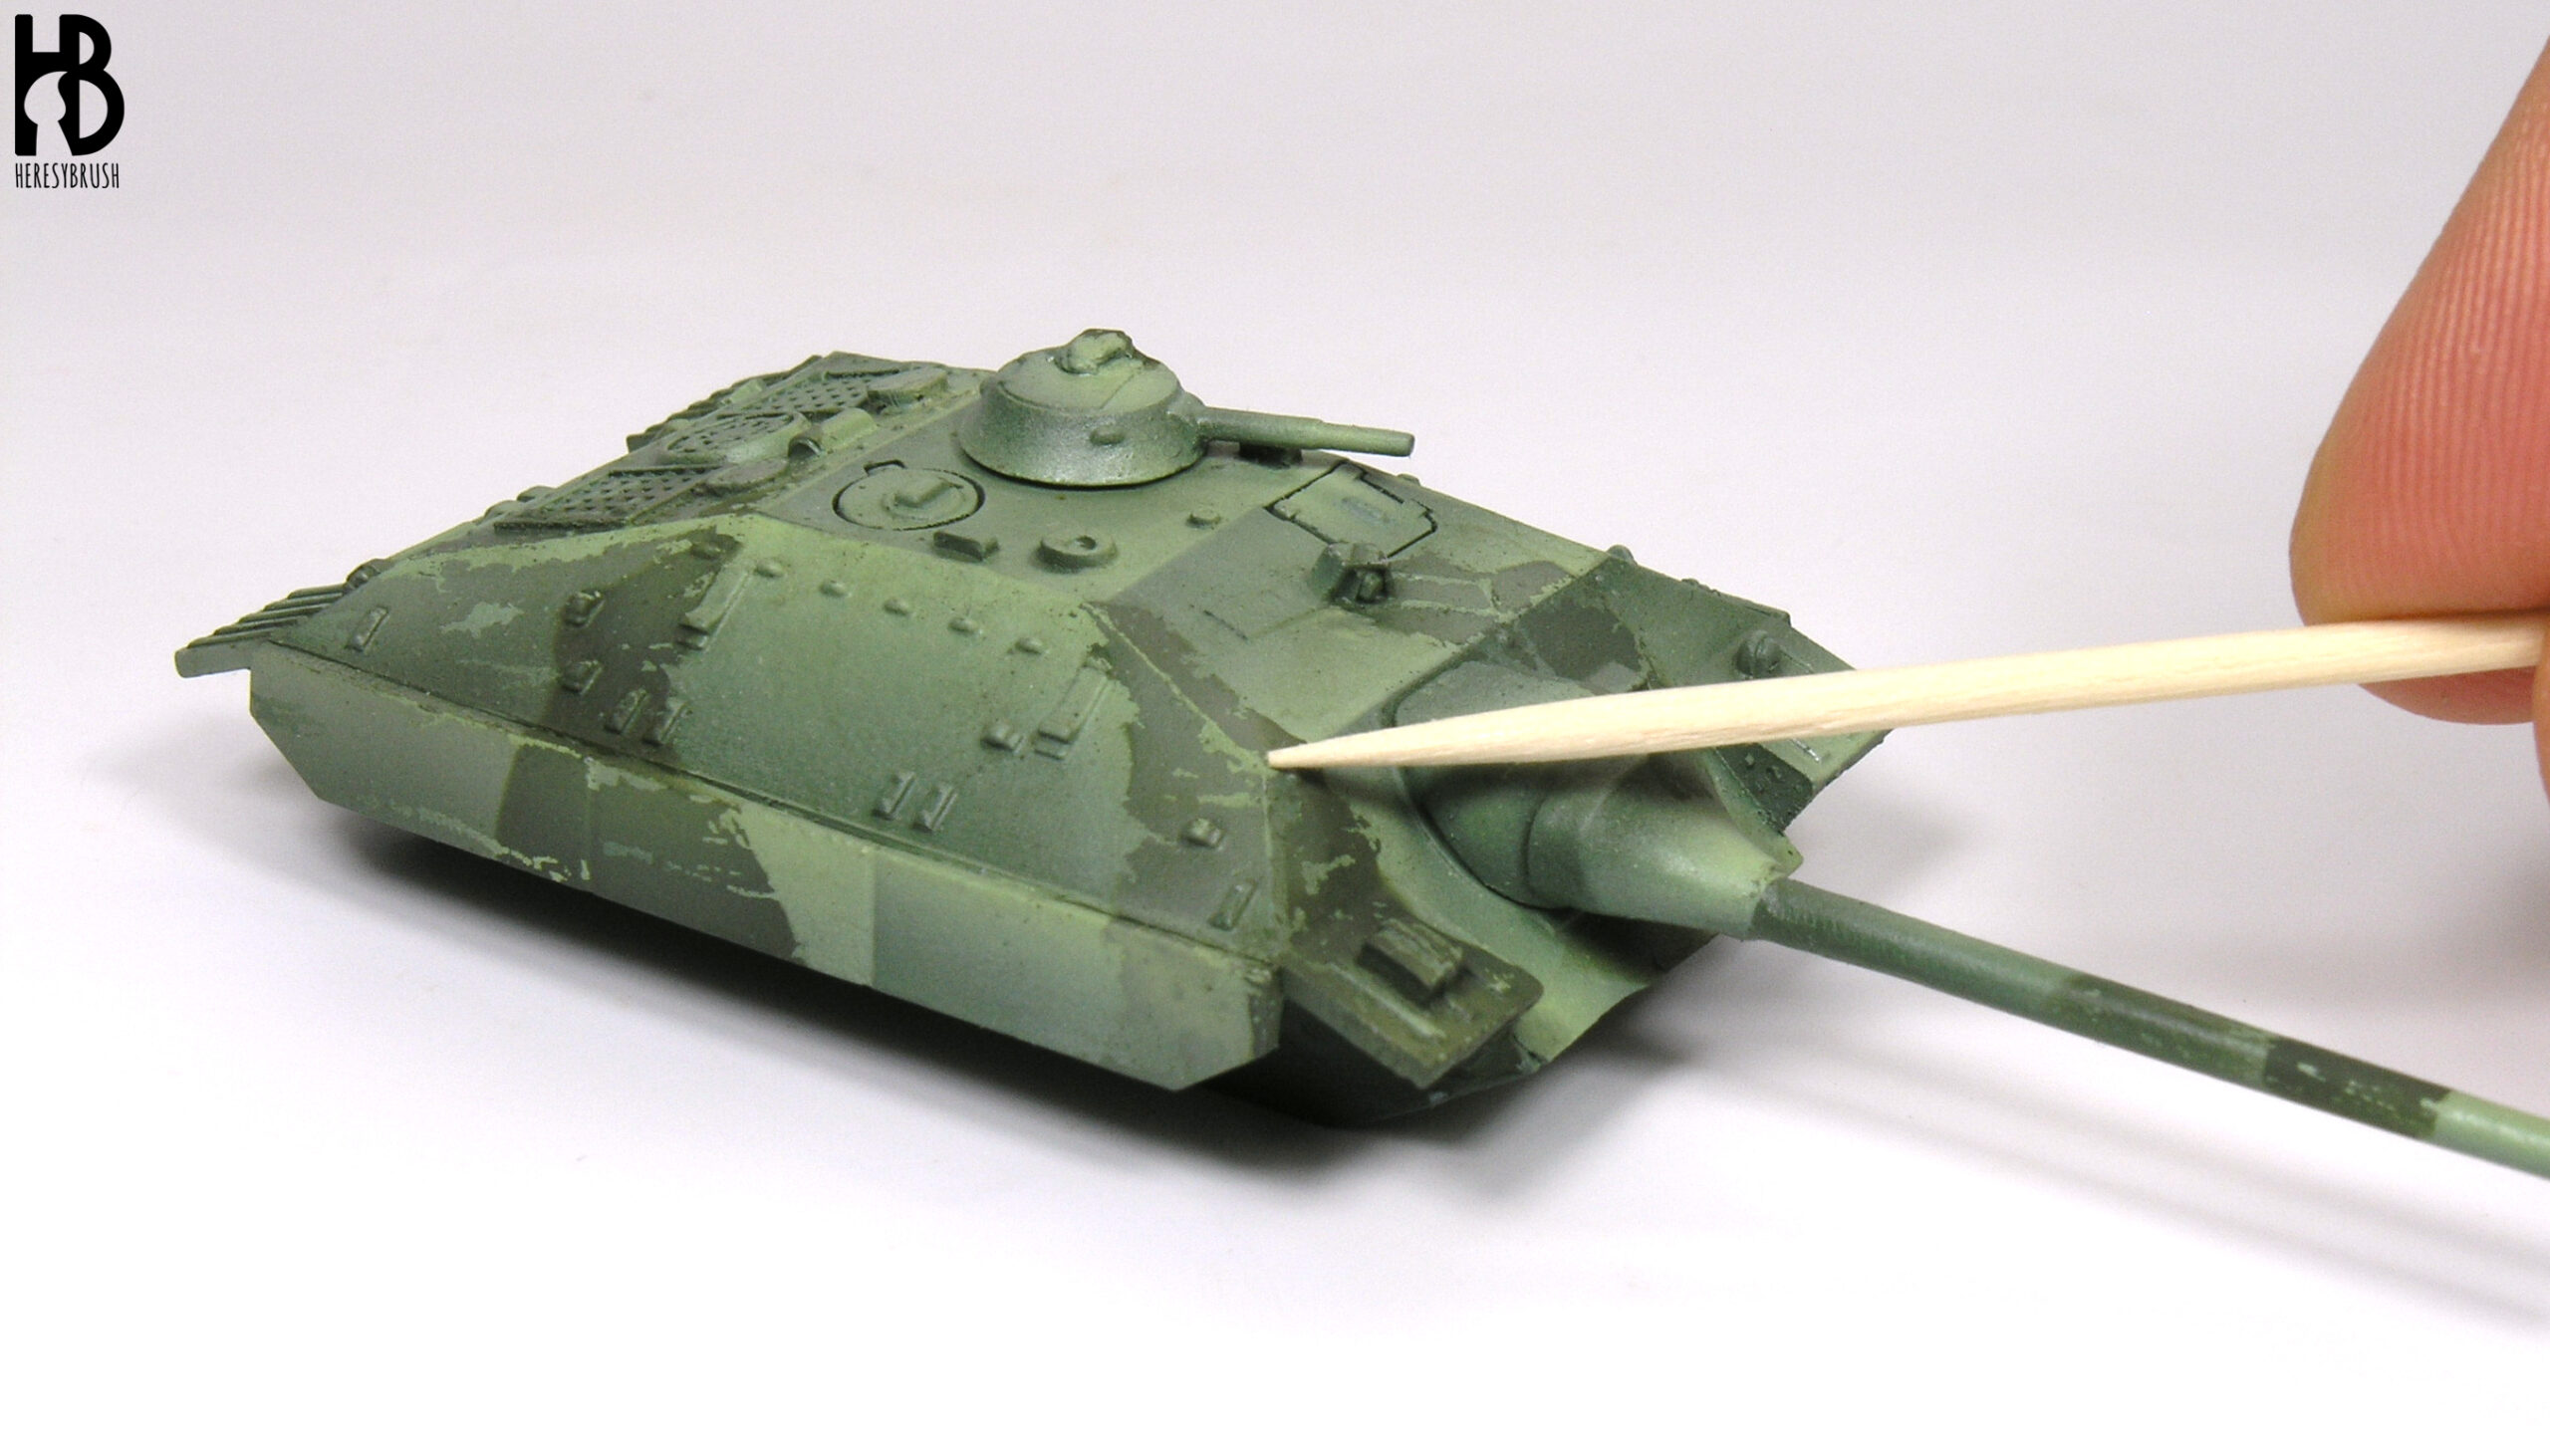
Next, we need tap water and a wooden toothpick (or similar tool). Like the hairspray, the chipping fluid dissolve in water even once is dry. Therefore, to “activate” the chipping fluid (or dissolve part of it) we moisten the surface with water using a brush, so that the chipping fluid -and the camo paint applied on top- will come off easily when scratching the surface with a toothpick.
The more water we apply, the bigger chunk of paint will fall off. Therefore, we should proceed carefully. It is recommendable to start from those regions that are not very visible in the tank to find the optimal amount of water and scratching. To remove the traces of paint that came off we can gently brush them off with a brush moistened with water (but be careful: if you press too much with the brush, you will remove more paint!).
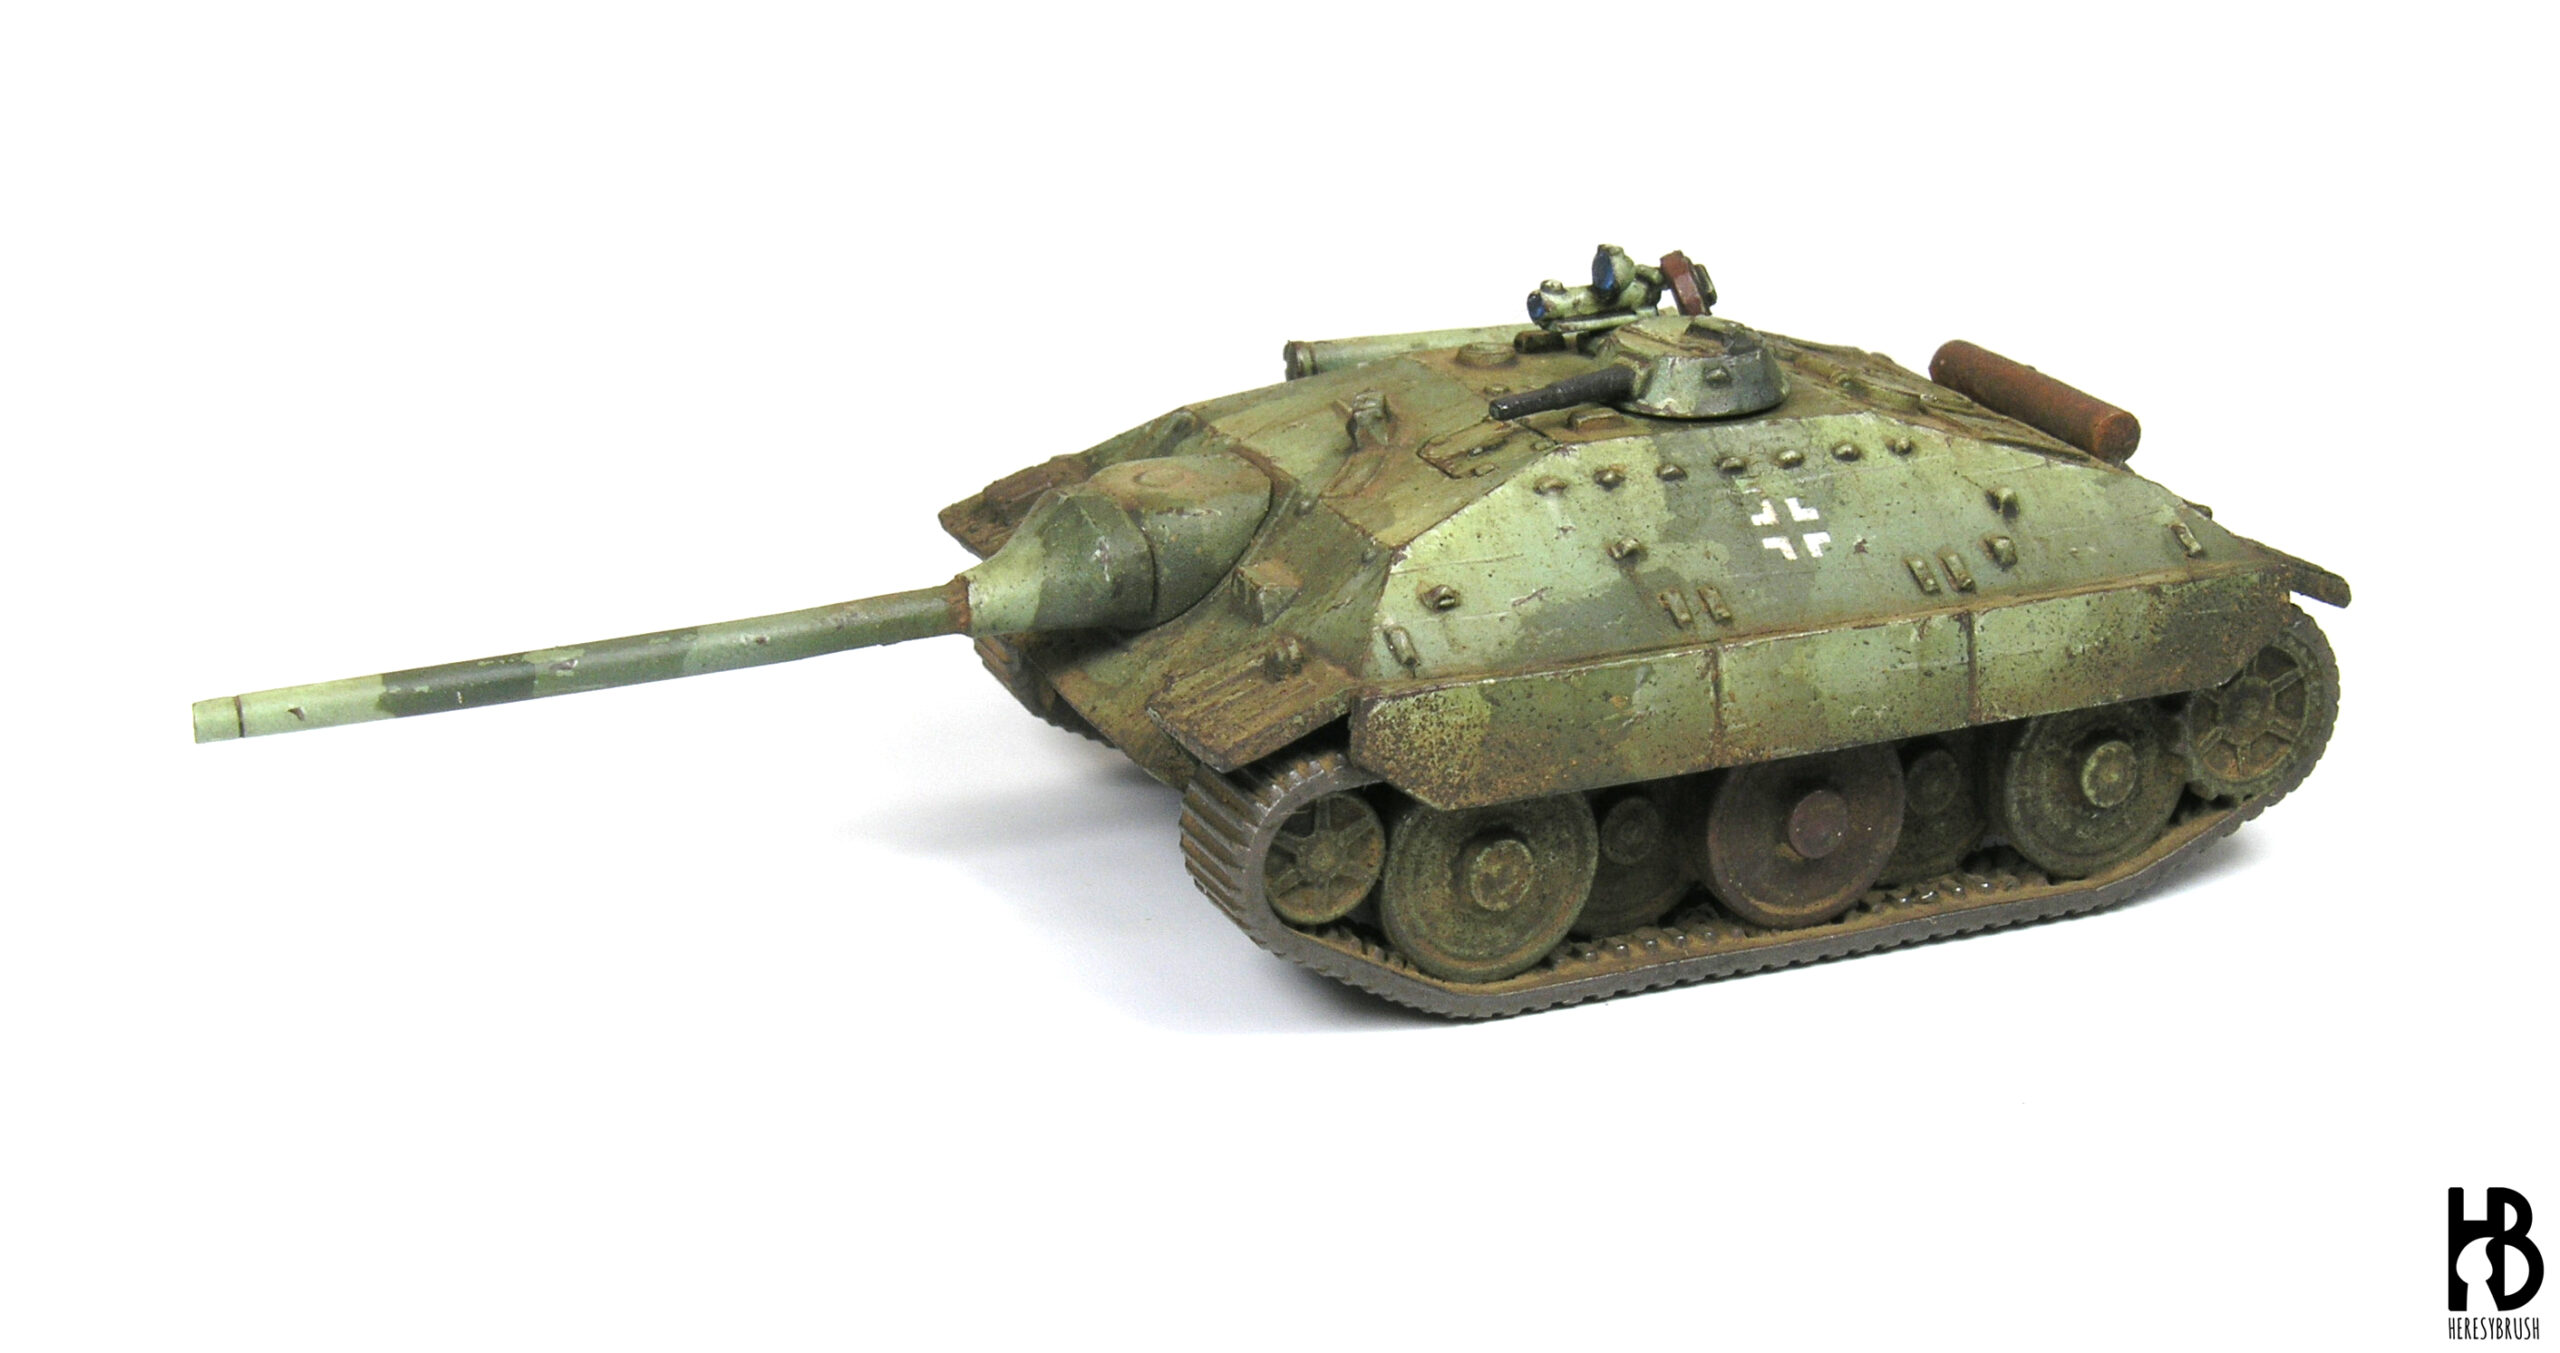
Finally, to protect the resulting chipping effects we apply a thin layer of satin varnish over the whole tank. This will also serve to protect the acrylic paint from enamels and oils that we are planning to use for the weathering effects in the next steps.
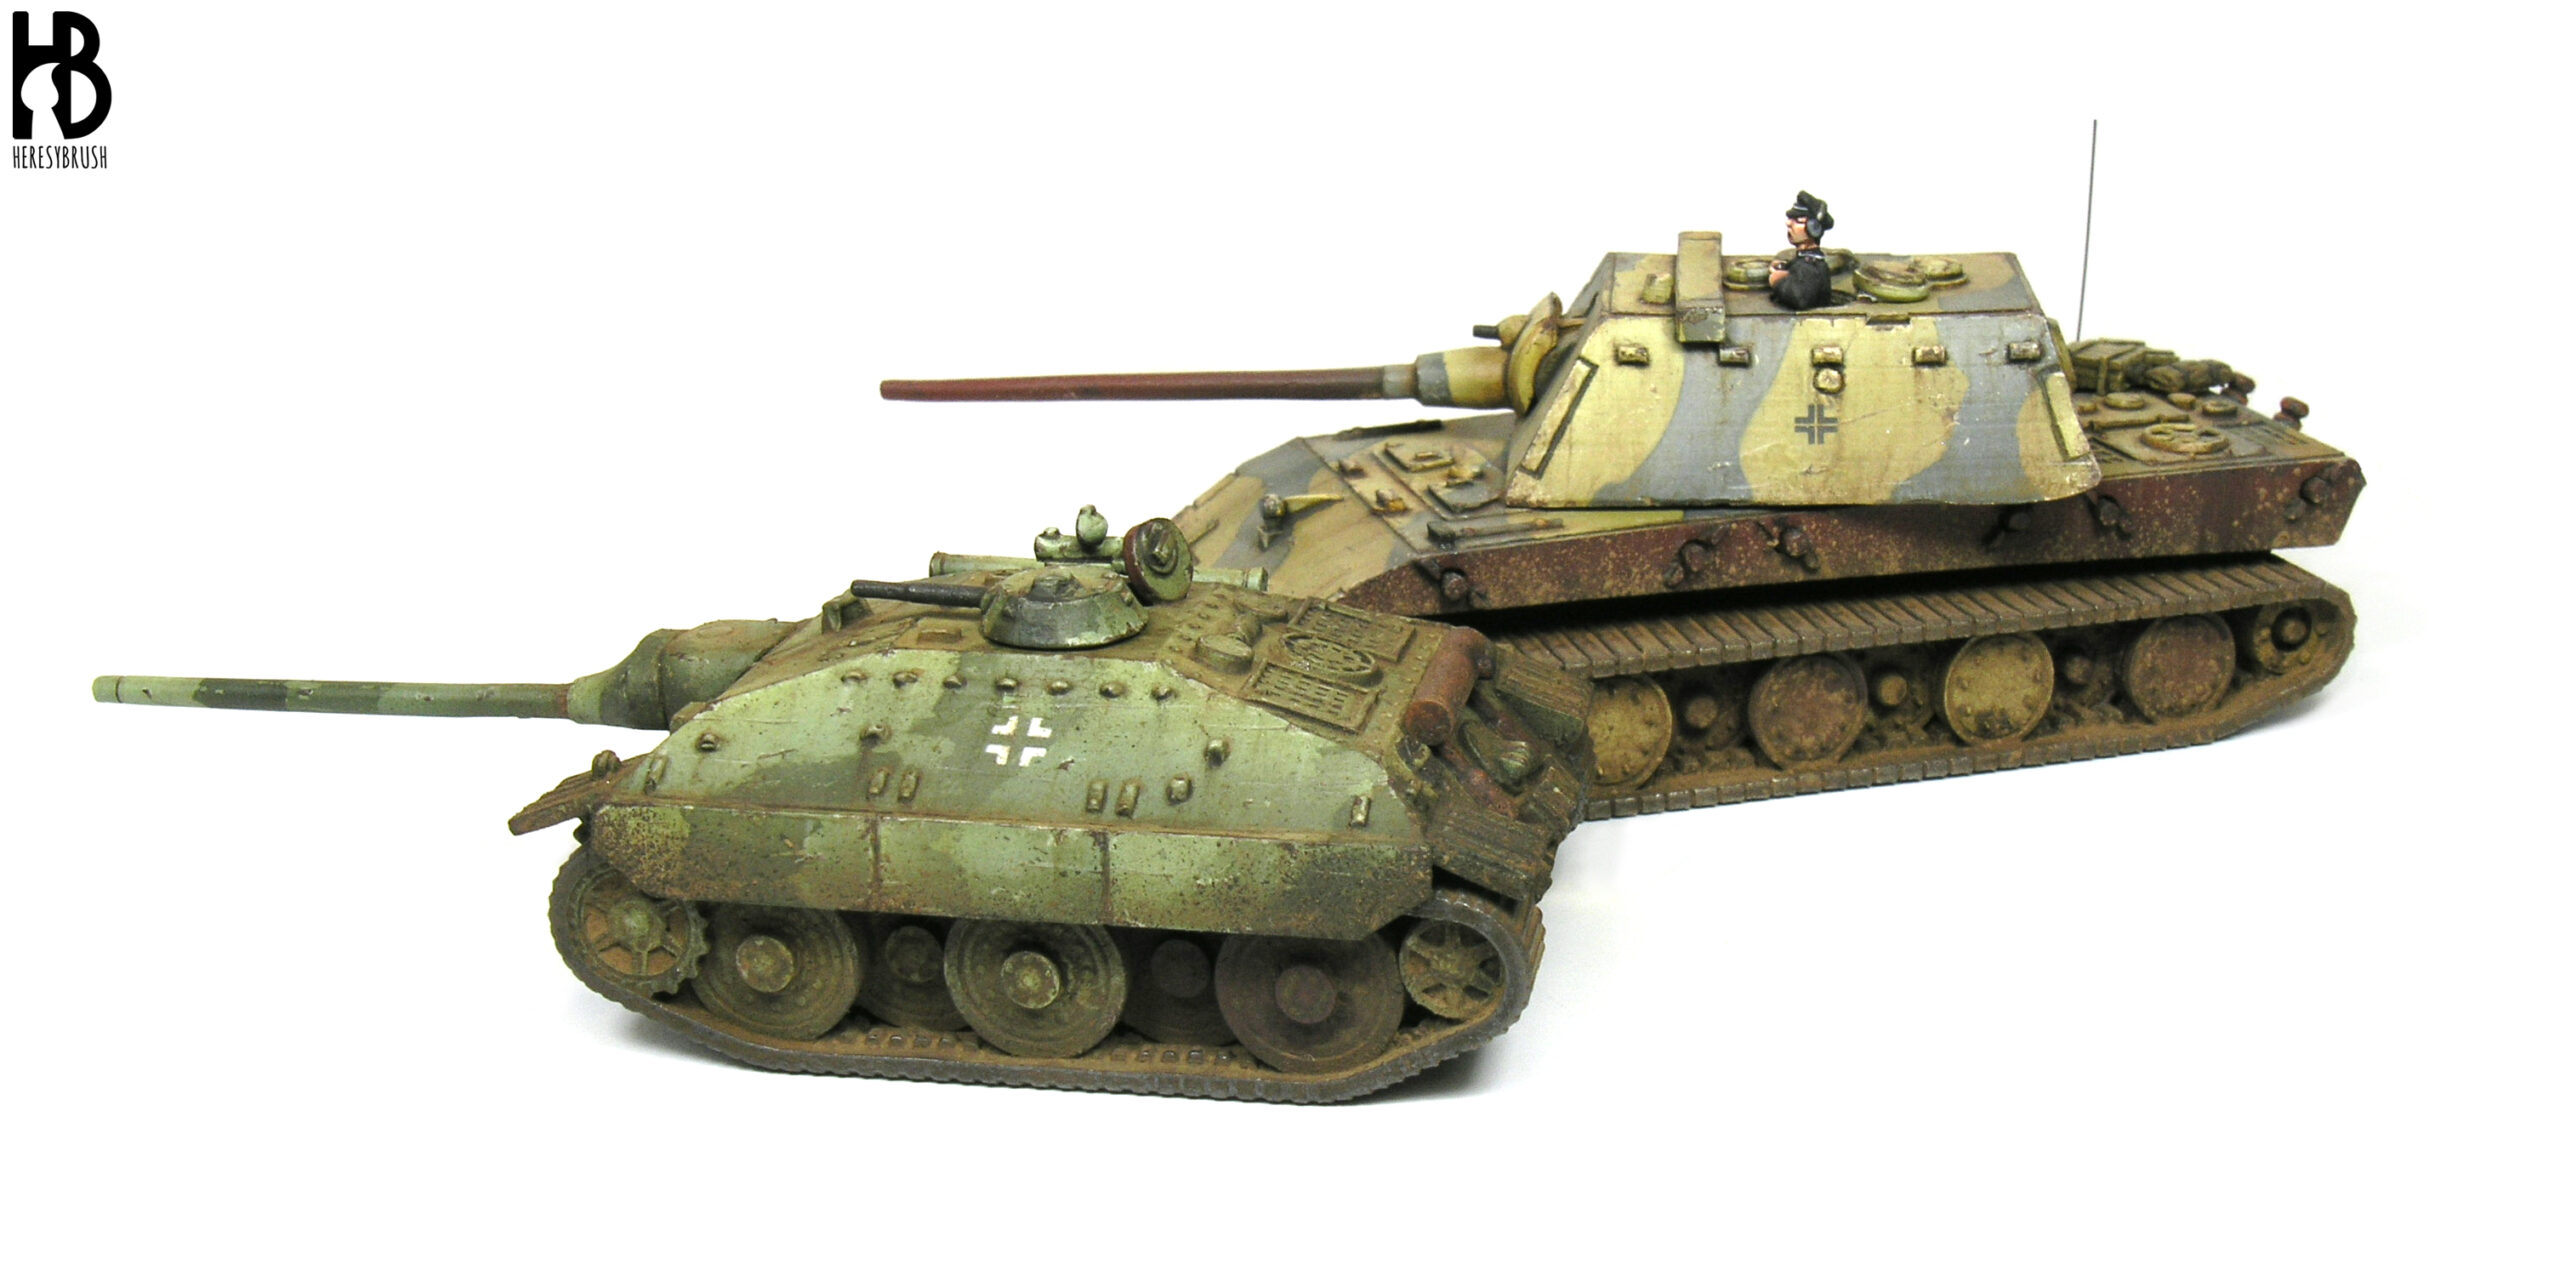
After the weathering:
» As a summary, these are the steps to follow:
- Paint the base color
- Apply the Chipping fluid / hairspray
- Paint the camouflage
- Moisten the surface with water and scratch the surface with a toothpick
» And we must keep in mind four variables:
- Thickness of the layer of chipping fluid / hairspray
- Time before activating the chipping fluid / hairspray
- Thickness of the layer of paint applied on top of the chipping fluid / hairspray
- Amount of water (and scratching) to activate the chipping fluid / hairspray
2 thoughts on “Camouflages with Chipping Effects fluid (hairspray technique)”